
How to Topstitch an Elastic Waistband
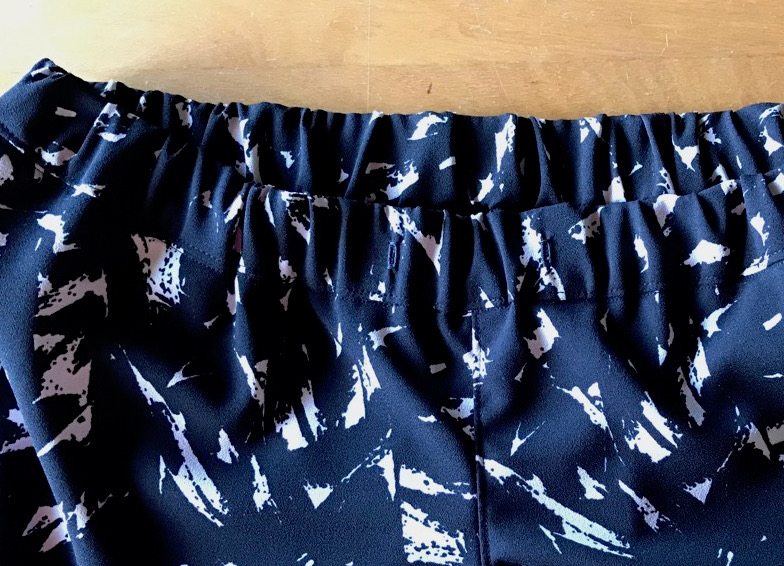
In store-bought clothes, you’d usually see that the waistbands of pull-on pants or skirts are topstitched.
At home, I try to achieve that same look too. But it’s not just a matter of esthetic; by topstitching the waistband, the elastic inside does not roll or move anymore, so you will never have to fuss with it.
There is really nothing much about stitching on the elastic, but there are several things you need to pay attention to.
Let’s get started on a waistband with the elastic already inserted. Be sure that your the waistband fabric is somewhat evenly distributed on the elastic. And of course, try on the pants and make sure that the waistband fits you. You might need to make the elastic slightly tighter if your elastic’s quality is not superb, because by stretching and stitching on the elastic, it is lightly to be stretched out.
At the sewing machine, sink your needle into where you want the stitch line. I usually start in the back of the waistband, but it really doesn’t matter much. I usually use a 3.0 mm stitch length.
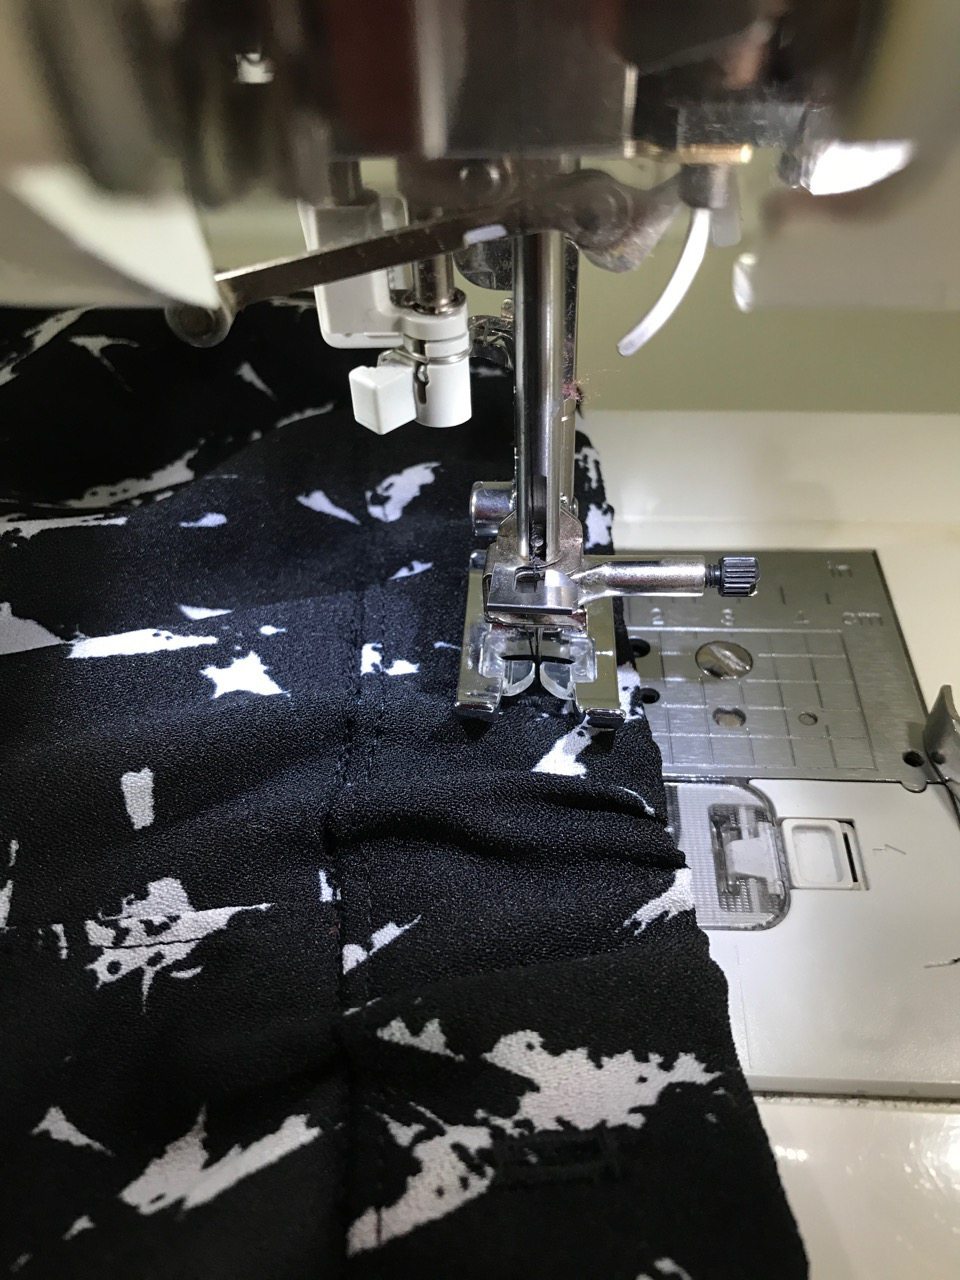
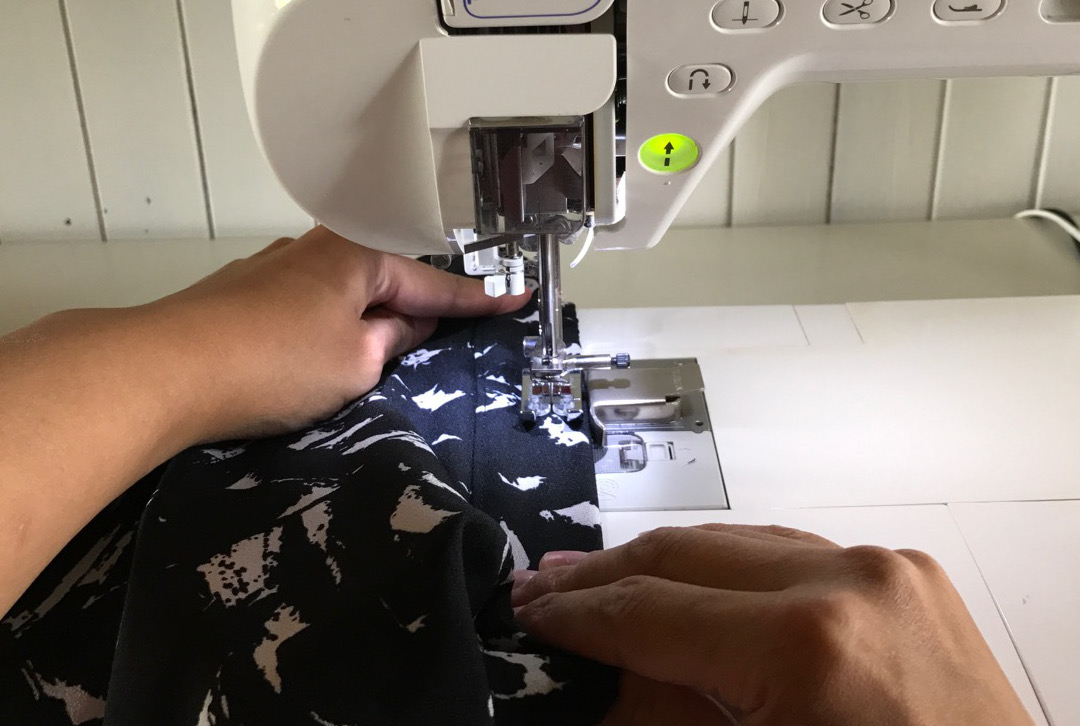
Now this is the most important point – you need to stretch the elastic while stitching. Go ahead and stretch it fully with both of your hands – one in the front and one in the back. You don’t want to give any stress to the needle, presser foot or the feed dog. At the same time, you need to let the feed dog do its work to feed the fabric as usual.
Photos really don’t do the job very well, so here’s a short video of what I do.
You might notice one thing: the default position of my needle is down. I am only stretching the elastic while the needle is down. That way, the fabric/elastic is not accidentally shifted. I am lucky that my machine has that function of setting the default needle position, and if yours does, I encourage you to do it. If your machine doesn’t have it, you need to manually put it down before you stretch the elastic. So this is the sequence of events:
- Sink needle down
- Stretch elastic with both hands
- Stitch a section of 2 – 3 inches (5 to 8 cm)
- Release the stretch
- Sink needle down
- Stretch elastic with both hands
- Repeat…
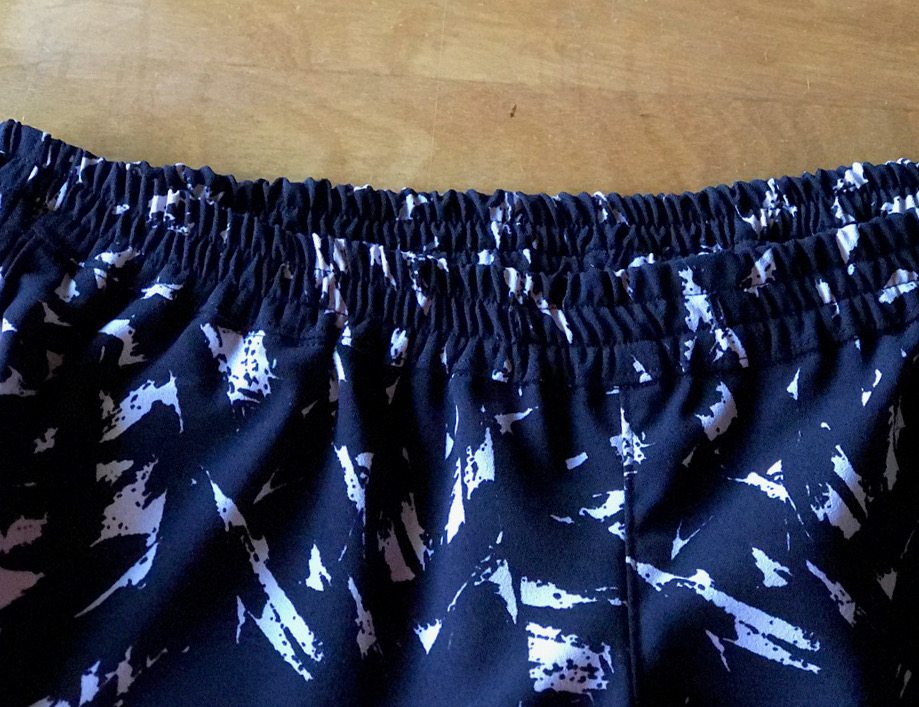
Usually there are at least 2 or 3 lines of stitching around the waist. So after you finish one round, start another round until you are all done.
Then give it a good stream and that’s all!
Ready to try the technique? Try it on the Tierras Woven Joggers or the Belize Shorts & Skort!
Happy stitching!

A) I sometimes overstretch the elastic. Is the only fix for this, practice?
B) “Then give it a good stream and that’s all!” This last instruction, I do not understand.
Hi Arly, if your elastic is of better quality, it doesn’t stretch out as easily, but it will still stretch out a little. You should plan on this and use 1” or 2” shorter elastic before topstitching. Also, the last sentence means that you steam the elastic with your steam iron. You hover your iron over the elastic and press the button for steam on your iron so you can blast steam over it. The elastic will shrink back quite a bit.
I have one doubt
What is the actual length of the elastic ?
How would be measured according to our waist length ?
Hi Vg, you wrap the elastic around your waist and then cut. You get to decide how tight you want it. That’s all.
Is there an easier way to expand an elastic pant waist that has been sewn 4 lines within the waist? Or do I need to remove the 4 stitched lines and add an extra inch to the elastic, before sewing the elastic back on the pants? Thanks!
I am afraid you have to remove the lines of stitches and replace the elastic. Not fun, I know. 🙁
What brand of elastic do you use?
I buy my elastic locally here in Costa Rica. Sorry, there’s no brand name (but you probably wouldn’t be able to get it anyway where you are).
Thanks for that. Especially the video. I have some joggers at home that drive me nuts as the elastic rolls. I will sort them this weekend. Thank you K xXx