
How to Make Bias Tape – Continuous Loop Method
I have been making a lot of bias tape lately because I am using it to finish my seams. When I need a large amount of bias tape, I always use this method. For a lack of a better term, I call this the “continuous loop method” of making bias tape.
By stitching only two seams, you are able to make a really long bias tape.
Let’s get started.
Cut a square piece of fabric.

Draw a line from the bottom left corner to the top right corner. Cut along the line. Now you have two triangles.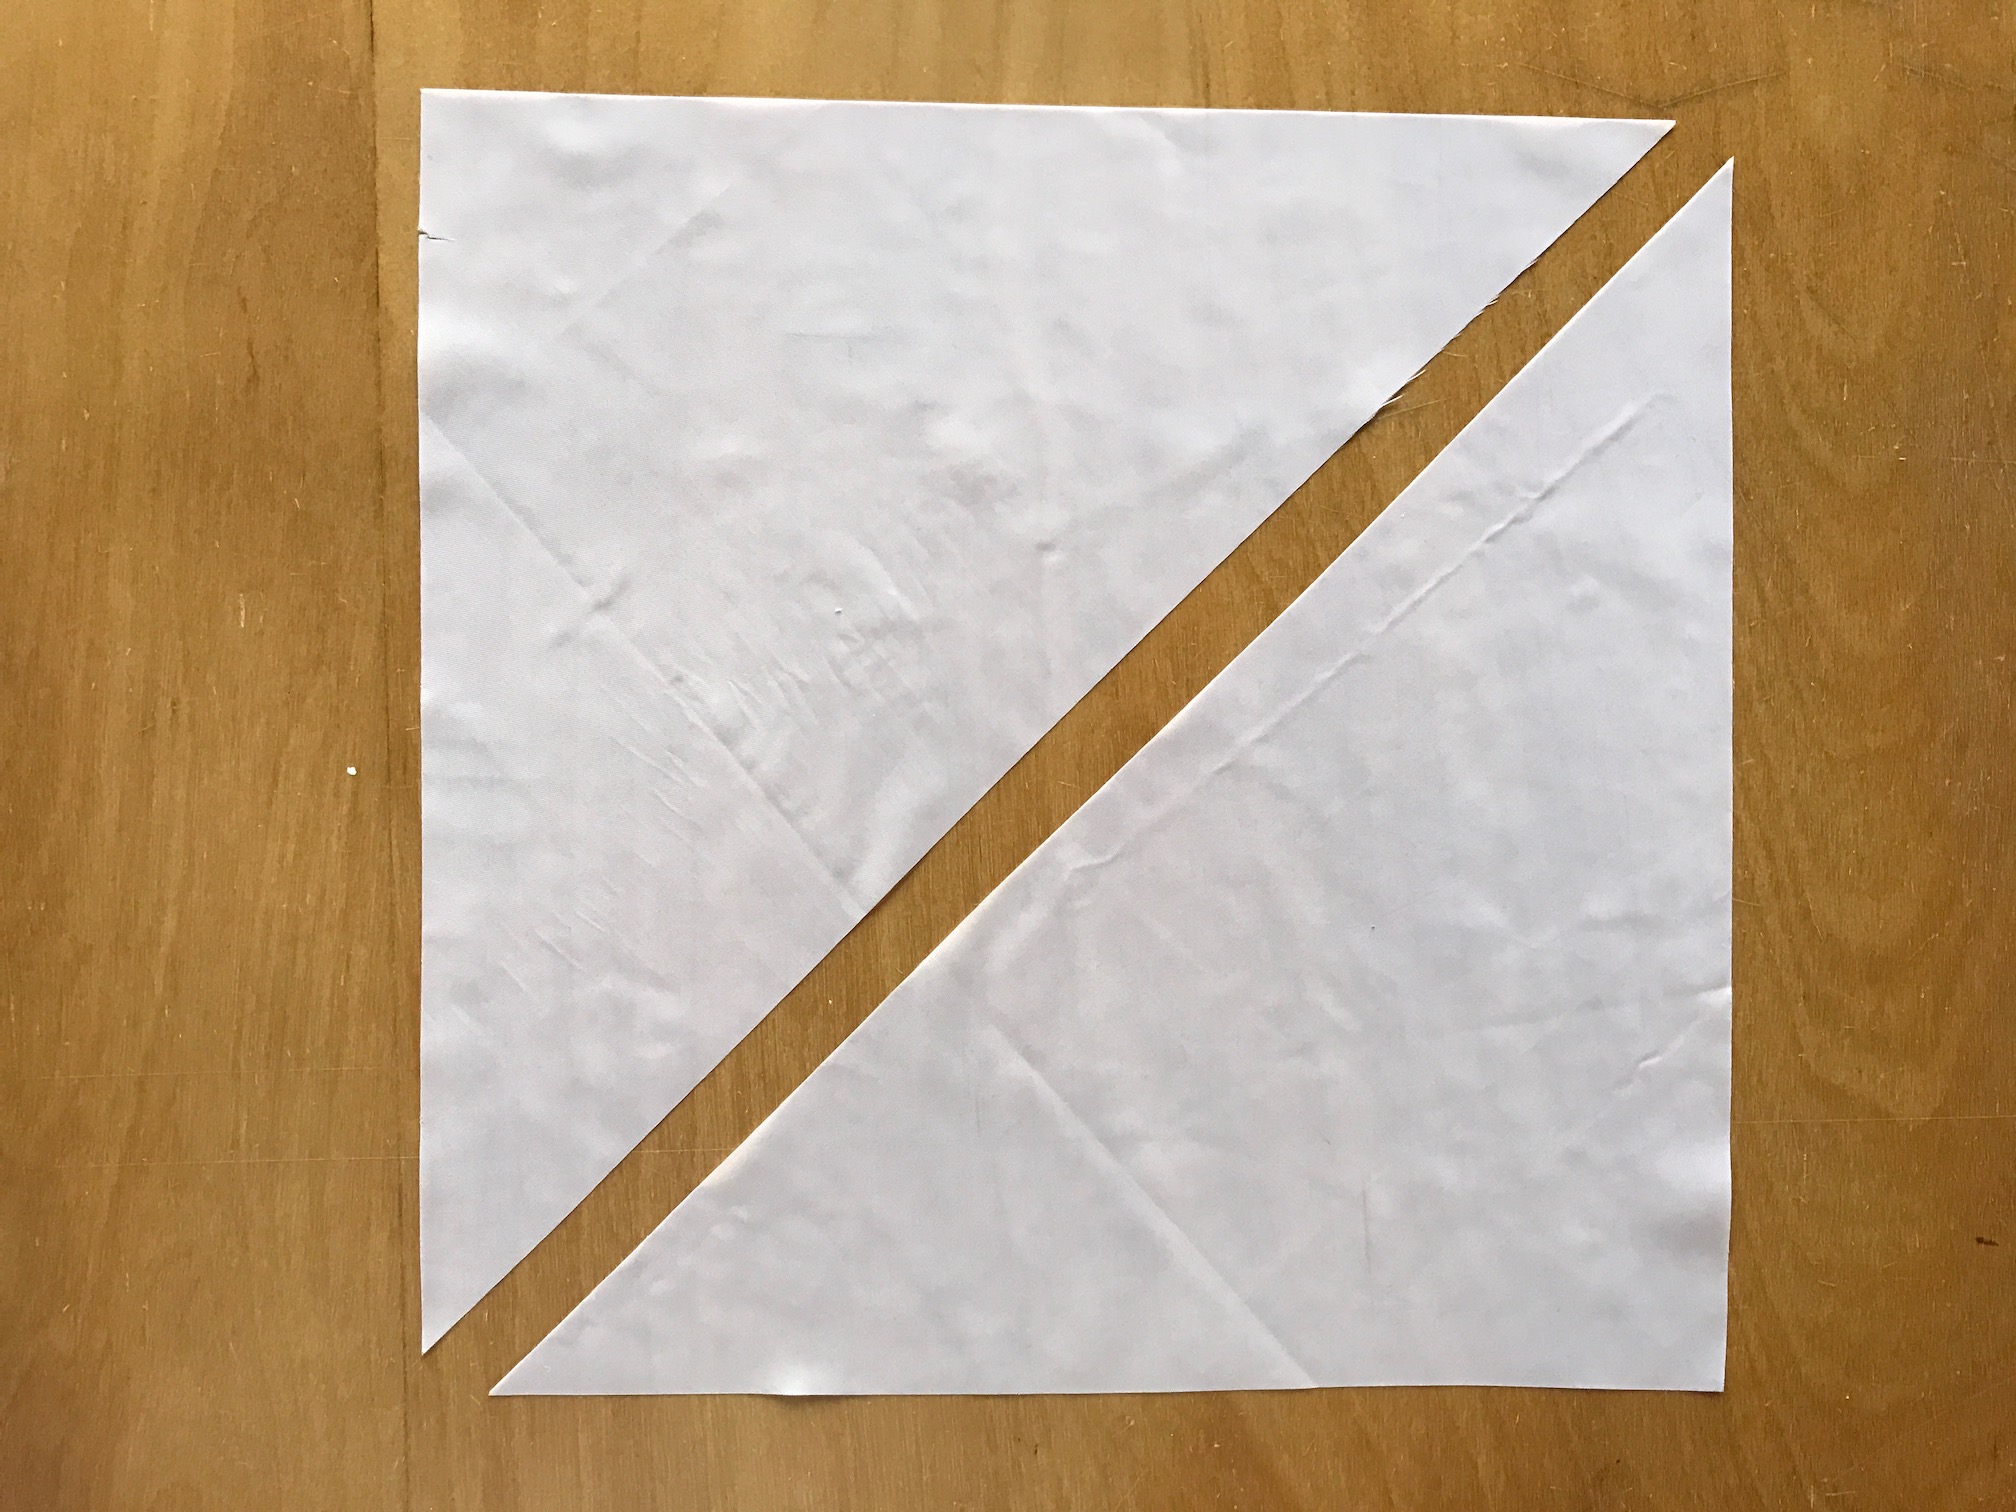
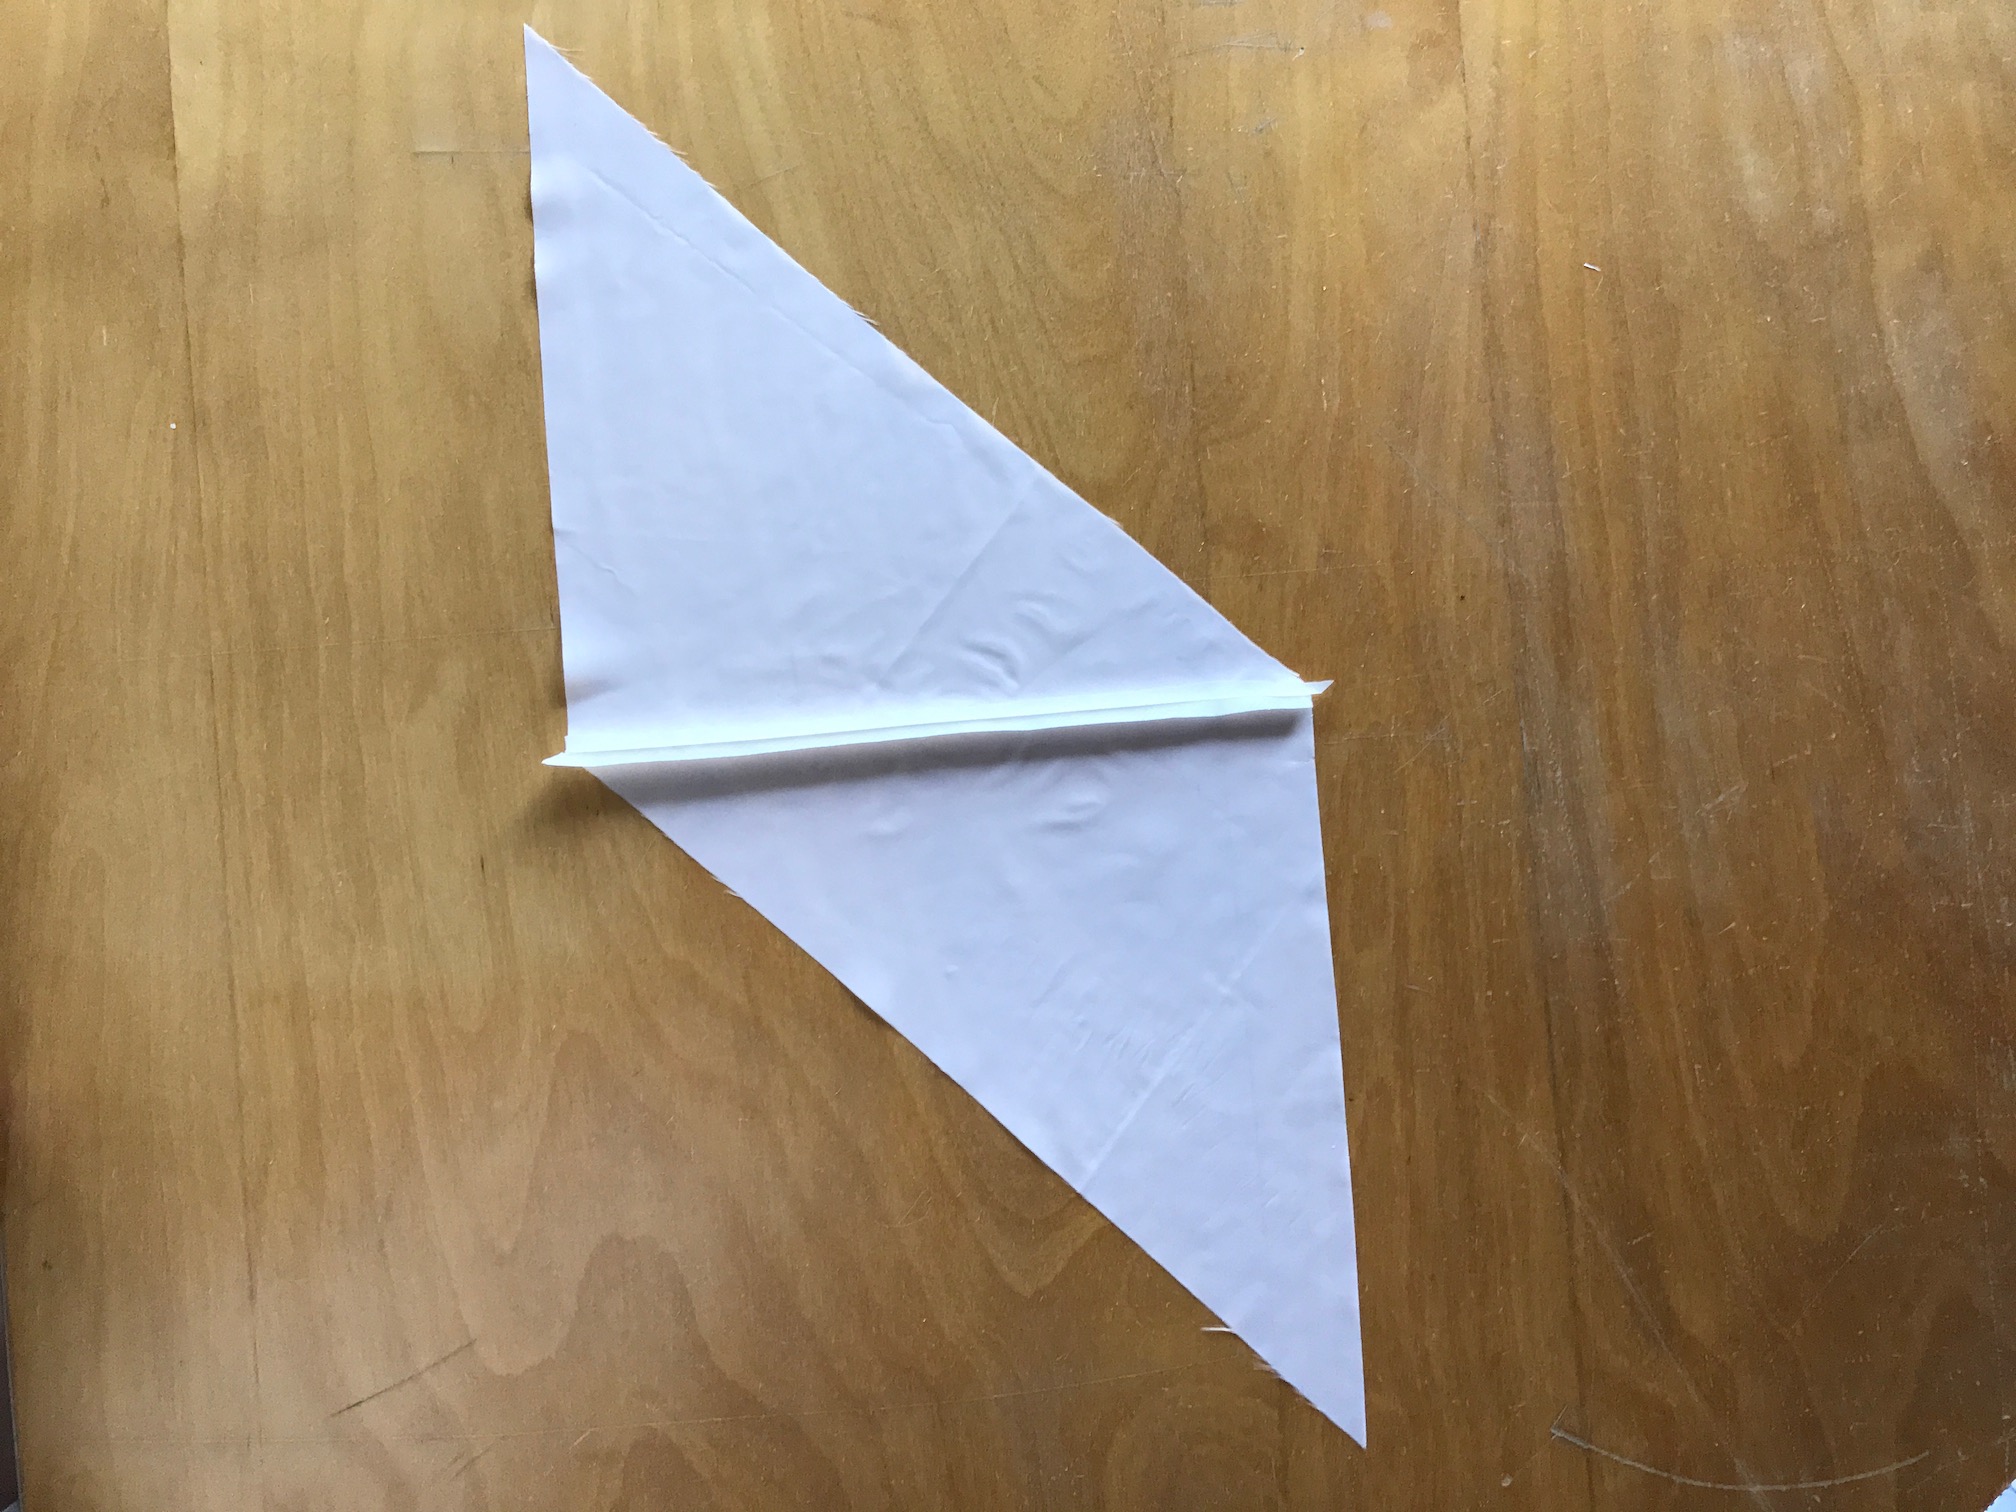
With right sides together, put the triangles together matching the top edge.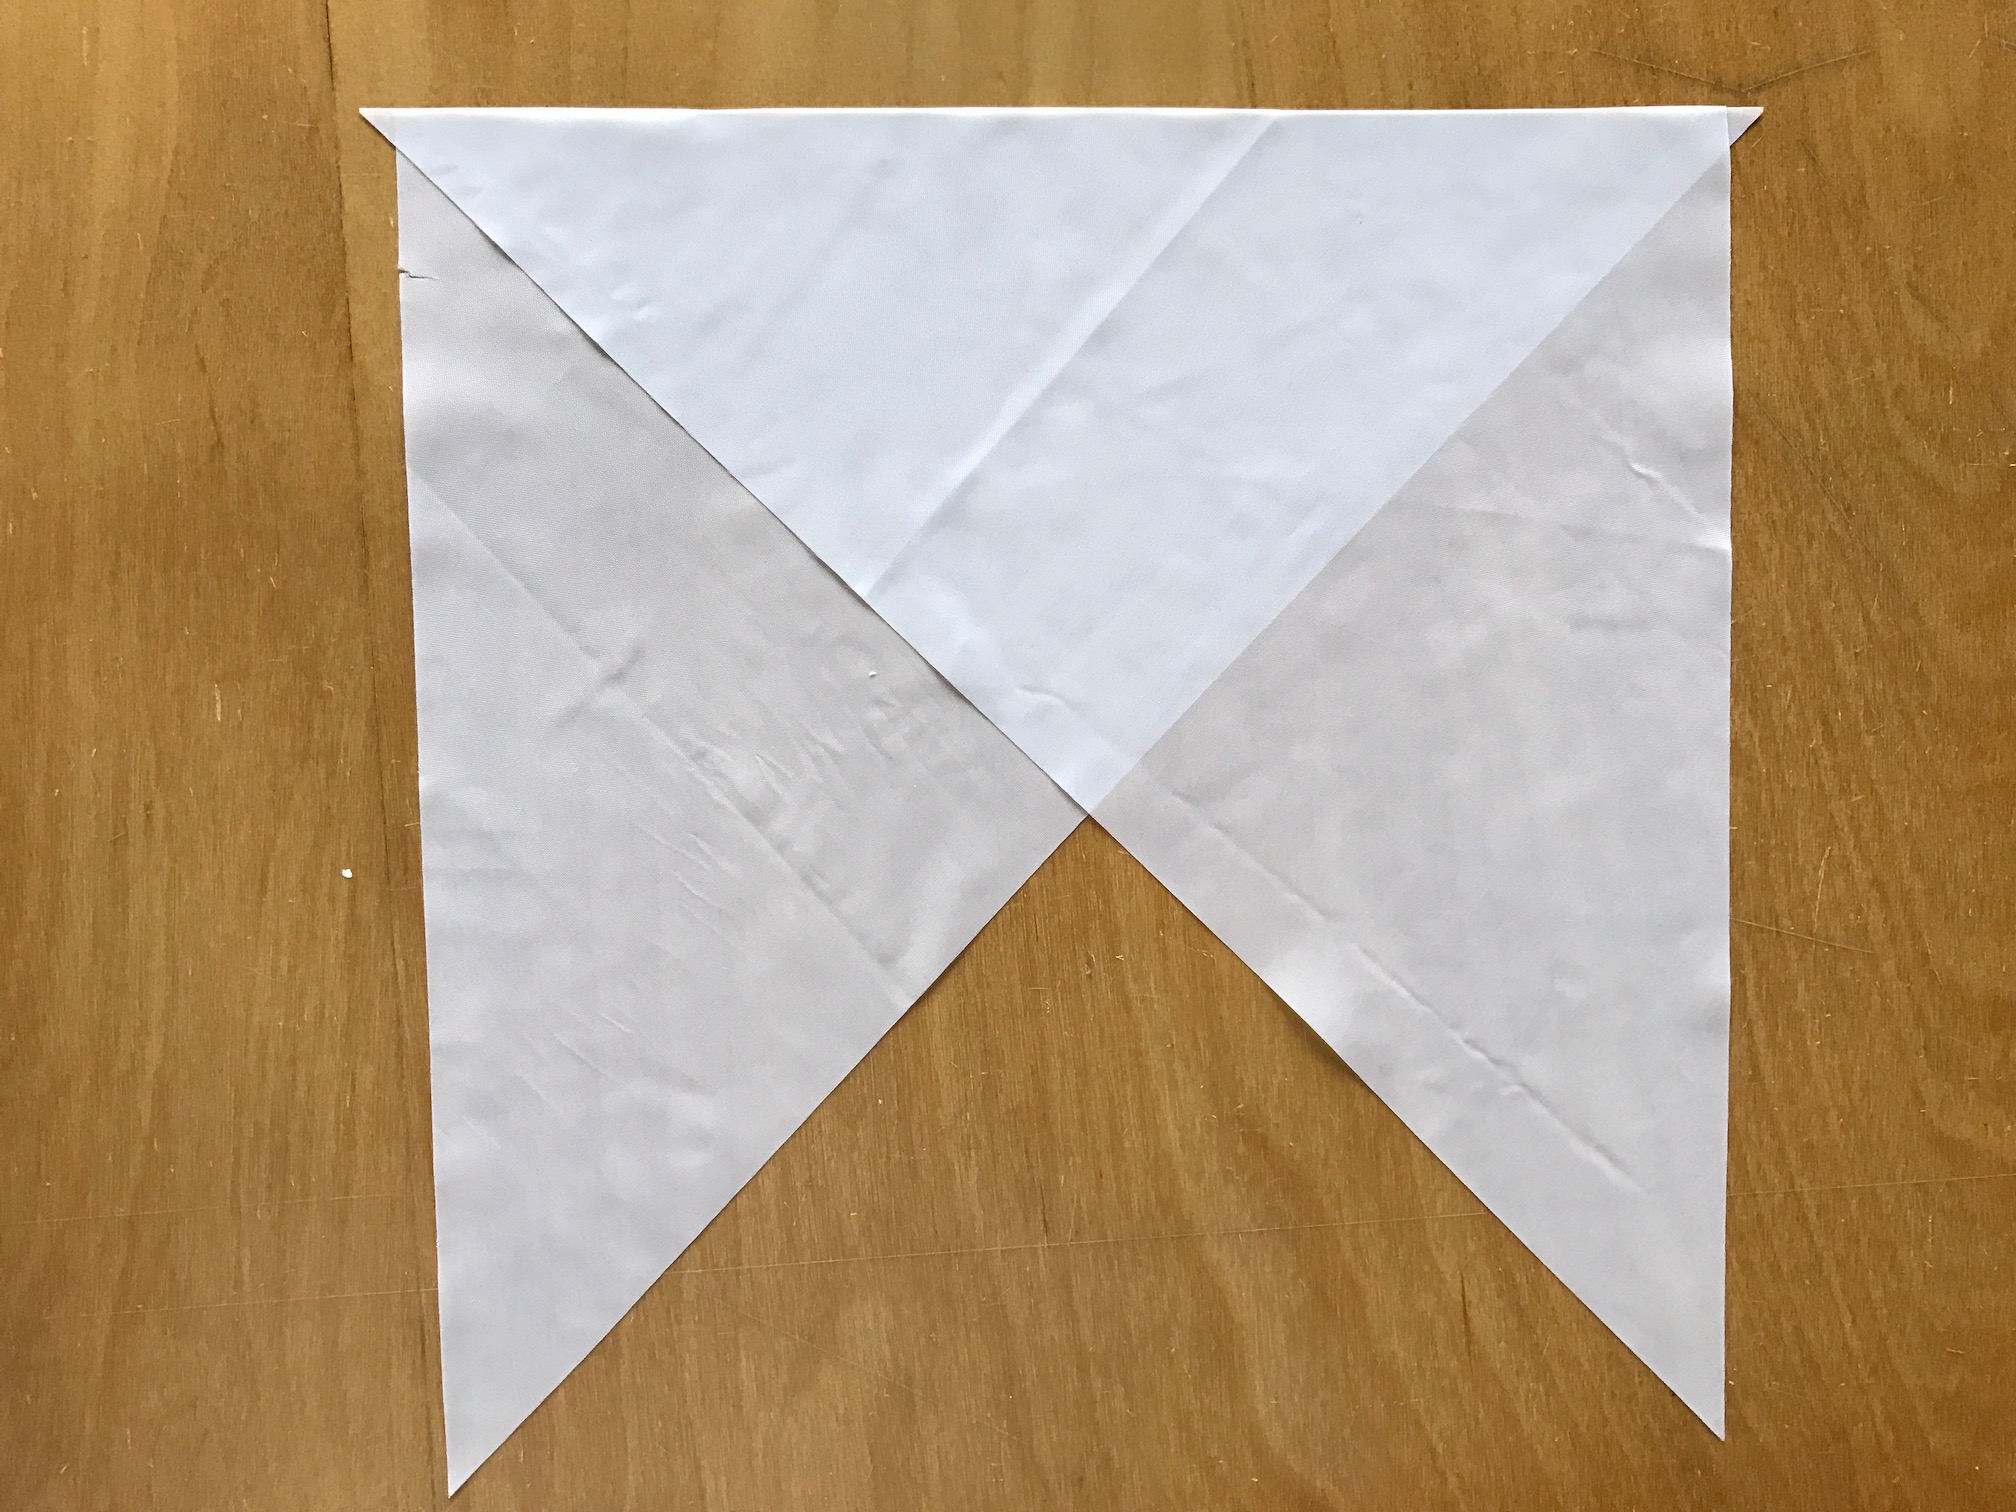
However, there’s a nuance here. Do you see that there are little triangles hanging out? That is because I am offsetting for the seam allowance. I am using 1/4″ (6 mm) here.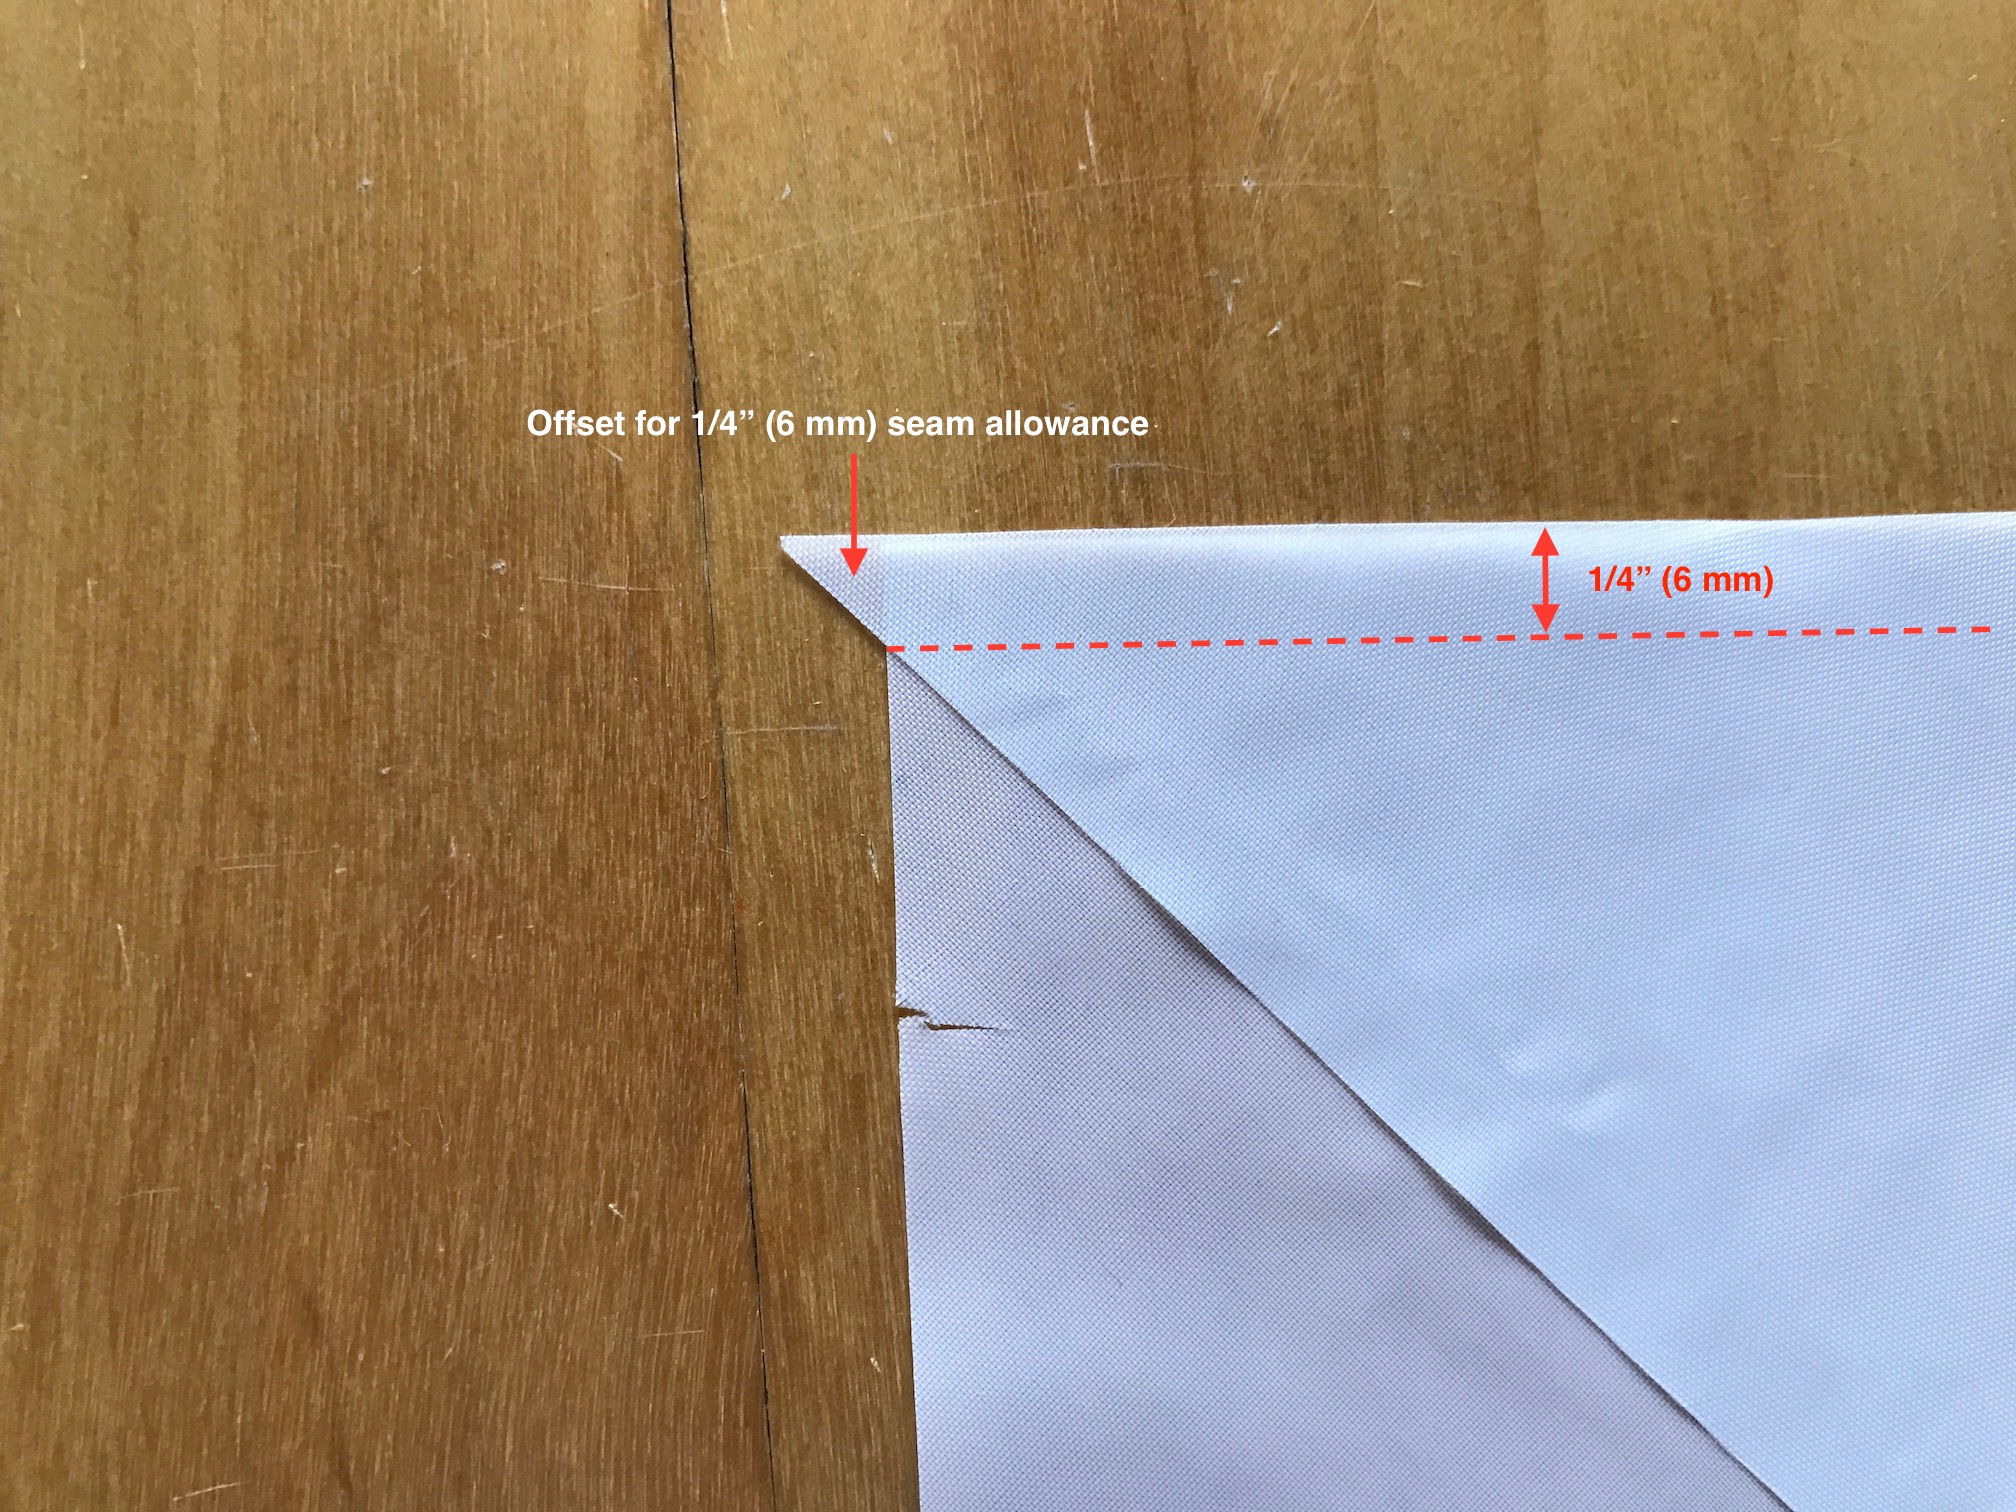
Stitch the seam.
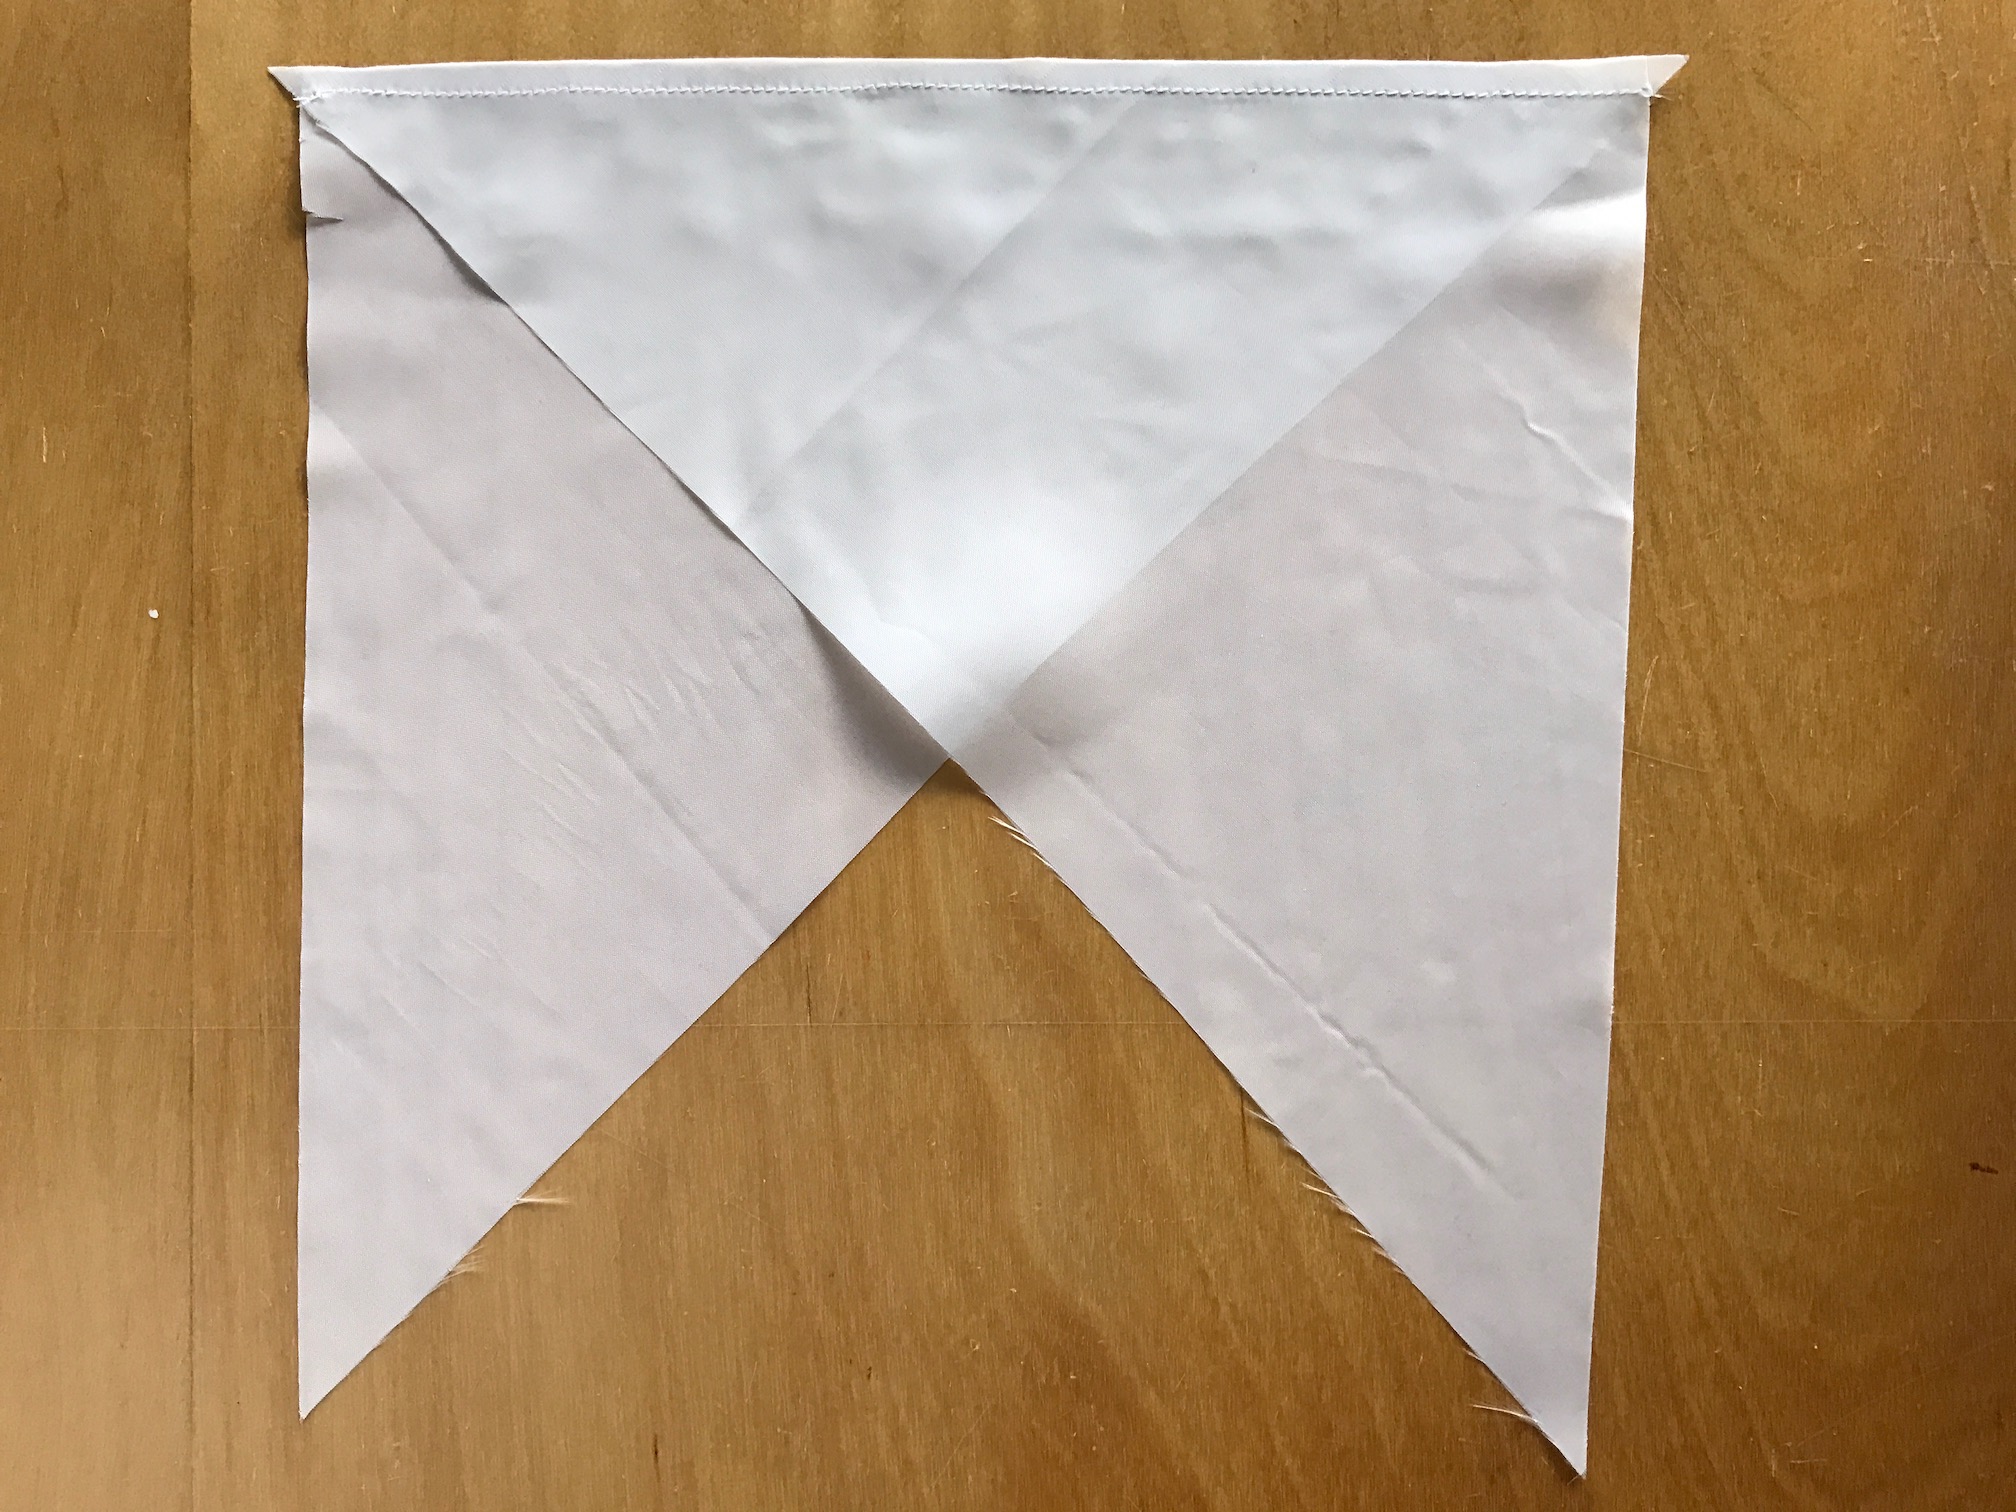
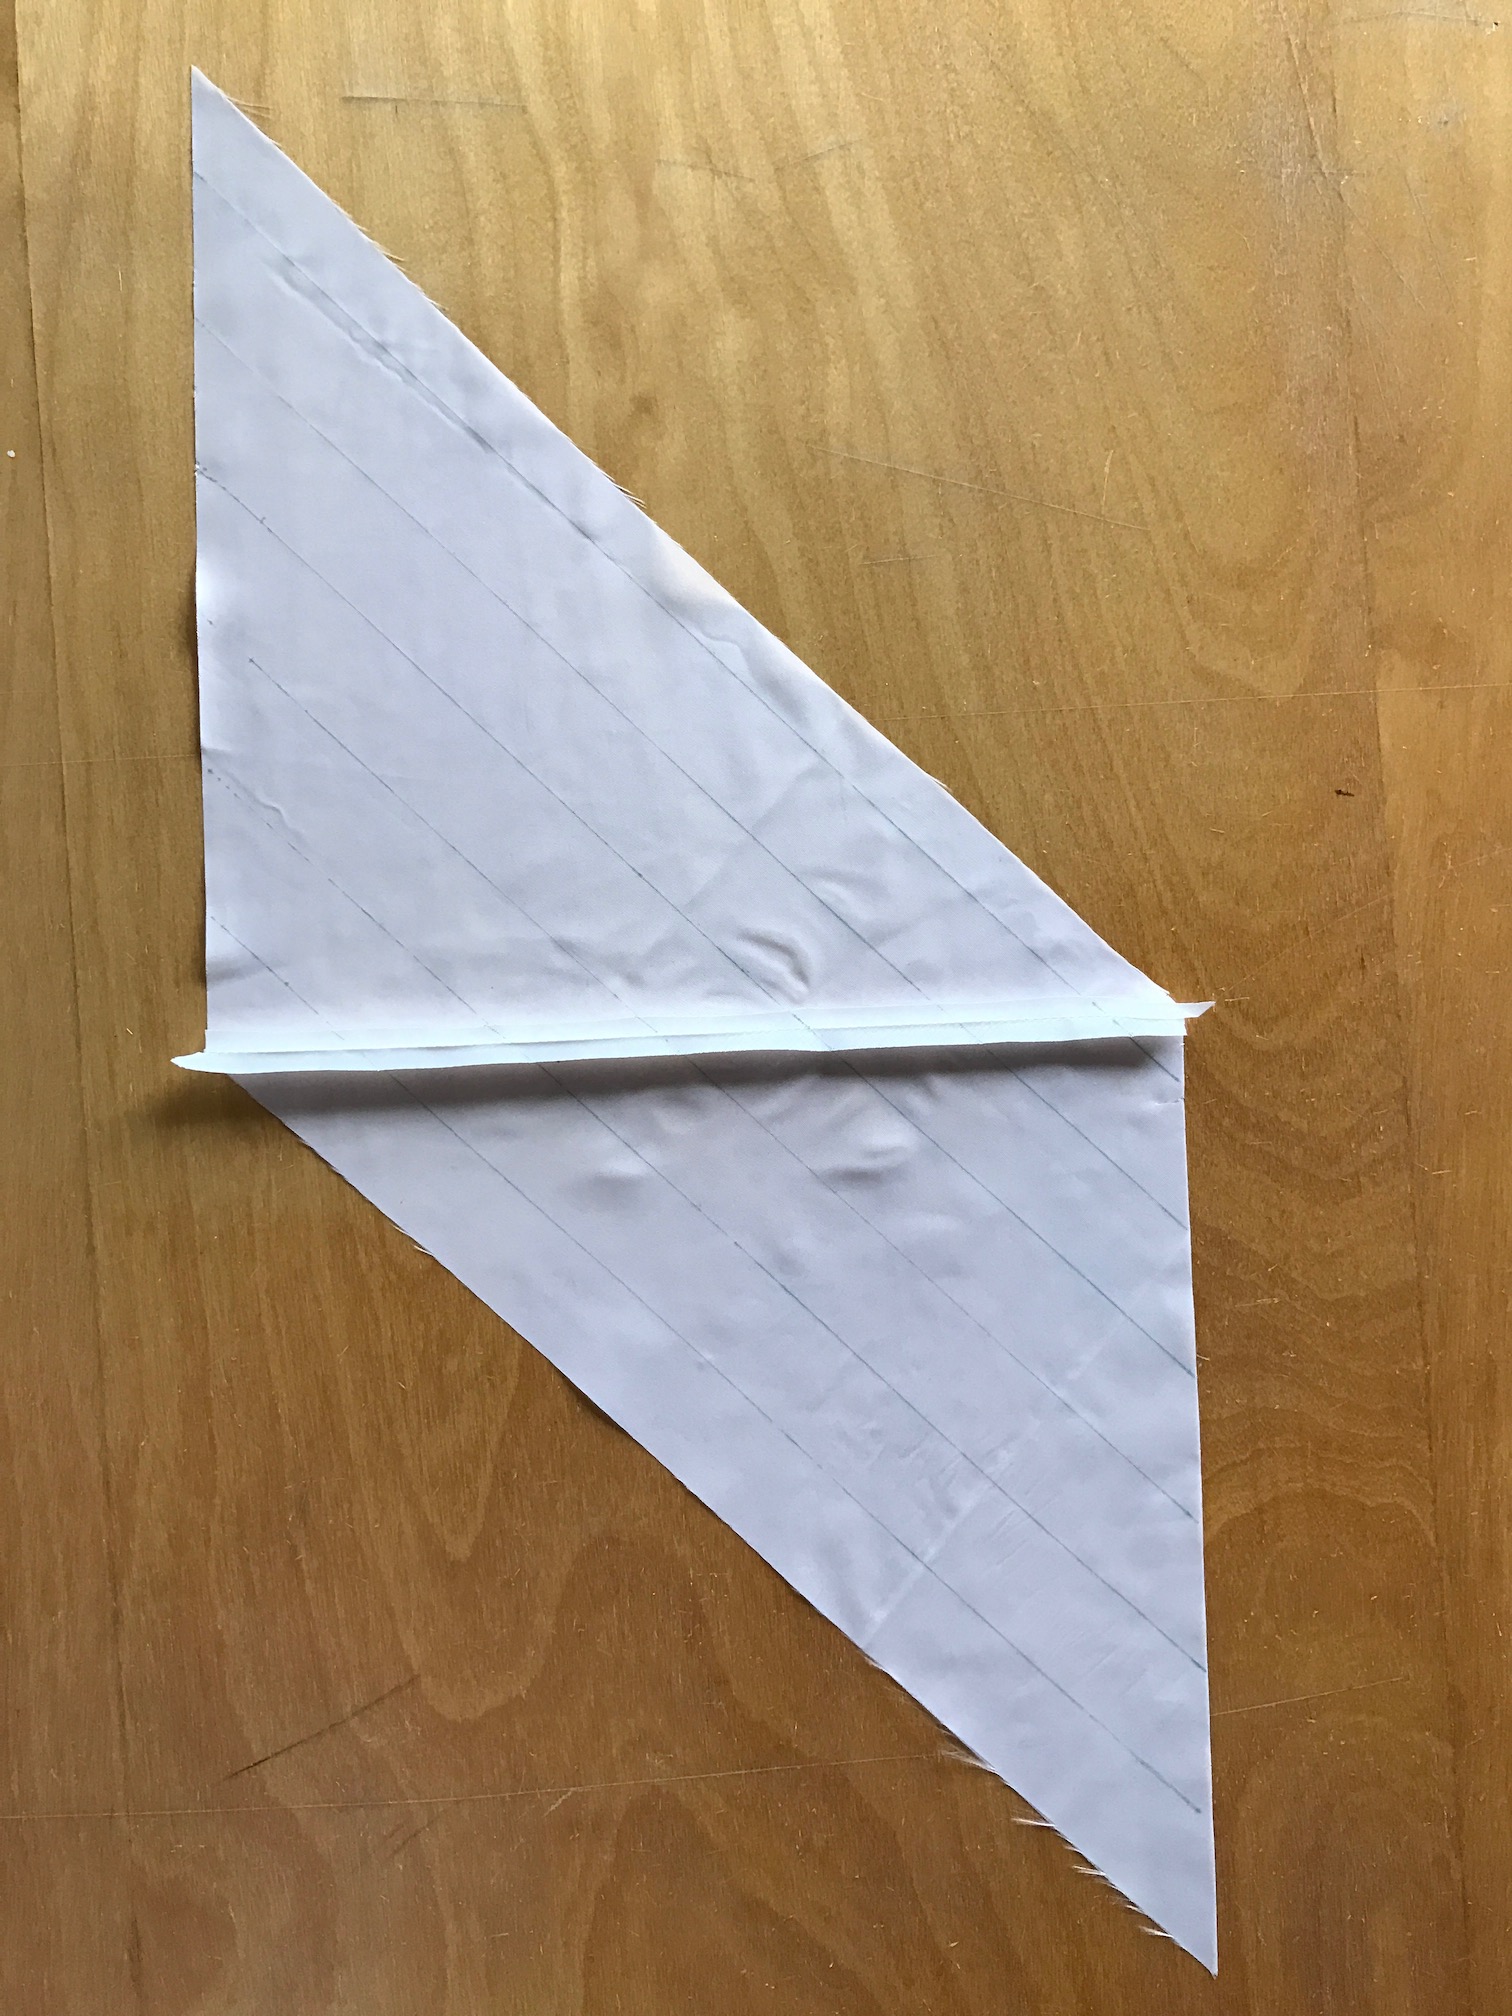
Press the seam open and you have this.
Whip out your pen again. Draw lines parallel to the *longer” edge. If you need a 1″ (2.5 cm) wide bias tape, you will draw the lines 1″ (2.5 cm) apart. If you need a 1 7/8″ (4.8 cm) bias tape, you will draw the lines 1 7/8″ (4.8 cm) apart. My sample here will be 1″ (2.5 cm) wide.
The likelihood is that the last section will not have the width you need, so trim it off and discard.

With right sides together, line up the short edges like this, so the lines you drew are connected/straight.
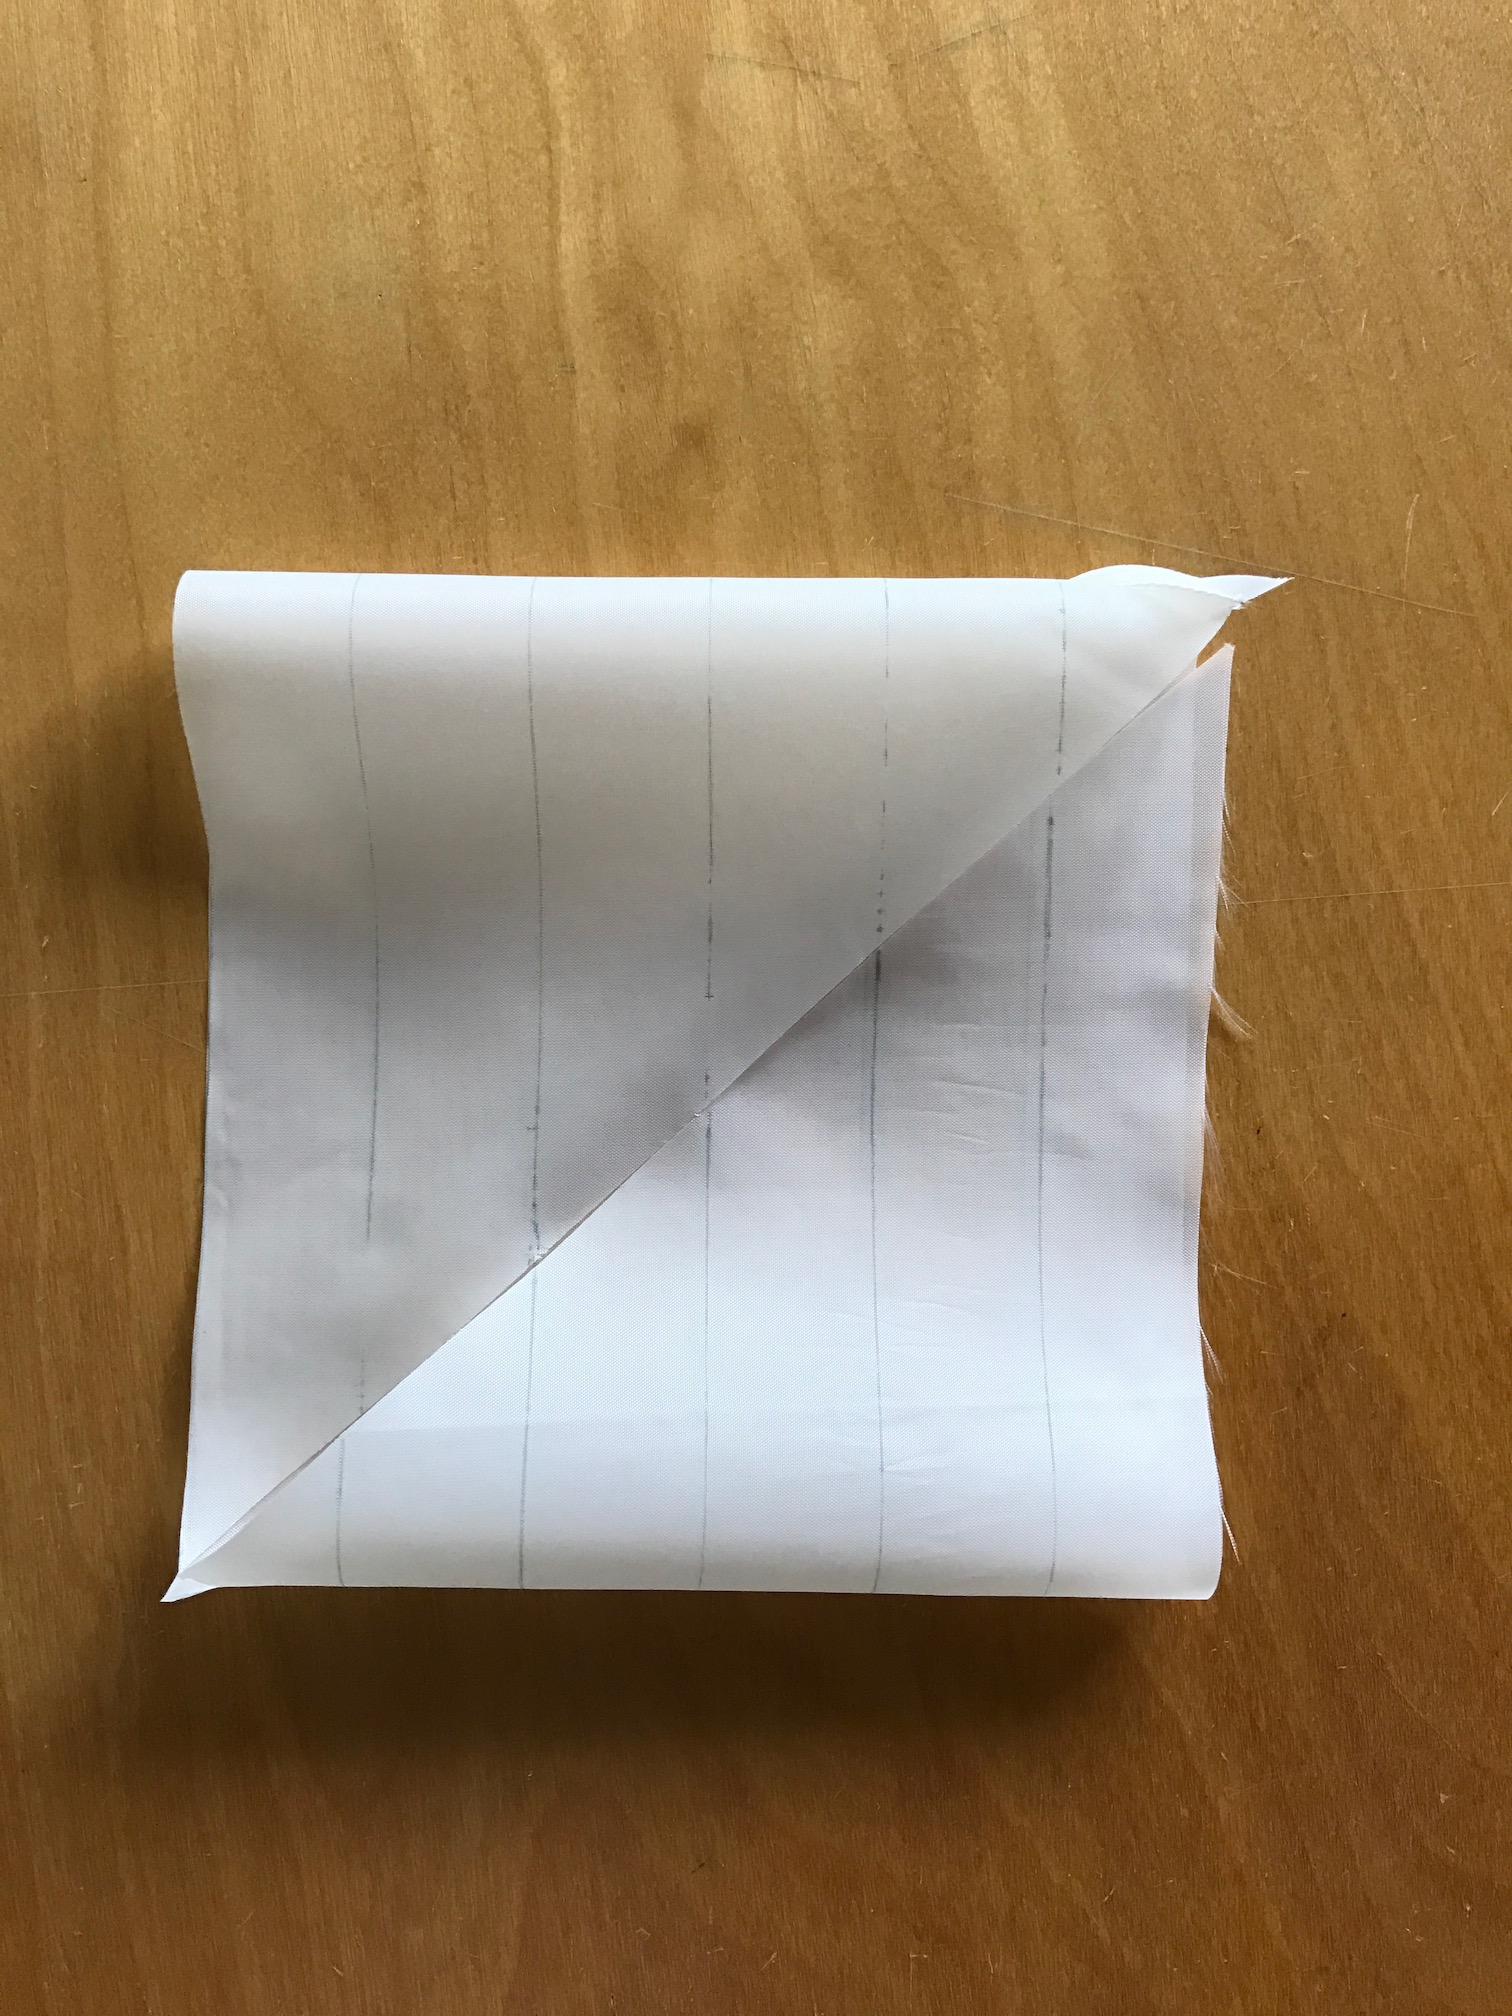
But this is not what we want actually. We need to “pull” the corners so that the one line is connected to the neighboring line instead.

By doing so, you see that there are overhangs on each side.
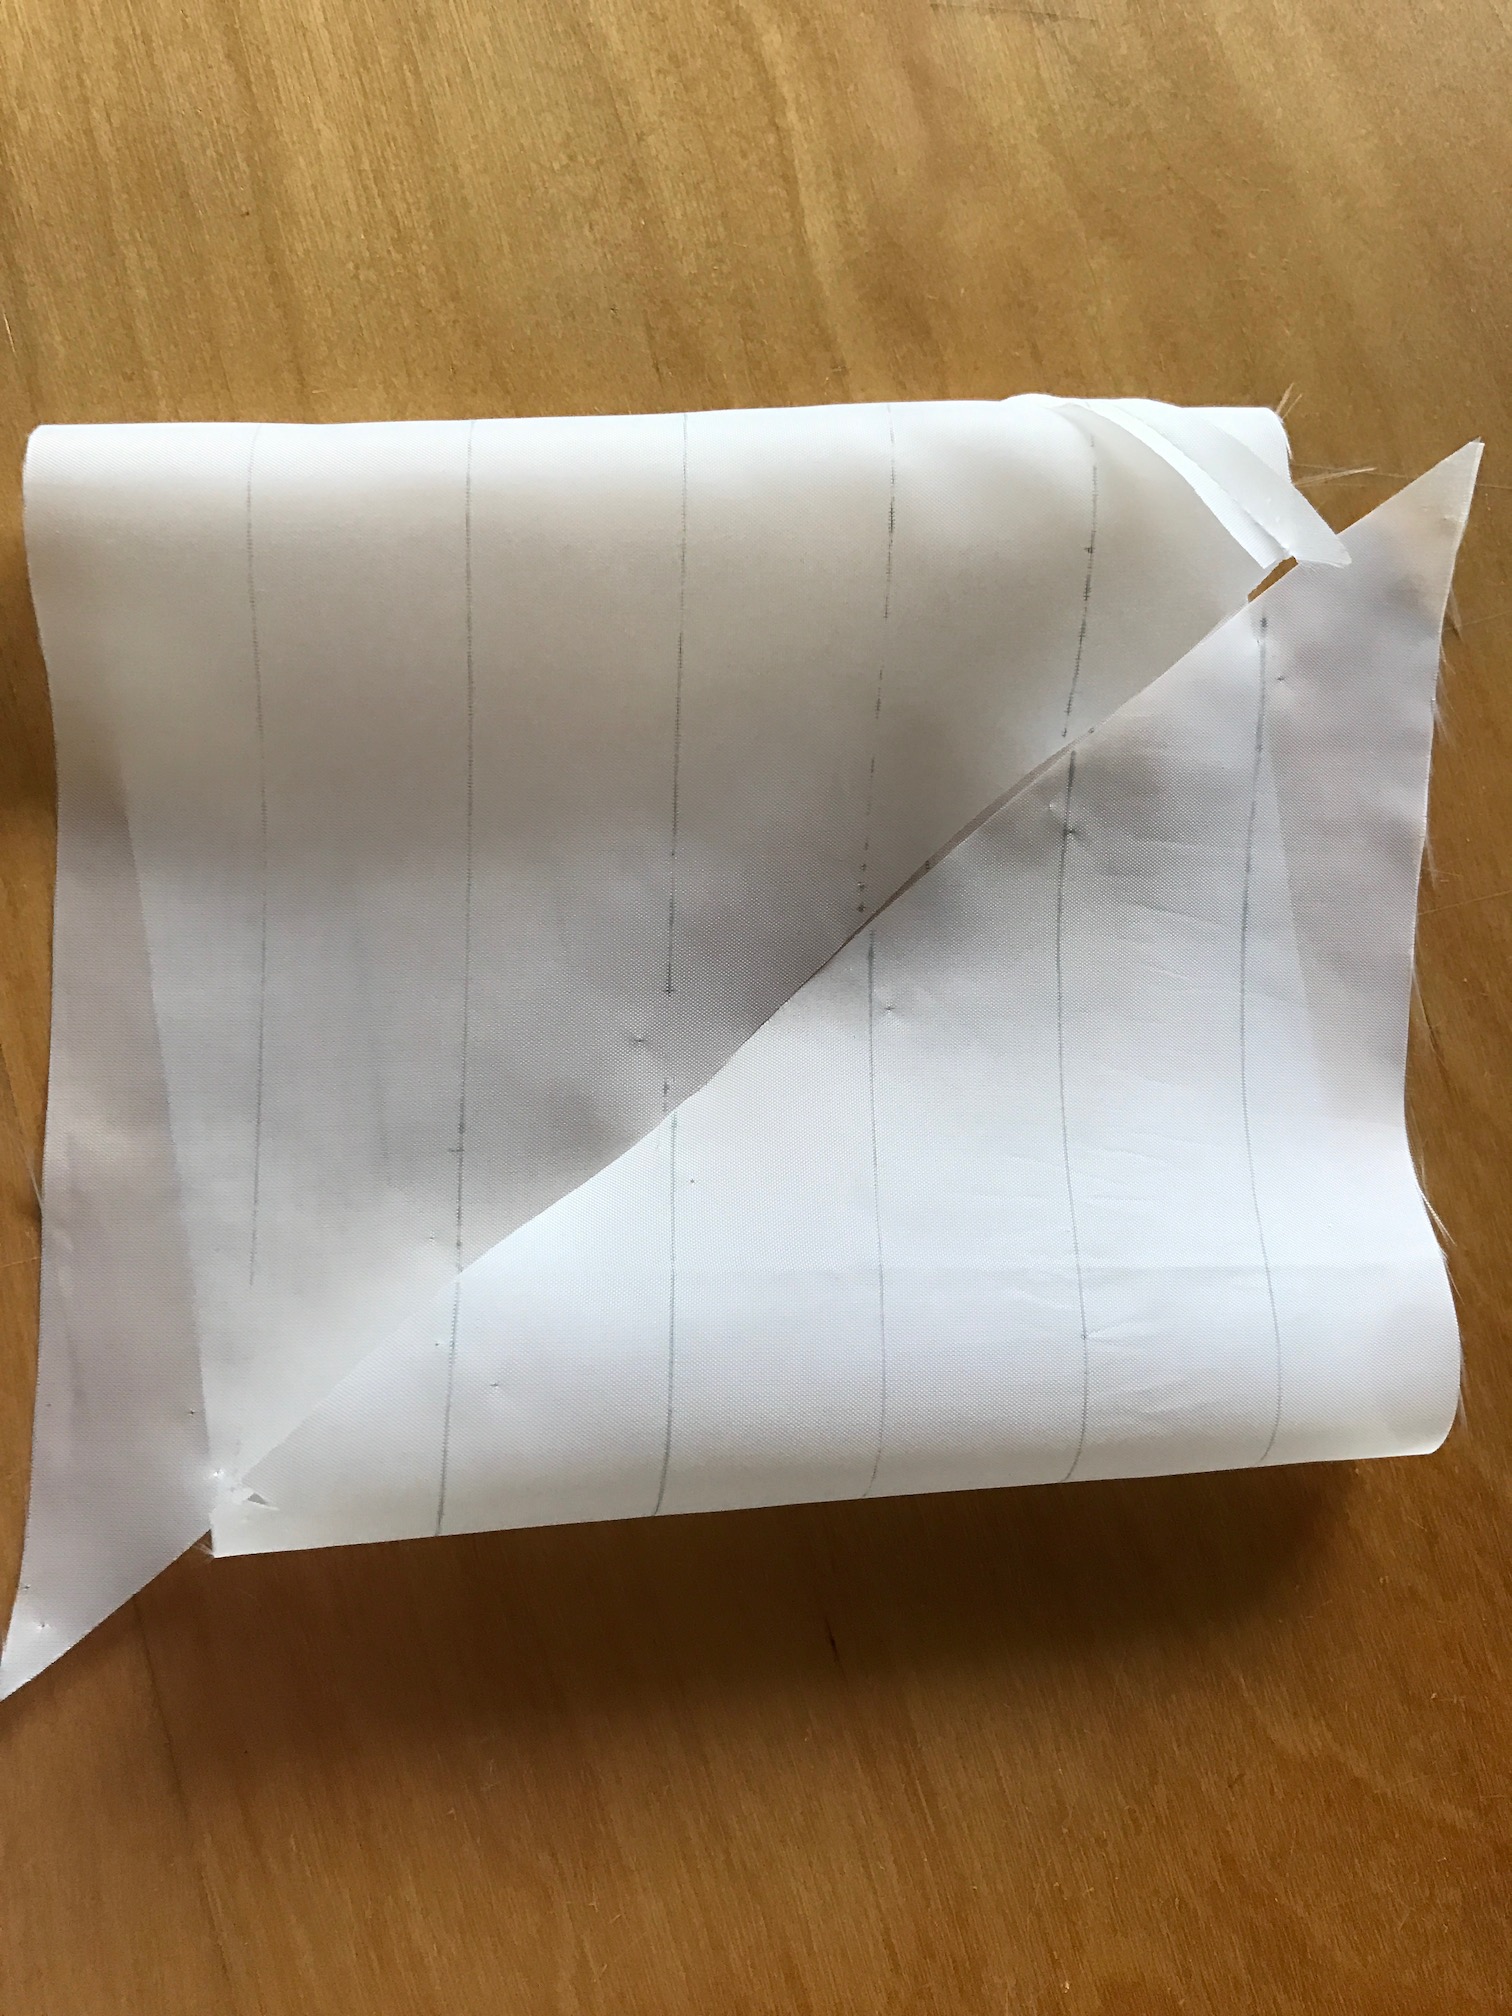
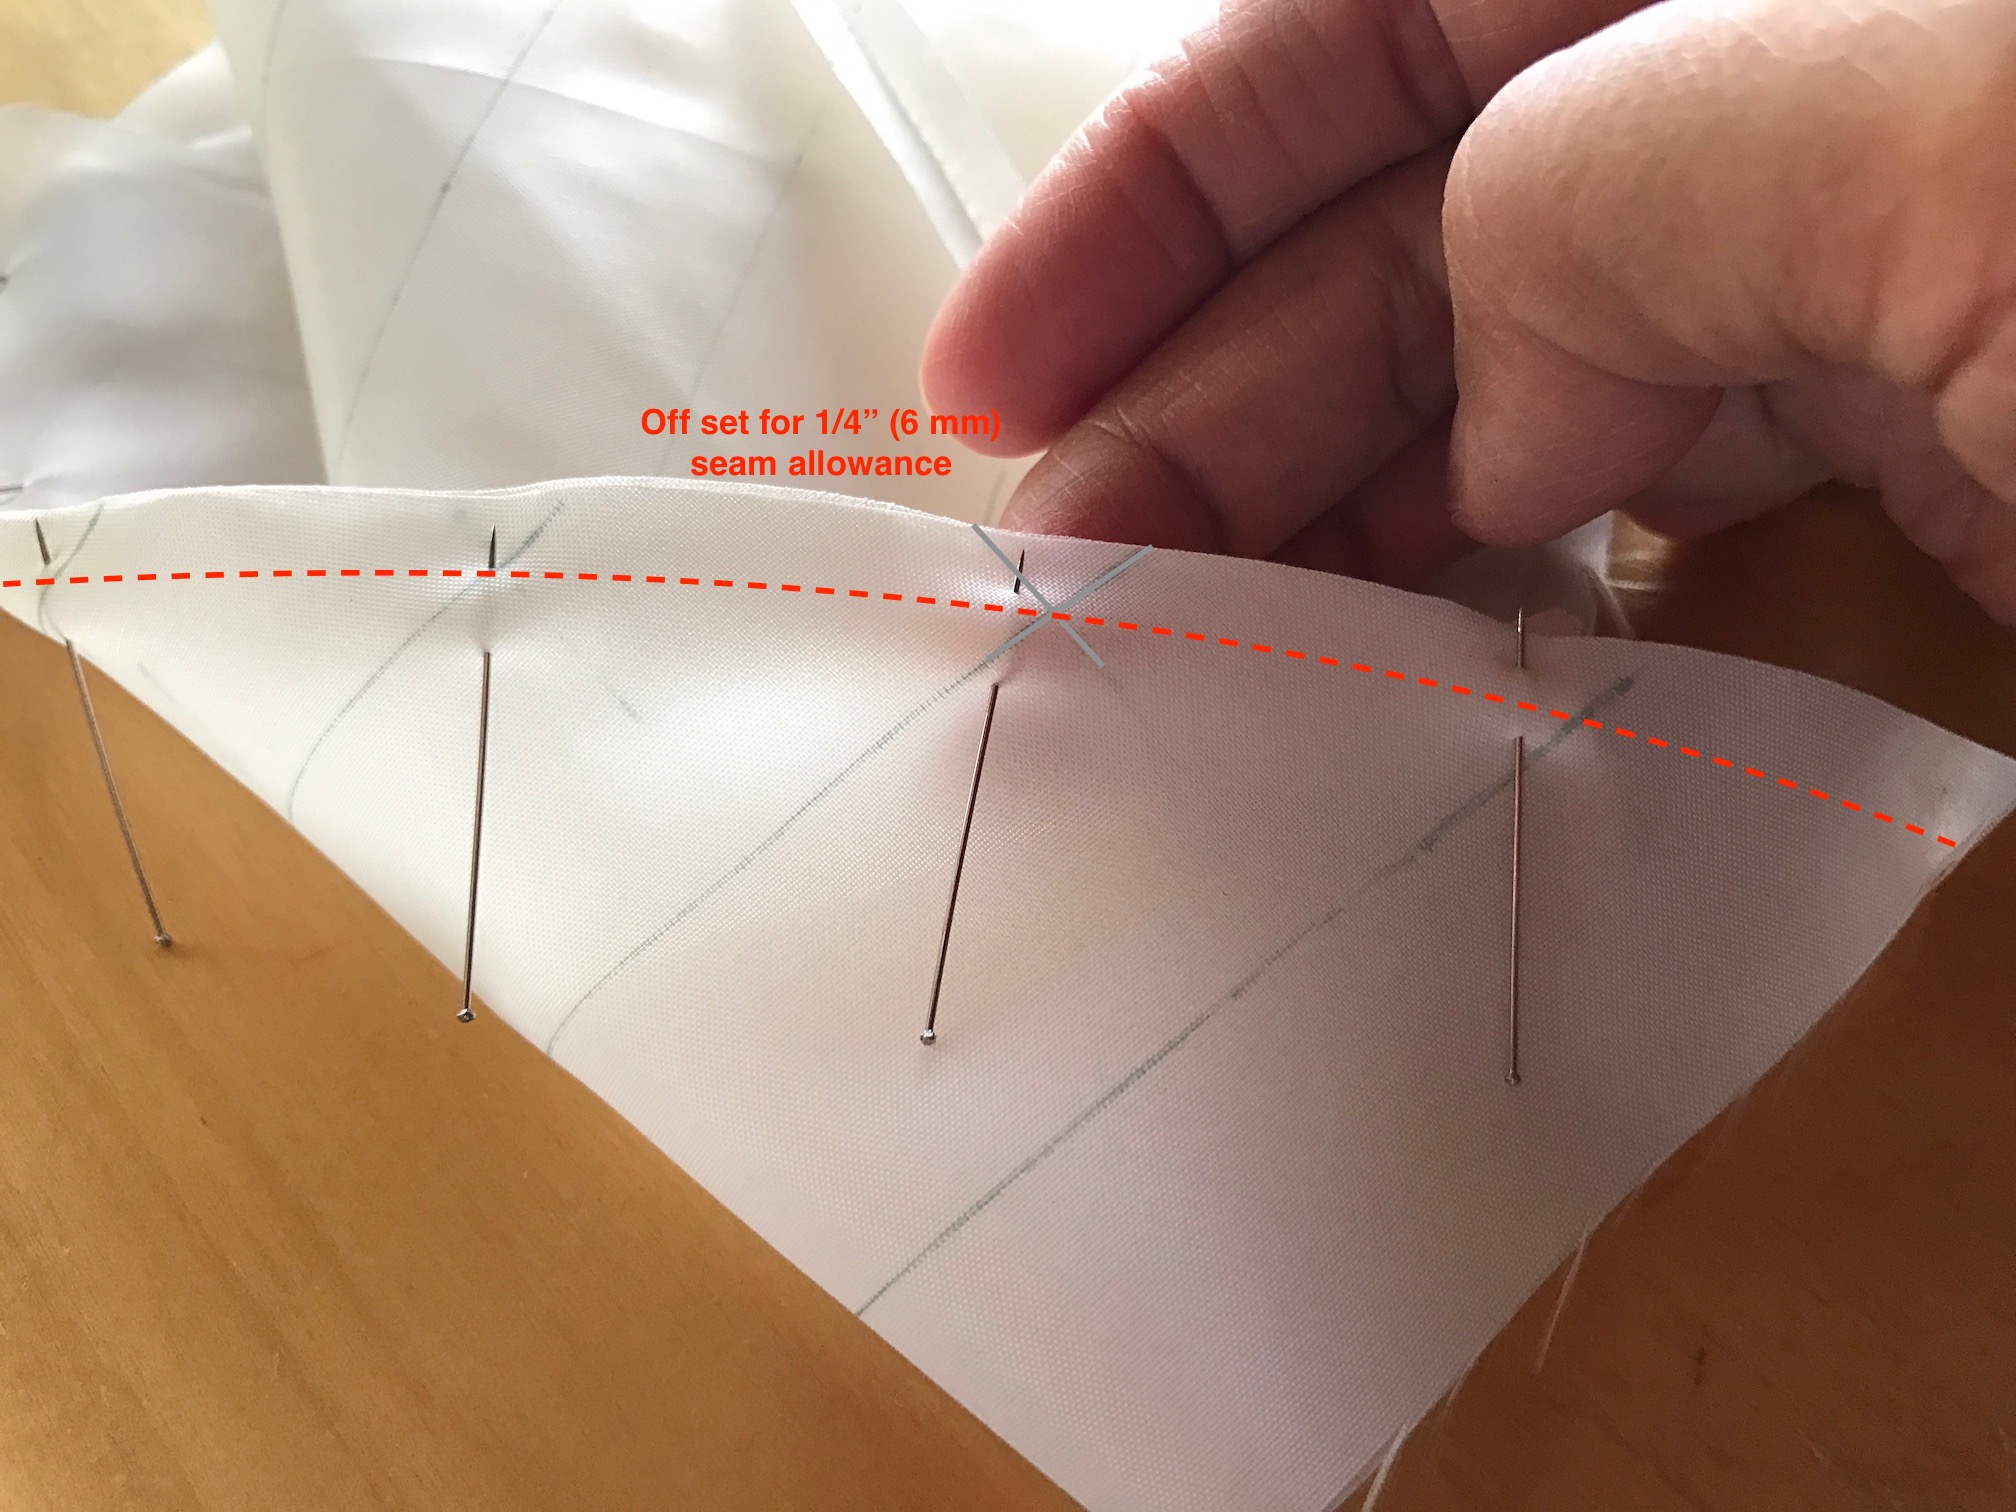
With right sides together again, you can pin the edges together. Similarly, to prepare for the 1/4″ (6 mm) seam allowance, the lines need to offset a little bit. You can faintly see through this fabric; do you see that the lines are crisscrossed?

A closer look.
Stitch the seam and press, and this is what you have.
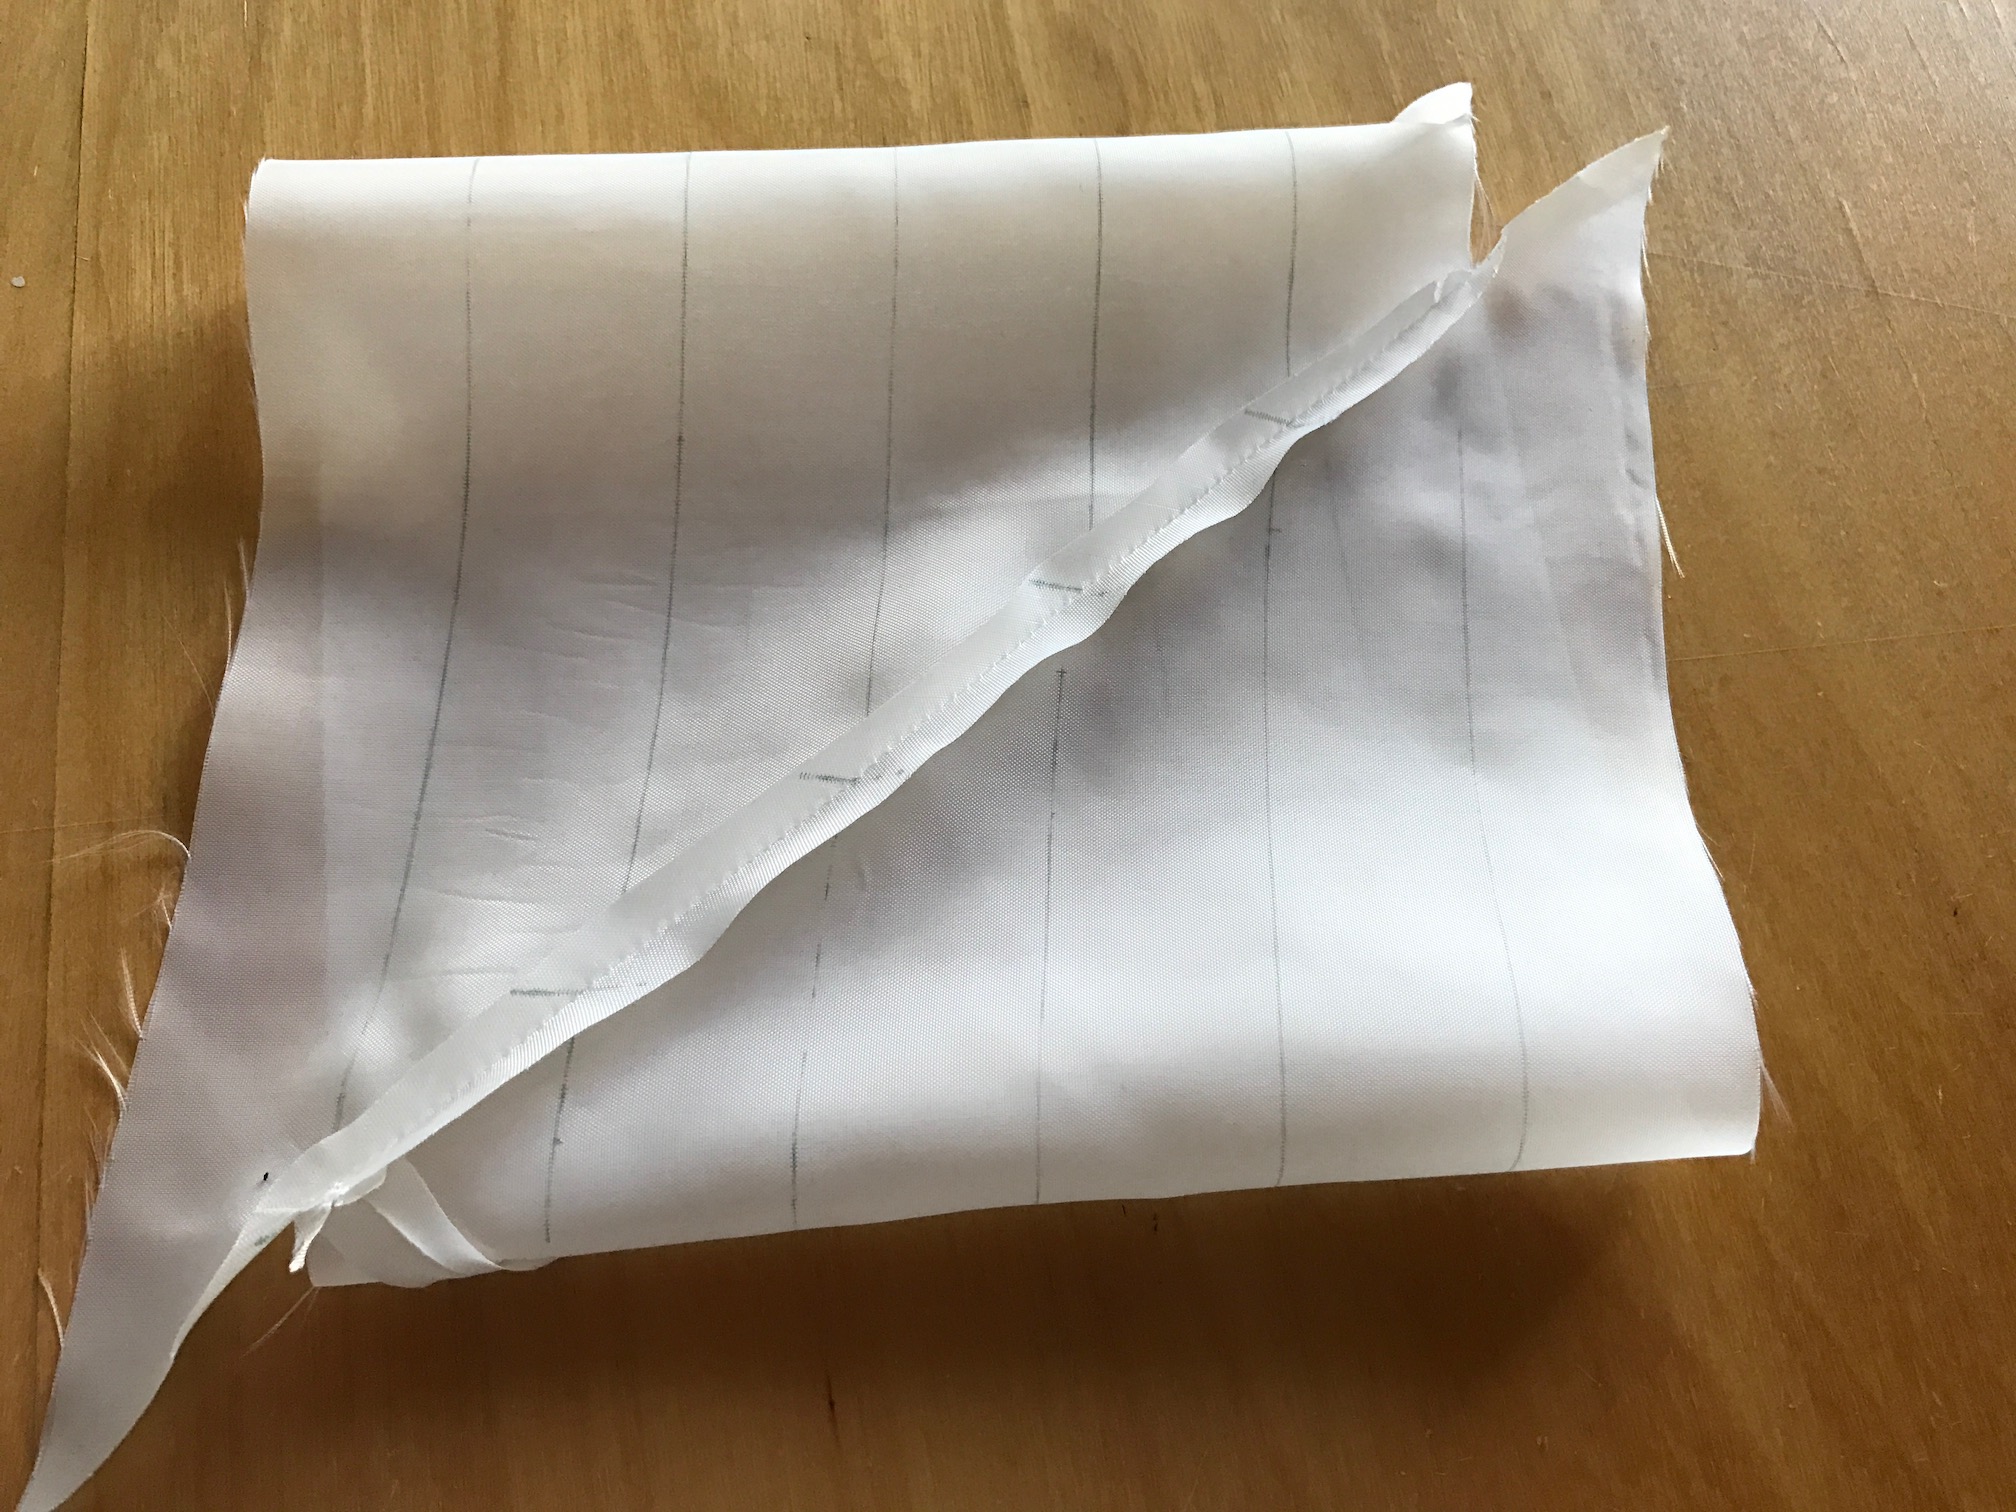
You can now cut from one end, following the line (which is now continuous).

And you will end up with one long bias tape!

There are some pros and cons to this method.
Pros:
- With relatively little fabric, you can produce a long bias tape.
- It only needs two seams to make a long bias tape.
Con (I can only think of one):
- After you cut, you will realize that there are a lot of seams within a pretty short length. This is the price you pay I suppose.
I usually don’t bother to calculate how much bias tape I need – if I didn’t make enough, I can make more. But if I start with a 10″ x 10″ (25 cm x 25 cm) square, I’d end up with about 95″ of 1-inch wide (240 cm of 2.5-cm wide) bias tape. (Basically, it’s 10 x 10 / 1, and then assume about 5% waste and seam allowance.)
Hope this helps! Keep stitching!

Thank you for making lovely well fitting patterns. Your patterns are the best for fit I’ve ever sewn. Please keep up the good work. I just today found your tutorials. Fantastic.❣️
Thank you for making lovely well fitting patterns. Your patterns are the best for fit I’ve ever sewn. Please keep up the good work. I just today found your tutorials. Fantastic.❣️
Thank you for making lovely well fitting patterns. Your patterns are the best for fit I’ve ever sewn. Please keep up the good work. I just today found your tutorials. Fantastic.❣️
Gasp!! I did it! I have never been able to comprehend videos or tutorials on this technique despite being 68 years old and college educated. I am just not one of those people who grasp spacial relationships. I never quite mastered the cube with the holes for the shapes and shape blocks! This was an awesome tutorial! Thank you! Game changer!
Thank you so much for these clear steps, I was struggling with other instructions and fact I had never made bias binding before.
I was taught this way in a class over 20 years ago (I am now 83) and lost the instructions. Have been looking for instructions on-line and came across this. Thank you soooo much.
OMG! First one i actually understood. Thank you so much; I’ve been going crazy thinking I’m just not qualified to read instructsbles
Margo
Definitely *the* best tutorial I’ve come across. Great photos and succinct instructions. Thank you especially for pointing out the need for offsetting to ensure lines match up properly.
I found your tutorial after I had made continuous bias tape for making cording. I love that you used a transparent fabric to show how things should look and for showing you would have a piece narrower that should be trimmed off. I learned this while making mine because the other tutorials made it seem as if all of it would be usable and not mentioning the seam line. Excellent tutorial, photos and written instructions, I am qualified to say this because I have viewed soooo many! Best one I have come across, thank you!
Well, that spectacularily didn’t work! But I’ve figured out what I did wrong. I cut the fabric double instead of just following along a line on a single fabric. Live and learn (sigh).
I used to have the instructions for this from a class I took a looong time ago. I probably still have it at my studio but I needed it right now for a project at home. THANK YOU for posting these instructions! They are very clear & easy to understand.
Thank you so much for this! I have been making my own bias, but cutting small pieces from the leftover fabric scraps, and then stitching each together individually. It was becoming a bit tiresome. I’m going to try out your method next time I make some!
I love this method and often use any left over fabric from a project to make some ‘spare’ so that I can bind necklines etc. with pretty contrast fabrics whenever I want a bit of a change.
Great tutorial thank you! I think making bias tape can be a really nice way to spend the afternoon to be honest. If I don’t feel like stretching my brain but I feel like fiddling around I pull out some nice end pieces of cotton lawn and spend it making up some nice bias tape. Since discovering how much love curved hems – there is nothing like a bias finish to make that curve just right!
I make mine the same way. Heather Valentine of The Sewing Loft has a great cheat sheet to tell you how big of a square it takes to make a specific width and length of bias. I keep it in a notebook beside my machine because it’s so handy. http://thesewingloftblog.com/calculating-continuous-bias/