
Invisible Zipper with Lining Installation – Part 1
This post is about installing an invisible zipper. Part 2 will be about installing the lining with this invisible zipper.
++++++++++++++++
I was never truly happy about my way of installing a lining with an invisible zipper. It looks fine from outside, but there is still a little bulge and a bit of pull at the top of the zipper inside. Though the instructions in my patterns on this topic is far from perfect, I have gone through many other tutorials and pattern instructions (MANY!) on handling the lining with an invisible zipper, none gave me a better result than what I already have. If you check out the instructions on any “big-4” pattern, they will tell you to hand stitch the lining.
I have never worked in a clothing factory, but my wild guess is that no factory would give you the couture touch of hand stitching the lining in your dress. Yet the invisible zipper and the accompanying lining in ready-to-wear clothing are mostly great. No bulge and no pull. So it appears that this is a solved problem, but that knowledge is just not widely circulated in the home-sewing industry.
What do I do? Nothing but to go through every one of them in the store (ok, not EVERY one) and try to figure it out. I am that chick who always turns the clothes inside out and admires the internal structure of clothing (my favorite is to dig through the various pockets in the outerwear section at REI). My friends are embarrassed to go shop with me, so sometimes I just take the clothing to the fitting room and geek over them privately. I have also been known to buy used clothes and cut things open. It’s a problem. (Maybe not.)
Anyway, I found that even different ready-to-wear clothes have different ways to handle the invisible zipper and lining. This particular one that I cracked is mostly found in little girls’ dresses. I like it because it’s not difficult to do, although it’s a little hard to explain. Once you get it though, there’s really nothing hard about it.
However, before I go straight to lining installation, I feel that I need to go over the actual invisible zipper installation. Often I try to write tutorials only when I have something special and valuable to add to the vast sea of tutorials out there on the topic. But for the sake of completeness, this part 1 covers the invisible zipper installation. I hope that it gives you a tip or two anyway. However, if you already know how to install an invisible zipper, by all means, do it your own way. What’s really special is the lining installation, which is the next part.
Let’s begin by bringing out the invisible zipper! My favorite kind of invisible zipper has a mesh tape. I like its flexibility. Supposedly it is for lighter weight fabric, and I have used it on a slightly heavier quilting cotton with no problem. I never had one broken on me (touch wood). Unfortunately, this mesh tape zipper is not easy to find in the big-box sewing stores. When I see it available, I buy almost a boat load at once. But the typical Coat and Clark zipper from any sewing store would work too.
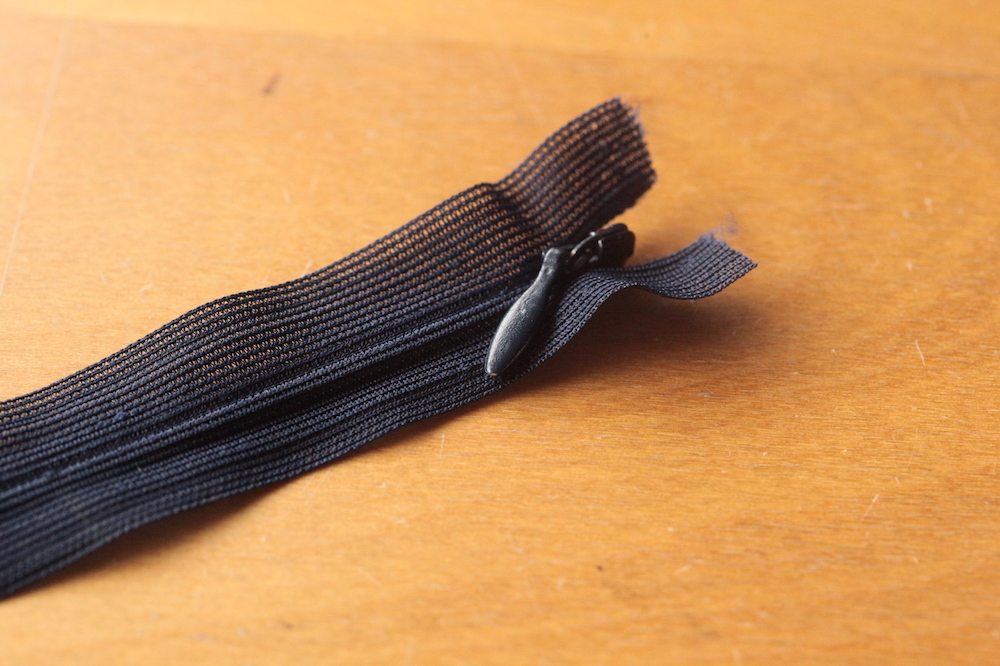
I’d also like to mention that I always use a longer invisible zipper than needed. It’s way easier to shorten the invisible zipper at the end than having to dodge the zipper pull during installation. I encourage you to do the same.
Some people also like to open the zipper and press to uncoil the teeth. But I found that is not always desirable. For lightweight fabric, a pressed zipper is OK. But for heavier fabric, a pressed zipper usually leads to me stitching too close to the zipper teeth. So instead, I don’t press and only control it at the sewing machine with my finger.

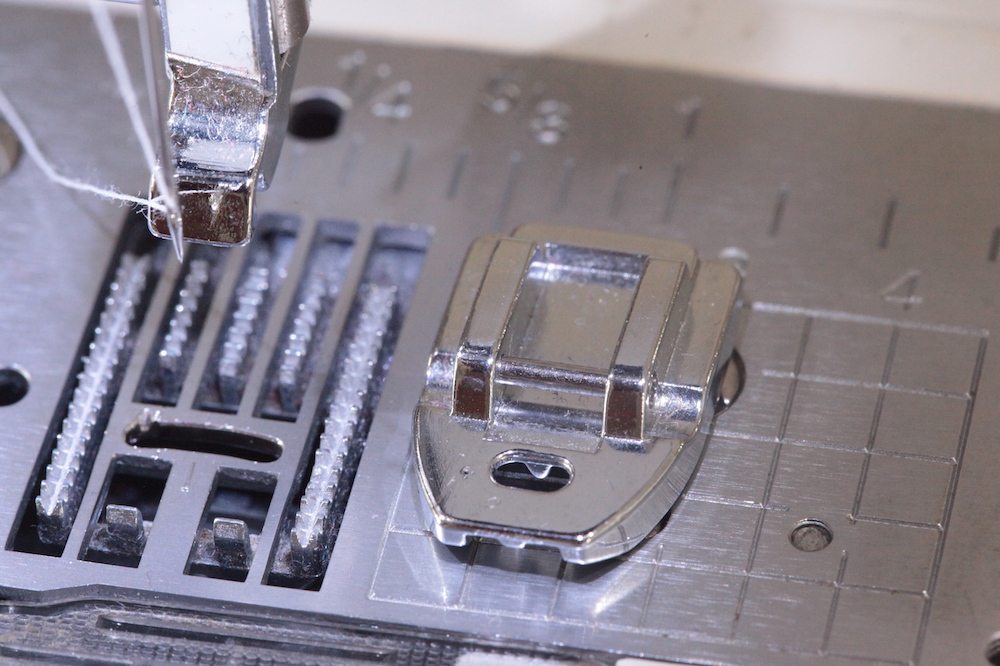
You will need an invisible zipper foot and a regular zipper foot. People have successfully installed invisible zippers with only the regular zipper foot, but I am not doing that here. I’d like to use the right tool for the job to make my life easier. If you are used to do it without, kudos to you and do what works for you.
This is my invisible zipper foot. It is a generic one and did not come with my sewing machine. Some people swear off generic feet, but this particular one works great for me. I used to use a plastic one too, but this metal one works better. I think there’s a “acquaintance” period with a new tool; once I learn to navigate the nuances, then the tool and I can do great work together.
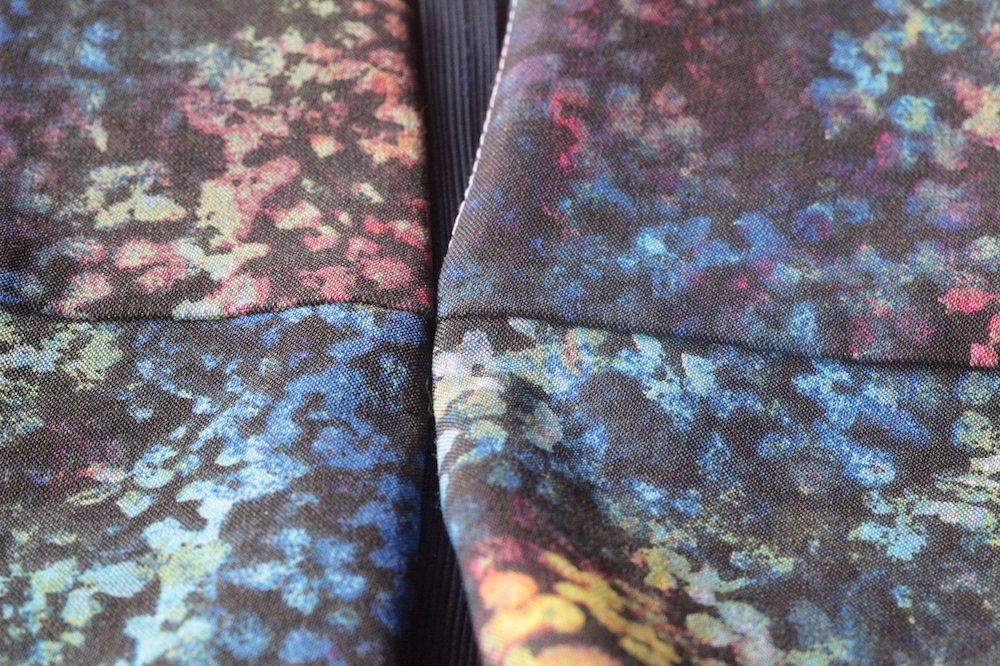
Let’s go on to the skirt. I am using my Vientiane Skirt as the demo. This skirt has a yoke, so you can see how I handle matching the yoke seam. But this method works for a dress too.
First and foremost is to stabilize the zipper area. I use a fusible stay tape and press it onto the seam lines. This type of stay tape is the straight variety, which means it has no stretch at all. Beware that there is a bias variety, which has a little bit of give, which is not what you want here. I have also just used regular woven interfacing on the area as well. That is fine, as long as you cut the interfacing on the straight grain, so that there is no give lengthwise.
When applying the fusible stay tape, be sure that it extends slightly below the bottom of the zipper. Usually patterns have a notch (or some kind of mark) to indicate the bottom of the zipper. I used my scissors to point out where my notch is (I clipped my notch here, but it’s hard to see with the serger thread).
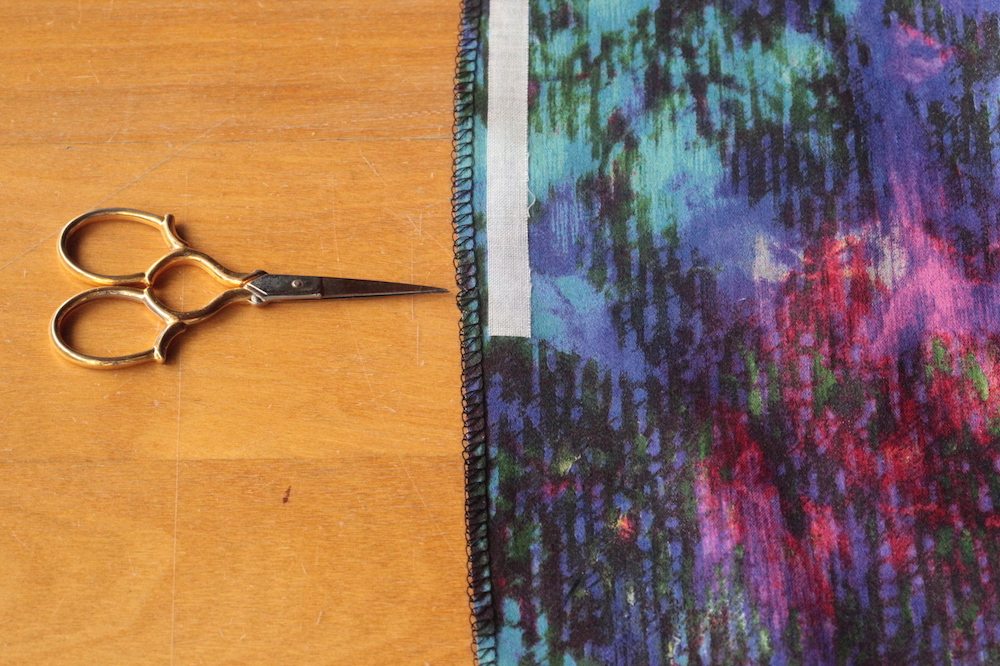
Also note that I have already serge finished the raw edges on the center back (this is a center back zipper). I found that it’s easier to do it now than later. You just have to take care not to trim more than a hairline when serging the edge so the seam allowance stays true.
Next I stitch a line at the seam line on either side as a guide. My seam allowance here is 1/2″ so that’s where I am stitching on either side. If your seam allowance is different, then use that instead.
Now I can place my zipper on the skirt. Note that my zipper is right side down (because when the zipper is stitched, the seam allowance is folded back so the zipper will be flipped right side up).
A close up just to be sure you see what I mean by flipping it right side down.
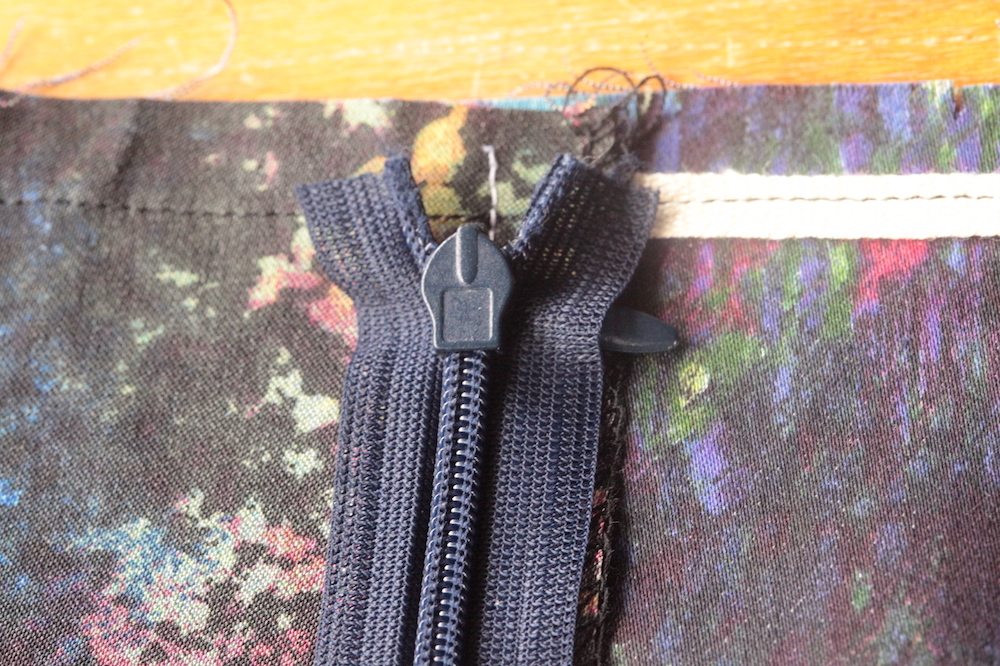
Another point is that you have to leave some room up top for the waist seam allowance. Be sure to leave the width of the seam allowance plus 1/8″, which means 5/8″ in my case. However, for thicker fabric, you need to leave the width of the seam allowance plus 1/4″.
That extra space I am talking about is between the top of the slide body and the raw edge. If you pull the zipper all the way up, you’d see that the slide body goes higher than the top stops. So don’t just look at the top stops when evaluating the zipper placement.
I then open the zipper and pin the zipper tape along the guiding stitch line that I made earlier. My goal is to have my stitch line on the zipper exactly on top of the guiding stitch line.
We will be stitching from the top to the bottom of the zipper, so point your pins upward for easy removal later.
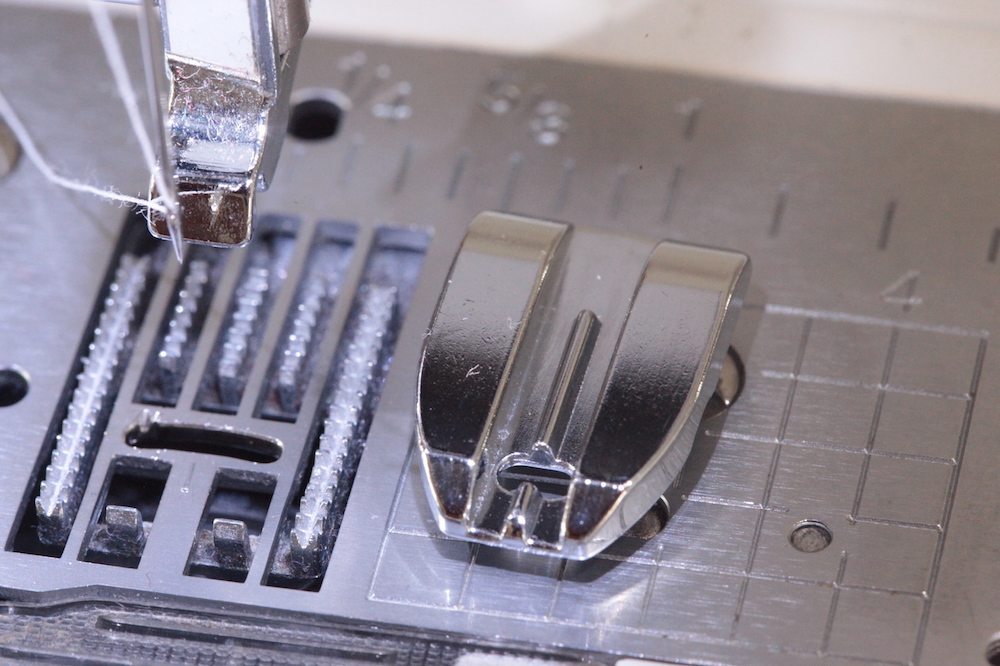
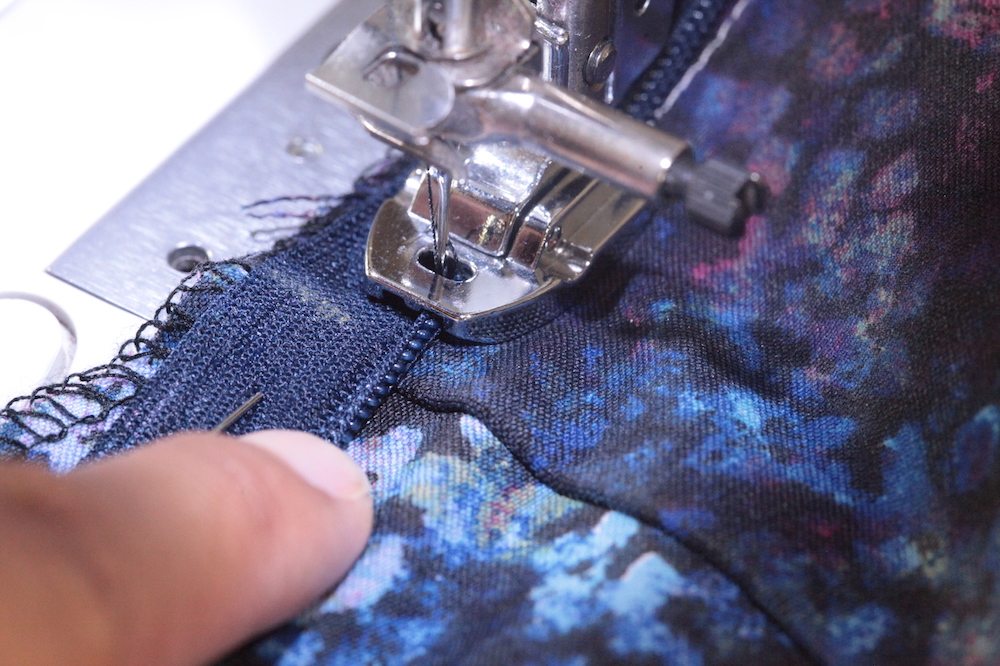
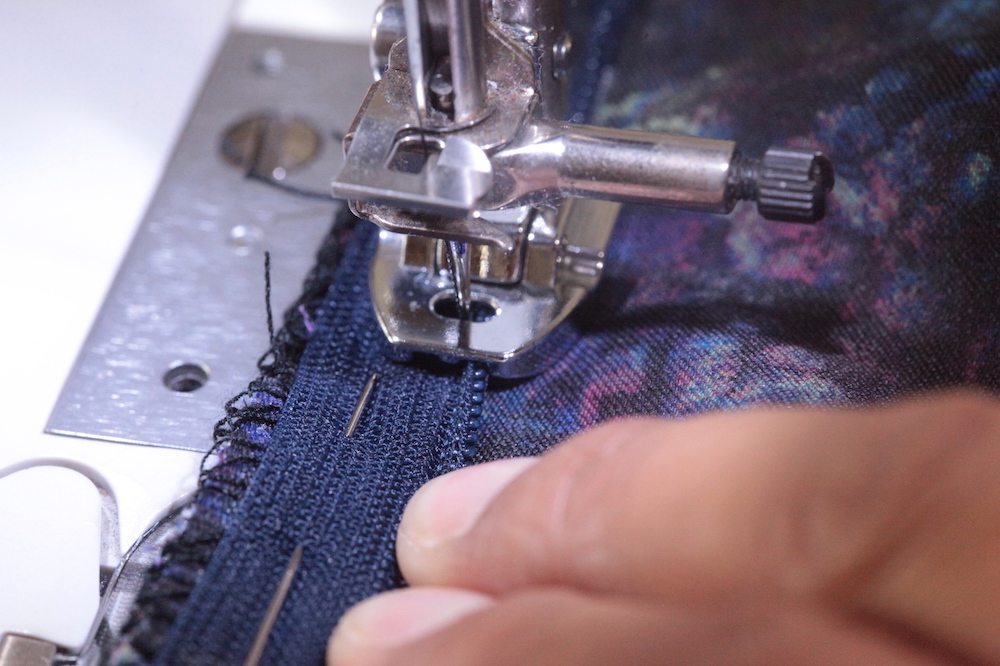
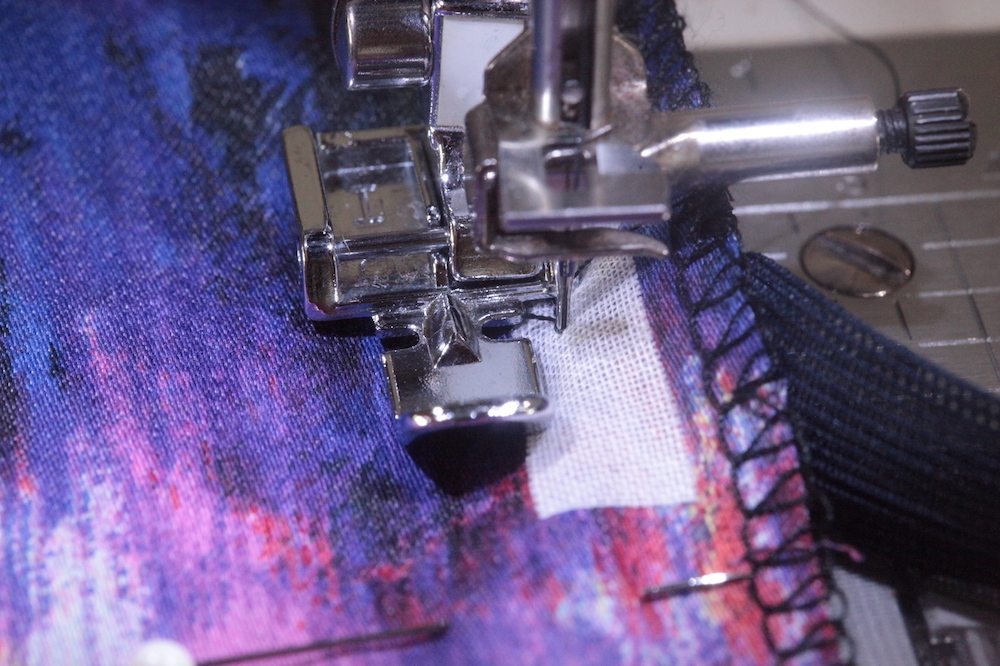
It’s ready for the sewing machine. I place the zipper teeth under the left groove of the foot. Note that I uncoil the zipper teeth with my finger too. But whatever you do, do NOT let the needle poke through your finger!! No bleeding allowed!
I keep stitching, and removing the pins as I get to them, until the notch, where it indicates the end of the zipper placement.
OK. Done! I backstitched to secure the end.

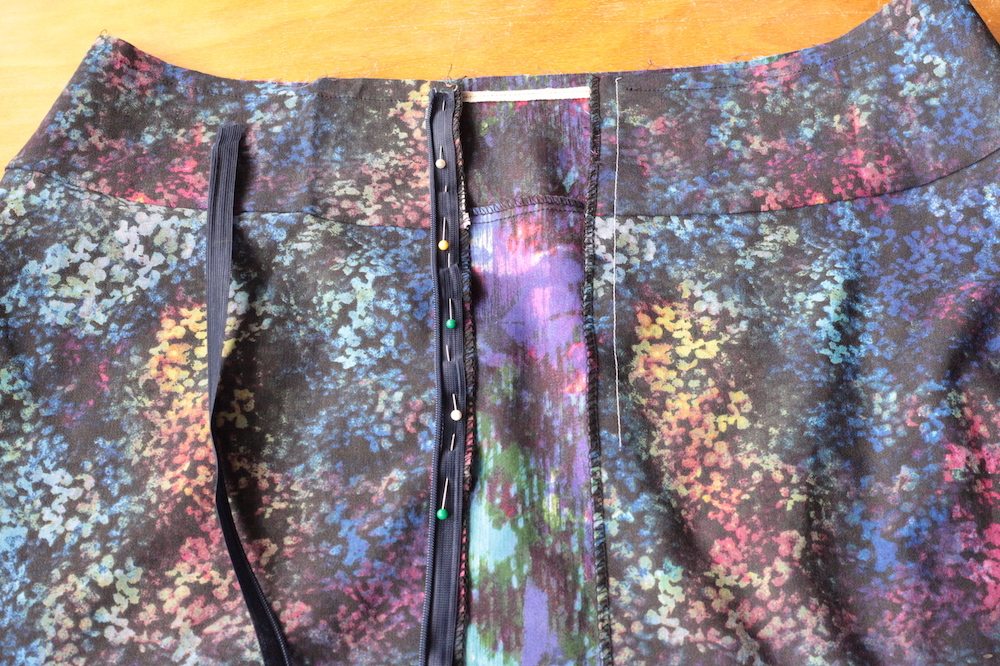
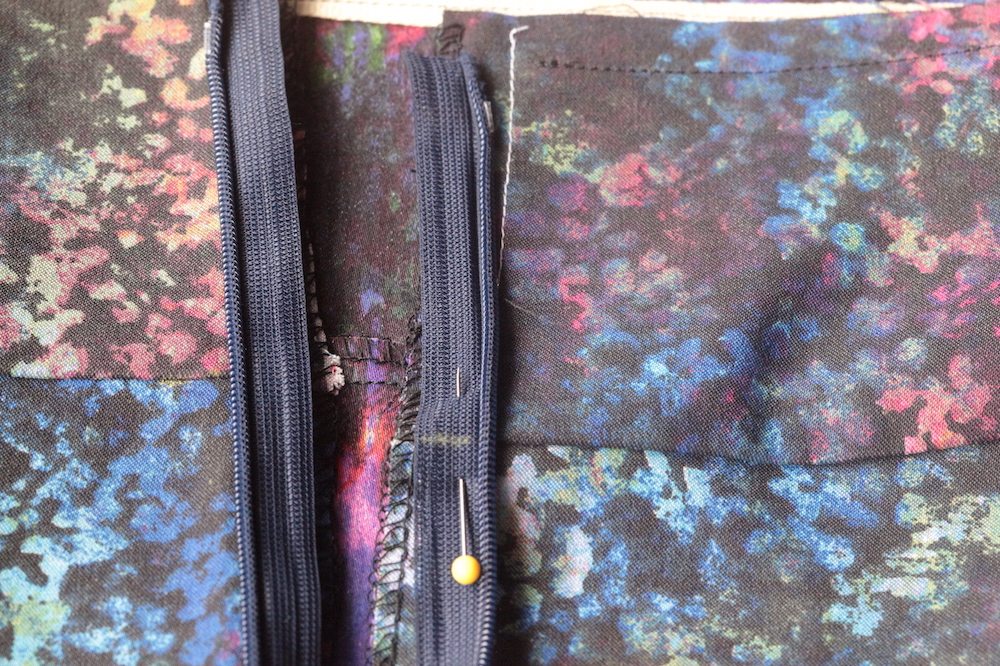
Now, this is something not everyone does, but I found it very helpful. Close the zipper and use your chalk to mark on the zipper tape where seam matching is necessary. For this skirt, that is the yoke seam. If you are making a dress, you want to mark the waist seam too.
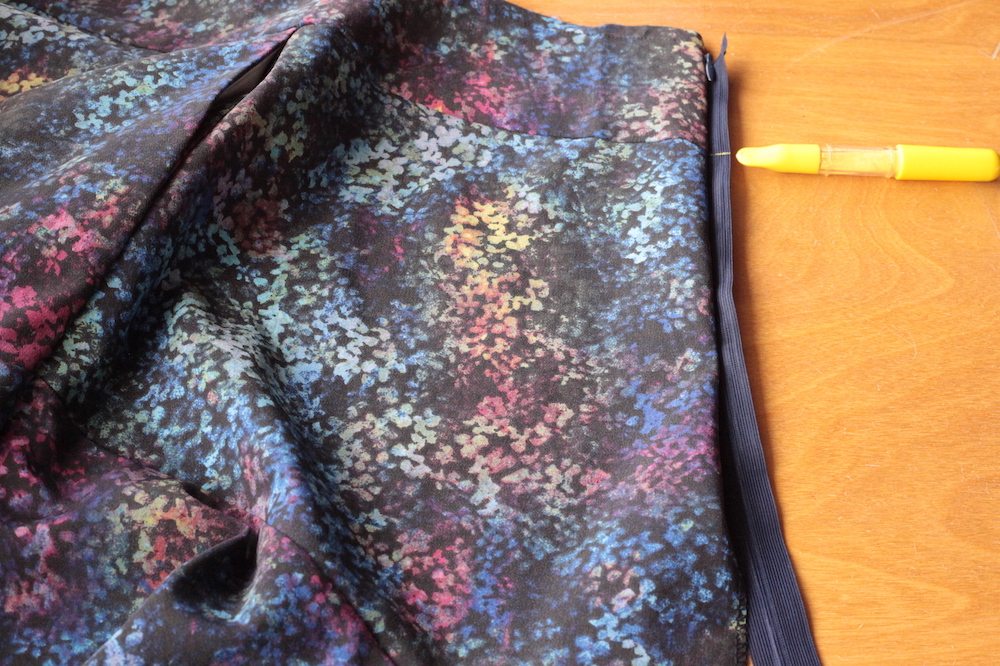
Also, mark where the stitching stop on the zipper tape.
Be sure to chalk both right and wrong sides of the zipper tape. Actually you can only see the wrong side when you are sewing, but I found it easier to mark the wrong side after marking the right side first.
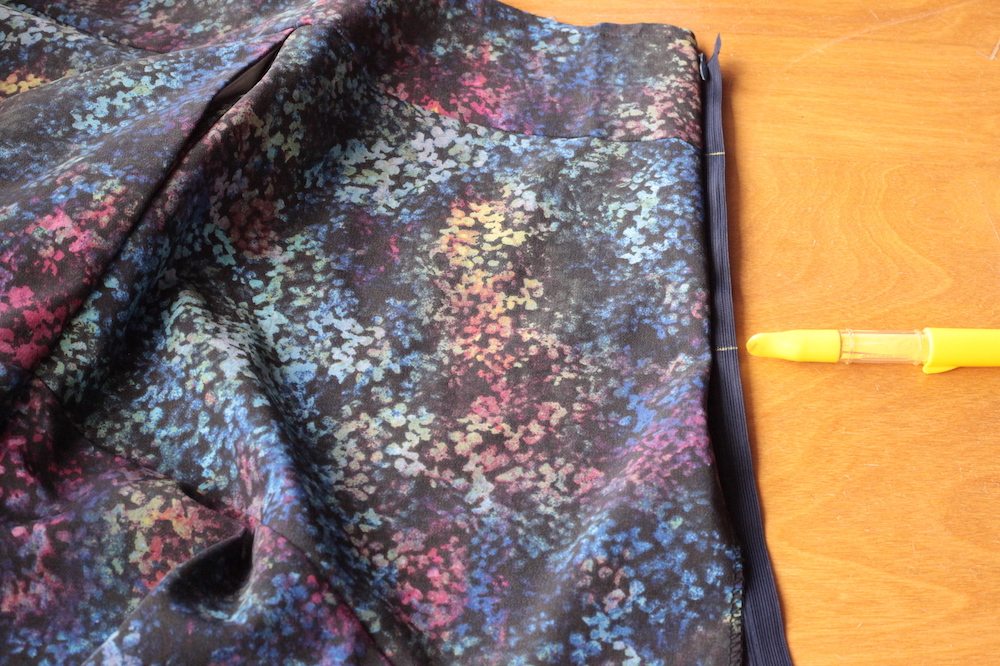
With that in place, you can fold the seam allowance on the free side and try to put the side on the zipper. I like to do this first because then I won’t accidentally twist the zipper. I only hold it together with my finger, and then unzip.
I can then pin the other side to the other zipper tape. The mark you made earlier should be exactly on the yoke seam line (or whatever seam line you are matching). I am not pinning the entire zipper tape; I am only pinning around the seam that I need to match.
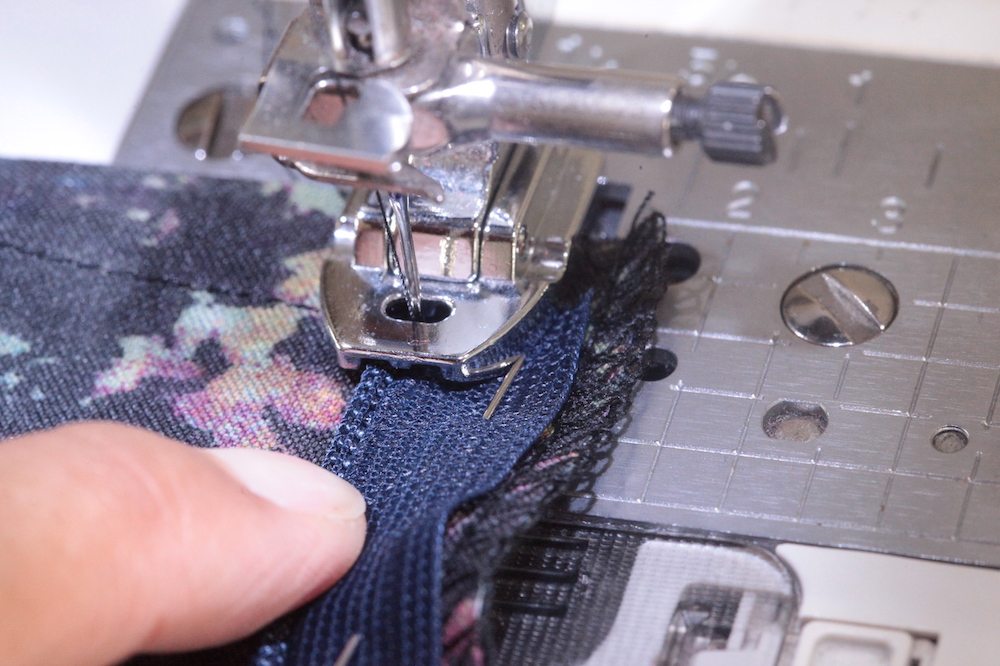
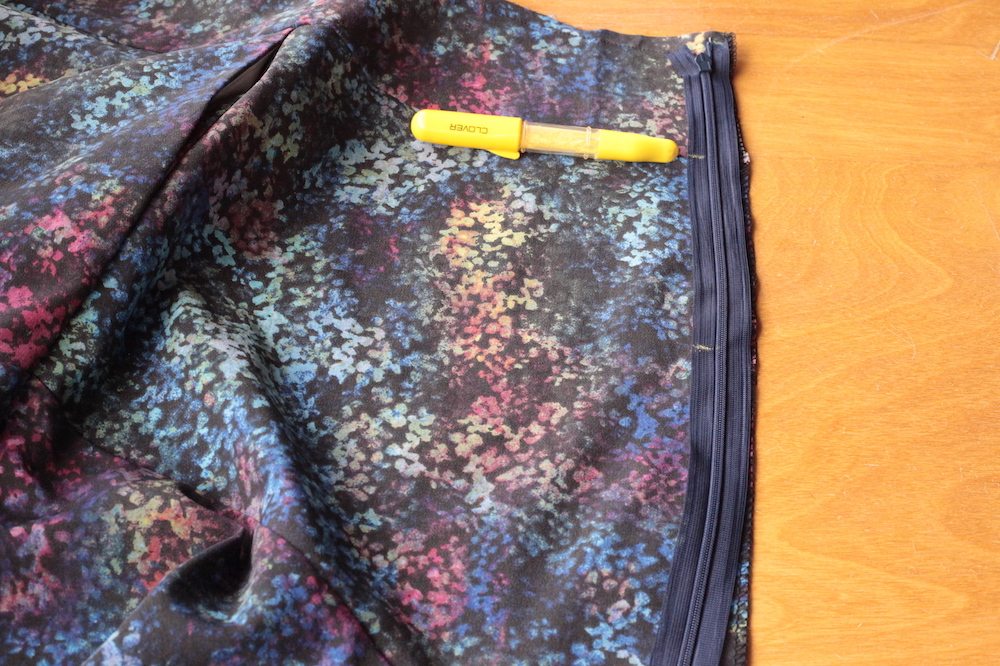
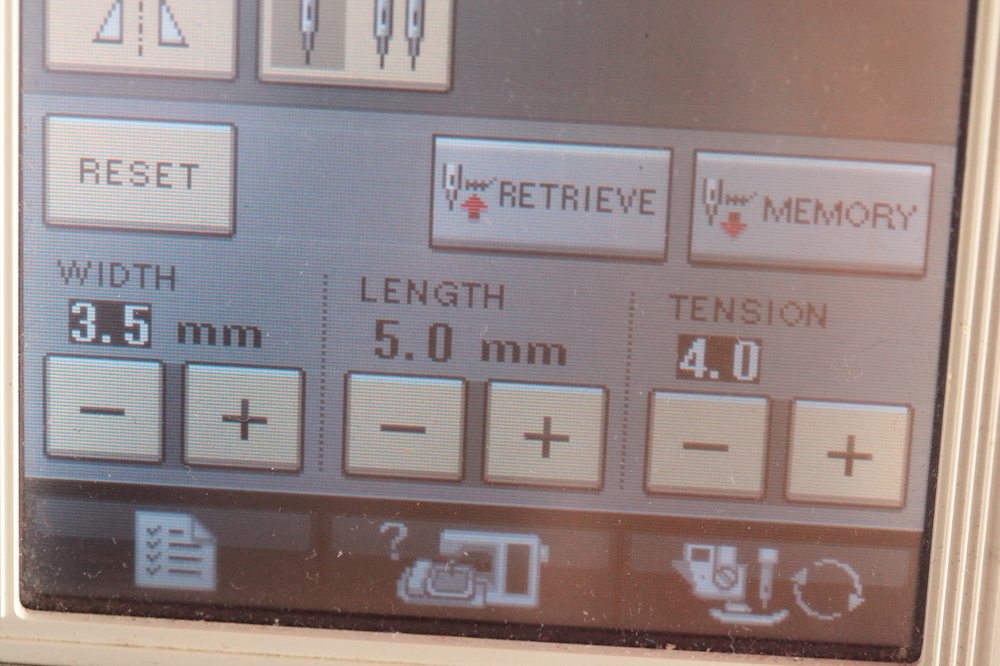
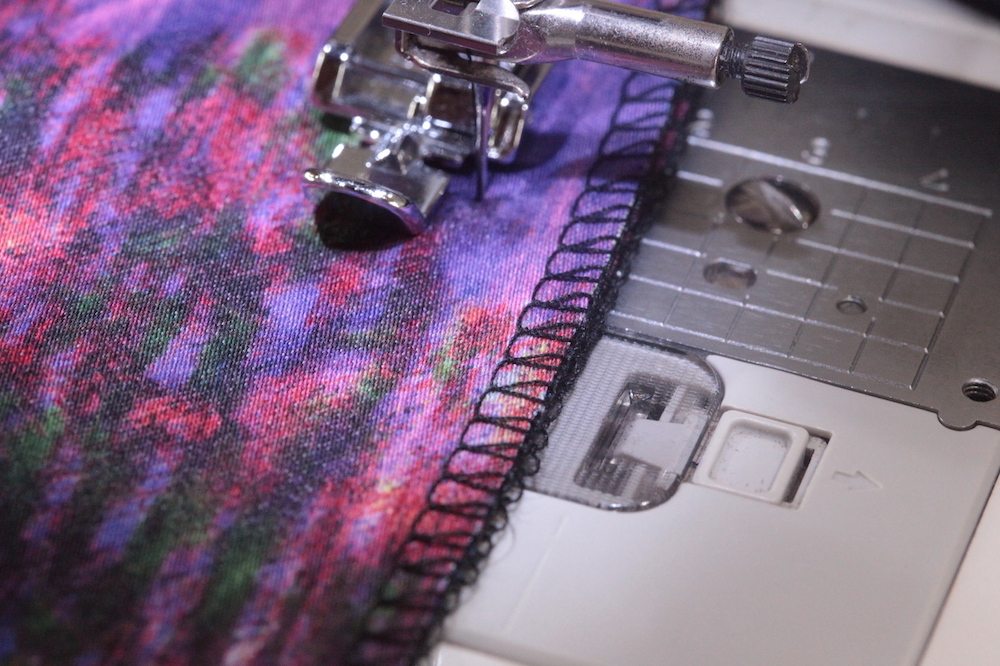
Then I go to the sewing machine to stitch ONLY that portion of the zipper with a 5 mm long stitch. The idea is to baste it on only. Note that now I am placing the zipper teeth under the right groove of the foot.
The purpose of that is to be able to check the matching. If the matching is a little off, you can re-do it without too much drama. The basting stitch is easy to remove.
I call this satisfactory, so I move on. Note that you don’t have to do this step at the chalk mark at the base of the zipper; it’s only done for the seams you need to match.
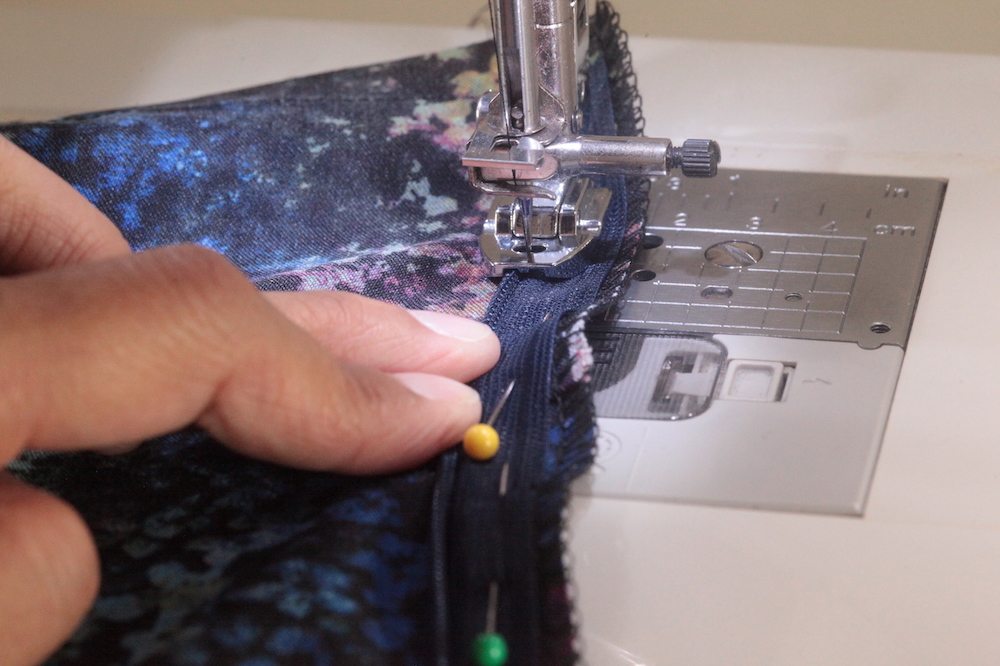
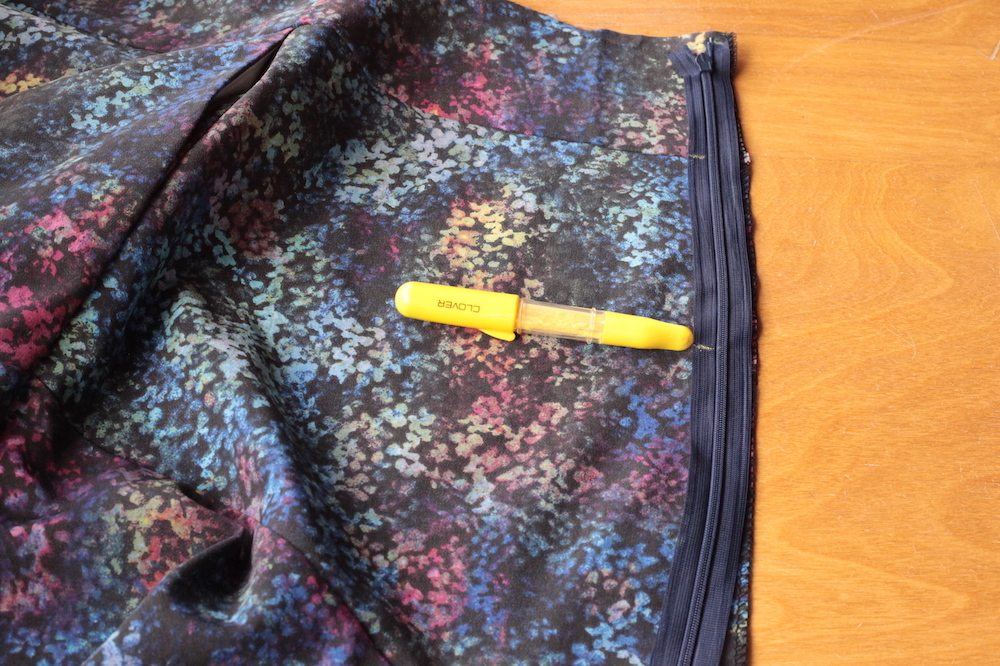
Unzip it again and stitch the line from the top to the base chalk mark at the zipper (my pins point up just like before), this time with your regular stitch length (2.5 mm in my case). Note that I also use my finger to uncoil the zipper teeth a bit.
Stitch to the base chalk mark and back stitch to secure.
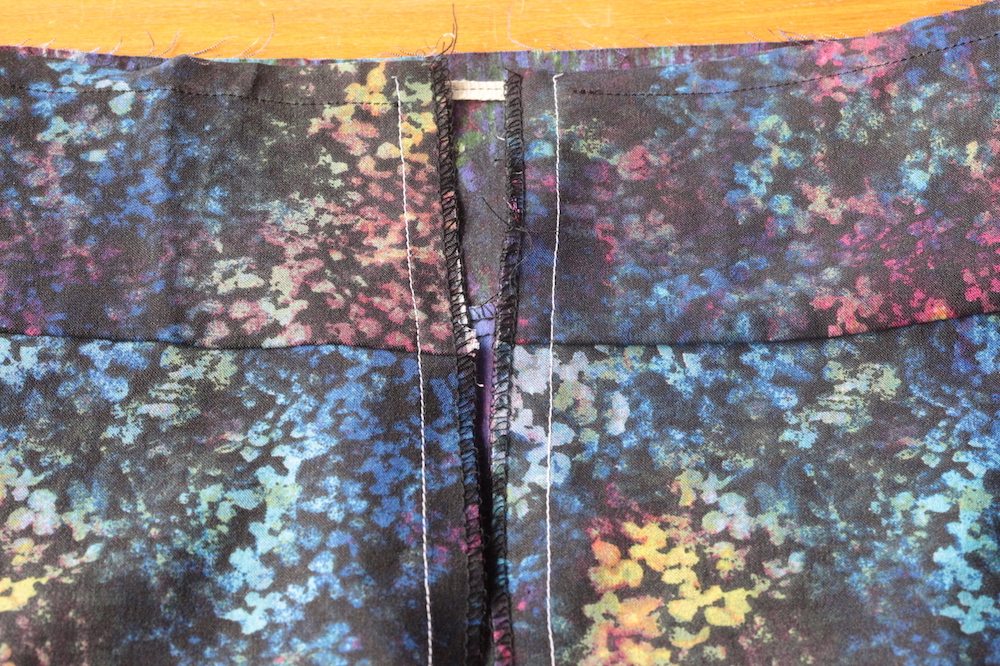
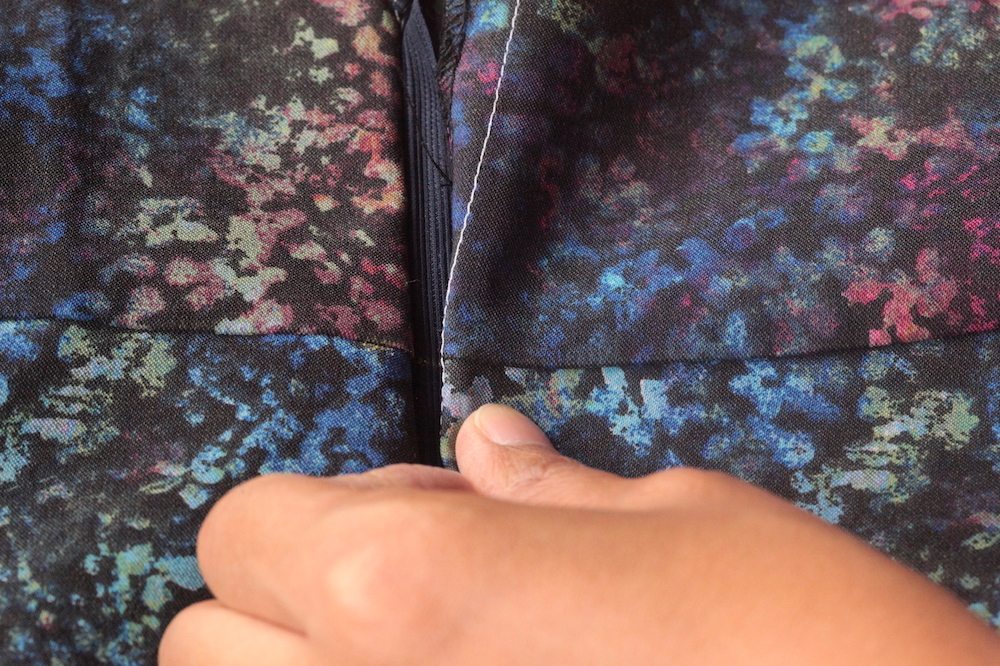
Now you can zip it up. One point I want to make is this: if there’s a big gap between the two sides (i.e., the zipper is not invisible), you can stitch another line again closer to the zipper teeth. You do not have to remove the original line. So feel free to stitch again and closer until you are happy with it.

Your work is not done yet. We still need to stitch the skirt below the zipper. Pin the two sides together below the zipper.
Using your regular zipper foot, stitch from where the stitch line was left off at the base of the zipper. I need to move the zipper out of the way, as well as moving my needle all the way to the right-hand side to get in there. Truth be told, it’s a little hard to get in there, so I walk my sewing machine several stitches manually. But even though it doesn’t look perfect at this stage, you’d be surprised that it actually doesn’t look bad from the right side later.
Keep stitching to the bottom of the skirt.
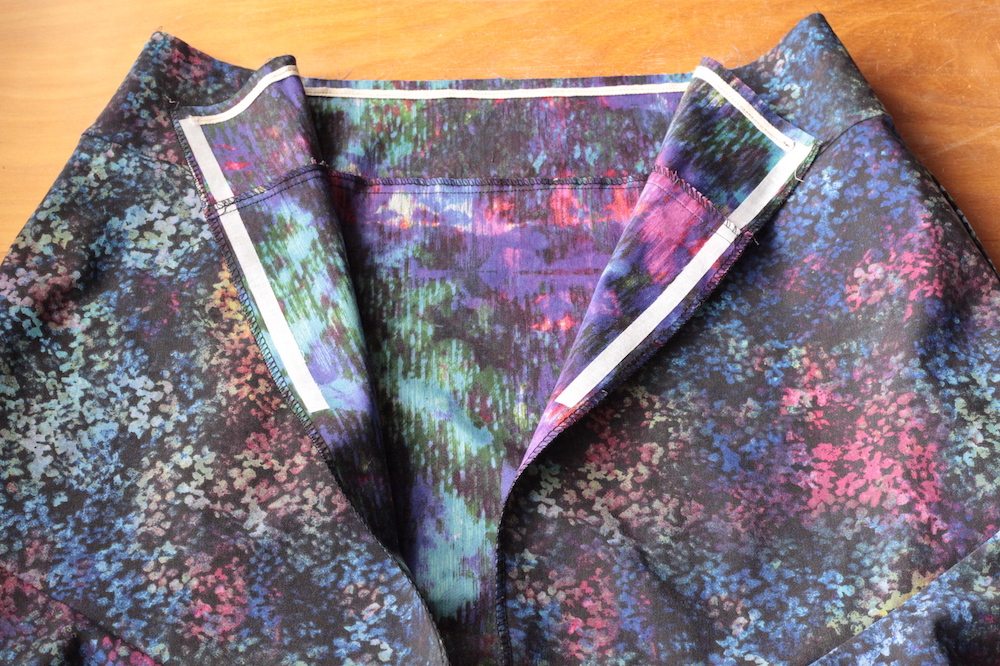
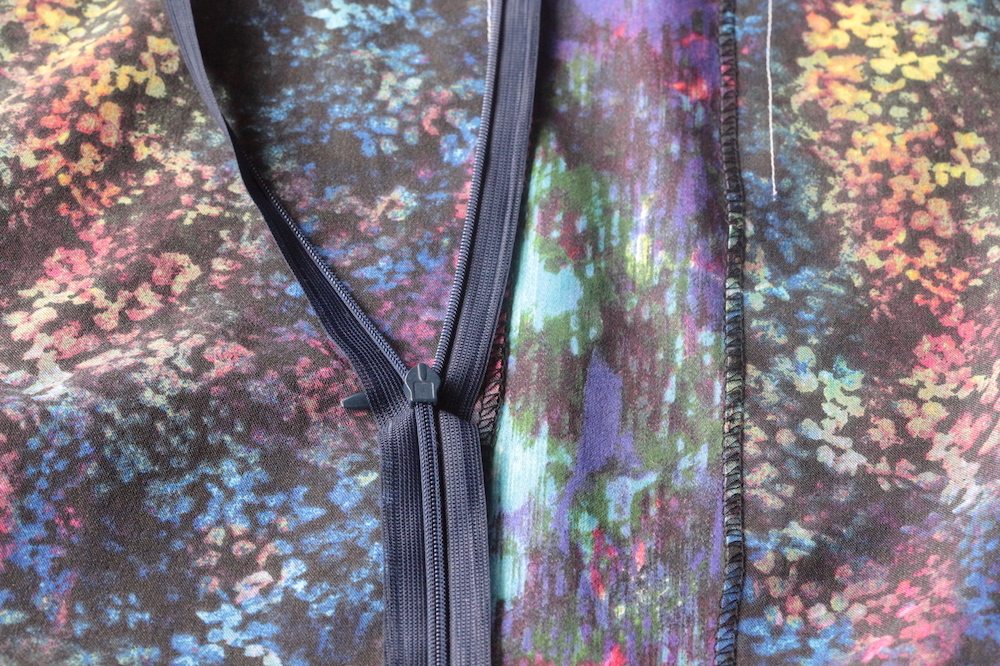
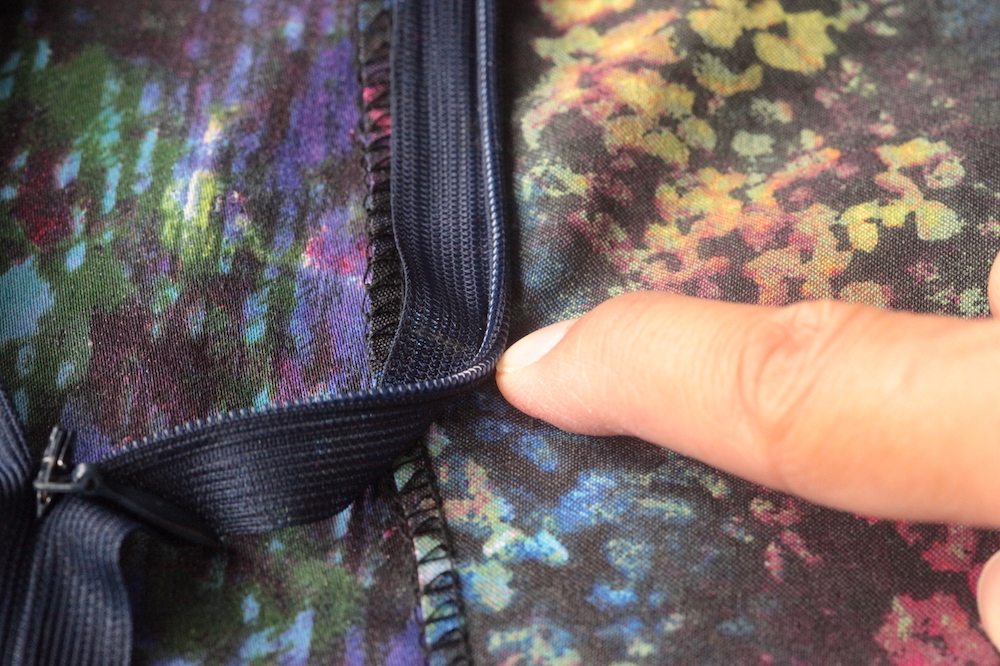
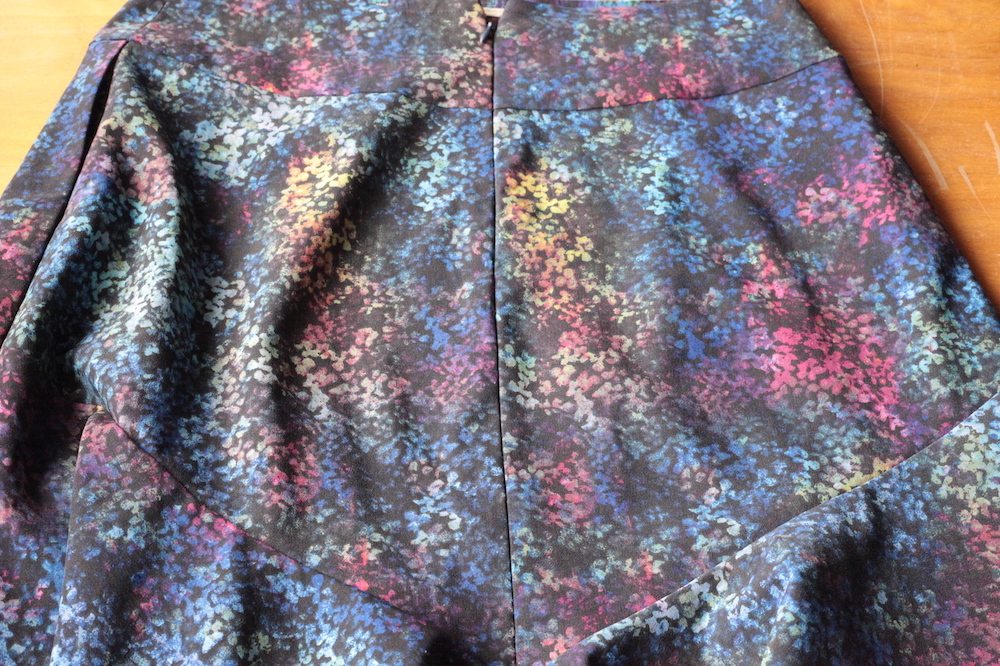
Turn the skirt right side out and give it a little press (seam pressed open). Doesn’t look bad at all, doesn’t it?
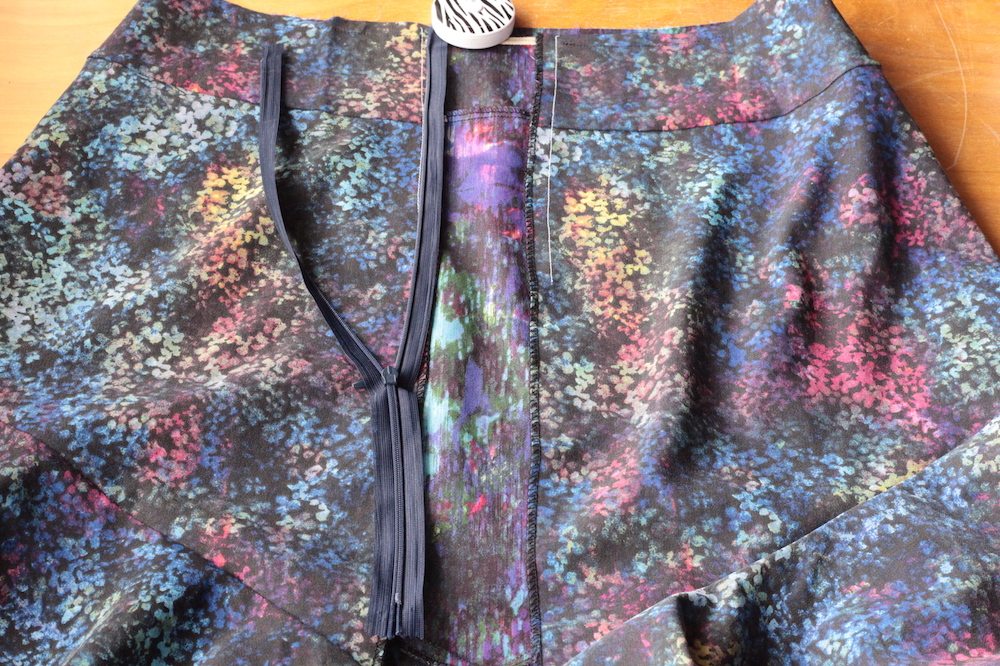
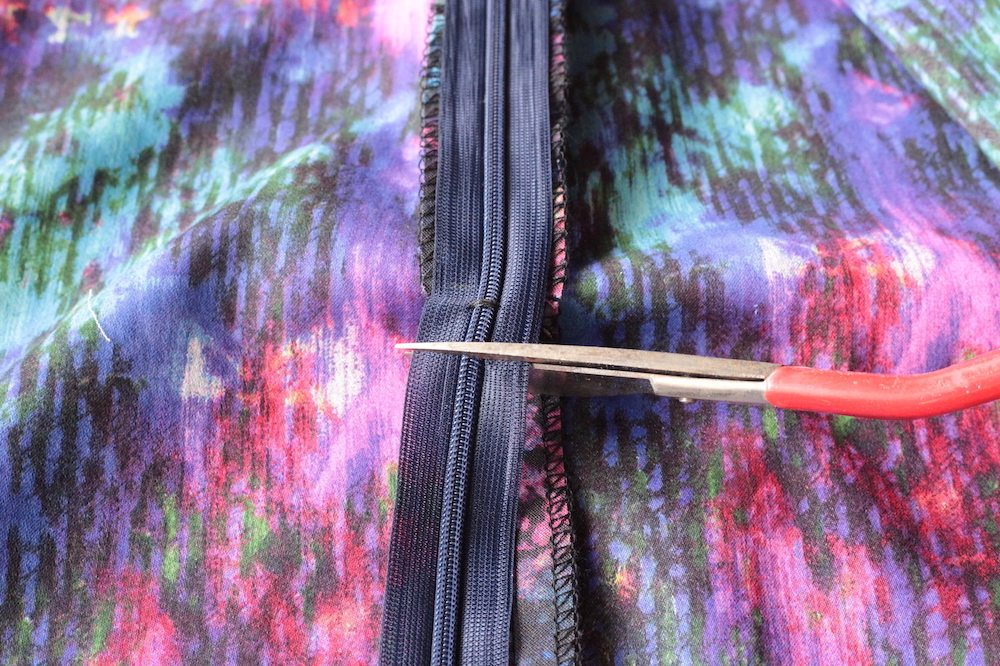
Now let me deal with the excess zipper. Hand stitch a stop at the base; this should be a little lower than stitch line you made earlier.
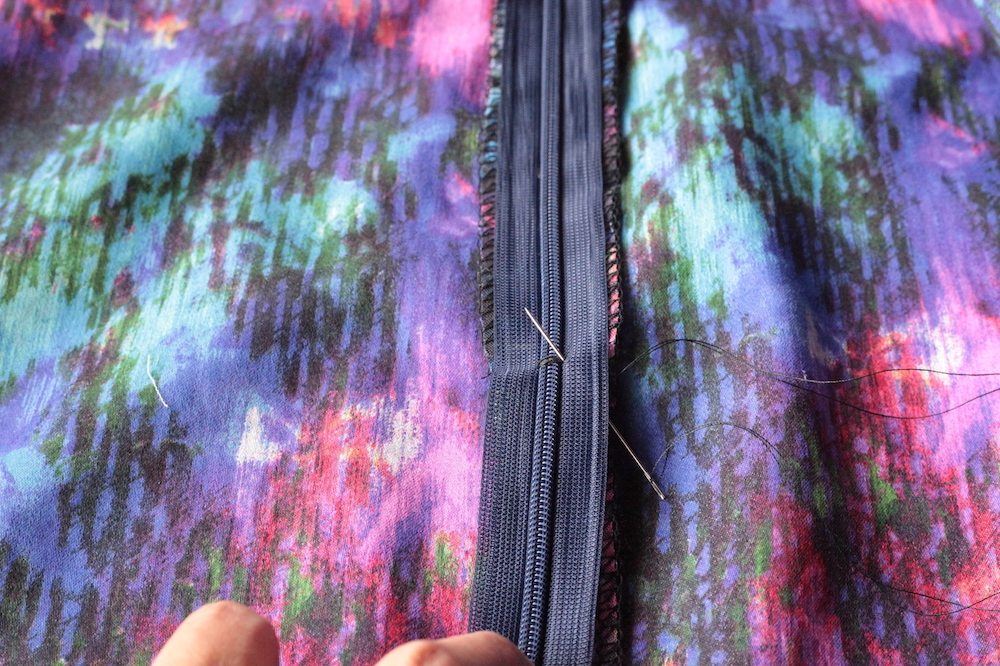
Then cut it below.
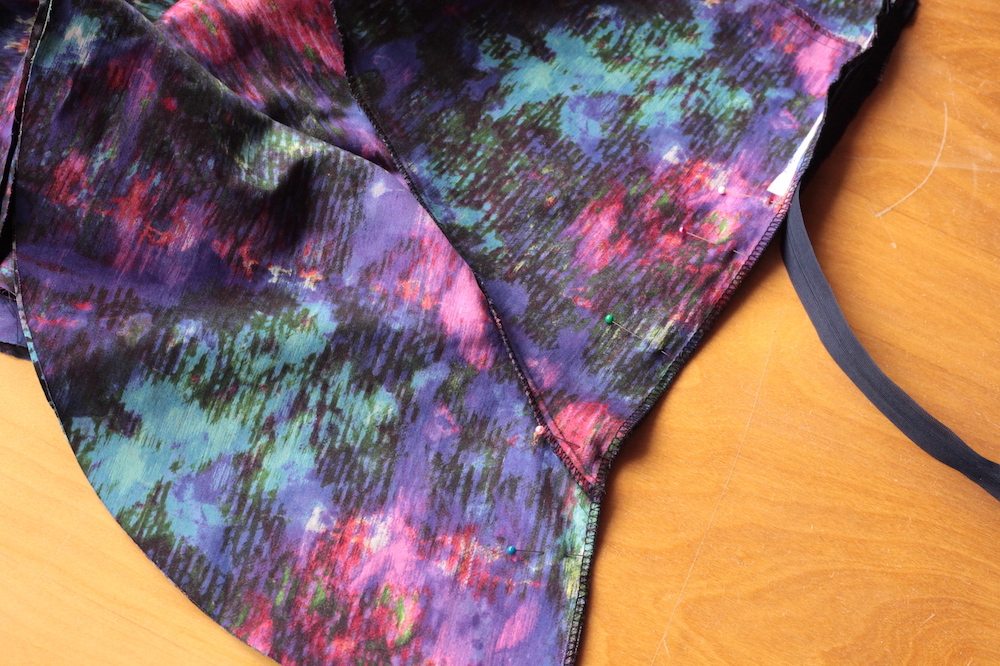
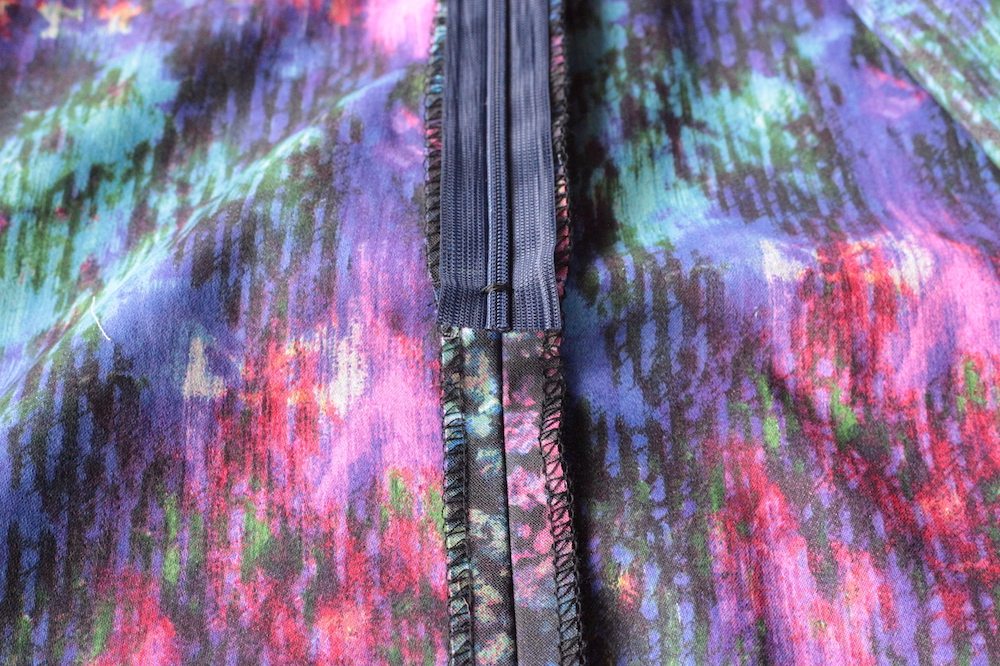
Tada! If you are not lining your skirt/dress, you can choose to bind the cut edge with some pretty fabric. I am going to line the skirt, so this is the end of the step for me.
Also, some people stitch the base of the zipper tape to the seam allowance, but don’t do it if you are lining the skirt/dress! They will be in the way of the lining later.
Go to part 2 for the lining installation.
Until next time, keep stitching!

Hi, hope that all is well with you and your family! I have never sewn an invisible zipper before and was a little reluctant to attempt doing one; however, your directions and suggestions are clear, concise, and quite understandable! I now have more confidence to attempt sewing an invisible zipper than ever before! Thank you much for your time in studying different methods used in ready to wear garments in order to achieve a professional finish when home sewing! I deeply appreciate your meticulous efforts in researching and explaining the procedures well! My mindset is that when I invest my time and money into sewing garments, I love when someone asks from where I purchased the garment and see the shocked facial expressions when I say proudly that I made the garment! Again, a HUGE heartfelt THANK YOU for your encouraging research and explanations on installing invisible zippers!
After reading your post i was successful in stitching my invisible zip perfectly first try. Thank you so much
I sewed my first proper invisible zipper today. This was very helpful, thank you!