
How to Sew a Button by Machine
I notice that many sewists, despite sewing for many years, never try to use their sewing machine to sew a button. Many sewing machines come with button feet now, even ones that are sold cheaply at Walmart.
Personally, if I am just sewing one button, I opt for the hand sewing method. But when I am sewing several, then I definitely use the machine to do the job to save some time. Check out my Jacqueline Hoodie here; you think I sewed on those buttons by hand? No. 🙂

My machine came with the button function as well as the button foot. Yours might only come with the foot but not a specific setting. Or it might not have the foot nor the function.
But you can still sew by machine regardless. The minimum is that you need to have a zigzag stitch on your machine.
Here is the button sewing setting I have.
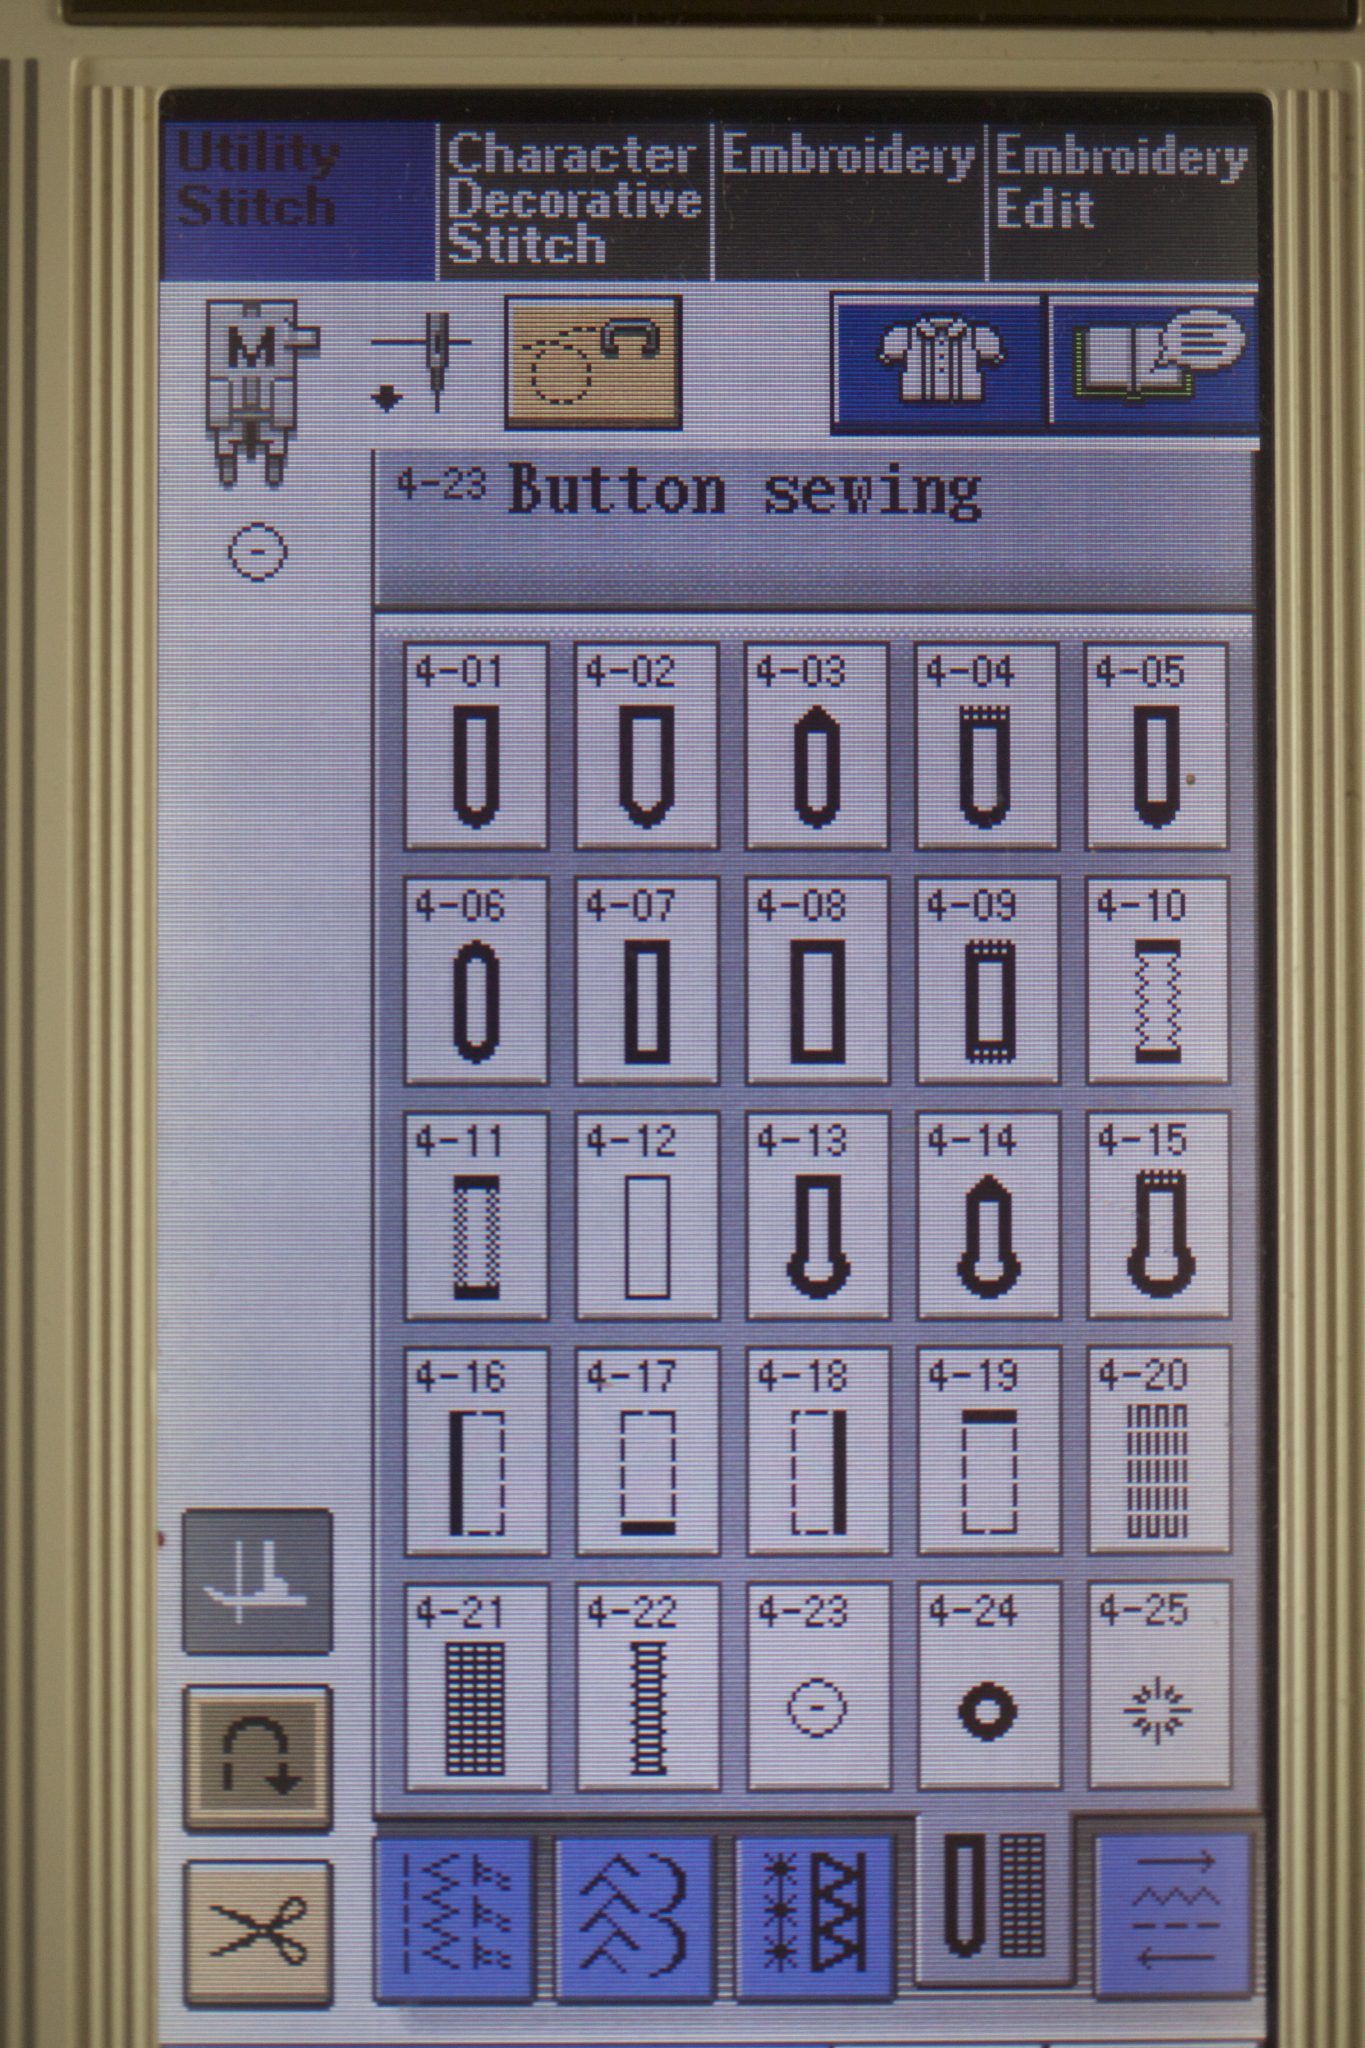
The function does two things: 1) Disengage the feed dog; 2) Set the width to 3.5 mm (most buttonholes are 3.5 mm apart – but not all). If you think that you could achieve the same result without this function, you’d be correct. You can manually disengage the feed dog and, obviously, set the stitch width, if your machine has a zigzag stitch.
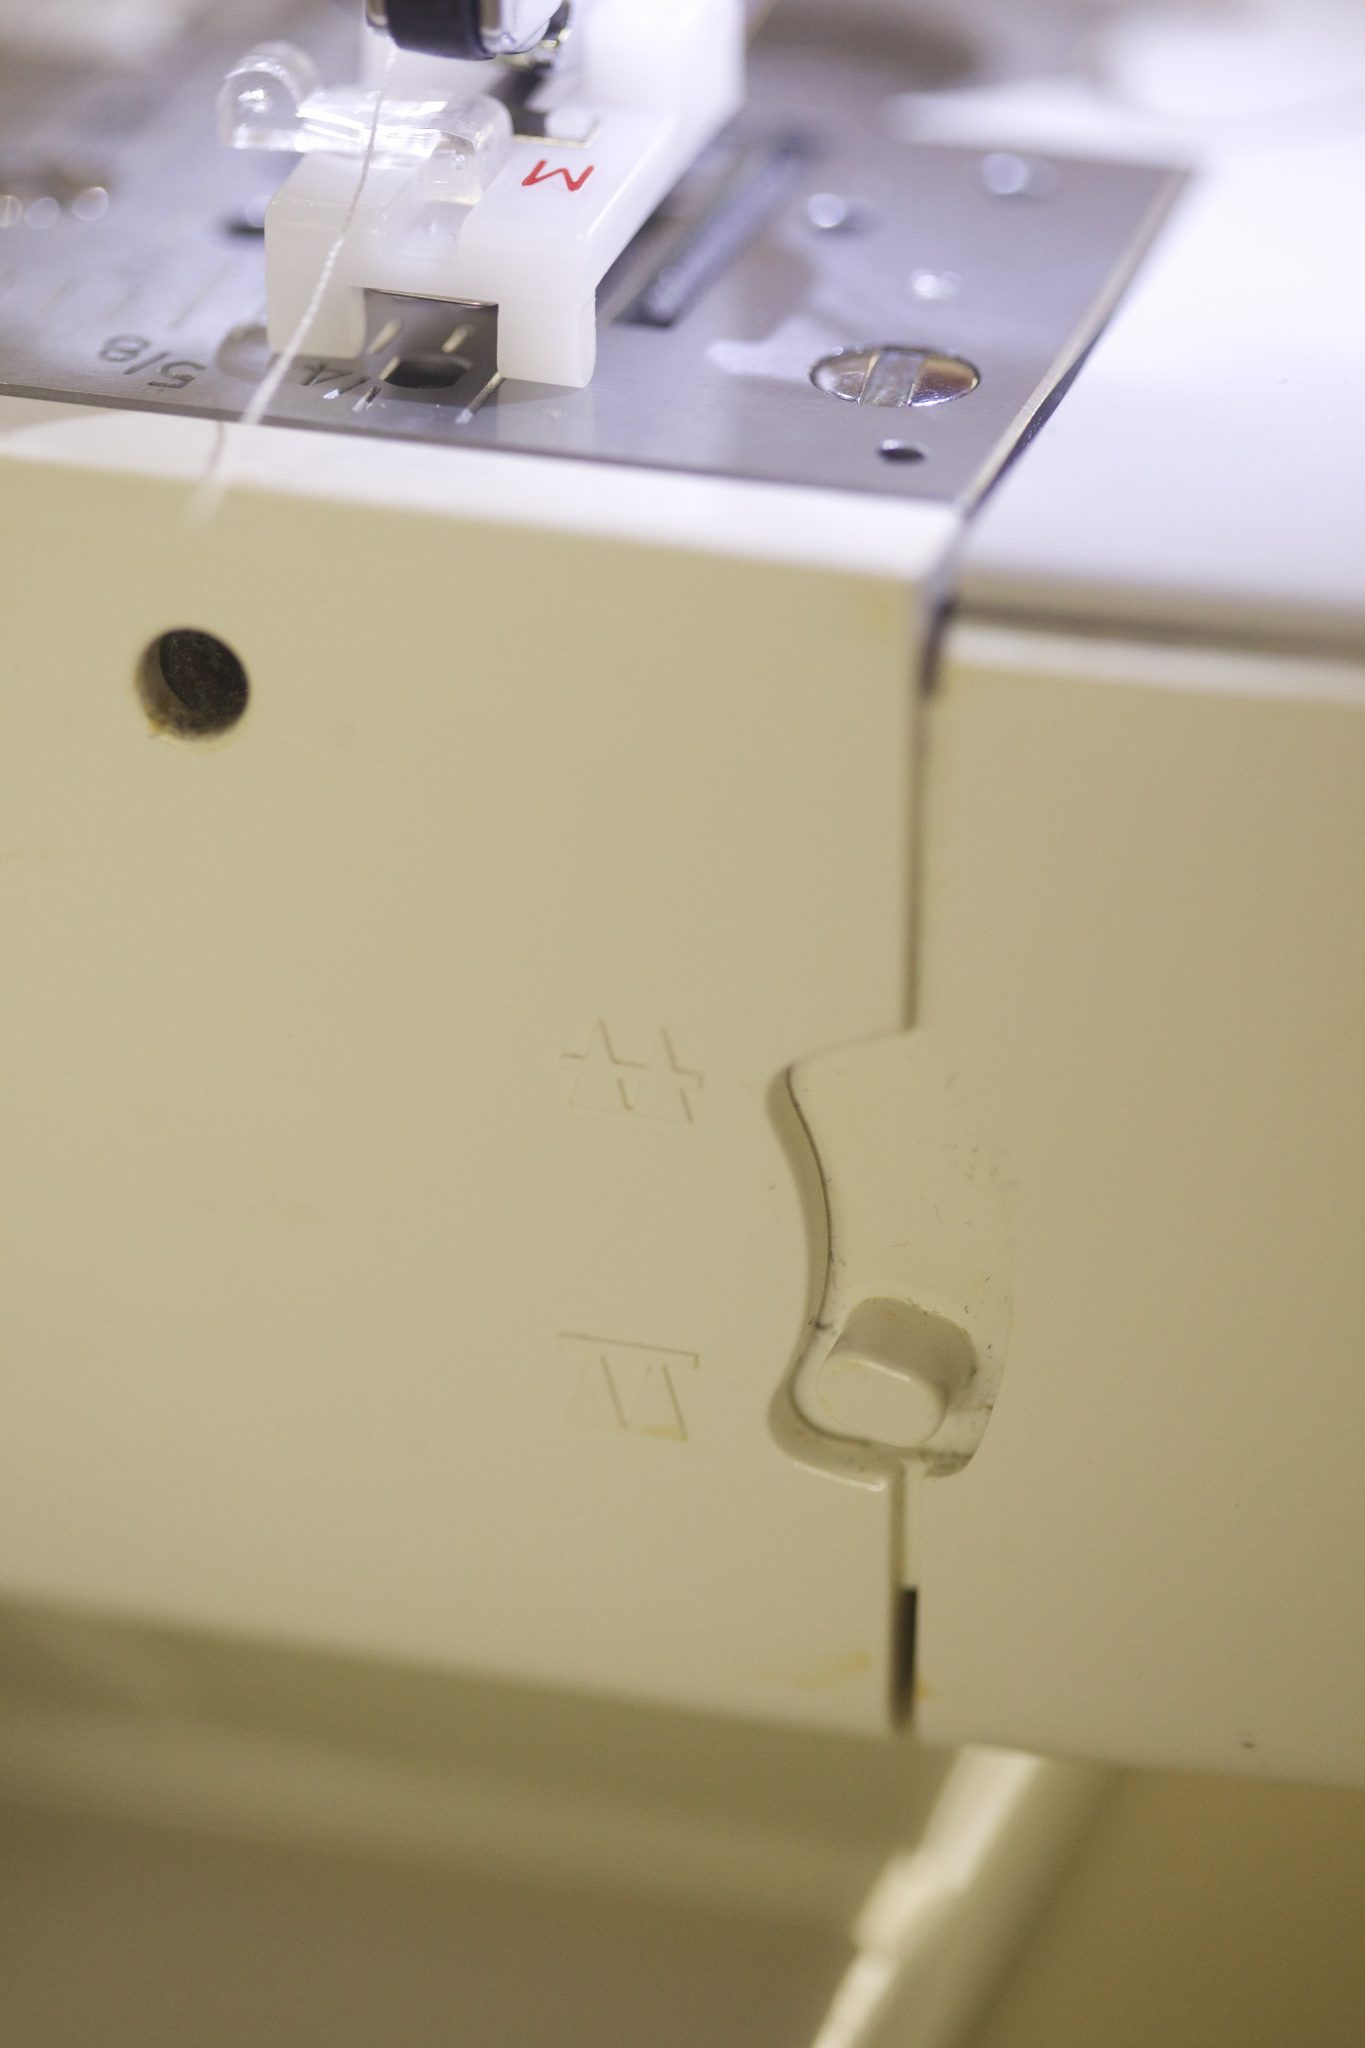
My feed dog disengagement switch is at the back of the machine. The up position is the “normal” mode where the feed dog moves the fabric; the down position means the feed dog is lowered so it doesn’t move any fabric. This switch is on the side for some sewing machine, so when in doubt, check out your sewing machine manual.
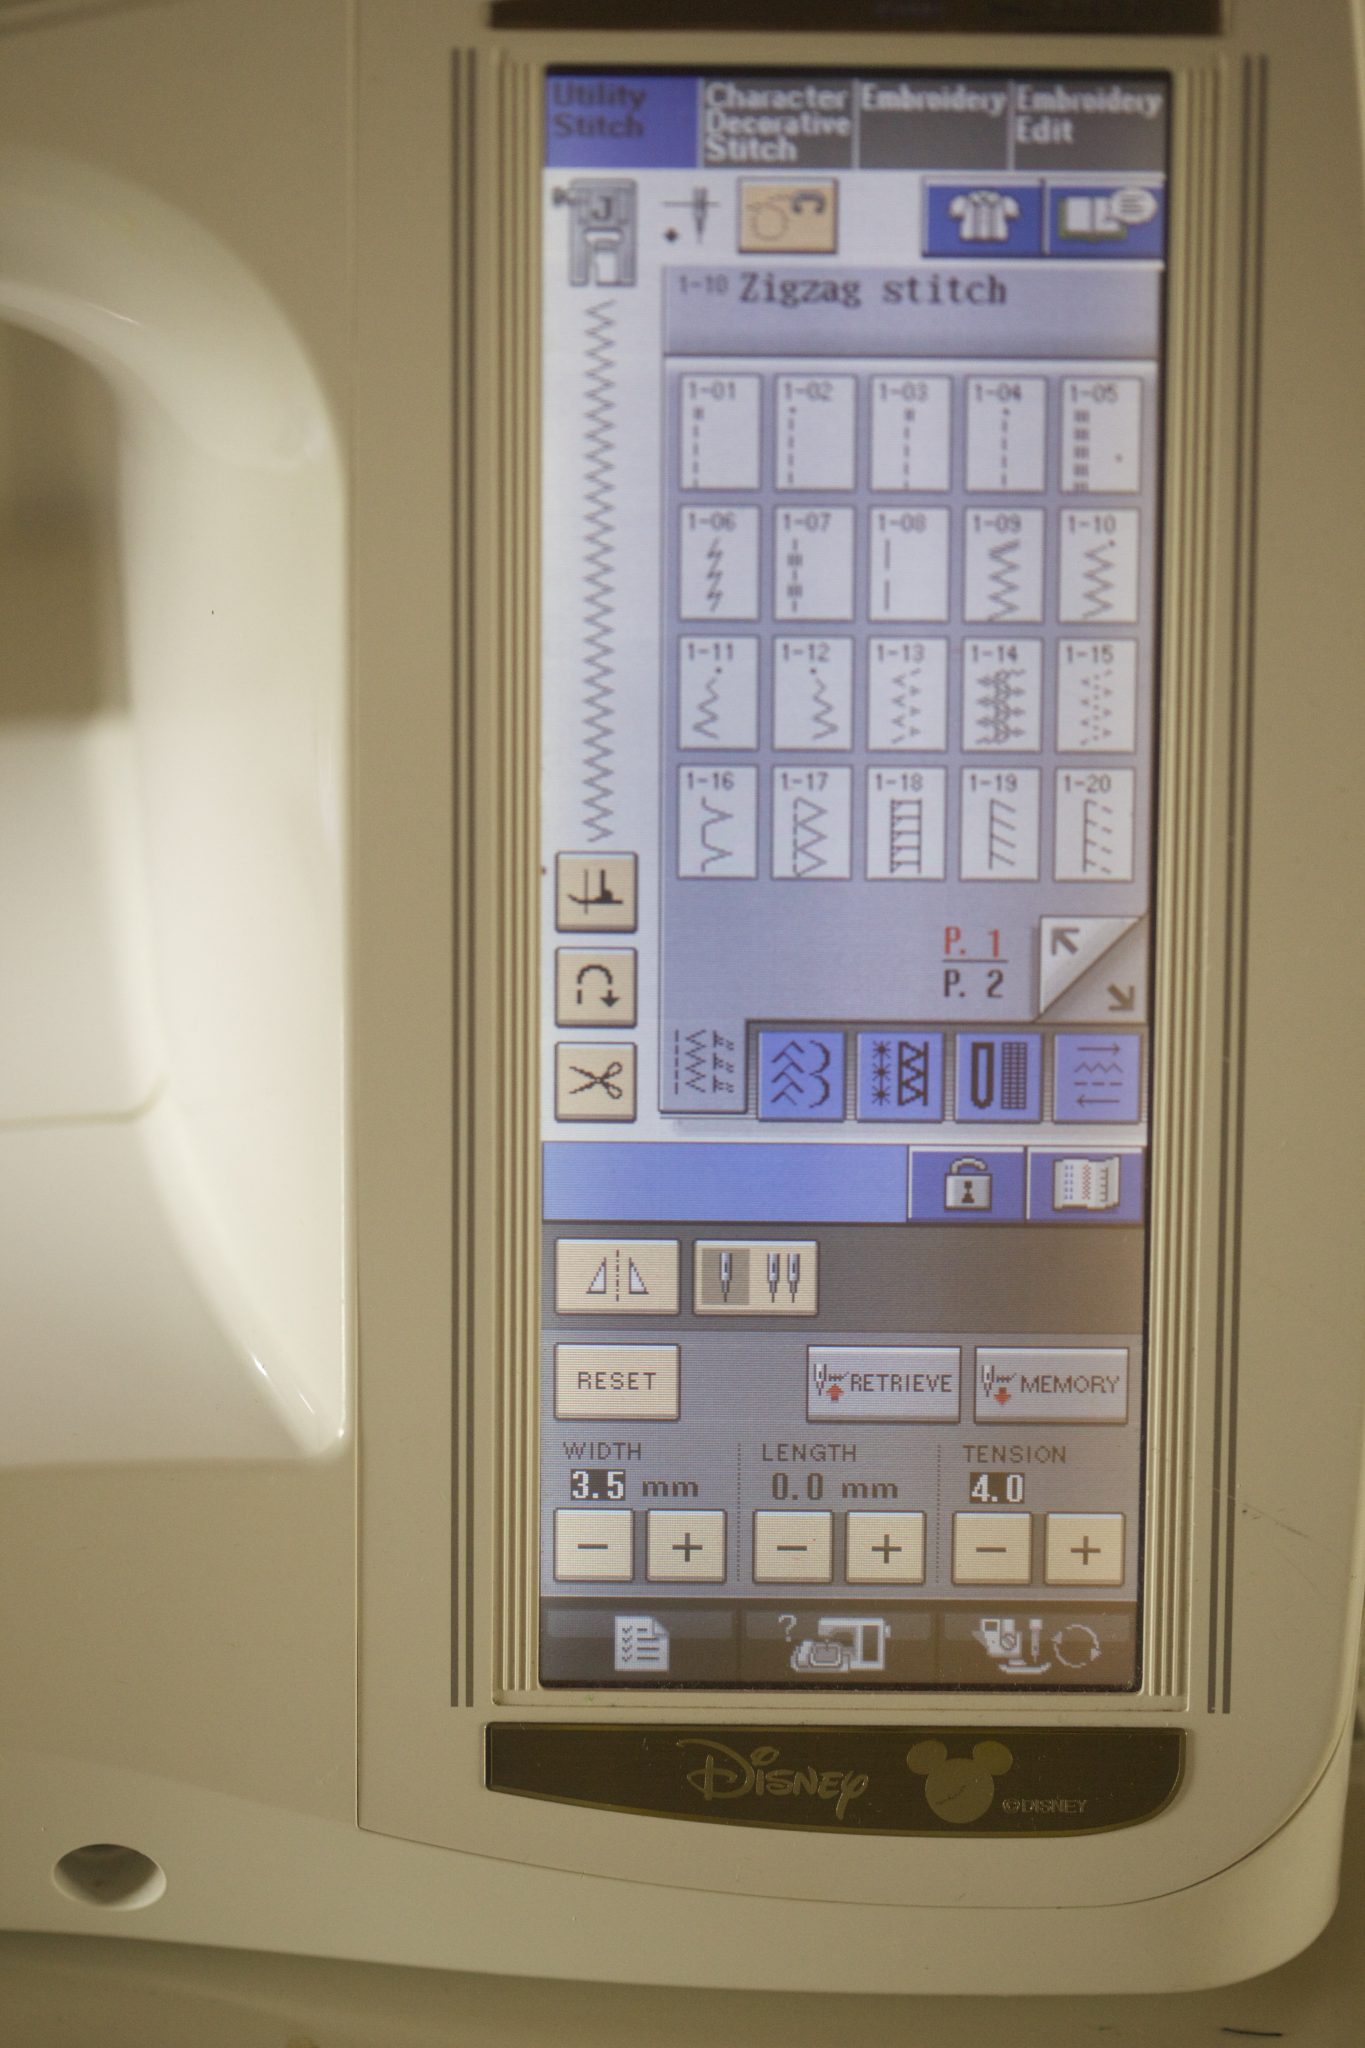
When using your zigzag stitch, set the width to 3.5 mm, which is a pretty typical distance between the holes on a button. We’ll be testing this later on too.
On my machine, the button foot is M. Yours might have a different letter. If you don’t have a button foot, it is possible to use your regular foot.
Here’s the little weird looking foot.
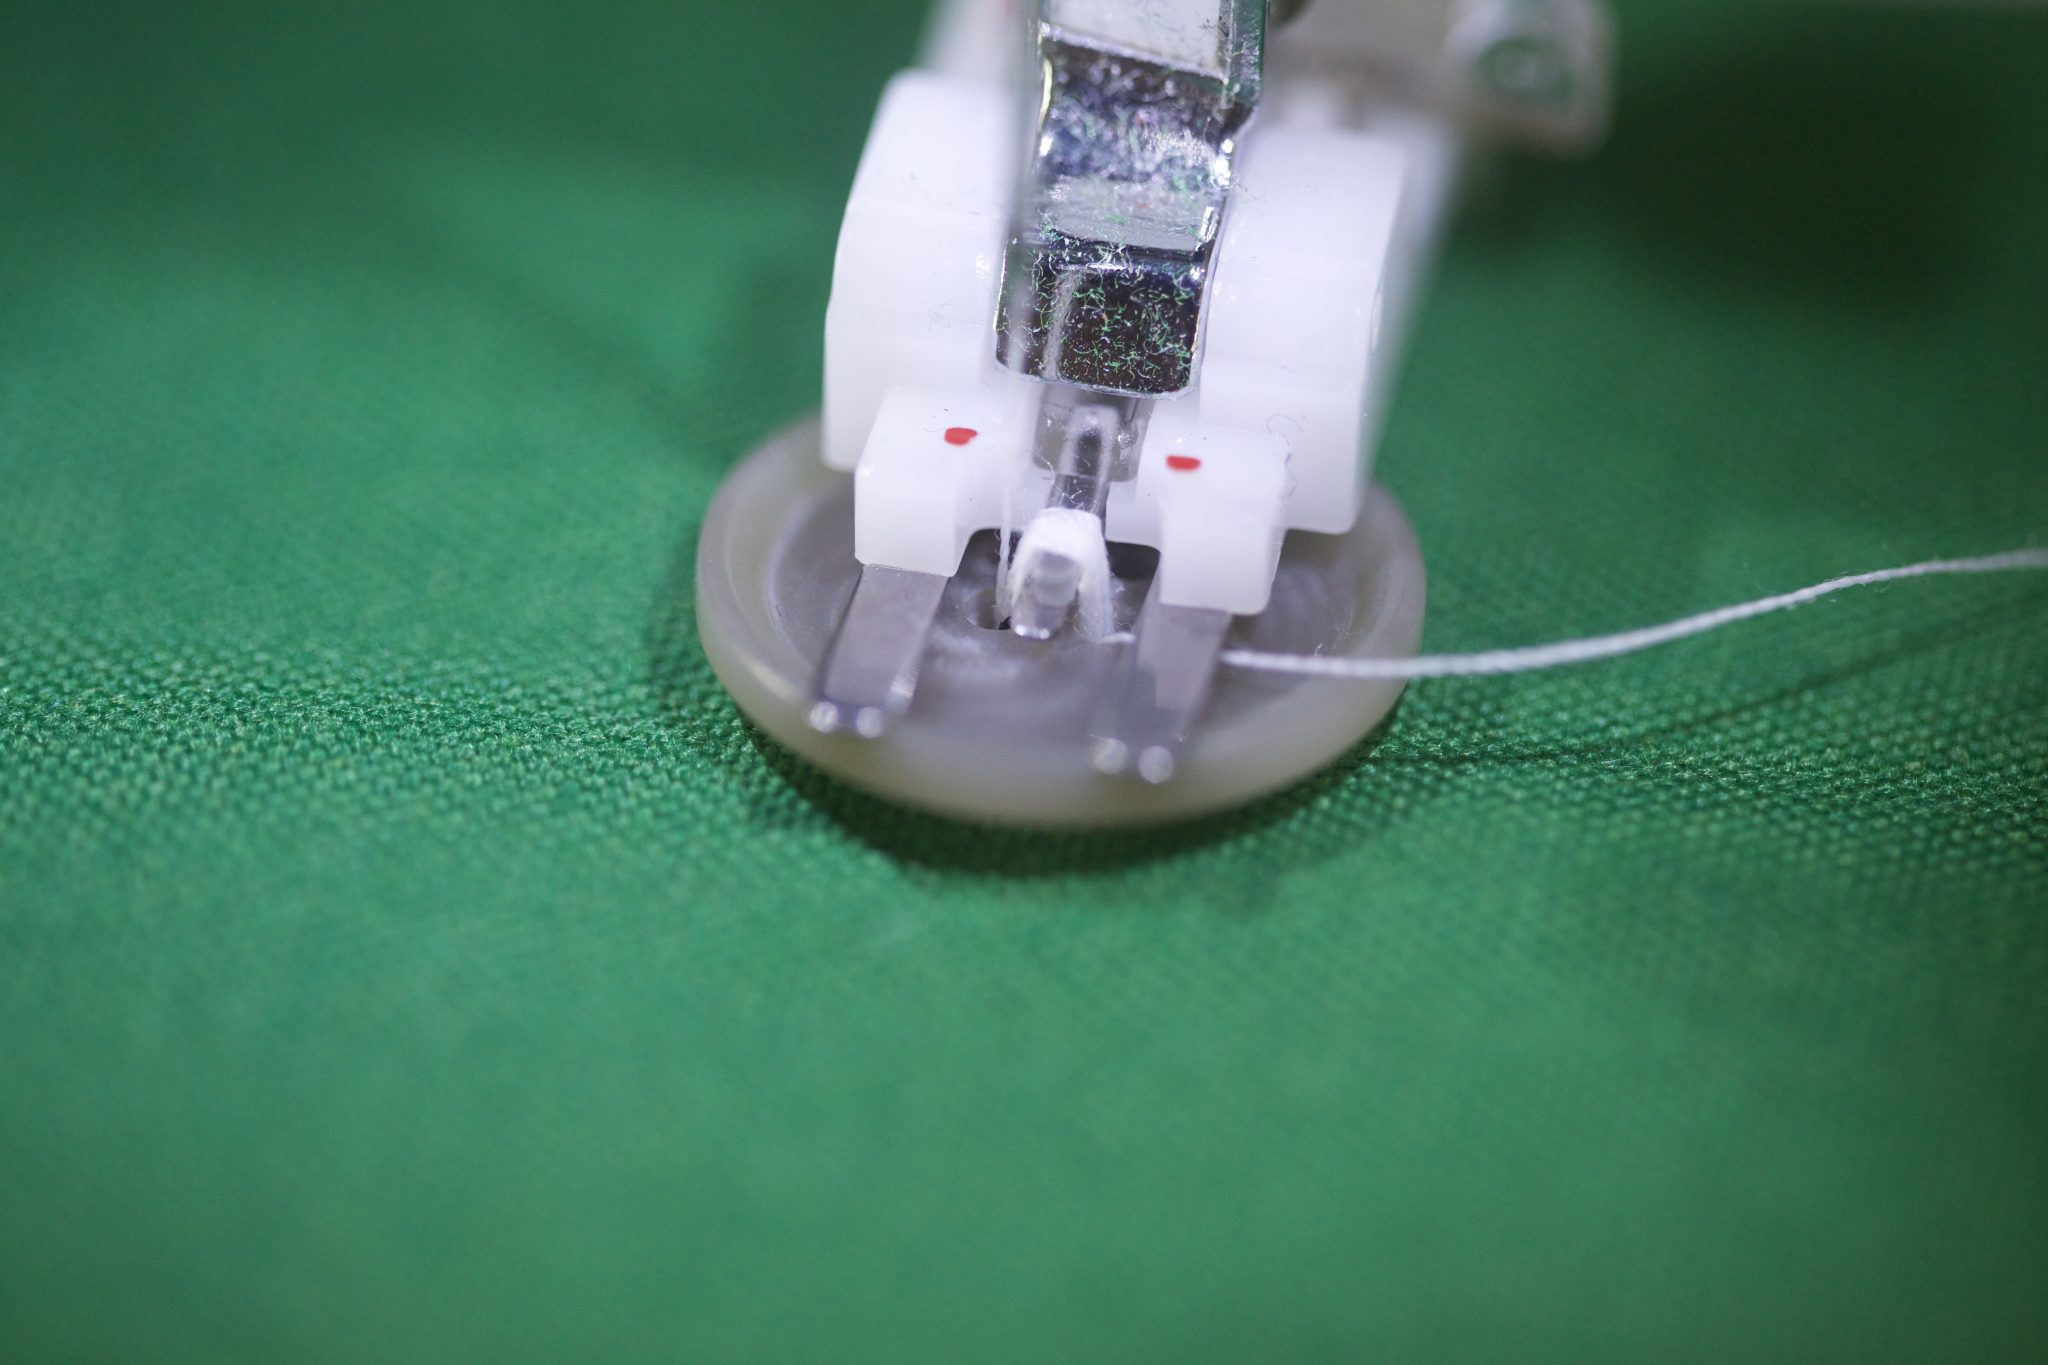
Get the fabric and the button underneath the foot.
Edit: you can temporarily secure your button on the fabric by taping on both side of the button to the fabric. I use masking tape, but you could use scotch tape too. I let the holes to the open so you can see them while stitching. The tape is removed in the following steps so you can see more clearly. (Thank you Jennifer for the reminder of this step!)

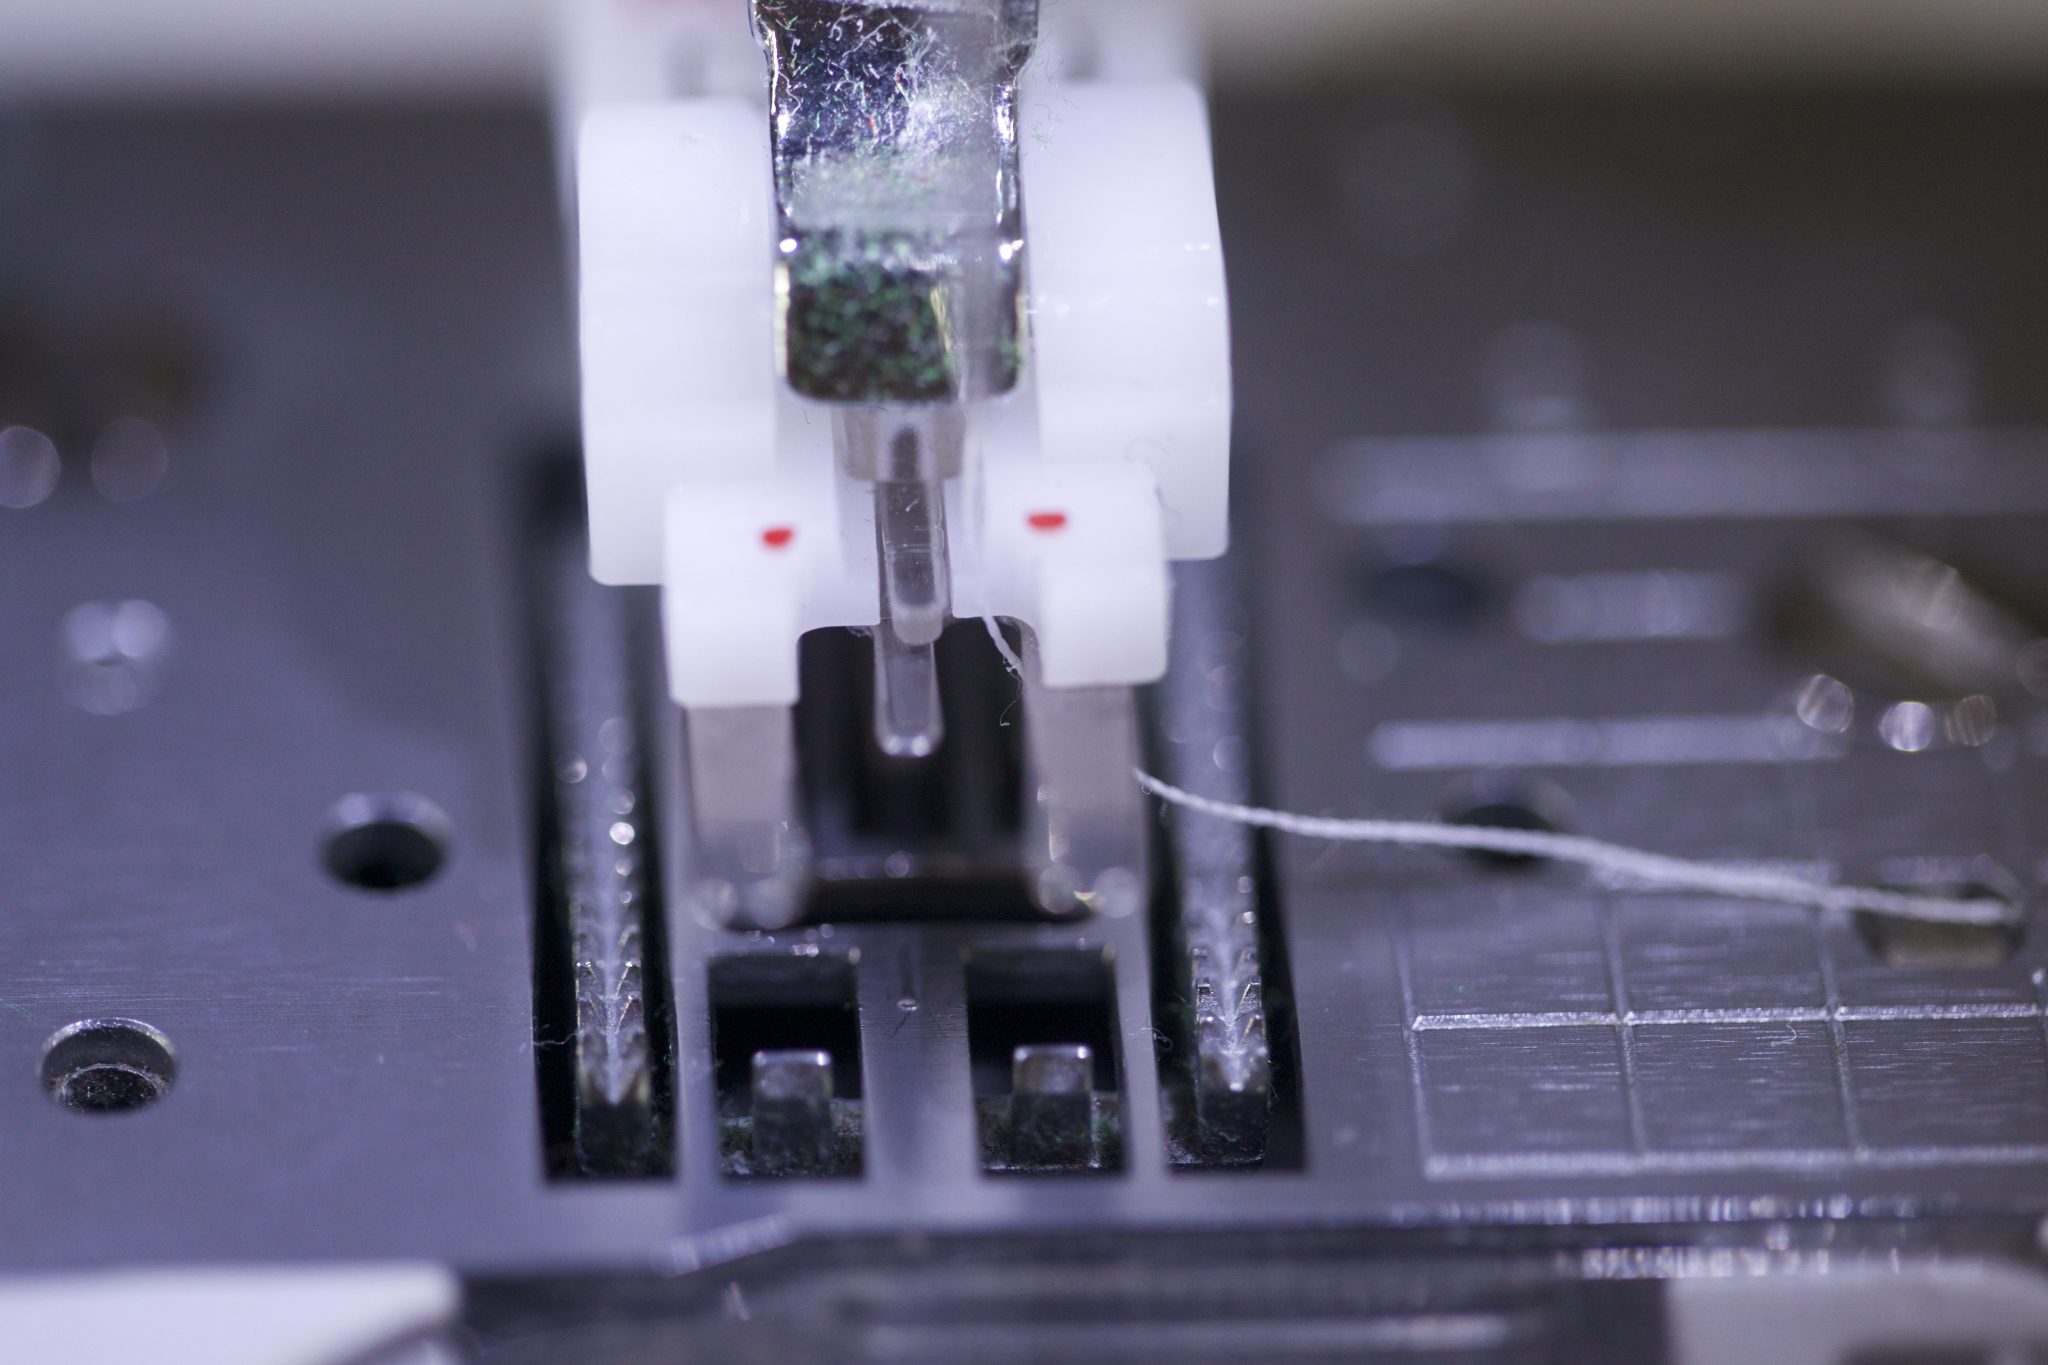
Note that there’s a little lever at the side on the back. Some button foot has it but some don’t.
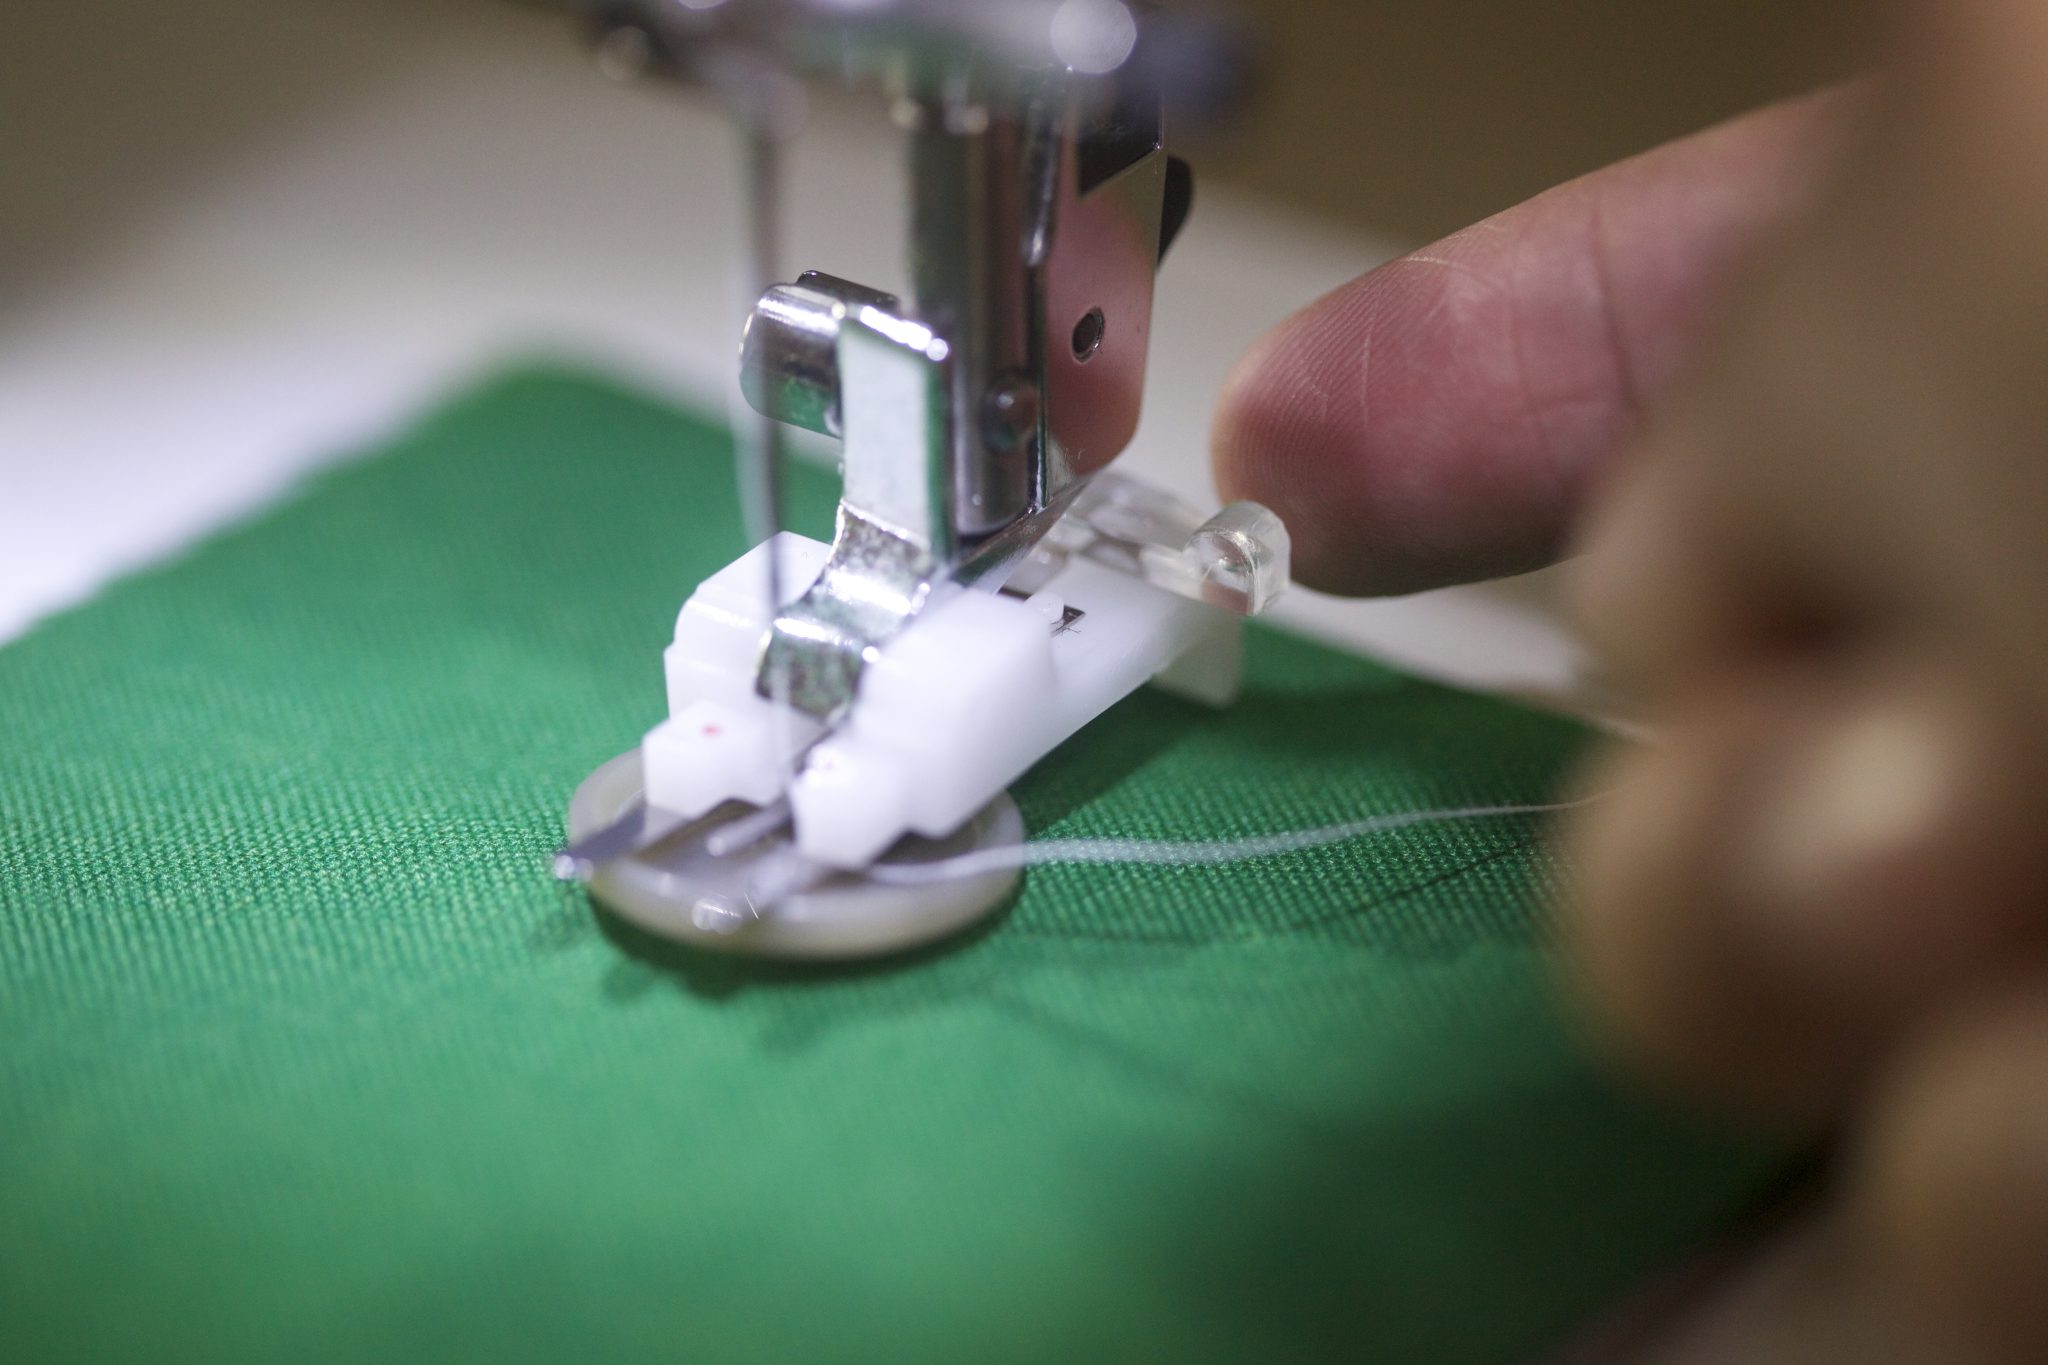
When the lever is pushed forward, there’s a plastic piece that sticks out in the center of the foot. Can you see it? It’s the transparent piece between the two red dots.

You can see that when the lever is not pushed forward, the center transparent piece does not stick out.
Ninety-nine percent of the time, I want the center piece to stick out. It is used to create a thread shank for the button. You will see later how it is achieved. Adding a shank to a button raises the button slightly so that there’s less friction when the garment is closed and make the closure more durable. But if the button is decorative, as in the case of Jacqueline Hoodie, then I don’t push the lever forward. Unfortunately, not all button foot comes with this neat feature, and you’d have to live without the shank.
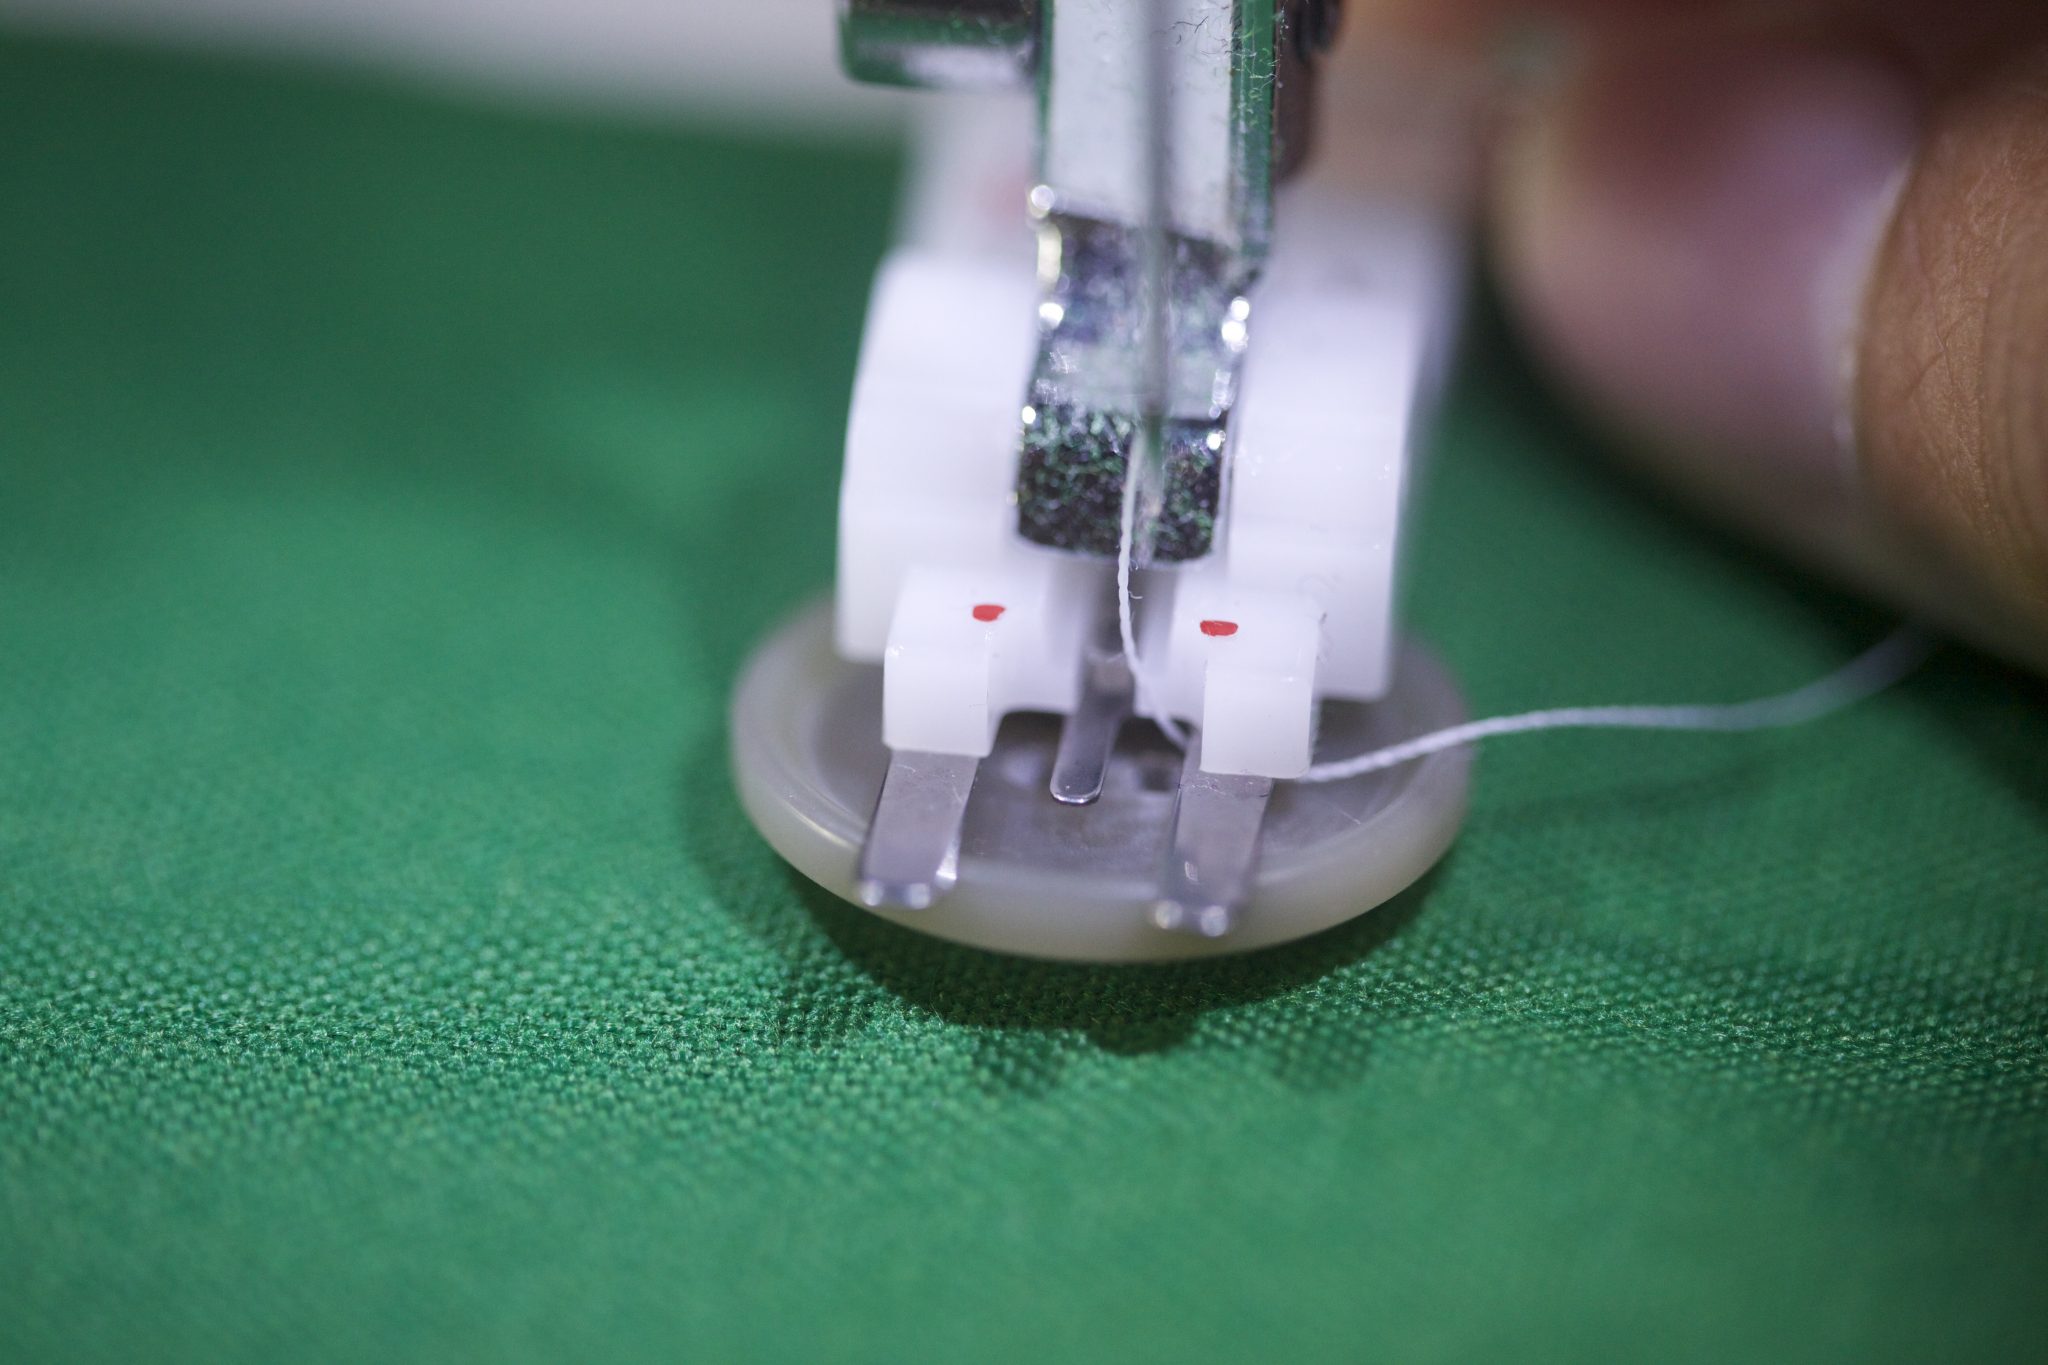
By the way, my button actually has four holes, I am sewing with the “front” two holes first; the “back” two holes are underneath the foot right now.
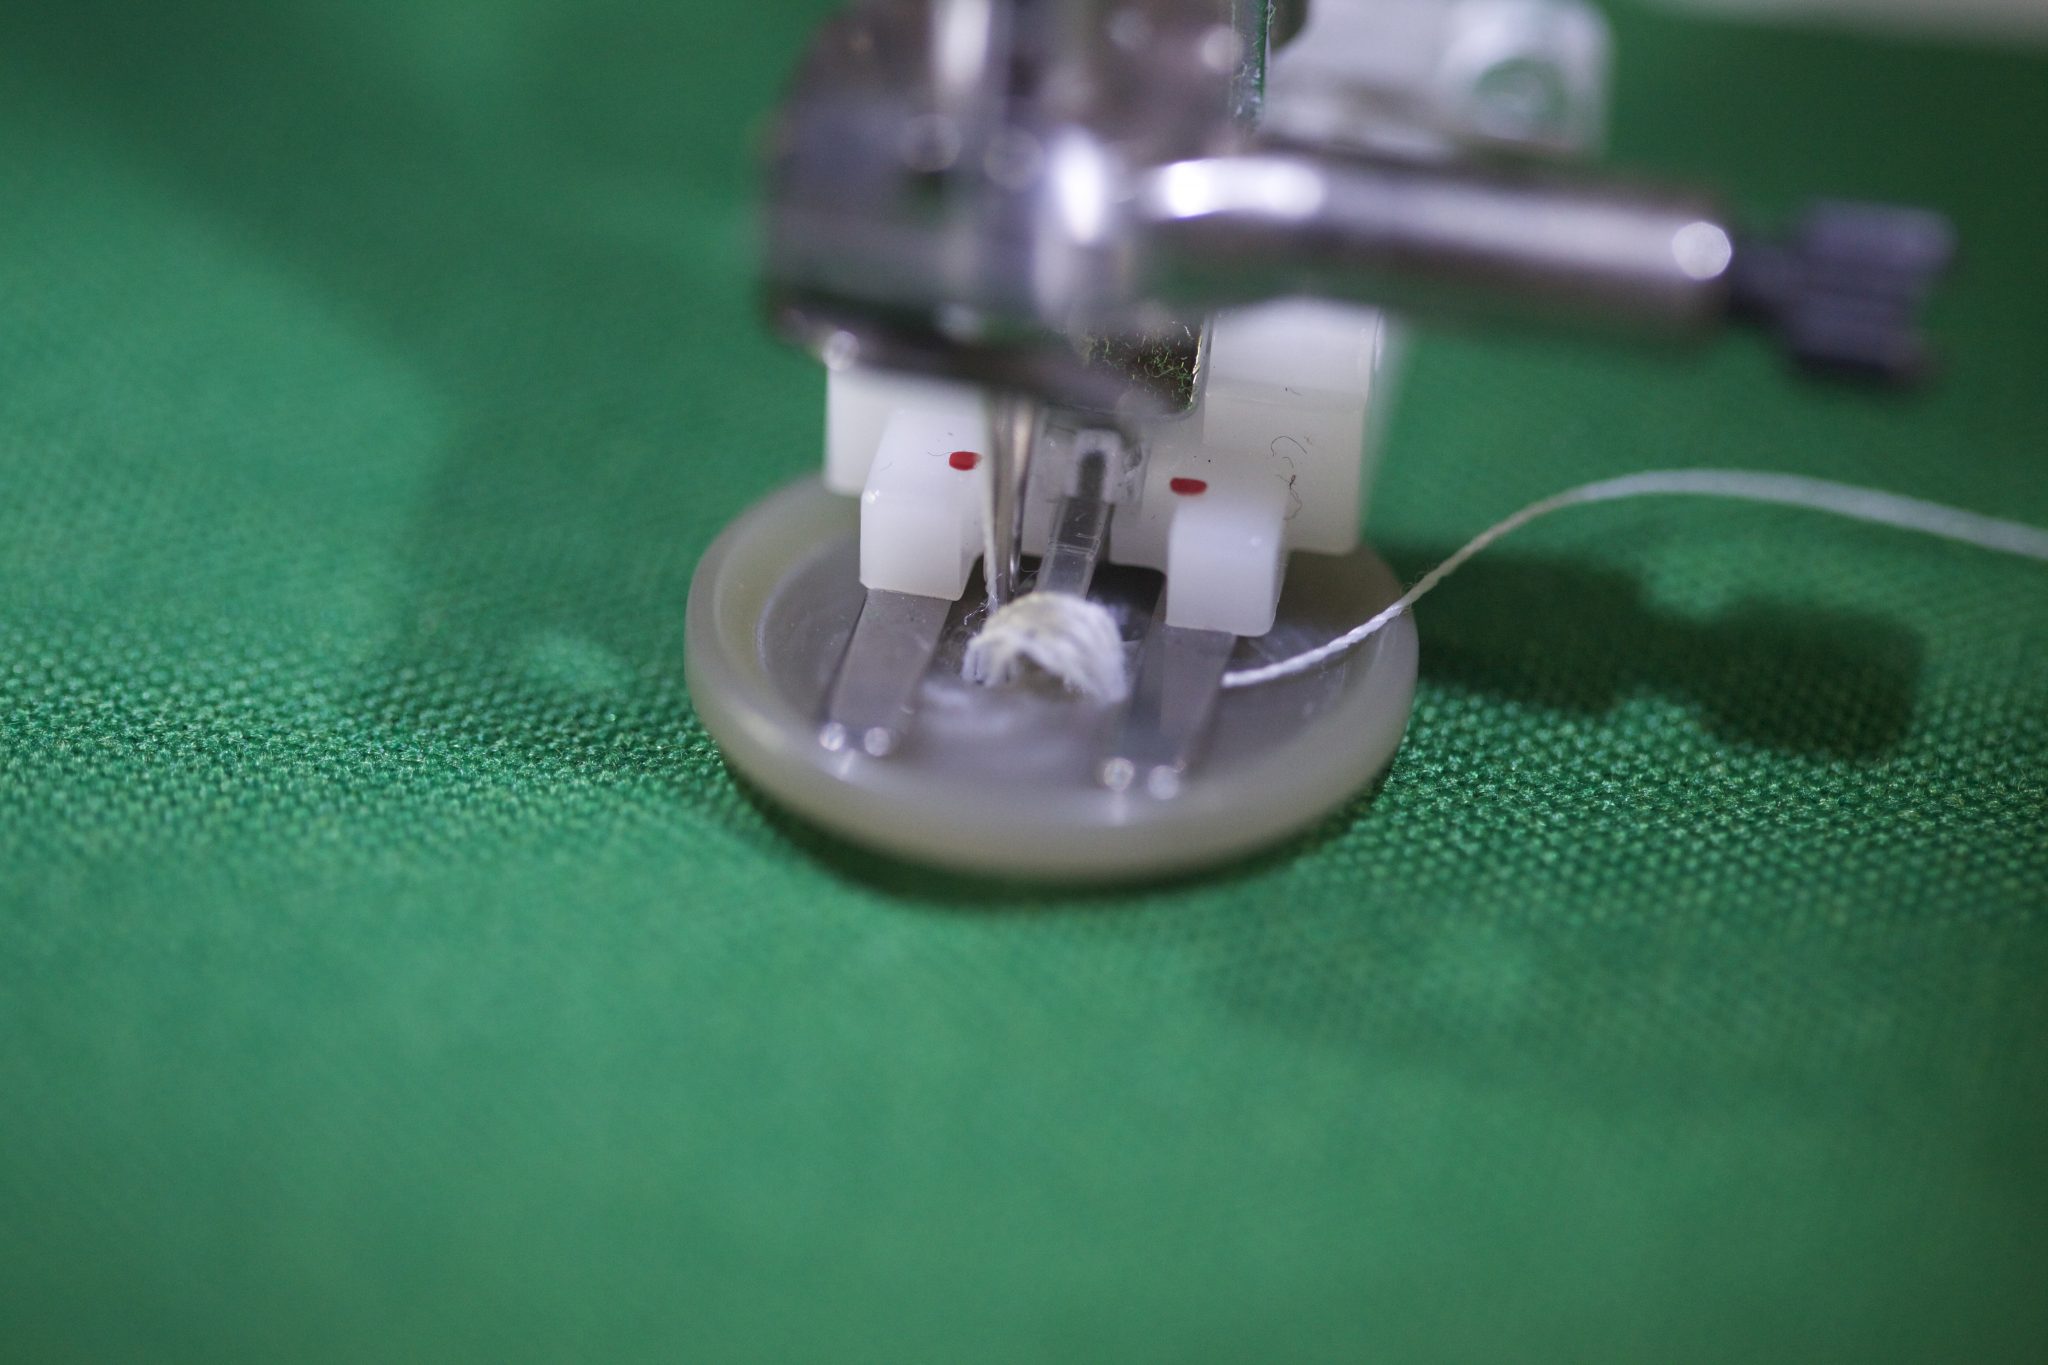
The next step is very important: test the width by turning the balance wheel manually, so that you can be sure that the needle is hitting the holes correctly. If you skip this step, you’d be risking a broken needle flying into your eye. Don’t take the risk!
Also, be sure that you leave a pretty long thread tail. You’d make your life a lot easier later on.
This one fits into the first hole perfectly.
It fits into the second hole perfectly too. If yours doesn’t, adjust the button and/or the width of the stitch.
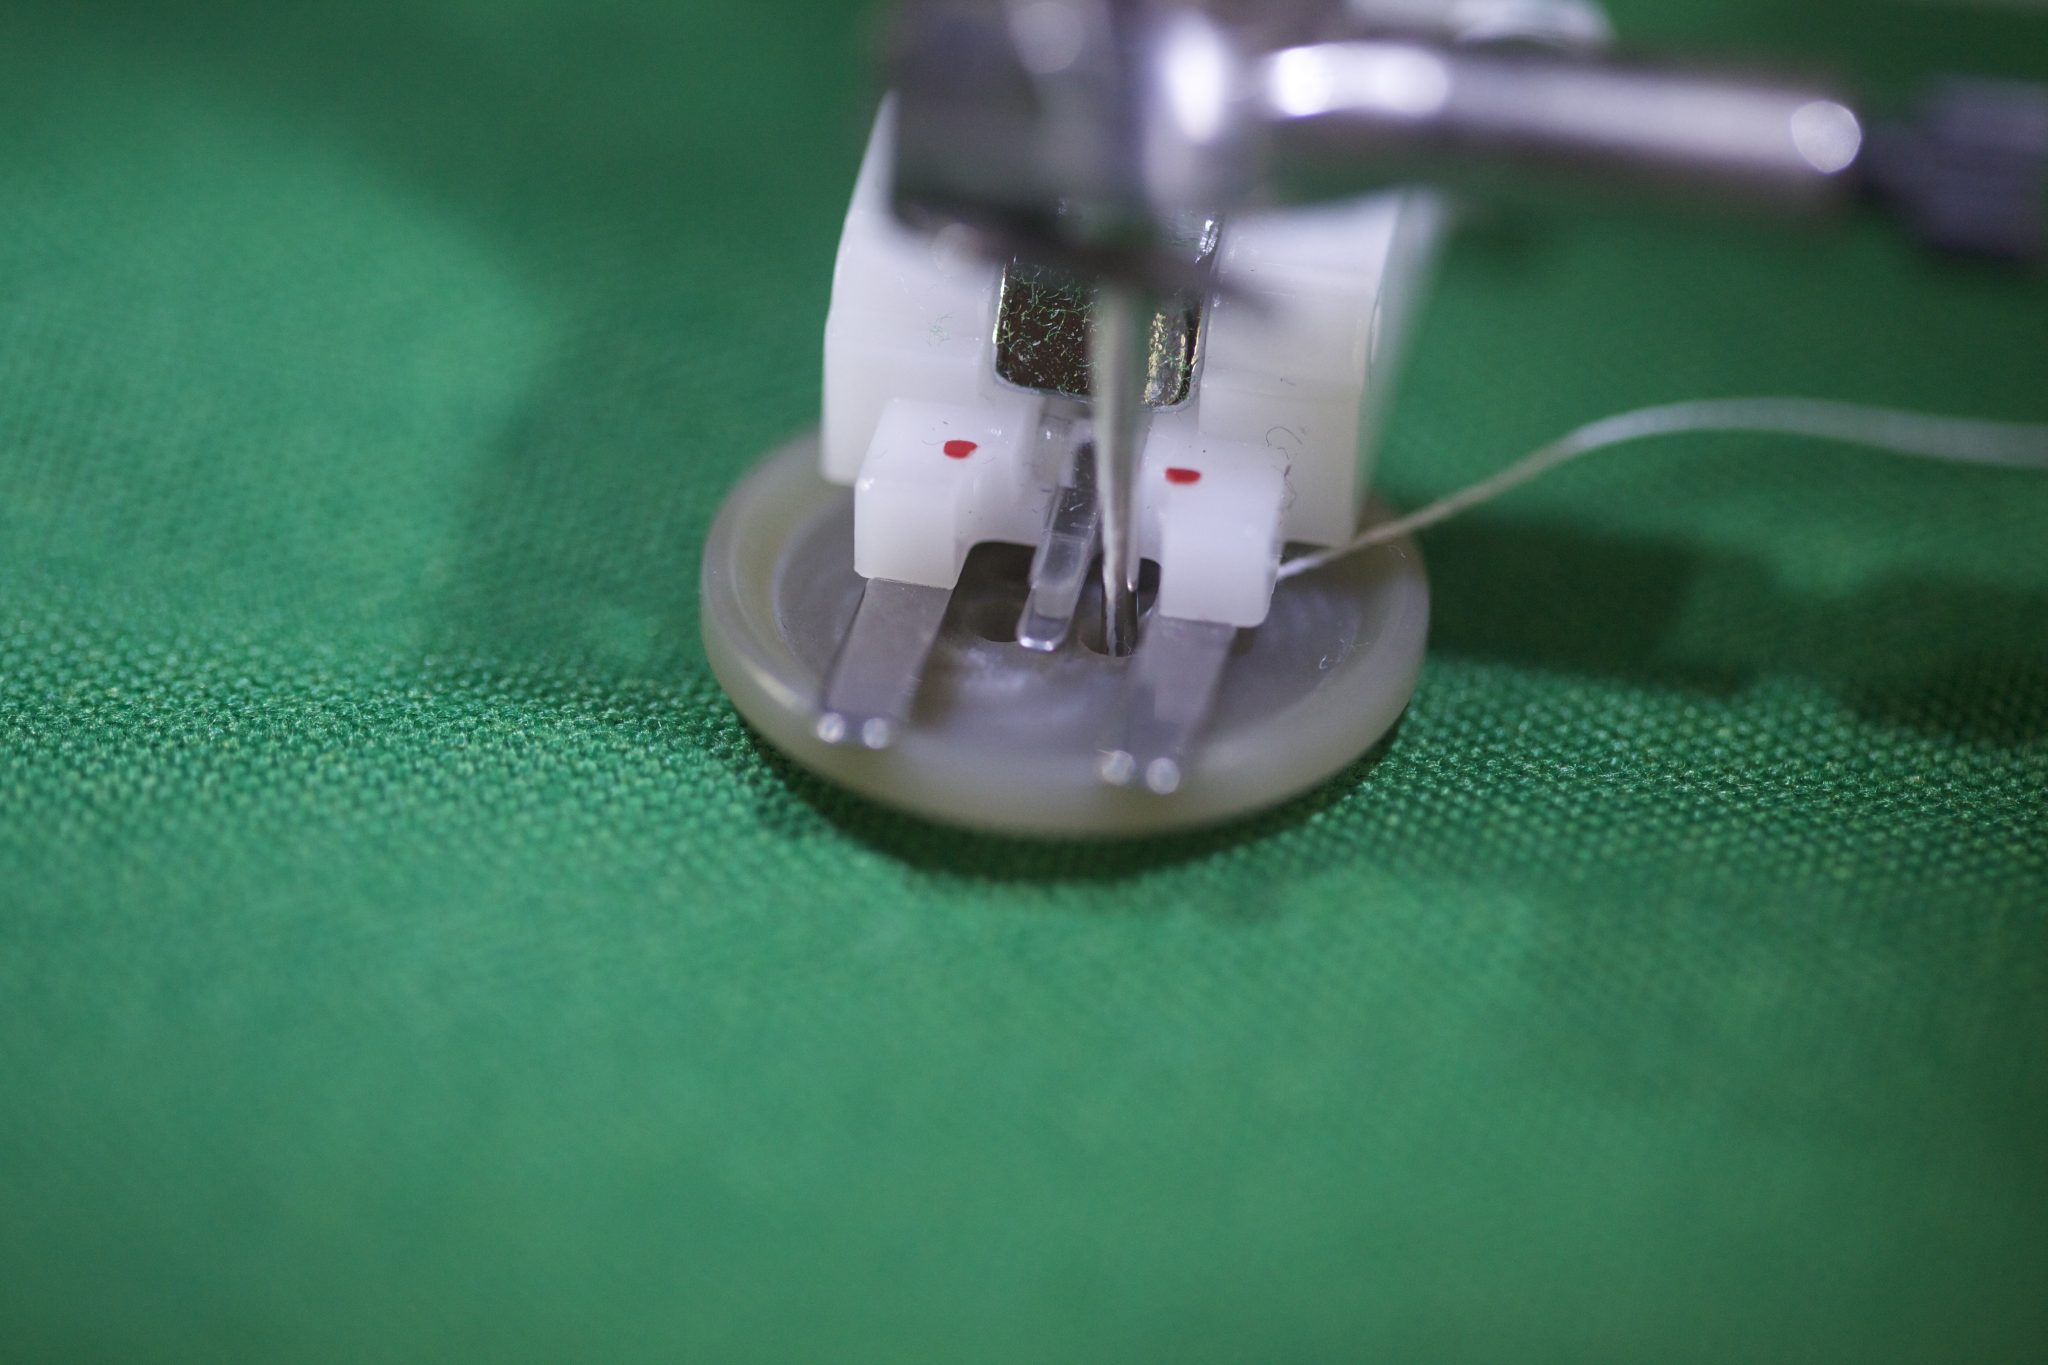
Now you can step on the pedal and let it go. Since I am using my machine function, it stops stitching after about 10 stitches. If you are using a zigzag stitch, stitch ten to a dozen or so stitches.
As I mentioned, my button has four holes. Now that I am done with the first two hole, I raise the button foot and nudge the fabric/button forward until the back two holes are lined up with the button foot’s position. Again, test to be sure that the needle is hitting both holes correctly.
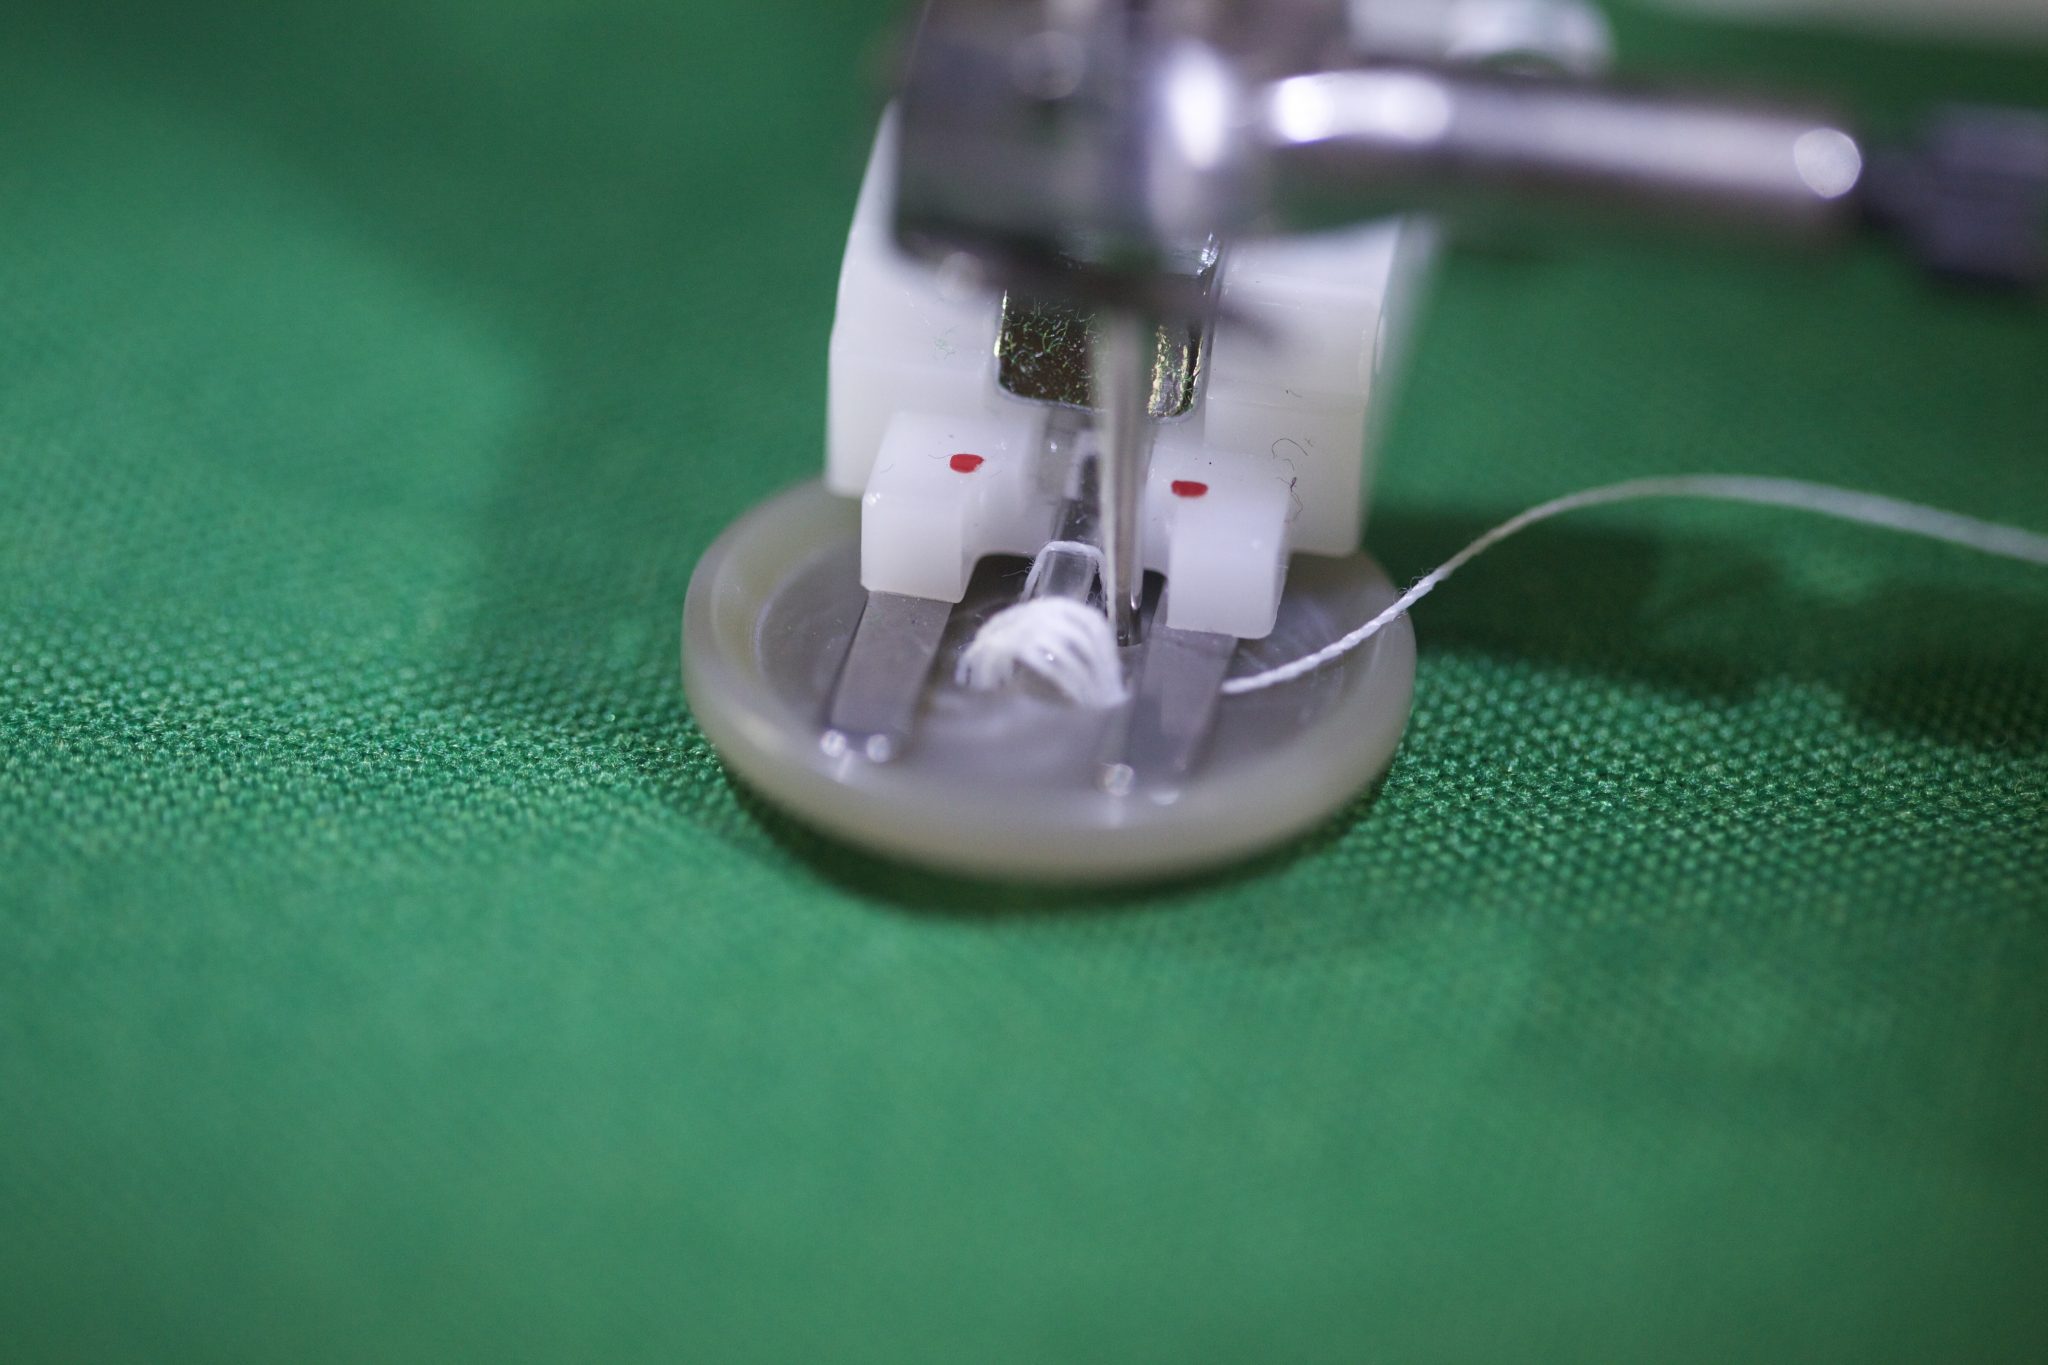
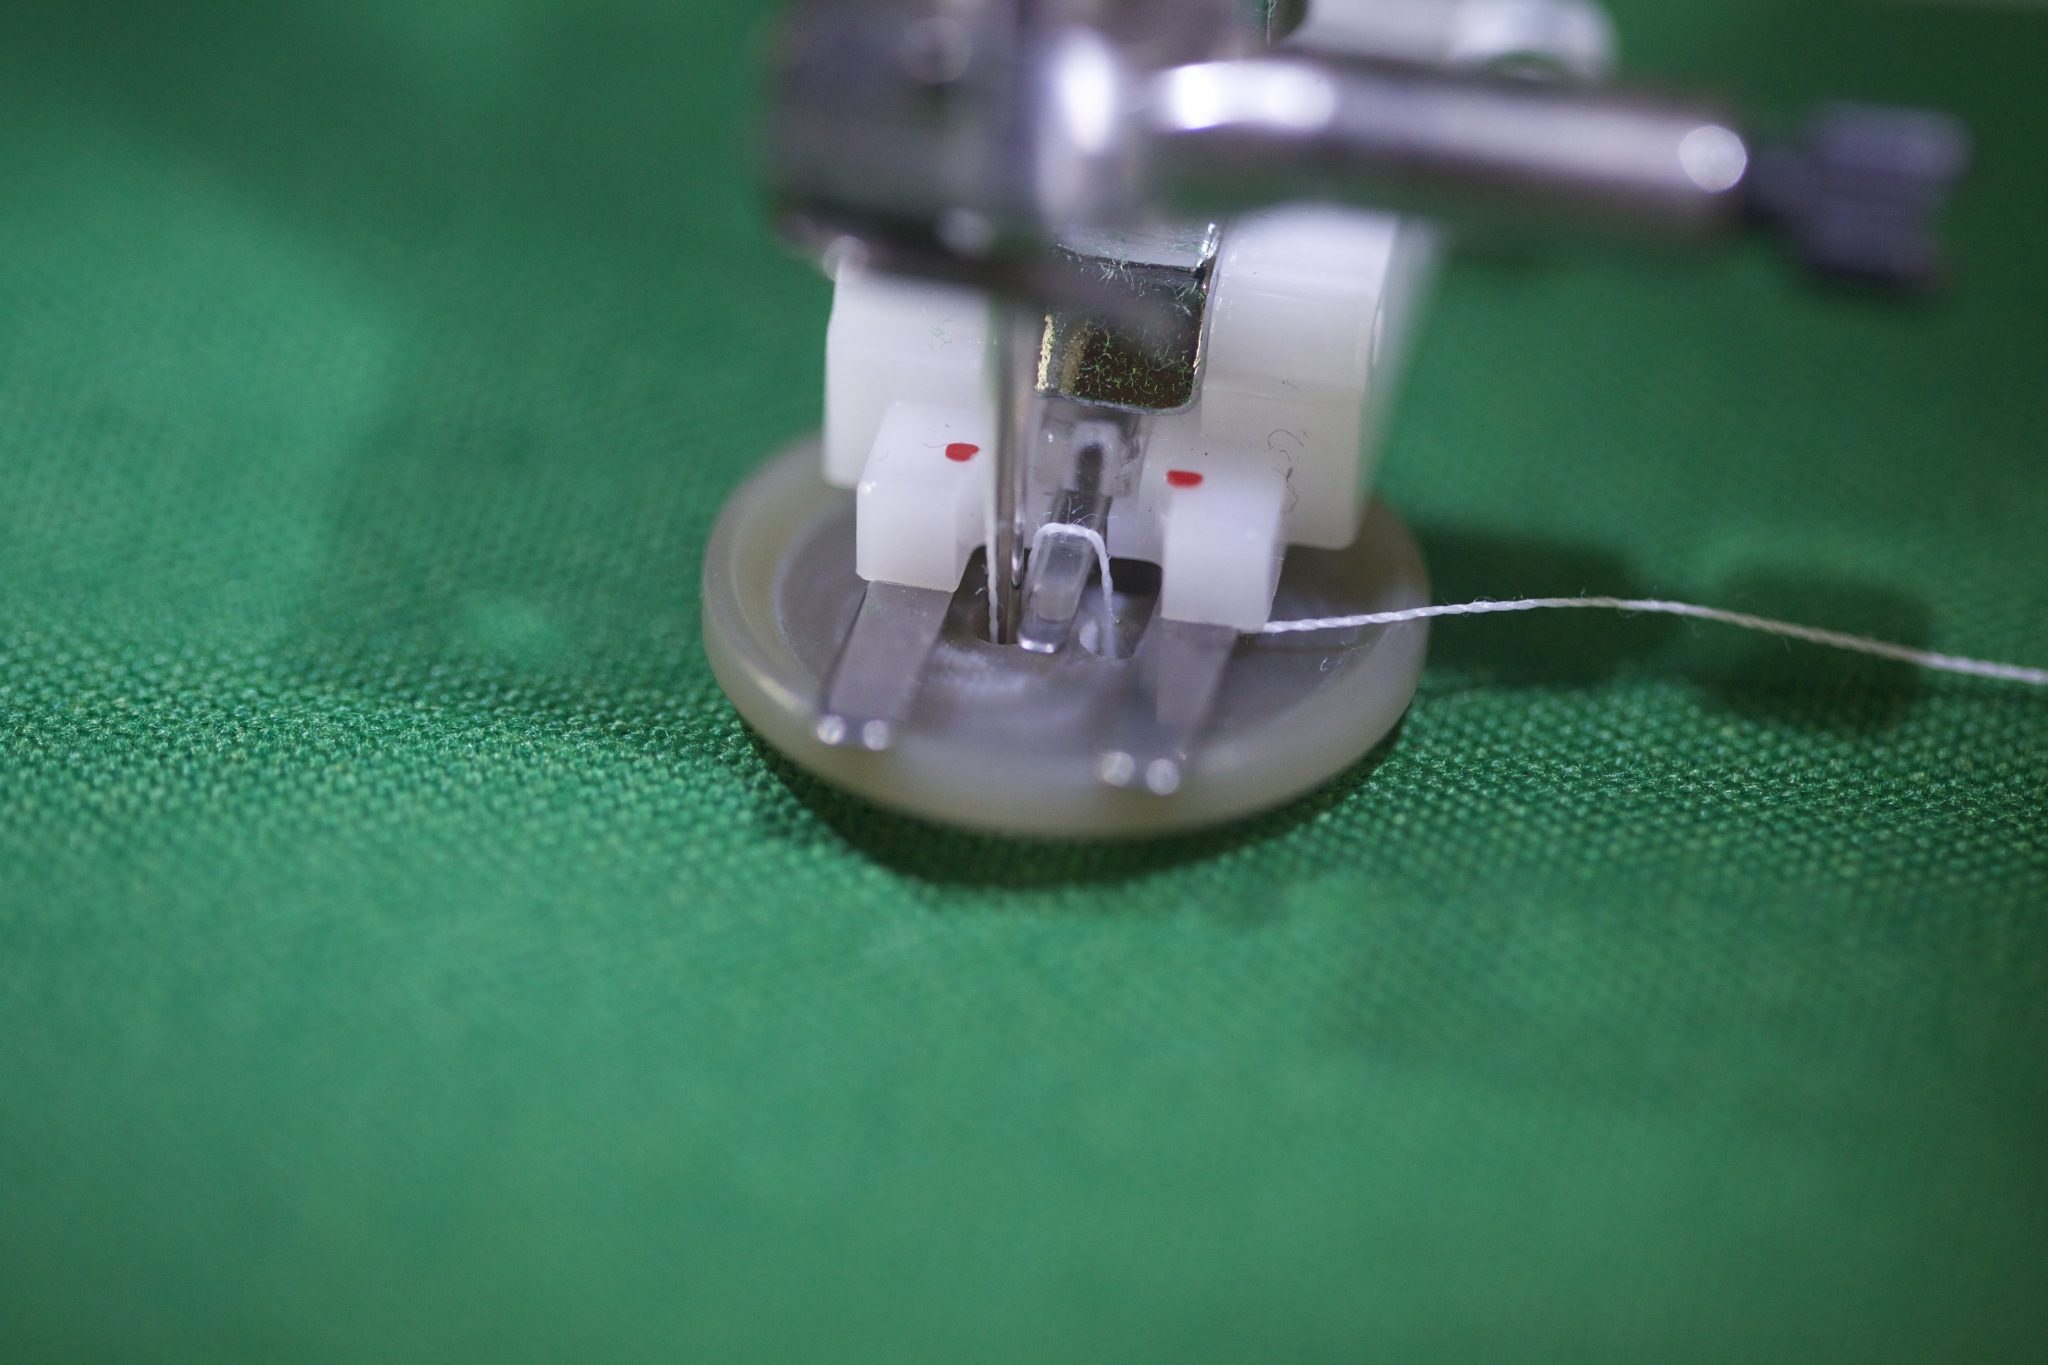
Let it run again in the same manner.

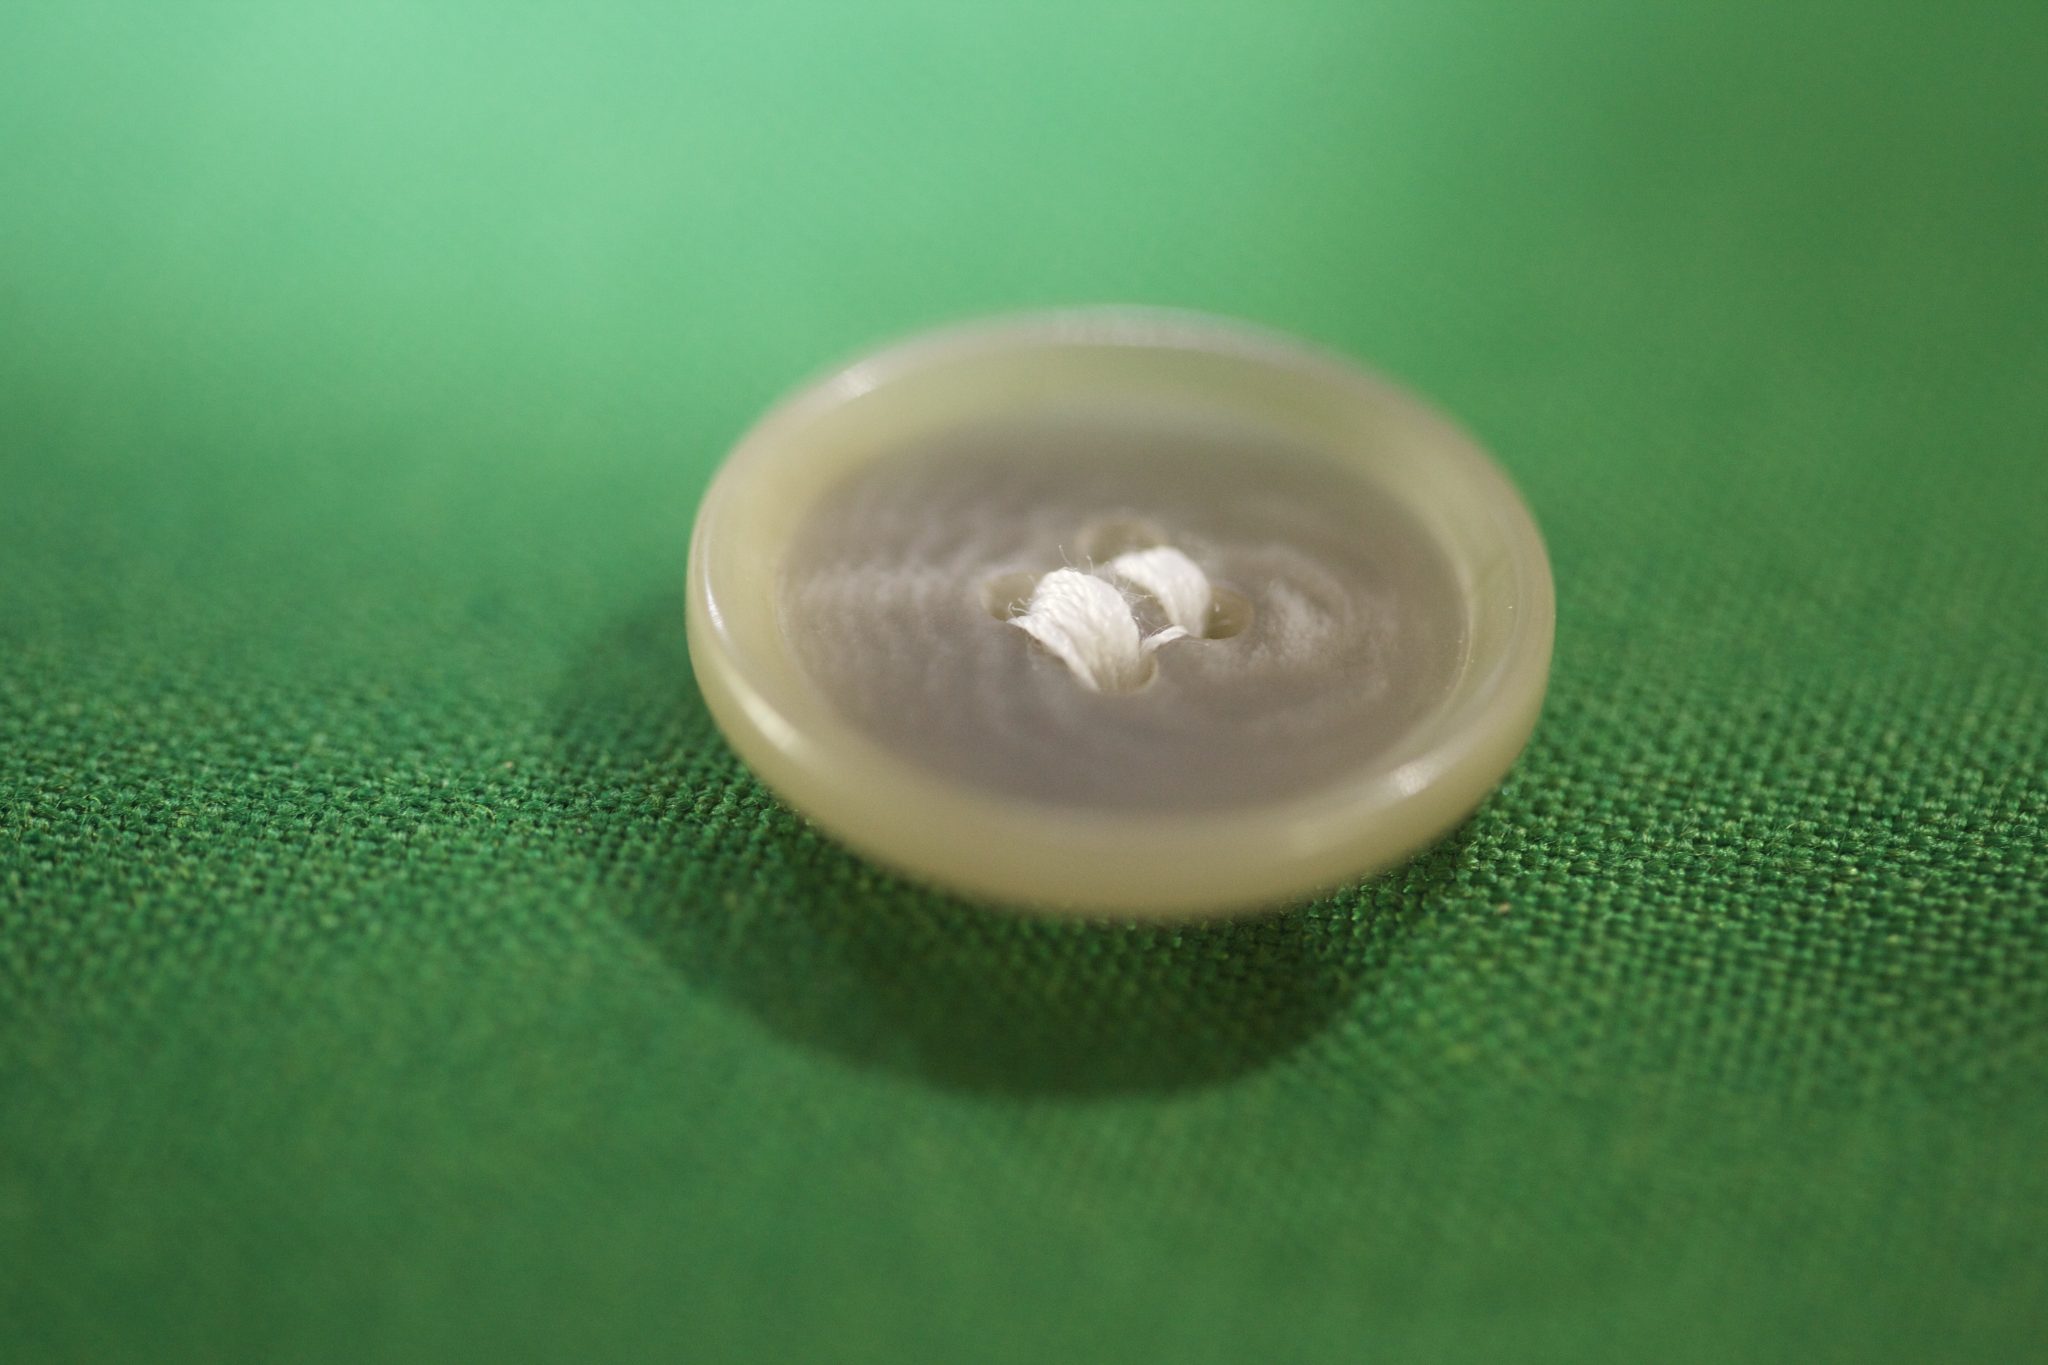
Now you can remove the button and the fabric from the machine. You see the thread is loose and yucky. But worry not. It will be better.
If your button foot doesn’t have the lever for the center piece, yours would already look quite nice. But not this one. This one is waiting for you to create the shank.

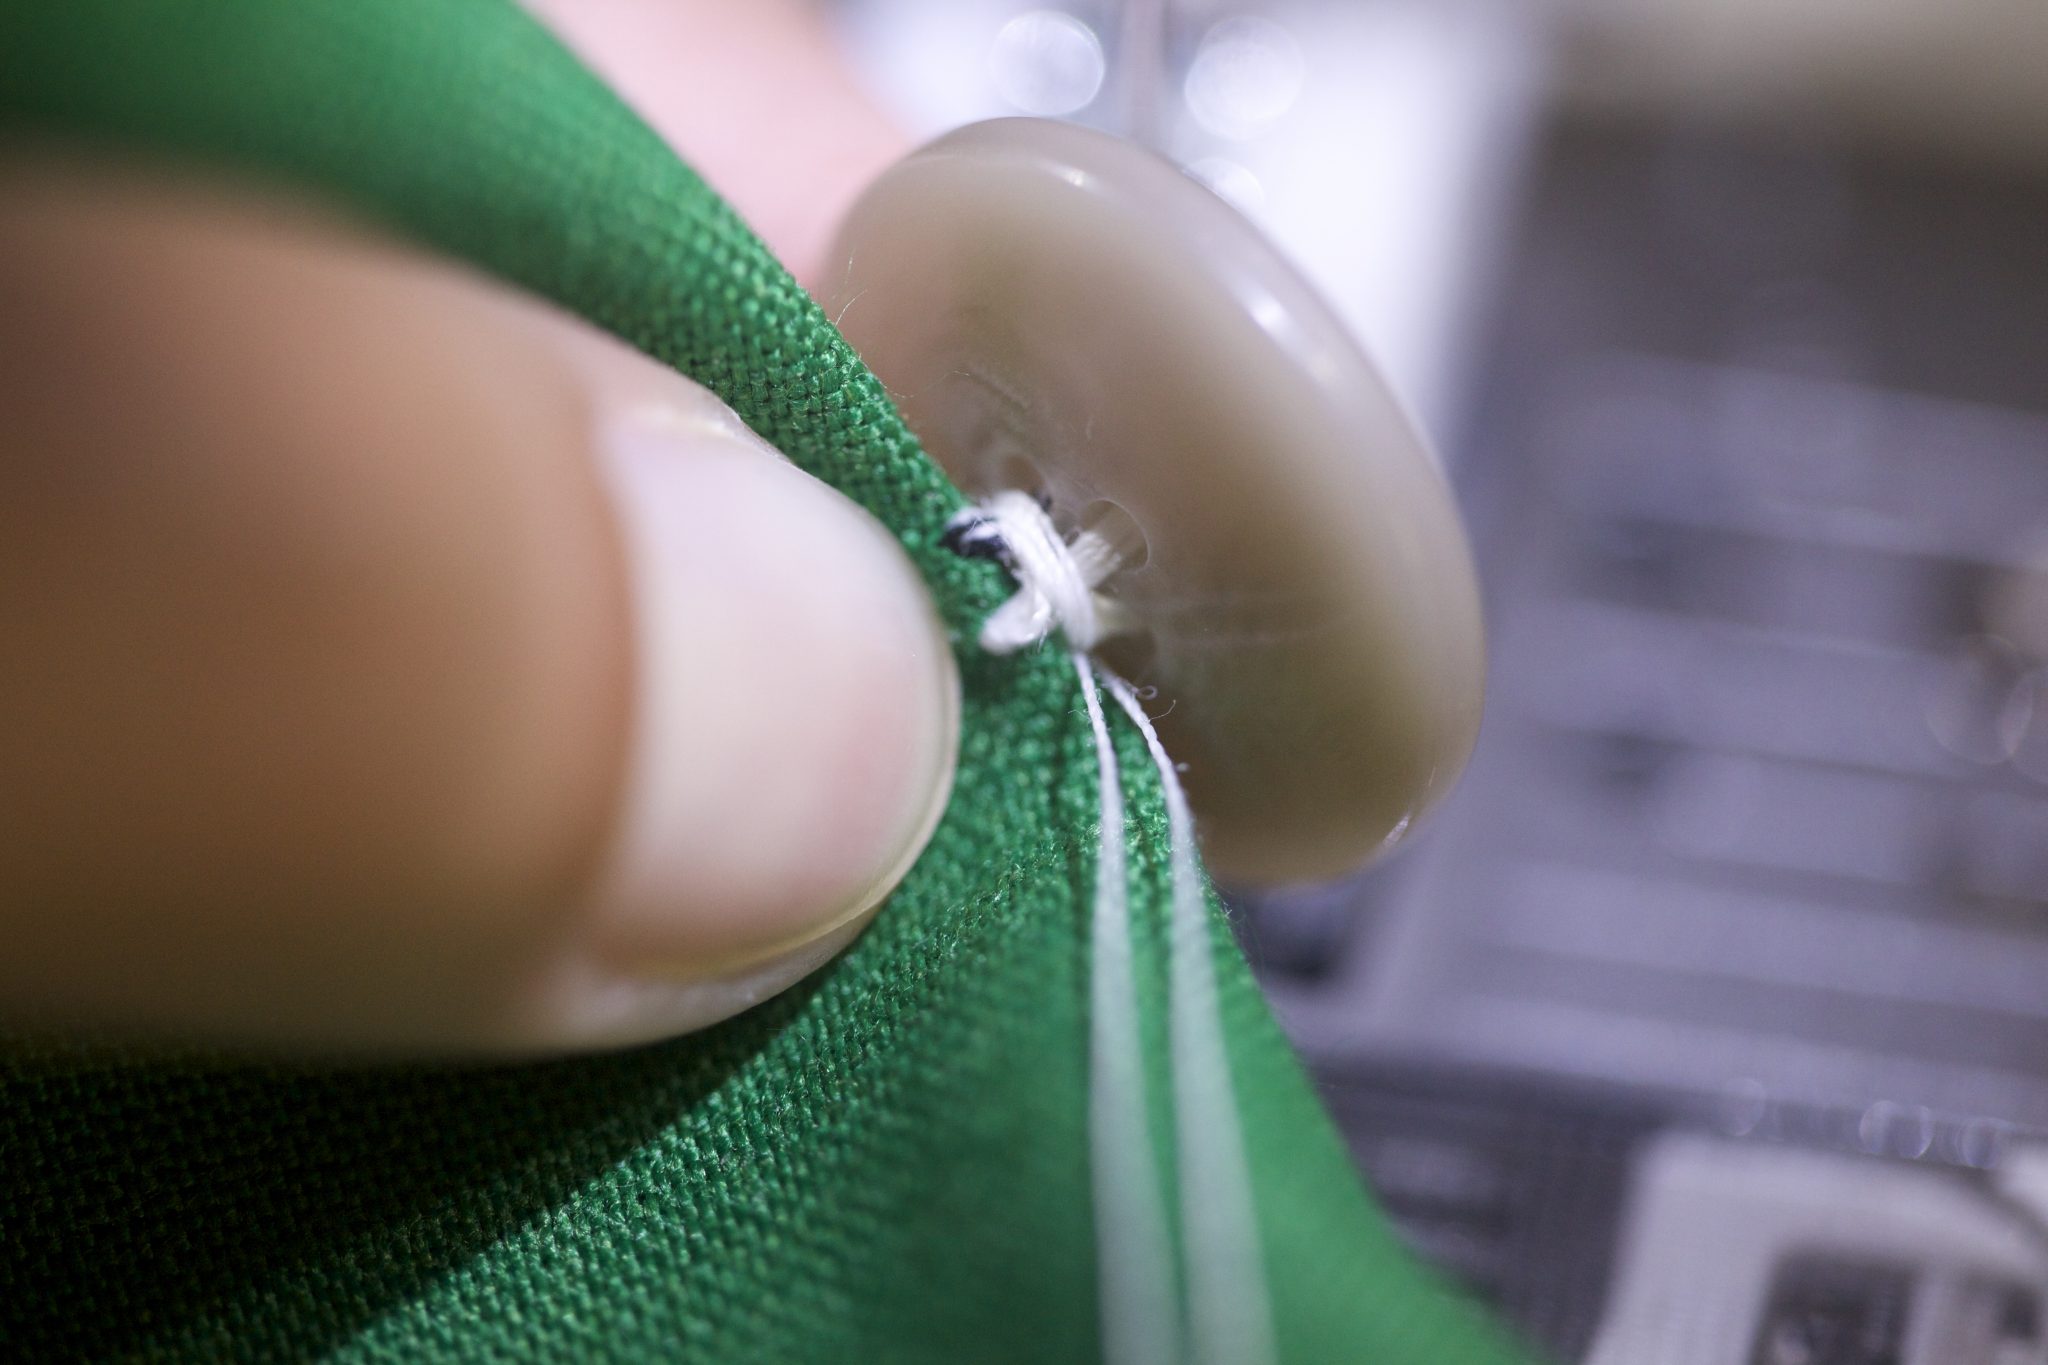
Thread the loose end through the holes so that they are between the button and the fabric.
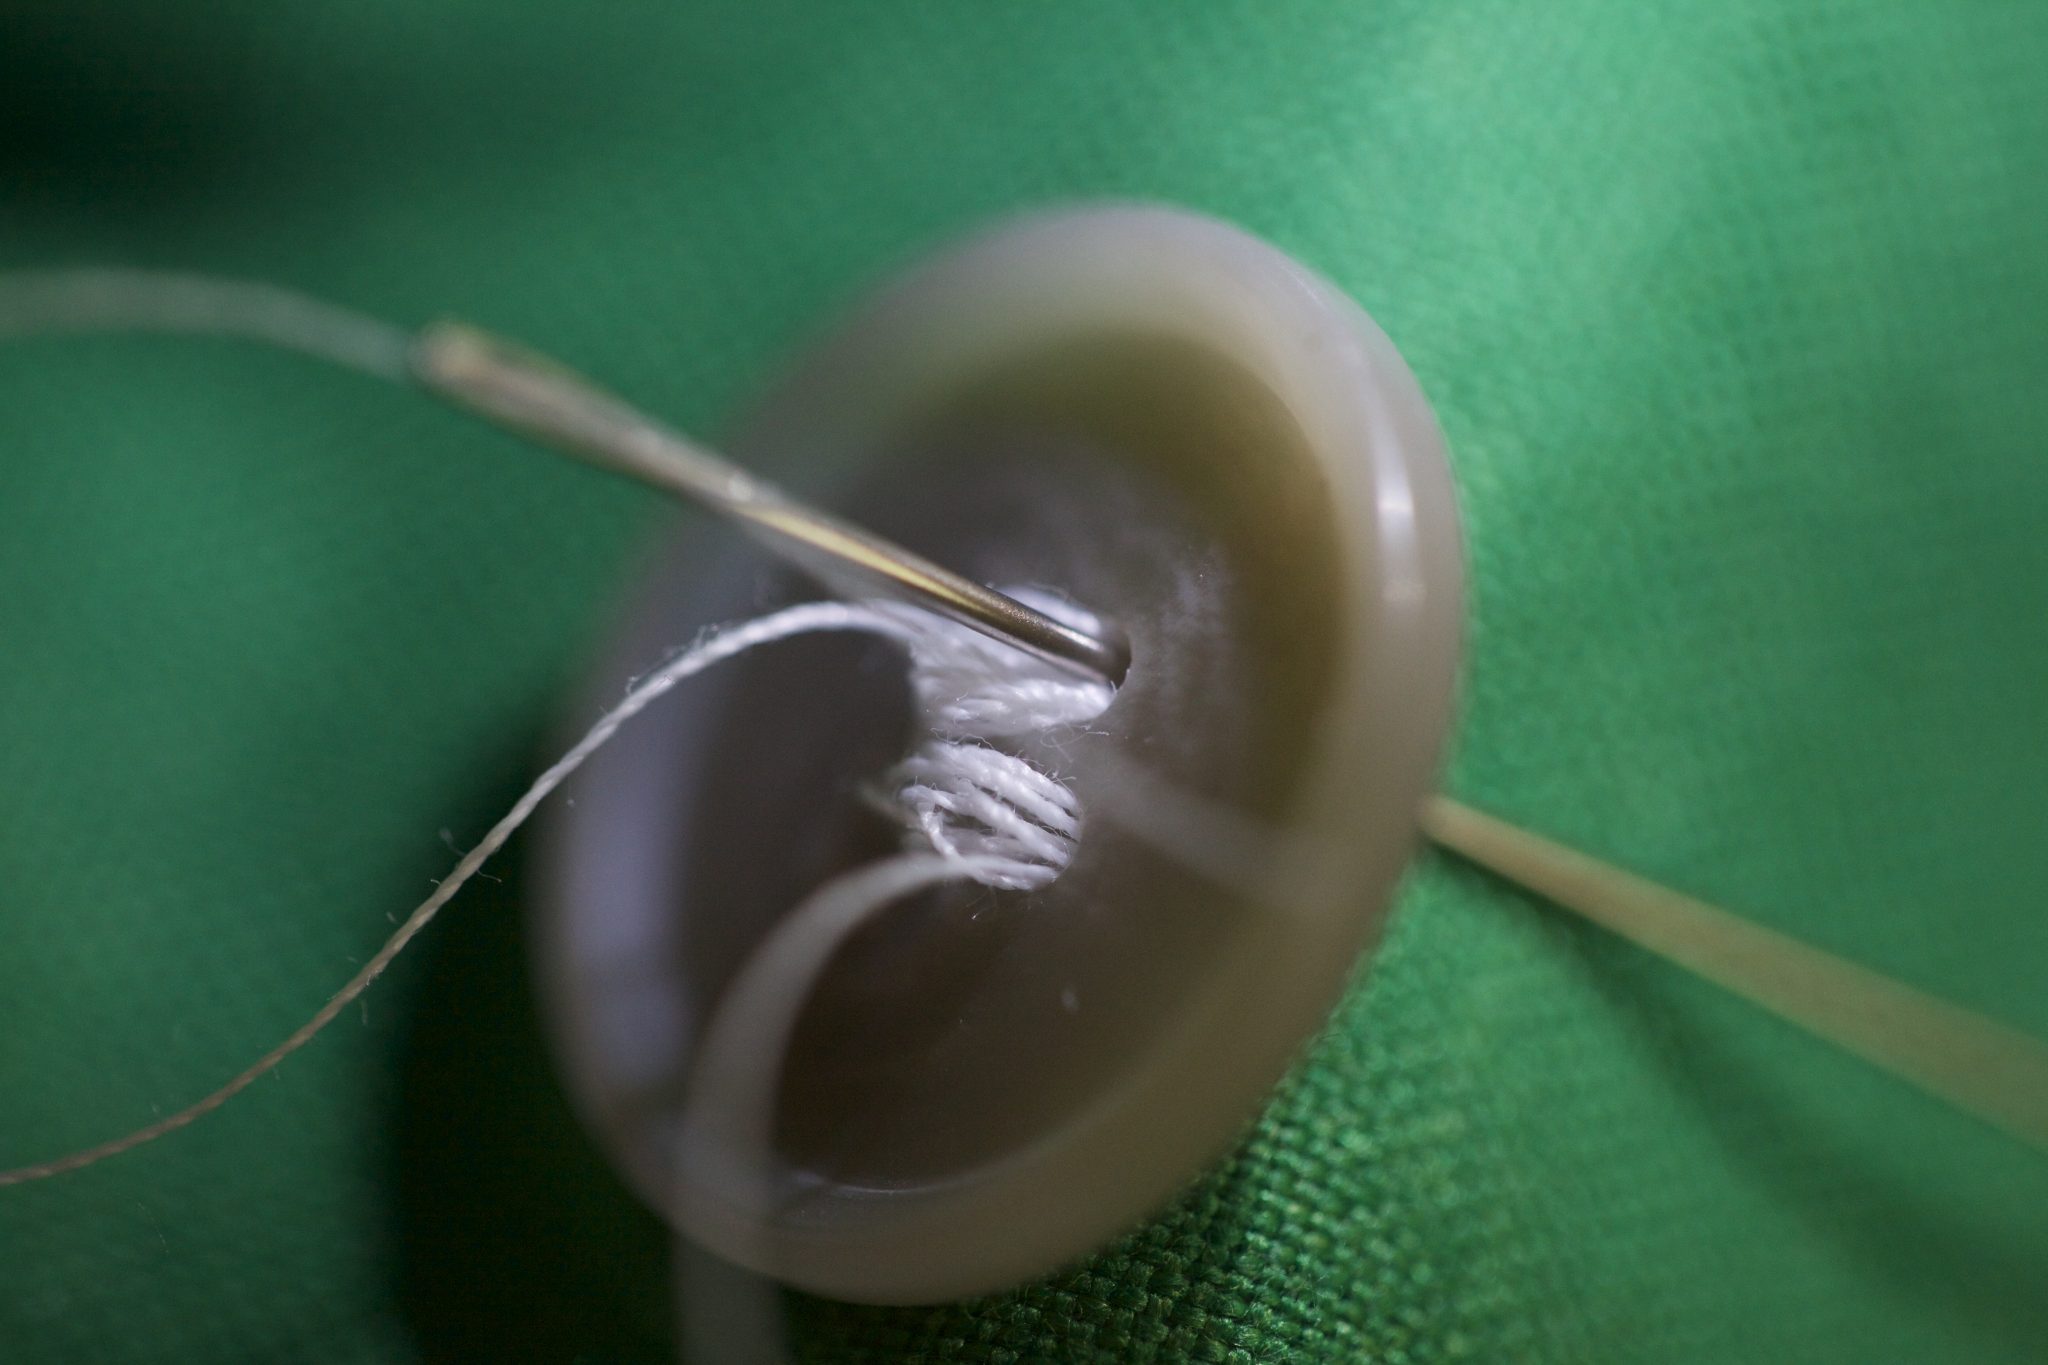
Pull the button away from the fabric, and you see that the thread looks much better on top of the button. At the same time, you create some space between the button and the fabric.

Wrap the thread around the button five or six times (between the fabric and the button) to create the shank.
Then pull the thread end to the back of the fabric using a needle.
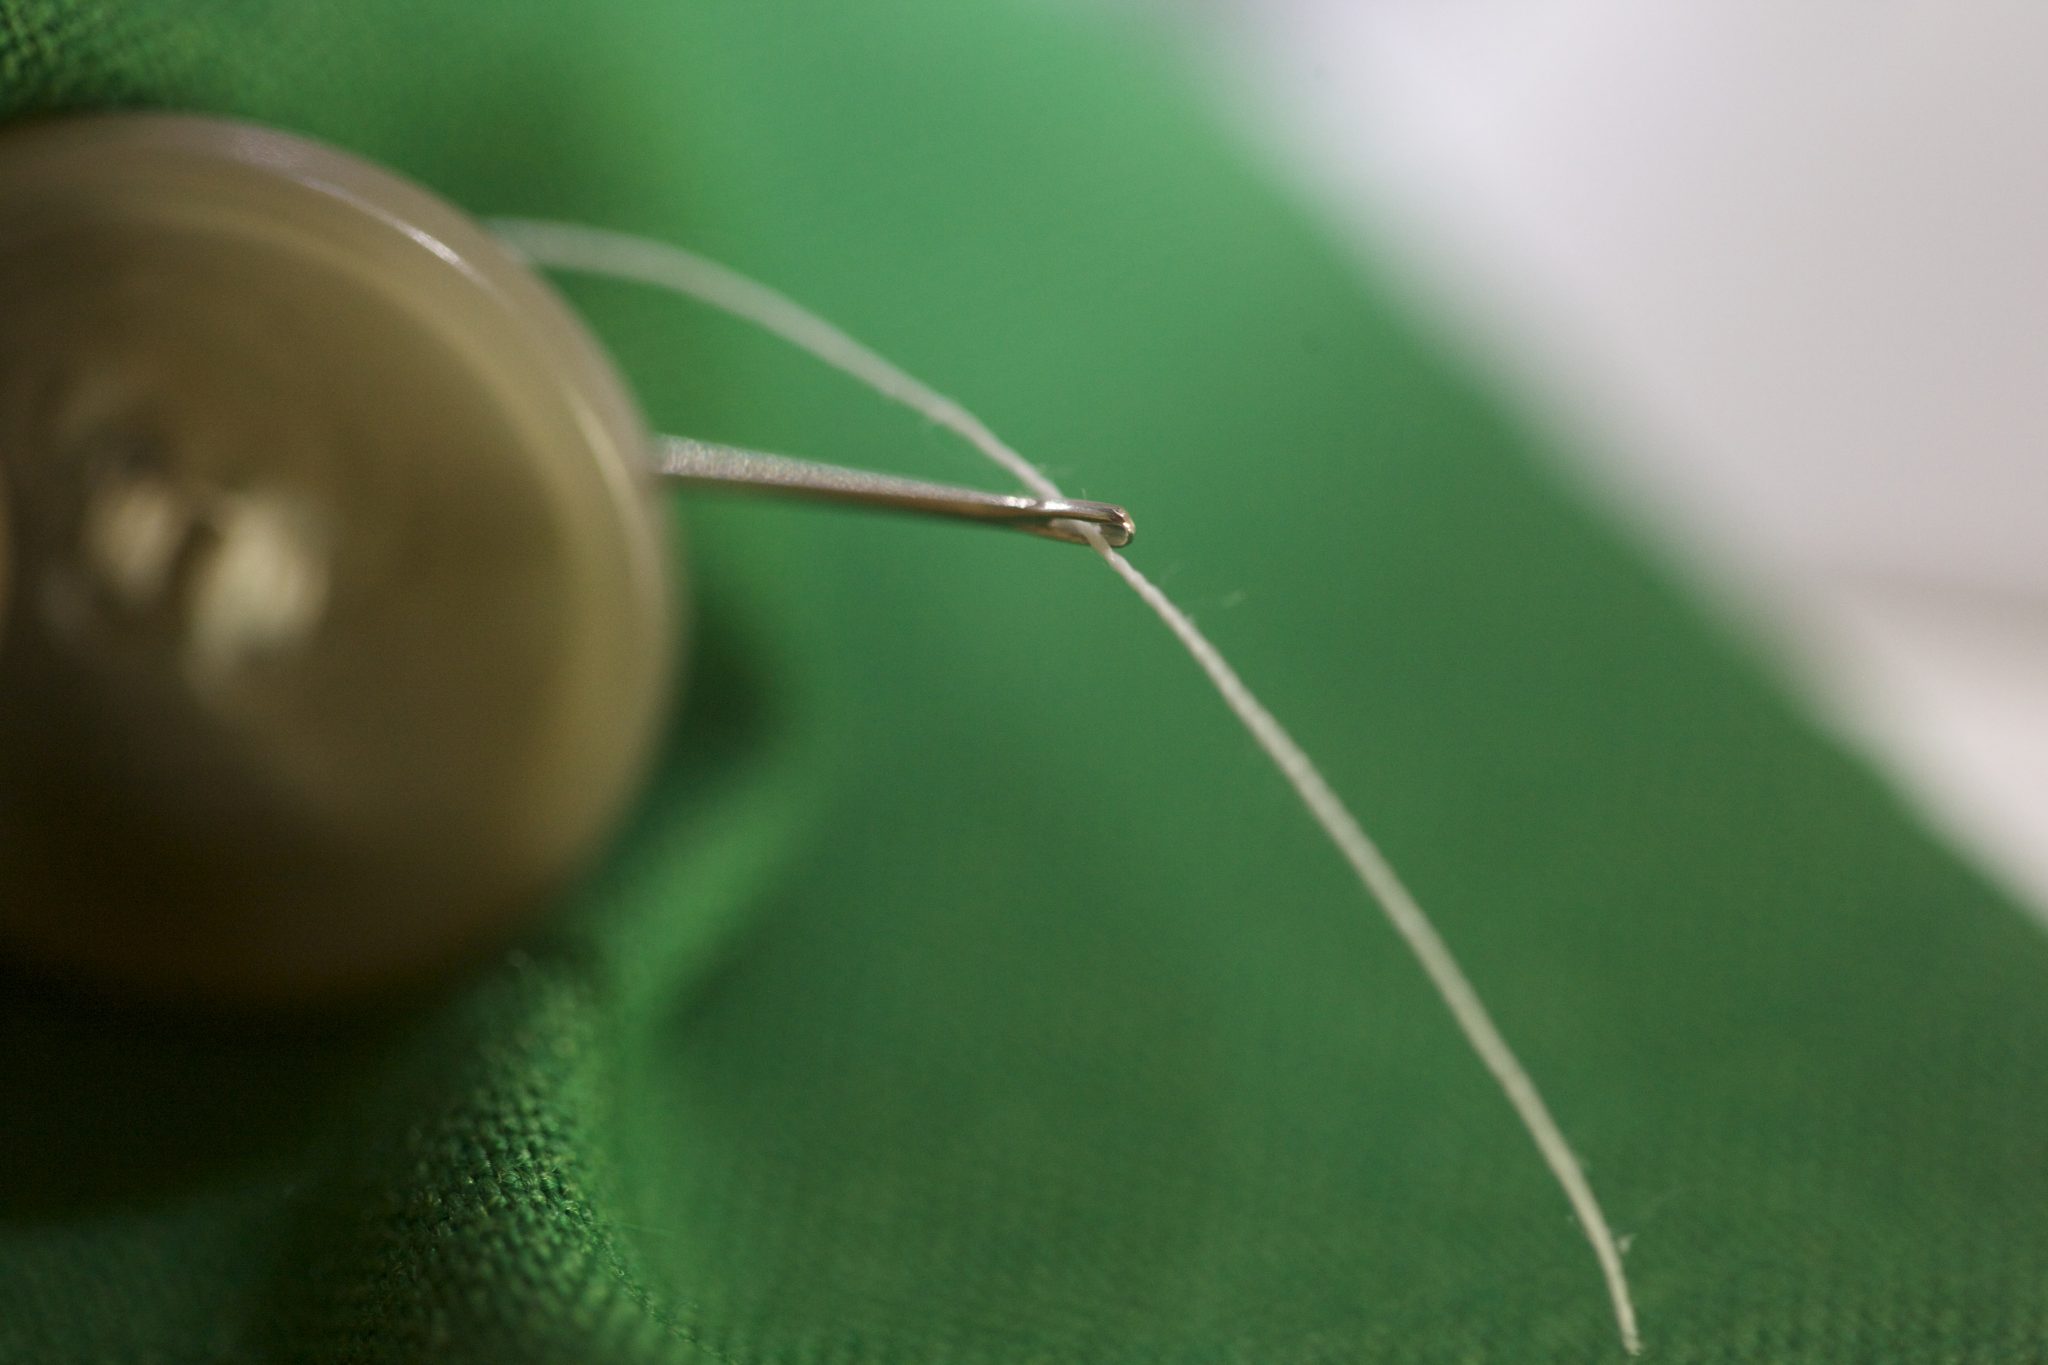
Now everything looks awesome and you tie a knot in the back of the fabric.
This may look like many steps, but when you are doing five or six (or 22, in the case of Jacqueline Hoodie), this is a serious time saver. You would do all the machine stitching first, and then do the threading/knotting at the end.
And don’t forget to raise your feed dog back up when you done!
I hope this is helpful! Until next time, keep stitching!

Oh! I’d forgotten all about sewing on buttons by machine. Thanks for posting!
If you don’t have the sticky out thing that creates a shank, you can just lay a cocktail stick down on top of the button and stitch over that. It creates just enough room, in my experience.
You could certainly do that. That’s what I do when I hand sew a button (put a toothpick on top). But when it comes to the machine, I want to make sure that the stick doesn’t shift when the machine is working. So I’d tape the stick on so it doesn’t move. I’d also find something big enough to be taped on, but small enough to be not in the machine’s way.
Great post! The last time I tried doing this on my machine, I thought the thread looked really sloppy, so I haven’t used it again …but I didn’t know the shank trick…I will try that next time. Thanks!!
You are welcome, Jodi! I create that shank even when I hand sew my button. I put a toothpick or a very thick needle (the kind you use for weaving in yarn after knitting) on top of the button to create that space you see in the photo above. I am glad this post inspires you to try it again! 🙂