
Liana Jeans Sew Along: Day 8 – Sewing Fly Front Zipper
Welcome back to the Liana Stretch Jeans sewalong. Have you finished your front pockets? If you have, then you are ready for the fly front zipper. I think that the fly front zipper has an underserved reputation for being difficult. I used this same method for my Angelia Short pattern, and many people couldn’t believe how easy it was. The bottom line is that the result is consistent and professional-looking.
I first learned about this method from Sandra Betzina in this video, and then I never sewed another fly front zipper any other way. It’s worthwhile for you to hop over there and watch the five-minute video now. There are several differences between Sandra Betzina’s way and mine:
- Mine includes a line of topstitching next to the center front; this is completely decorative, but without specifying in the instructions, it might not be apparent when it should be done.
- For Liana Stretch Jeans, I did not apply fusible interfacing on the fly (there is one in the Angelia Shorts though). This is because the pocket stay goes all the way to the the fly, and that acts as a sewn-in interfacing. It stabilizes enough without the fusible interfacing.
- Sandra Betzina did not cover how to handle the fly shield. It’s just not part of the video, but I think it should have been to round the whole thing off.
- My method specifies when to finish the raw edges, but the video didn’t.
The pattern calls for a 6″ (15 cm) zipper, but actually a 4″ (10 cm) will do. I ask for a longer zipper because you can get the zipper pull out of the way, which makes the process much easier. However, that means we’ll have to shorten the zipper. If you absolutely despise shortening zippers, then you could use a 4″ (10 cm) zipper. Pick the lesser of the evil – your choice!
Without further ado, let’s dive into it. I took many in-progress photos, which I hope make the steps even clearer than the pattern illustrations.
Sew Fly Front Zipper
- Be sure that your fly front circle marking is visible on the wrong side.
Mark circle on the wrong side.
- Machine baste from the center front notch to the circle, and then stitch the front crotch seam from the circle to the inseam.

Baste above circle; stitch below circle.
- Clip at the base of the fly to about 1/2″ (1.25 cm) below the circle. Don’t clip through the stitch line!

Clip the base of fly
- Press the fly open and the front crotch seam to the left (as worn).
Press fly
- If you are distressing the denim, it’s time to do it now.
Distress
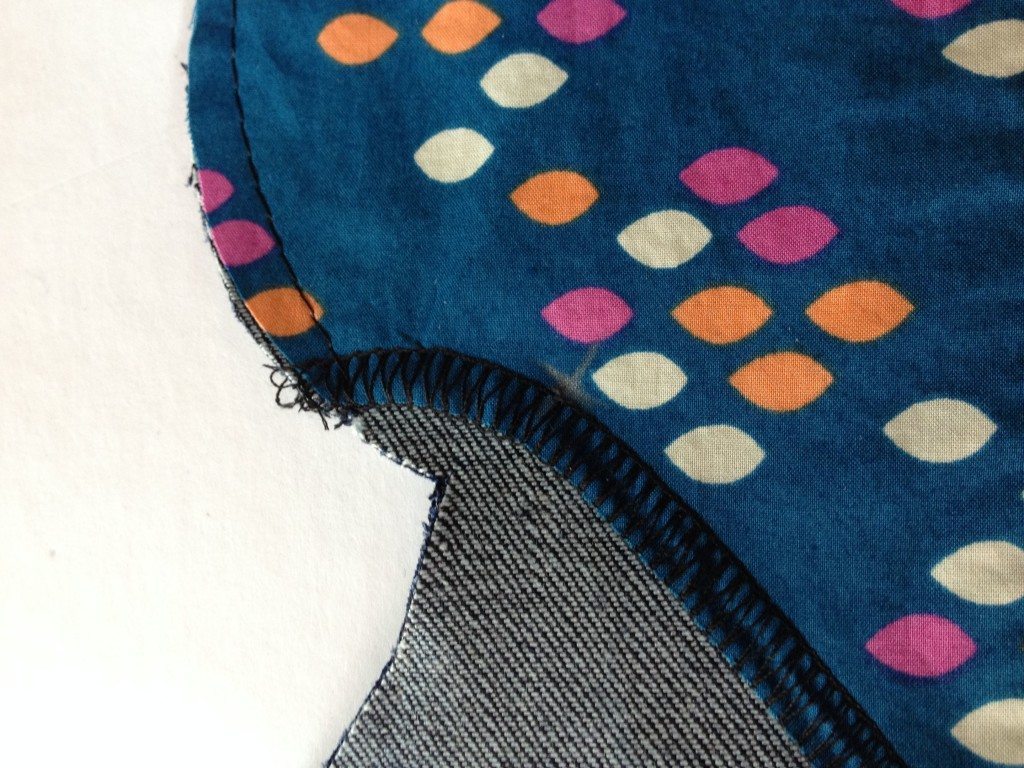
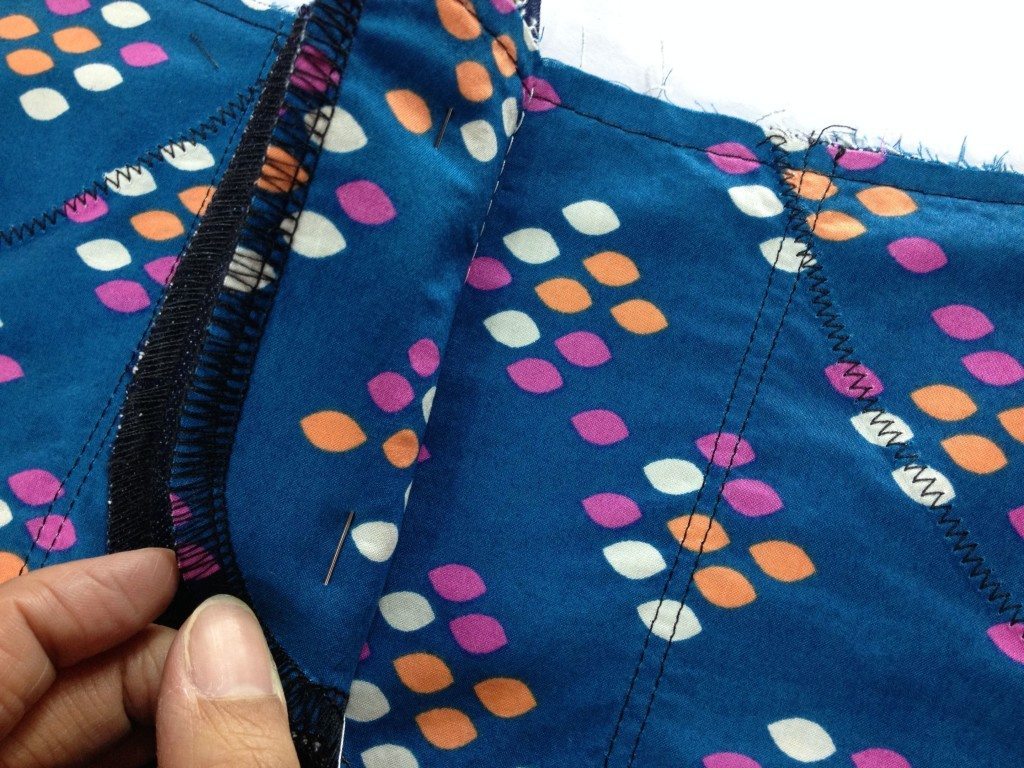
- Finish the raw edges of the fly and the front crotch seam.

Serge/zigzag raw edges
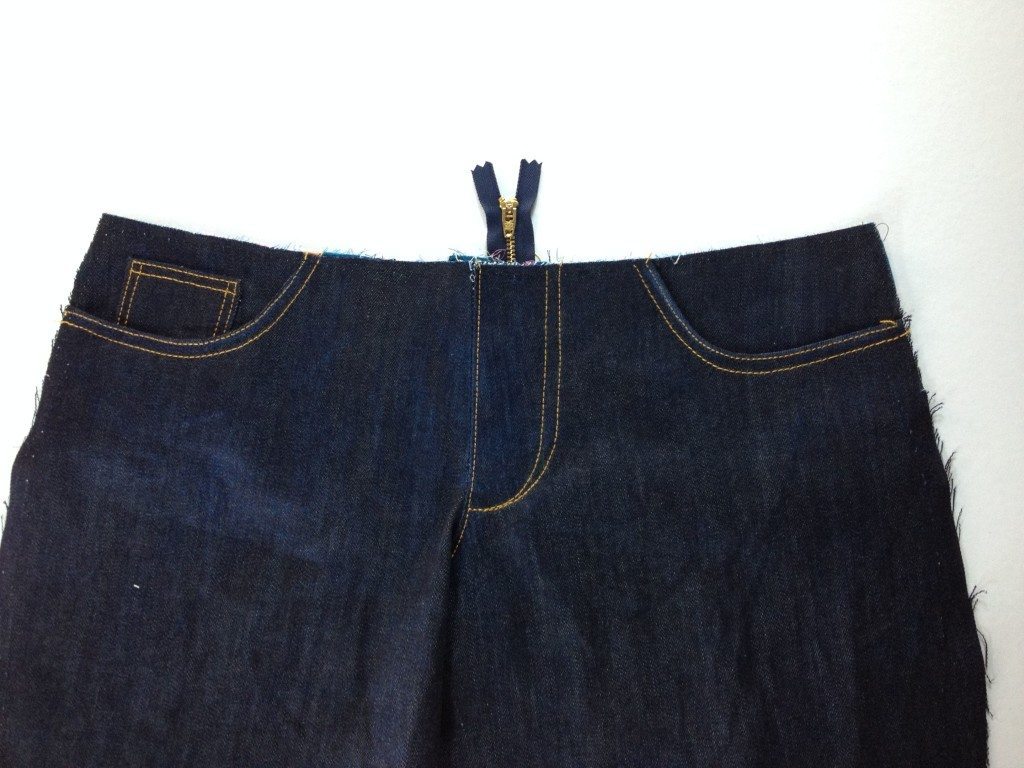
- On the right side, topstitch on the left (as worn) of the center front, from the top all the way to the inseam.

Topstitch on the left of center front
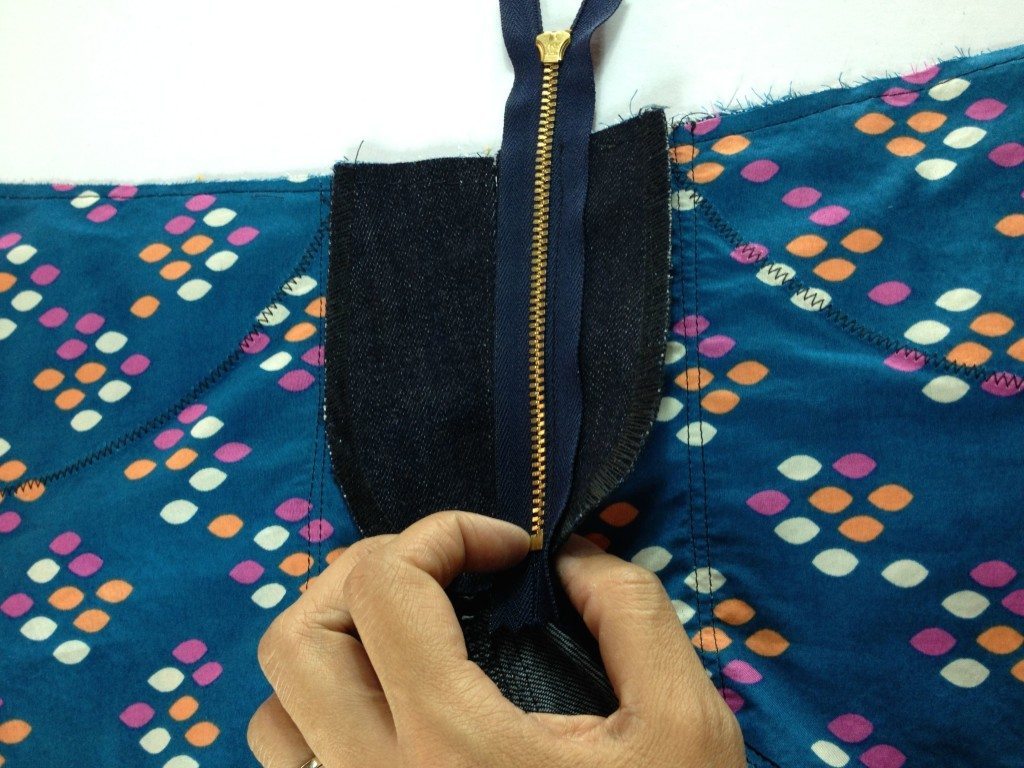
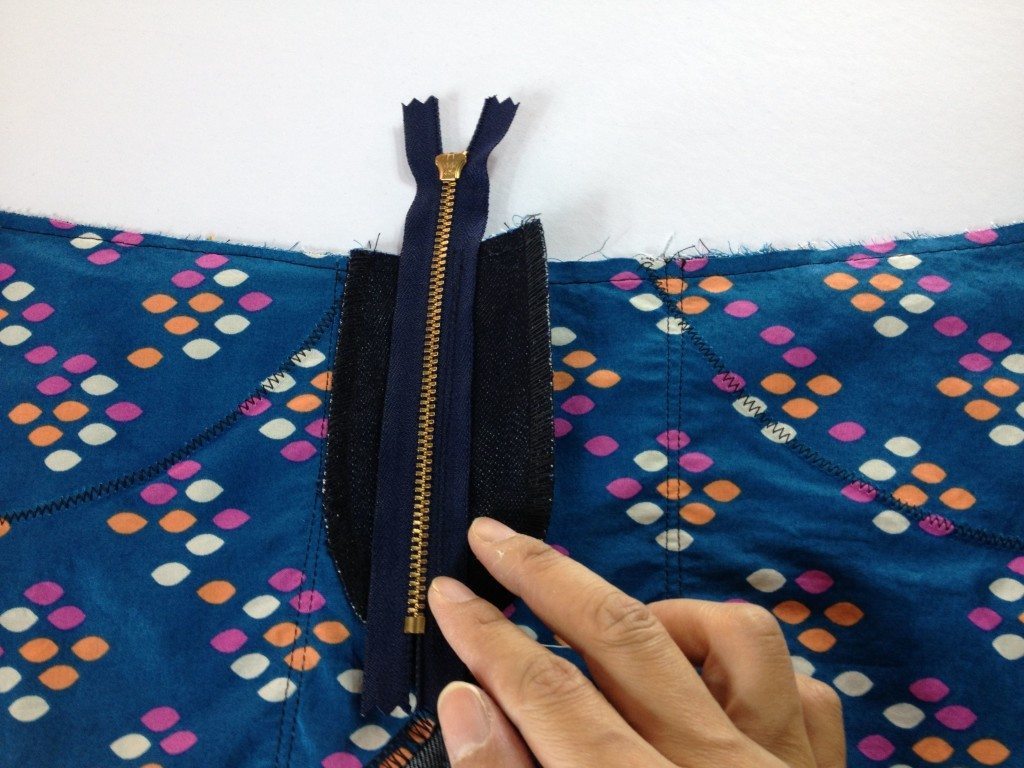
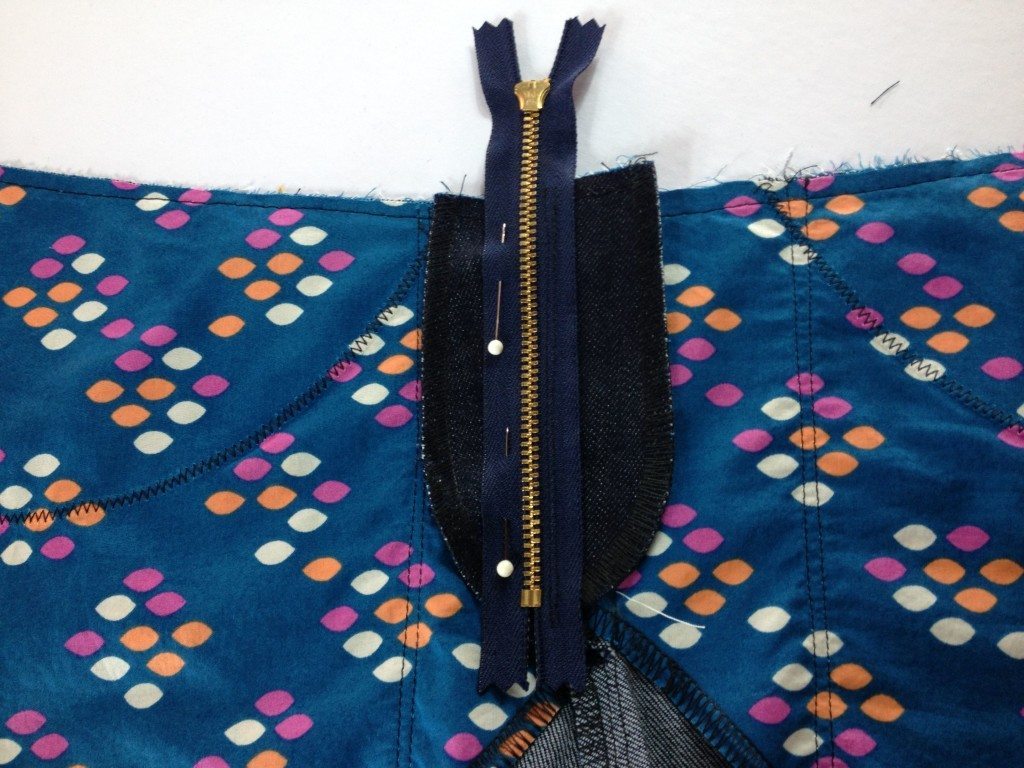
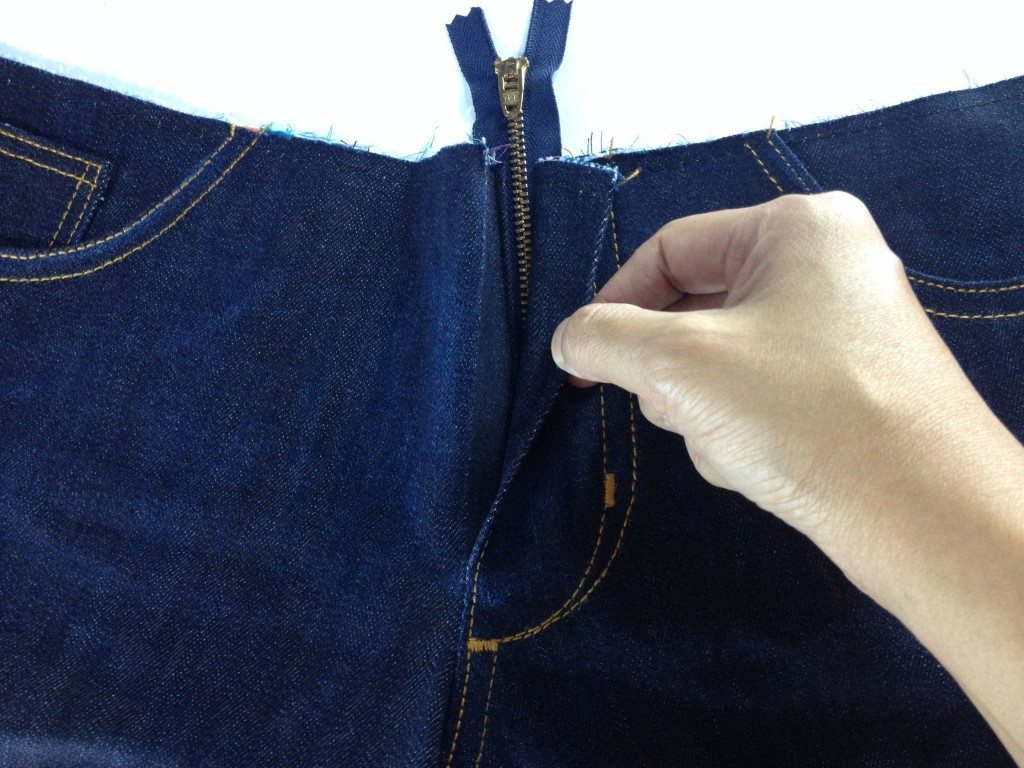
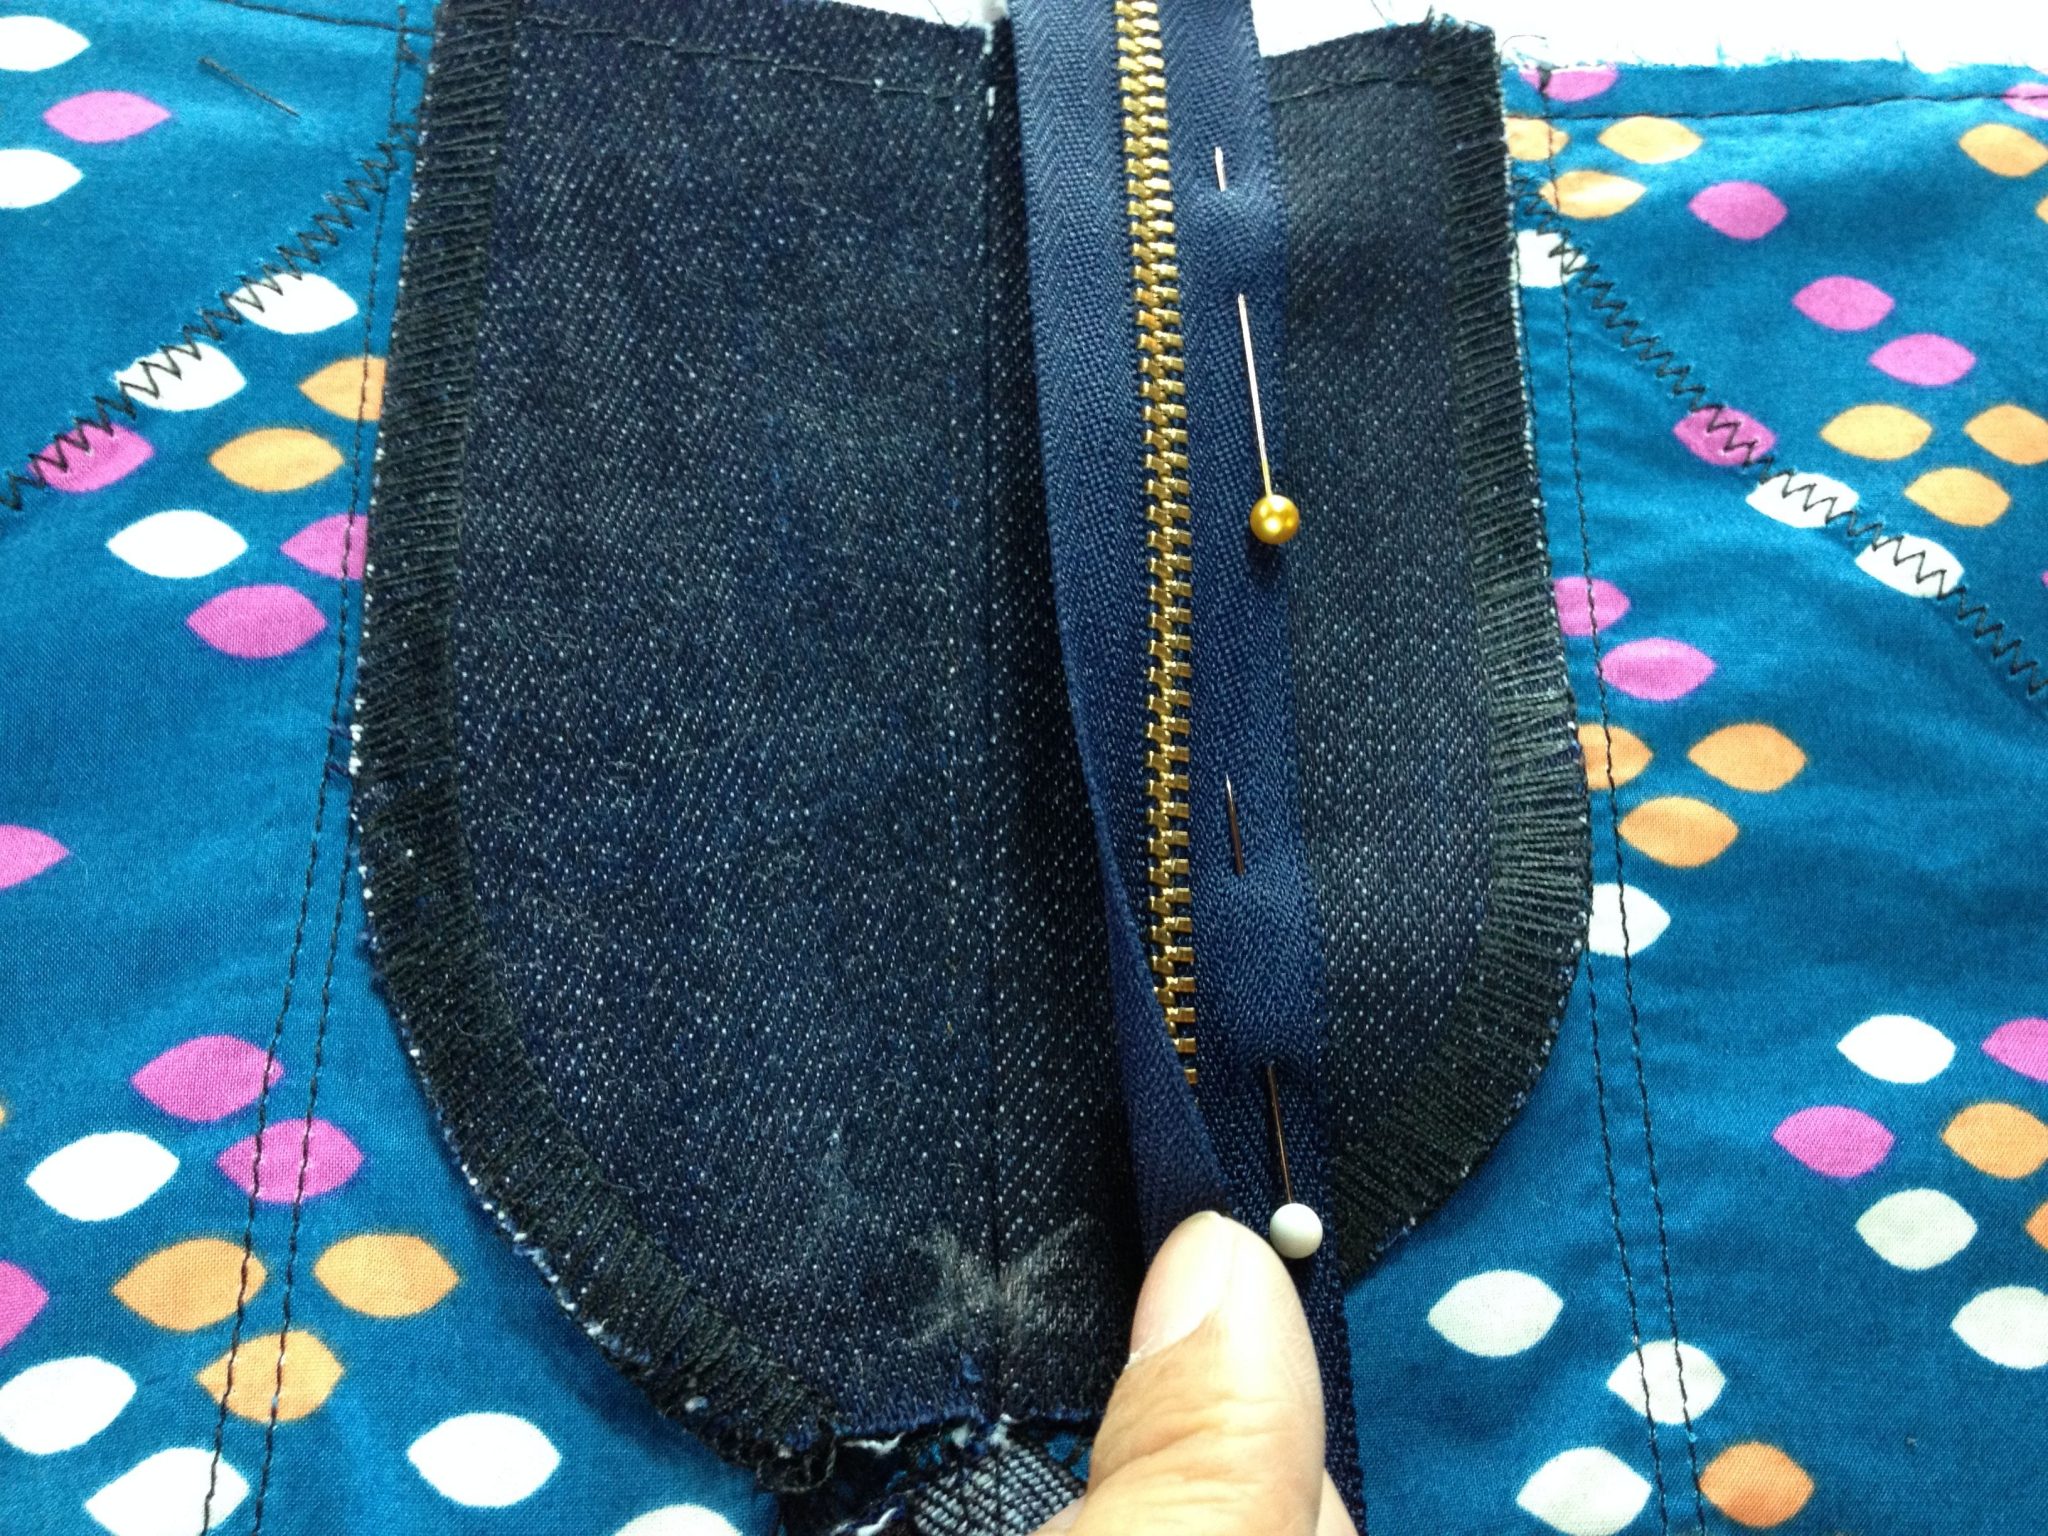
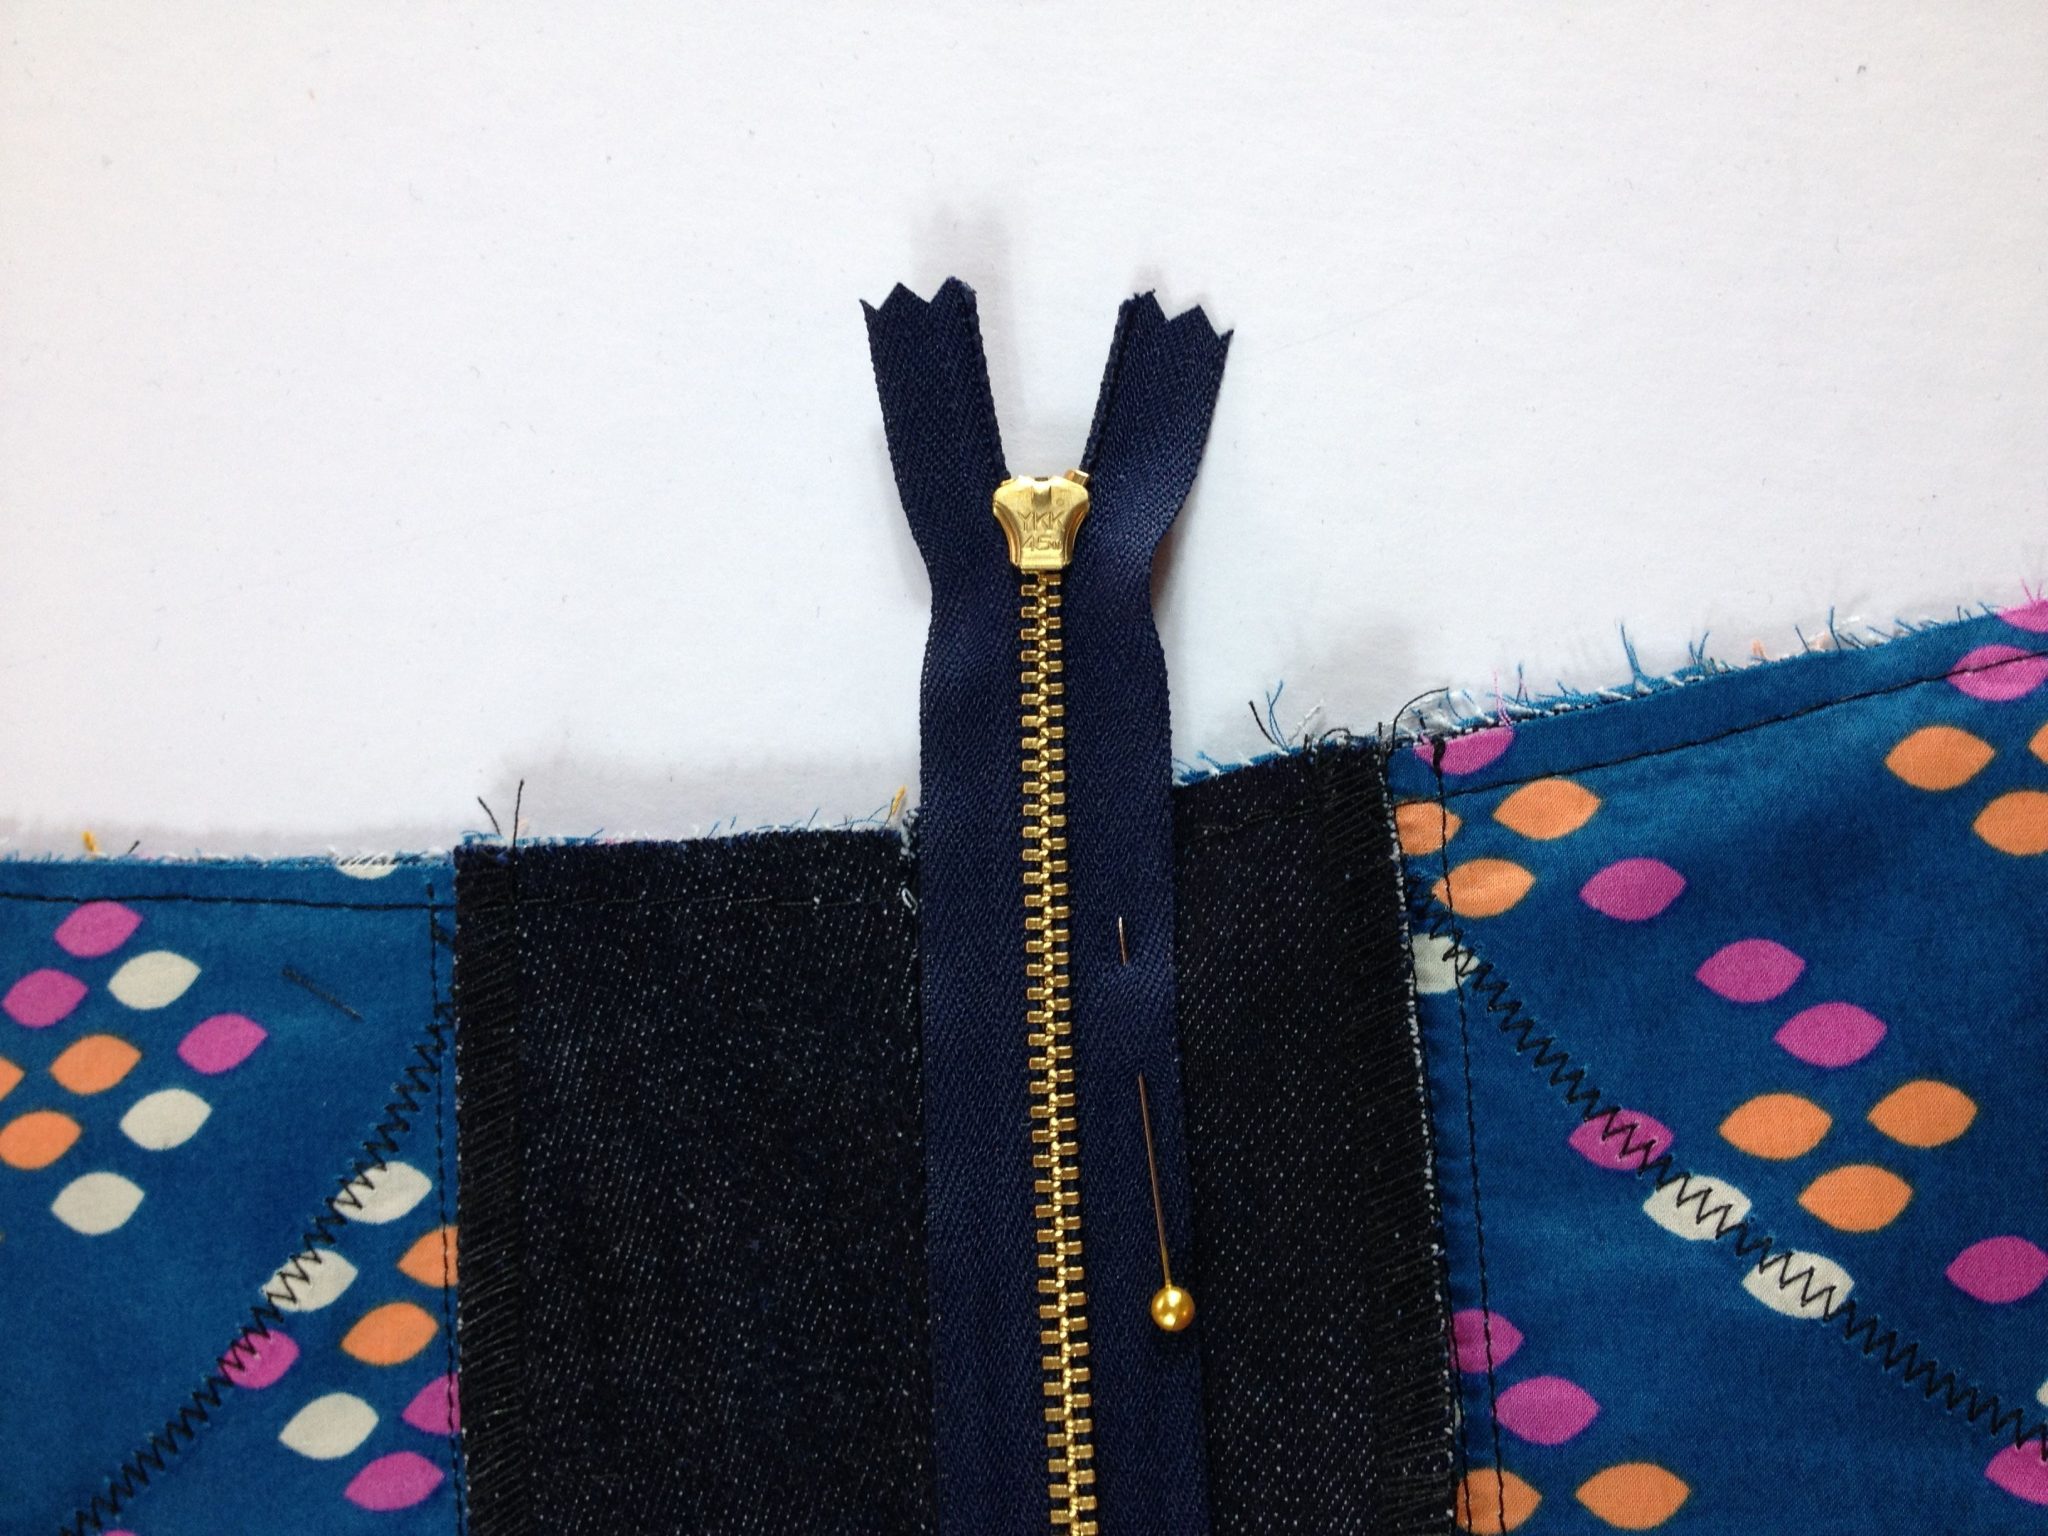
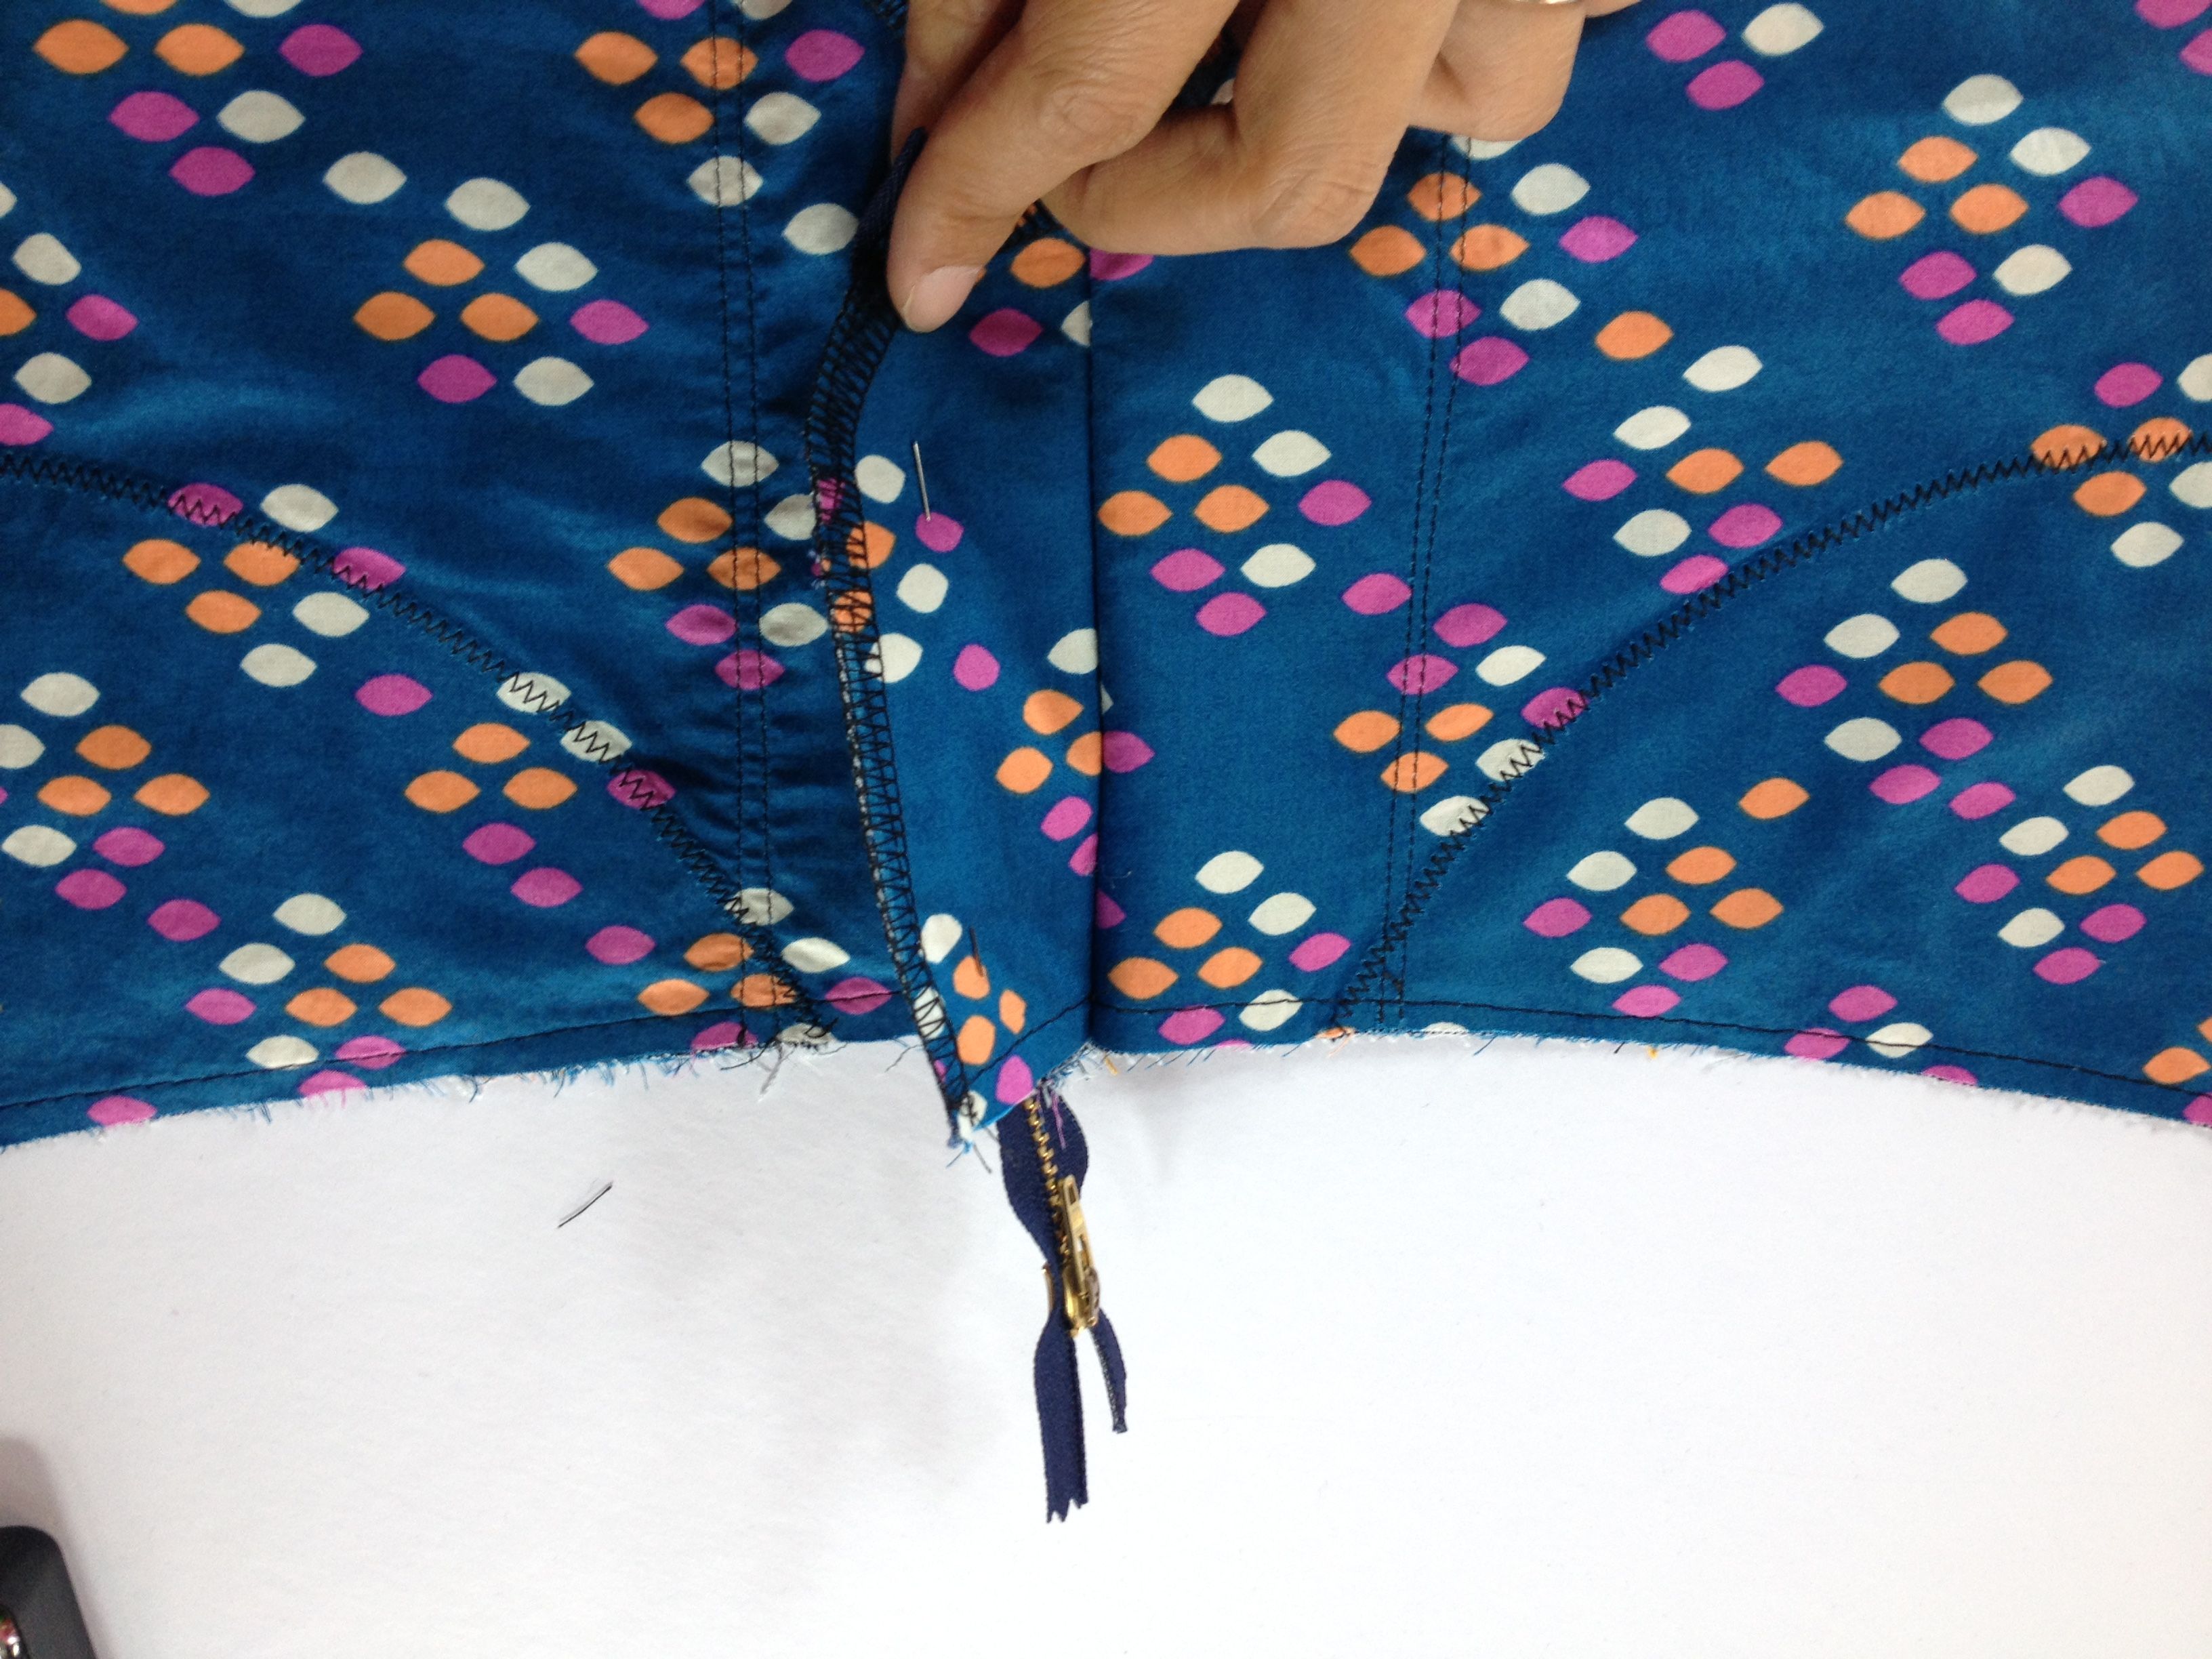
- Go back to the wrong side. Place the zipper with its left tape edge aligned with the center front seam. The bottom stop of the zipper should be at the same level as the circle marking. Only pin the zipper tape to the fly, not through the front. Notice that the zipper faces down!

The left edge of the zipper tape is aligned with the center front seam.
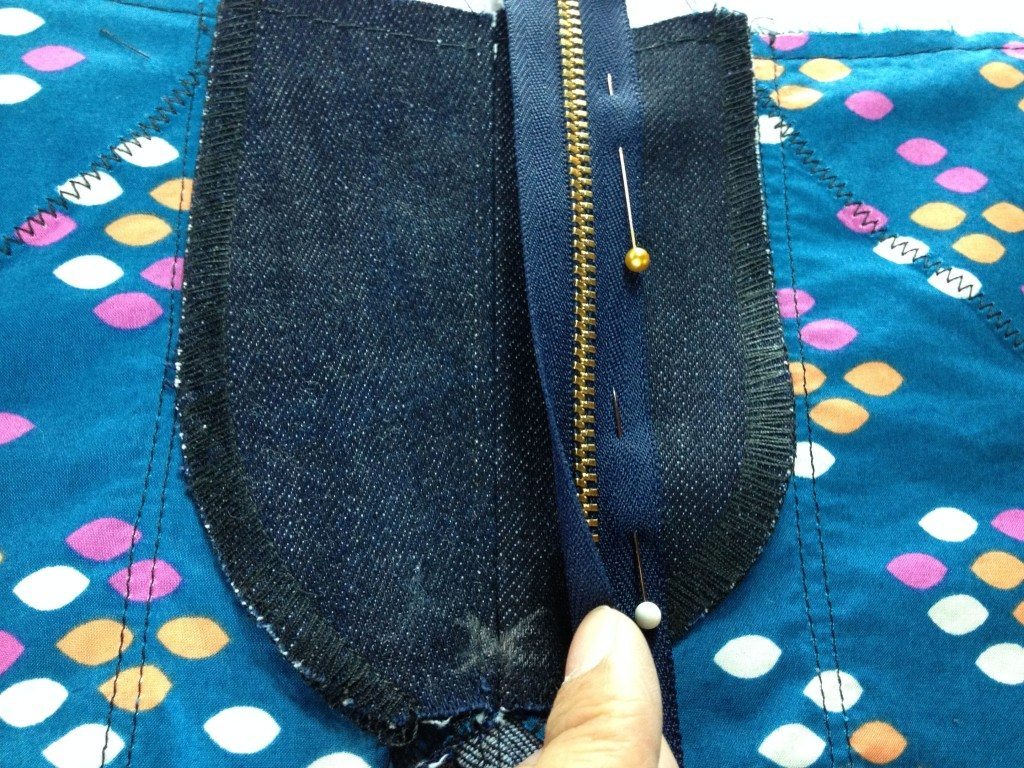
Aligned with the center front
Only pin the zipper to the fly, but not through the front

The zipper faces DOWN
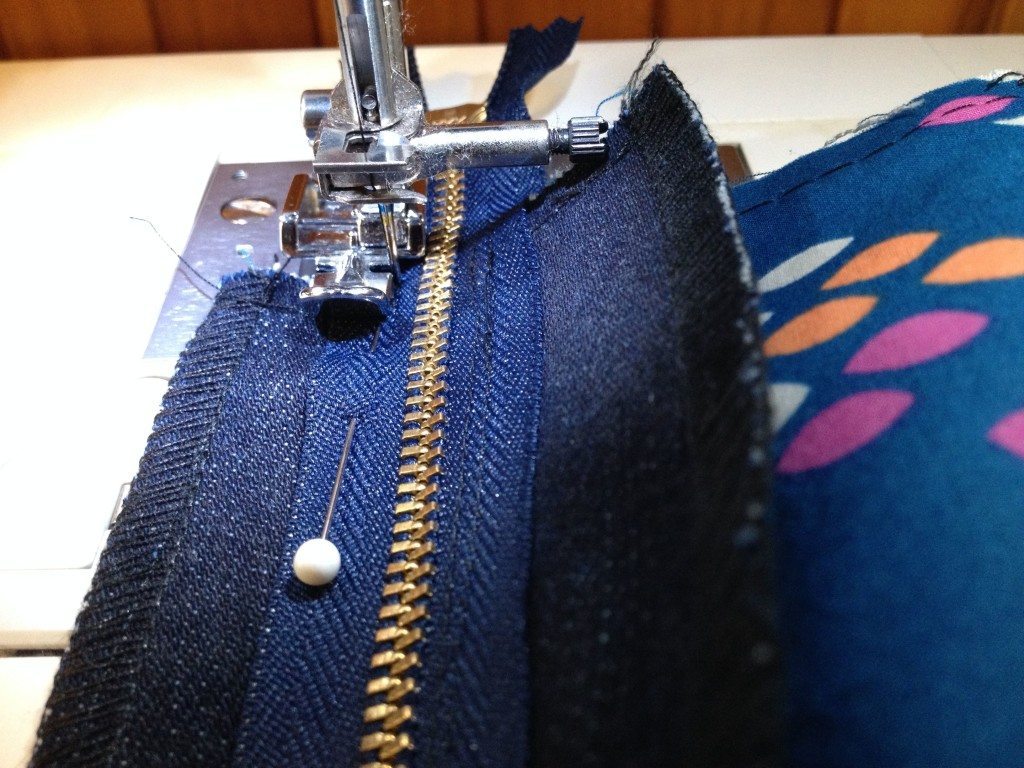
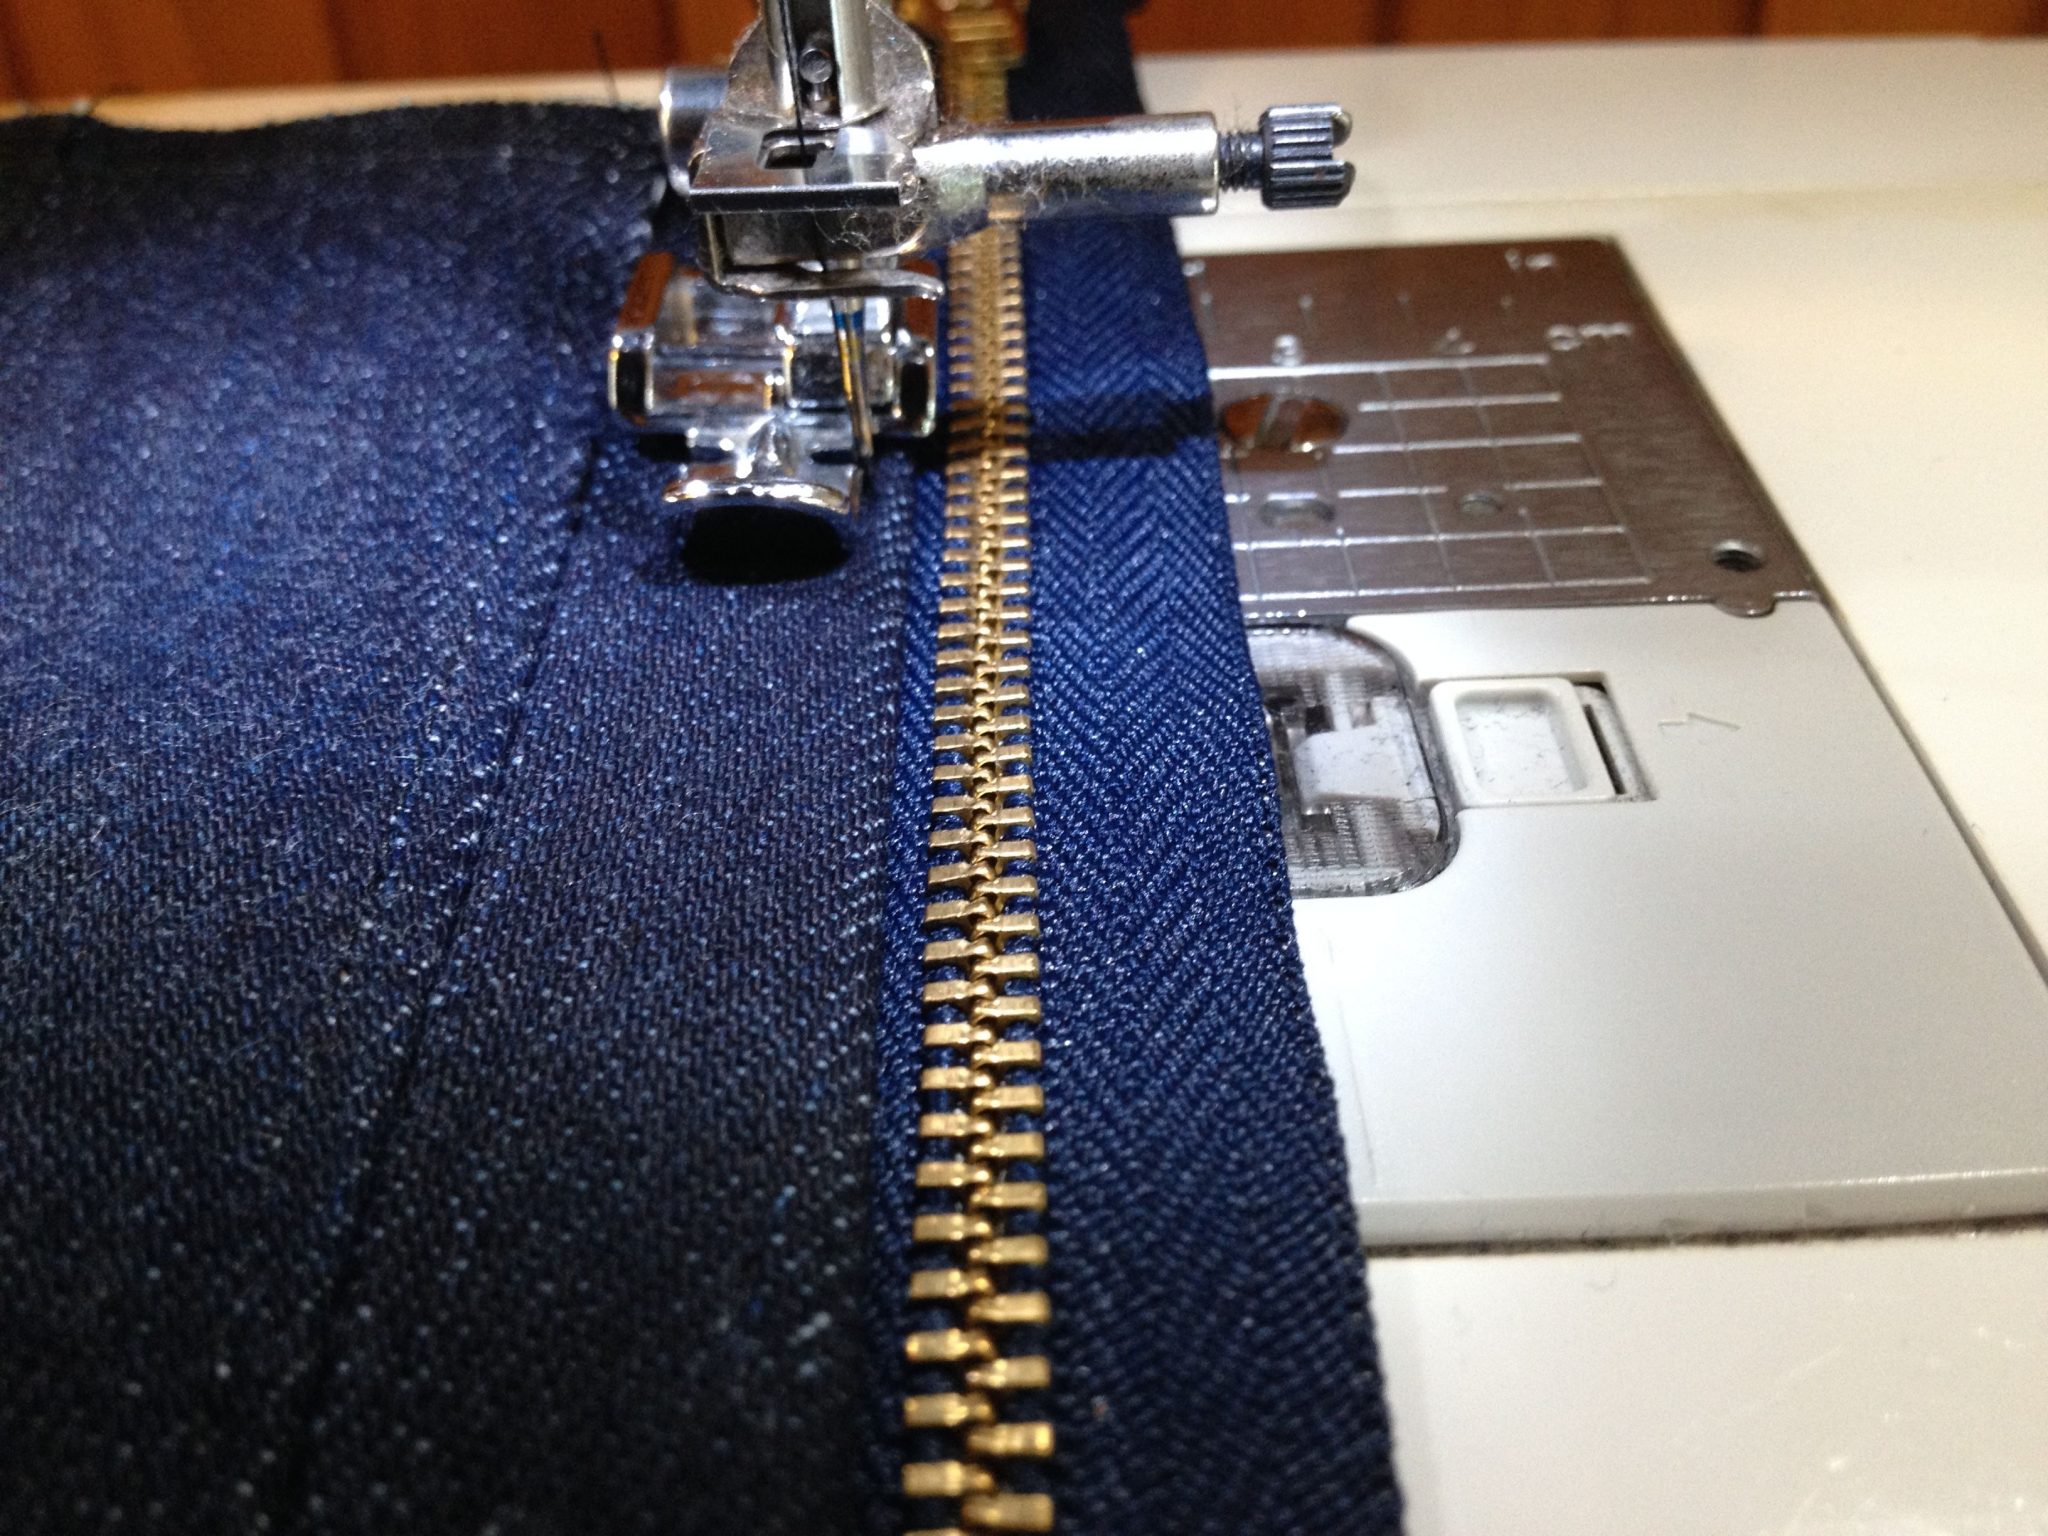
- Stitch 1/8″ (3 mm) to the right of the zipper teeth.

Stitch on the right of the zipper teeth
Stitched!
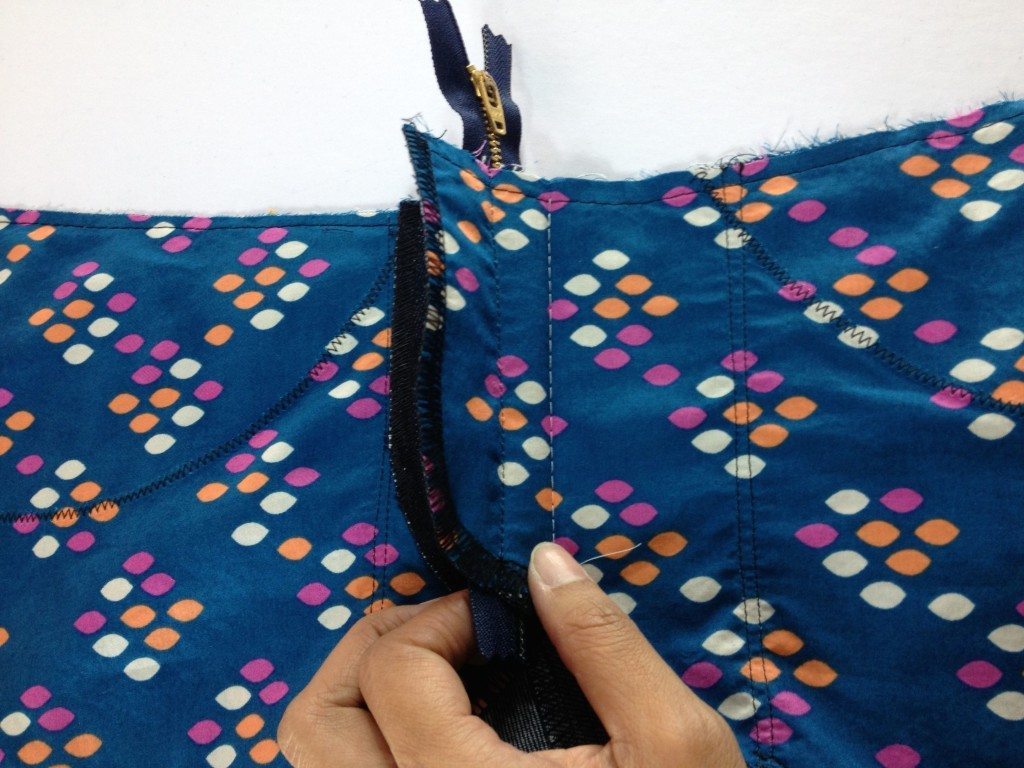
Remember only through the fly, not through the front, right?
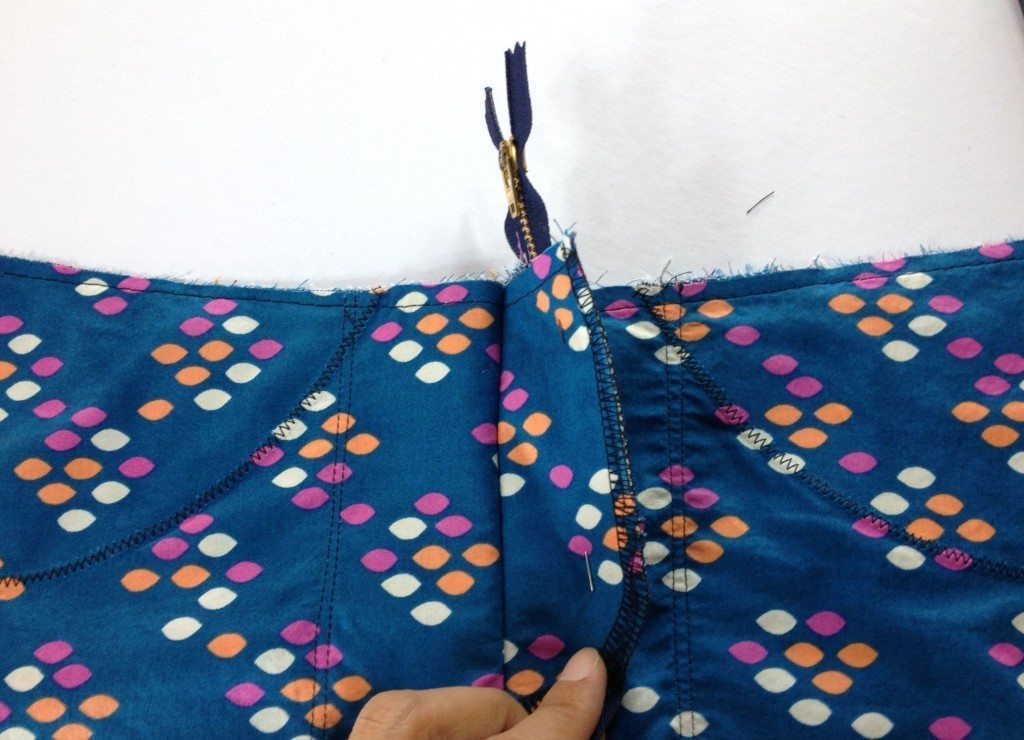
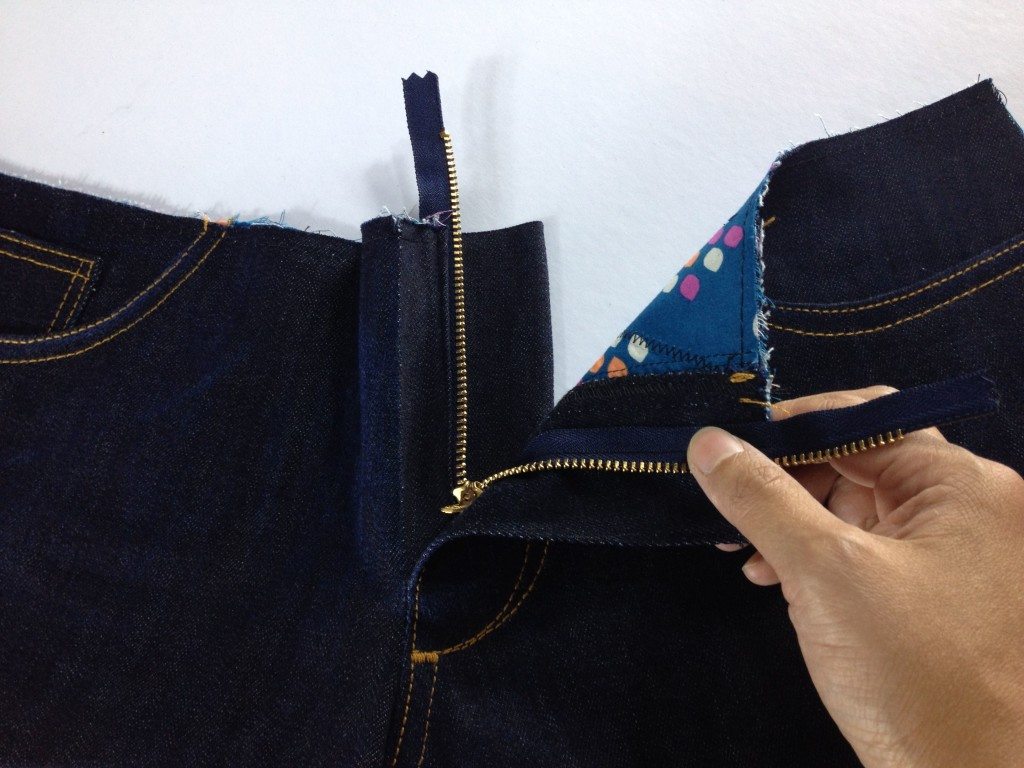
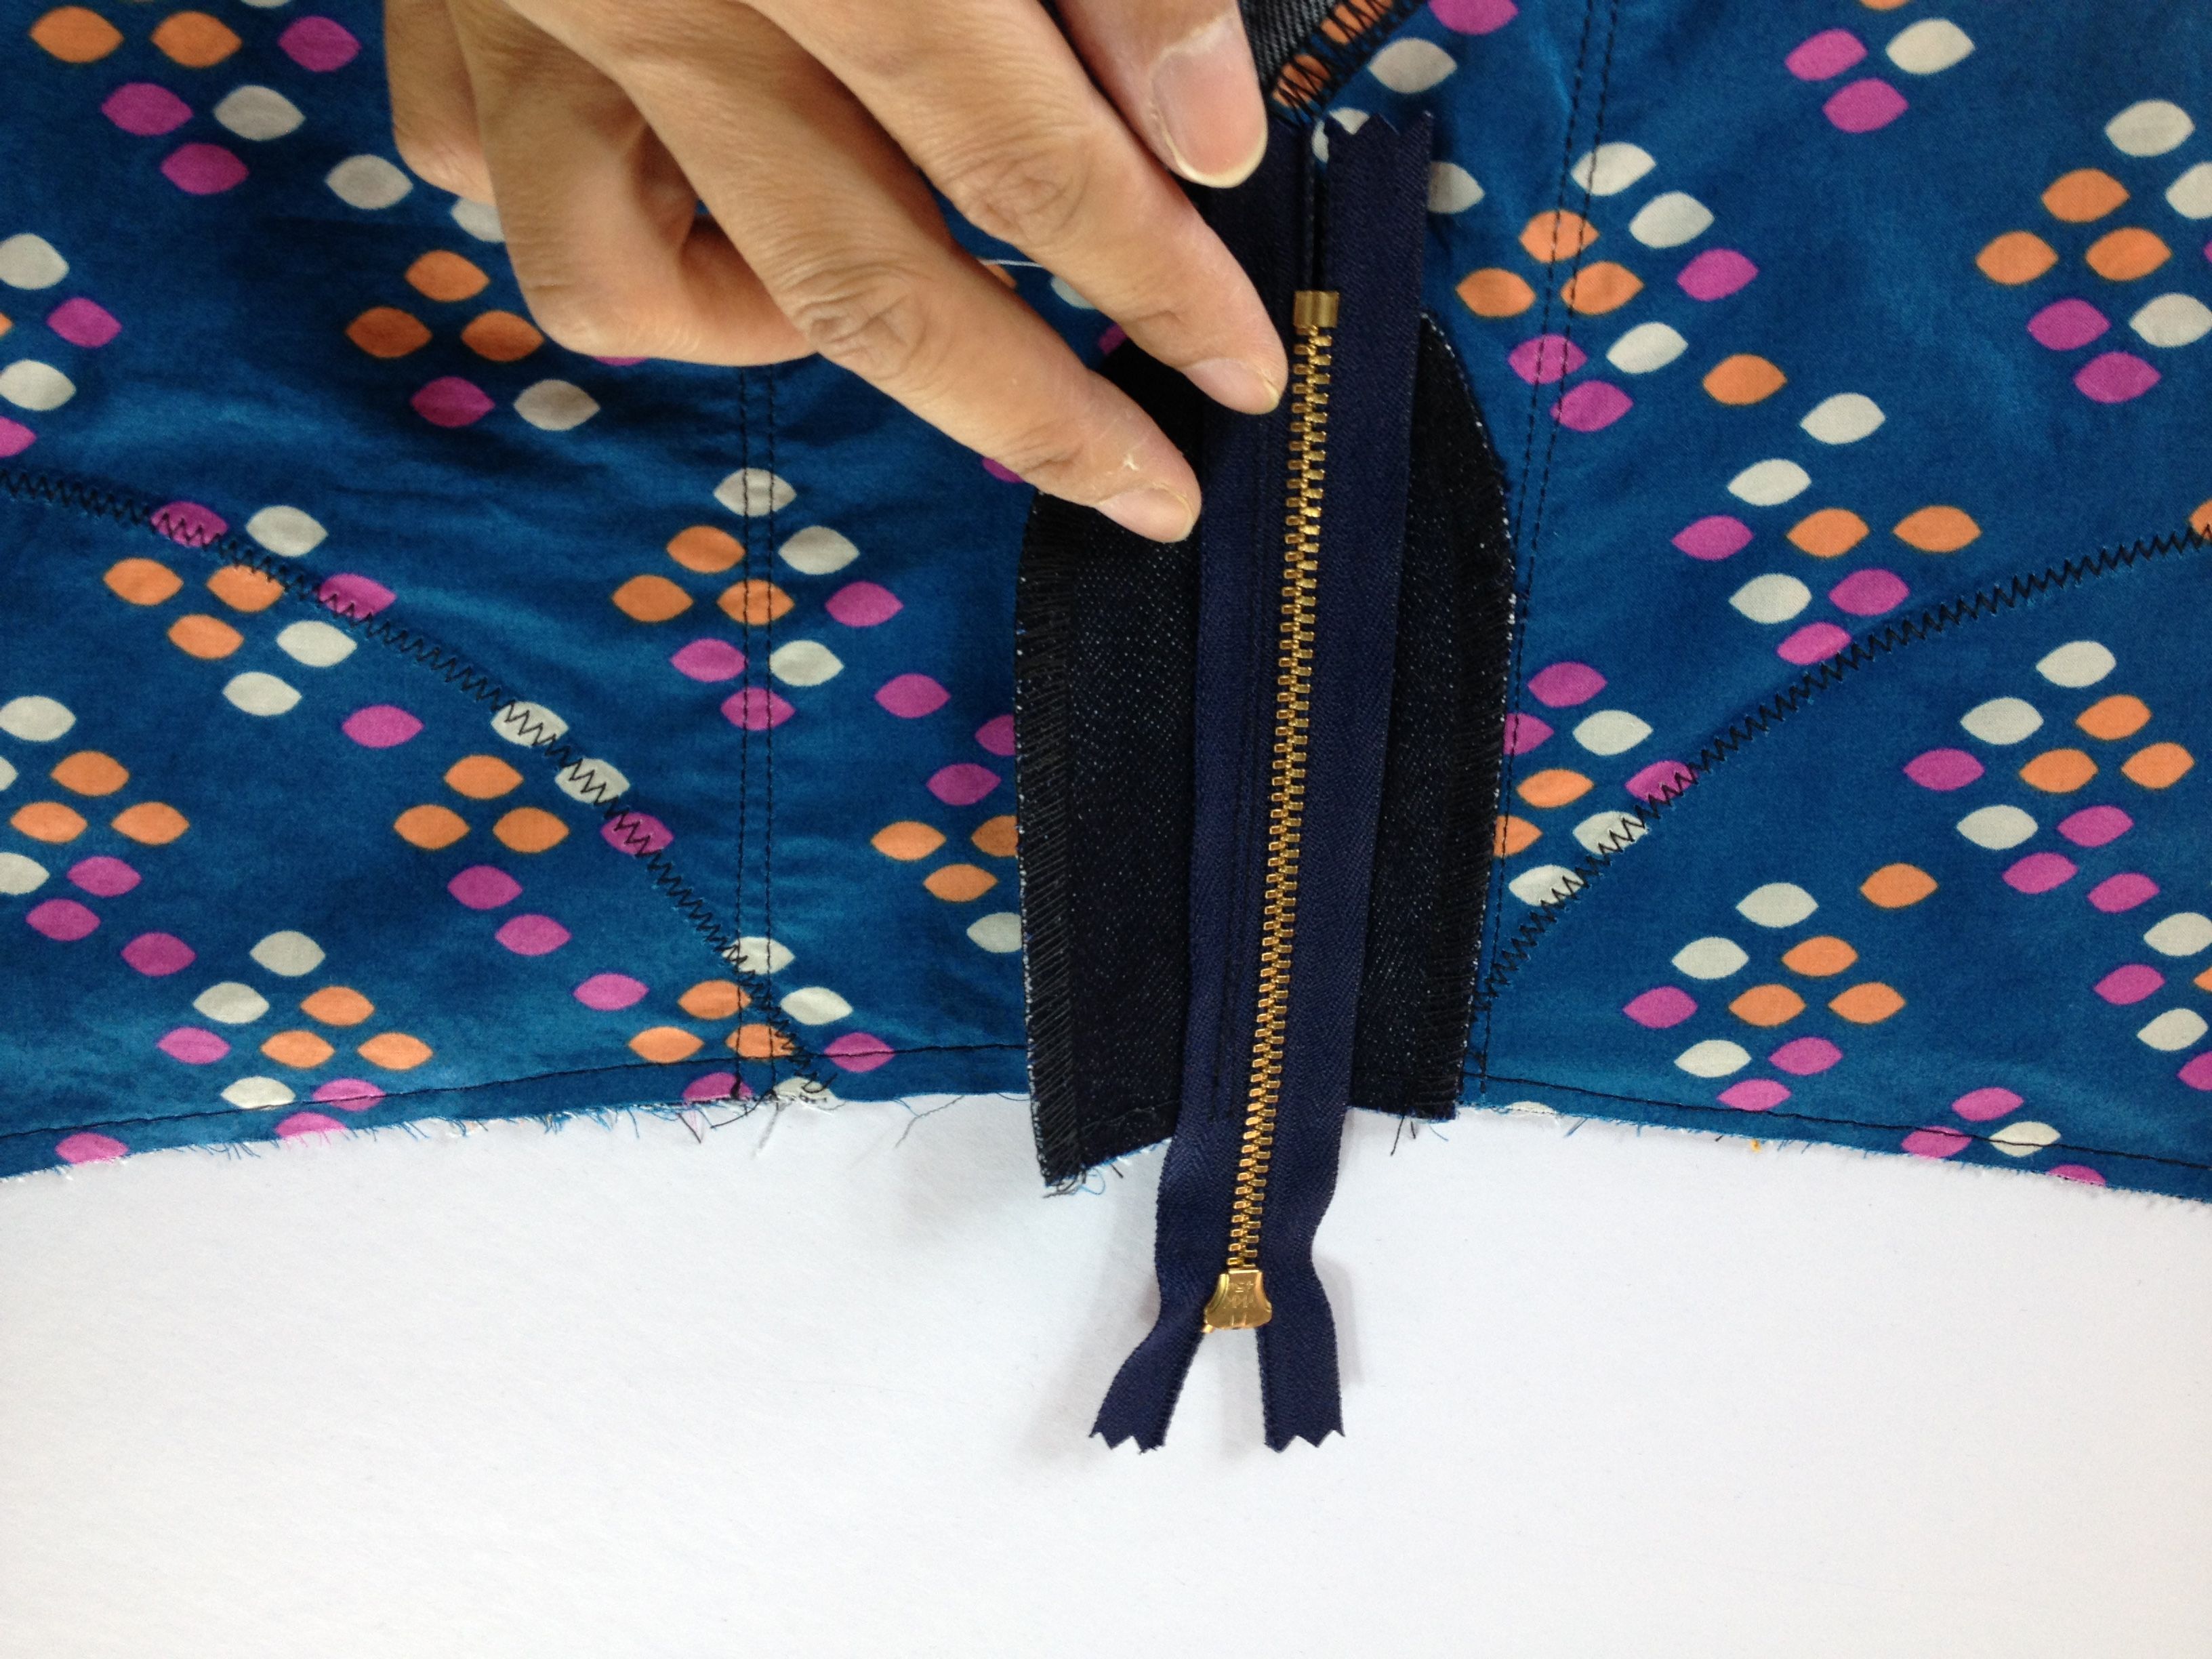
- Fold the Front out of the way and expose the fly only. Flip the zipper so now it faces up. Stitch a line to the left of the zipper teeth.
Get the Front out of the way and the zipper pull faces UP.

Stitch on the left of the zipper teeth
Stitched!
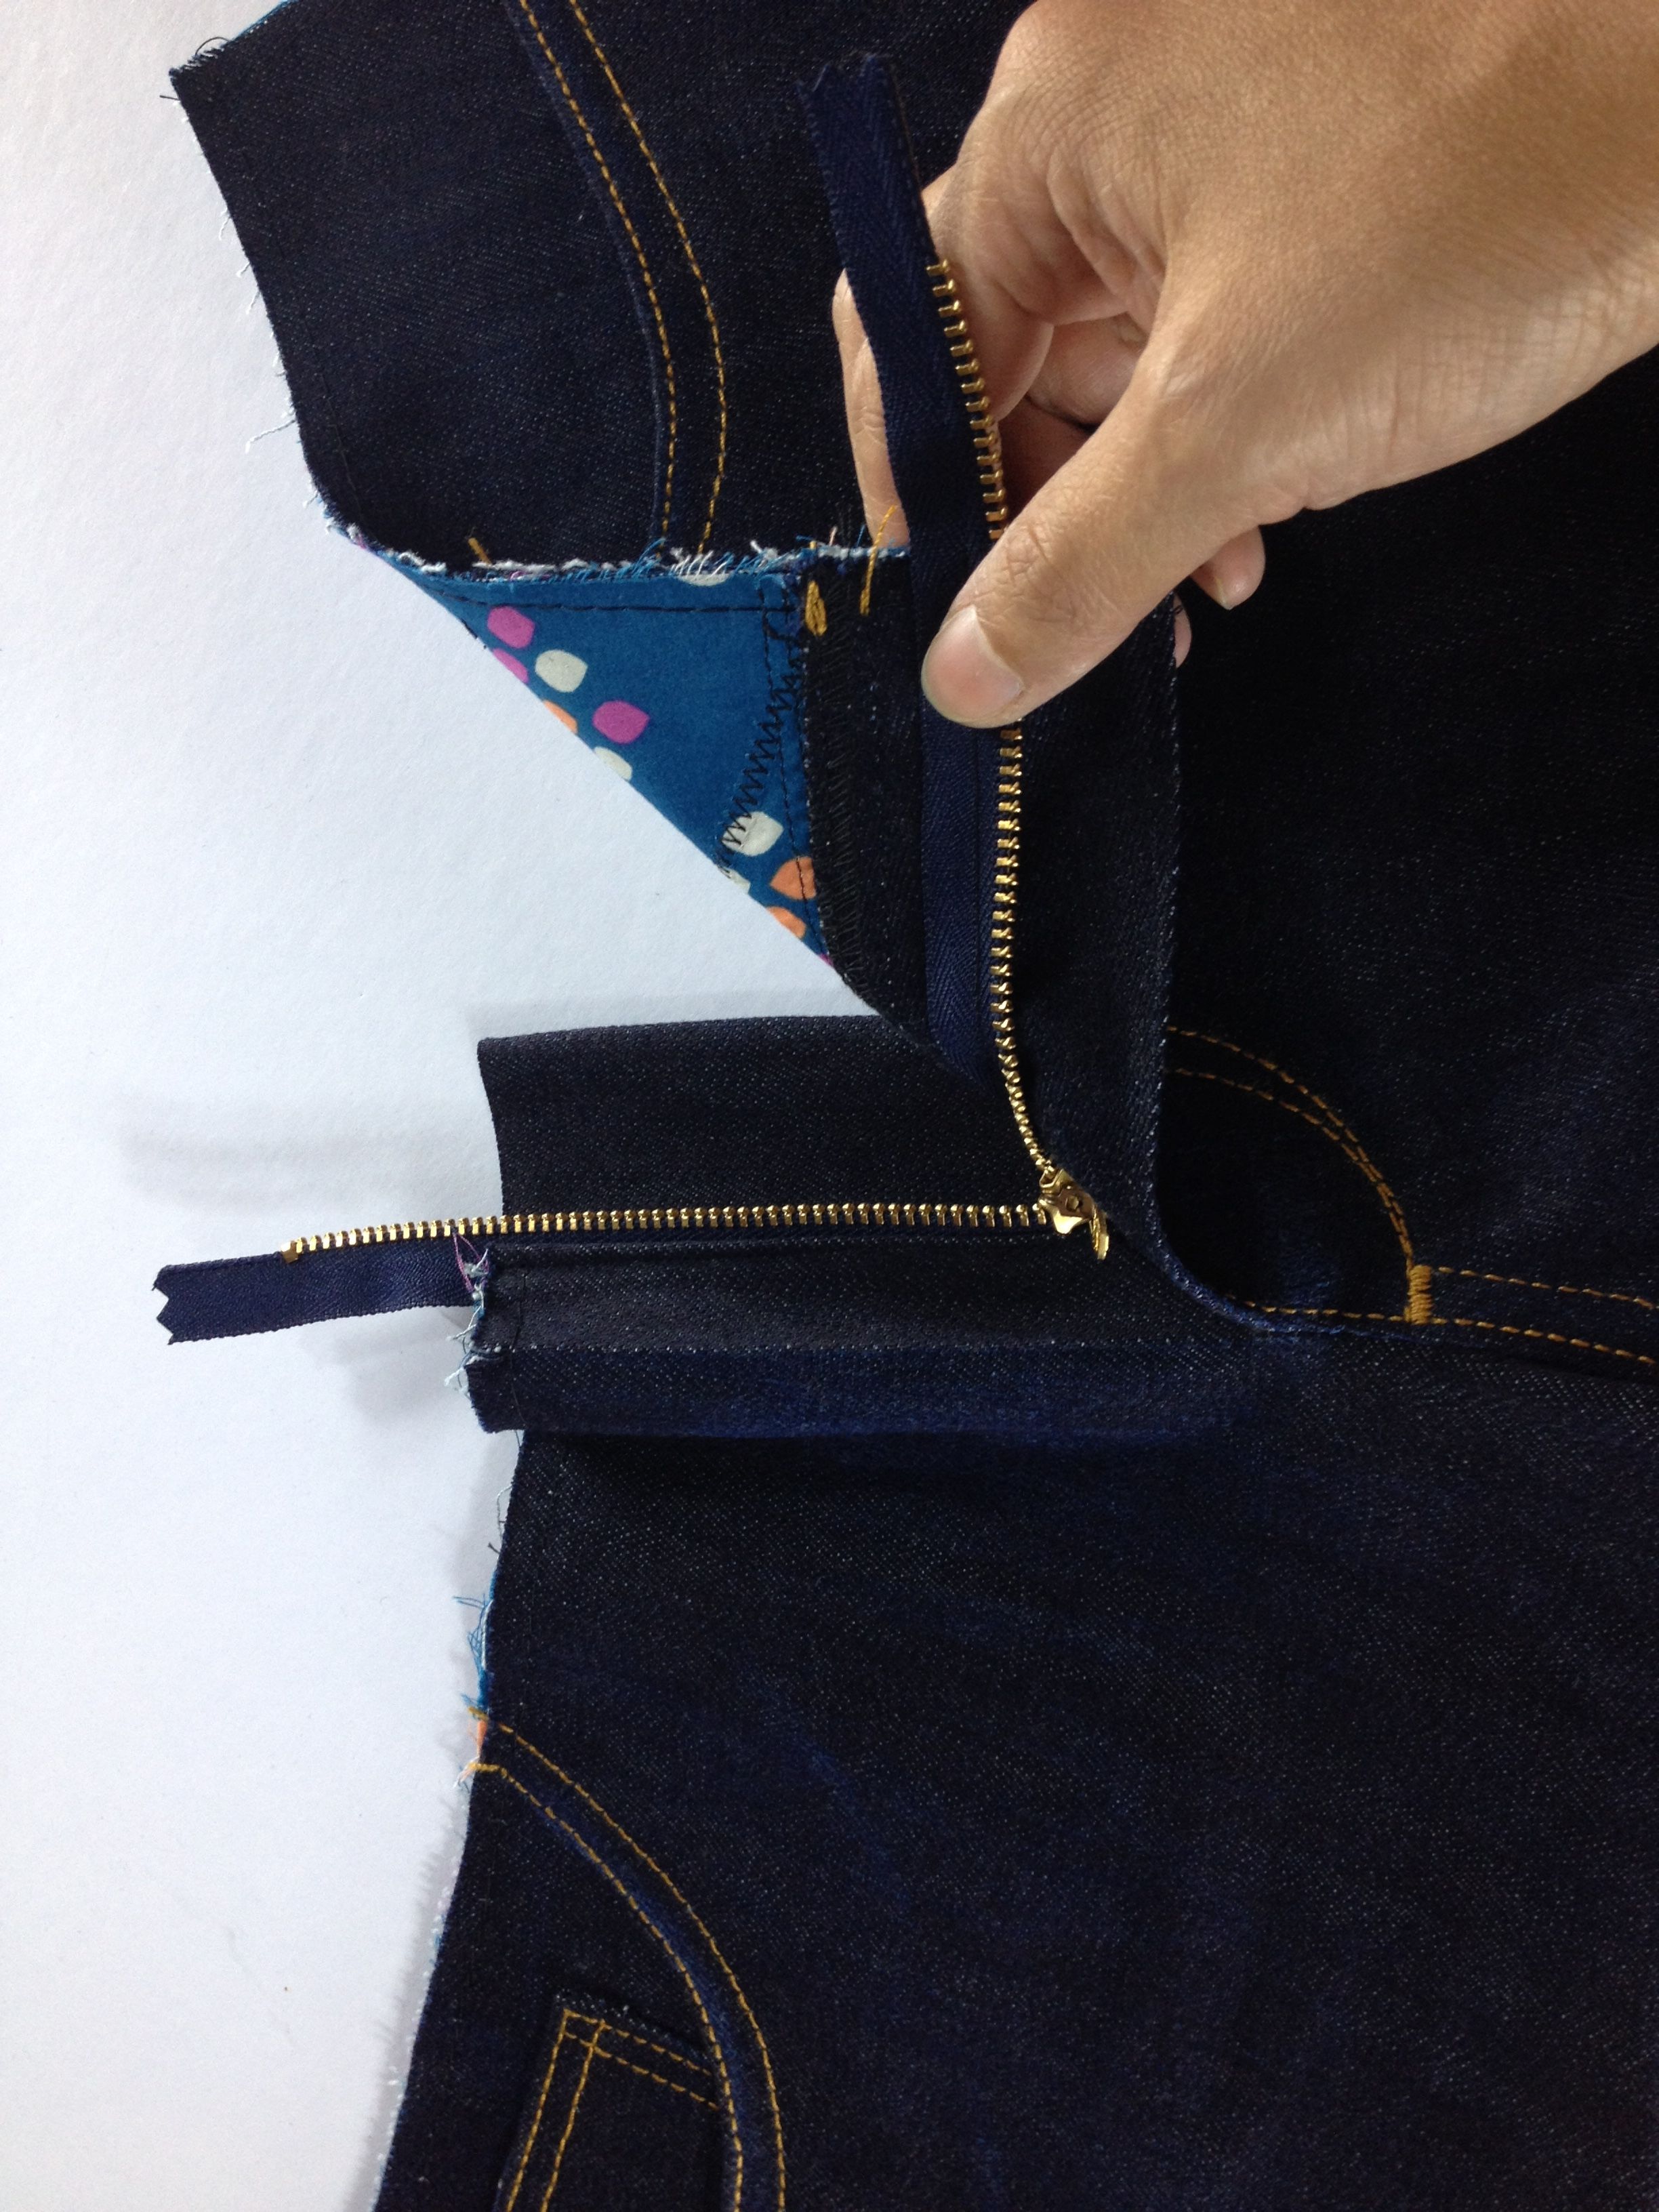
- Open the Front back again so you see both pocket bags. Flip the zipper with the fly toward the left side. Yow now see the back of the zipper again. Pin the left zipper tape to the left fly – only the left fly, not through the Front!
Flip the zipper to the left
Pin to the left fly
Not through the Front though!
- Let’s stitch a line left of the zipper teeth, through the fly, but not through the Front.
Stitch on the left of the zipper teeth

Stitched! You see there are a total of 3 stitched lines visible.
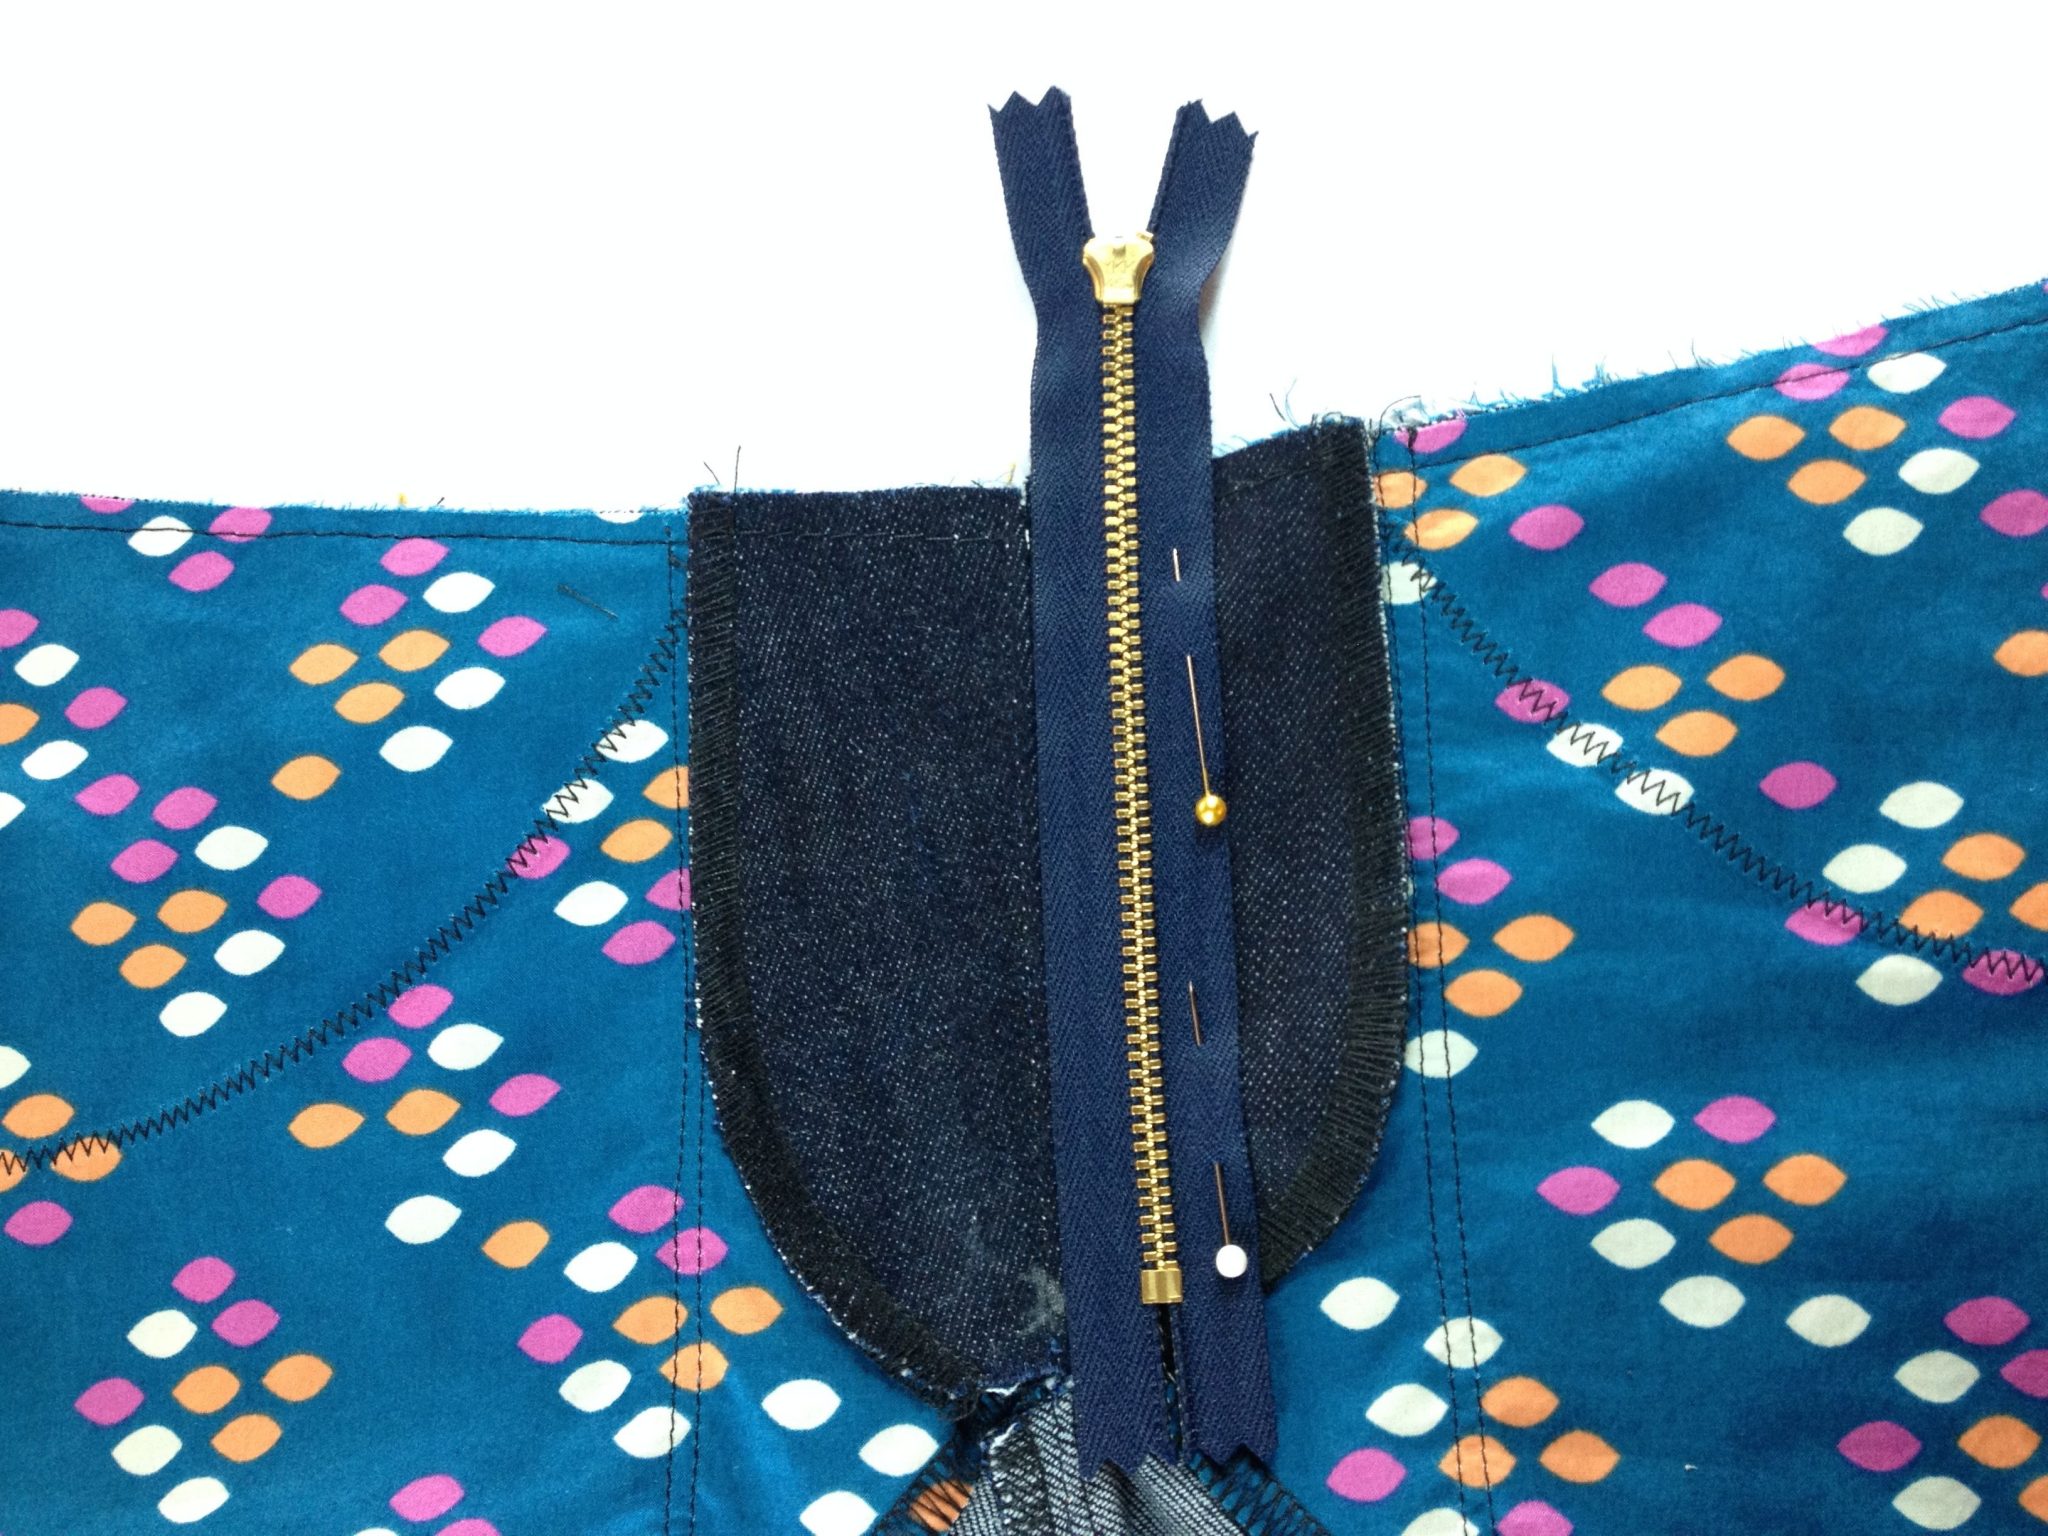
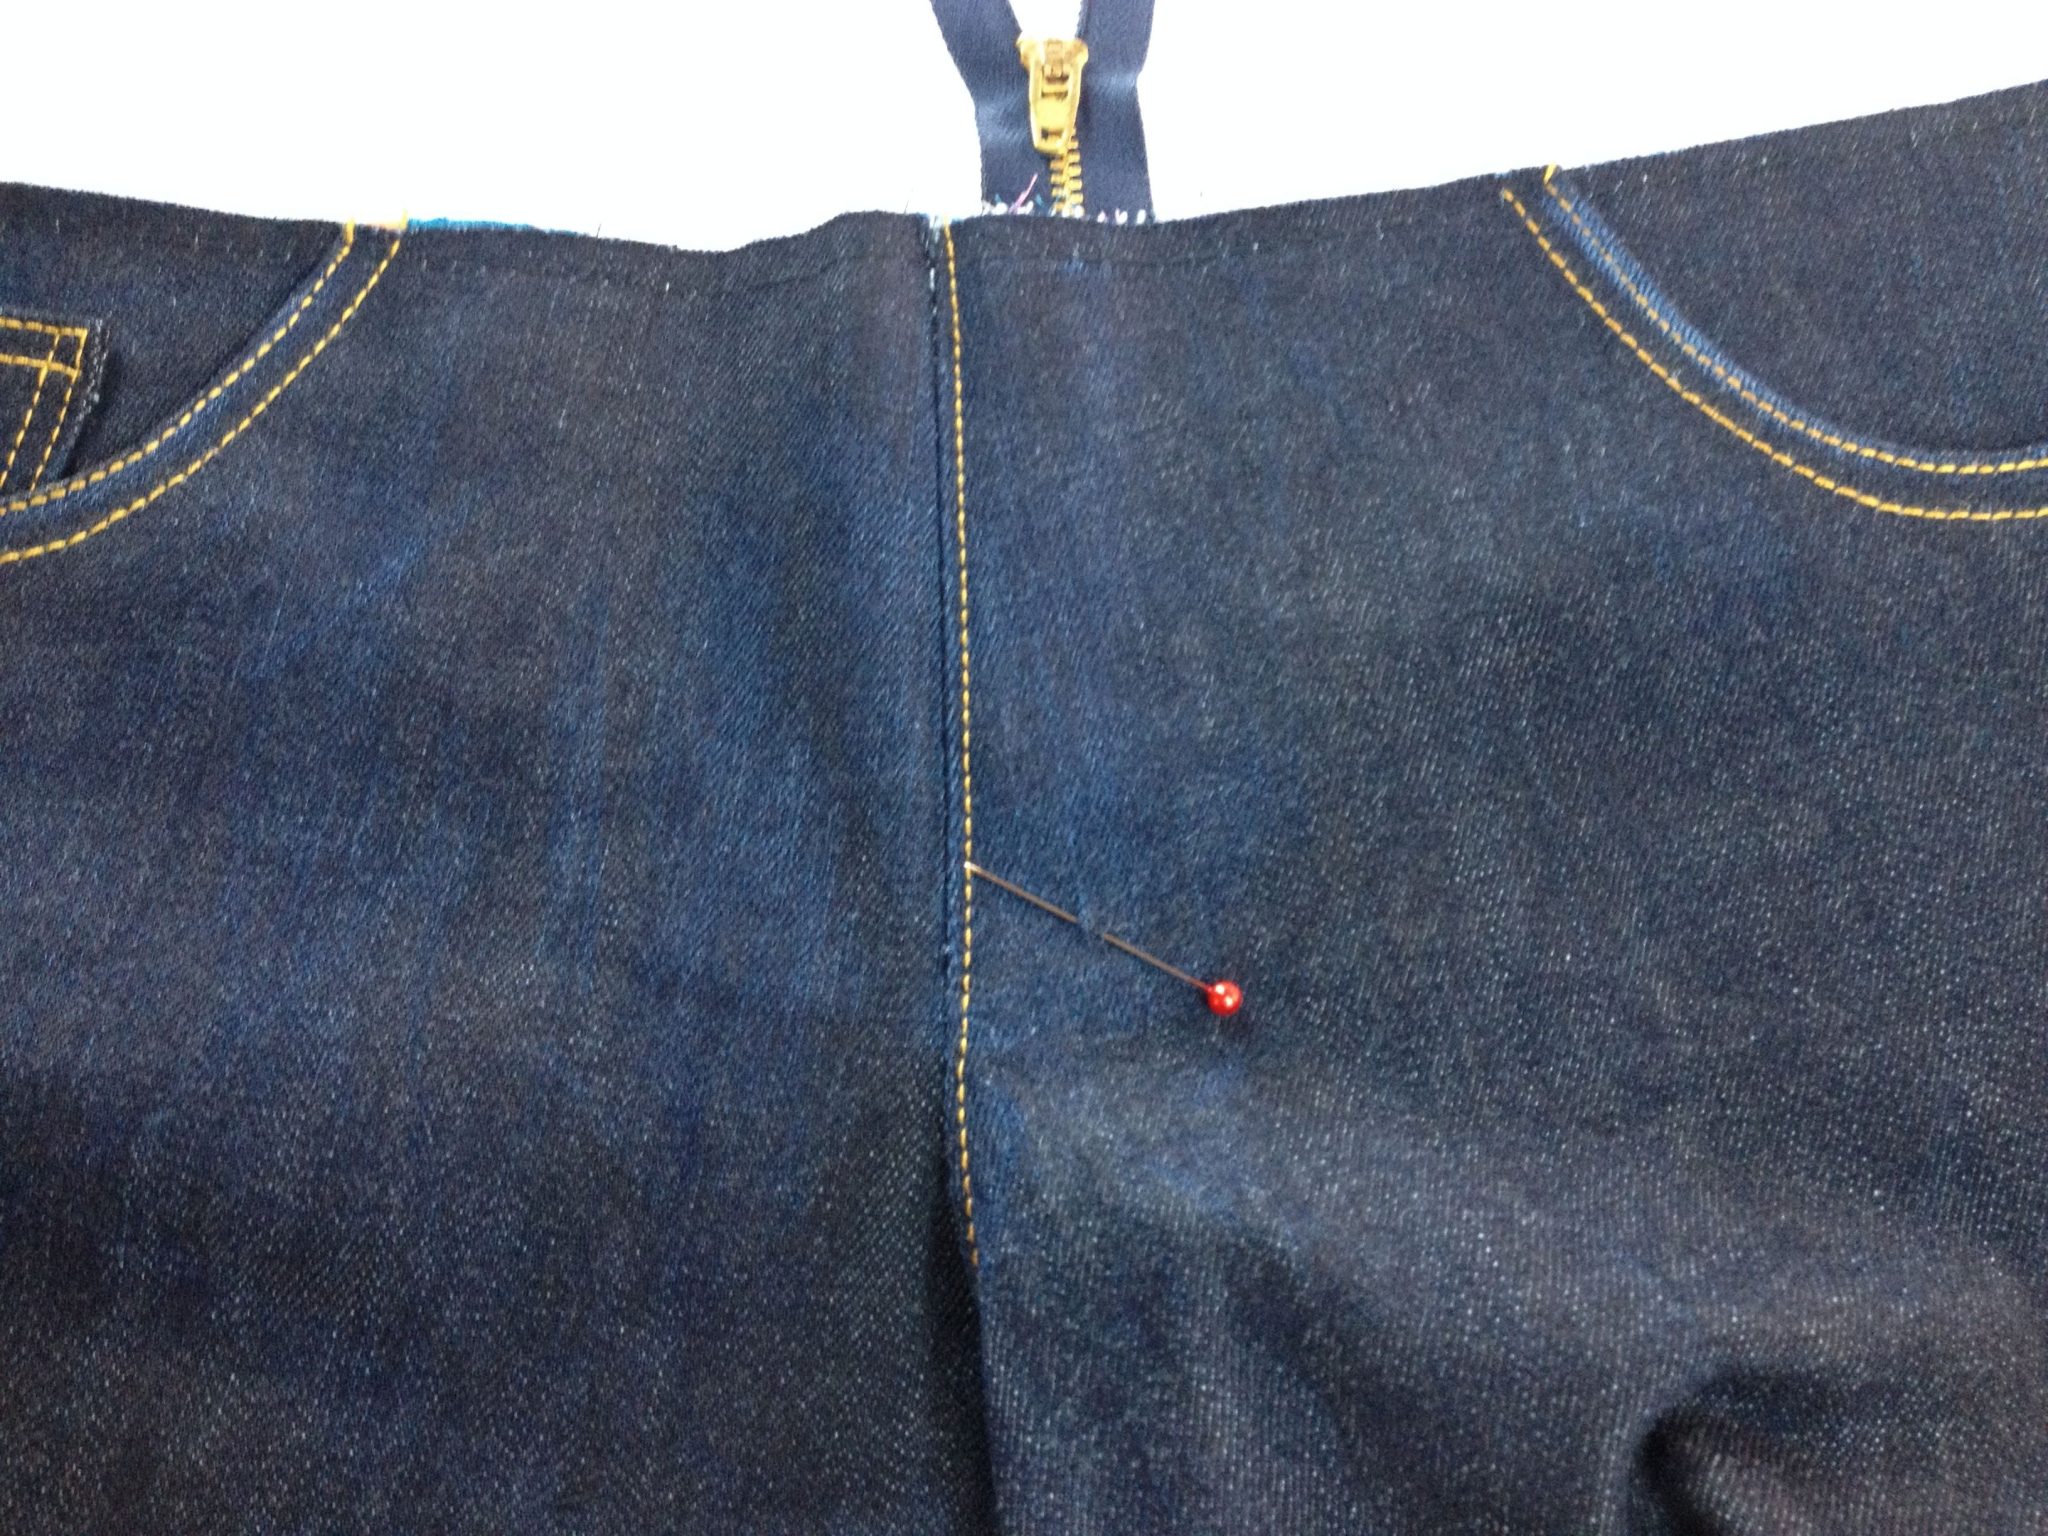
- Turn and let’s work on the right side. Feel for the bottom zipper stop and put a pin there; we want to avoid it when topstitching.
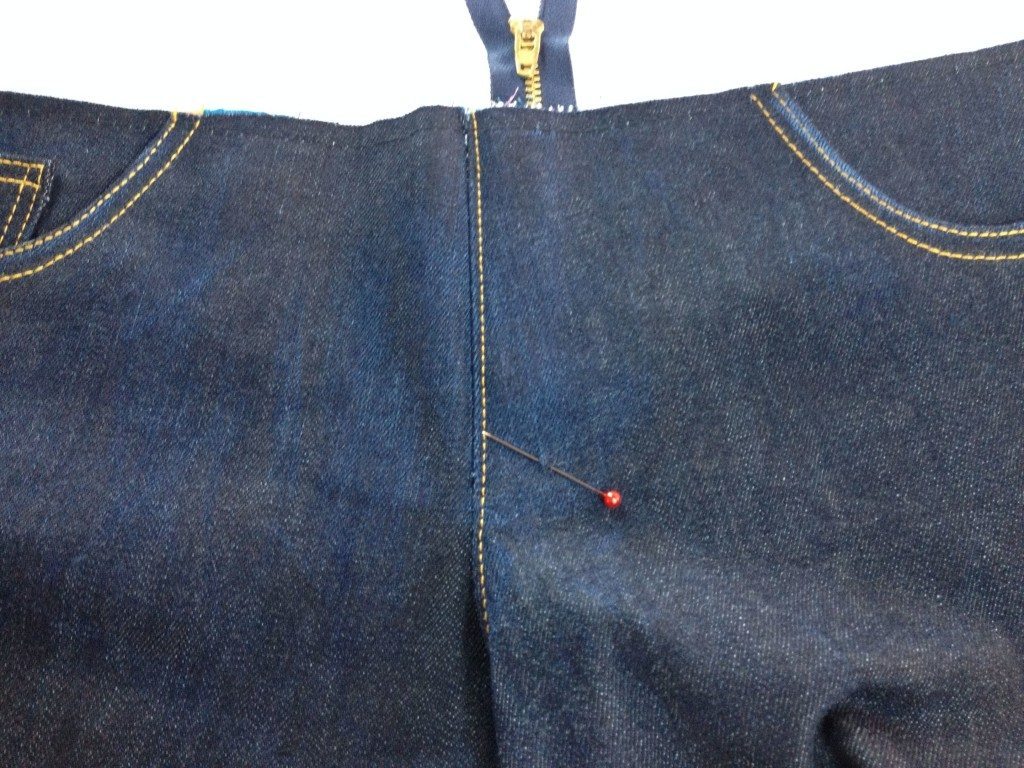
Put a pin where the bottom stop is.
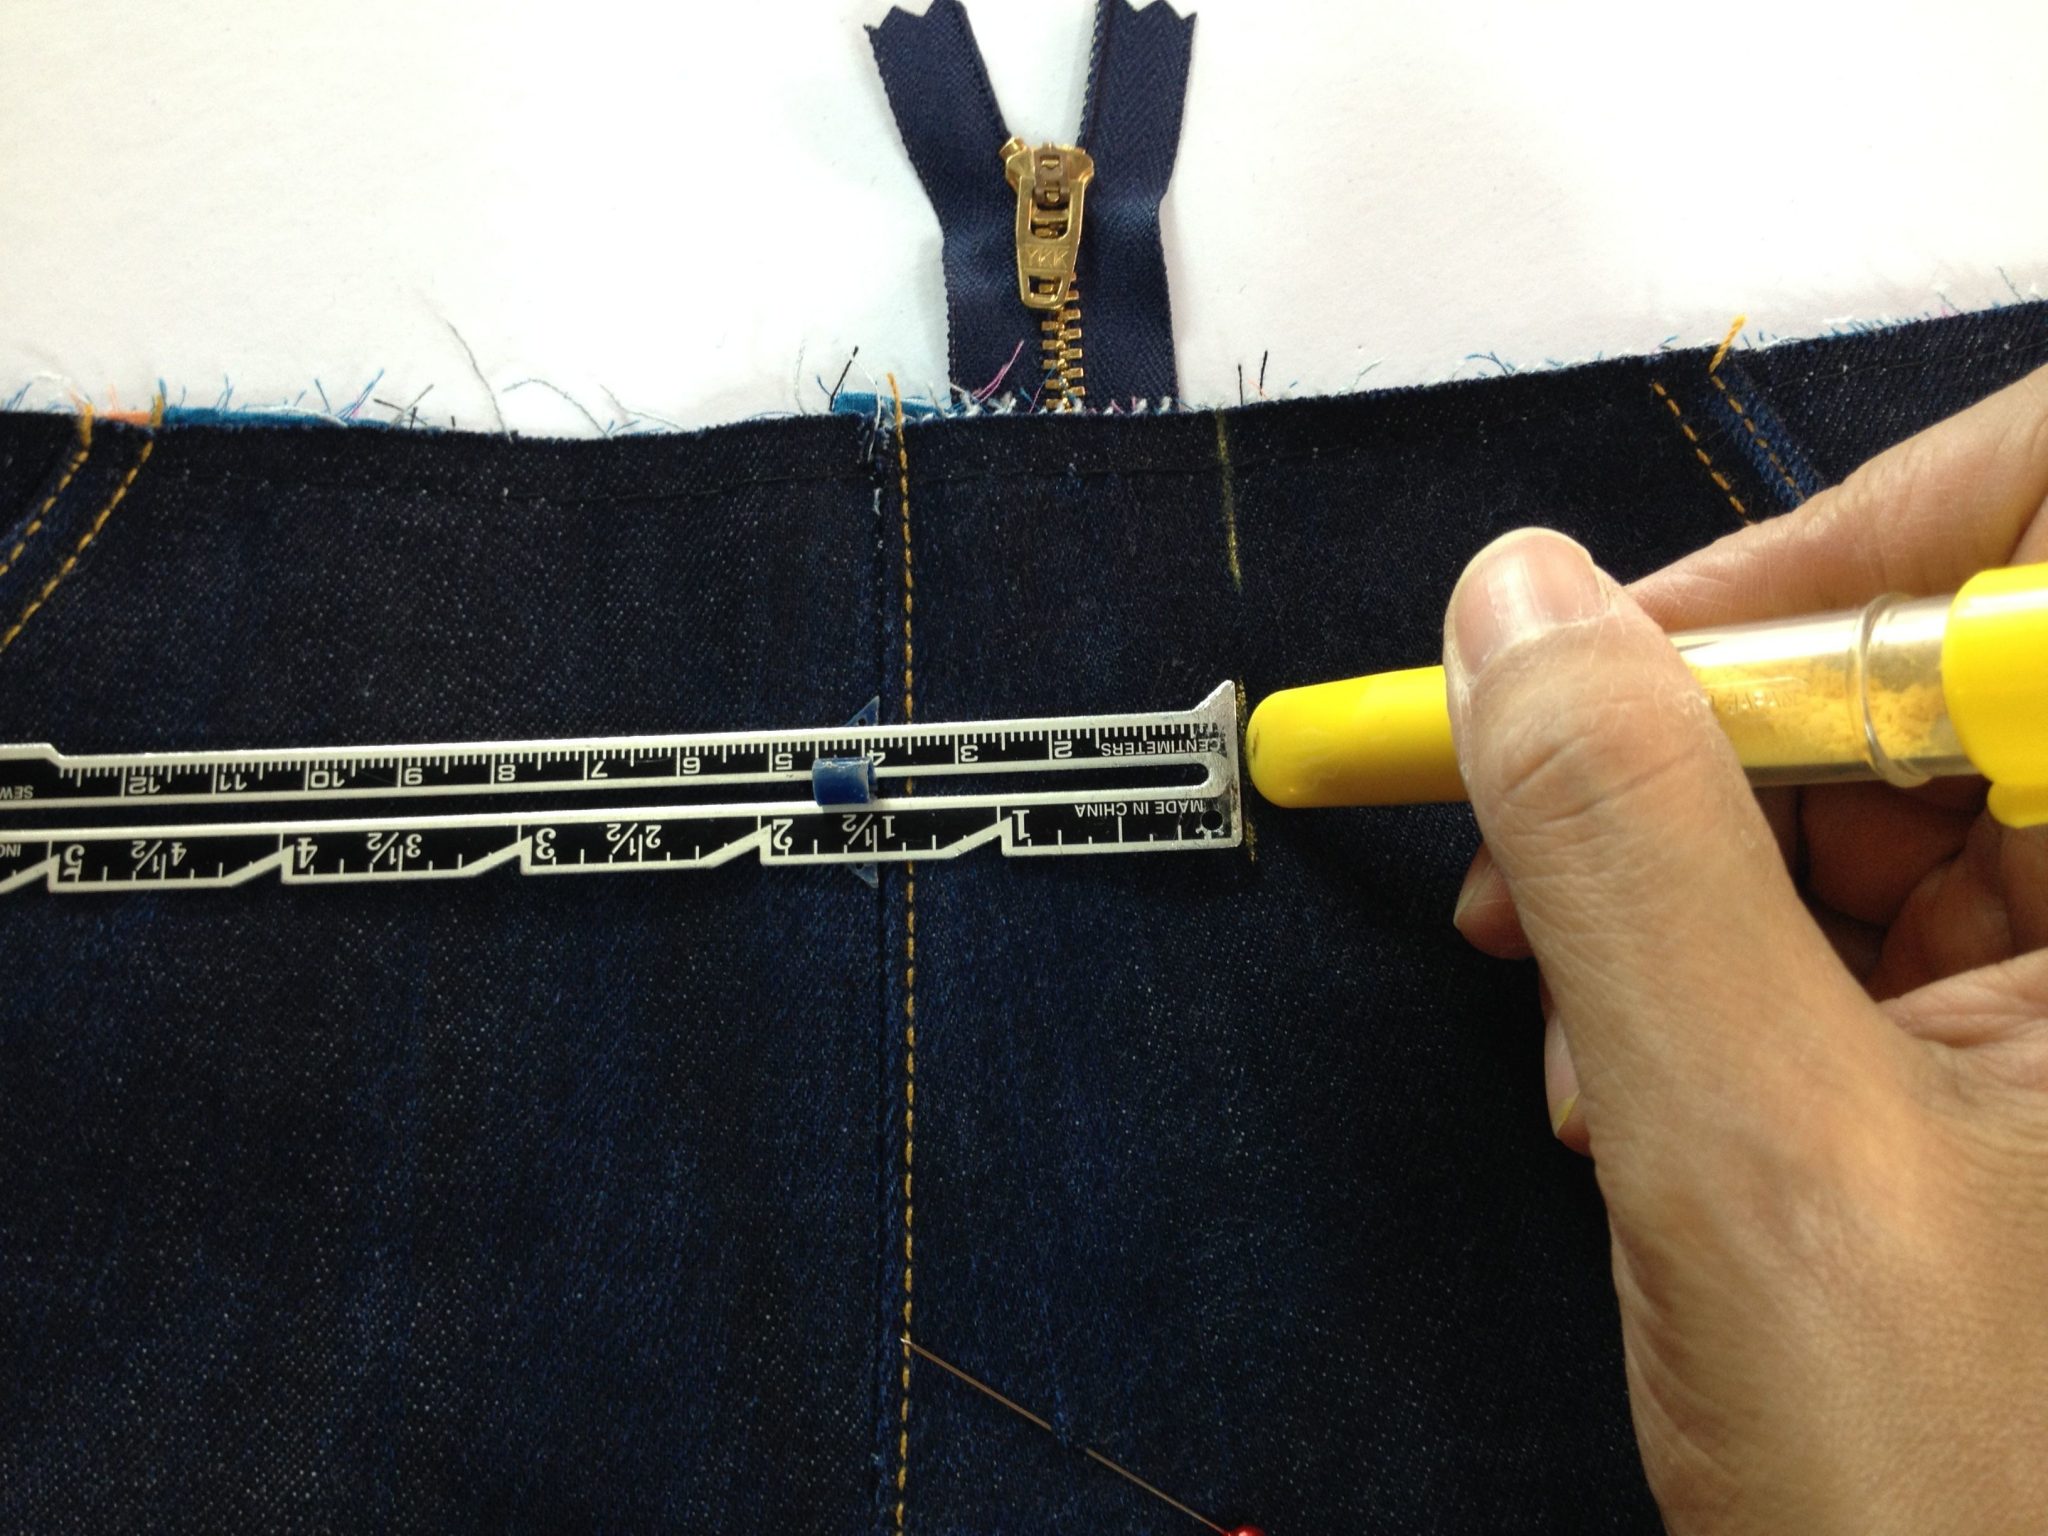
- Let’s mark where we will be topstitching. It’s going to be a 1 1/2″ (3.8 cm) from the center front. Keep going and at the end we are curving it back to the center front. You can use pattern piece 6 as a template to trace the curve if you have trouble free-handing it.
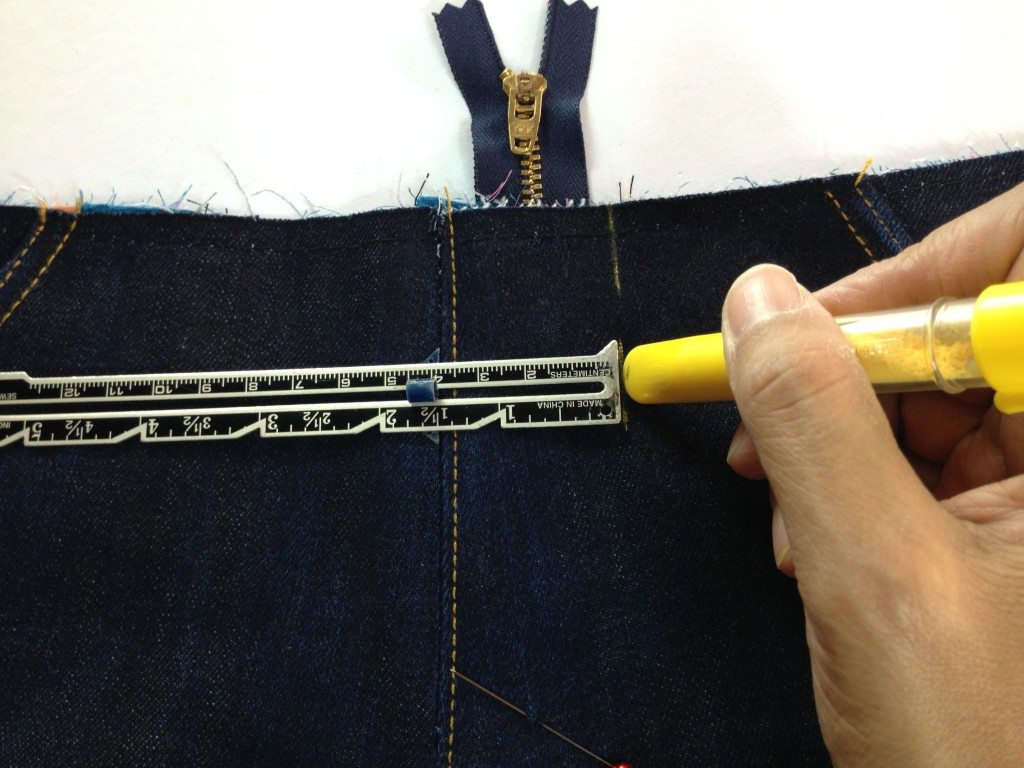
The topstitch will be 1 1/2″ 3.8 cm) from the center front.
Curved to the center front
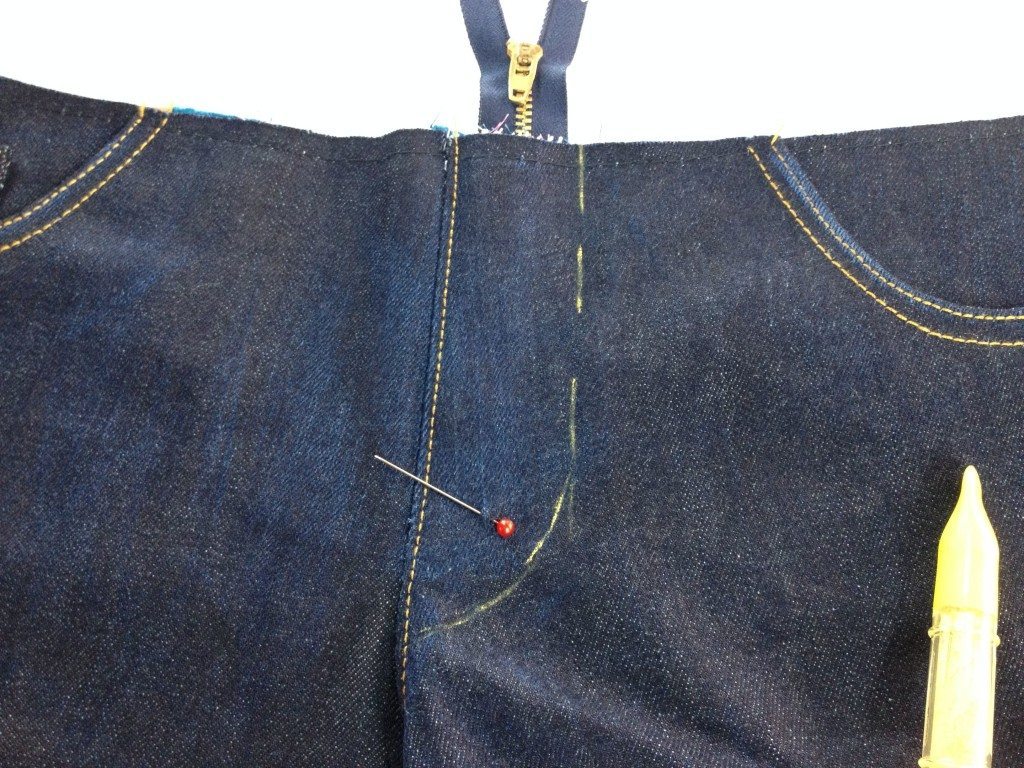
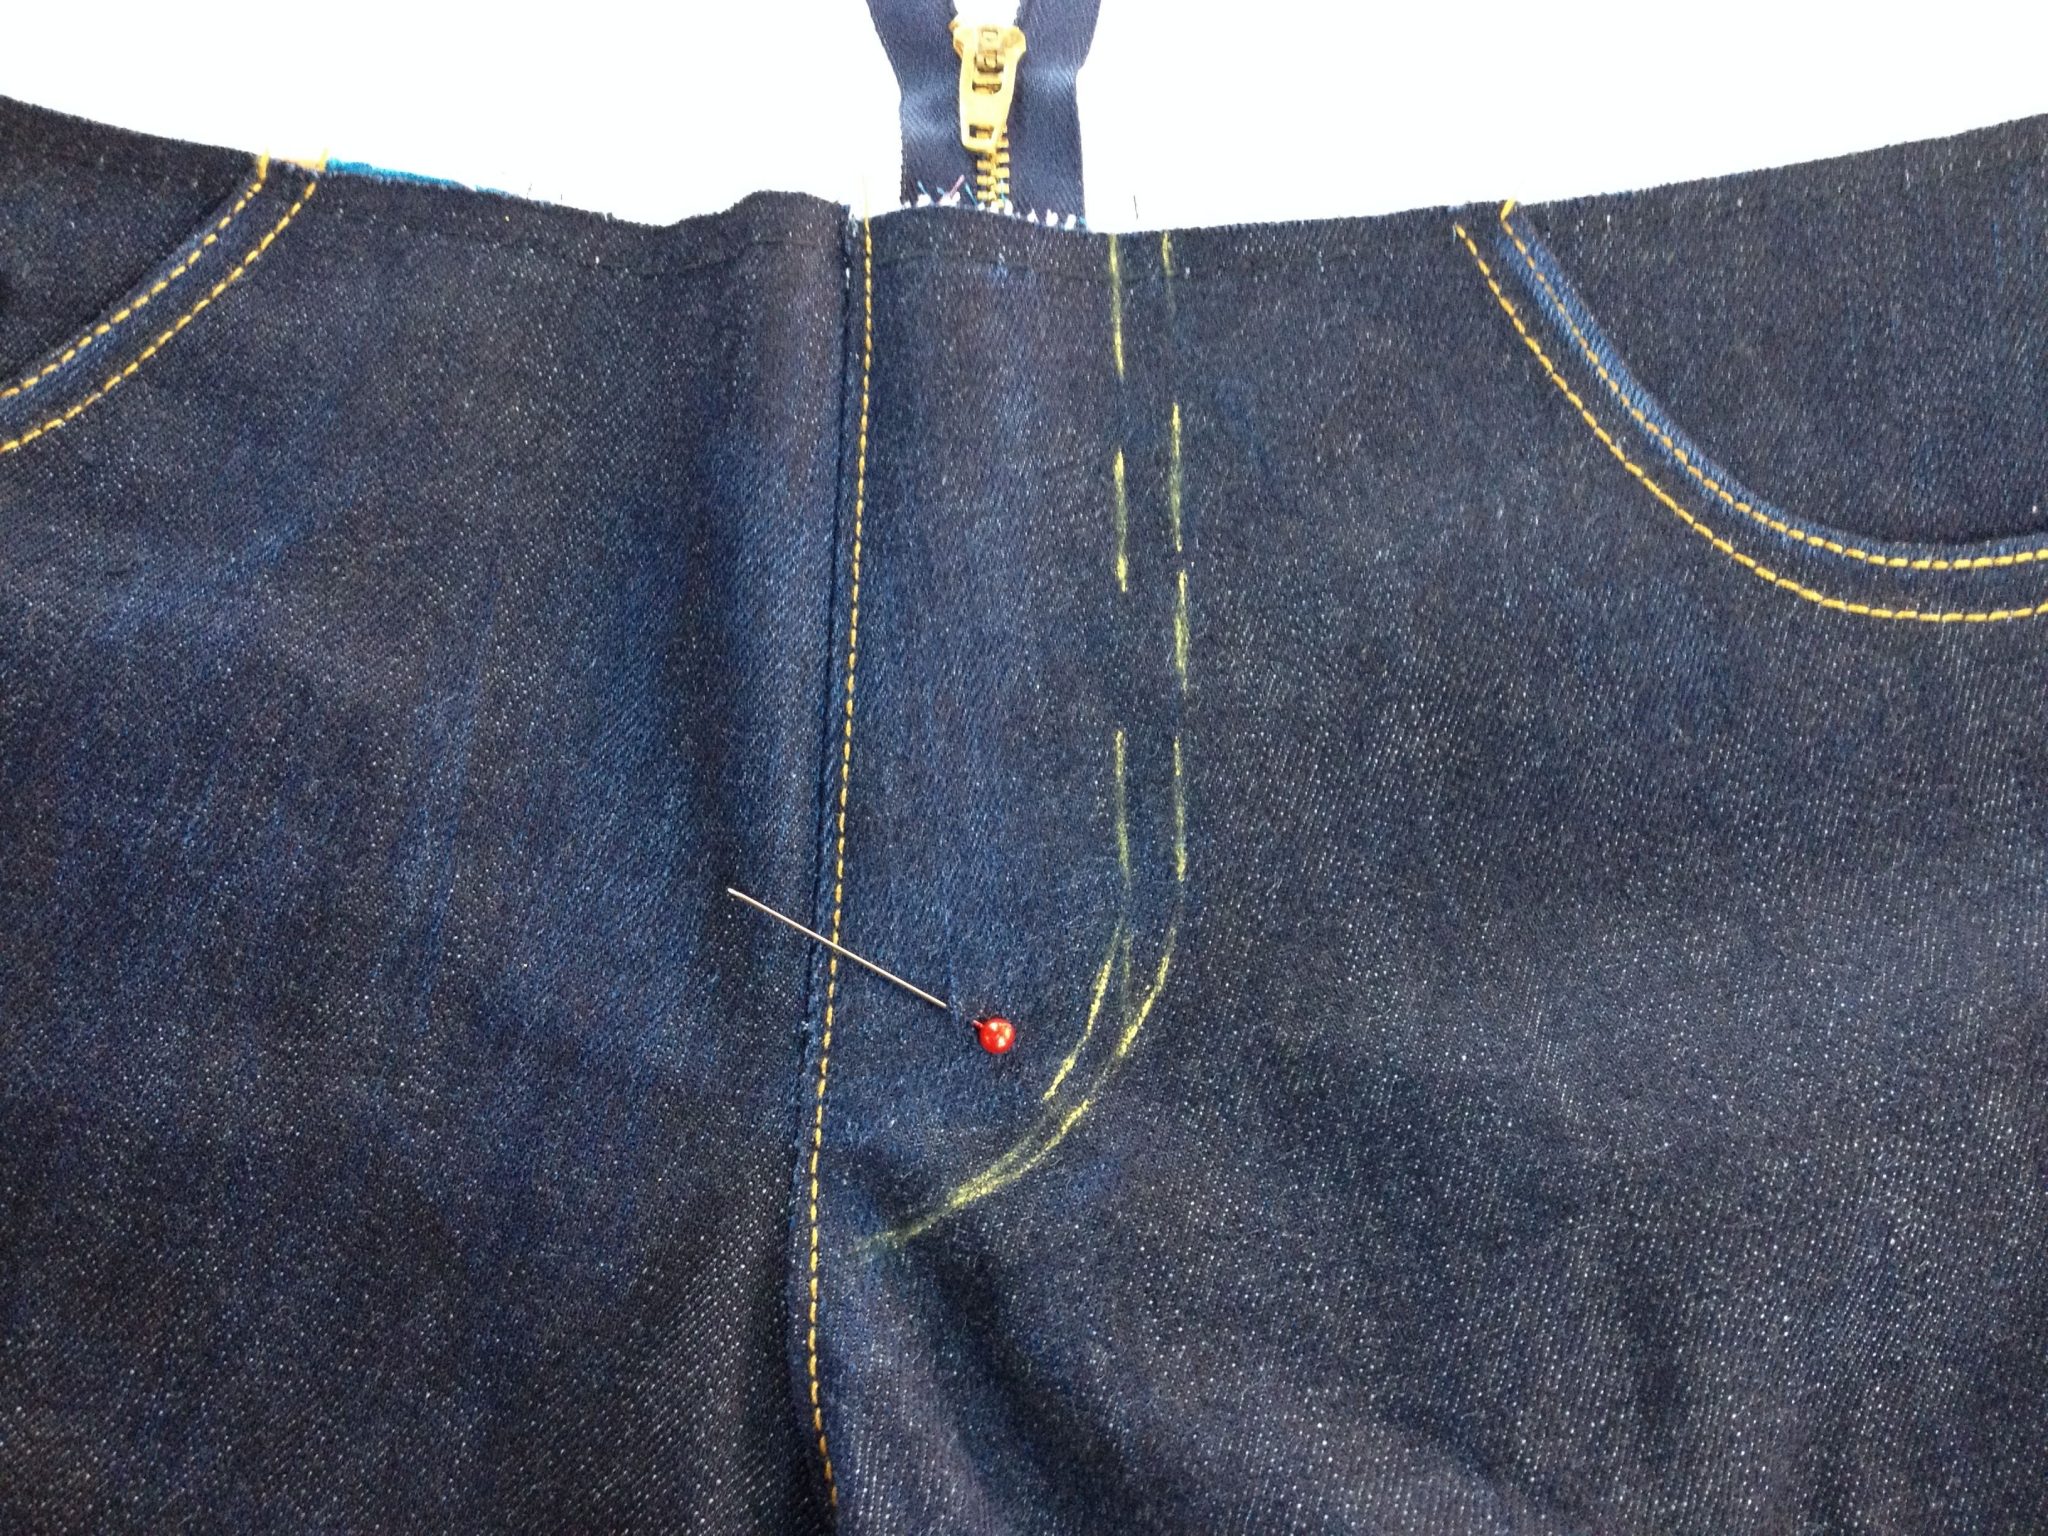
- Now mark another line just to the left (as worn) of the first line, and then merging it with the first line at the center front. This is just a style choice; you could skip this line if you want.

Mark the second line just to the left as worn) of the first.
- You can remove the pin now and start topstitching. It’s not necessary to catch anything underneath, although it doesn’t hurt to; the zipper underneath is already secured!
Topstitching done!
- Now stitch another line along the front crotch, 1/4″ (6 mm) left (as worn) of the first one.

Another topstitch line along the front crotch
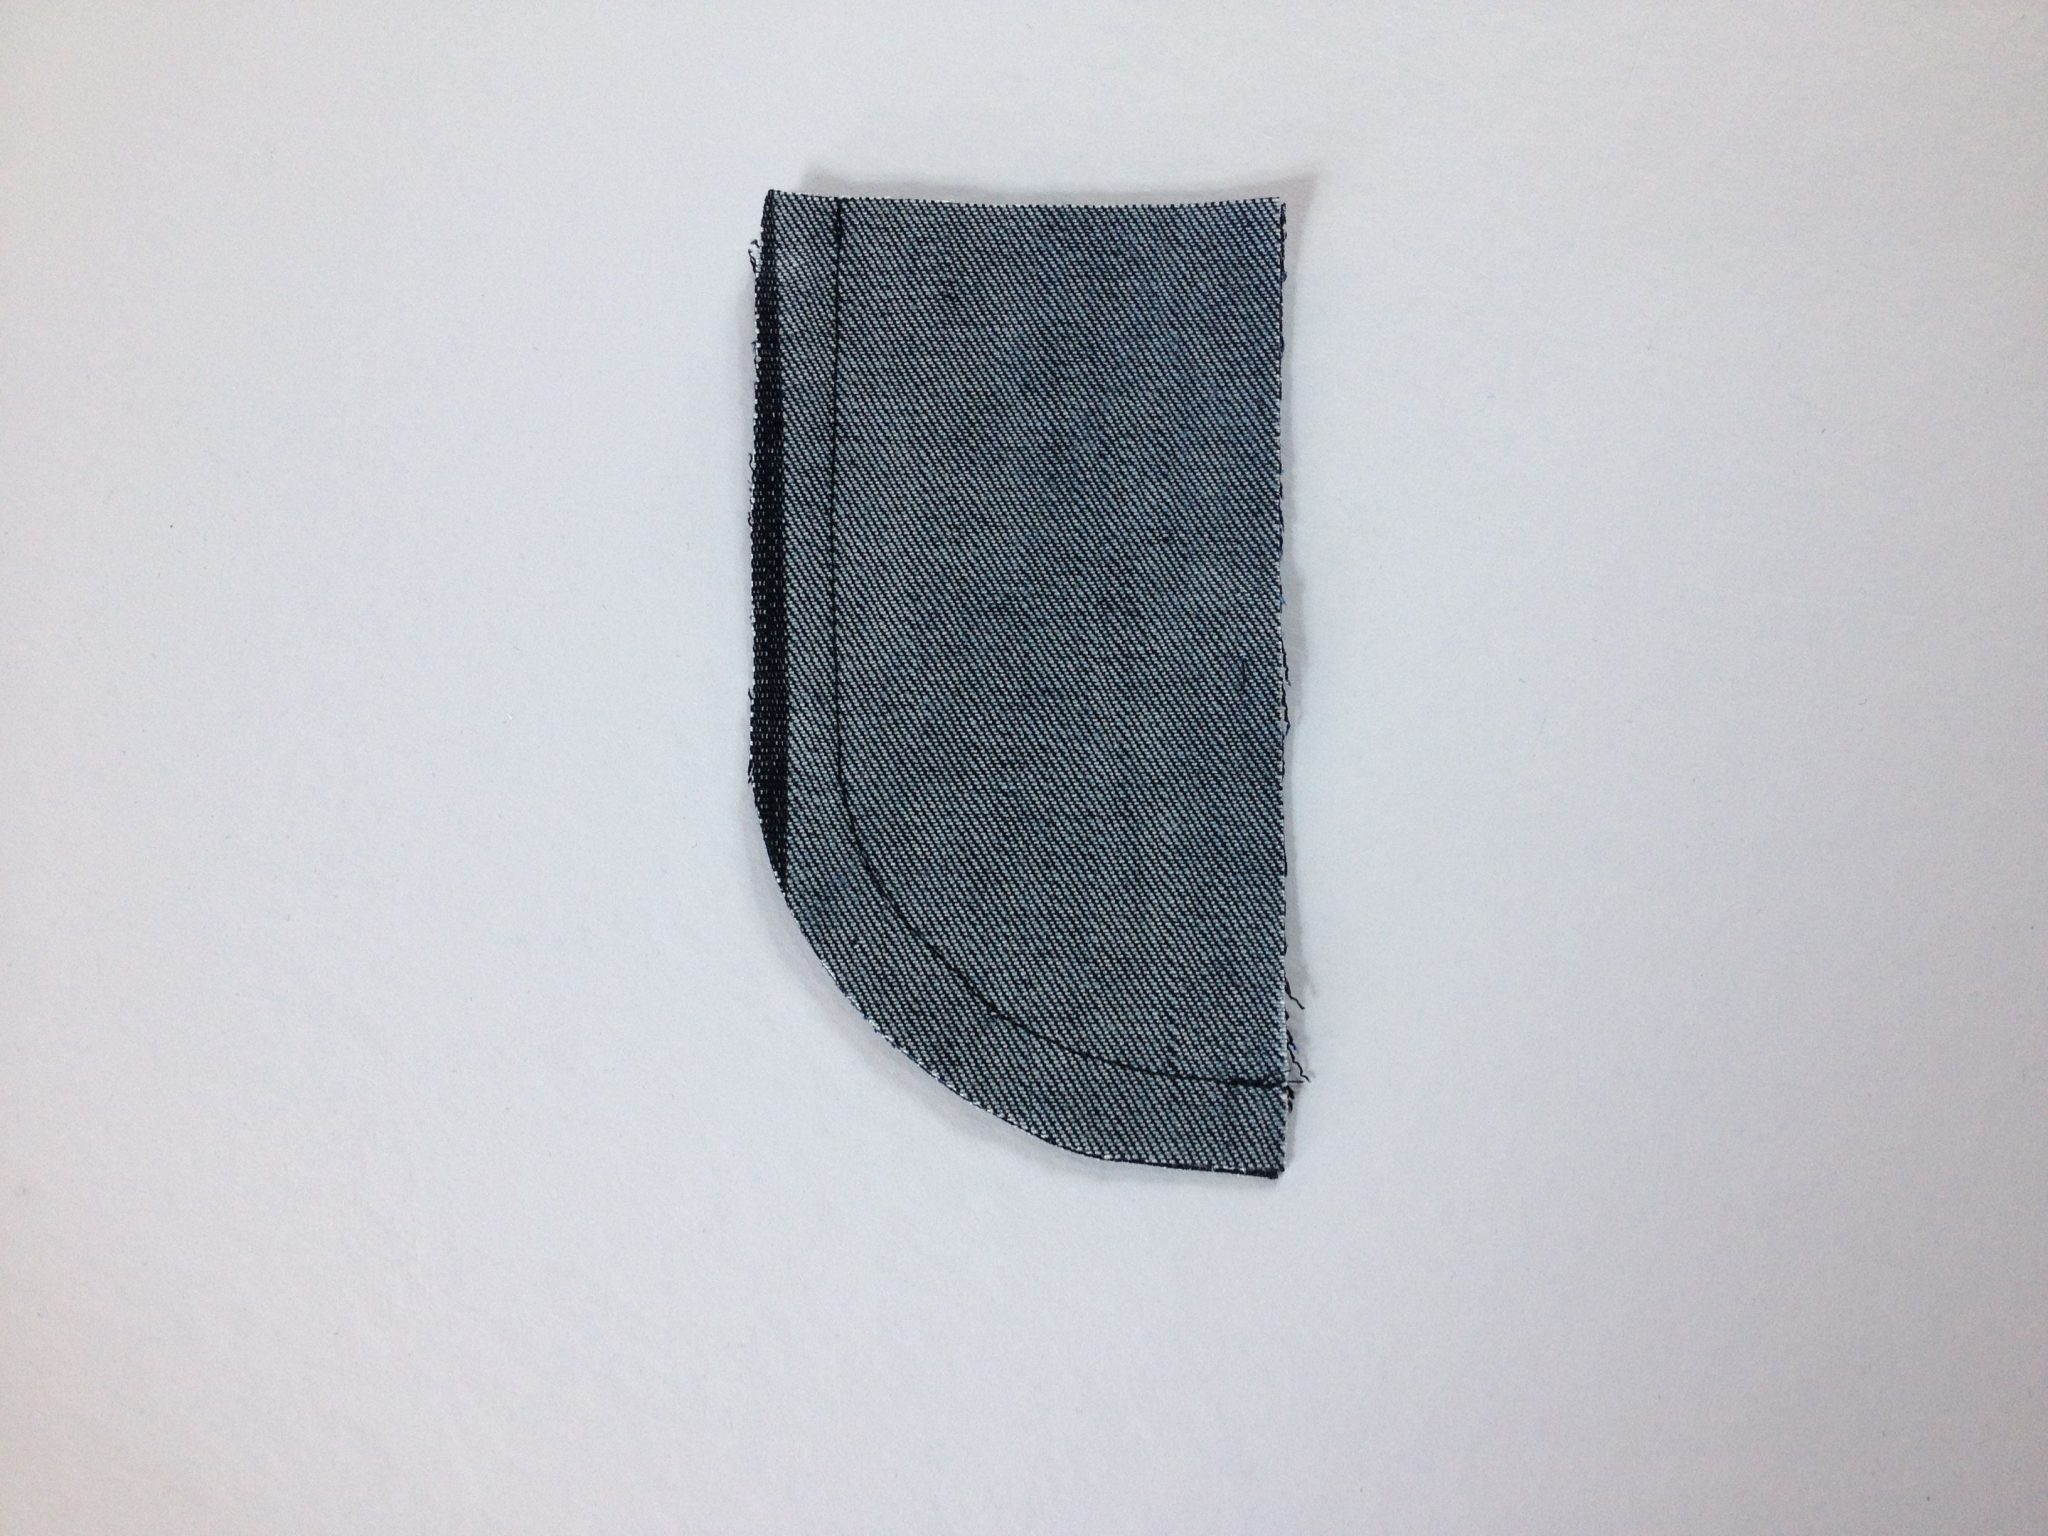
- Let’s prepare the fly shield. With right sides together, stitch along the curve. Trim seam allowance and clip along the curve. I didn’t bother to grade the seam and stagger the clipping, but you certainly could. (Sometimes I use shortcuts when I know I can get away with it 🙂 .)
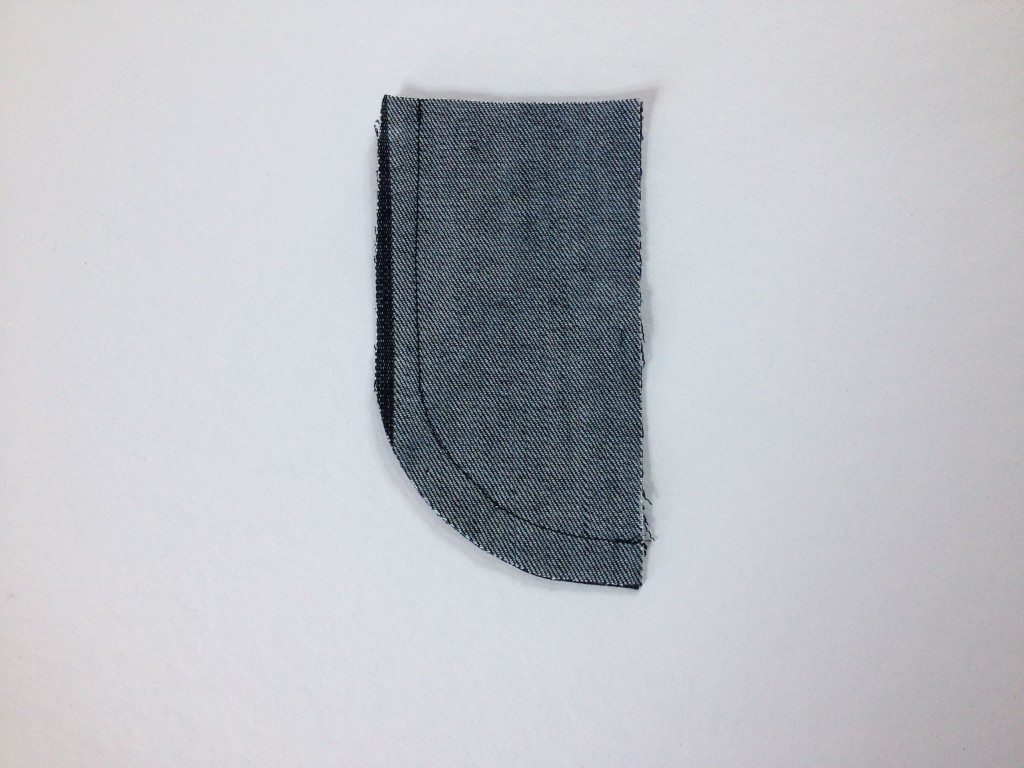
Stitch two fly shield, right sides together, along the curve.
Trim

Clip several notches along the curve for smooth turning
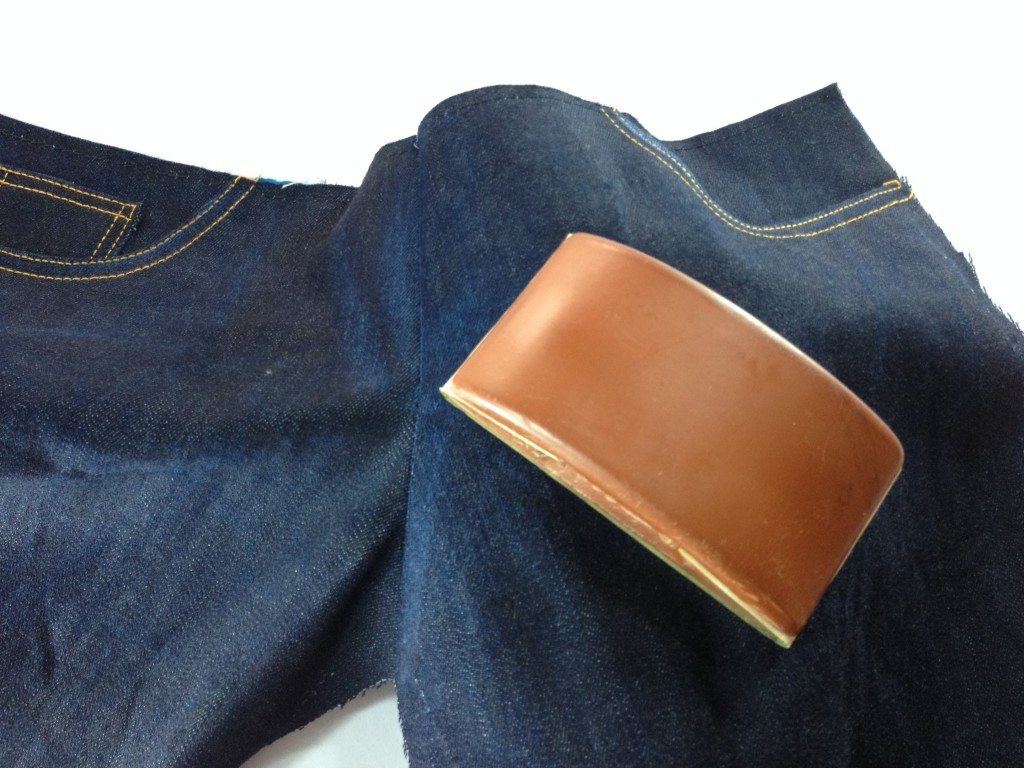
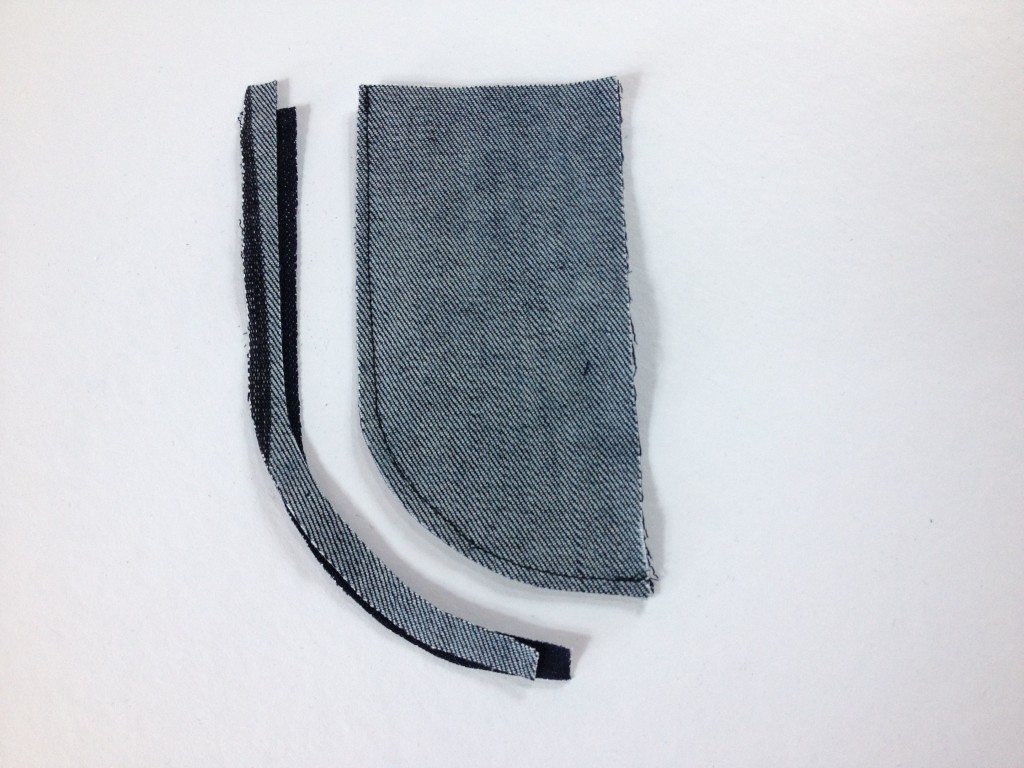
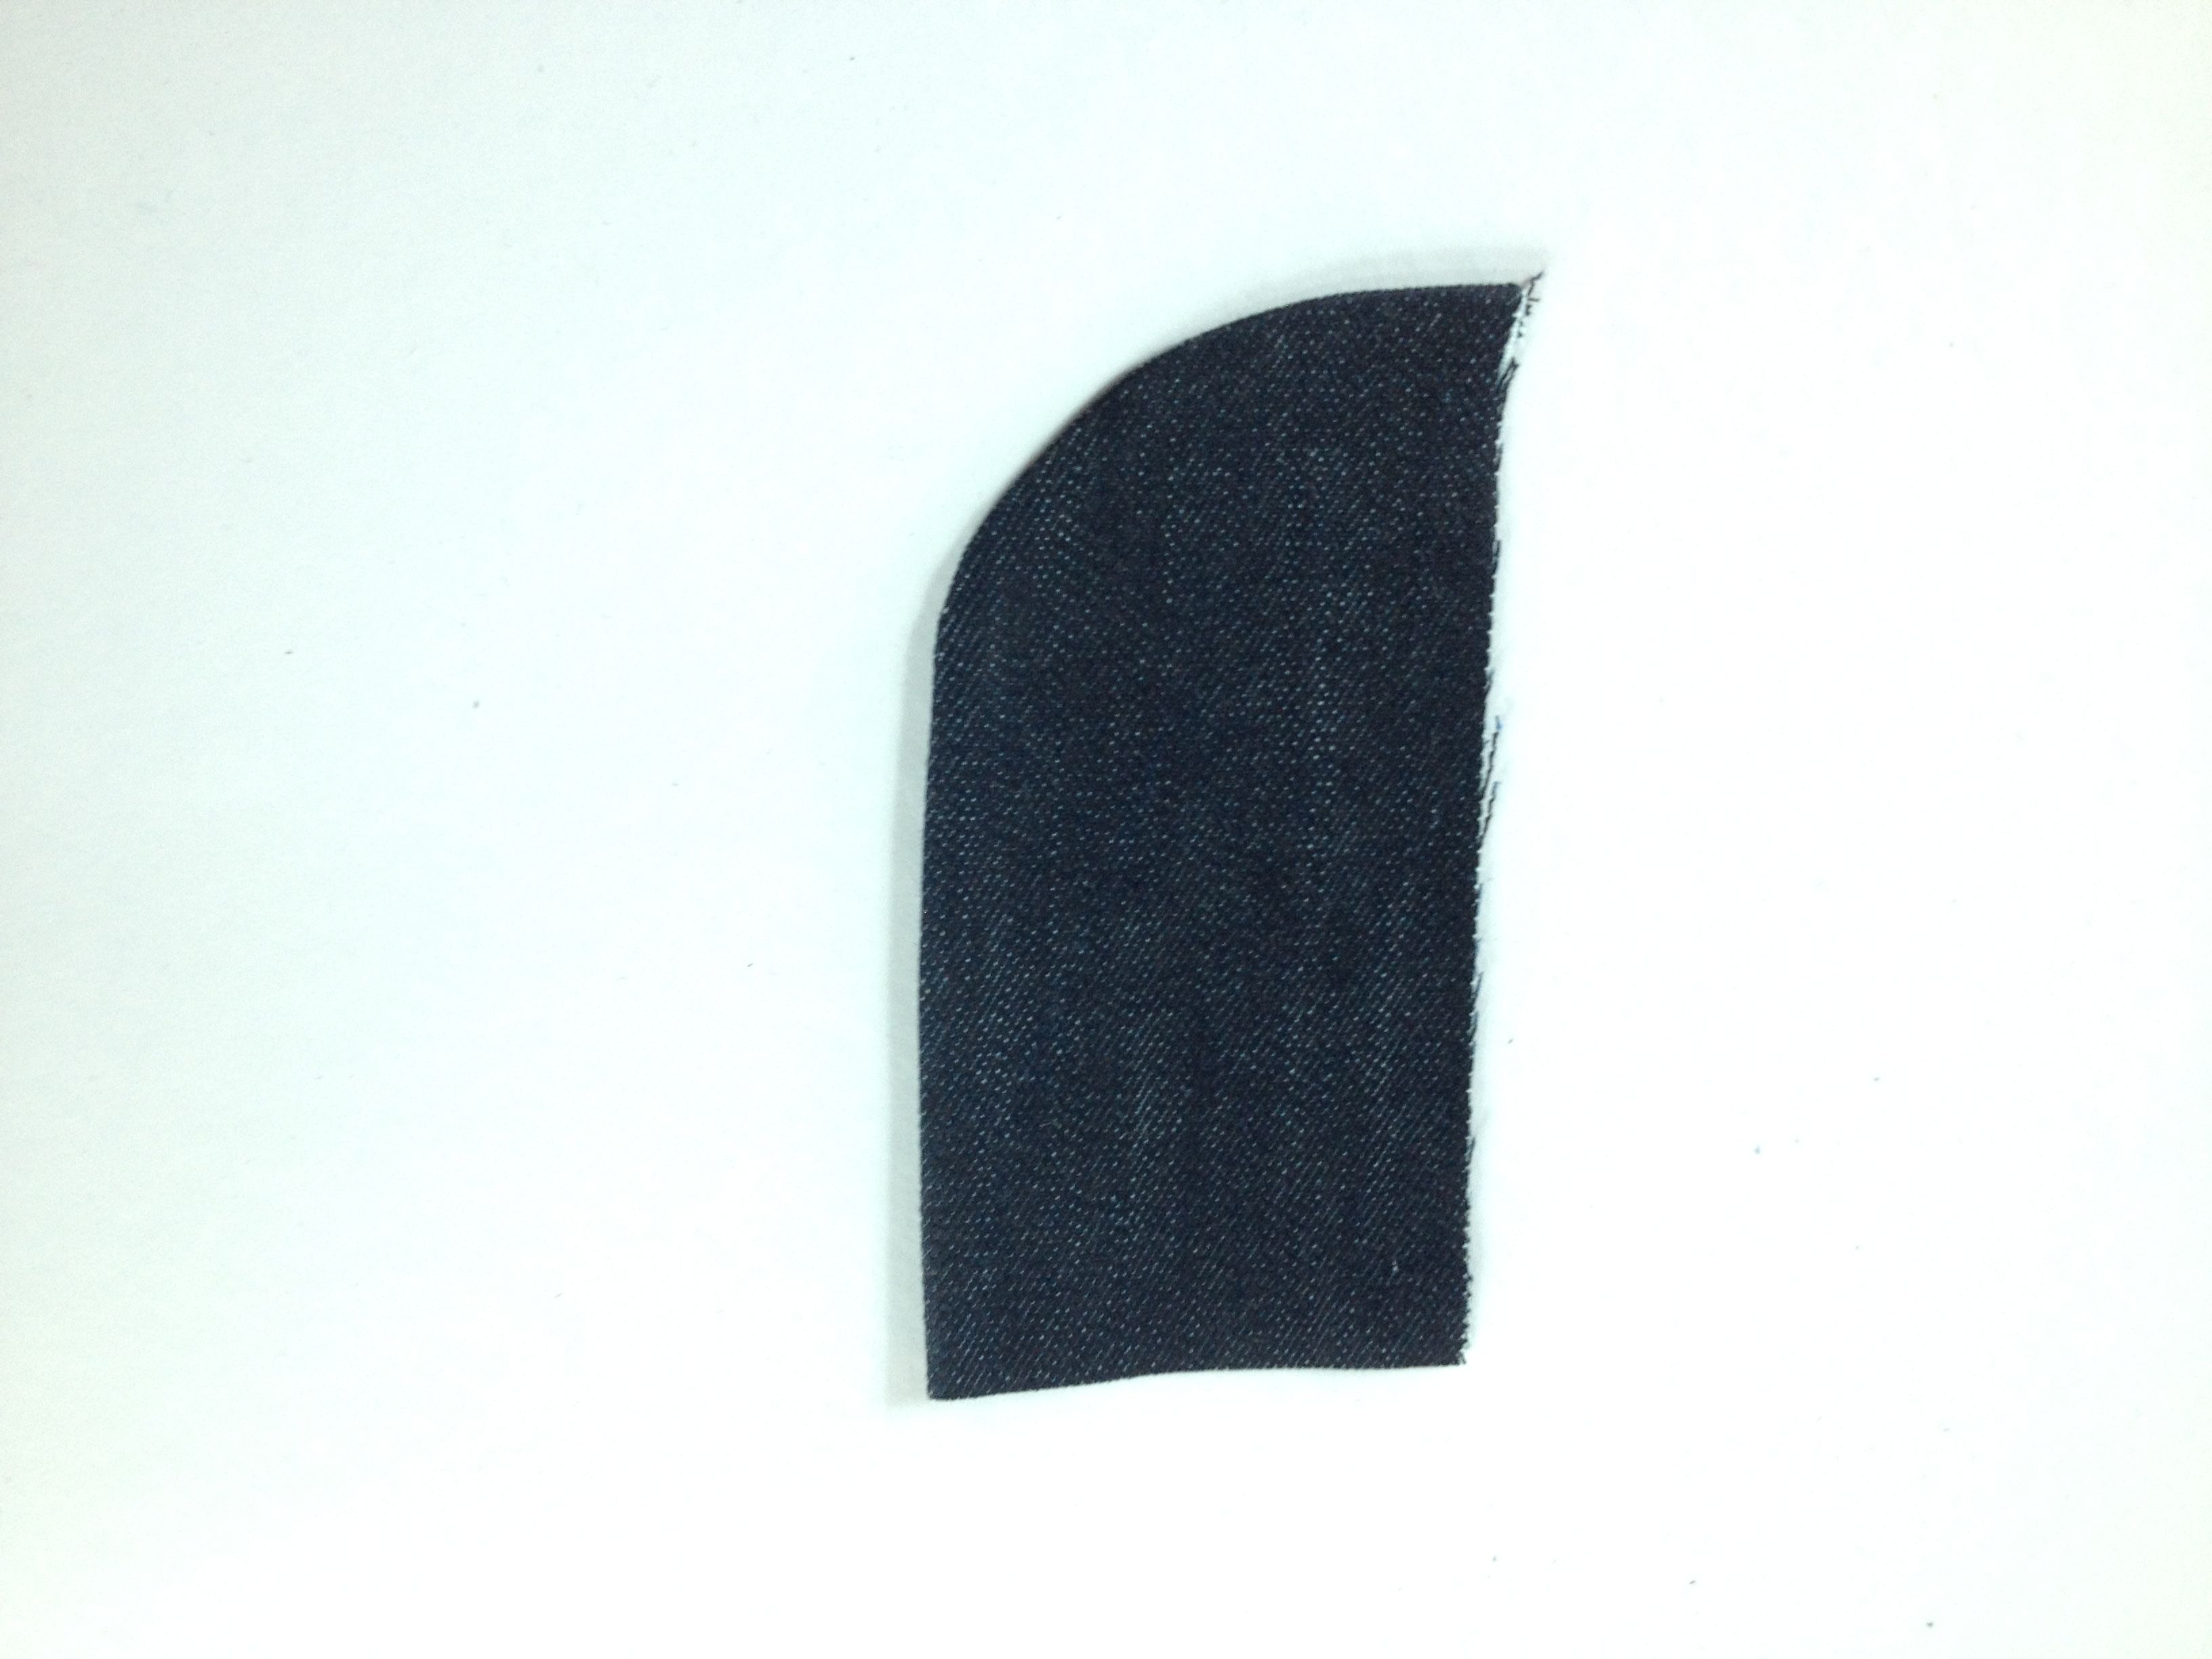
- Turn the Fly Shield right side out, and press.

Turn right side out
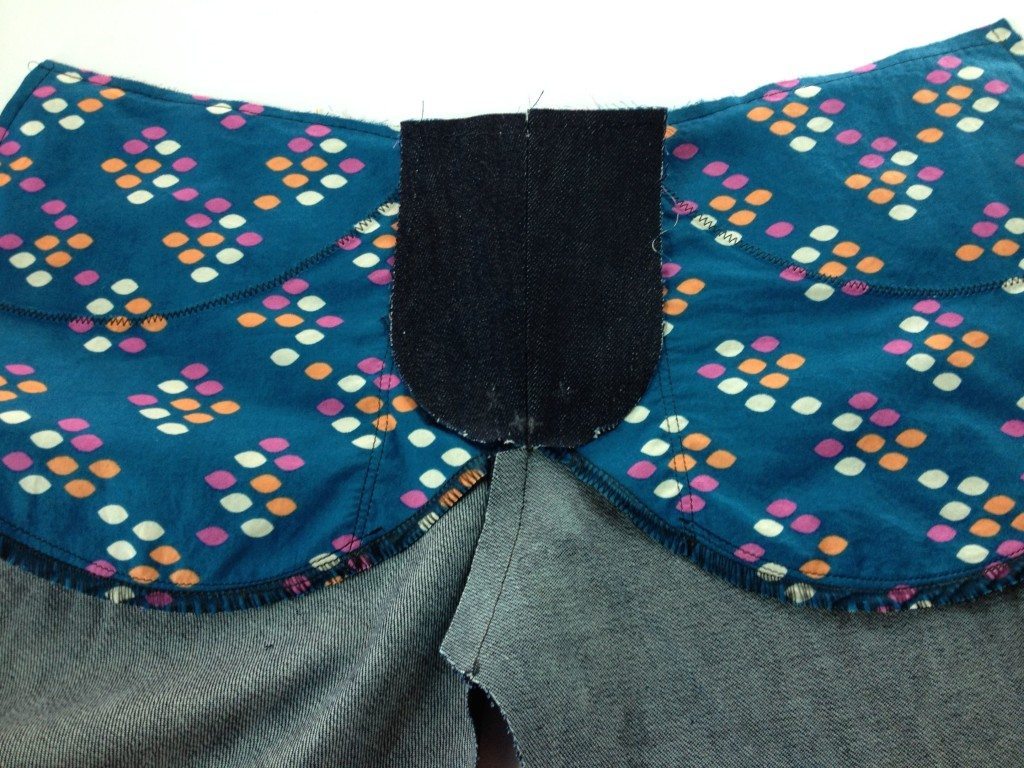
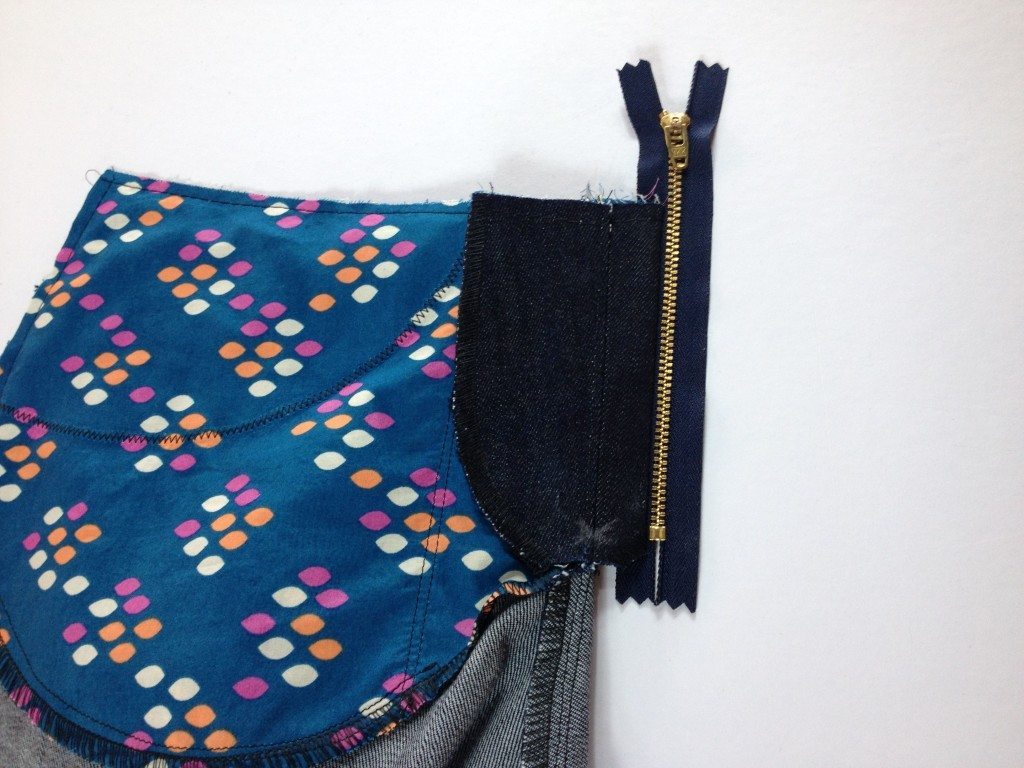
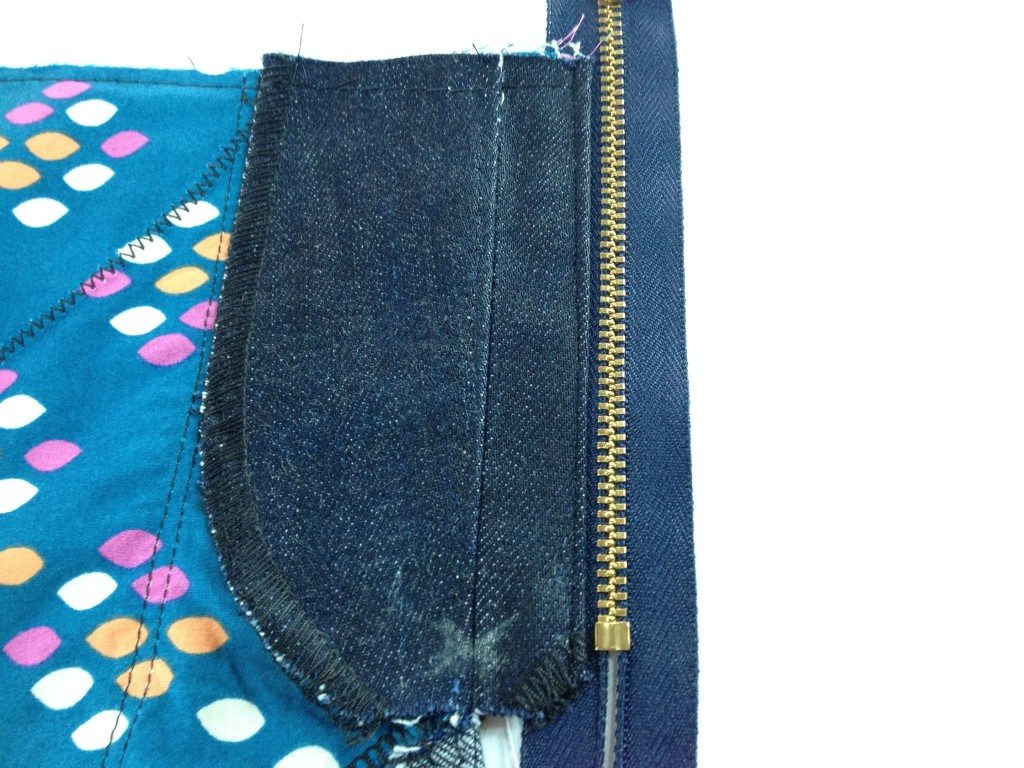
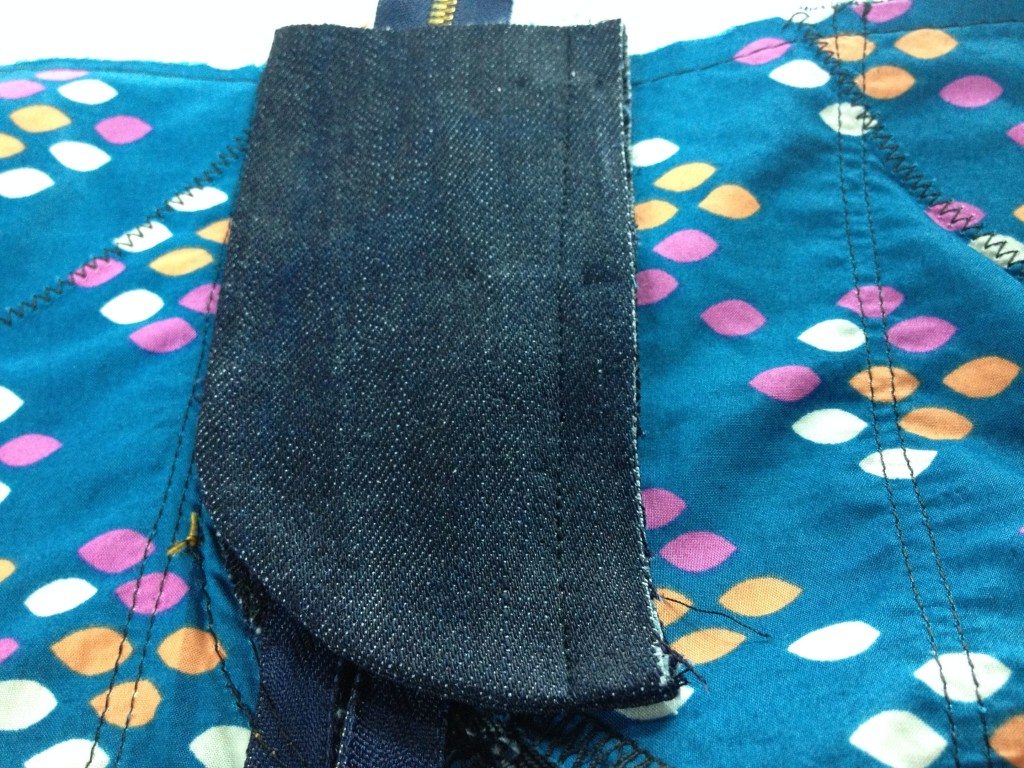
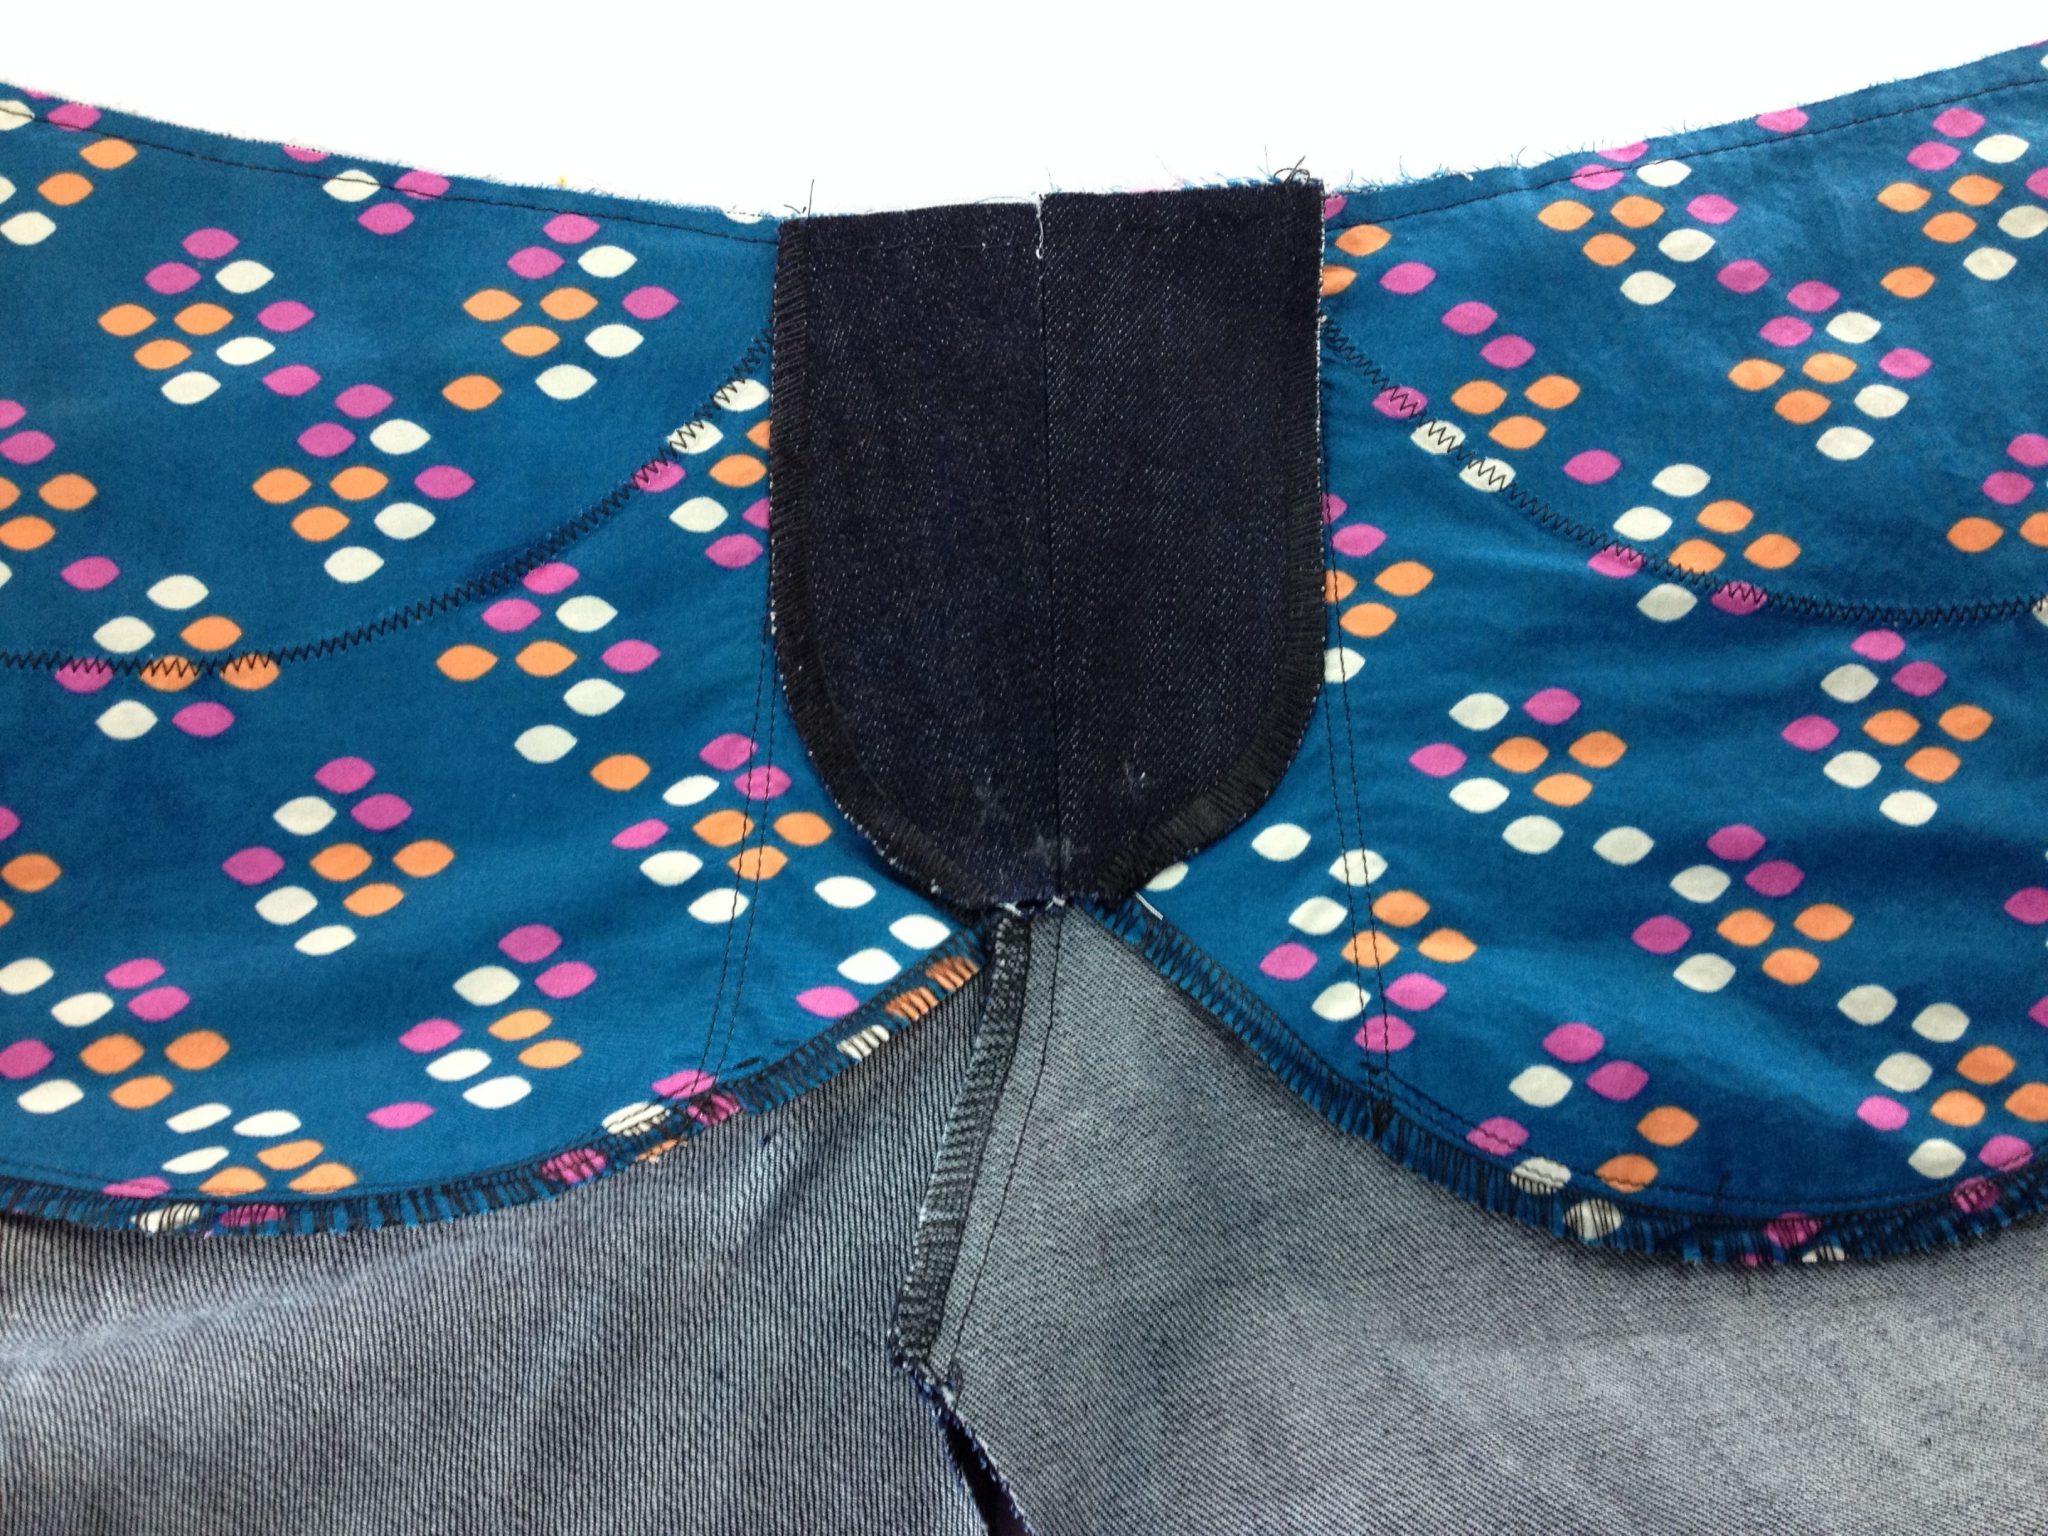
- Put the Front wrong side up again so you can see both pocket bags. Place the Fly Shield on it so that the curved edge of the Fly Shield is against the curve of the left fly. Then pin the Fly Shield to the right-hand-side fly.
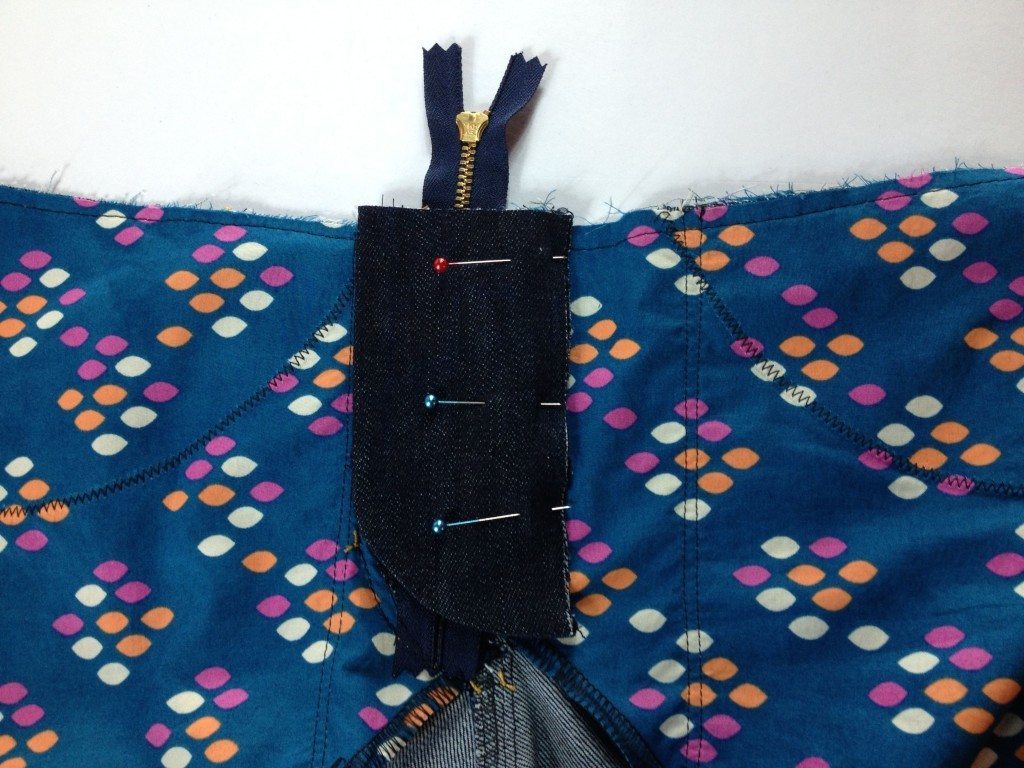
Pin Fly Shied to Fly.
- Stitch the Fly Shield to the left-hand-side fly (but not through the Front though). You can then trim the excess and then serge the raw edge.
Stitch Fly Shield to Fly.
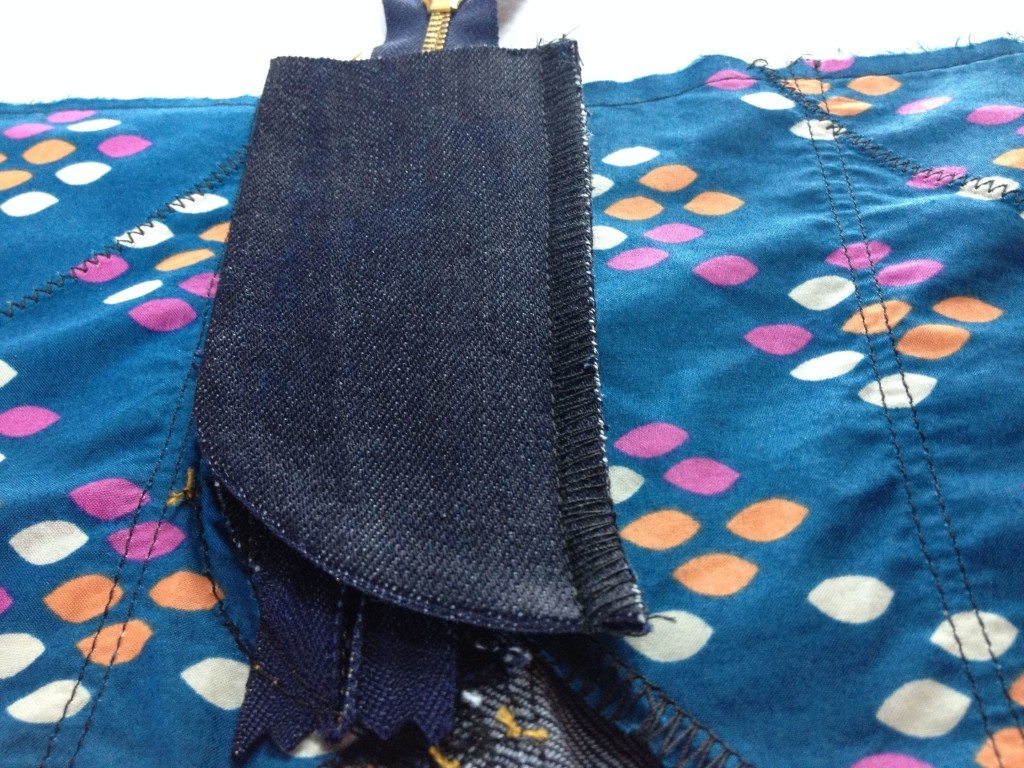
Serge the raw edge.
- On the right side, put a bar tack on the curve of the topstitching, as well as the bottom of the curve next to the center front. My sewing machine has a bar tack function, but I actually don’t like it, so I used a zigzag stitch. I shortened the length and narrowed width of the stitch. Test yours on a piece of scrap before doing it on the jeans.
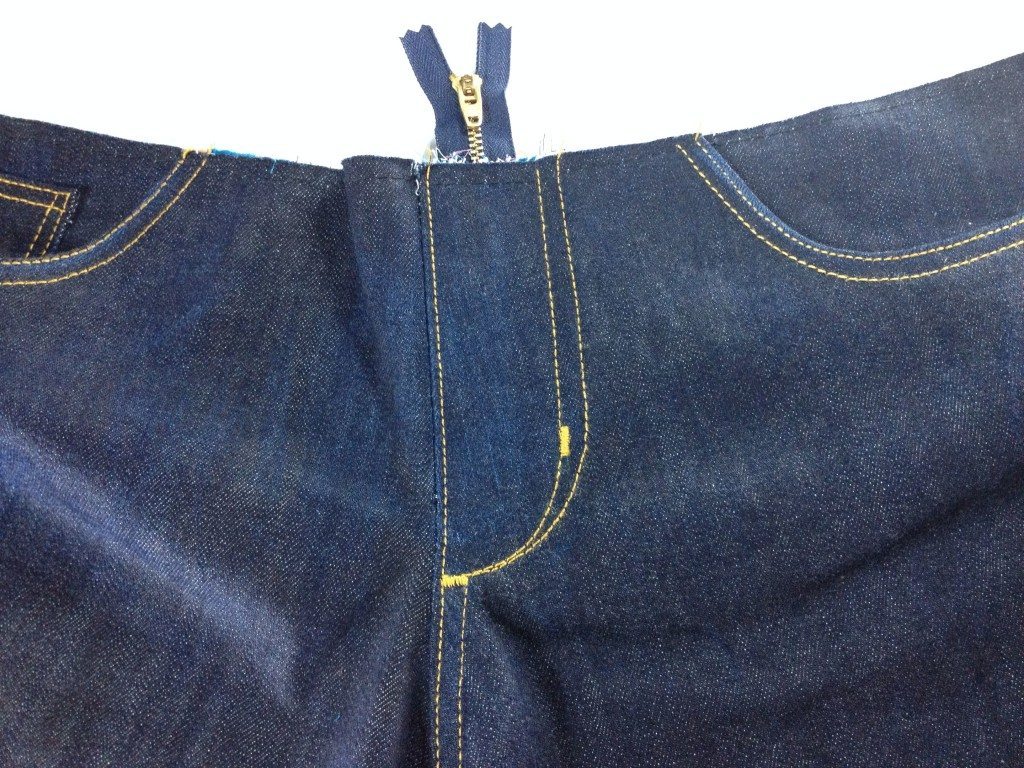
Stitch bar tacks.
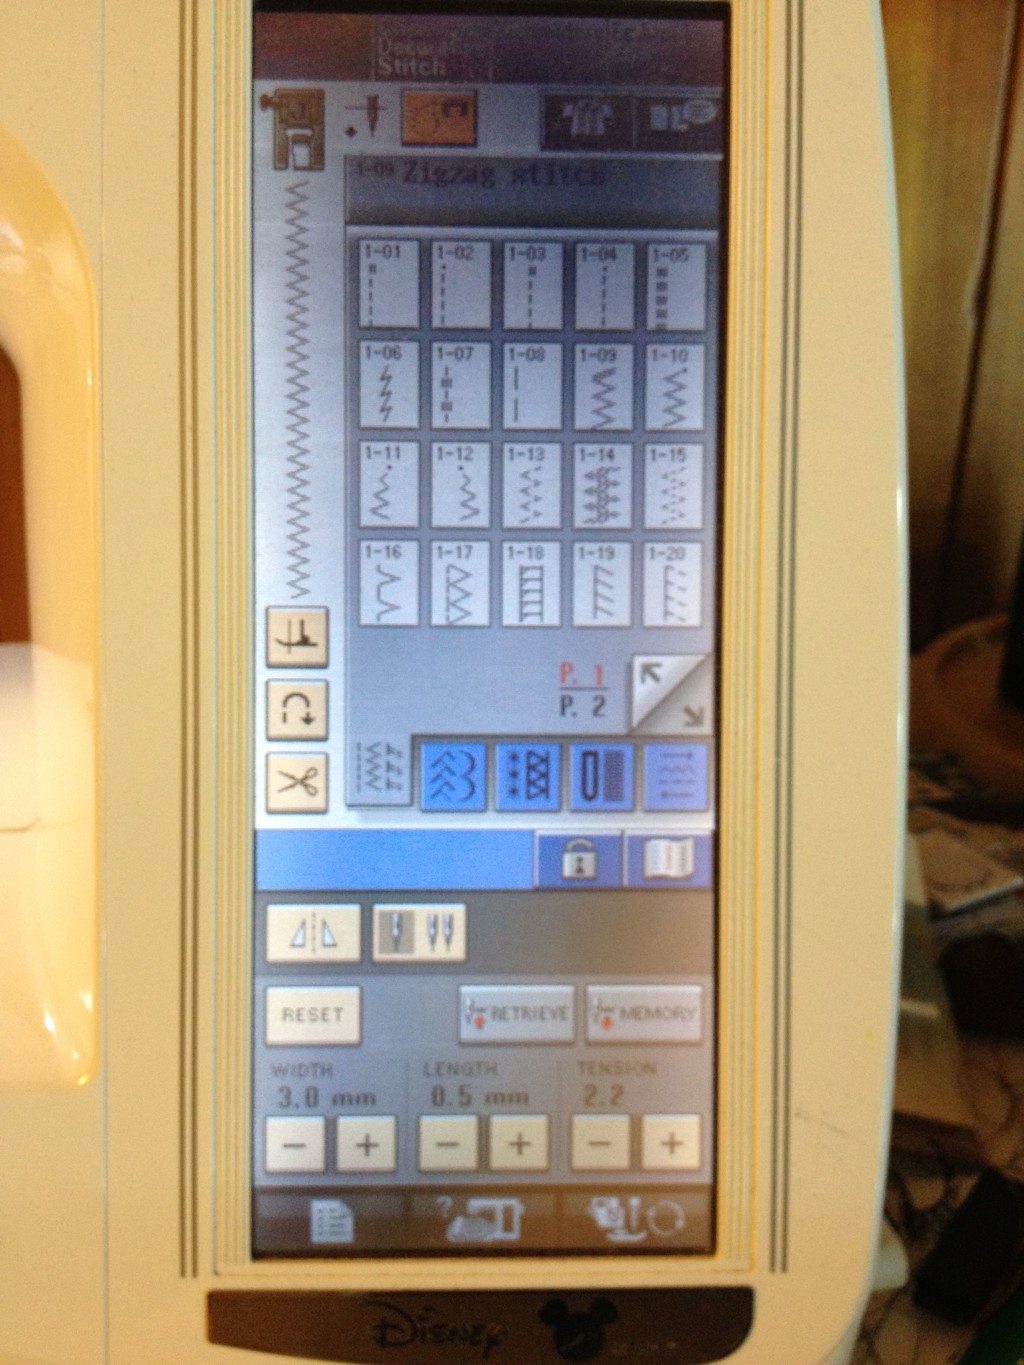
This is my narrowed and shortened zigzag stitch setting, but yours certainly could be different. Test on a piece of scrap!
- Remove the basting stitch and you are done with this part. Can you believe it? Oh, don’t forget to press.
Remove basting stitch.
You can open the zipper and look. So pro!


Shorten Zipper
But sorry, we are not done yet. We still have to shorten the zipper if you used the longer zipper. You will need a pair of wire cutter, and optionally a pair of pliers. Having a safety pin is handy too, to prevent you from pulling the zipper pull off. If you don’t have one, just promise you’ll be careful. It’s not fun to have to put the zipper pull back on. Don’t ask me how I know.
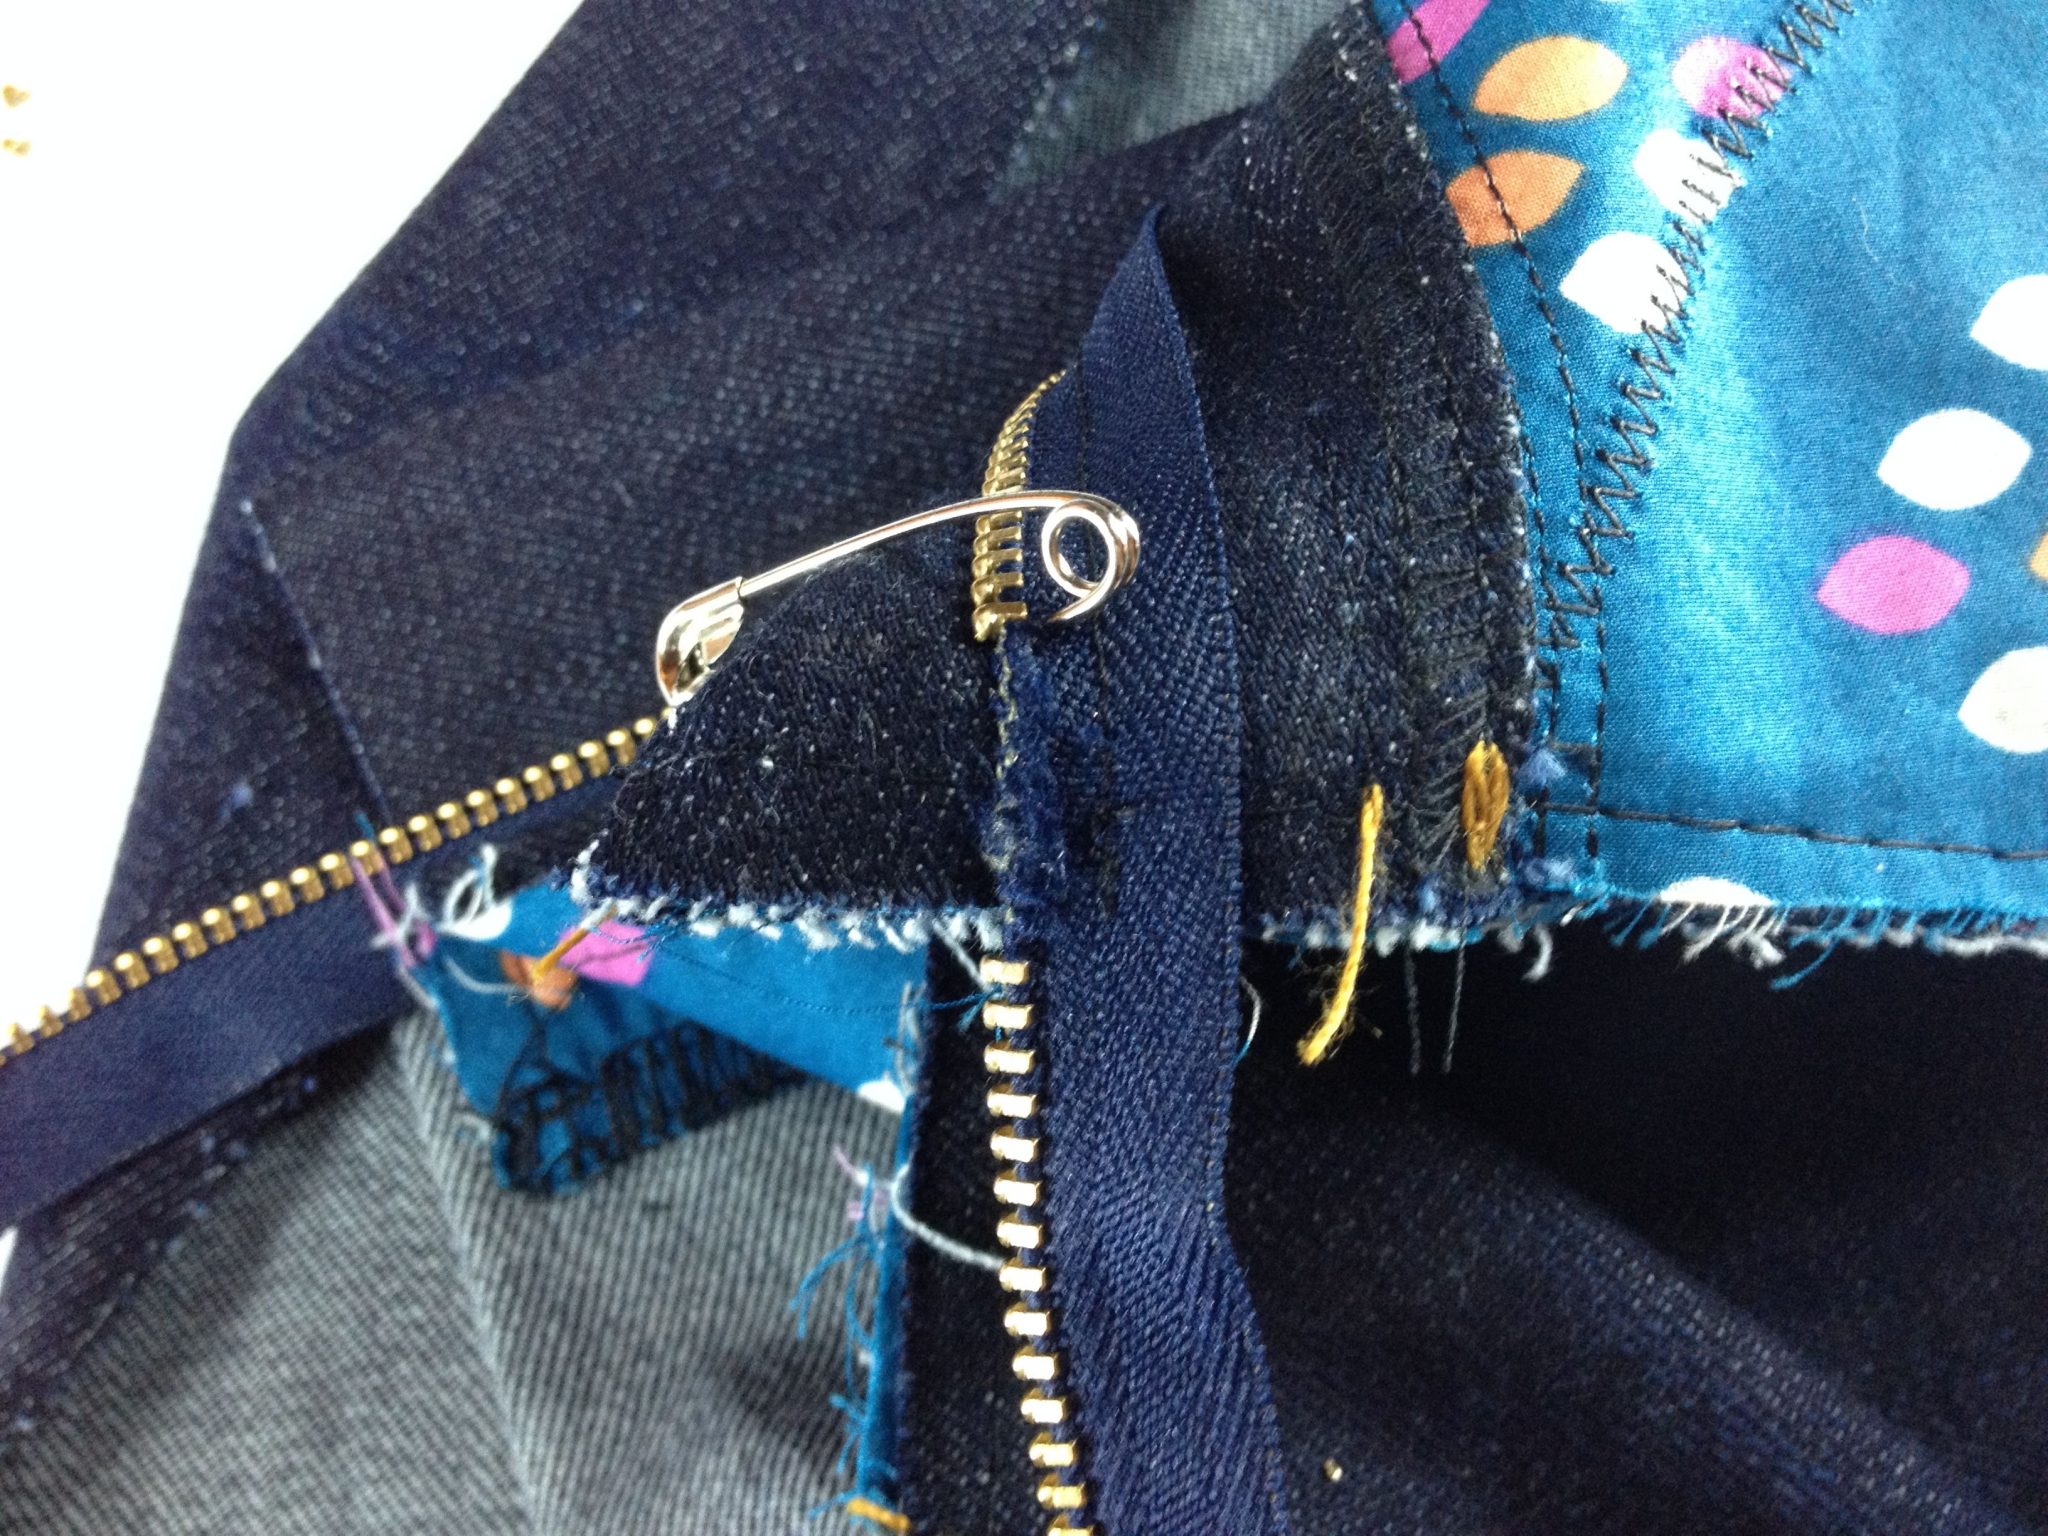
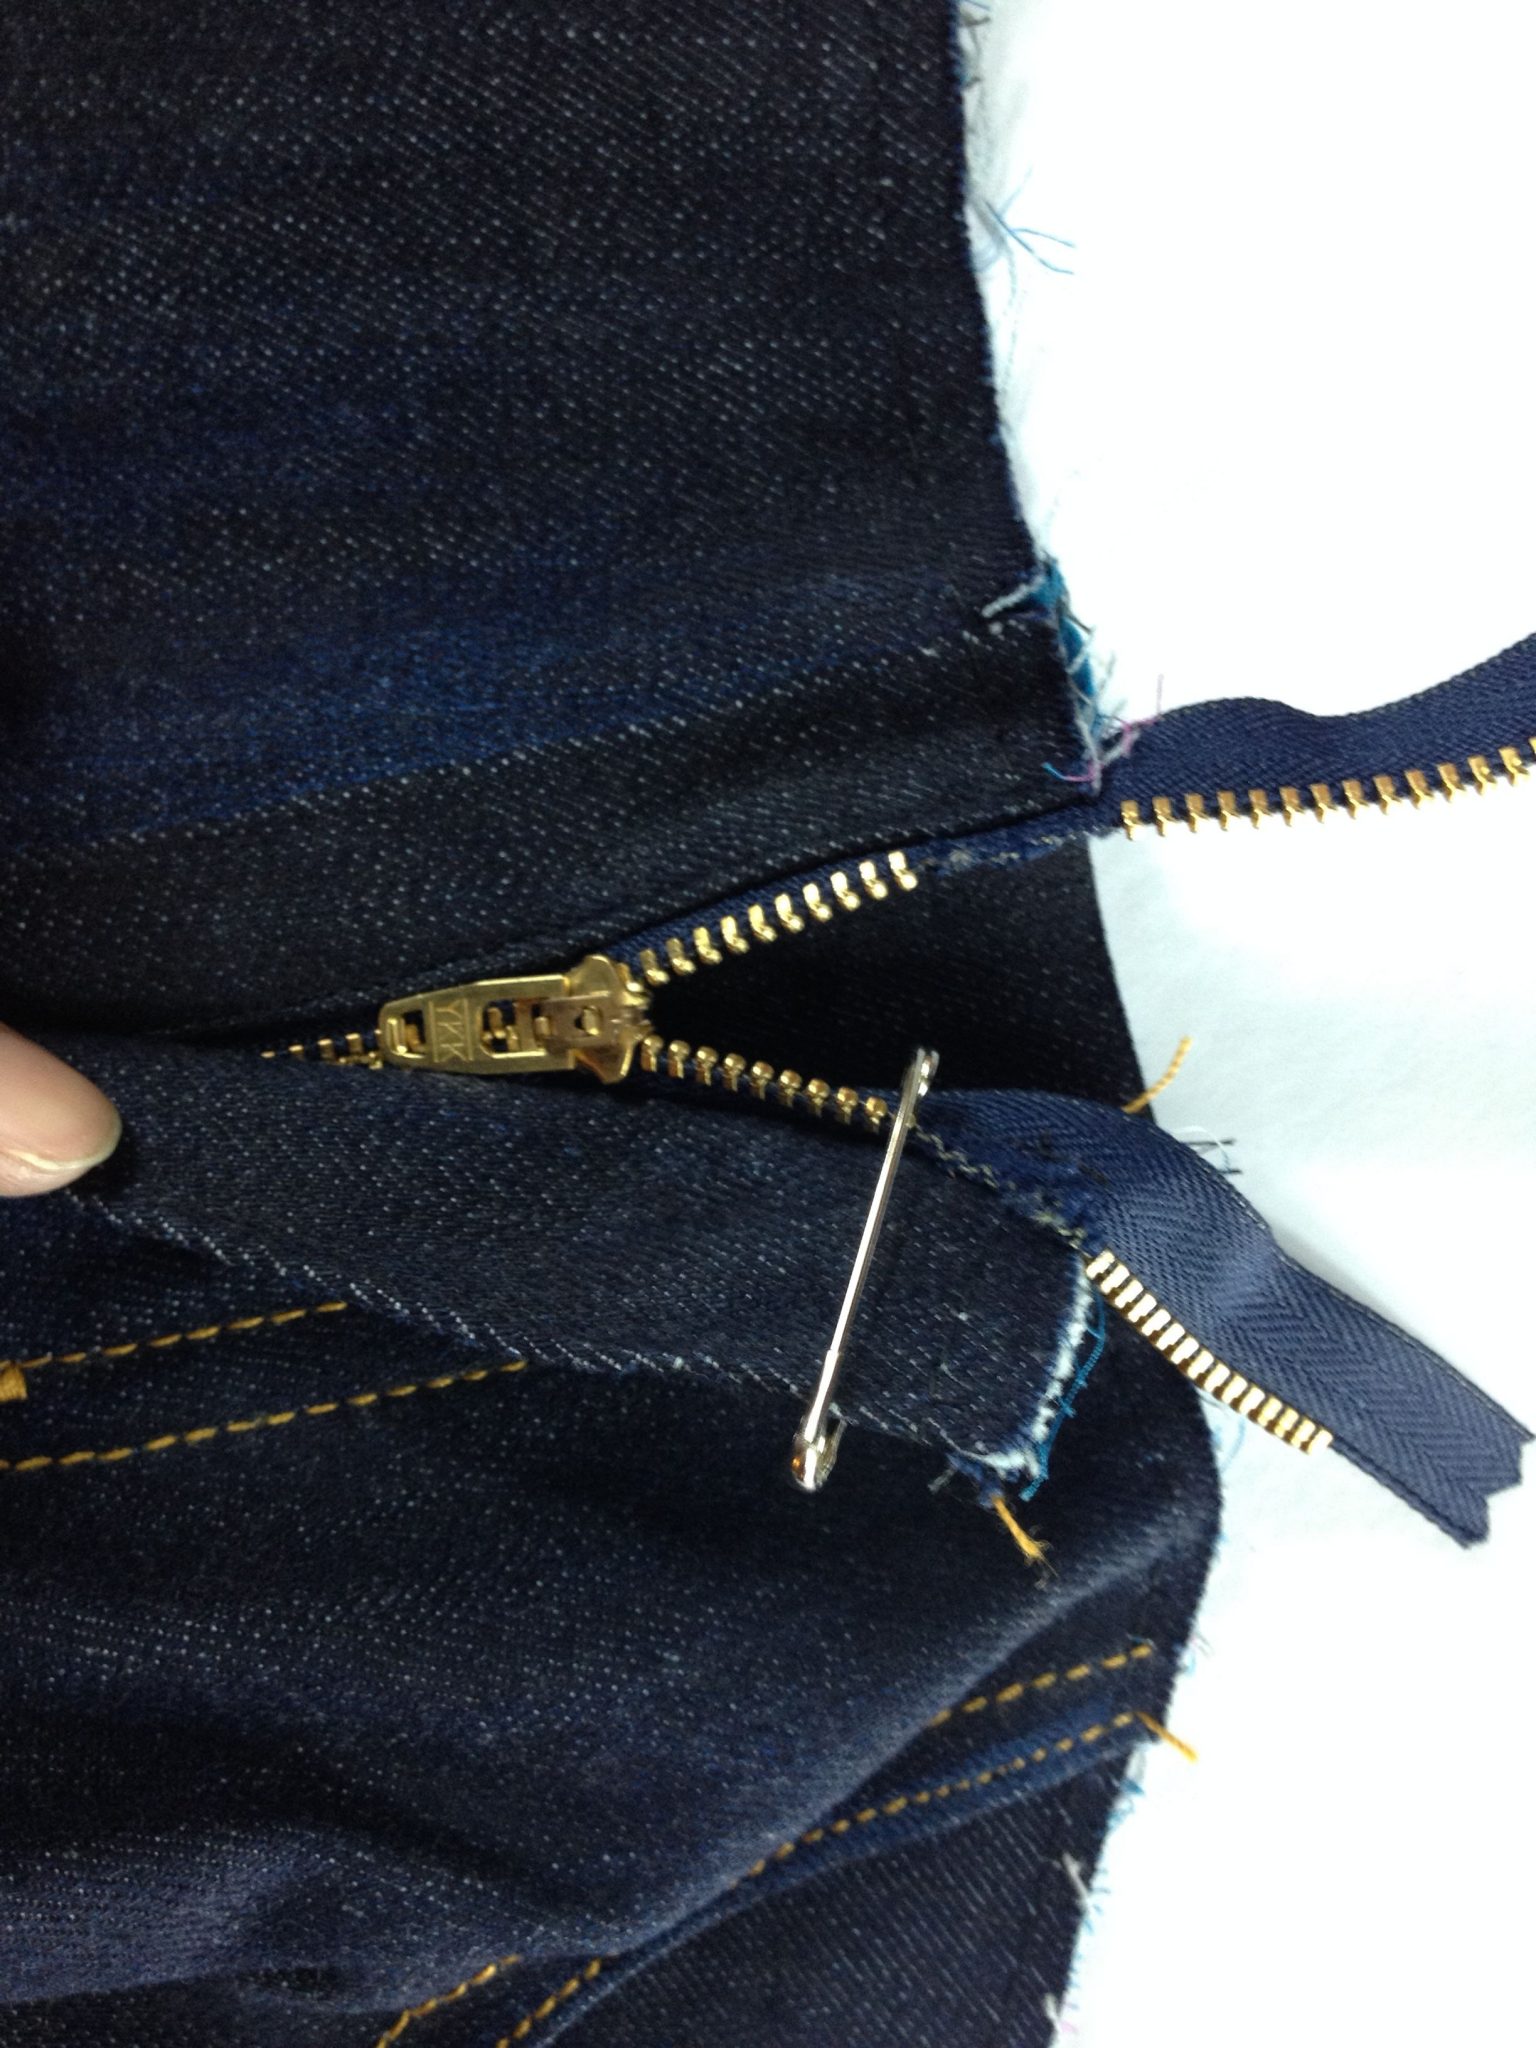
- Put the optional safety pin just 1/2″ (1.25 cm) below the top raw edge across the zipper teeth.
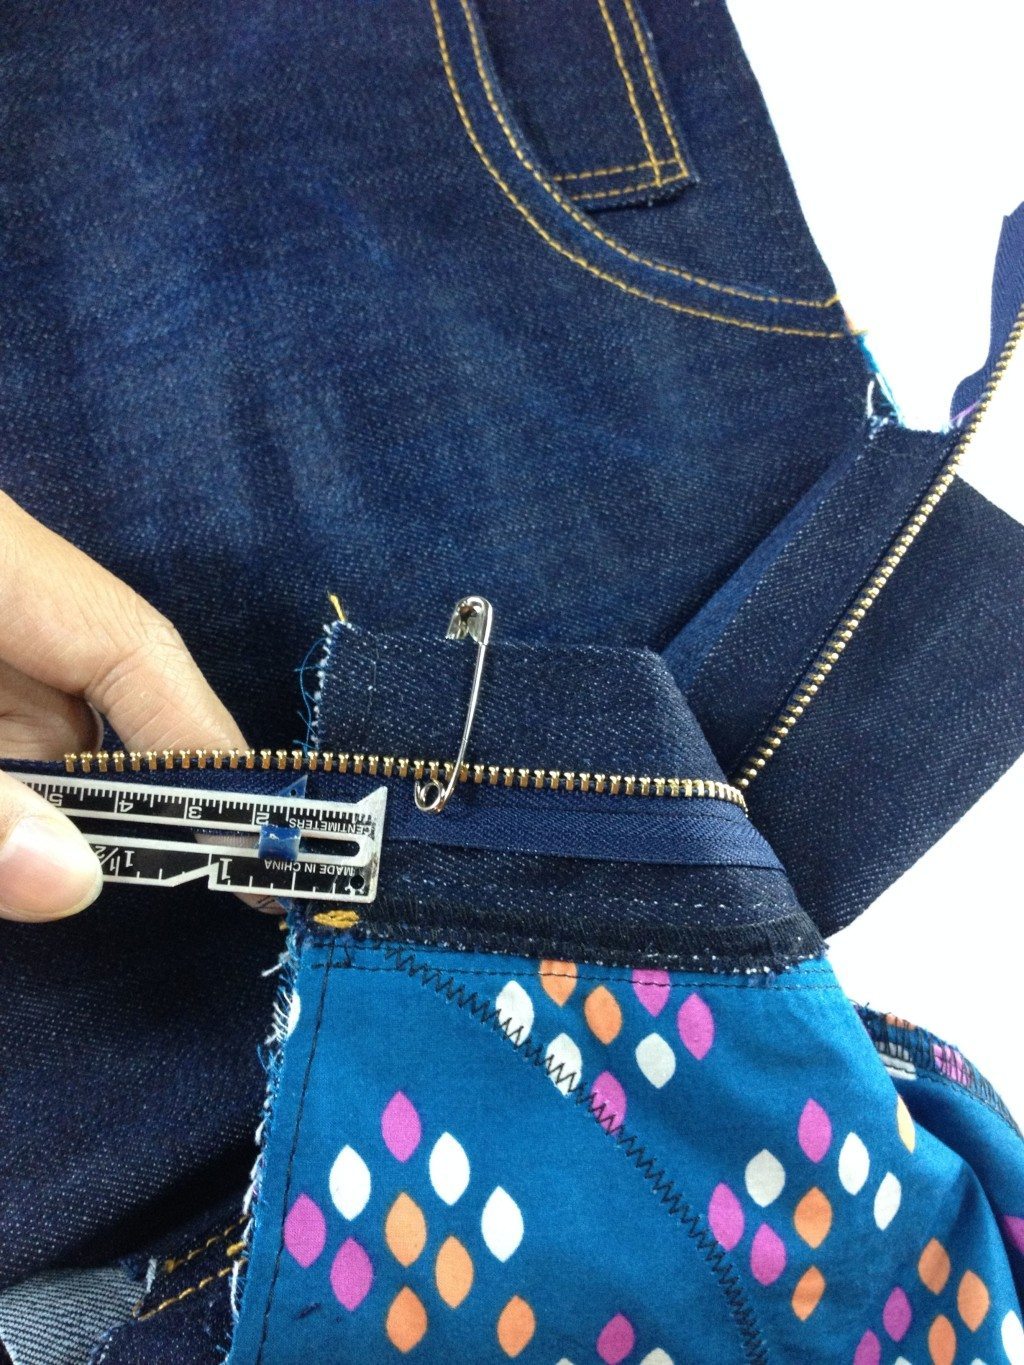
Put safety pin to prevent zipper pull coming off.
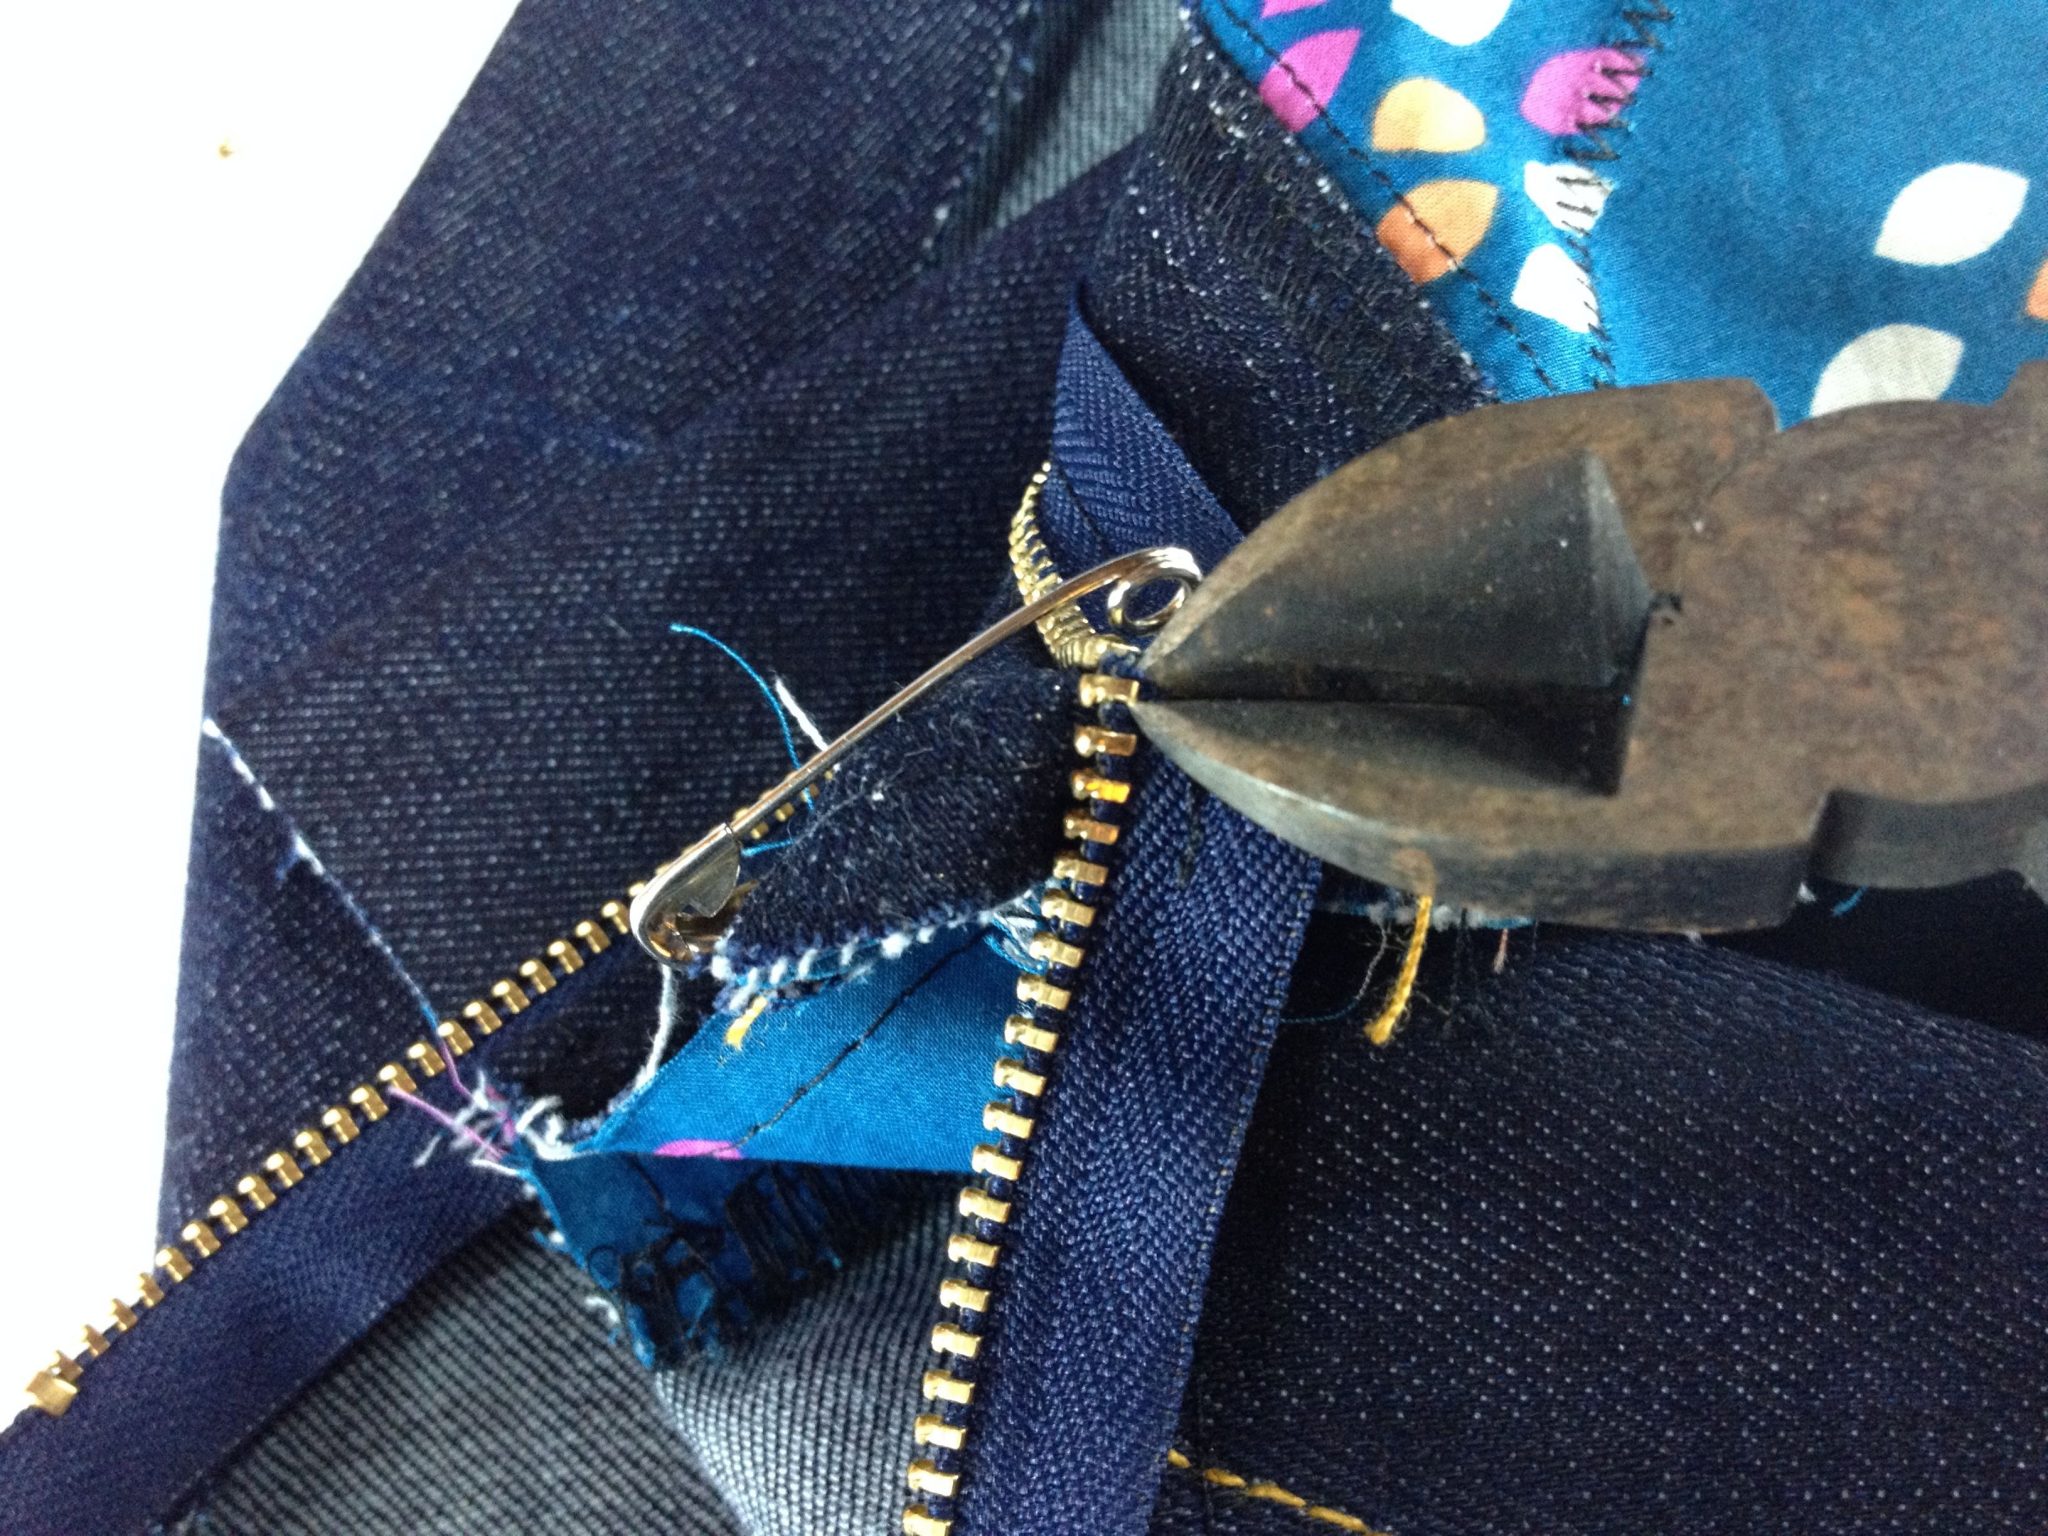
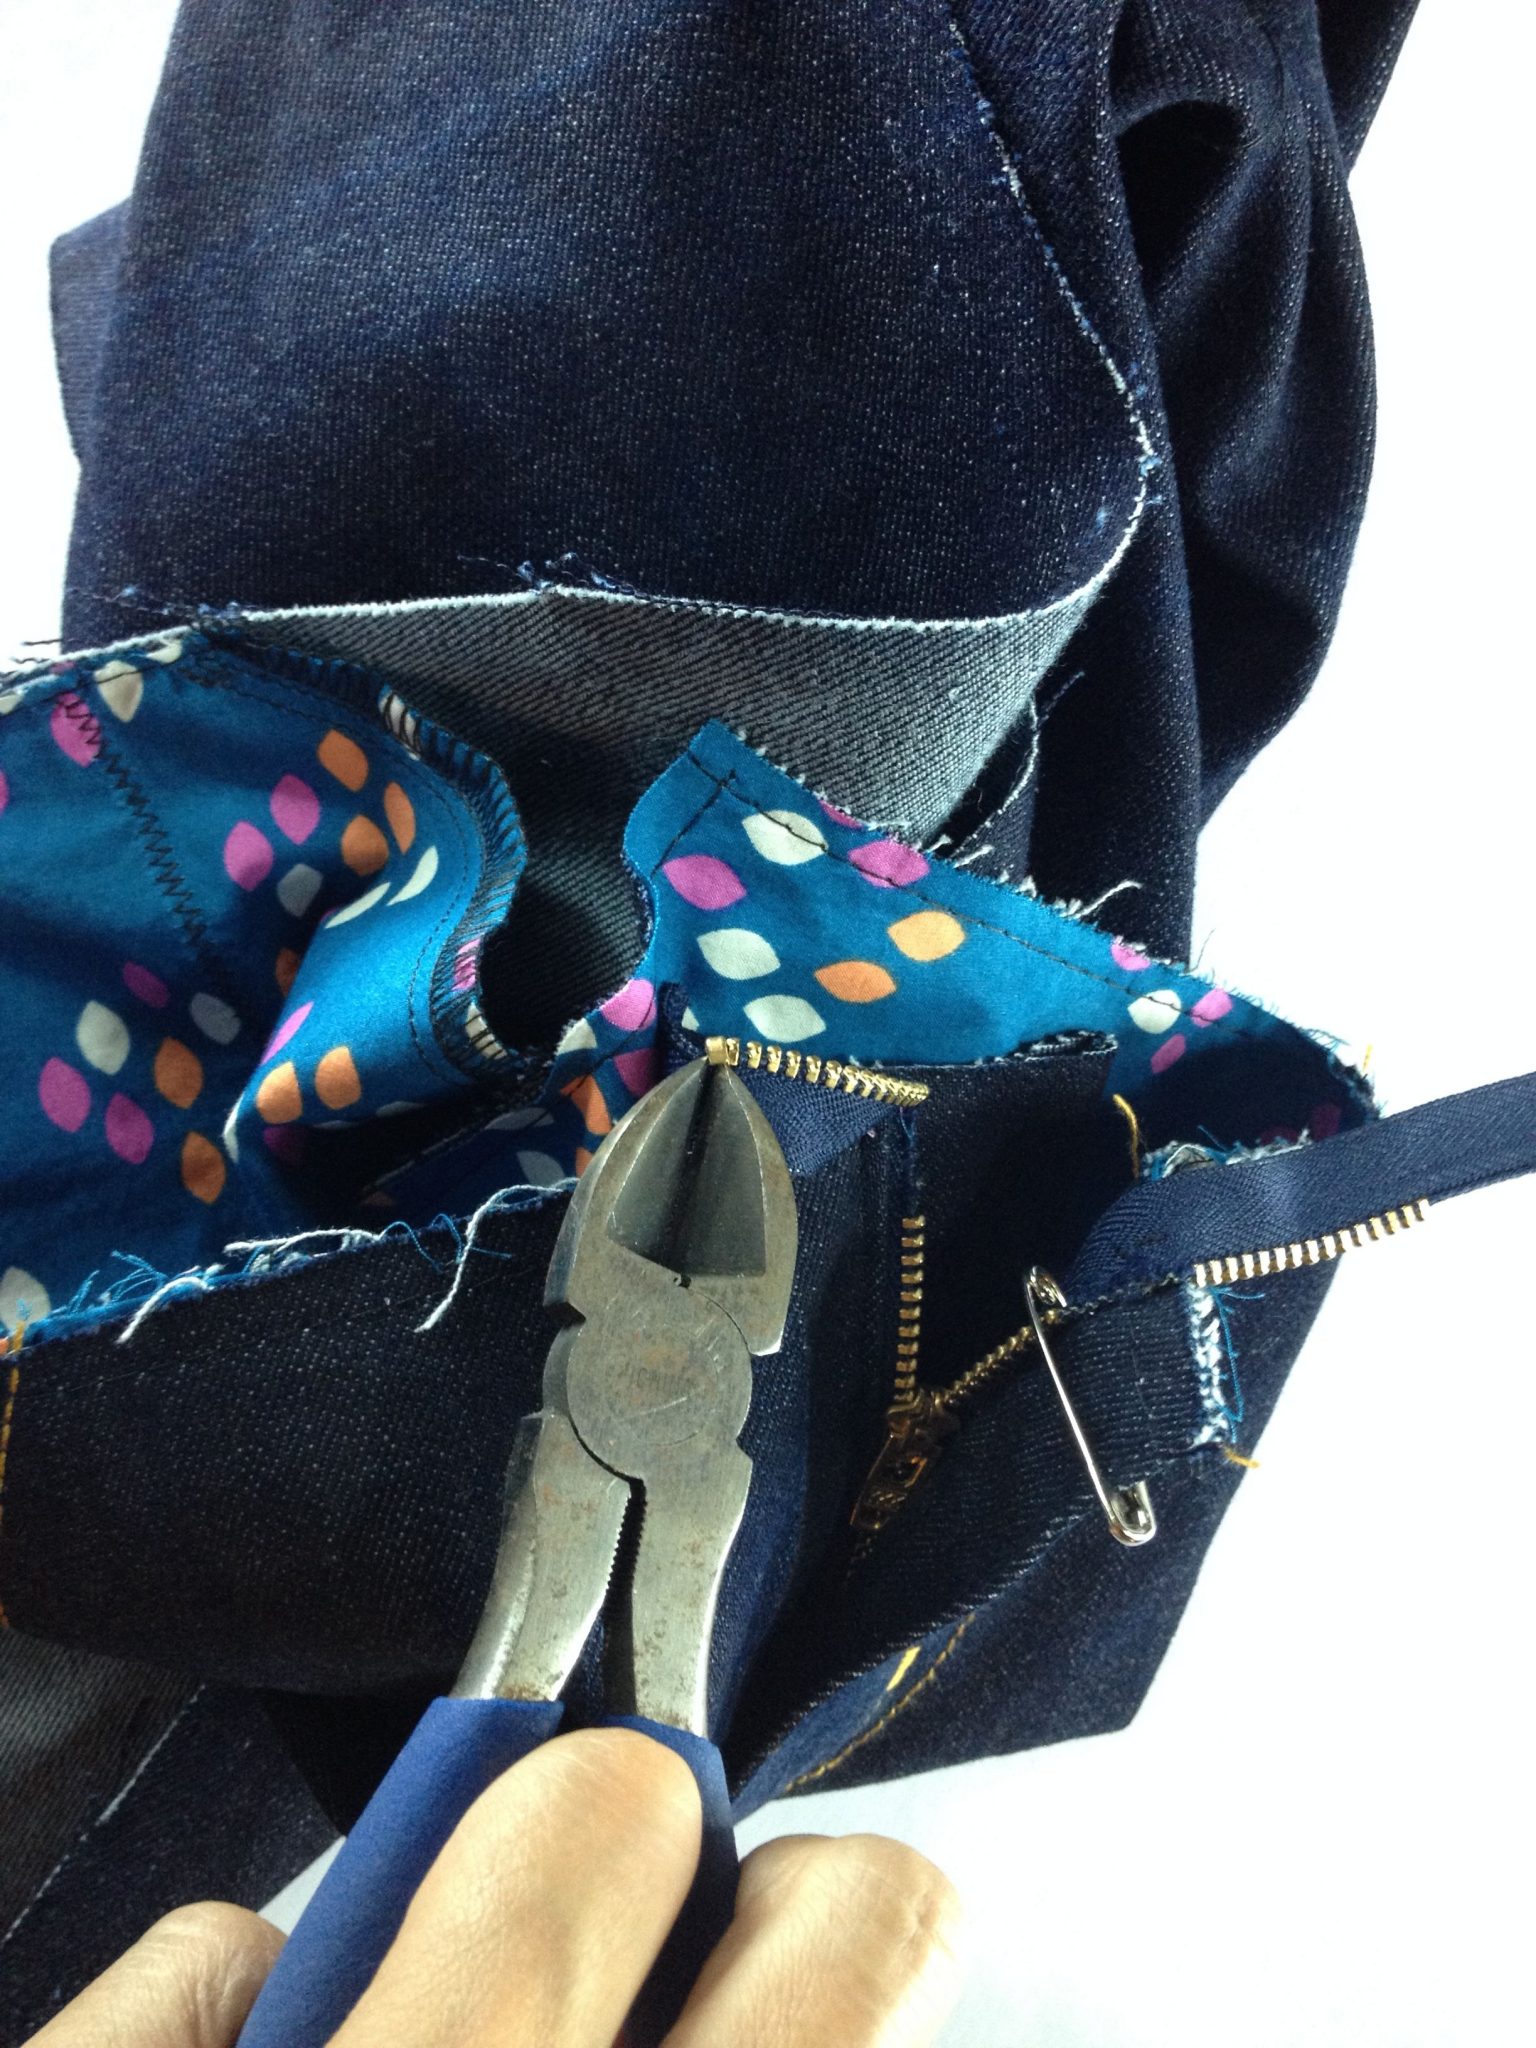
- Mark 1/2″ (1.25 cm) (which is the seam allowance) from the top raw edge. Then start removing one tooth below that mark. To remove the tooth, you have to nudge the wire cutting underneath on both sides of the tooth. The first one is going to be harder because there’s not much room to get the wire cutter in there. You can fold/roll the zipper a little and get yourself more room. Please be very careful; it’s easy to hurt yourself.
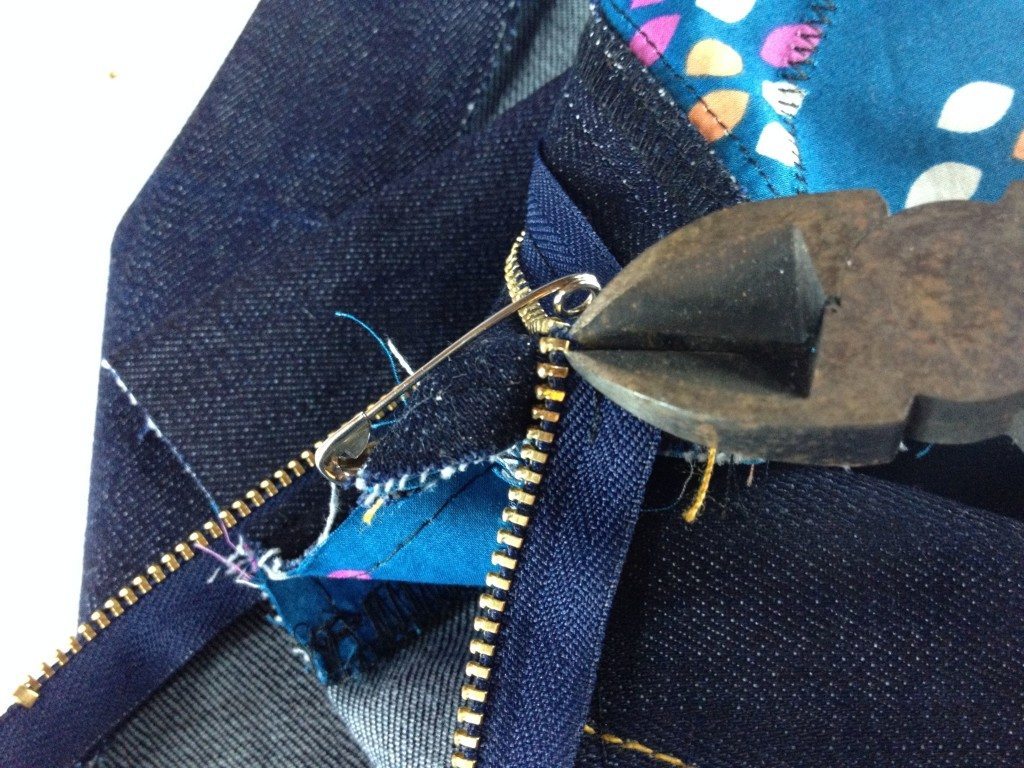
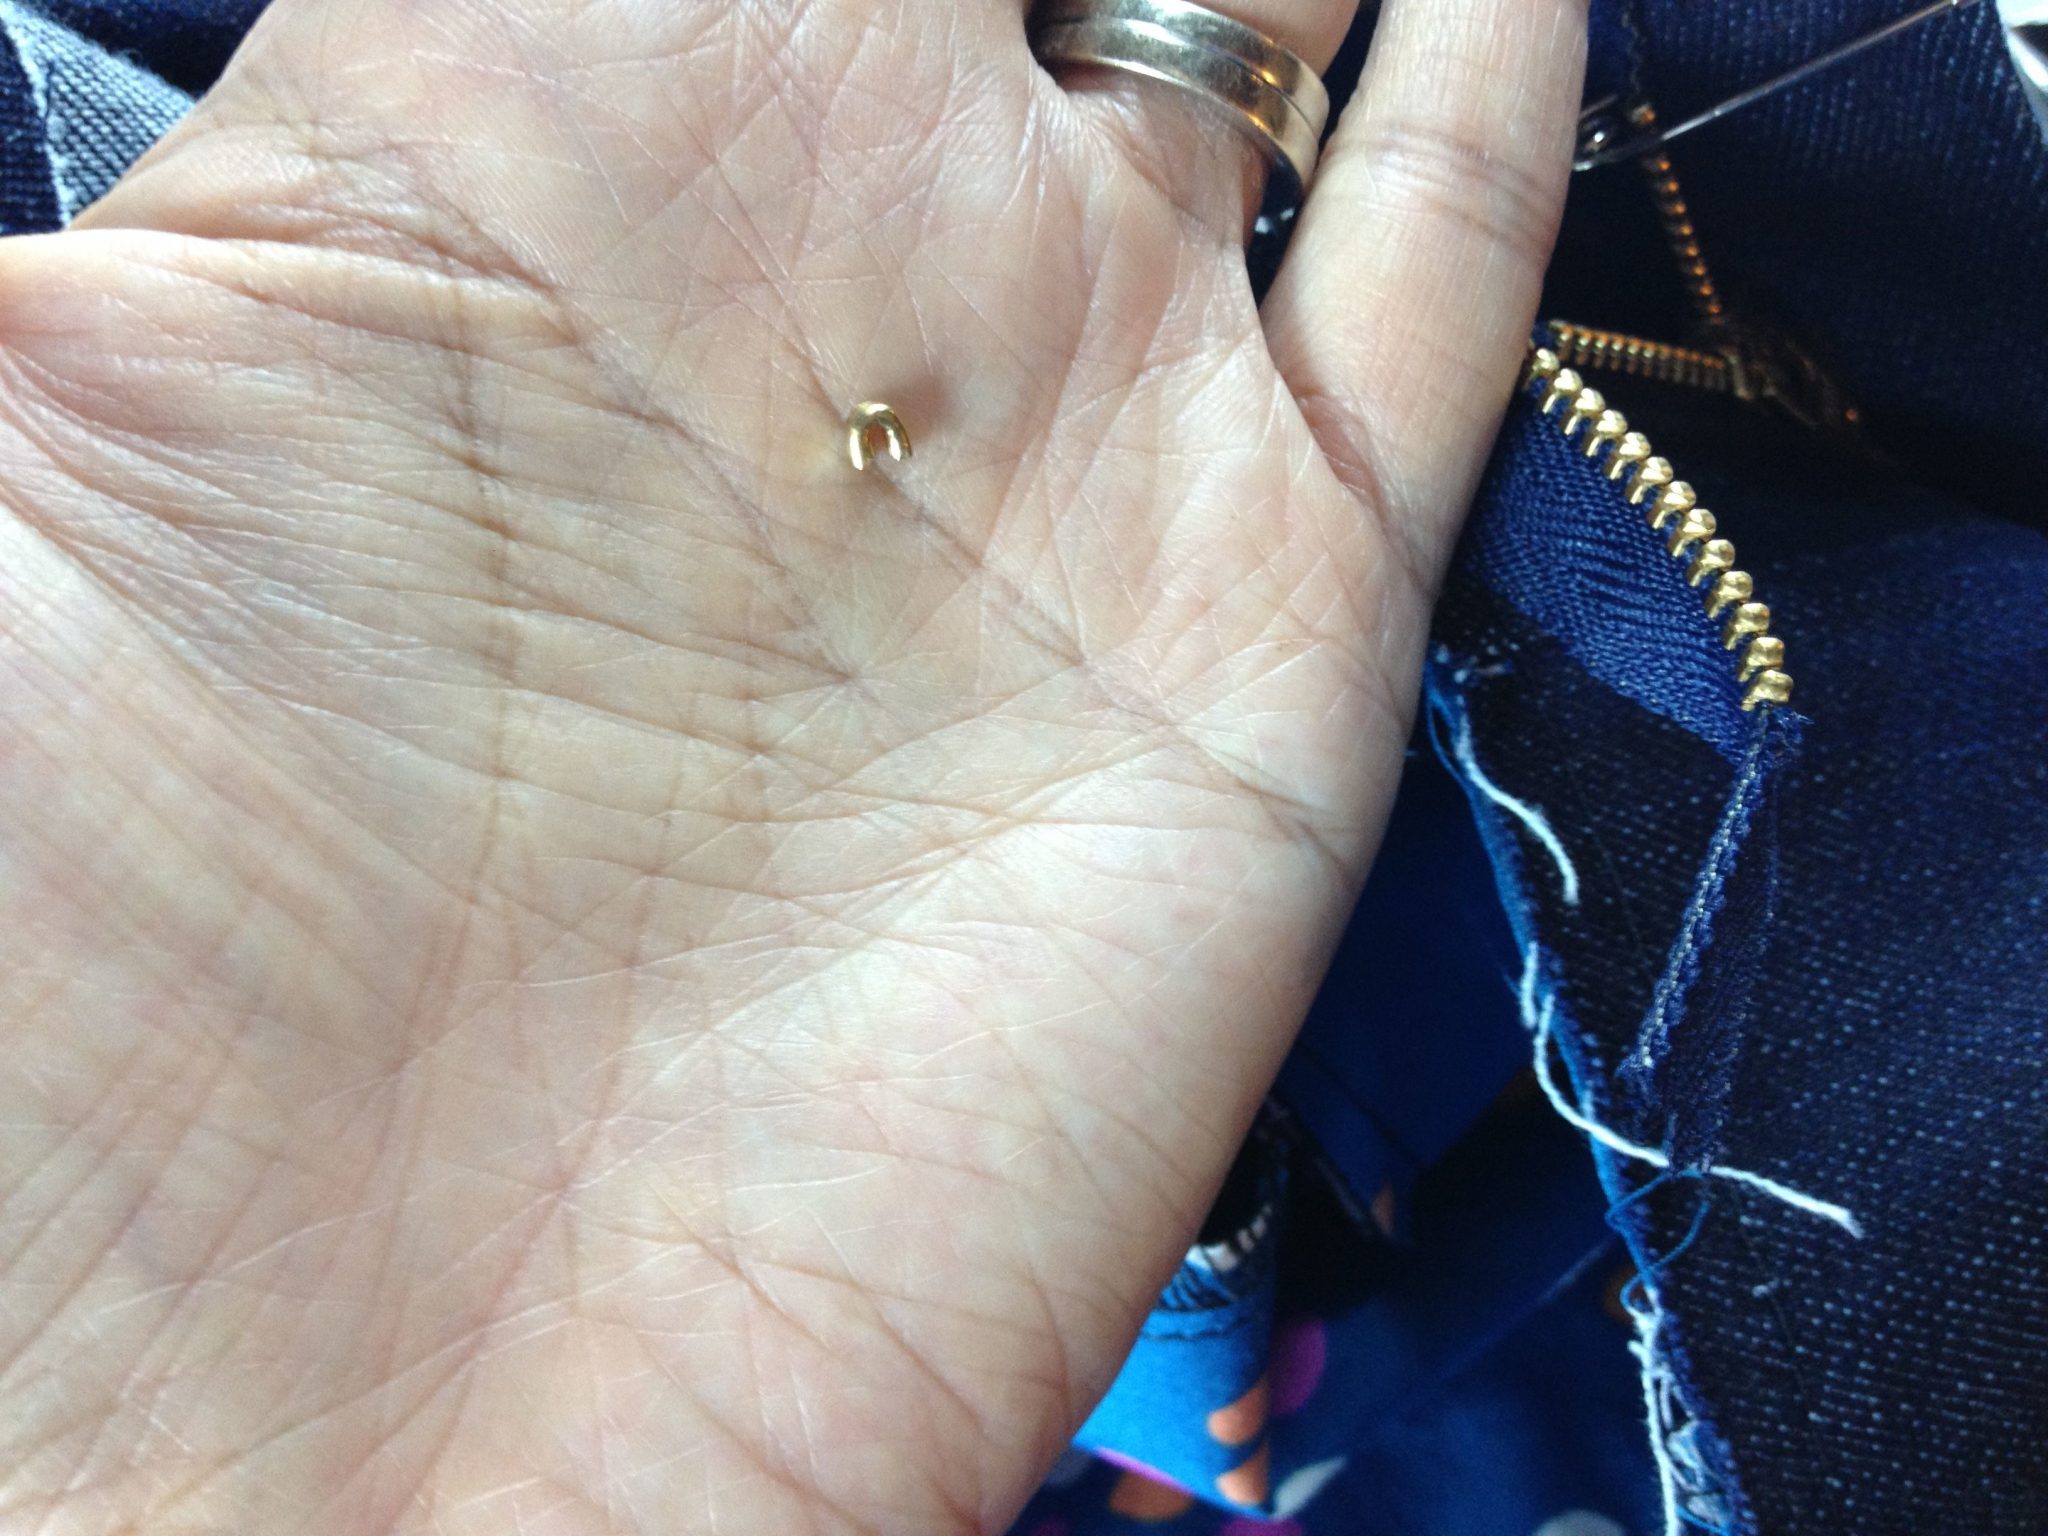
Remove a zipper tooth by nudging the wire cutter on the base of both sides.
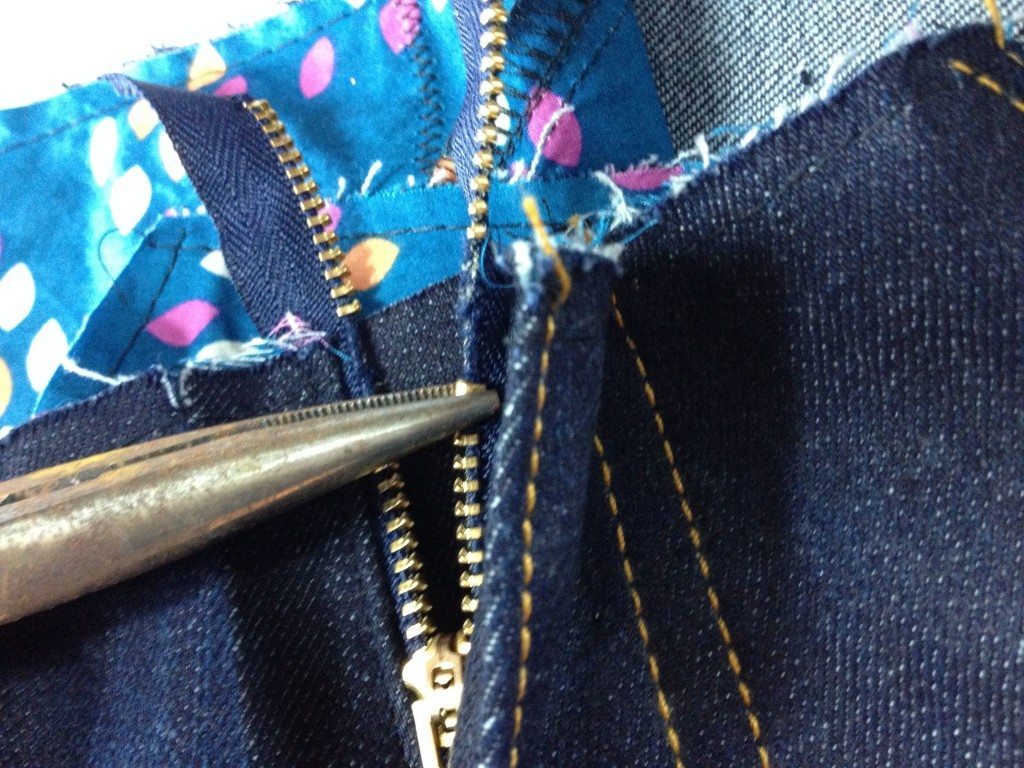
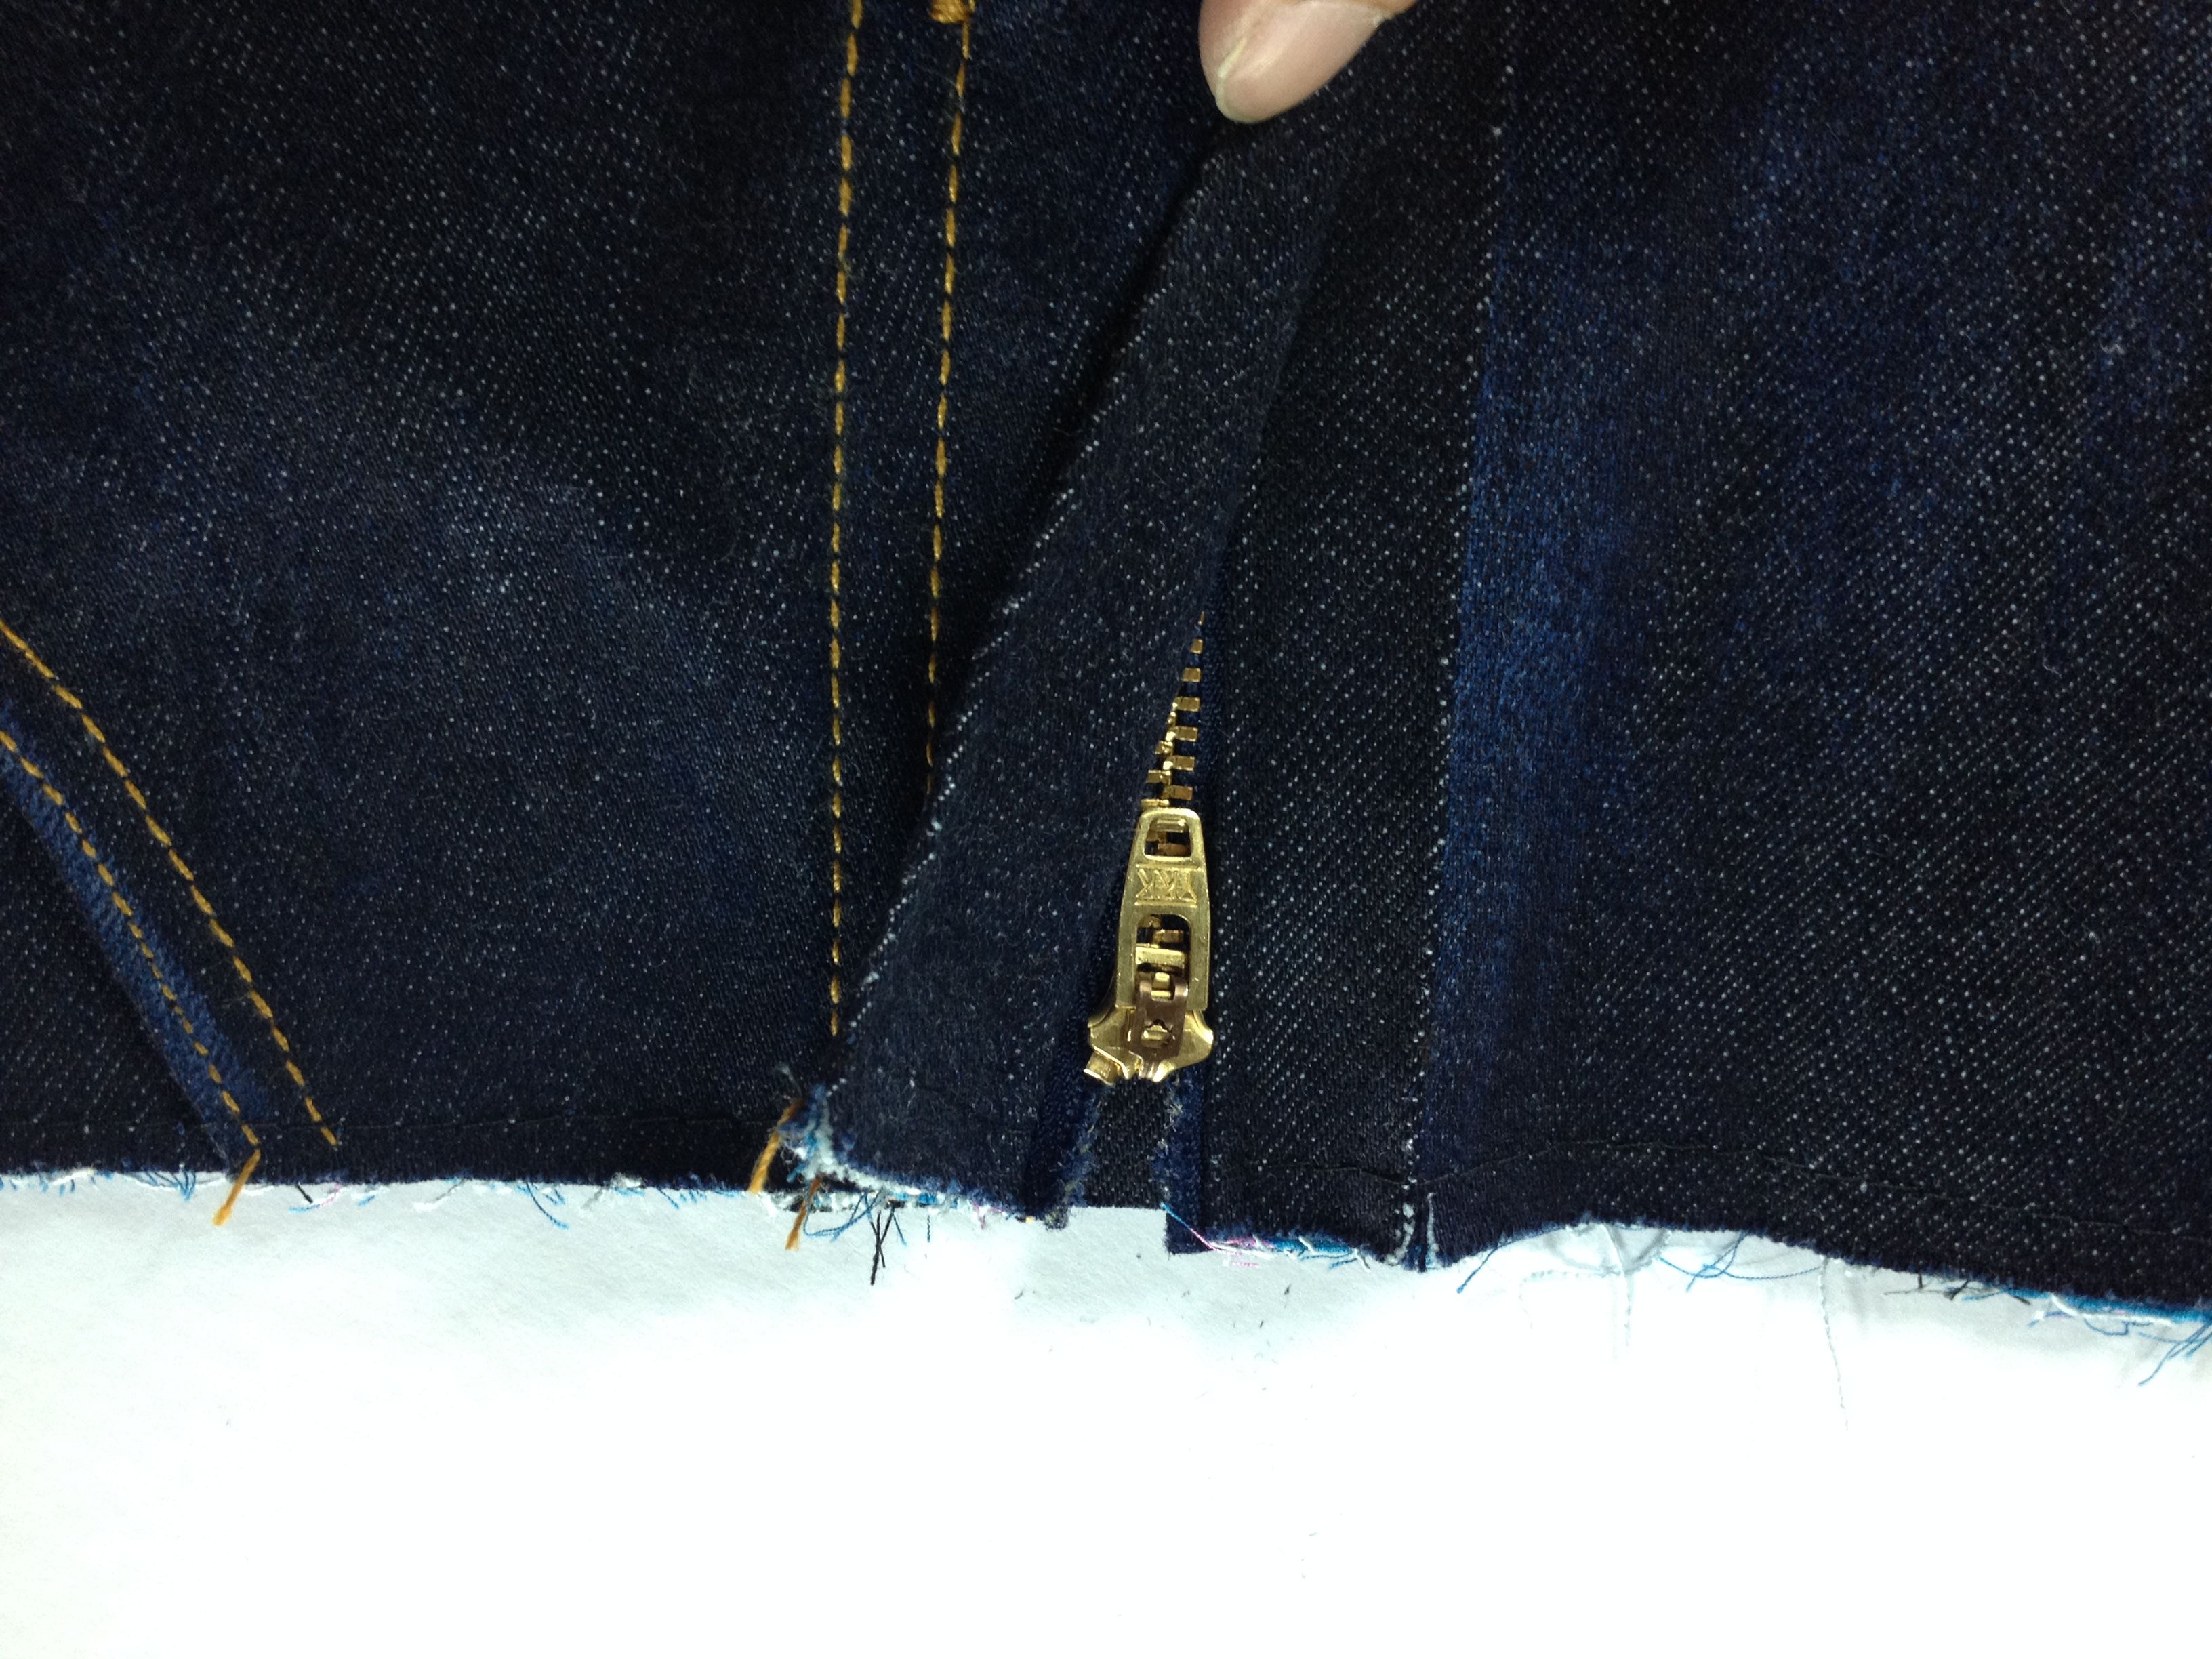
- Keep removing more teeth above until you reach the top raw edge. You will have to remove about 7 teeth to get there.

Remove the teeth until you reach the top raw edge of the Front.

You have to do both sides.
- Optionally, you can remove the top stop using the same method. If you manage to preserve the top stop, you can crimp it back at the new top of the zipper. If you can’t preserve it, you could a) leave it alone; the waistband will become your zipper stop; or b) you could buy a new zipper top stop and use that instead.

Remove the top stop the same way.

If you manage to preserve it…
You can crimp it back to the new top of the zipper using pliers.
- You can now cut the excess zipper tape. You can leave the safety pin there until you work on the waistband. If you already put the zipper top stop on, you could remove the safety pin.
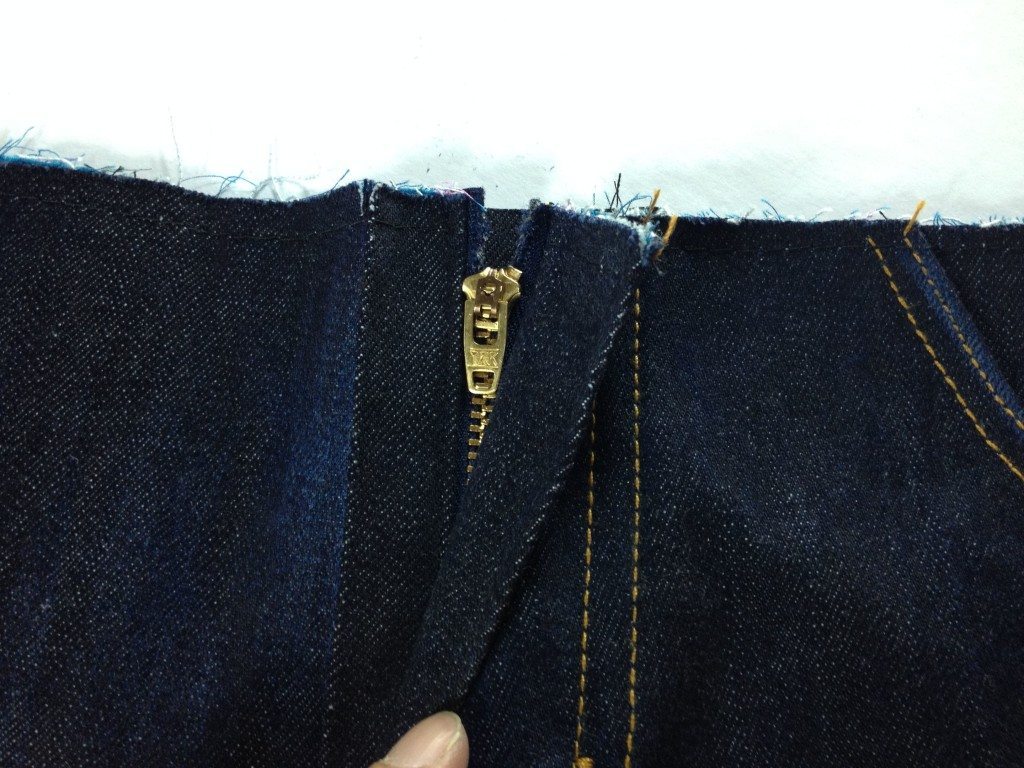
Zipper tape cut!


Now it’s time to pat yourself on the shoulder and congrat yourself for a fine job done. I promise that if you do this several times, you will be really good at it. We almost see the light at the end of the tunnel! Next up will be the side seam, inseam and waistband. It looks like we’ll have a pretty busy day.
Here’s the schedule of the Liana Stretch Jeans Sew Along, be sure to look at other posts too!
Day 0: Get Ready!
Day 1: Intro, Material and Supplies
Day 2: Topstitching & Distressing
Day 3: Choosing a size & Cutting Test Garment/Muslin
Day 4: Fitting Part 1
Day 5: Fitting Part 2
Day 6: Sewing the Back
Day 7: Sewing Front Pockets
Day 8: Sewing Fly Front Zipper (this post)
Day 9: Sewing Back to Front & Waistband
Day 10: Hemming and Finishing

I wasn’t going to do a sew a long ever. I think my mind just got changed!
I am gearing up to sew a pair of fly-front pants this winter. I now feel 100% confident about the fly front.
Thank you so much for creating this tutorial. It is so clear and detailed. I can tell that you put a lot of effort into making it easy to understand—you have definitely succeeded!
Thank you Lori. I am putting a lot of effort in this sewalong. The greatest reward would be to see people finish their pants/jeans using the information. I am glad to hear from you!