How to buy, download, print & assemble PDF Patterns—Part 4—Print at Home
In case you want to jump to a specific topic, here's a list of posts for the How to buy, download, print & assemble PDF Patterns series:
Part 1—Shopping cart
Part 2—Payment
Part 3—Download
Part 4—Print at home (this post)
Part 5—Assemble at home
Part 6—Print at a print shop
Now that you’ve downloaded your purchased pattern, you are ready to print the pattern!
Itch to Stitch patterns provide you 2 options for printing your pattern:
- You can print the “pattern tiles” on a regular printer using letter or A4 paper. You will then attach the pages together to assemble the pattern.
- You can use the “large format” file and get the pattern printed at a copy shop on large A0 size paper.
In this post, we will go over how to print the pattern at home. If you are not interested in printing at home, you can skip to how to print the pattern at a print shop.
Print “at home” pattern on letter size paper
First, you want to open Adobe Acrobat Reader (this is a free app used to view PDF files). You can search for it on your computer using the search bar by the start menu.
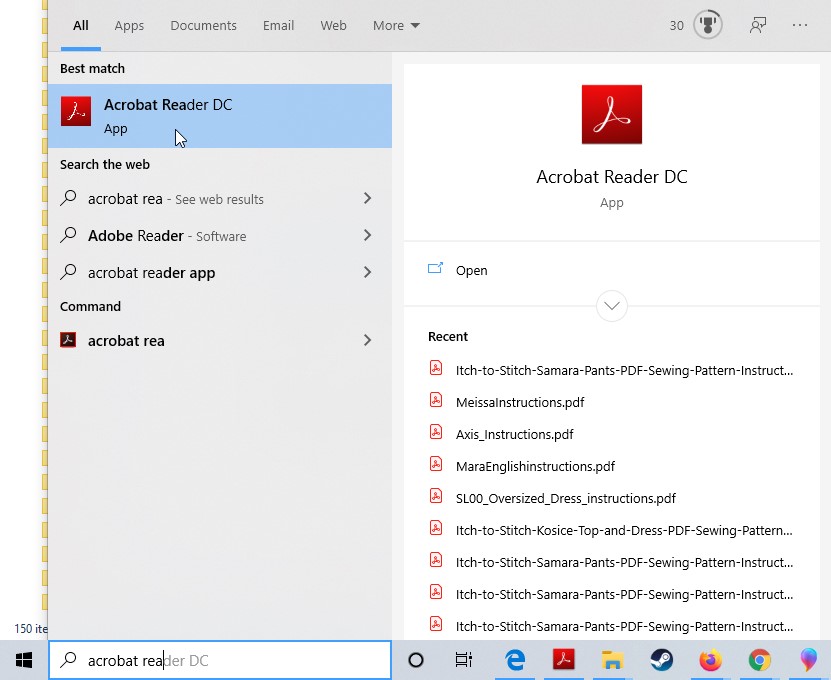
If you don’t already have this app on your computer you can download it here—https://get.adobe.com/reader/. The free version of Adobe Reader is sufficient here; there is no need to use the paid version.
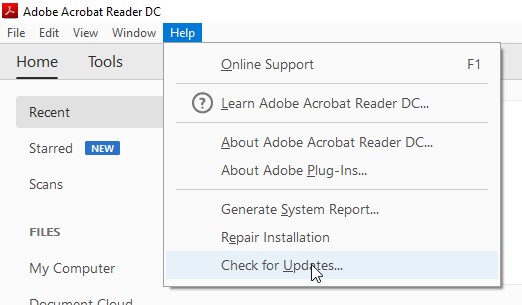
If you already have Adobe Reader open it and check you have the most current version installed by clicking under the menu “Help > Check for Updates”
Now onwards to actually printing your pattern!
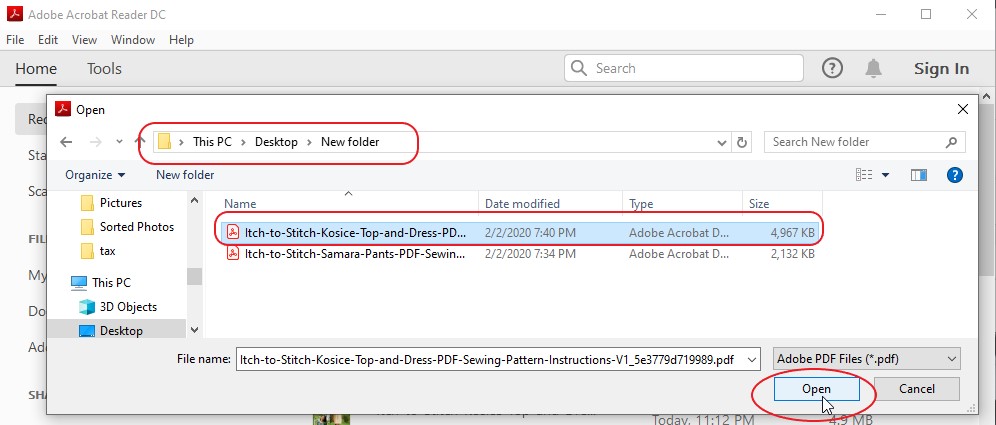
In the Adobe Acrobat Reader app chose the option File then Open.

Navigate to the location on your computer where the pattern file was saved when you downloaded. Click on the pattern + instruction file you wish to open so it shows as “highlighted” then click the Open button.
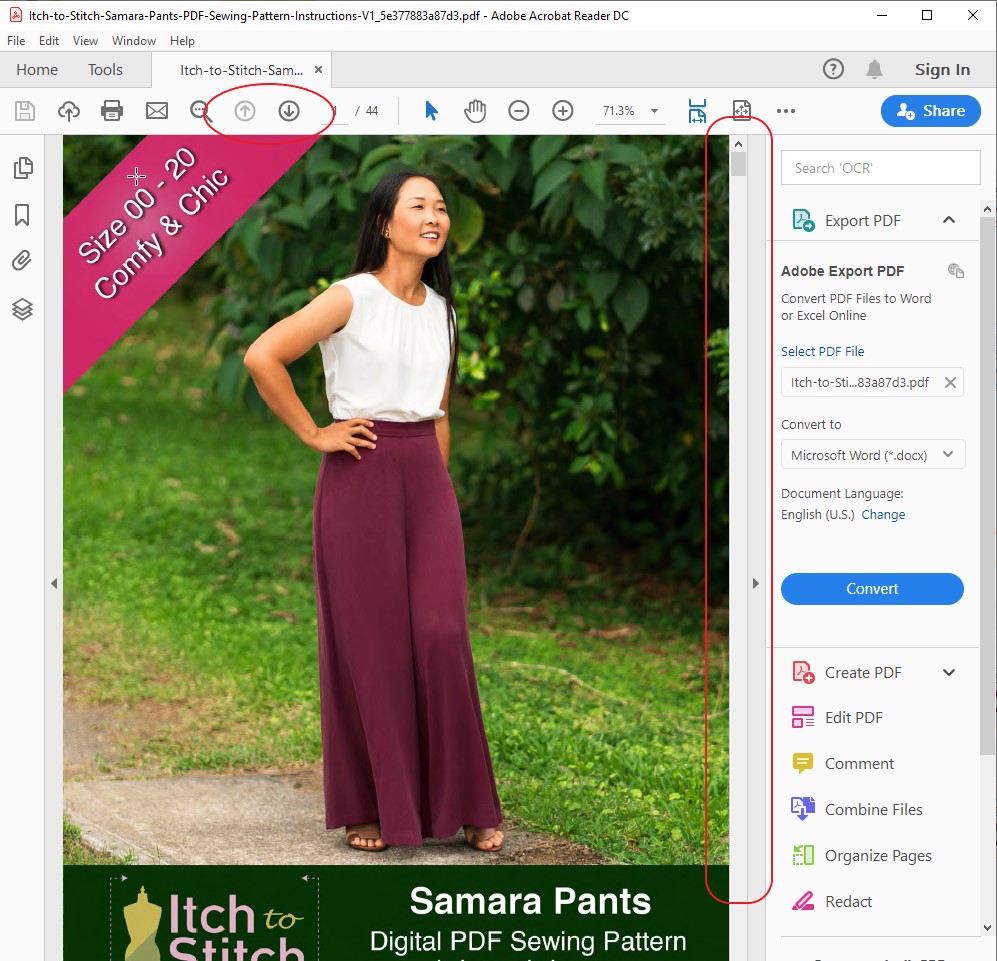
The pattern file will now be open in Adobe and you can use either the arrows in the top menu or the scroll bar on the side to move from page to page.
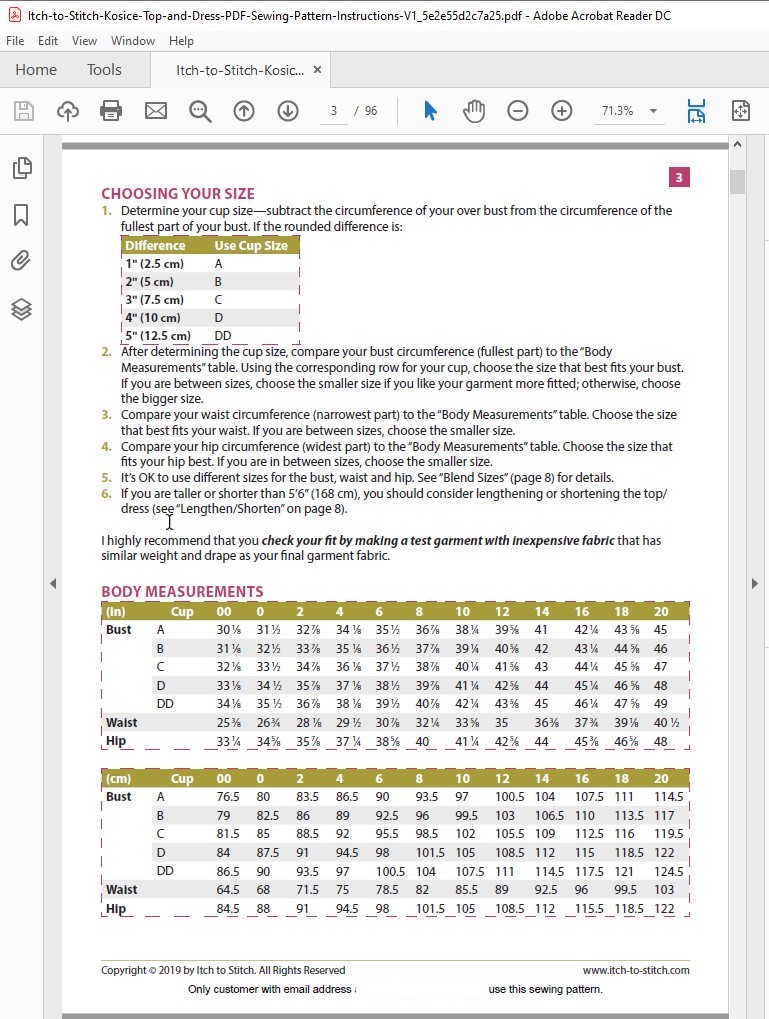
Scroll or flip to view the instructions page about choosing your size. Determine the size or sizes you will need to print.
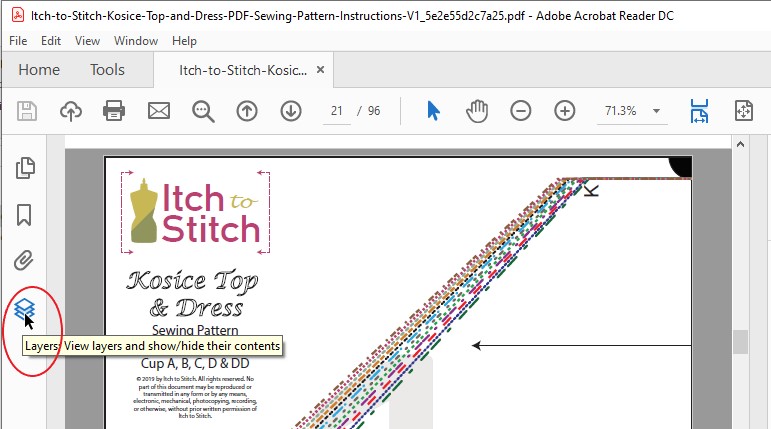
Click on the Layers icon on the left side of the page. Itch to Stitch patterns use the “layers” feature which allows you to print only the size(s) you need!
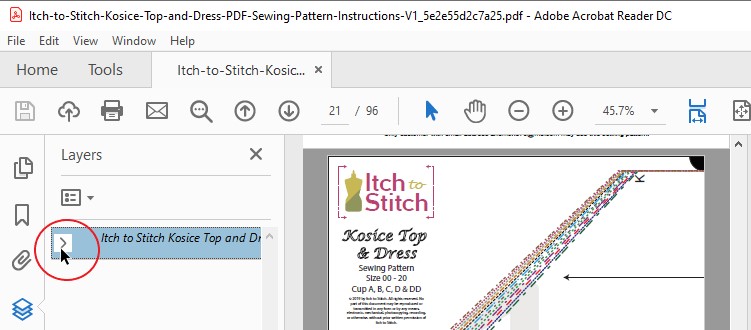
The layers side bar will open and you can then click the > icon to see all the size layer options.
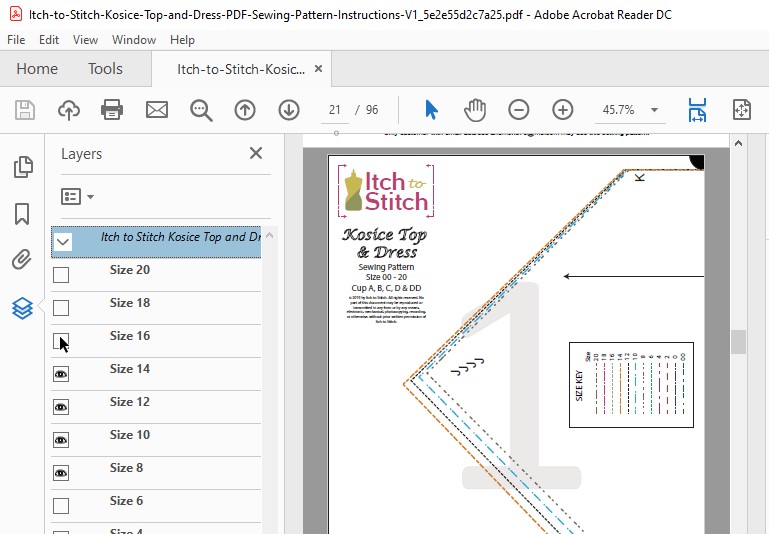
You will now see a list of each size with a little “eye” icon on all the layers that are turned on to be visible and printed. In this picture I’ve clicked on several of the little boxes to remove the “eyes” for sizes I don’t need to print. Here I’ll be printing sizes 8, 10, 12, 14 (so I can blend between sizes) and you’ll notice that only lines for these 4 sizes now show on the pattern tile.
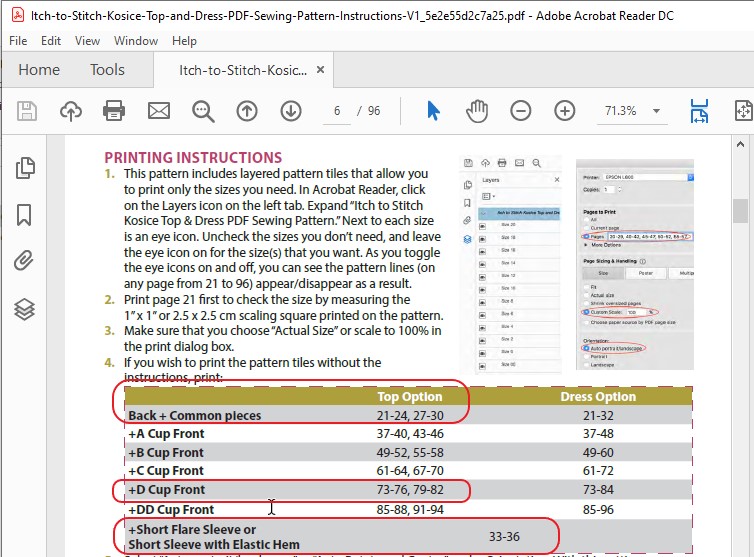
One more thing to check before you print is the pattern. Go to the page with Printing Instructions. Many Itch to Stitch patterns have different views or cup sizes and the pages you need to print for each option will be listed here. For example, I plan to make the Top Option with elastic hem sleeves and I’m a D cup so I’ll print only the pages I’ve circled in this picture.
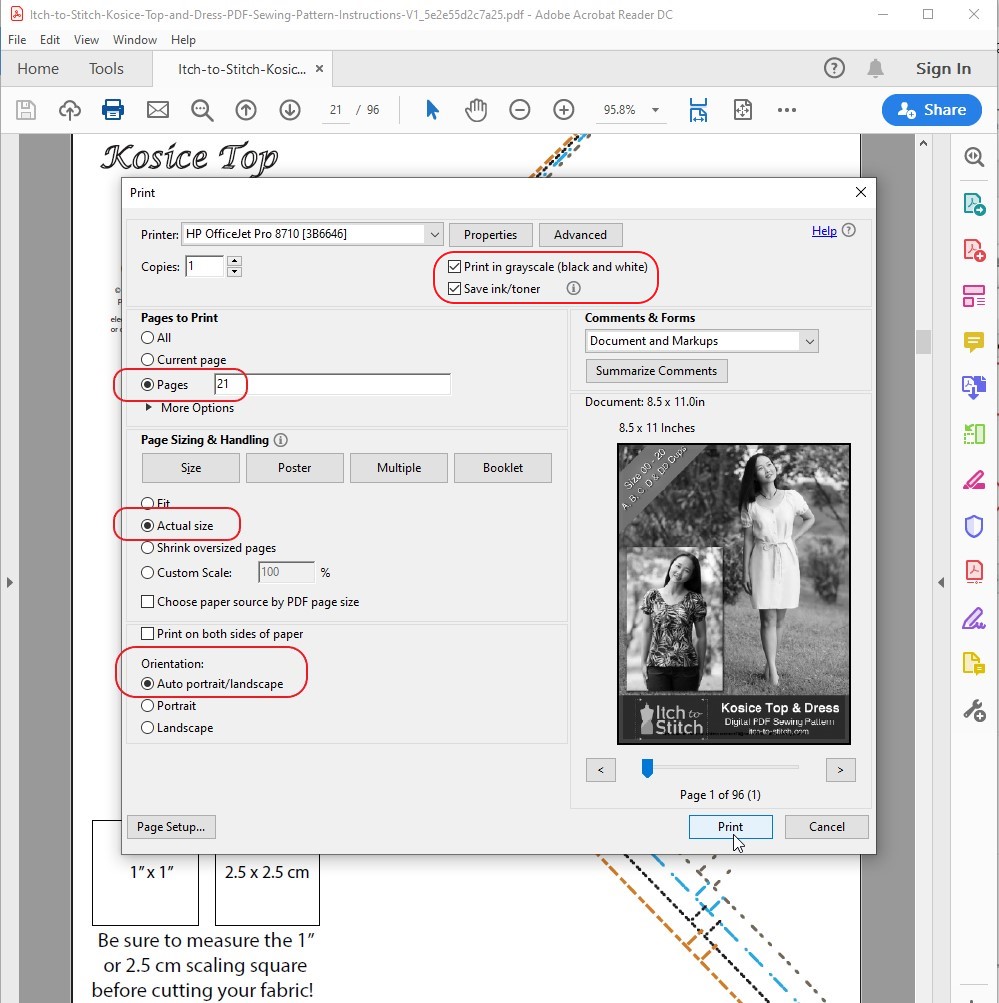
You’re ready to hit Print now!

I always print just the first patten page containing the “scaling squares” before I go ahead with printing the entire pattern. This ensures I’ve chosen the proper setting for printing, avoiding the possibility of wasting paper if my settings are incorrect.
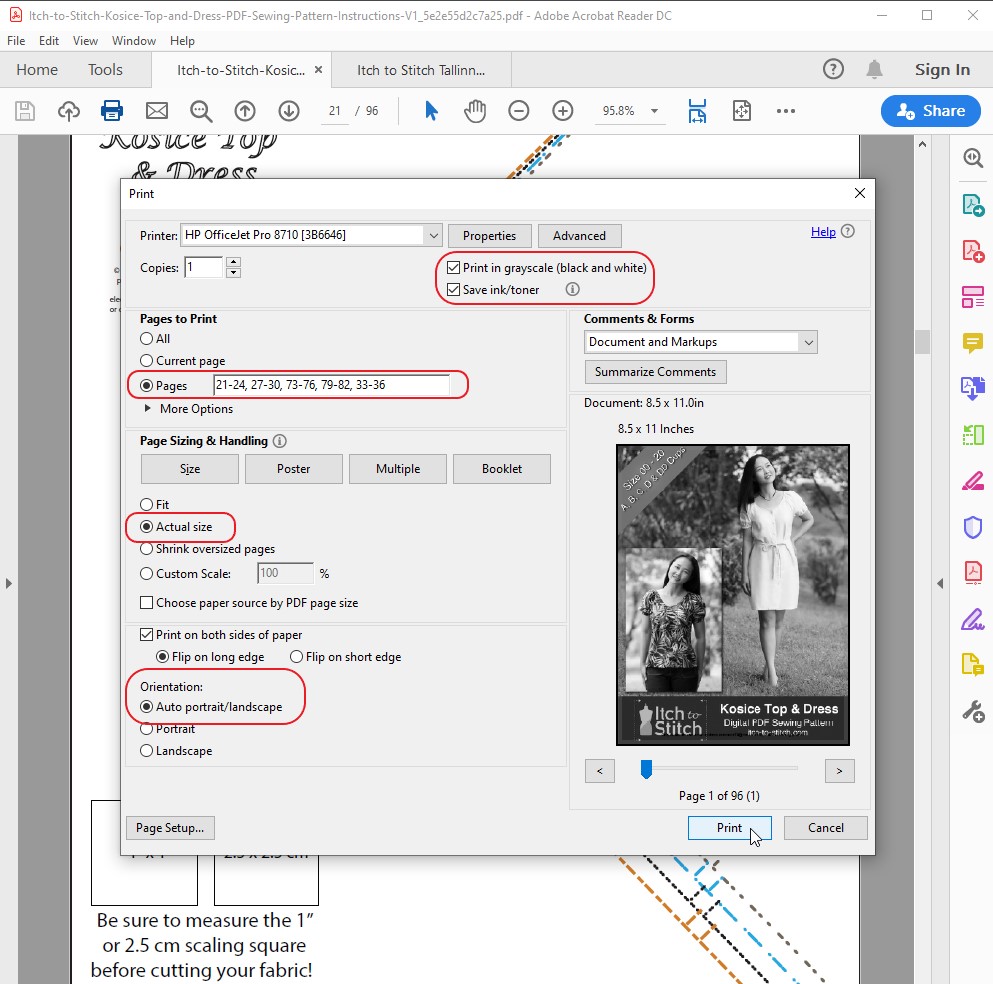
When printing a PDF pattern you want to choose these settings for printing:
- Under Page Sizing & Handling set to “Actual Size” or “Custom Scale at 100%”. If you miss this setting your pages may be shrunk or magnified and your scaling squares (and pattern) will not be the proper size!
- Under Orientation set to “Auto portrait/landscape” or “Auto Rotate and Center”. If you miss this setting the tiles will print shifted to the side instead of centered on the page.
- Optionally you may wish to set the pattern print in black & white (color ink cartridges are expensive!) and set to save ink/toner.
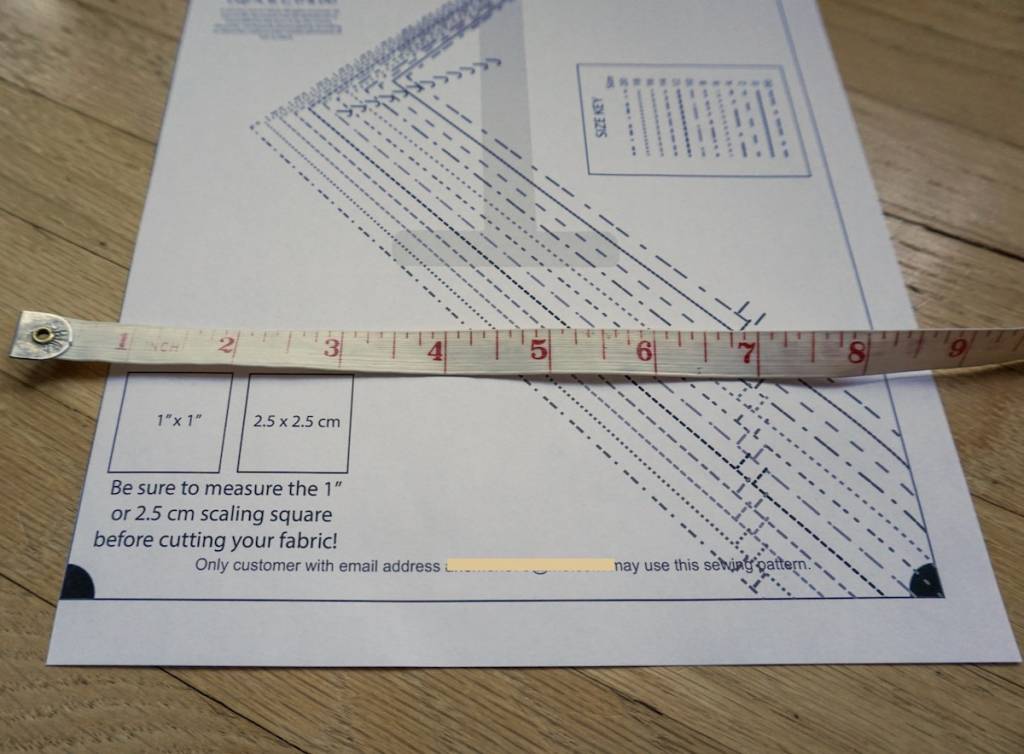
Print then measure the “scaling squares” on the single (first page) of the pattern to ensure they are 1”x1” (or 2.5cm x 2.5cm).
If your scaling square is the proper size and the tile shows centered on the page you are ready to print all the pattern pages you need. Just use the same printer settings you used for the single page!
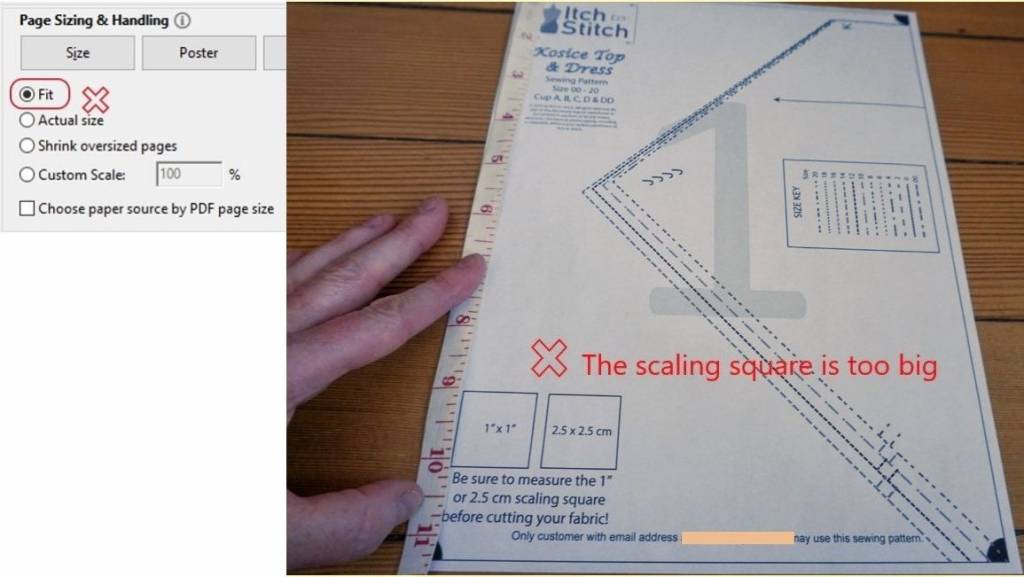
If your scaling square did not measure correctly you need to check the Page Sizing & Handling options you used. This is an example of how a page looks if I incorrectly chose the “Fit” option instead of the “actual size” or “Custom Scale 100%” option. The scaling square is ⅛” too big…this seems small but over your entire pattern it would make a big difference!
If your tile isn’t centered on the page you need to check the Orientation settings you used. This is an example of how a page looks if I incorrectly chose the “portrait” option instead of the “Auto portrait/landscape” or “Auto Rotate and Center” option. You can see the left edge of the tile is cut off and did not print, oops!
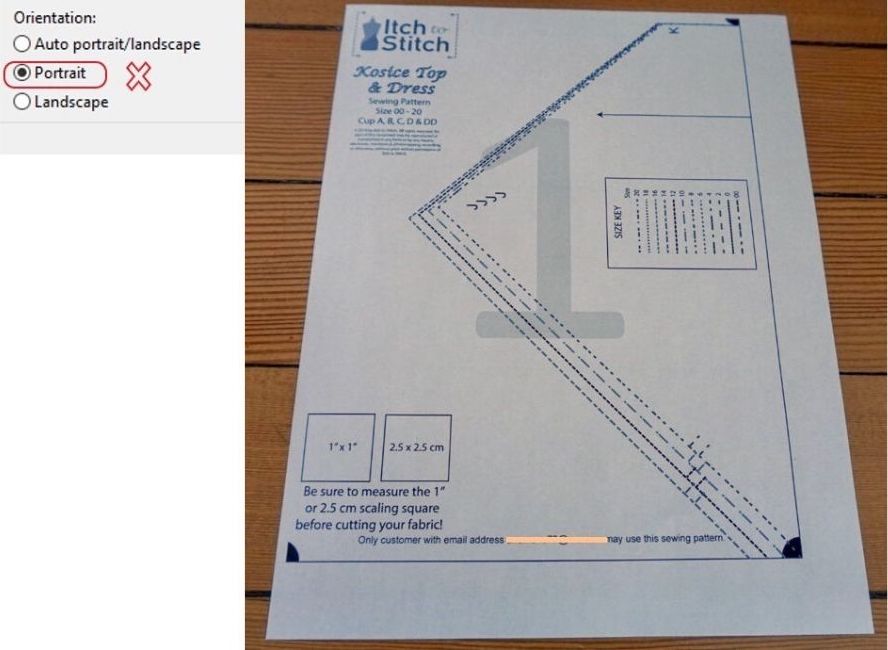
Your print out is correct when you can see all four lines.

Now that you printed the pattern, let’s go to the next post where we’ll assemble the pattern!


i can see only the size i am trying to print, but it will only print every size. I can’t get it to print just one size, even though i am looking at only that size. I am so frustrated that I am probably going to print all 50 pages and troll through it.
FYI for others on a Mac, i never got adobe to work, it’s not available in the app store anymore. I ended up having to use FoxIt.
Hi Carol, I’m sorry to hear that it’s not working for you. As a Mac user myself, I rely on all the Adobe products daily. I’m not familiar with FoxIt, but it doesn’t seem to be meeting your needs. It might be a good idea to get it printed instead.
Also, please make sure to read the first page of the pattern, as it will indicate which pages you need to print. For example, it specifies the pages required for a C cup. There’s no need to print all pages.
I see a question re printing your patterns with a Mac – don’t see the response…how do you print using adobe on a Mac
Hi Bonnie, when you open the pattern file, the file is automatically opened in a browser window. Click the save button to save the file to your computer first. Then open the file from within Adobe Acrobat Reader. The process is described in this post: https://itch-to-stitch.com/how-to-buy-download-print-assemble-pdf-patterns-part-3-download/.
How do you do this on a Mac? Is there any way to do this without purchasing Adobe Acrobat Pro?
Hi Tom, you also use Adobe Acrobat Reader on a Mac. There’s no need to buy the pro version of Acrobat; the free version is what most people use. Down it for free at the official site: https://get.adobe.com/reader/
Very helpful directions in printing. Pattern printed so nicely. What a huge amount of work you must of done to have this come out so nicely. Anxious to make coat. Thanks!
I have two of your patterns. When I try to print *only* the scale check pages from the patterns, Acrobat Reader tells me I need to specify a valid page range. Each preview is a 2-page preview – one tile from pattern page one, one tile from pattern page two. Any idea how to overcome this problem?
For informational purposes, I’m on Win10 (updated) and I’ve checked to make sure my Acrobat Reader is the current version.
Thanks for any help!
Hi Michelle, first of all, are you sure that you are trying to print the A4/Letter version? That version is followed by the instructions. There’s another stand-alone file that’s in A0 format.
*facepalm*
No, I was trying to print out of the A0 version. Details, details…
Thanks!
Thank you! No wonder I had trouble, ready to go now