
Tutorial: Sleeve Placket
A tower-style sleeve placket is used on men’s shirts, but some of the women’s shirts also use this same type of placket. I think it is suitable when you want your shirt to have a more masculine, strong, powerful look.

It looks a bit intimidating, but like any technique, with some practice, you will be able to master it in no time.
Let’s dive into it!
You can use them on any shirt sleeve with a cuff.
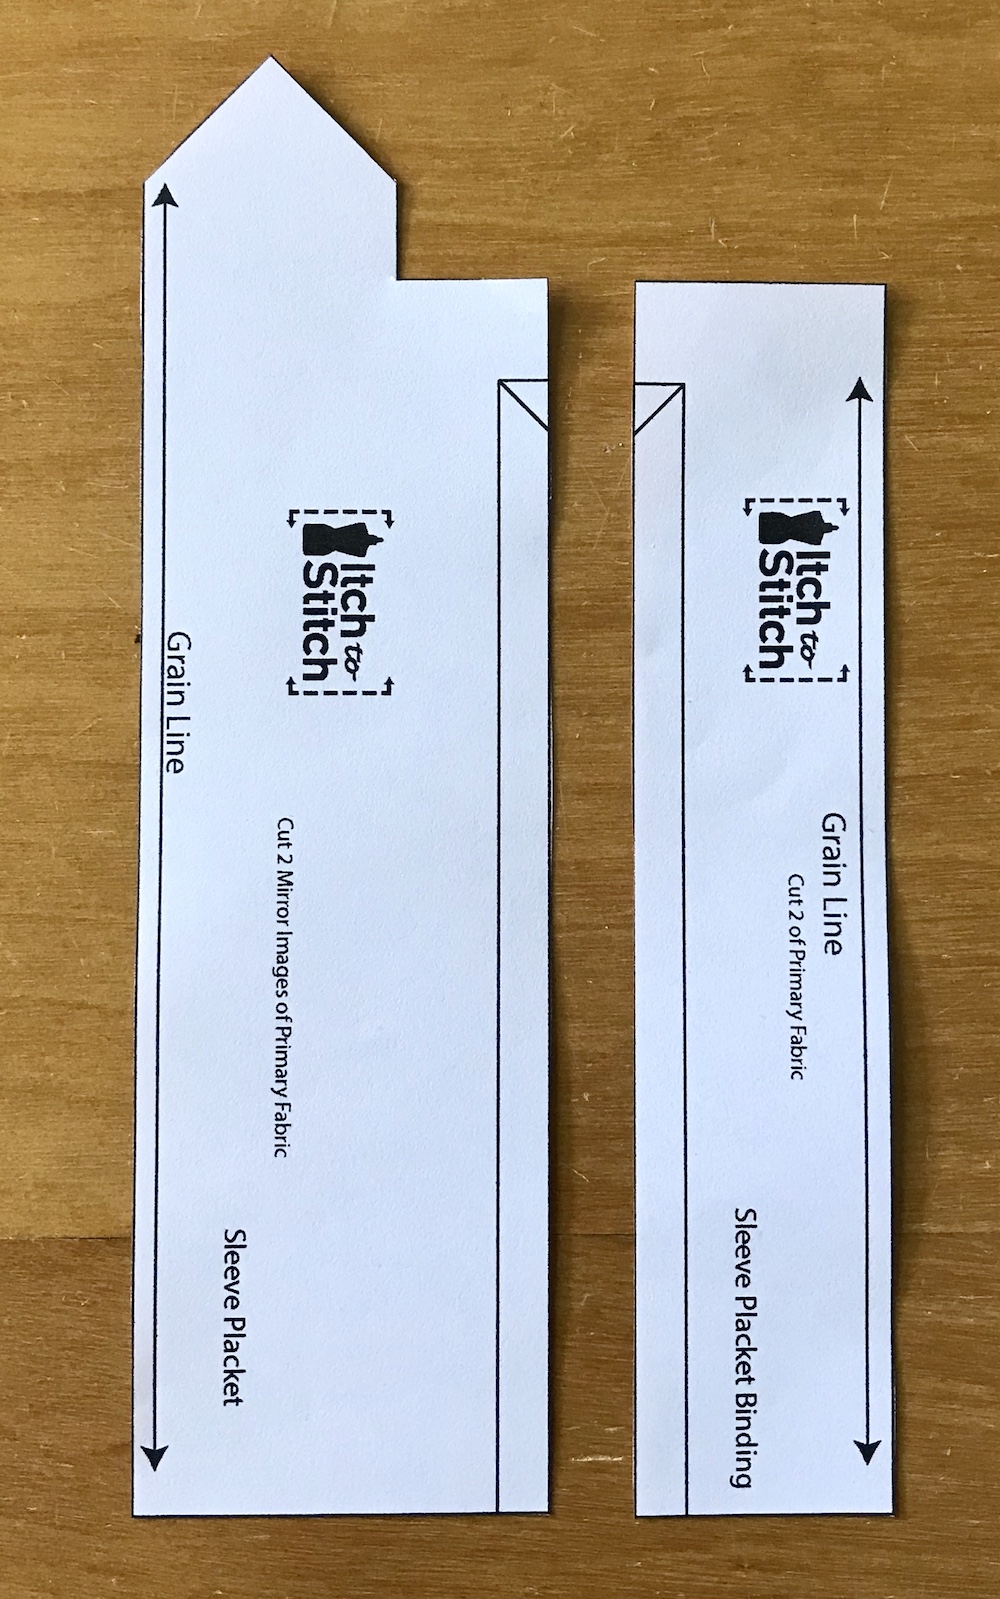
My sleeve placket has a finished width of 3/4″ (1.9 cm), and the sleeve placket binding is 3/8″ (1 cm). The sleeve placket binding is usually narrower than the sleeve placket that covers it. I encourage you to scout around your closet or your significant other’s closet to check out the placket on store-bought shirts.
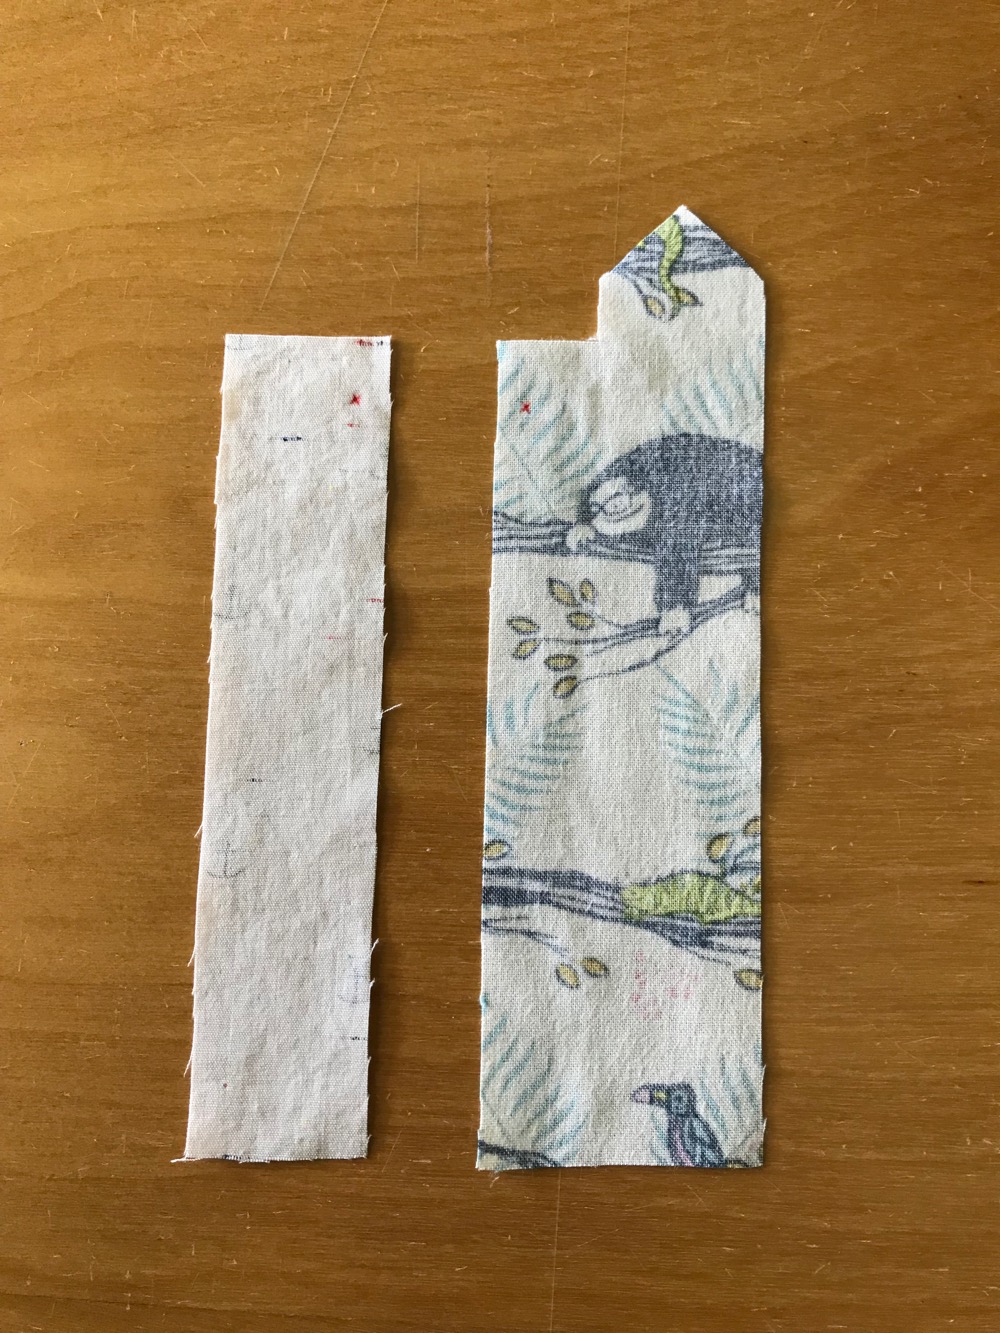
Here are the pattern pieces that I use. Here are some things that I’d like to point out:
- The seam allowance is 1/4″ (6 mm). Yes, it’s a little fiddly to deal with 1/4″ (6 mm) seam allowances, but it’s out of necessity. My sleeve placket binding is only 3/8″ (1 cm) wide as mentioned, so you want the seam allowance to be able to comfortably stay inside.
- The total length of the placket can vary, so you can lengthen or shorten it at the bottom. This one is 7″ (18 cm) long. If it’s any longer, I feel that adding a button in the middle would be a nice look. But I don’t want to add complexity to this tutorial, so let’s stay with 7″ (18 cm). Also, if you decide to use flat felled seam on your sleeve, then you want this placket to be long enough (and this length is a good length), so you can reach in more easily.
- See the “tower” at the top of the bigger pattern piece? It’s like a roof on the house. Some of the patterns might not have this, but instead have a flat top so you can fold that tower point yourself. Either way works; if you are drafting this yourself, you can try both ways to see which you’d like best.
- Some patterns combine these two pieces into one. In fact, if you have made the Mila Shirt before, the center front placket is one piece, and the method of making that placket is quite similar. The benefit of separating the piece into two is that you can use different fabrics for the two. I think that is a nice look.
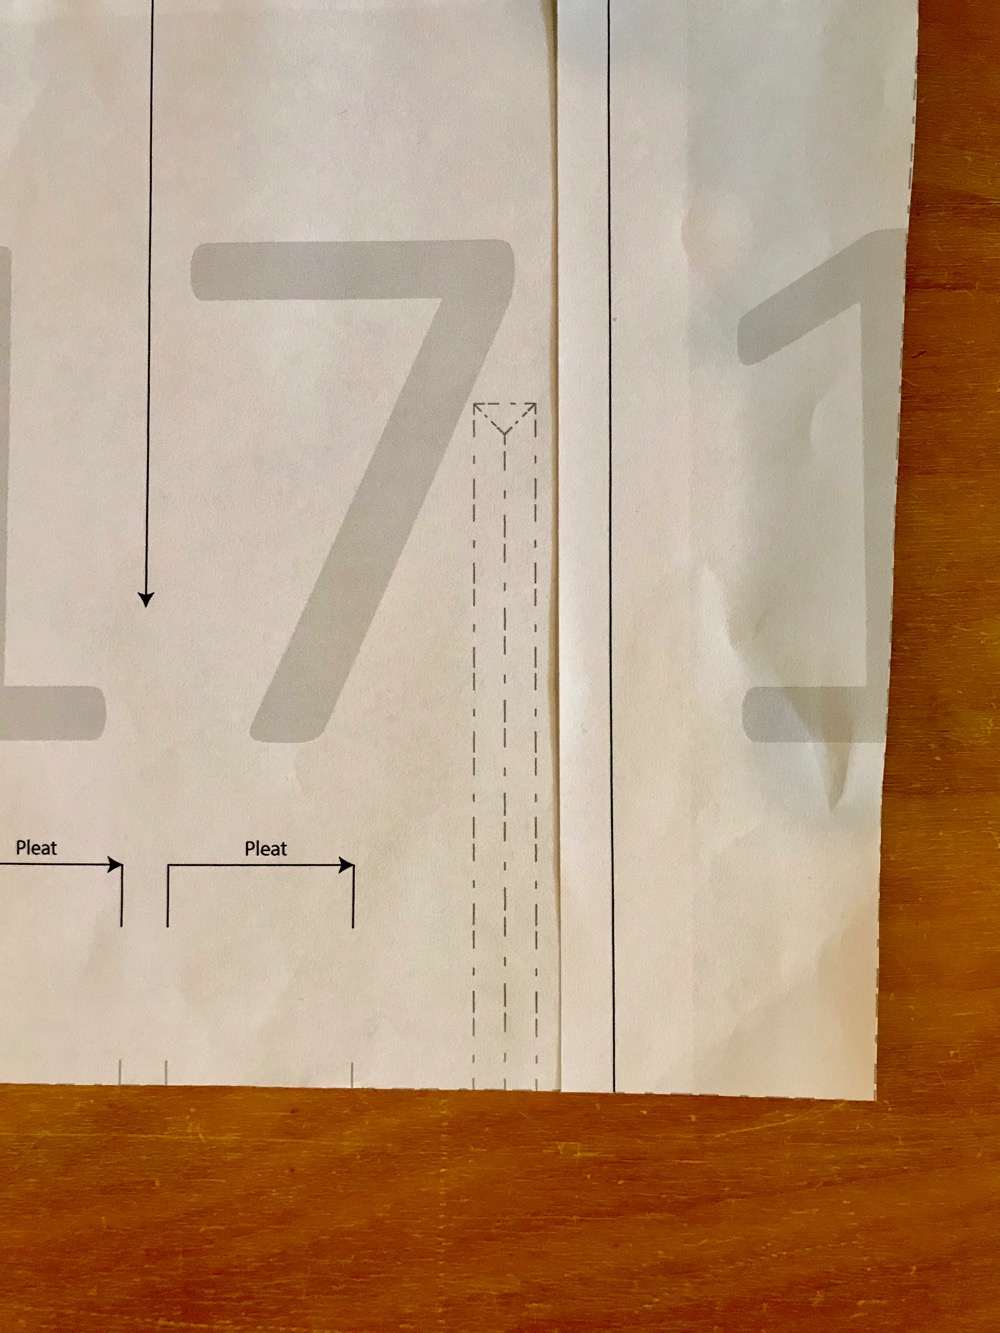
This is the sleeve pattern piece, and I zoom in the bottom to show the placement marking. Do you see that it’s like the markings on the sleeve placket and sleeve placket binding pattern pieces? Indeed it is, except they are combined to make this complete marking.
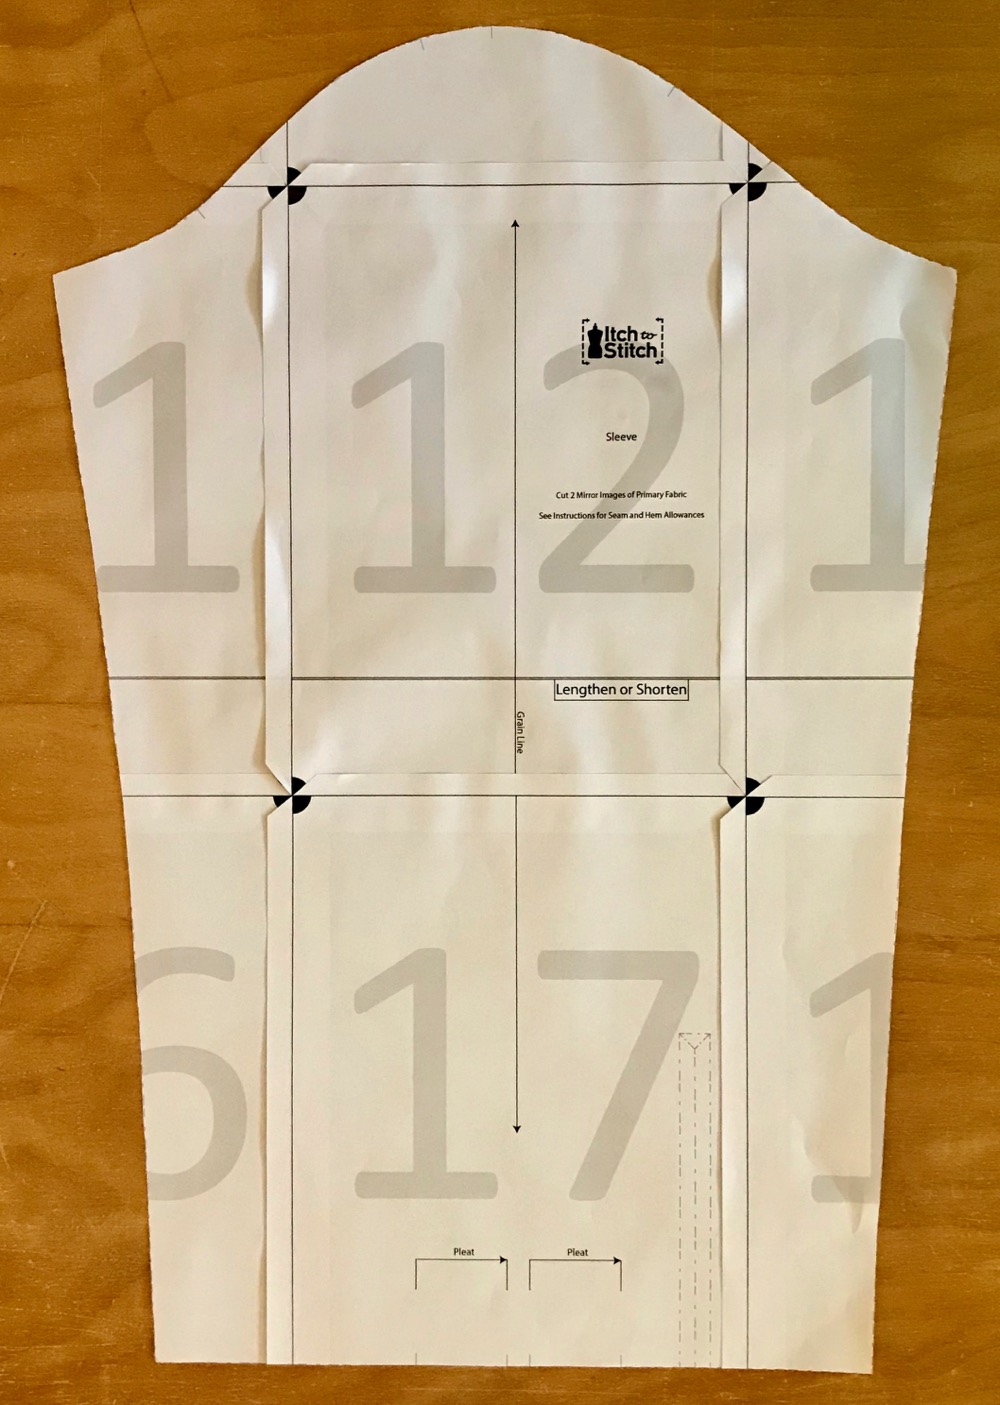
Let’s zoom out, and this is the entire sleeve pattern piece. I want to point out that the sleeve placket placement is off toward one side of the sleeve; on the left side of the placket placement is the bigger side, and on the right side of the placket placement is the smaller side. I am pointing out the obvious, but it is important to point out. You’ll see later.
I cut out the sleeve placket and sleeve placket binding using the pattern pieces. I want to point out that I don’t interface the pieces, but if you are using any slippery fabric that can easily be stretched out of shape, then I’d use very, very lightweight interfacing.
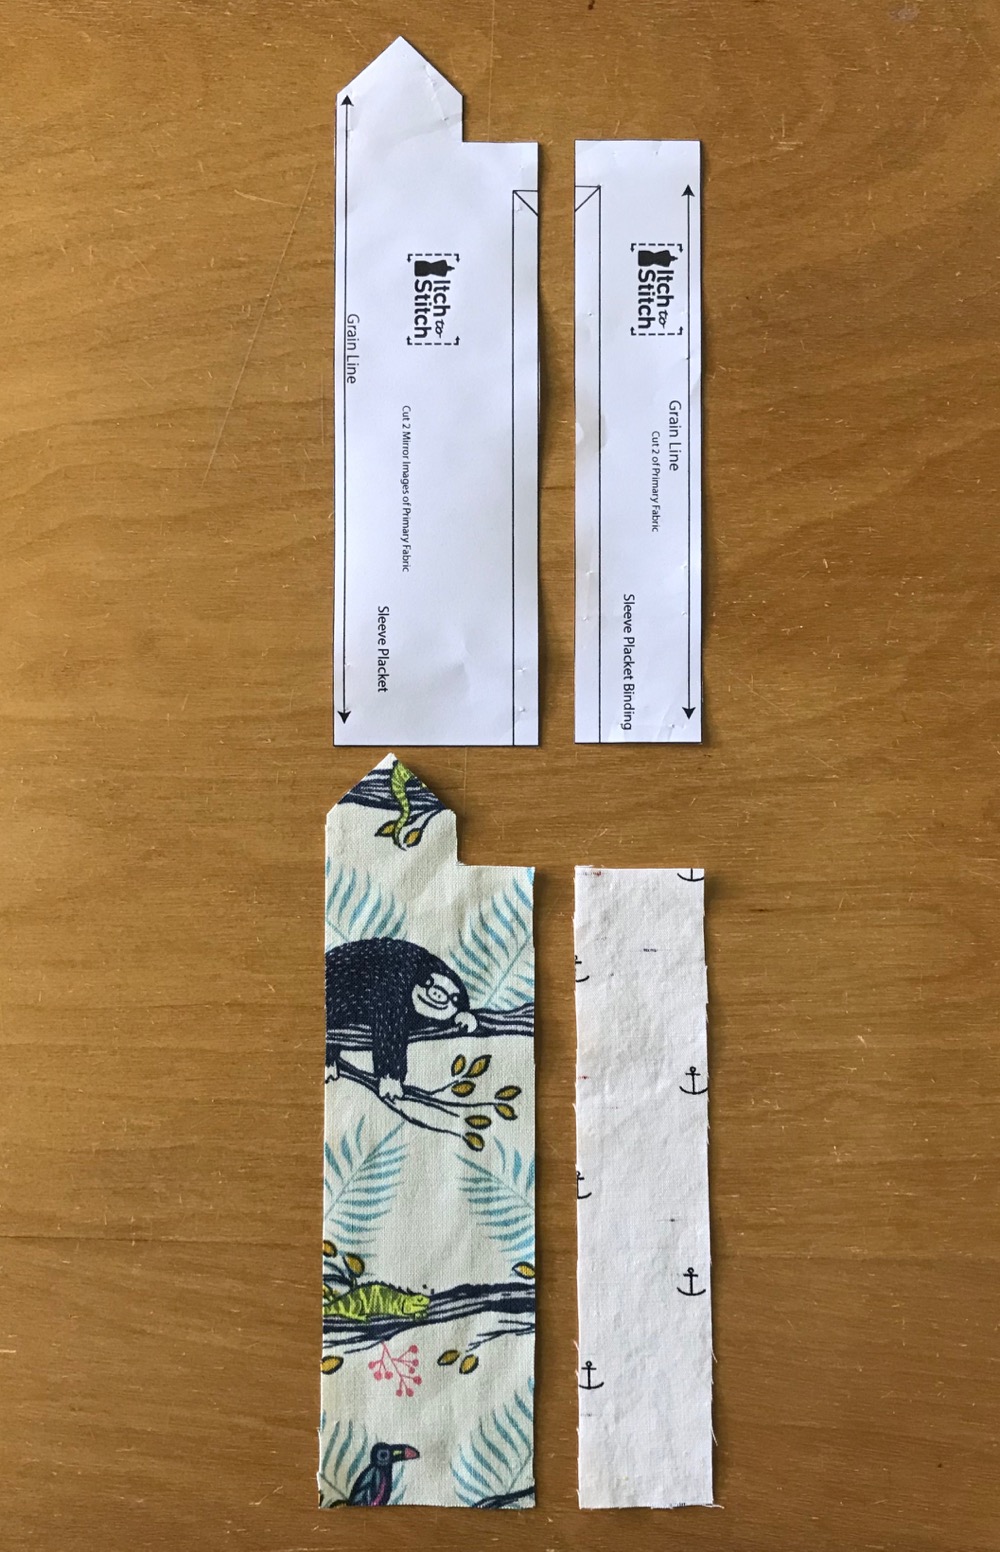
To mark the piece, I only put two tiny dots on the wrong side of the fabrics. The tiny dots indicate the corner of the placement boxes. That is because I know the seam allowance is 1/4″ (6 mm); that the is point I will stitch to, and then turn. If you want to trace the entire marking, that is OK too.
We need to do some pre-pressing that will make our job easier later. First, press the seam allowance (1/4″ or 6 mm) on the sleeve placket binding. It’s the side that is opposite of the marking.
Then press the seam allowance (1/4″ or 6 mm) on the sleeve placket as well. It’s the side that is opposite of the marking.
Then press the seam allowances (1/4″ or 6 mm) of the two sides of the tower.

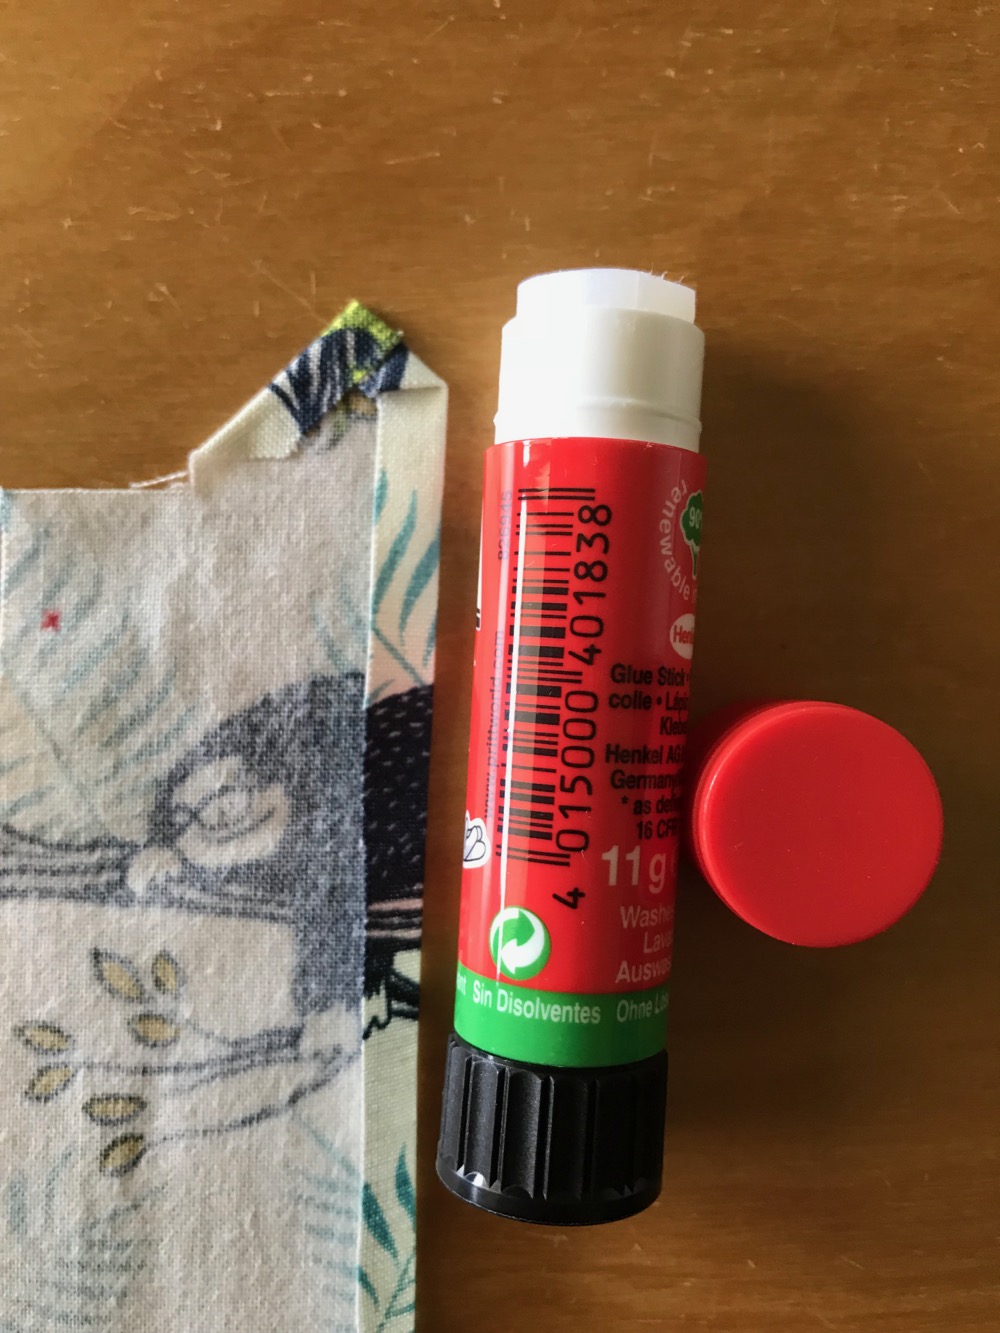
If your fabric resists pressing and doesn’t produce crisp folds, you could beat it to submission with a glue stick! Tell it who’s the boss! It will not hurt the final result.
Now all the pressing is done, let’s jump to the sleeve itself. I am marking the sleeve placket placement only by a little snip and a dot, indicating the center of the box. That is all you need to mark a straight line. Also, remember I emphasized the smaller side of the sleeve and the bigger side of the sleeve using the placket placement marking as a divider? Because we are on the wrong side of the fabric now, the smaller side now is left of the marking and the bigger side is right of the marking.
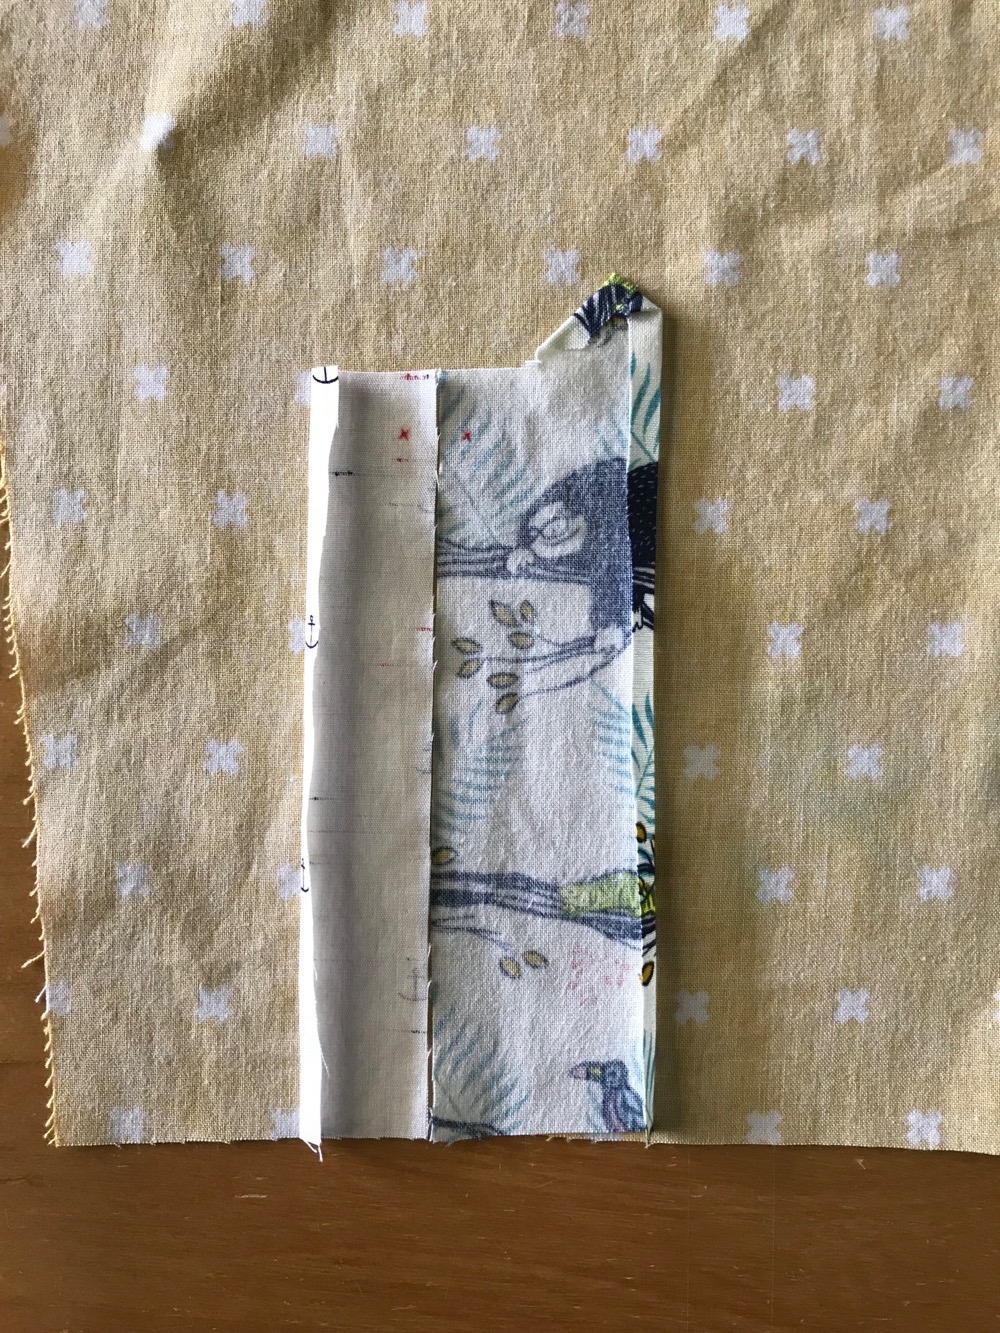
Now we can place the pieces onto the sleeve! One important, I mean IMPORTANT, point is that you are putting the right side of the sleeve placket and the sleeve placket binding on the WRONG SIDE (excuse my screaming so you will hopefully remember—THE WRONG SIDE) of the sleeve. It’s so easy to put right sides together as a habit, so this is something to be aware of.
You are placing the smaller sleeve placket binding piece toward the smaller side of the sleeve, and the bigger sleeve placket toward the bigger side of the sleeve. The line that they are butted together is the snip and dot that you marked in the last photo.
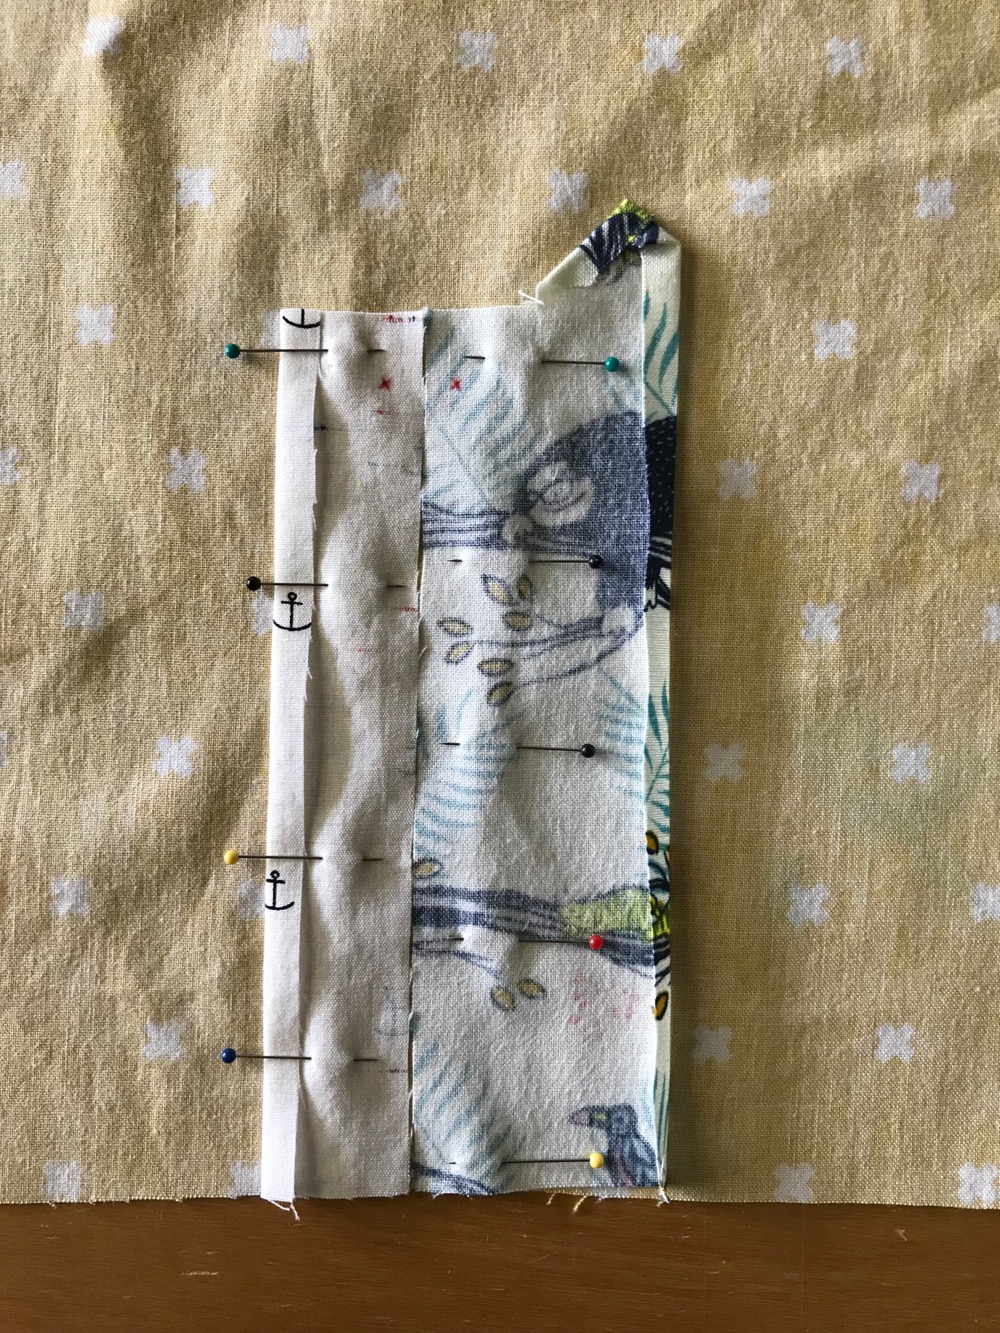
Pin, pin, pin.
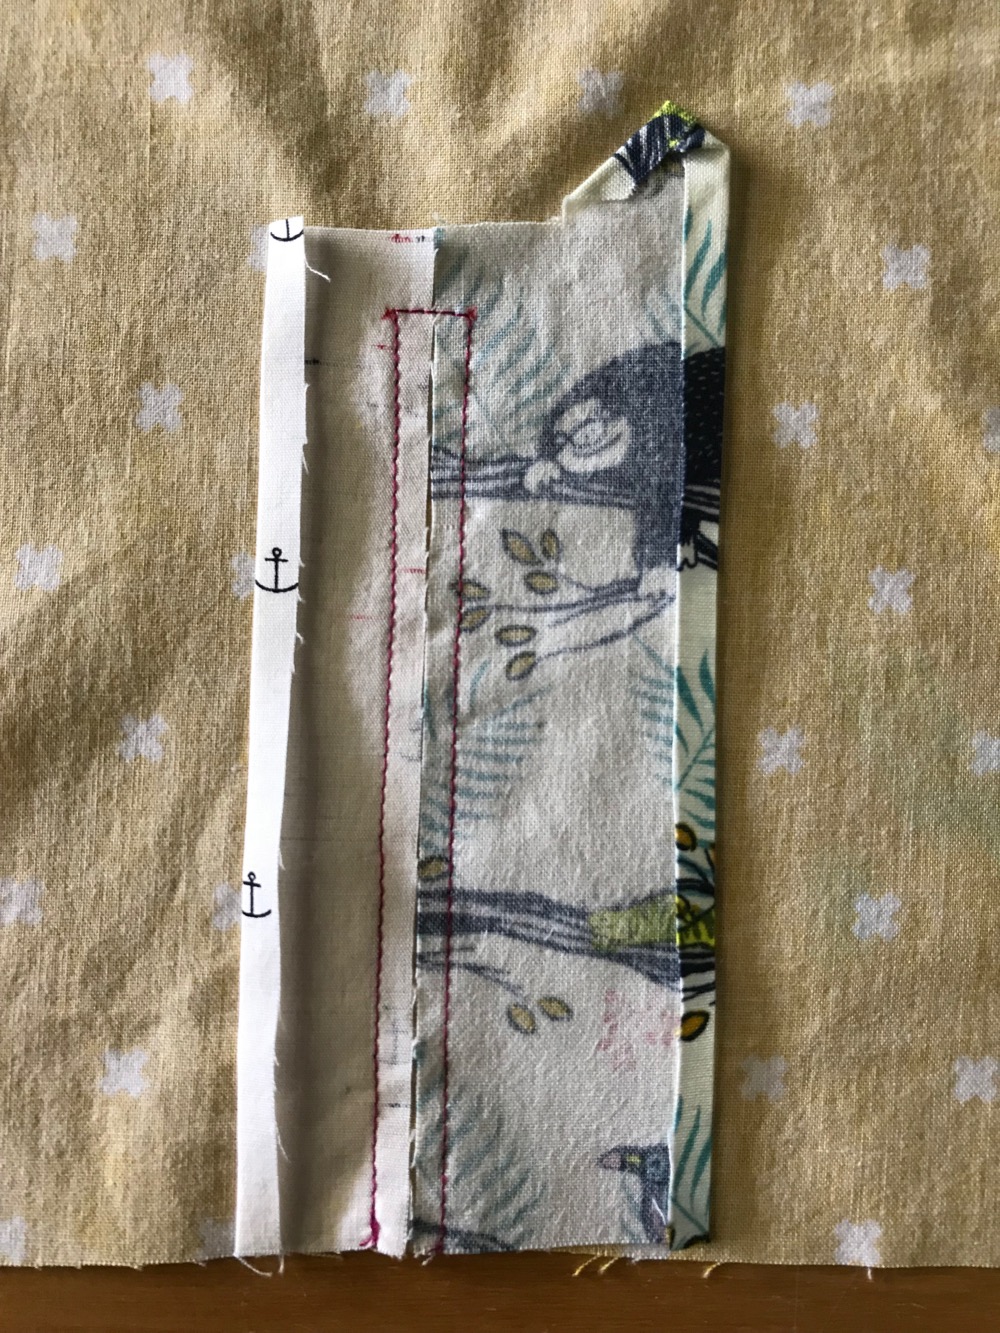
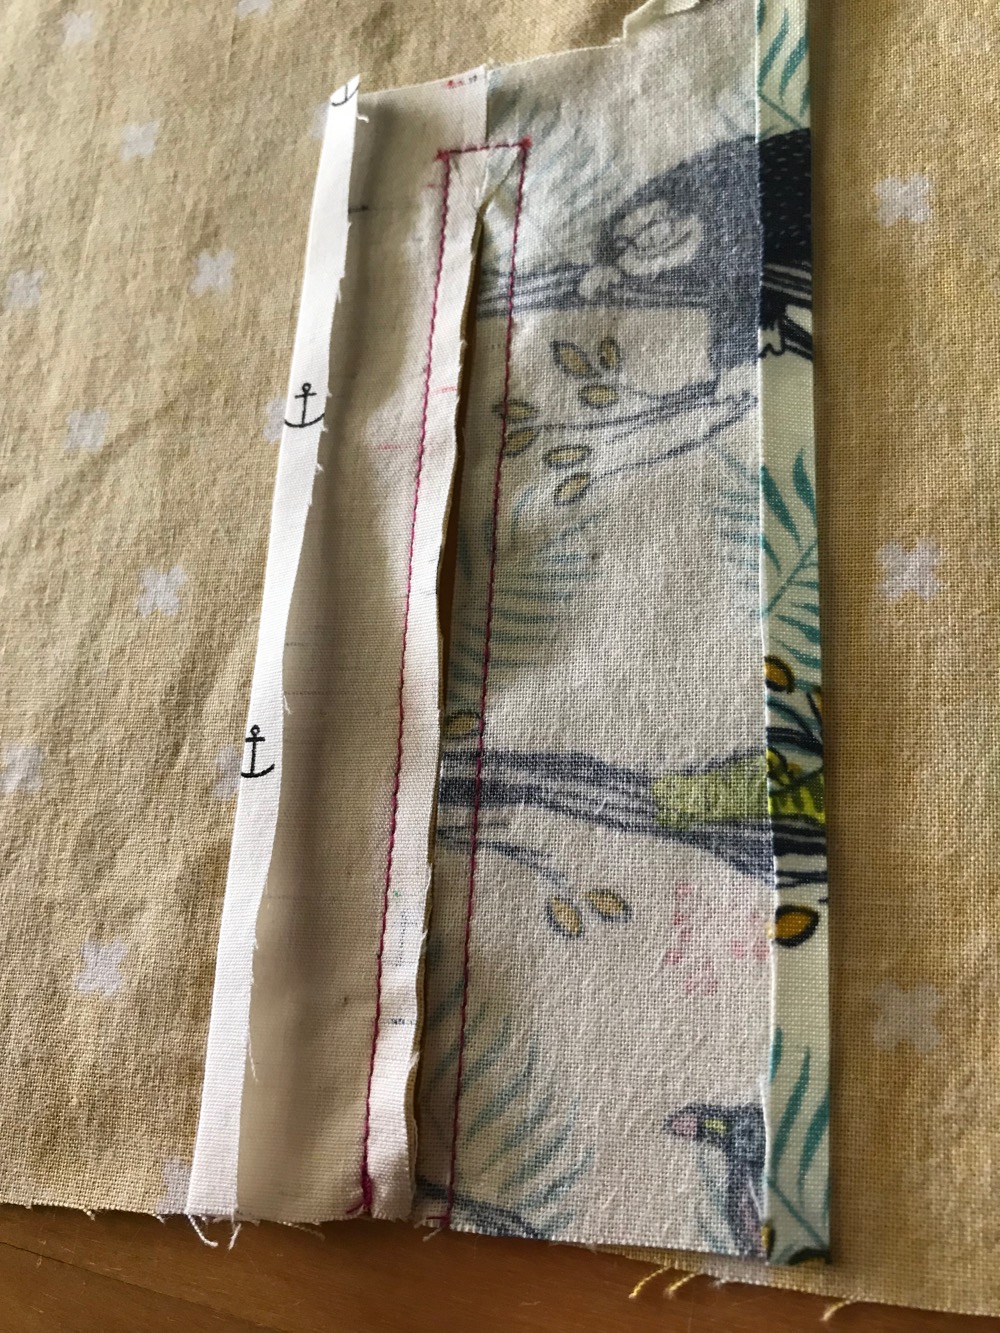
Stitching time! Stitch a box starting on one side, up to the dot you marked earlier. Pivot and stitch across to the adjacent piece until you hit the dot, then stitch down again. Yes, all in one continuous line of stitching. The seam allowance on side piece is 1/4″ (6 mm).
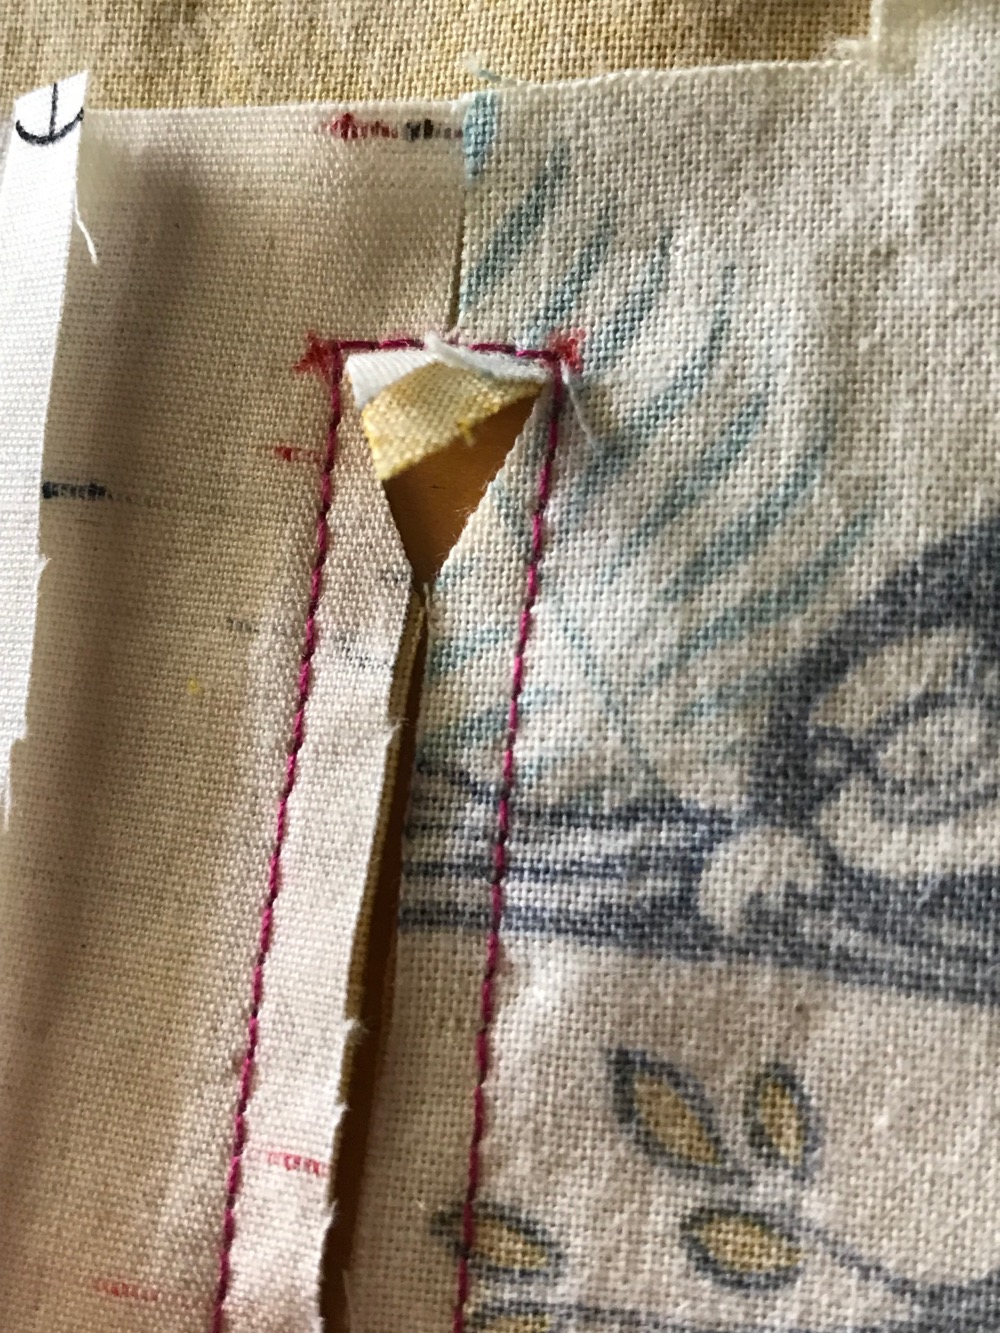
Then cut a slit between the two pieces, and when it’s within about 1/2″ (1.25 cm) of the top of the box, cut toward the corners of the box (through all layers), like you are cutting a “Y”.
Make sure you are cutting to the very corners of the box!
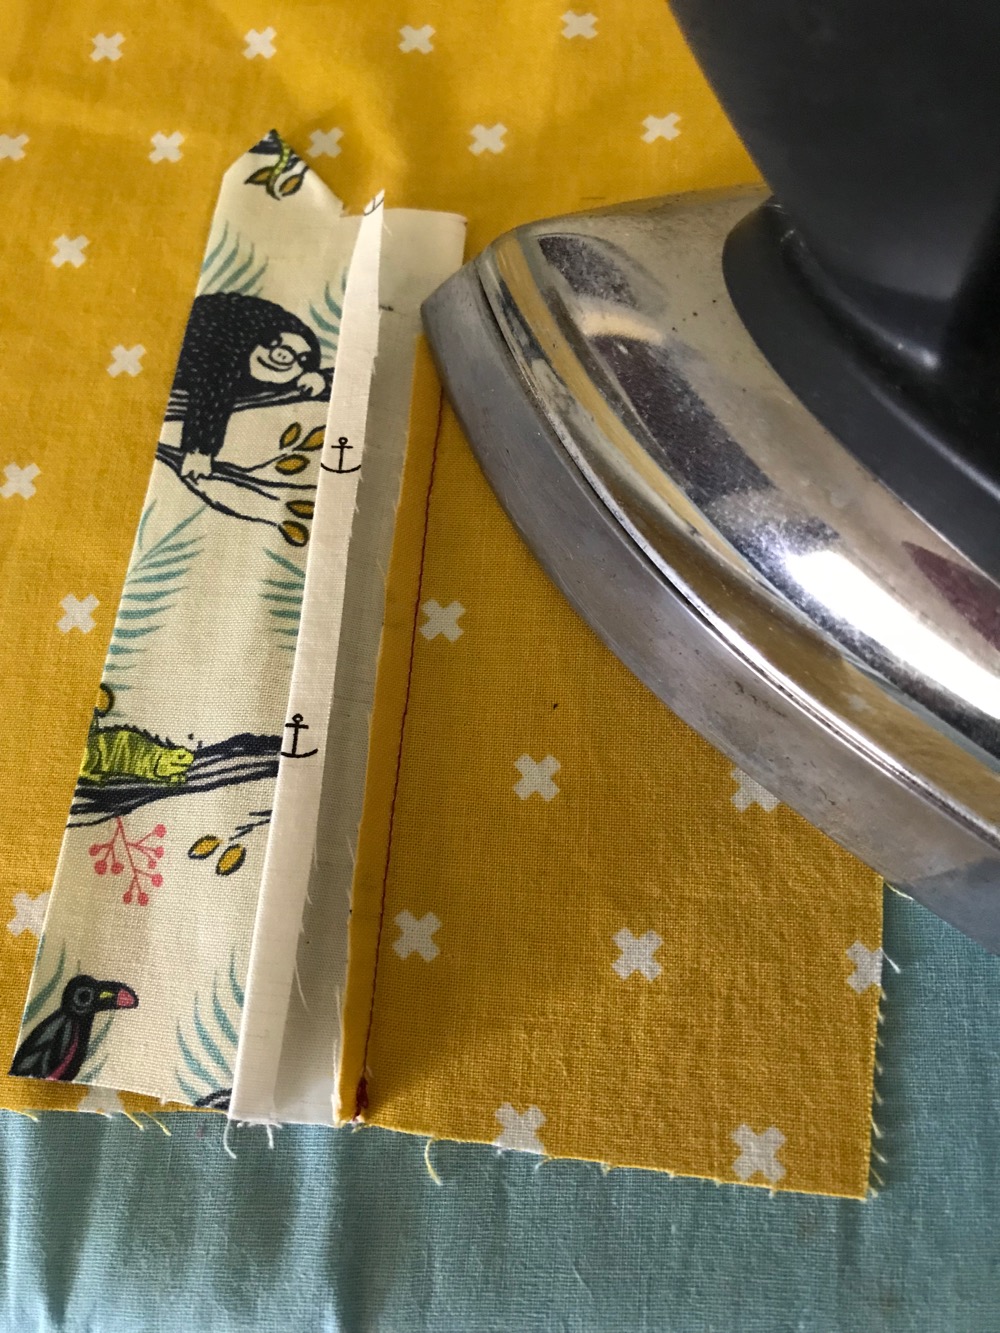
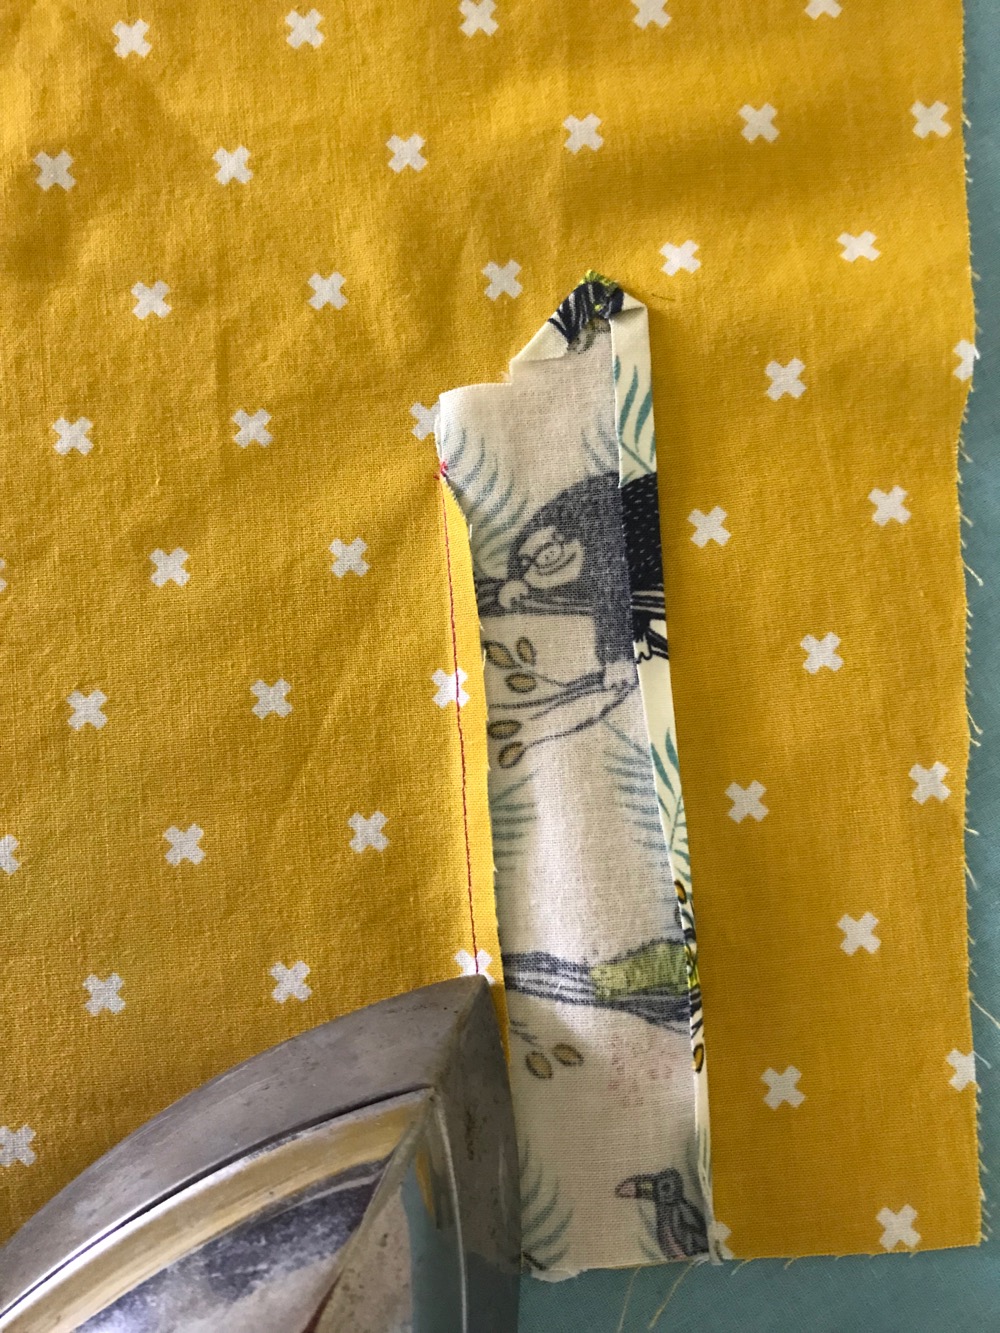
Now we can turn the pieces to the right side of the sleeve. Press it with your iron to create a crisp hollow box opening.

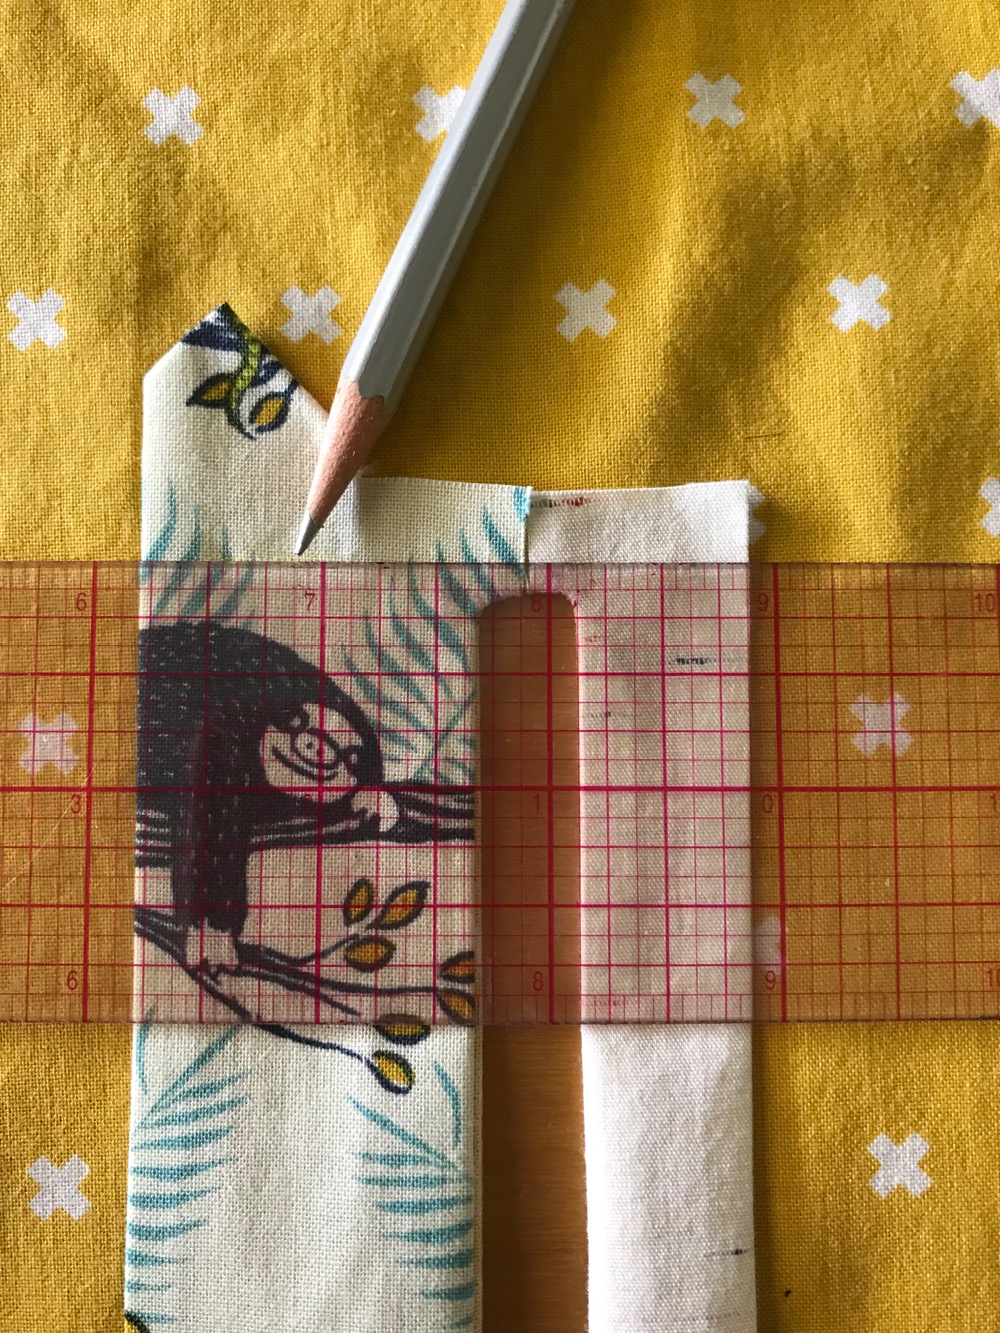
We also need to mark 1/8″ (3 mm) above that hollow box on the sleeve placket. Use an erasable marker to mark!
Next we’ll opening the sleeve placket binding and press the seam allowances toward the opening.
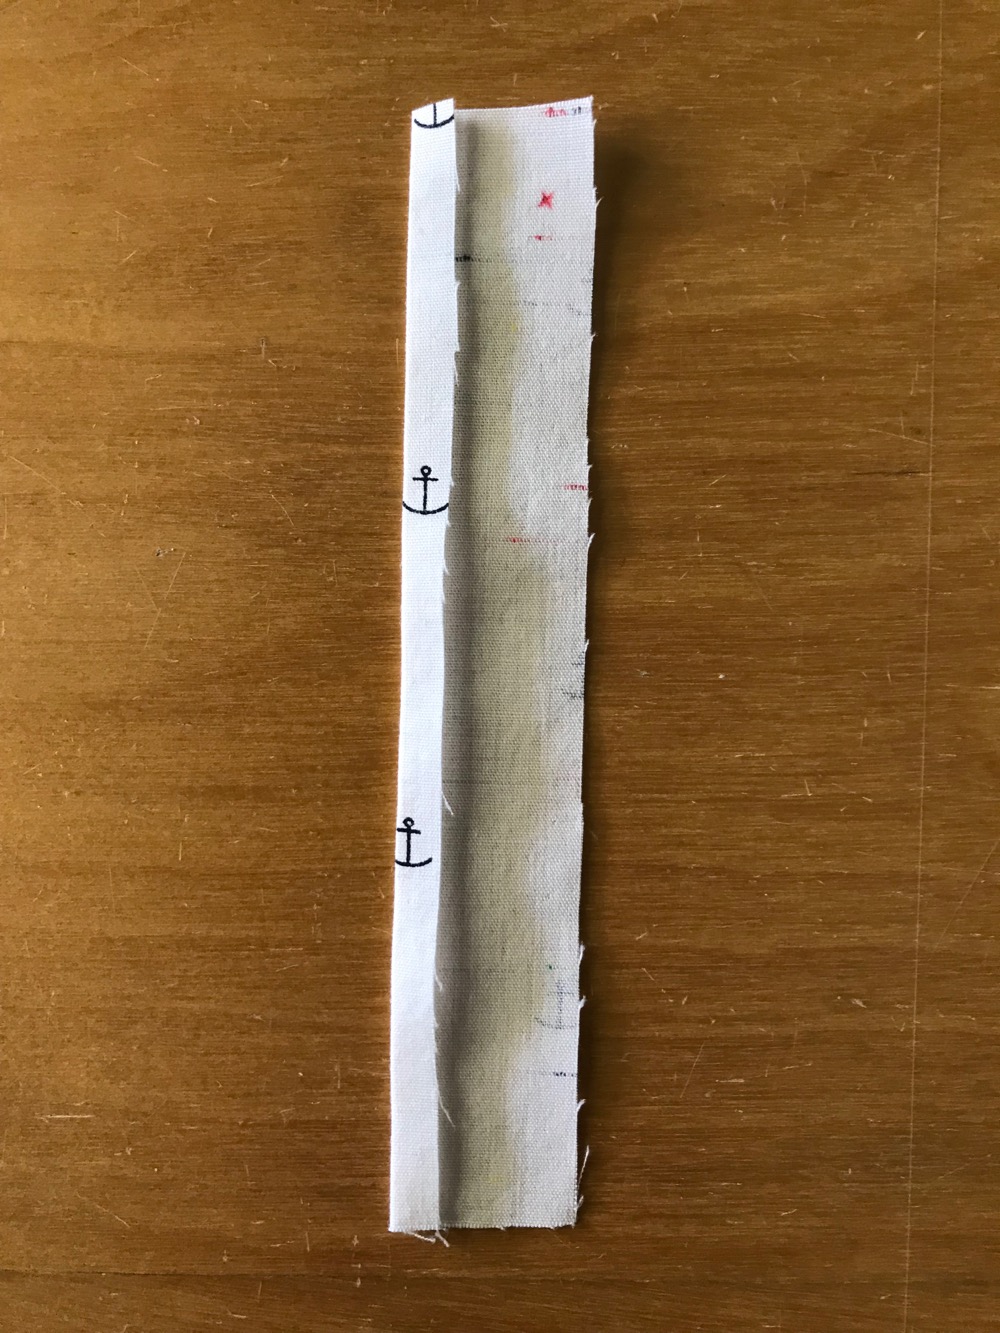
Then bring the fold of the sleeve placket binding to meet (and bare cover) the stitch line. Pin in place.
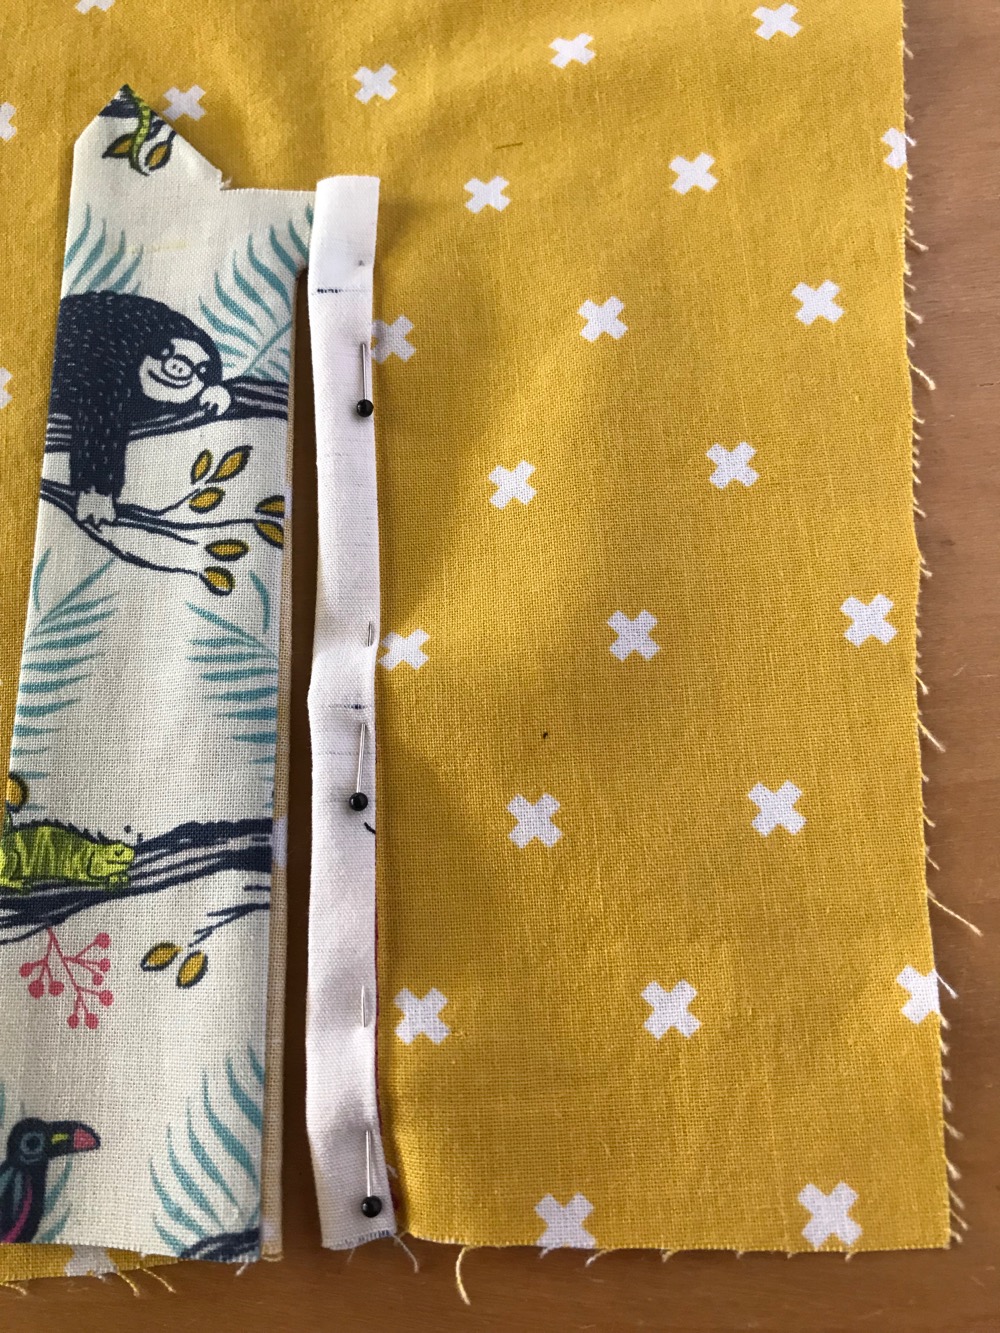
Edge stitch through all layers. Give it a good press.
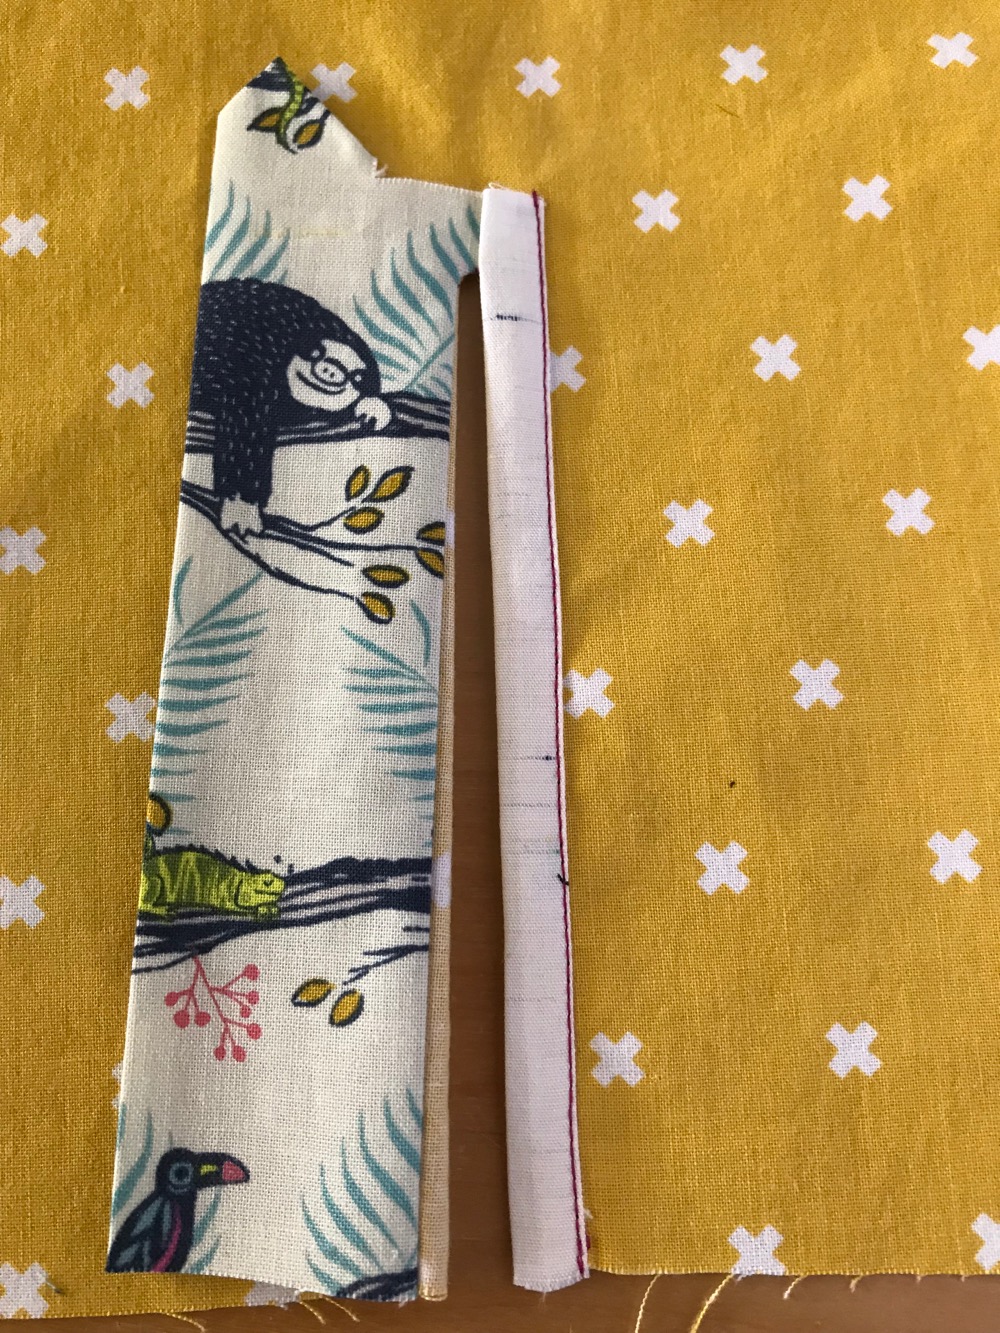
Now let’s do the bigger side. Do pretty much the same thing—open the placket and press the seam allowances toward the opening.
Bring the fold to meet (and barely cover) the stitch line. Pin in place.
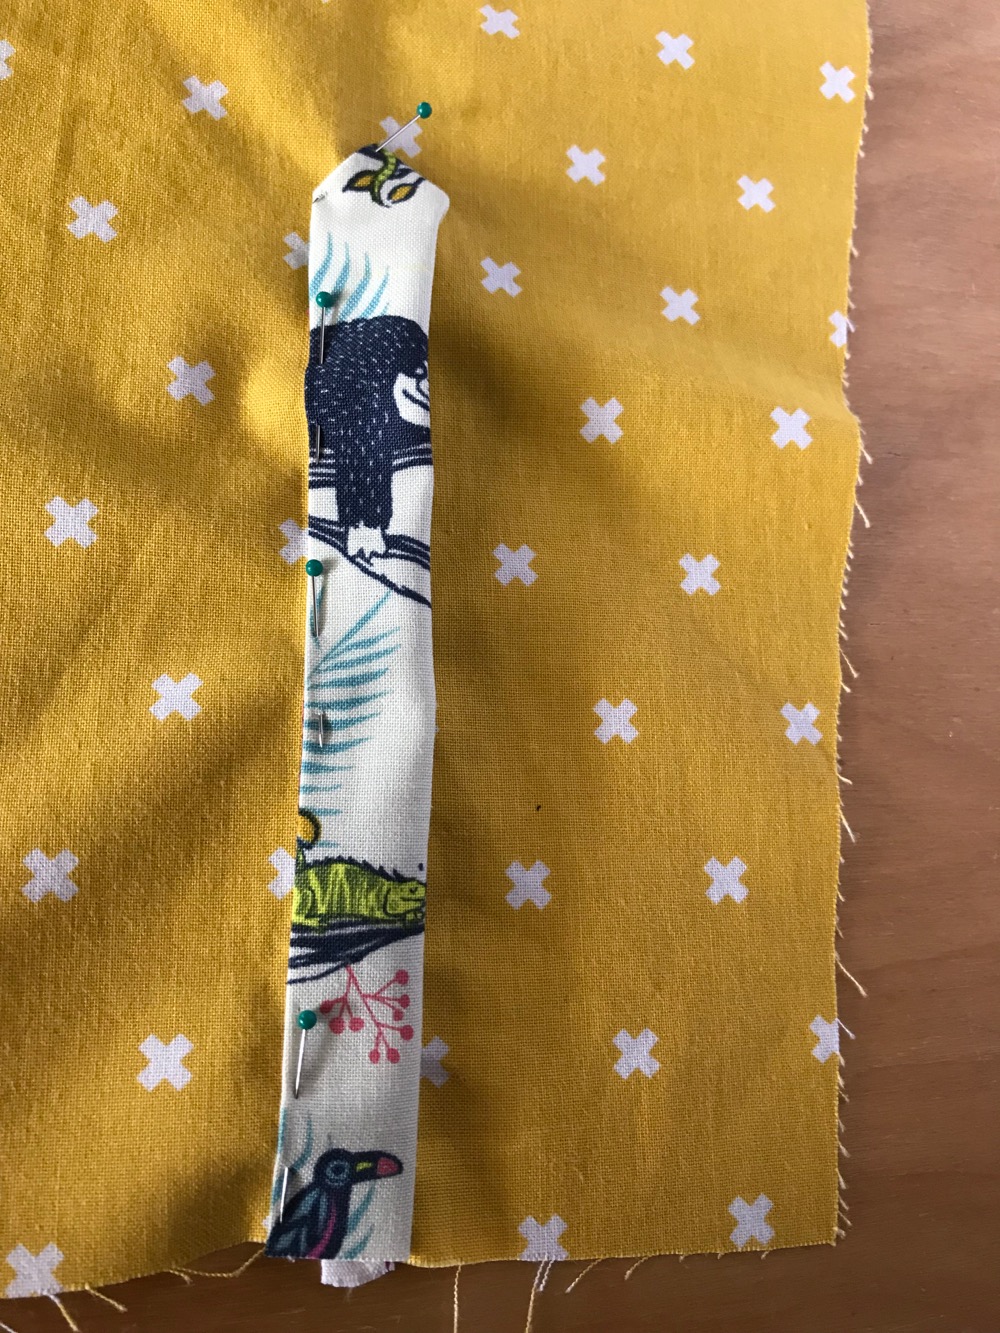
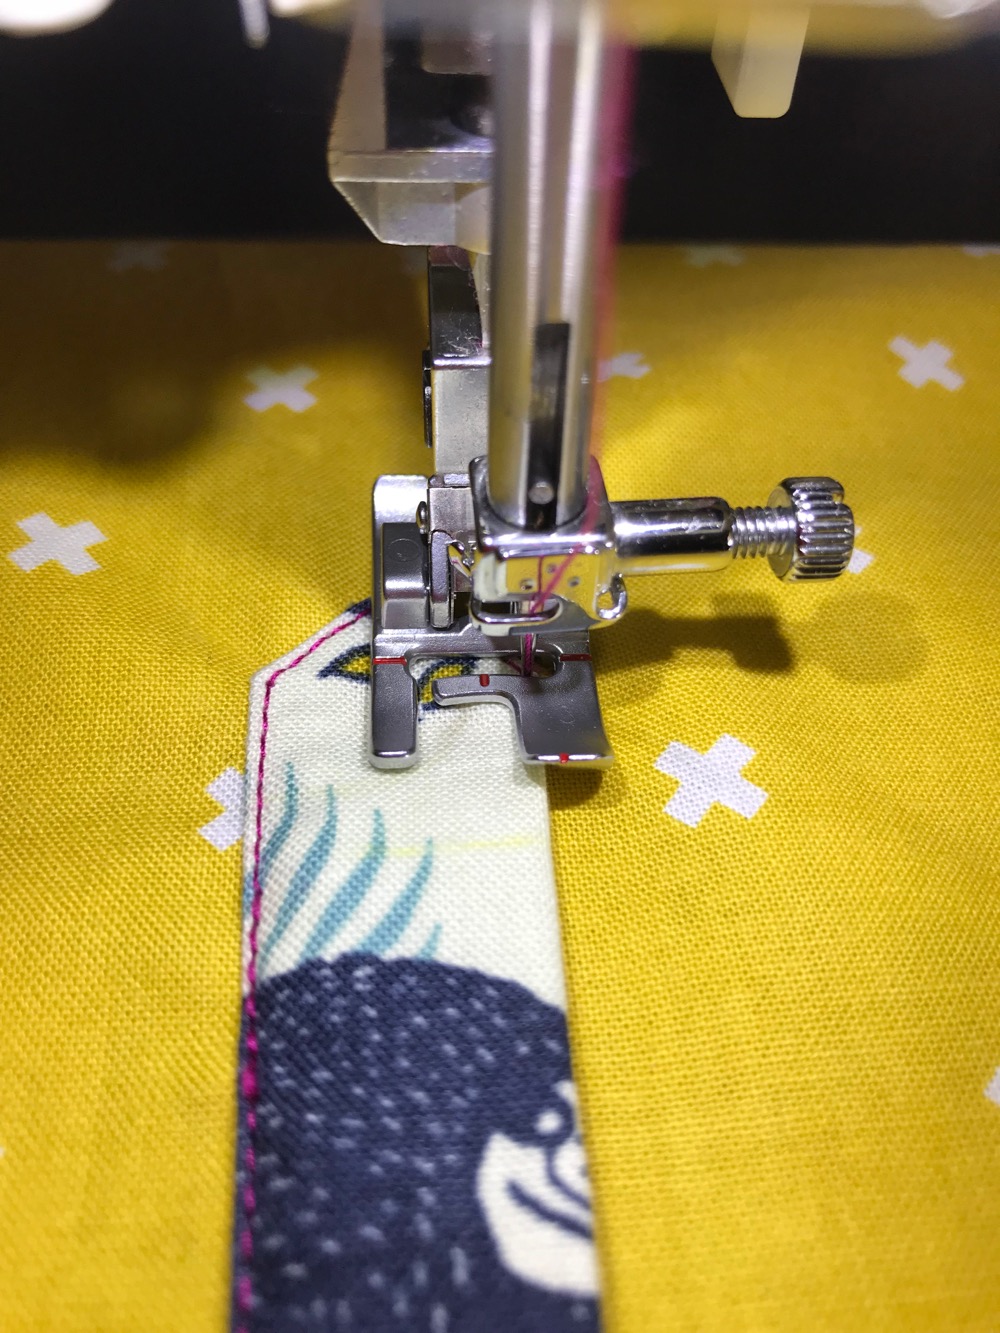
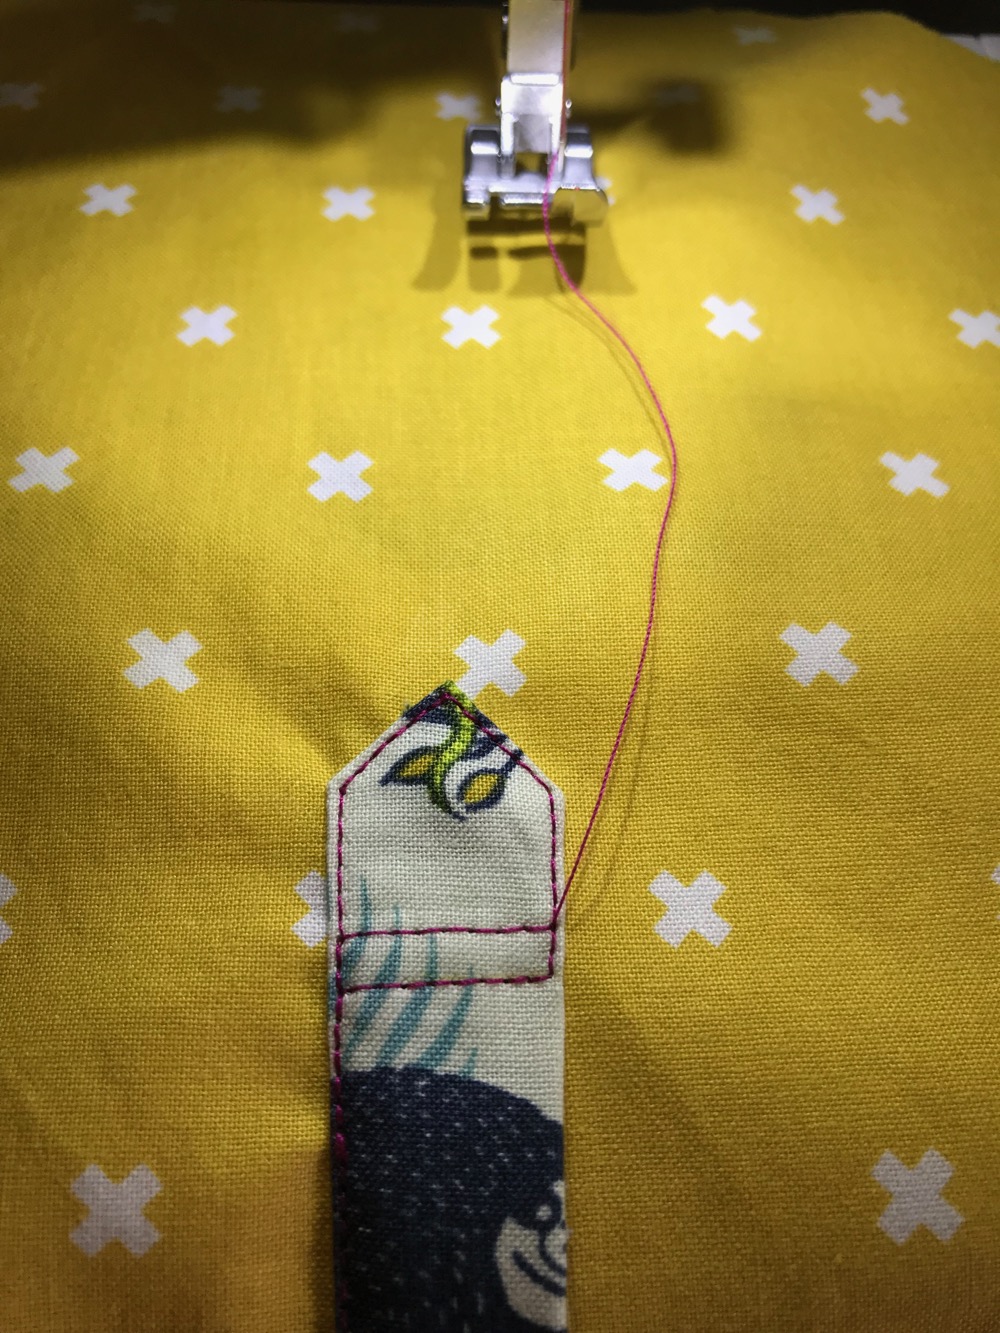
Edge stitch from the bottom toward the roof of the tower, continuing to edge stitch the two sides of the tower.
Stitch back down on the opposite side until you hit the mark you made earlier.
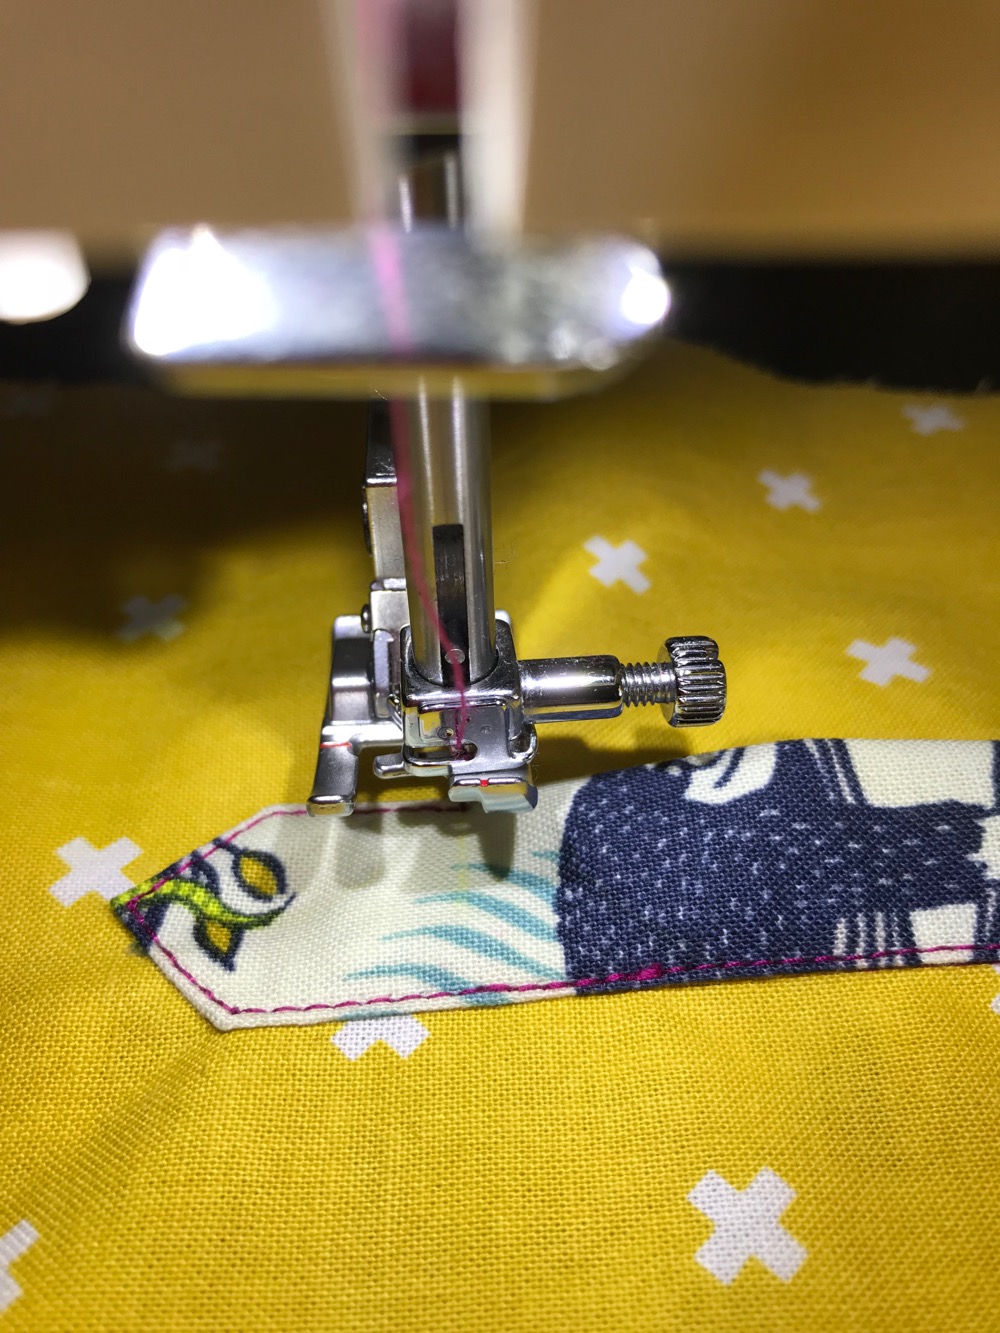
At that point, you want to pivot and stitch across the placket.
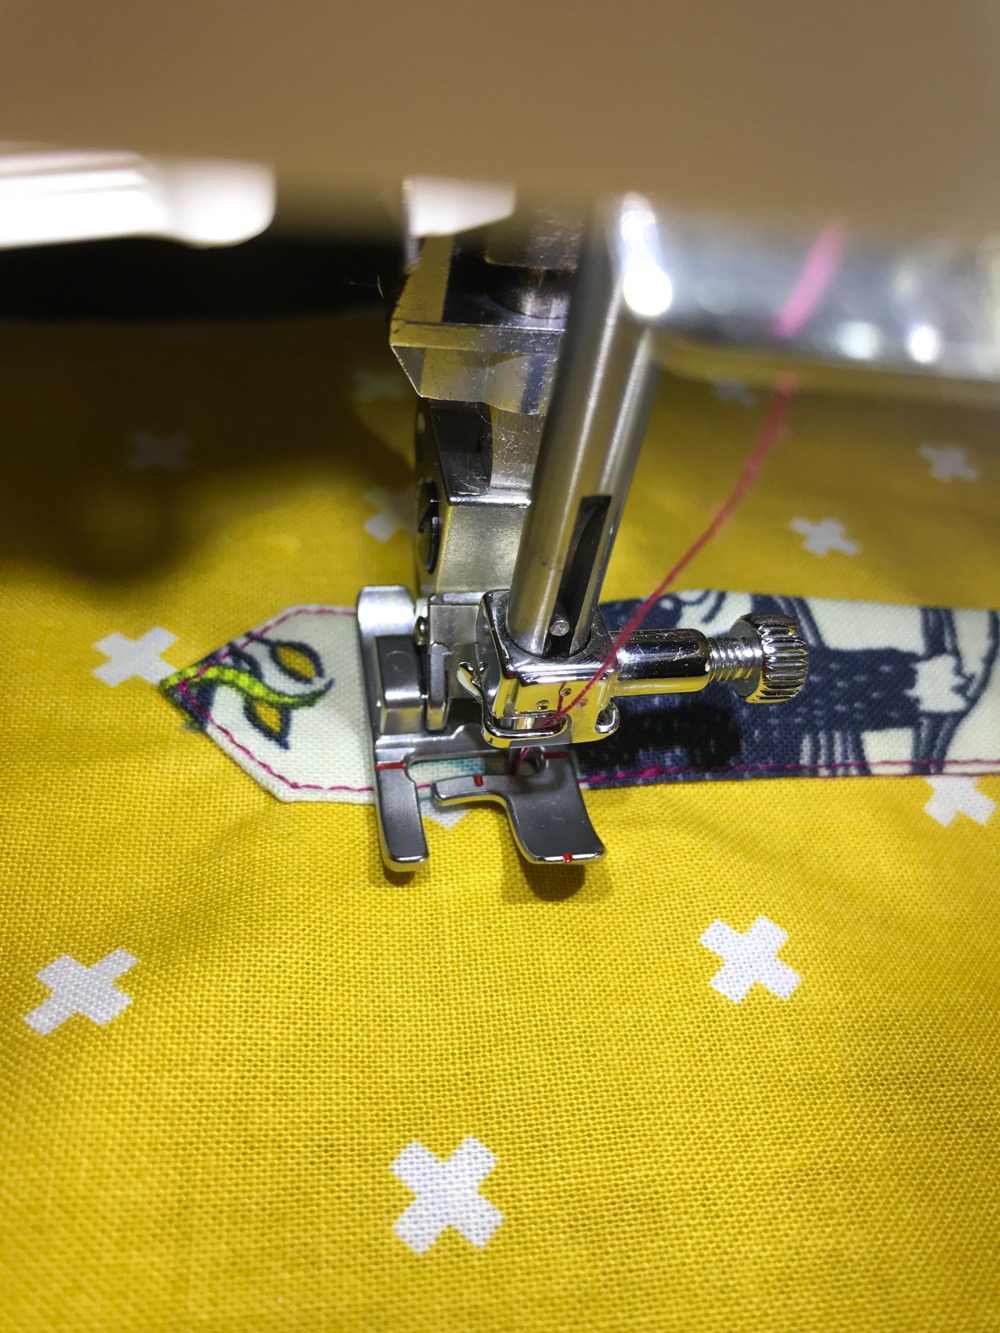
When you reach the opposite side of the stitching, pivot again to stitch up (toward the tower) a couple stitches.
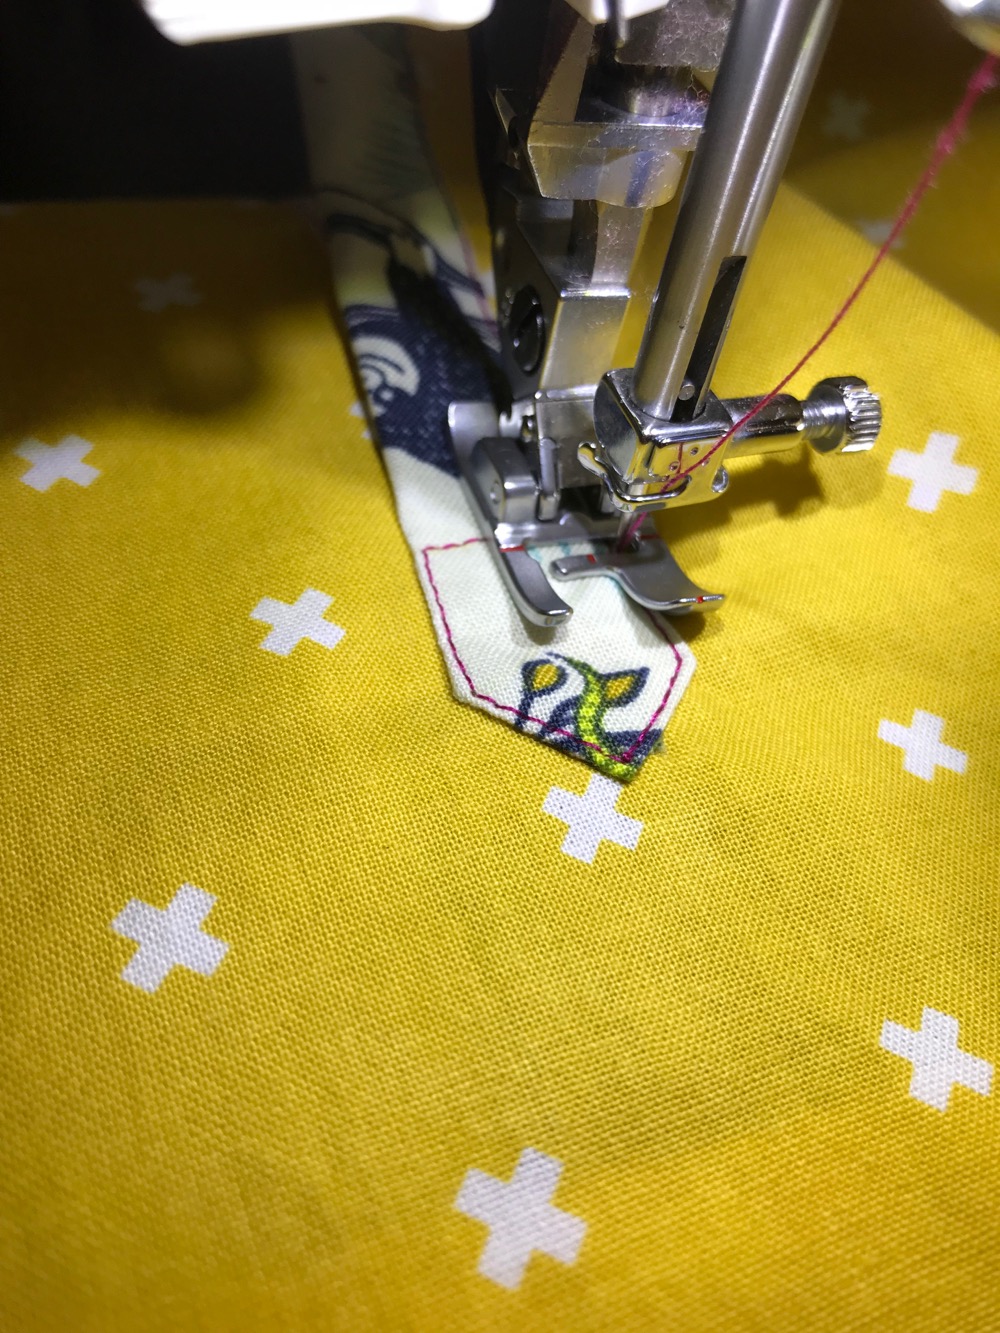
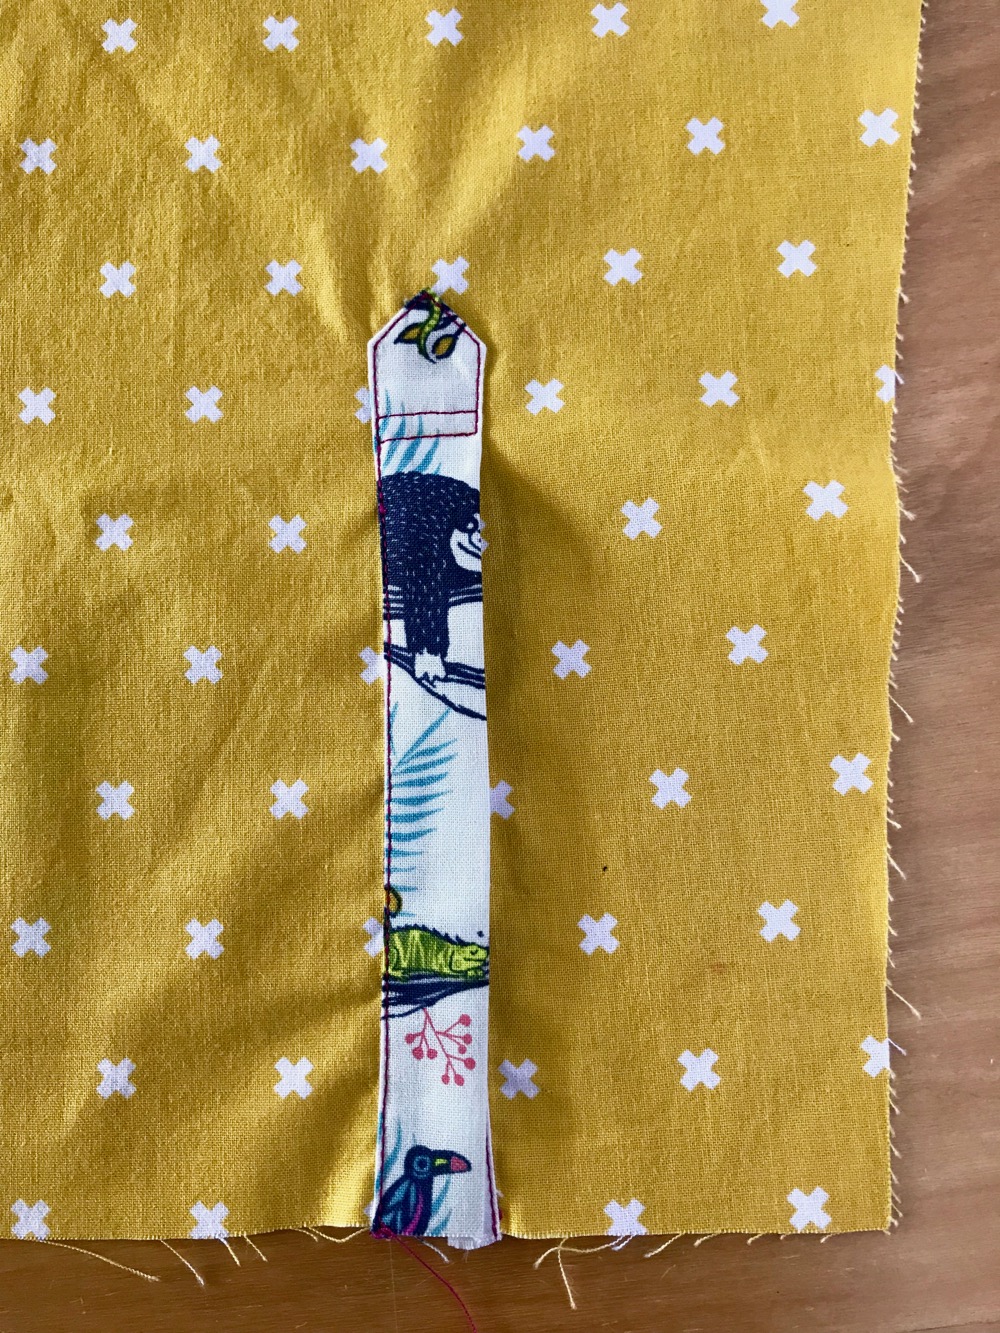
Then stitch across the placket again and you get this:
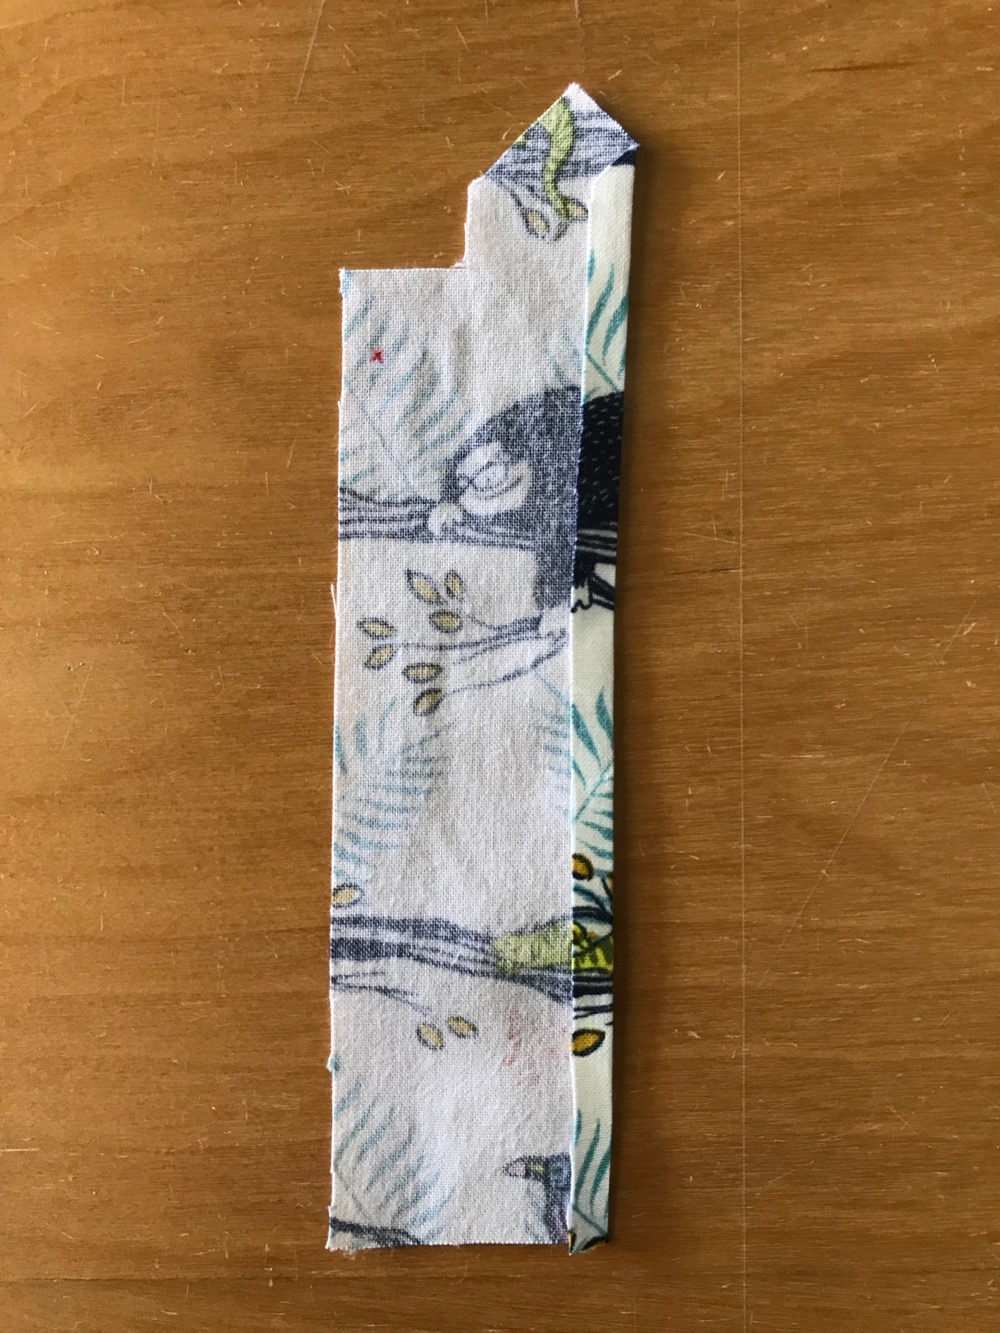
Give it a good press, and you are done! This is how it looks on the right side:
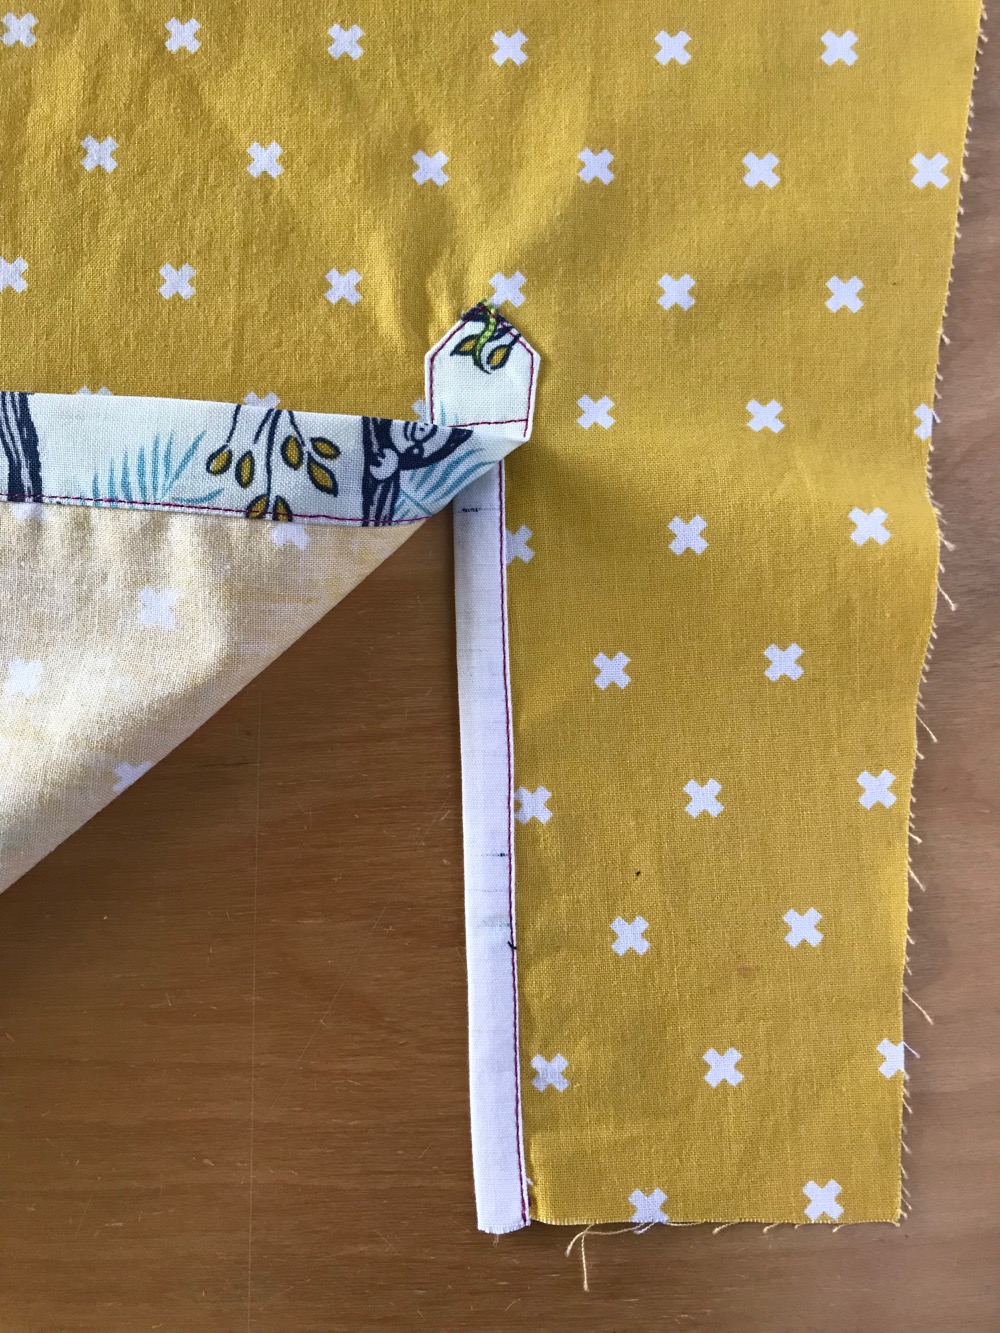
Open it, and that’s how it looks! See how the sleeve placket binding is hidden nicely behind the sleeve placket?
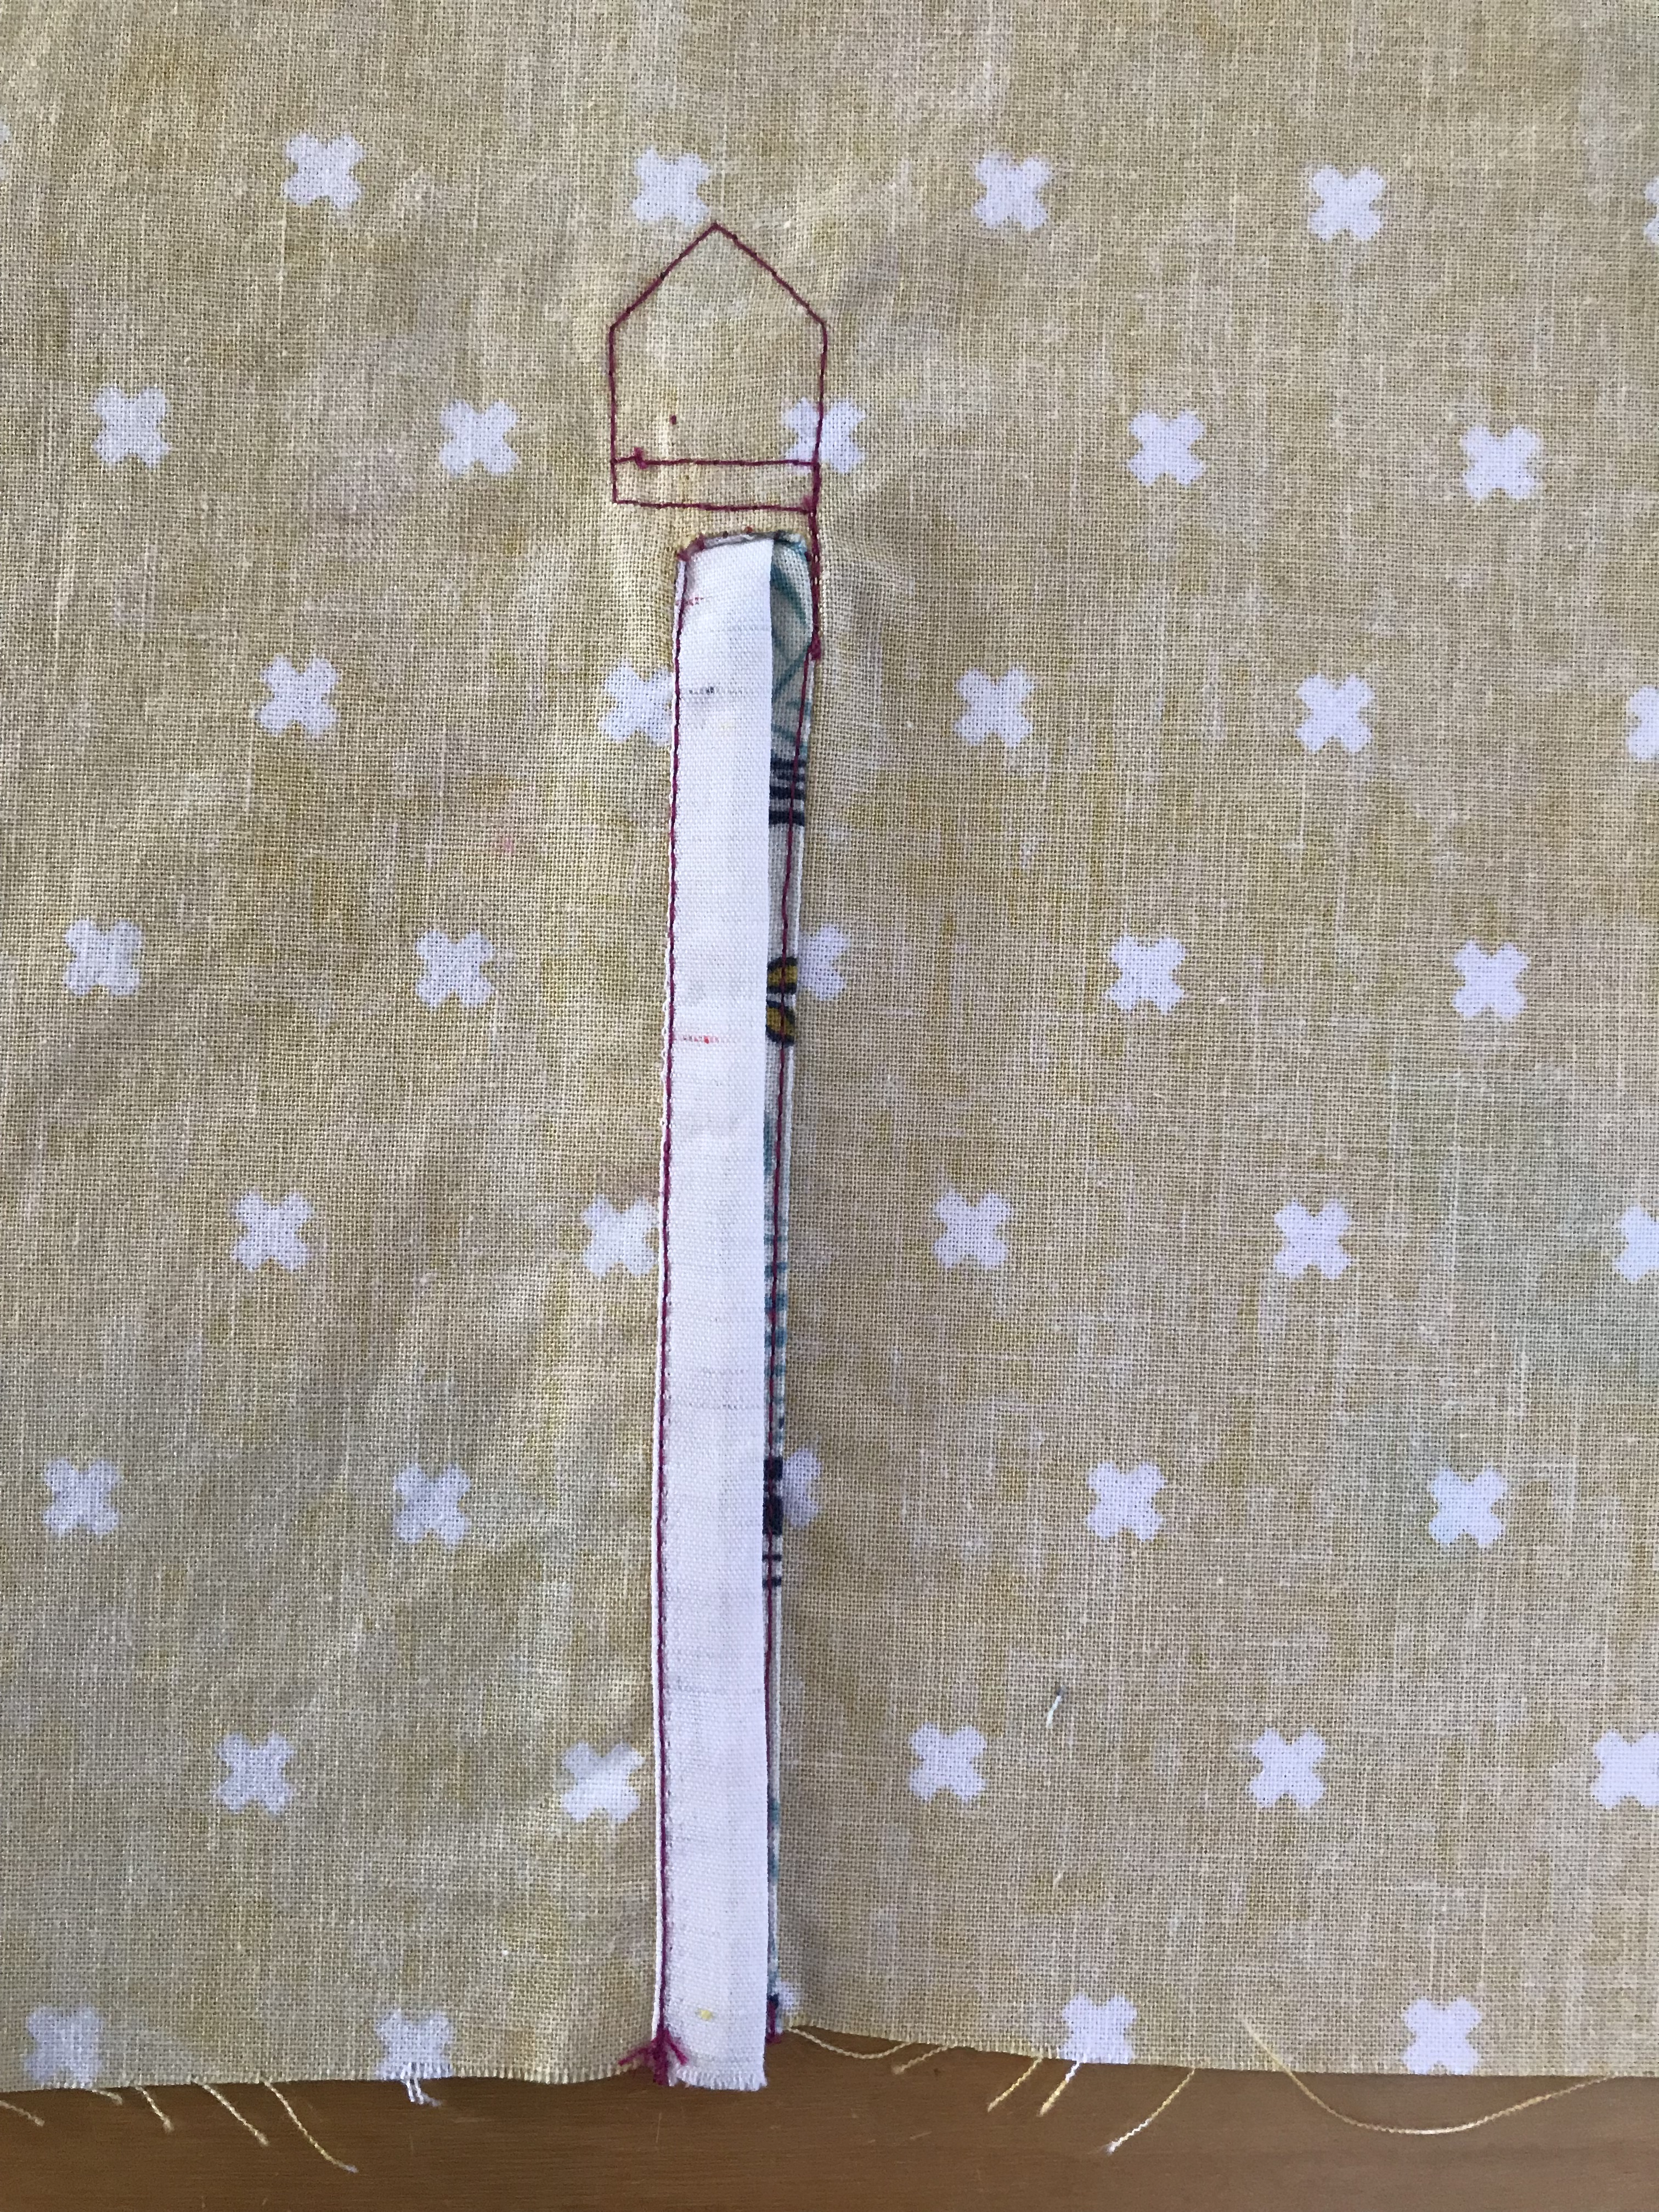
This is how the wrong side look; no raw edges is visible.
That’s all! Do you do it differently? Let me know how you like this method!

Please share this with BURDA patterns! So much better seeing your instructions.
Thank you SO MUCH for this tutorial!! Using contrast fabric and thread was genius. I finally understand the process.
Good, straightforward tutorial. Thanks. I like the idea of using two different fabrics.
Kennis,. you are in fact a genius! The sleeve placket was only “easy” because of your artistry. You are the only pattern maker/designer that I can sew without making many alterations!!! Thank you for what you do!
You’re a genius! Made this daunting task so so simple! thank you! I never would have though if using a glue stick while sewing either. What a game changer.
Super tutorial and very easy to follow. Wow, so sleeve plackets are really nothing to be afraid of! I think your patterns and instructions are the best on the Internet. Thanks so much for all your help.
love the photos , nice and simple explanation. I look forward to trying the technique.
Thank you for sharing
thank you so much for explanation, I had to search for help after sewing two plackets facing the wrong way and not being able to figure out what I did wrong. Made the easy bias placket all my sewing-life, but it simply looks too sloppy
Great tutorial. I am using instructions provided with my Mila pattern but this was also helpful. Thanks for the clear instructions and the simplicity 👌
Love the tutorial! Can’t wait to add this to the western shirt I’m in the process of making for my husband. Where can I find the placket pattern? I have searched and searched this page but don’t see it. Thank you so much!
I am glad to hear you found it helpful. The Montana Shirt uses this method to make the sleeve placket: https://itch-to-stitch.com/product/montana-shirt-digital-sewing-pattern-pdf/
This is brilliant.
Ive just made two fabulous tower plackets following your instructions.
I’ve always been to scared to make my DH a shirt, because I was not confident I could get the plackets right.
Well, that fear has evaporated, thanks to you!
Wow! You are fast! I am glad the instructions are working out for you! 🙂
I’ve never done this method but it looks awesome! I’m willing to try it!!
Let me know how it goes. 🙂
Thank you Kennis! Great instructions and guidance in this post! I recently saw someone put this on the bottom of her pants with snaps instead of a button and it looked fabulous 🙂
That’s a creative idea!
Love your tutorials! You explain everything perfectly. I’ve never done a sleeve placket, but I will use your tutorial if I need to. Thanks for sharing. ?
Hope you give it a try some day!