
Slam-dunk Contour Waistband: The Secret of Keeping Your Pants Up – Part 2
In my previous post, I talked about the characteristics of a contour waistband. In summary, a contour waistband is always on the bias, hence it is more flexible and has the ability to nicely and subtly contour to the shape of your waist. Not only it looks more graceful than a straight-grain waistband, it’s also more comfortable to wear, especially after you eat a big meal. However, because of this flexibility, your waistband gets stretched out during stitching and becomes much larger than you anticipated, as shown on the experiment on my previous post. The post ended on the fact that stabilization is necessary.
A reader asked why that is the case. I thought I answered that question, but perhaps I was just walking all over it and did not hit it on the head. When you are sewing any fabric, the feed dog and presser foot are moving the fabric to the back of the machine as the needle is piercing it with threads. Since the fabric is on the bias, where it is quite flexible, the feed dog and presser foot distort/stretch the grain slightly. The stitching is just making it more permanent.
But a sewing machine is not required to stretch out a piece of fabric on the bias. Gravity alone is sufficient to do that job. If you have been sewing for a while, you already know that you are supposed to hang your bias skirt/dress for a day or two before hemming it, since the length will continue to grow until the fabric is completely relaxed.
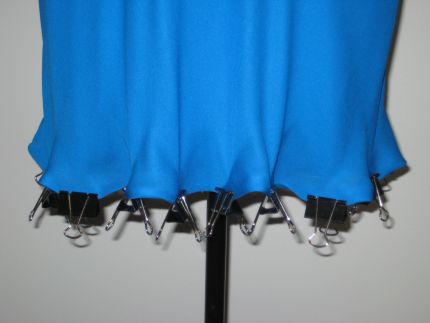
Hang bias skirt and let the fabric relax before hemming. They even use binder clips to add weight to spread up the process. (Credit: Threads Magazine)
One point that is worthwhile to mention. Many sewists like to straighten the edge of the fabric when sewing curves. This is necessary when you are using a serger, but it’s a bad habit when using a sewing machine. You will sure end up with a lousy-looking, rippled and stretched out curve. If you do this on your contour waistband, the waist measurement will grow even more. Instead, you should pivot the fabric gradually with your left hand as you sew along the curve, almost like you are turning your water faucet on/off slowly.
Now let’s come back to the main point of this post, which is stabilization of the contour waistband.
After I wrote the previous post, I couldn’t get an image off my mind. I remember seeing a designer using a stabilization technique on a bias dress’s plunging neckline. I flipped through my Threads Magazine back issues. No luck. And I didn’t remember who the designer was. But this morning I found it in my Sew Stylish magazine, which is short-lived sewing magazine, a sister of Threads, that only survived one year in 2007. If you ask me what I ate for dinner last night, I couldn’t answer you, but this photo was etched into my memory from a long-defunct magazine 8 years ago.

Typical easing on a neckline with pins by “Master of Bias” Charles Kleibacker. On the dress form’s left-hand side, the excess fabric is pinched out in one spot to show how much fabric needs to be taken out. On the right-hand side of the dress form, the excess fabric is “eased” evenly along the neckline using pins. You can read the article here.
This neckline is on the bias, and the fabric is naturally stretched out just by shear gravity, hence it needs to be controled and stabilized. Don’t worry. I am not asking you to use a million pins to stabilize the contour waistband like designer Charles Kleibacker did on his necklines. His is a couture method for super expensive garments; frankly we don’t have the time for that. But the idea is similar. Excess fabric needs to be “scrunched” together, much like how gathering works, except that these micro gathers are invisible when done (the actual term is “easing”).
What you don’t see in the photo is that there is a seam tape behind the neckline with the desired finished length. The fabric is fitted into the seam tape by pins. We, too, will need something to hold the “scrunches” or excess fabric as we ease and stabilize our waistbands.
Here are two methods you could use. I’d like to give special thank to Marisa, my tester of Emily Culottes, and Maris, a sewing instructor and fellow classmate of Pattern Workshop for suggesting these methods.
Method One – Stabilize with Straight Fusible Stay Tape
Fusible stay tapes come in straight or bias. For our purpose, be sure that you are getting the straight kind. Also, you can get them in regular, fine or extra fine. But really it doesn’t matter a whole lot since the regular is thin enough for this purpose, unless your fabric is extraordinarily fine. I personally use the 3/8″-wide one, but you could also get the 1/2″-wide kind. Your regular sewing stores probably have them, and of course you can get them online. Fusible stay tape is essentially a long stripe of fusible interfacing on the straight grain. So if you really can’t find it, you could cut yours out of light-weight woven interfacing.
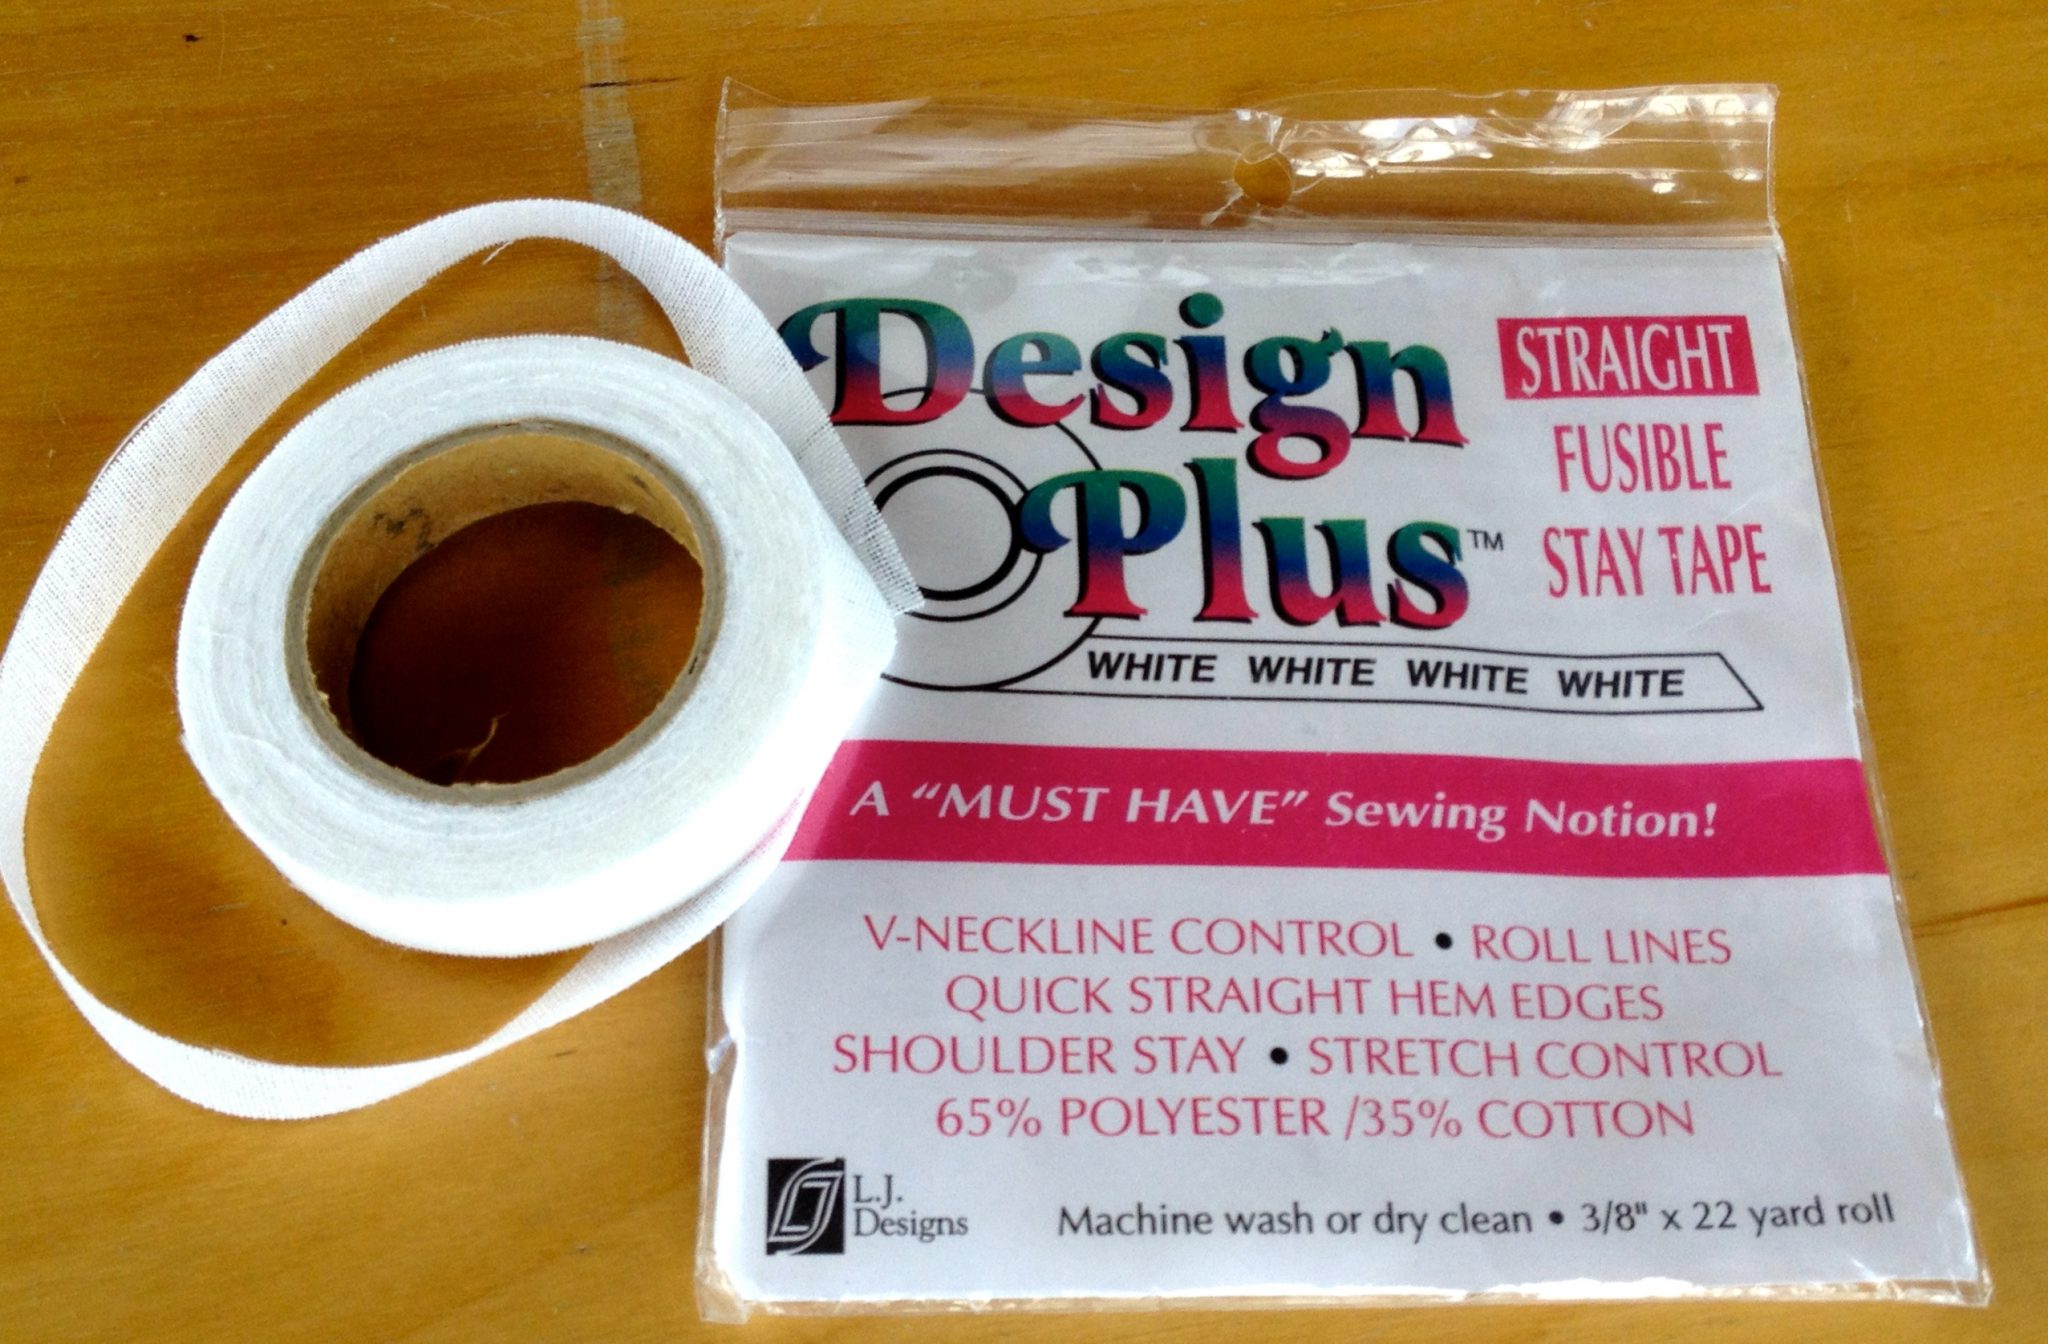
3/8″ Fusible Stay Tape
- Lay your contour waistbands (or yokes) wrong side up. In the case of Emily Culottes, use the non-interfaced waist yokes.
- Press the waistbands and be sure not to stretch them while pressing. In fact, you can lay your pattern pieces on top of the yokes to see if they are still the same shapes.
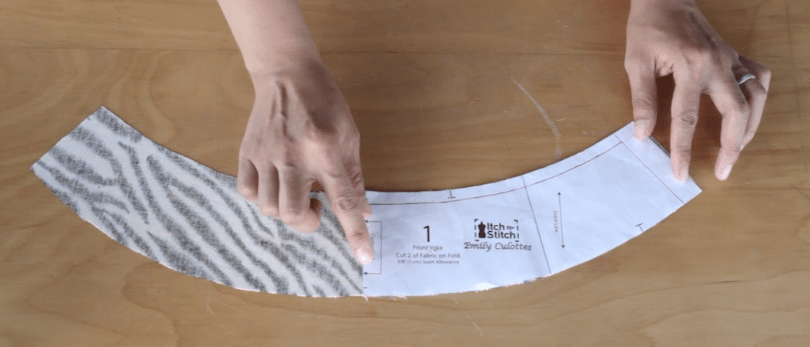
Lay the pattern piece on top to make sure it hasn’t been stretched out.
- Lay the straight fusible stay tape on top of and centered over the waist seam (yes, glue side down!). Fuse one end down (an inch or so) then pull it pull it taut before fusing the next section. Keep going until the end of the seam line and trim off the excess stay tape.
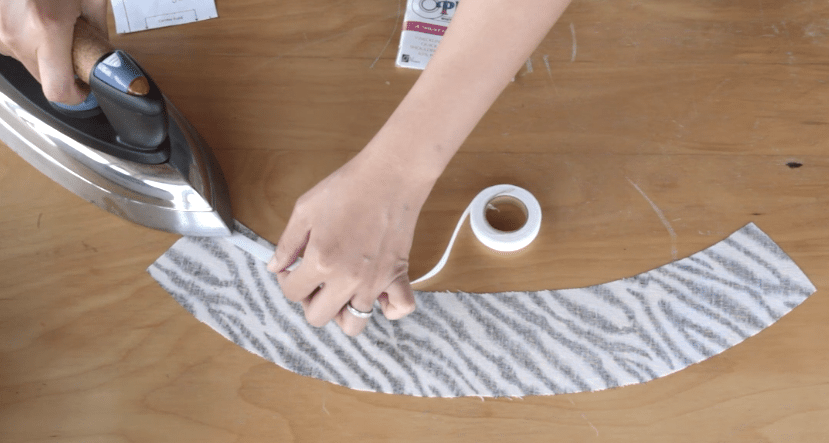
Pull the stay tape taut as you fuse the tape.
- Proceed with putting the waistband together according to pattern instructions.
That’s all there is to it. You may see other sources (such as Pants for Real People by Pati Palmer & Marta Alto) telling you to also apply stay tape to the bottom seam line. And you can choose to do that. But in the case of Emily Culottes, I recommend you only do it to the waist seams since the culottes start to flare right below the waist so it’s not necessary to treat the bottom yoke seams.
Method Two – Stabilize with Machine Ease Stitch and Twill Tape
This method involves two parts – easing the waist seam line using a sewing machine and then stitch a twill tape on the top of the eased stitch. I prefer this method because the finished waist line feels very sturdy. I can tuck/pull the waist line with great force and it will not bulge a bit. Granted, there’s no real reason for me to abuse my waist line so severely; still there’s a comfort to know that my pants are not going to drop.
I use 1/4″-wide cotton twill tape – the kind that people use for draping. You could also use the polyester packaged kind from Joann, which is thinner (hence less bulky) than its cotton counterpart. You could also use fabric selvage, as long as the selvage does not stretch (which it shouldn’t).

1/4″ Cotton Twill Tape
- Sew the front and back waistbands (or yokes) at the side seams or based on instructions. In the case of Emily Culottes, the zipper is on the left-hand side, so you would be sewing the back seam and the right-hand side seam first. For this method, we will stability around the waist with the front and back waistbands as one piece.
- Machine ease stitch the waist seam line: stitch on the waist seam line while having one of your fingers (I use my right thumb) placed behind the presser foot. Your finger is stopping the fabric to feed freely so it bunches up between your finger and the presser foot. This causes the stitches to take up a tiny bit more fabric in each stitch. Remove your finger every 3″ (7.5 cm) or so to release the fabric. Repeat until you stitch to the end of the waistband.
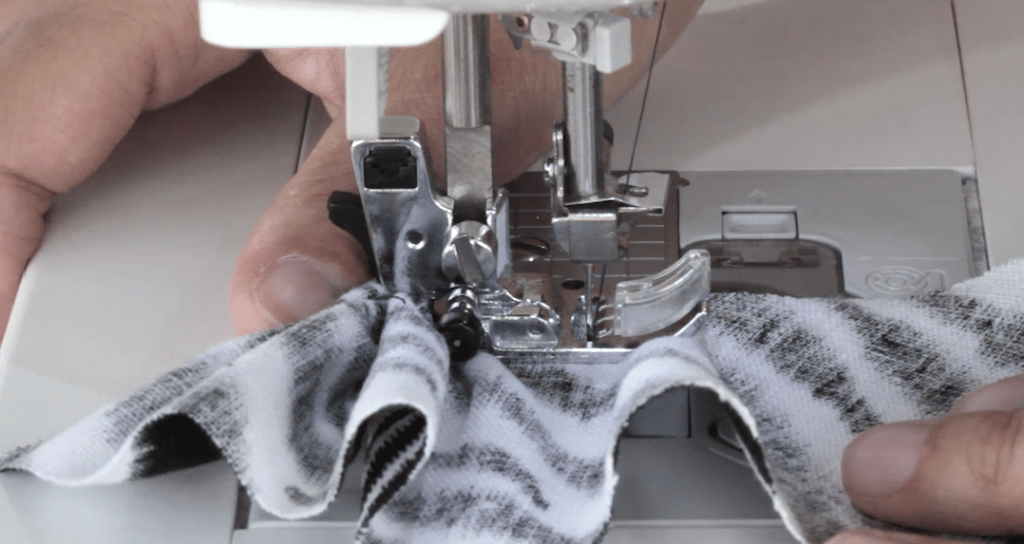
Put your finger or thumb behind the presser foot to ease the fabric.

Fabric bunches up after ease stitching.
- Cut a piece of twill tape (or selvage) in your desired finished length. Because Emily Culottes sit on the natural waist, so I just put the twill tape around my waist as measurement. But remember that not all pants/skirts sit on the waist, so you can either look at the finished garment measurement (if it’s provided by the pattern), or you can measure the pattern pieces directly. Of course you want to exclude the seam allowances when measuring.
- Pin your twill tape on the ease stitch along the waist on the wrong side of the fabric. The idea here is to fit your waistband into the twill tape. You may need to adjust a bit here and there to fit the waistband completely into the twill tape.
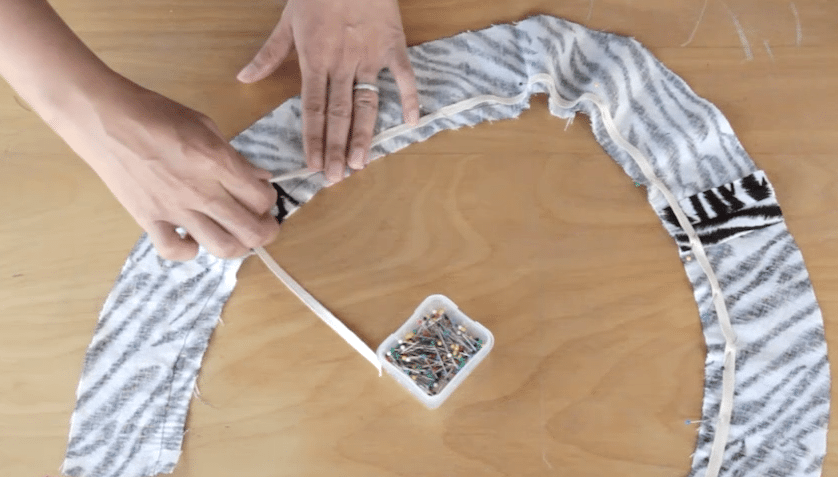
Fit your waistband into the length of the twill tape as you pin.
- Stitch the twill tape onto the waist line. Press the waistbands, and voila! You are done.

You can also see this technique being used in Power Sewing Step by Step by Sandra Betzina, and probably many other sewing books.
Now you have a very stabilized waist line. Until next time, happy sewing!

I know this post is a bit older based on the comment dates, but hopefully you still see this! I was wondering if you use the staytape route, do you apply the waistband’s interfacing right on top of the stay tape afterward? Or is it better to do staytape on the inner waistband and interfacing on the outer waistband?
This two part explanation with videos is so so so helpful. I especially appreciate the first “experimental” explanation. It truly differentiates your offering. So often, instructions just say what to do and not why which doesn’t help me understand. Thank you!!
Hi! I was searching for help with this issue. I’m confused though – do you not use any other interfacing on the waistband to stabilize? I’ve learned to use fucible interfacing on one side to end up with a nicely reinforced waistband. My professional garments have this too. Thanks!
Hi Arielle. Yes, you still use fusible interfacing on the waistband. But the fusible interfacing is also cut on the bias, so it will also stretch out. So you need something that doesn’t stretch to be on the seam line; it could be a twill tape or a fusible stay tape on the straight grain. If your waistband is on straight grain (not a contour waistband), then you don’t need additional twill tape or stay tape.
Nice job with the tutorial!! This is simple to do, but so not simple to explain. You nailed it! Sometimes I like to press the twill tape version over my pressing ham… it helps to give it that natural curved shape.
Marisa, it’s easier to explain using videos. A video is worth a million words. 🙂 I use my ham quite a lot too, like my pockets or collars – everything that has a curve to it.
Great tutorial Kennis, worth the wait. Now I feel extremely confident with sewing my biased waist lines. I have used method 1 but not 2, I like the idea of it being super stable.
Deb, look forward to seeing your version!