
Shirring with Elastic Thread
Shirring with elastic thread is easier than it looks. Sure, it does take some time, but you can succeed without a whole lot of practice. Even if you think it does not look perfect, the truth is that when the garment is worn, any imperfection will not be visible. You can put shirring on just a small or very large part of your garment. When you have shirring on the bodice, the garment can fit very well because the elastic naturally contracts to fit your body.
This tutorial contains the way I mark the fabric and the way I shirr. Frankly, the way I shirr is pretty much the same as how everyone else does it. I am hoping the way I explain things will reinforce your understanding. The way I mark the fabric, however, is perhaps different from what you learned before. In fact, shirring tutorials don’t usually tell you how to mark fabric. I just found this is the easiest way for me, so it’s worth for me to share with you so you can be your own judge.
The first step to shirr with elastic is to hand wind the bobbin with elastic thread. There’s no short cut here; do not attempt to wind the bobbin using the regular way on the sewing machine. And it’s really is not that time-consuming to hand wind. The elastic thread is thick, and it will take a minute or two to hand wind. Do not stretch the elastic thread when you hand wind; it just needs to be taut so that the elastic thread doesn’t flop around in the bobbin. You see my hand winding is not perfect? It works anyway, so don’t worry too much about not being able to make it very even.
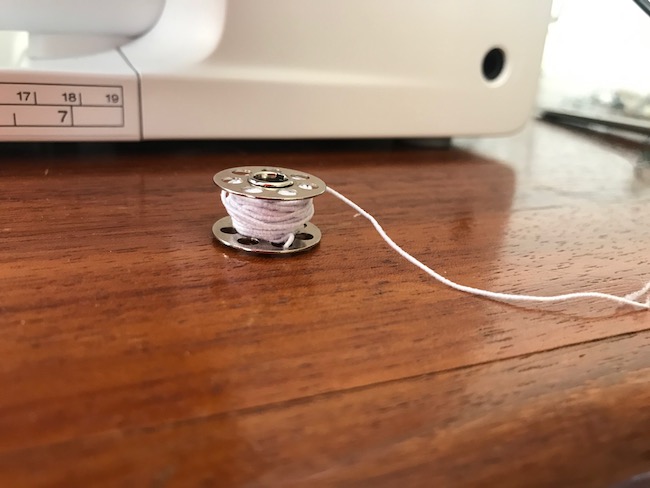
Put the bobbin into the bobbin case and then into your machine like you normally would. Be sure to turn the balance wheel of your sewing machine to bring up the elastic thread through the throat plate.
If your sewing machine has a drop-in bobbin, be sure that the elastic thread is hooked into the groove. It’s easier to show you in a photo than to describe it. See where I am circling below? That’s the groove I am talking about.
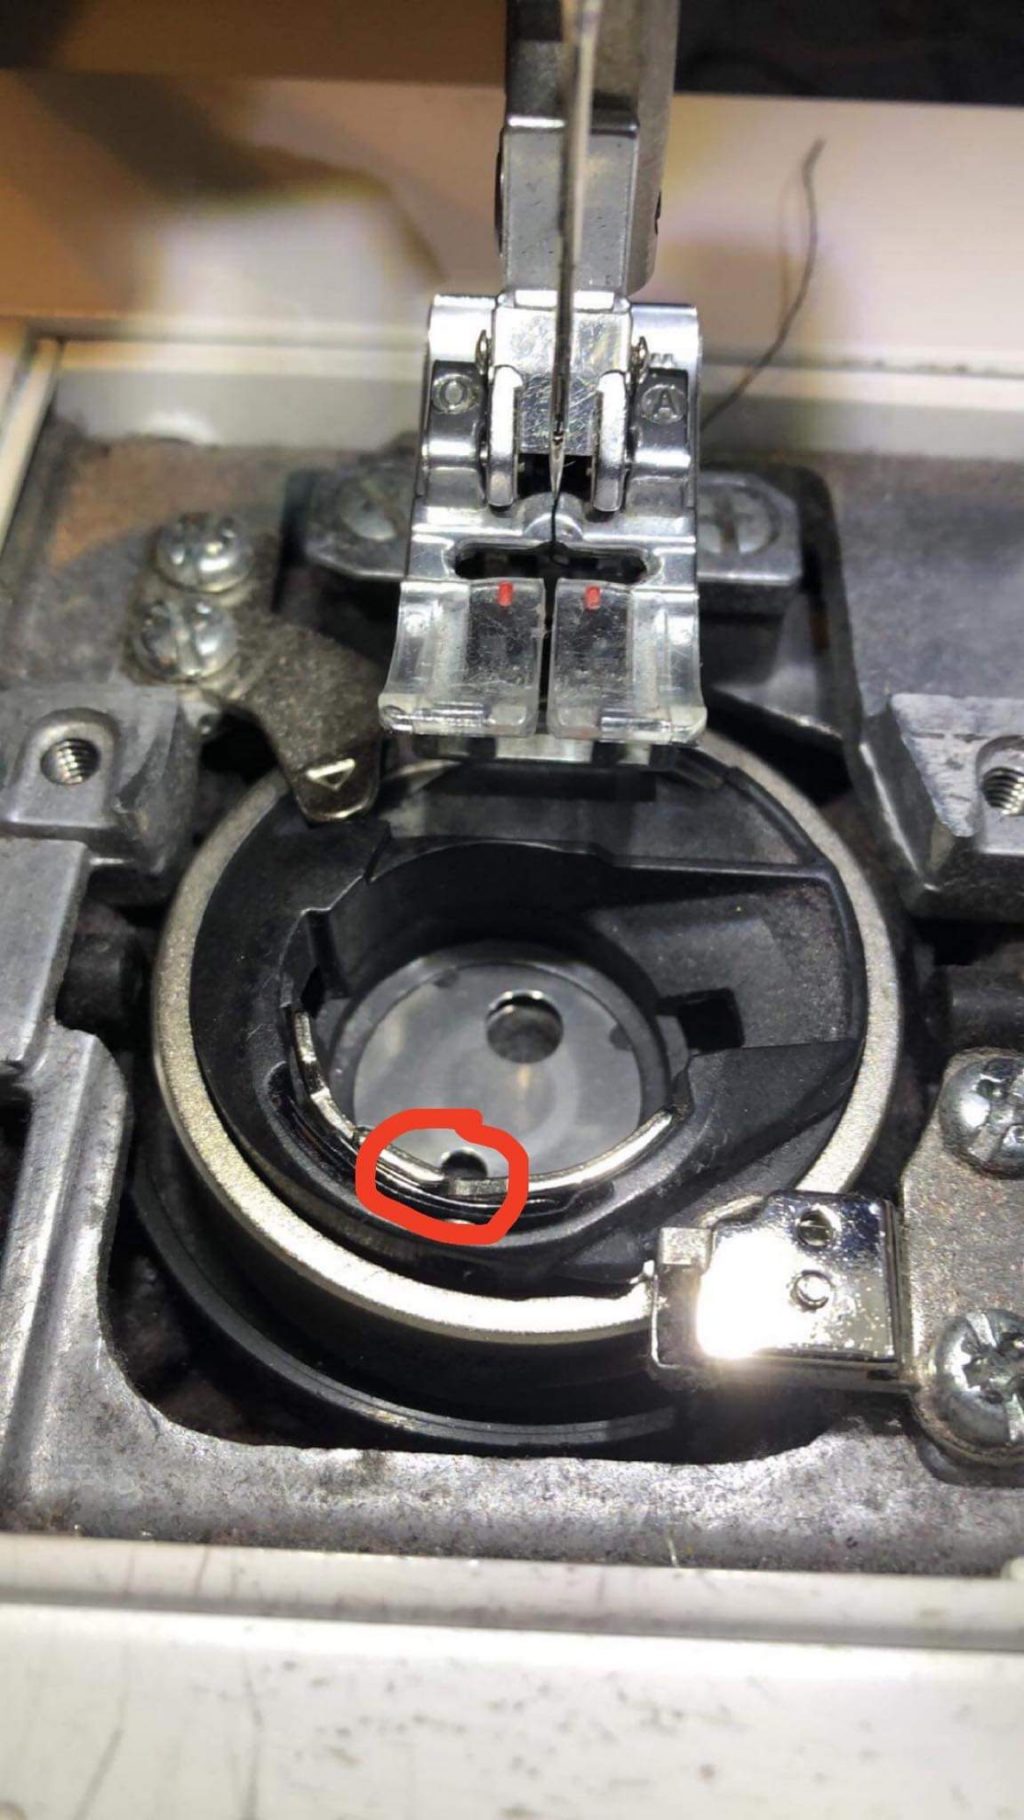
If you don’t hook your elastic thread into that groove, you will have tension problem and your machine will fail to shirr.
Most Brother sewing machines have this type of drop-in bobbin system as well. However, that groove is covered by a piece of plastic; that’s a part of a bobbin cover. You can remove the plastic relatively easily; it is designed to be removable. If you do use a Brother sewing machine, I found that this video shows you well what to do. The point of interest in this video starts at 2:17 (I am not affiliated with Learn to Sew Academy, but I just want to share a video I found useful.)
Alright, back to the regular programming…
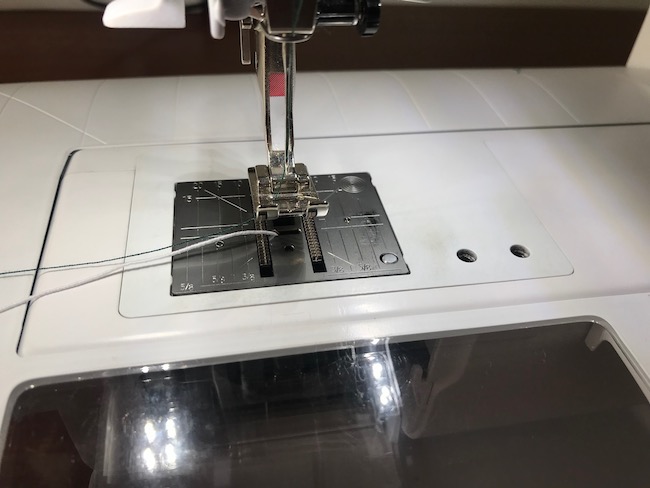
You should set the stitch length longer. Mine is about 3.5 mm long.
Now that the machine is set up to go, let’s jump to the fabric that you are shirring.
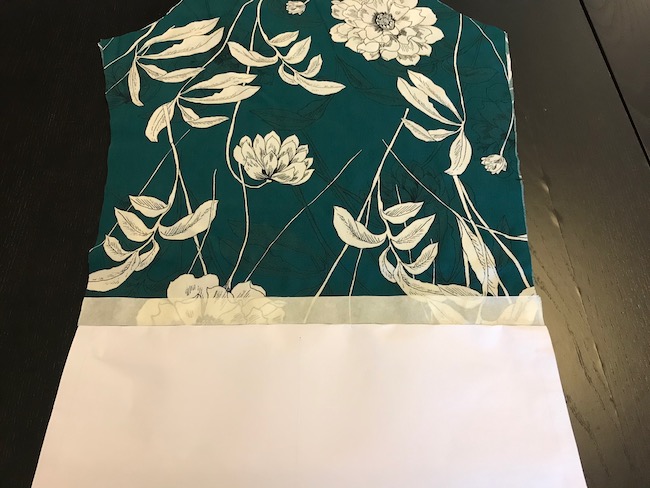
Here I have a sleeve that I want to shirr at the wrist. It is a lightweight viscose crepe fabric. Generally, you want to use a lighter-weight fabric for shirring.
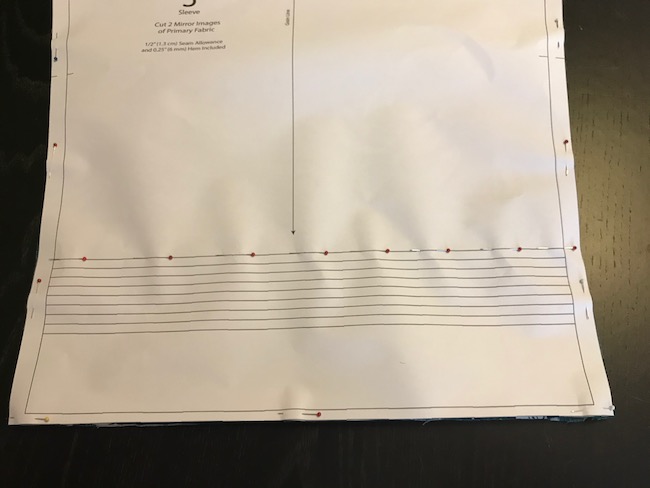
Keep in mind that you will be shirring on the right side of the fabric, so when you mark, you should mark on the right side of the fabric. For this sleeve, I am cutting two mirror images (a sleeve for the left arm and a sleeve for the right arm), so I fold the fabric with the wrong sides together and put the pattern piece on the right side of the fabric.
I am only marking the first line of the shirring with pins. I poke the pins through all layers of the fabric at the exact line. Oh, do you see in the photo that I haven’t removed all other pins on the pattern piece, yet? That’s right; don’t remove them yet.
Now I flip the fabric over, and you can see that the pins poke through.

Then I use my all-time go-to sewing tool—masking tape. I put the masking tape over the line of pins. You can use painter’s tape, which I sometimes use. Here’s my disclaimer: please test it first and make sure the tape doesn’t leave any residue on your fabric.
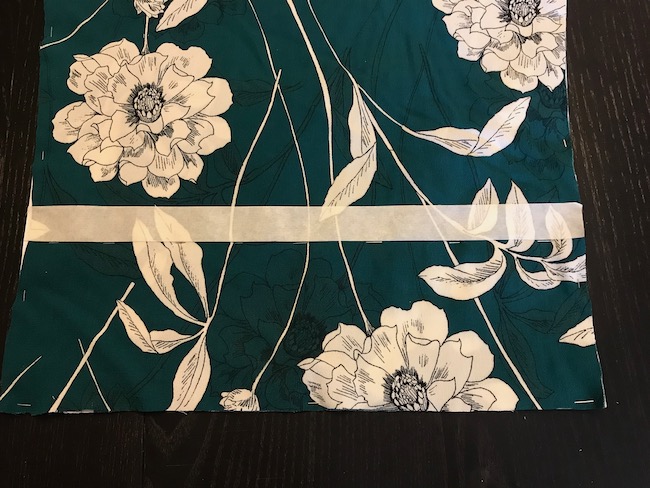
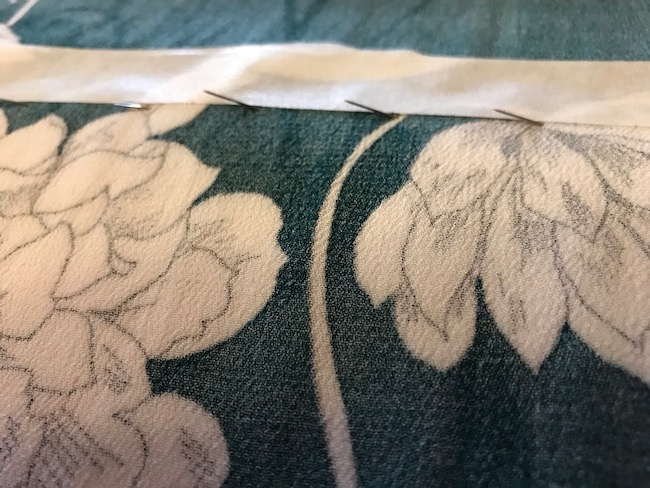
Maybe you can’t see very well in the photo, but here’s a close-up photo—the masking tape is just above the pins.
To mark the second sleeve, I flip the whole thing over again so that the pattern piece is facing me. If there are other markings on the sleeve, such as the sleeve cap, front single notch, and back double notch, mark them now if they are not done already. Then I remove the pins on the sleeve cap, as well as all others above the top line of shirring marking—basically remove enough pins so that you can fold the pattern piece down at the first line of shirring marking.
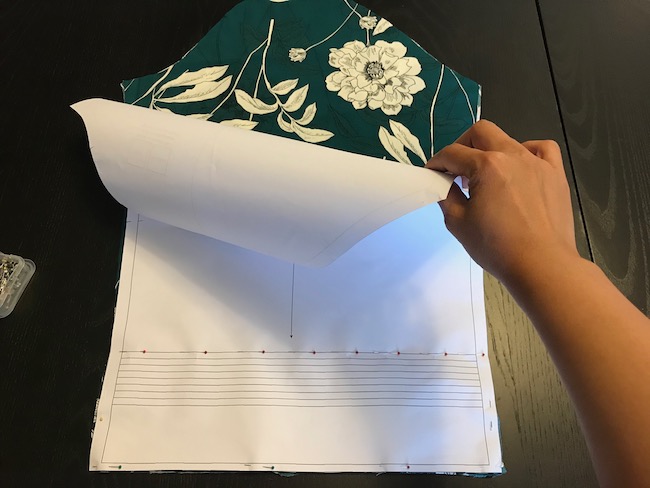
I fold the pattern piece at the first line of marking (or the line of pins). Now I can use the masking tape again. I tape it right above the fold of the paper.
The marking is complete. You can take the pattern piece and the pins off. The preparation is done!
(Here’s a note about marking. If you are using a projector to cut your fabric, you usually cut your fabric in a single layer. Marking is way easier. I would still use the masking tape, but there’s no need to use pins. You would mark each piece separately. Now back to our regular programming…)
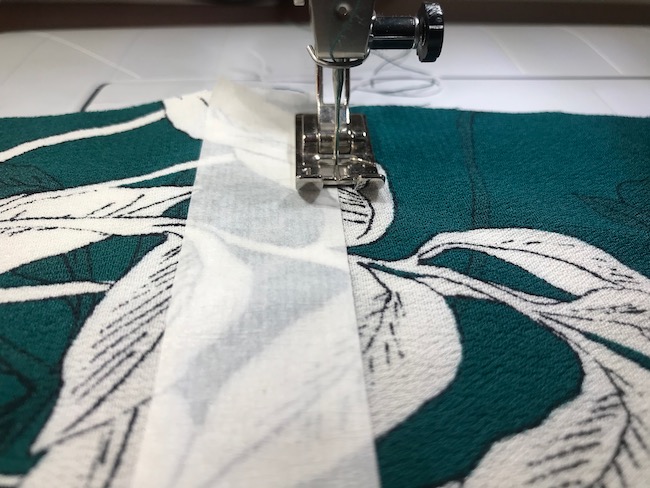
Now let’s get sewing. On a single layer of fabric, sew along the edge of the masking tape (but not on it!). Remember that the masking tape is ABOVE the marking, so you should be sewing along the lower edge of the masking tape.
When you are done, be sure to pull enough of the elastic thread out before cutting it so that it doesn’t retract back into the machine. Don’t worry, if it does retract back, you will just have to pull it out again, and soon enough, you will learn to remember to pull the elastic thread out long enough before you cut it off.
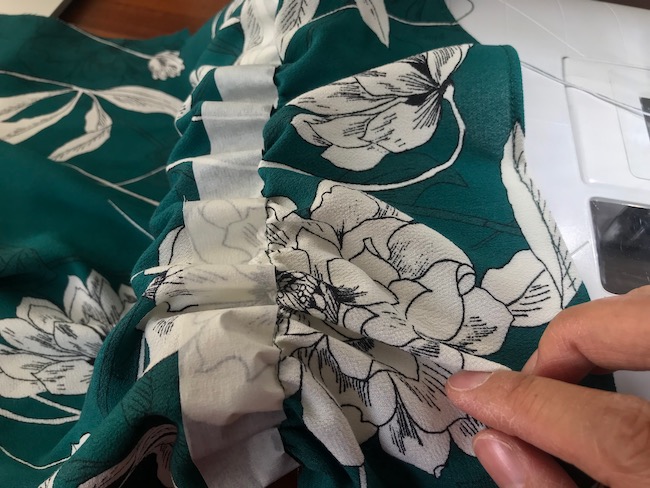
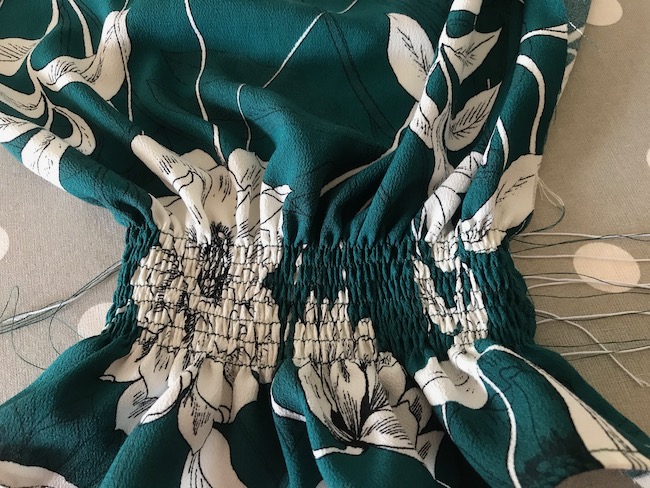
Here’s how it looks when you are done. The elastic thread is already doing its job to gather up the fabric.
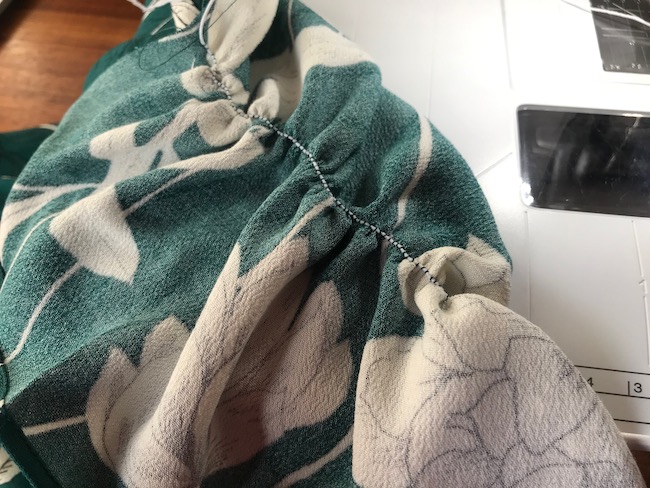
Here’s how it looks on the back.
The masking tape has finished its job. You can remove it now.
Using the first line of shirring as a guide, sew another line 1/4″ (6 mm) (or whatever width the pattern tells you to do). Most of the sewing machine foot is 1/2″ (1.25 cm) wide, and you can use this to your advantage. You can see that I put the edge of the sewing machine foot right at the first line of shirring to sew the second line of shirring.
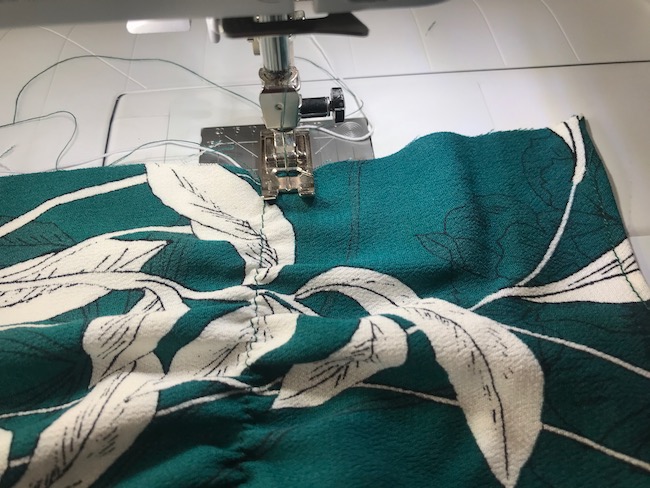
And when you sew the second line, you have to stretch the fabric so it is flat for you to sew. You keep doing the same thing until all the shirring lines are sewn.
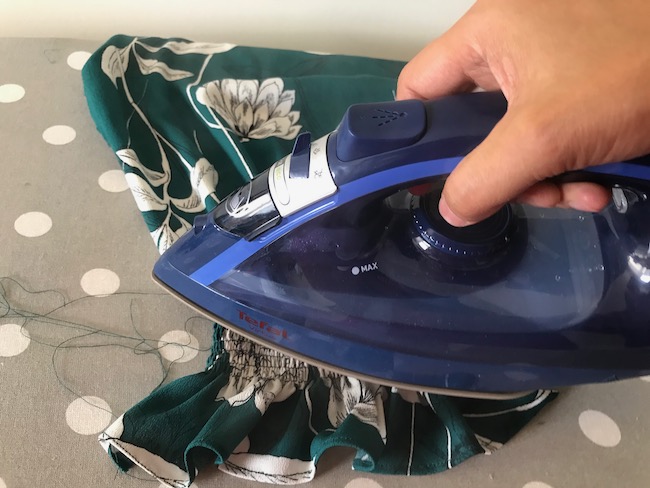
Now you can hover your steam iron over and blast some steam over the shirring to make them shrink more.
I didn’t take a photo of this, but to tie off and cut the thread, you need to pull the thread to the wrong side of the fabric and tie a double knot at the beginning and end of each line. Yes, I know there are a lot (I am sewing 7 lines of shirring, so that means I have to tie 14 times…).
So what happens when your thread ends in the middle of the shirring? No worries, you can pull the thread to the wrong side of the fabric and tie it off, then start again at where it’s left off.
That’s how I do the shirring with elastic thread. Practice and try on some fabric and see how it looks.

Elastic thread comes in so many widths. I bought .6mm, but it seems thinner than the dritz which I think is .75 mm. What do you advise?
Hi Stephanie, I think you should try it out. I think it would work, and my guess is that it would gather more than the thicker elastic thread, but it will still depends on your machine, so try it out!
Would Wooly Nylon Serger Thread work instead of “elastic thread?”
I haven’t tried before so I don’t know. But I think wooly nylon may not have the strength to pull the fabric together to create the smocking look.
Thanks Kennis. I am a huge fan of your designs and patterns- I’ve made and worn so many. Now I’m making my first Fisterra – hopefully it will be my dress for my niece’s late spring wedding celebration. I love learning new skills and am ready to shir!
Thanks Kennis. I am a huge fan of your designs and patterns- I’ve made and worn so many. Now I’m making my first Fisterra – hopefully it will be my dress for my niece’s late spring wedding celebration. I love learning new skills and am ready to shir!
This is amazing! I always heard that you have to adjust the tension screw on the bobbin case to use elastic thread in the bobbin and that some people keep a separate bobbin case on hand to use just for that purpose – but this worked with no tension adjustment necessary. I’m working on the Fisterra top and just finished the shirring at the back. It looks great!! Love the masking tape tip, too. Thanks for the tutorial!
Of all the tutorials I’ve looked at, this is the only one that addressed the bobbin groove and pulling the bobbin elastic up top. I’m finally shirring like a pro….it was just those two things that were messing me up….thank you!
I have never been successful (yet) with shirring. I will give this a try!
Thank you for the tutorial!
Have you ever tried shirring in an overlocker? I’m curious about the pros and cons of both methods.
This makes sooo much sense! Utilizing the tension of the elastic thread through the bobbin groove seams like a much better and safer way than other explanations I’ve read. Thank you for sharing!
Wow your tips are amazing, I would love to make a top or dress with shirred sleeves.
Thank you for sharing this, I will definitely try it out
Have read many shirring instructions but yours are by far the most logical. Straightforward and concise.
Thank you for making time in your extremely busy life to do it.
Regards
Catherine
Wow using masking tape to mark the shirring line is inspired! I will definately be using that tip for shirring and marking fold lines in the future. Planning to put your shirring tips into action on the Ariana top or dress sometime this year.