
Liana Jeans Sew Along: Day 6 – Sewing the Back
Have you completed your fitting process yet? If you are, then let’s start putting our Liana Stretch Jeans together!
Cut Out Fabric
I am very glad that I was able to use the test fabric to make the real jeans too! The 1/2″ (1.25 cm) seam allowances that we added during the test was not only good for the purpose of fitting, but they also make the fabric pieces bigger so I am able to squeeze in the new shape of the pattern on it. This is how my new pattern piece sits on the fabric. Is that cool or what?
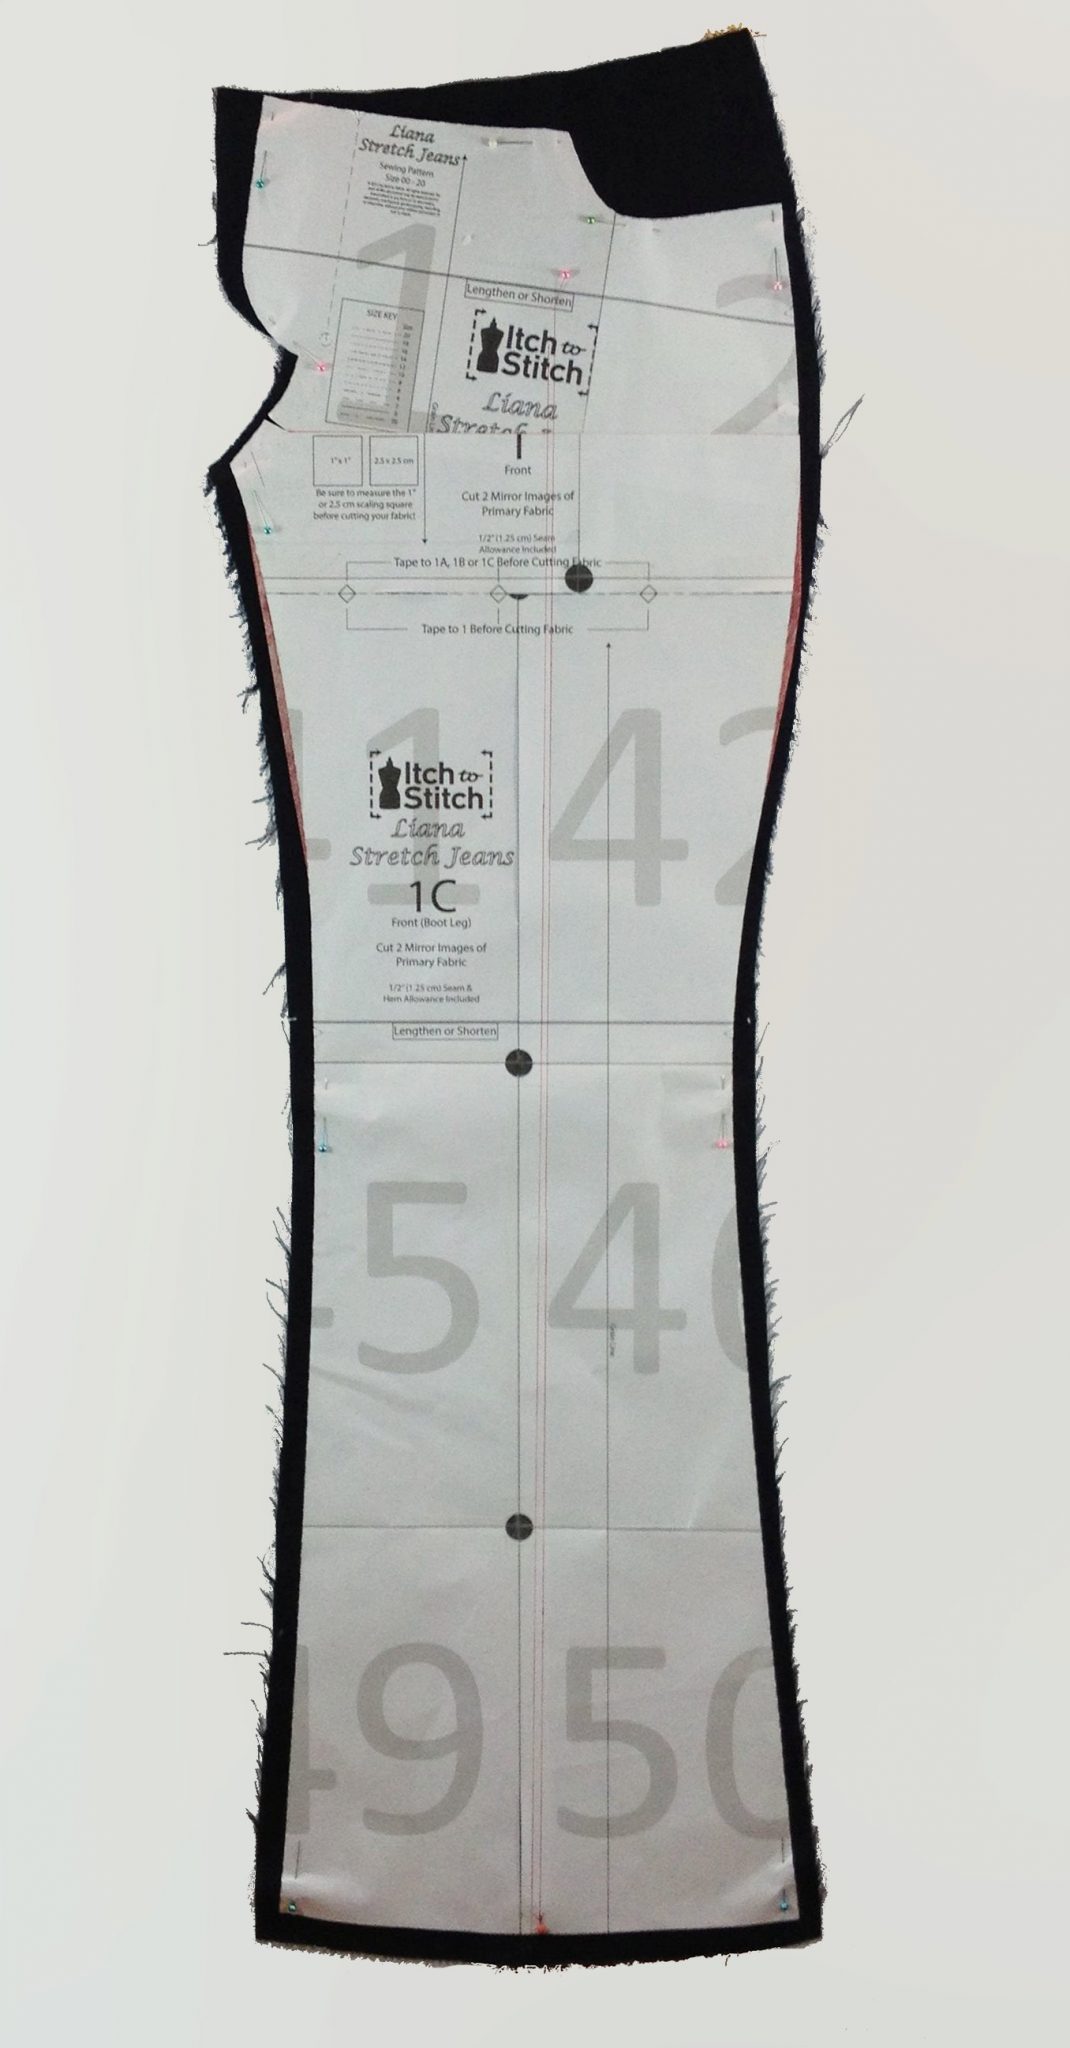
I am able to fit the modified pattern back on the test fabric piece!
If you are able to do that, great! Be sure that you are placing the pattern piece on the fabric on grain though. If you can’t tell where the grain of the fabric is, use the same method that I mentioned in the last post: find the mid point at the hem line and find the mid point between the knee notches. Connect the two mid points and you have the grain that was used to cut the fabric. You might not be as lucky to be able to reuse your fabric; in that case, I am afraid you need to use new fabric.
Oh, at this time, you should remove the Front Pocket Yoke (5) pattern piece that was previously taped to the Front.
I have cut out my fabric. I have a habit of leaving the pattern with the fabric until I am sewing the piece.
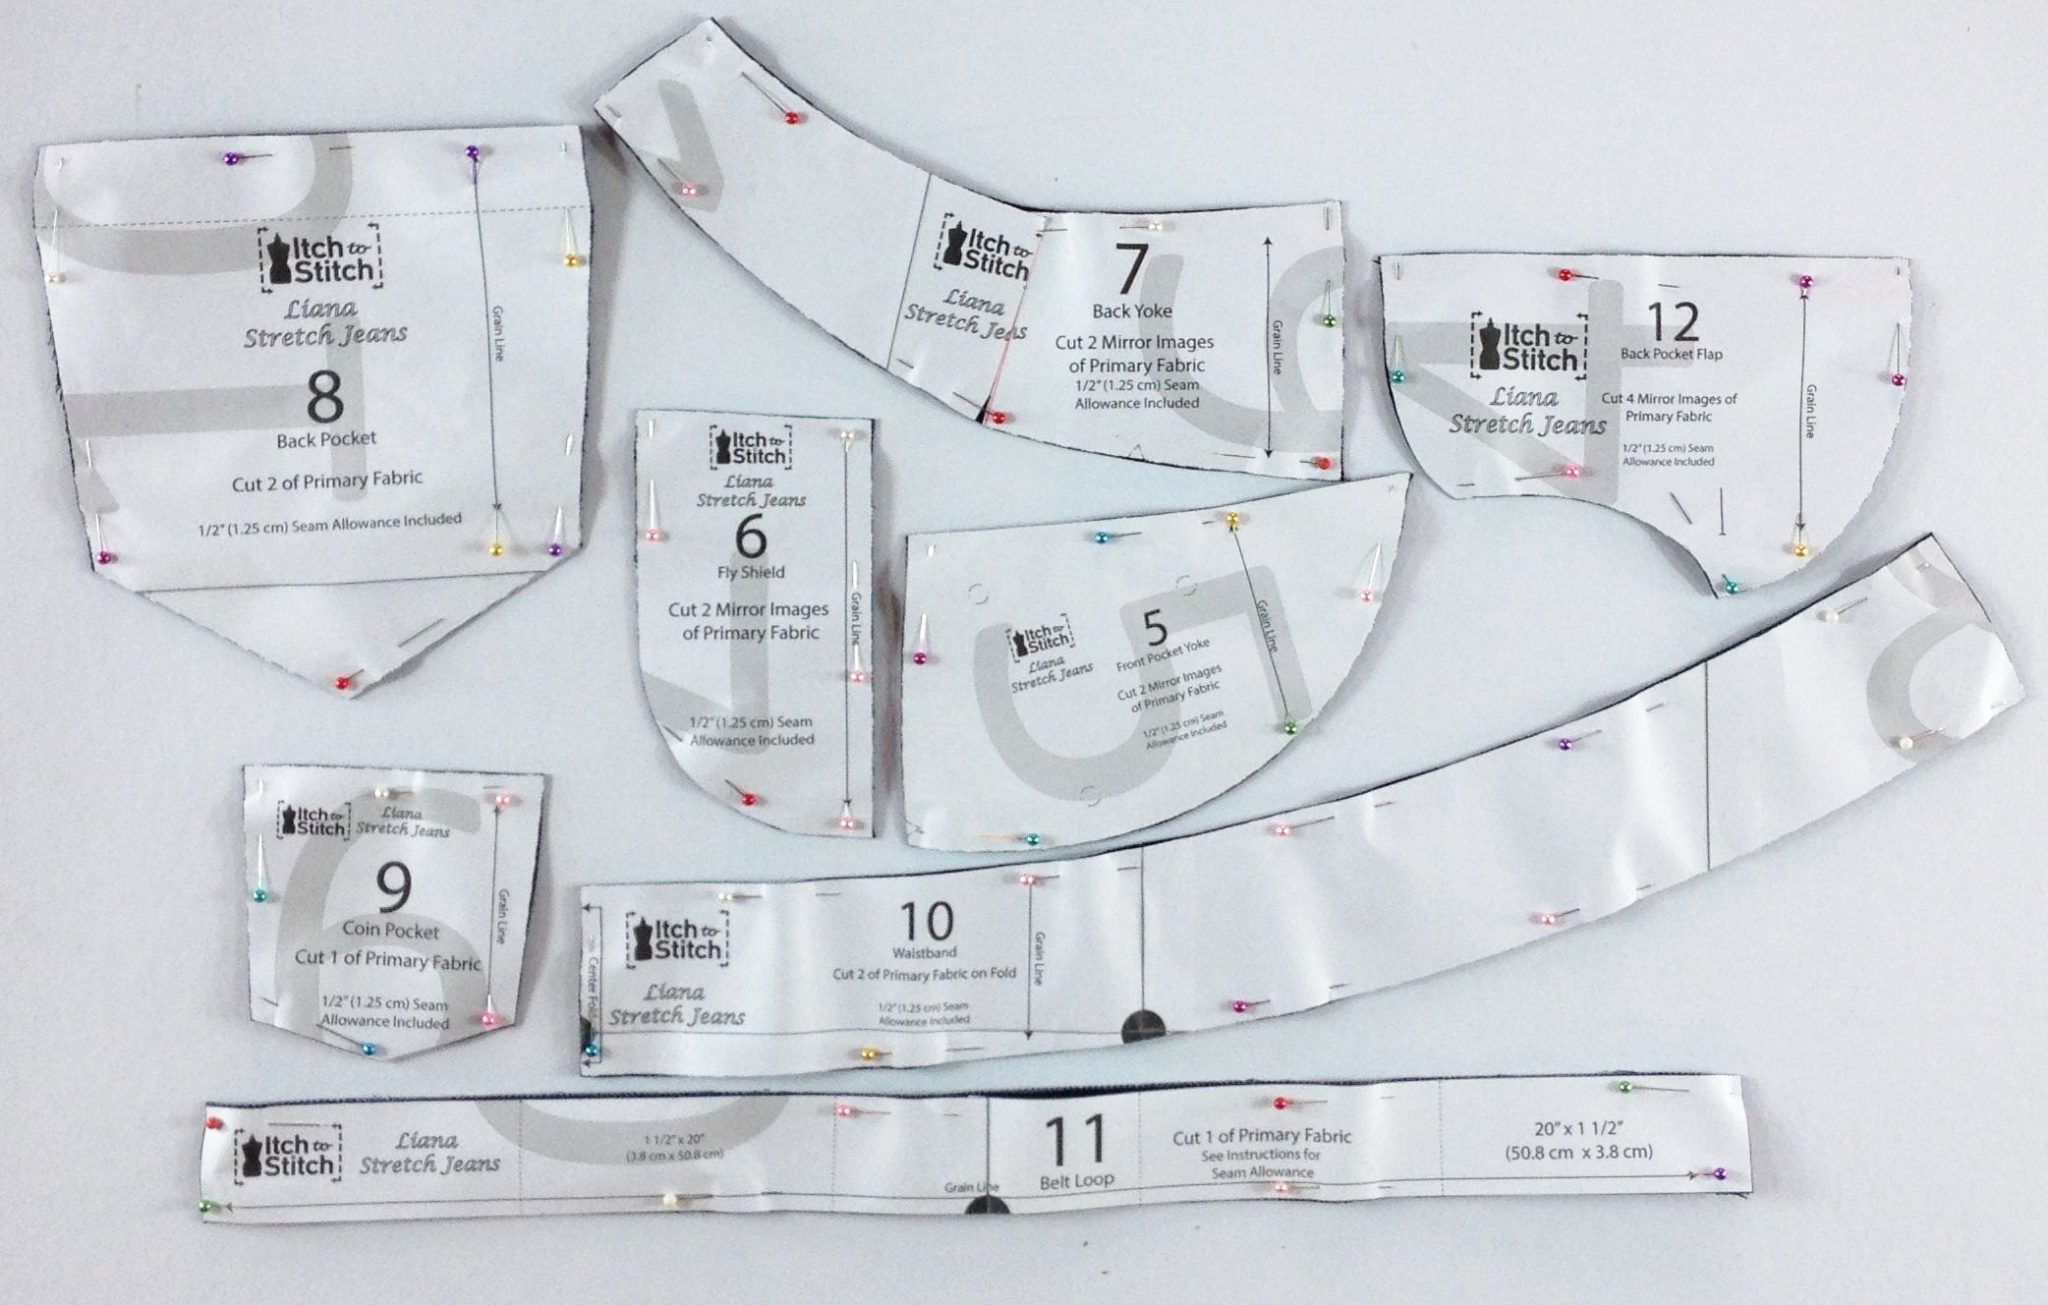
Fabric all cut! (yes I use a lot of pins)

Fabric all cut!

Also cut out the lining
Remember to transfer all markings.
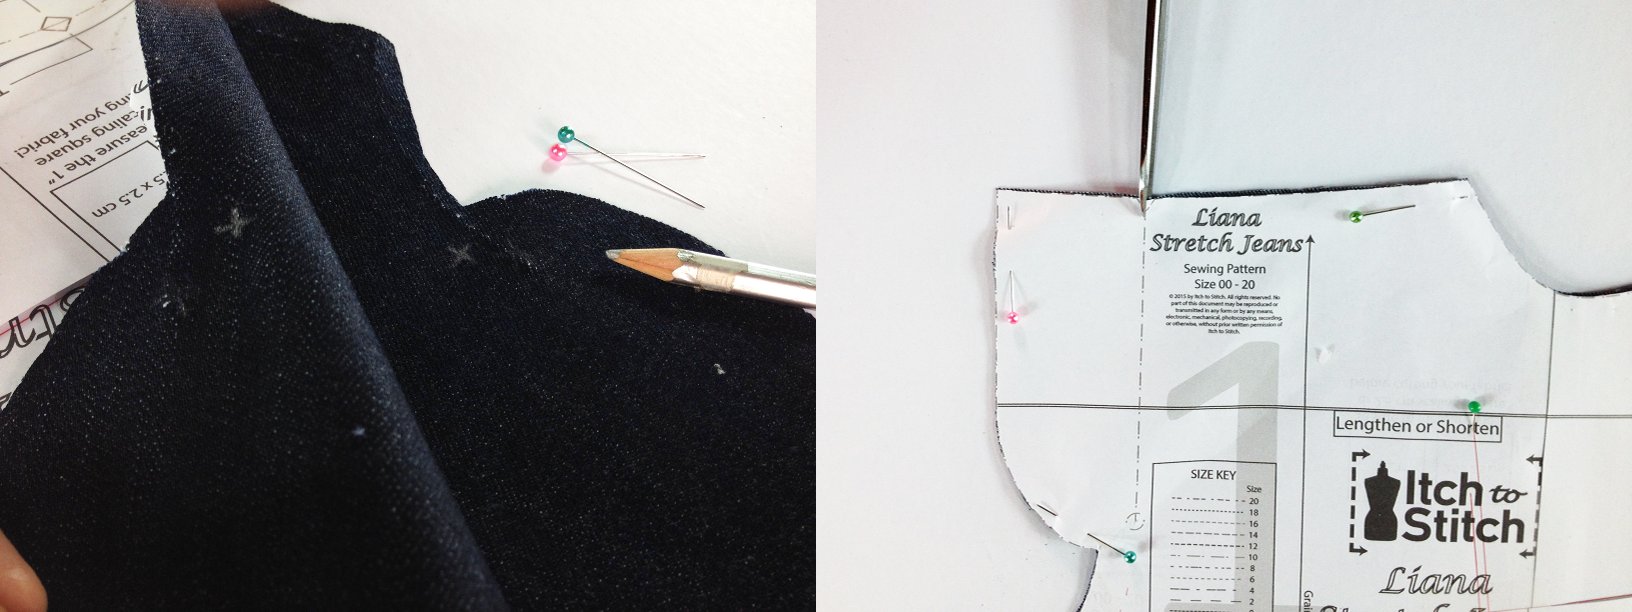
Remember to transfer all markings.
Create Back Pockets
I think back pocket is the part most people like to be creative. You can go so crazy with the design. Keep in mind if you are going to put the back pocket flaps, you may want to have back pocket designs that are compatible with the flaps (you don’t want the flaps cover most of your design). If you have an embroidery machine, you can even embroider some simple design. Or go ahead and Google “back pocket designs” and you’ll get tons of results.

Back pocket designs for inspiration
I feel like going pretty streamlined with my jeans.

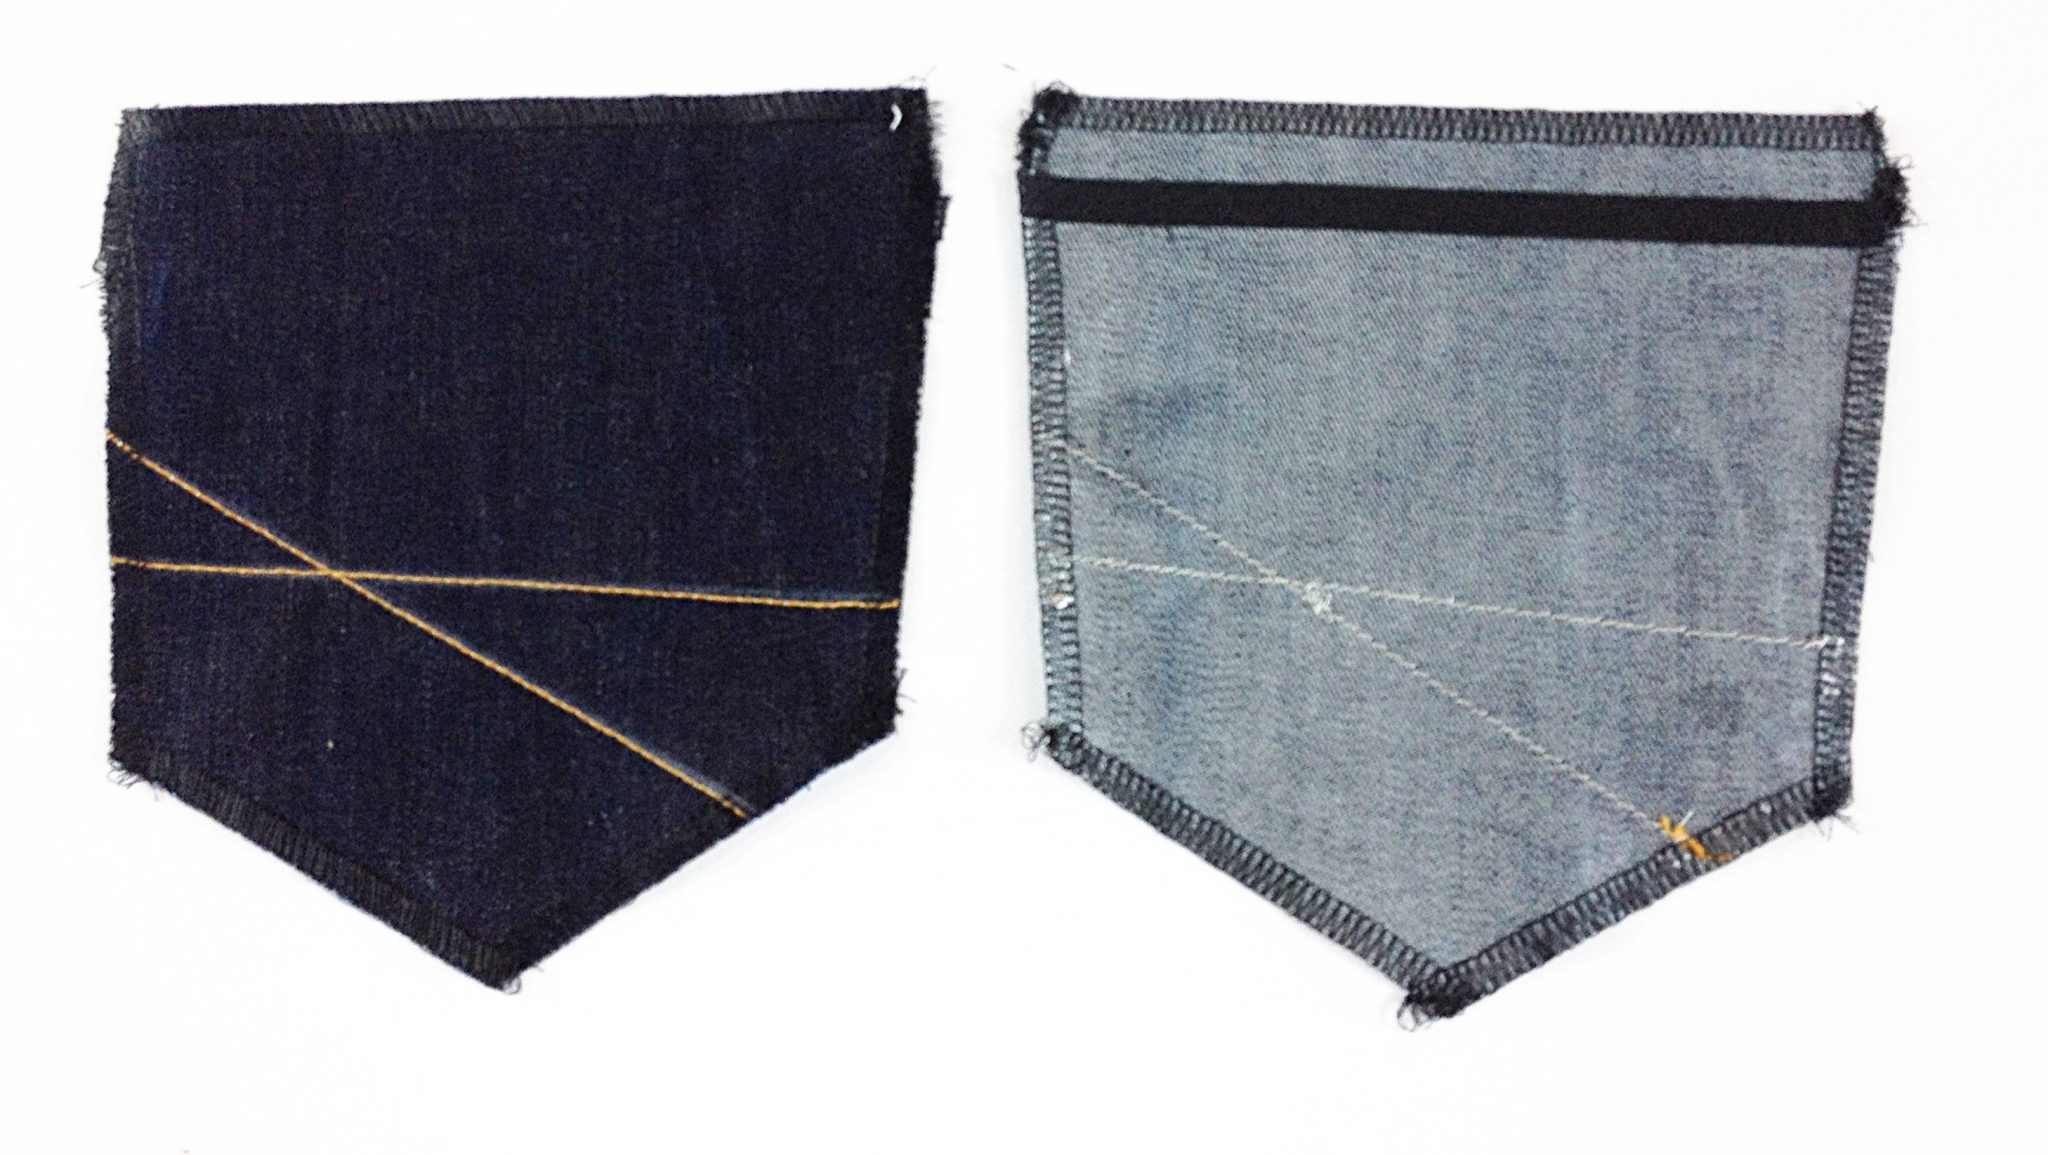
My back pocket design
One way to transfer your design from one Back Pocket to the other is to use chalk to draw on one first. Then you put the two right sides together and just rub with your fist. Some chalk will get rubbed off from one pocket to the other. Then you can use the faint mark as a base and darken it with chalk.
Here are the steps for creating the Back Pocket after I drew the design.
- Topstitch on the design. I use a water-soluble stabilizer as backing when I topstitch, because otherwise the pockets are prone to getting stretched out. However, you will then have to be very careful about pressing your pockets because the stabilizer will melt (before you wash it away). I have also used cut-away stabilizer before, then pressing is not a problem.
Topstitching Back Pocket with water-soluble stabilizer underneath
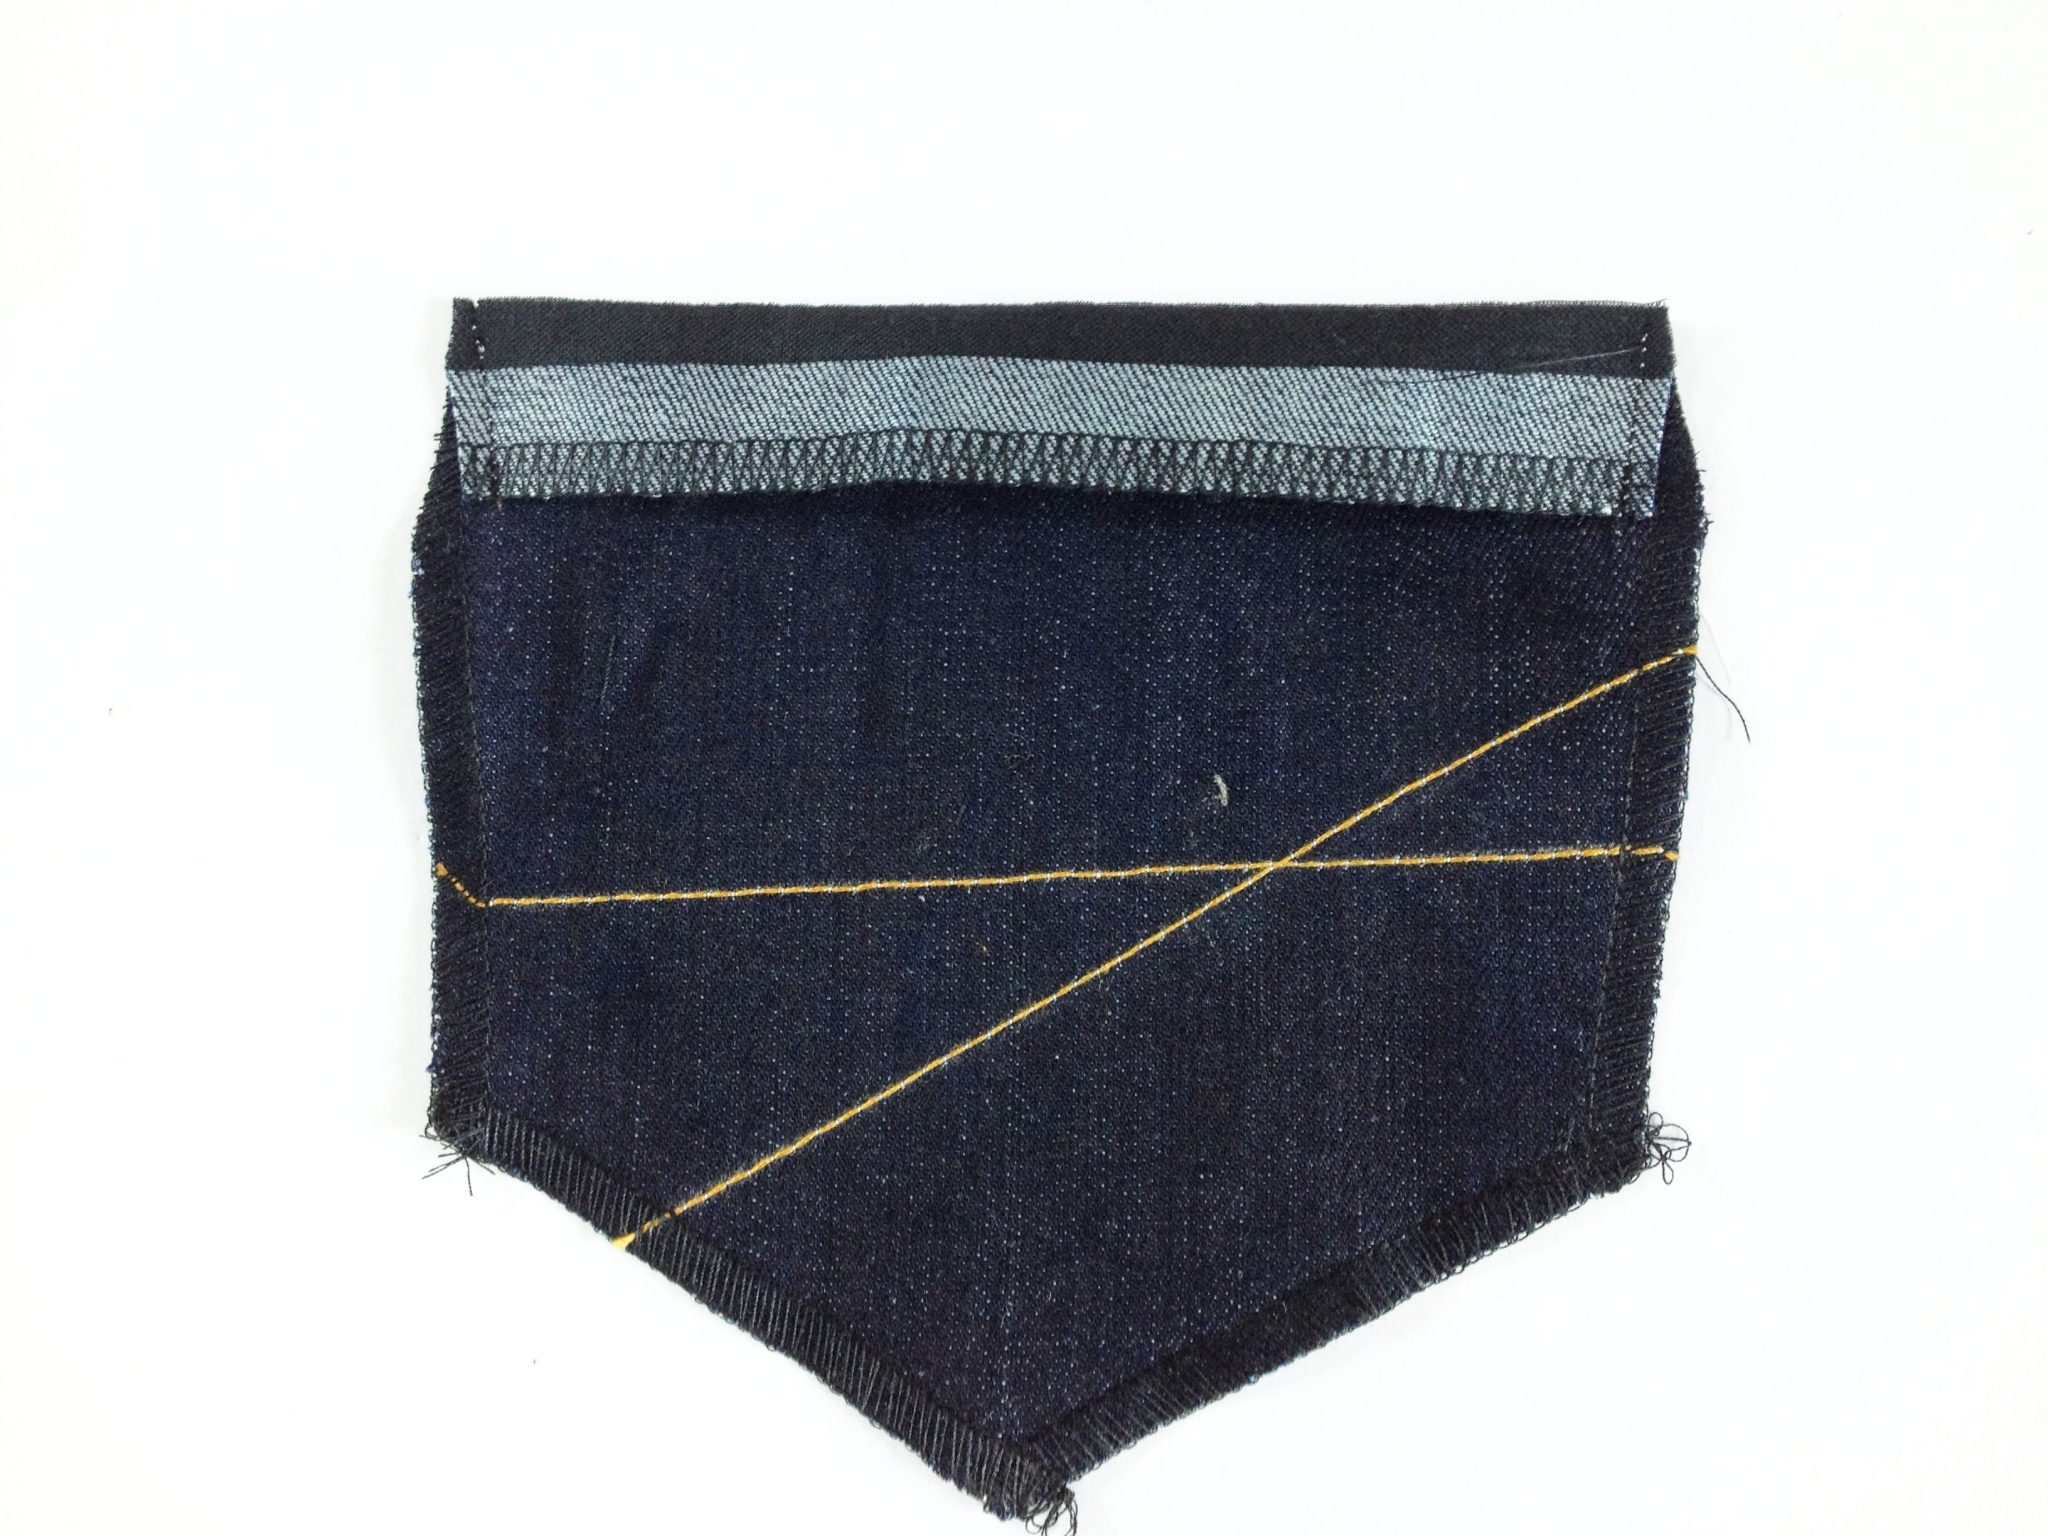
- Serge all edges. If you don’t have a serger, you can use zigzag stitch.
- I also applied a fusible straight tape just below the fold line at the top of the pocket on the wrong side, so that when I topstitch the opening, it will not get stretched out.
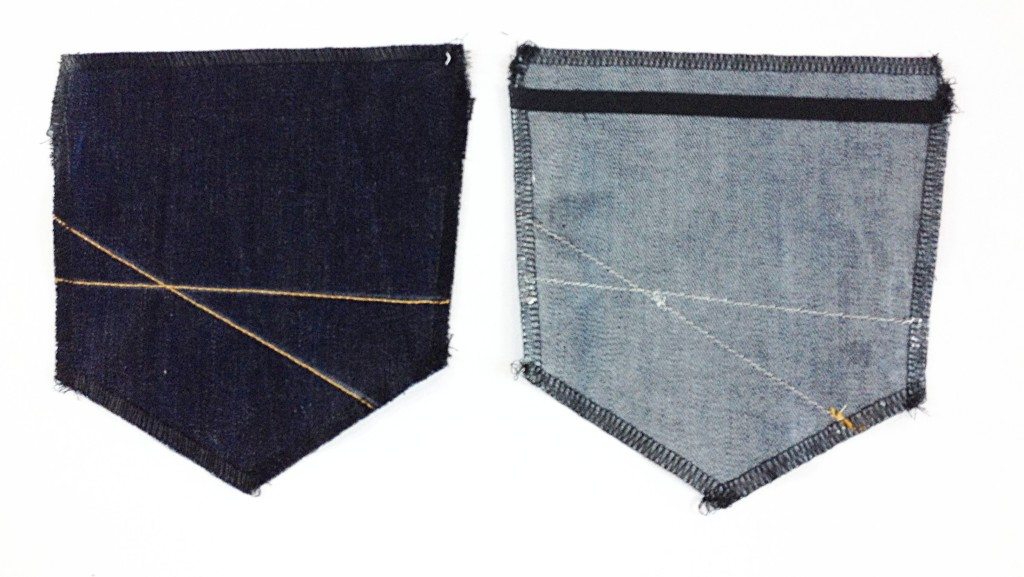
Serged all edges and applied fusible stay tape on top of pocket to prevent stretching
- Press the top of the pocket according to the fold line with right sides together. Stitch the sides. Trim corners.

Fold down top of pocket right sides together, stitch side seams and trim corners
- Then turn it right side out. Press seam allowances in around the pocket.
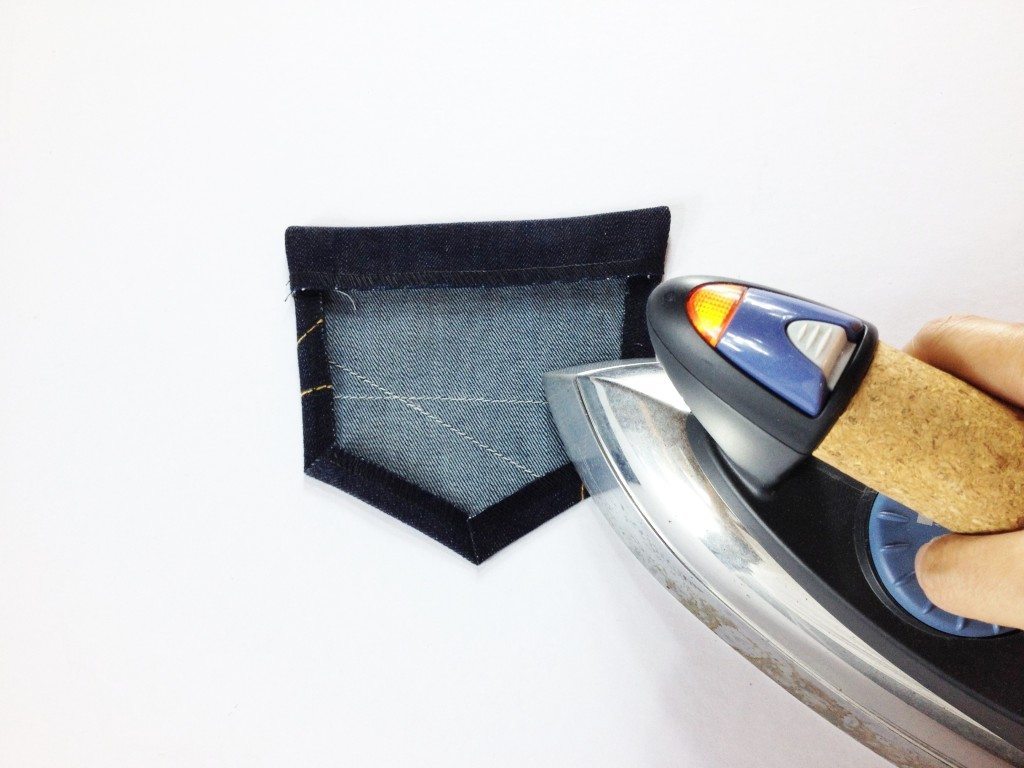
Press seam allowances in
- Pockets are distressed and then topstitch across the top opening.
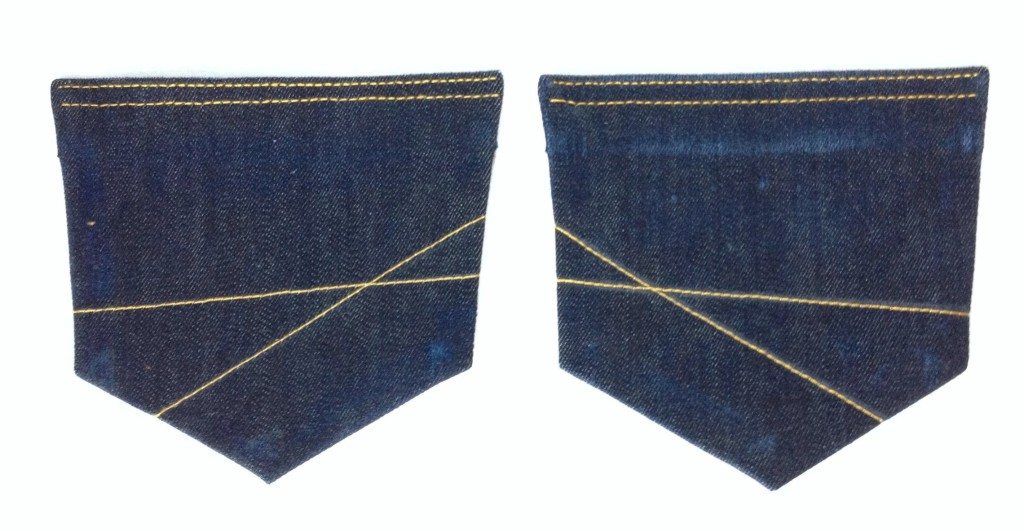
Pocket distressed and topstitched


Create Back Pocket Flaps
For demonstration purposes, I am sewing the Back Pocket Flaps, but I think that the Back Pocket Flaps look great on ladies with small behinds who want to look more curvy. My behind is plenty big, but we’ll see how they look on me.
Steps to create the Back Pocket Flaps.
- With right sides together, stitch two Back Pocket Flaps together. Trim and grade the seam.
- Turn flap wrong side out and press.
- Press the top seam allowance under. The side you press toward is the side that will be hidden, whereas the opposite side is the public-facing side. It’s really up to you whether you want the shorter curve of the flap to be closest to the center seam or the side seam. For mine, the longer curve will be the closest to the side seam; I think that gives the butt a nice round look.
- Distress flap. I like that the folded-under seam allowance makes a bit of an impression. That’s why I fold the seam allowance down before I distress.
- Topstitch around flap except the top edge.
- Serge the raw edge. I also trimmed the little corners that would otherwise peak out.
- Make buttonhole. (My sewing machine didn’t like my topstitching thread, so I had to use regular thread. Be sure to test yours before making buttonholes on the flaps.)
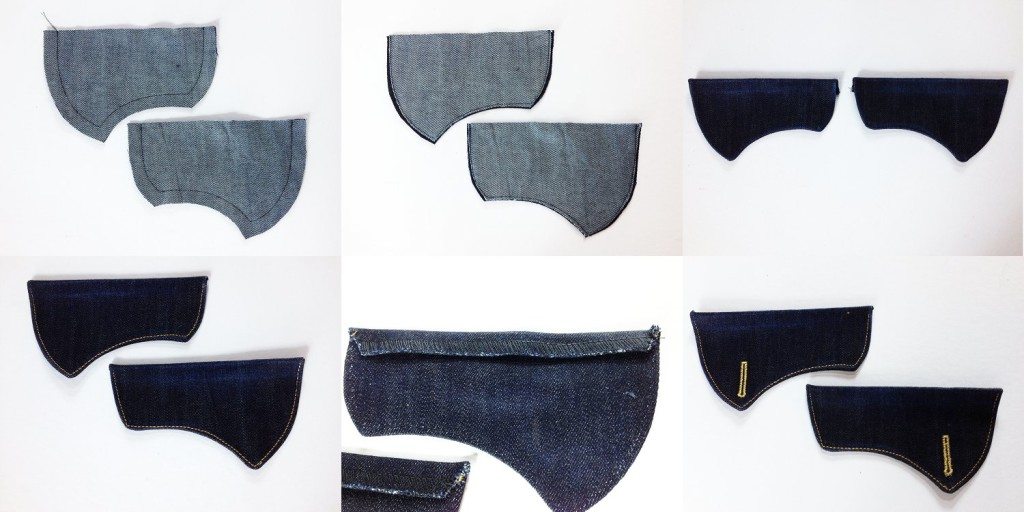
The making of the Back Pocket Flaps
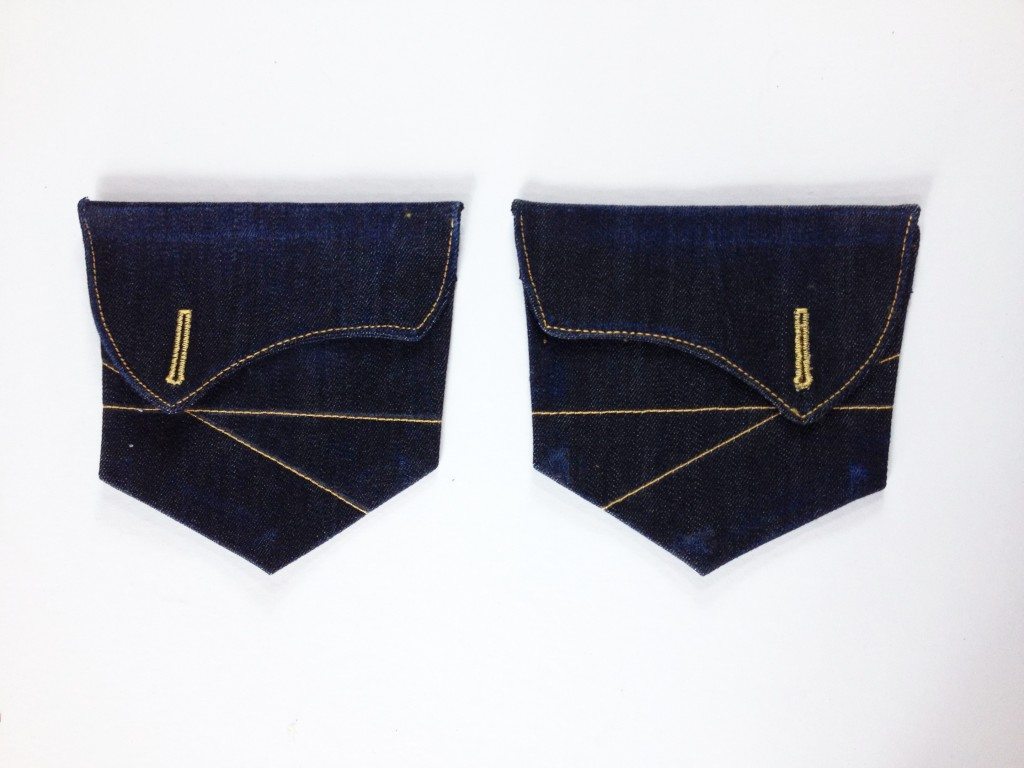
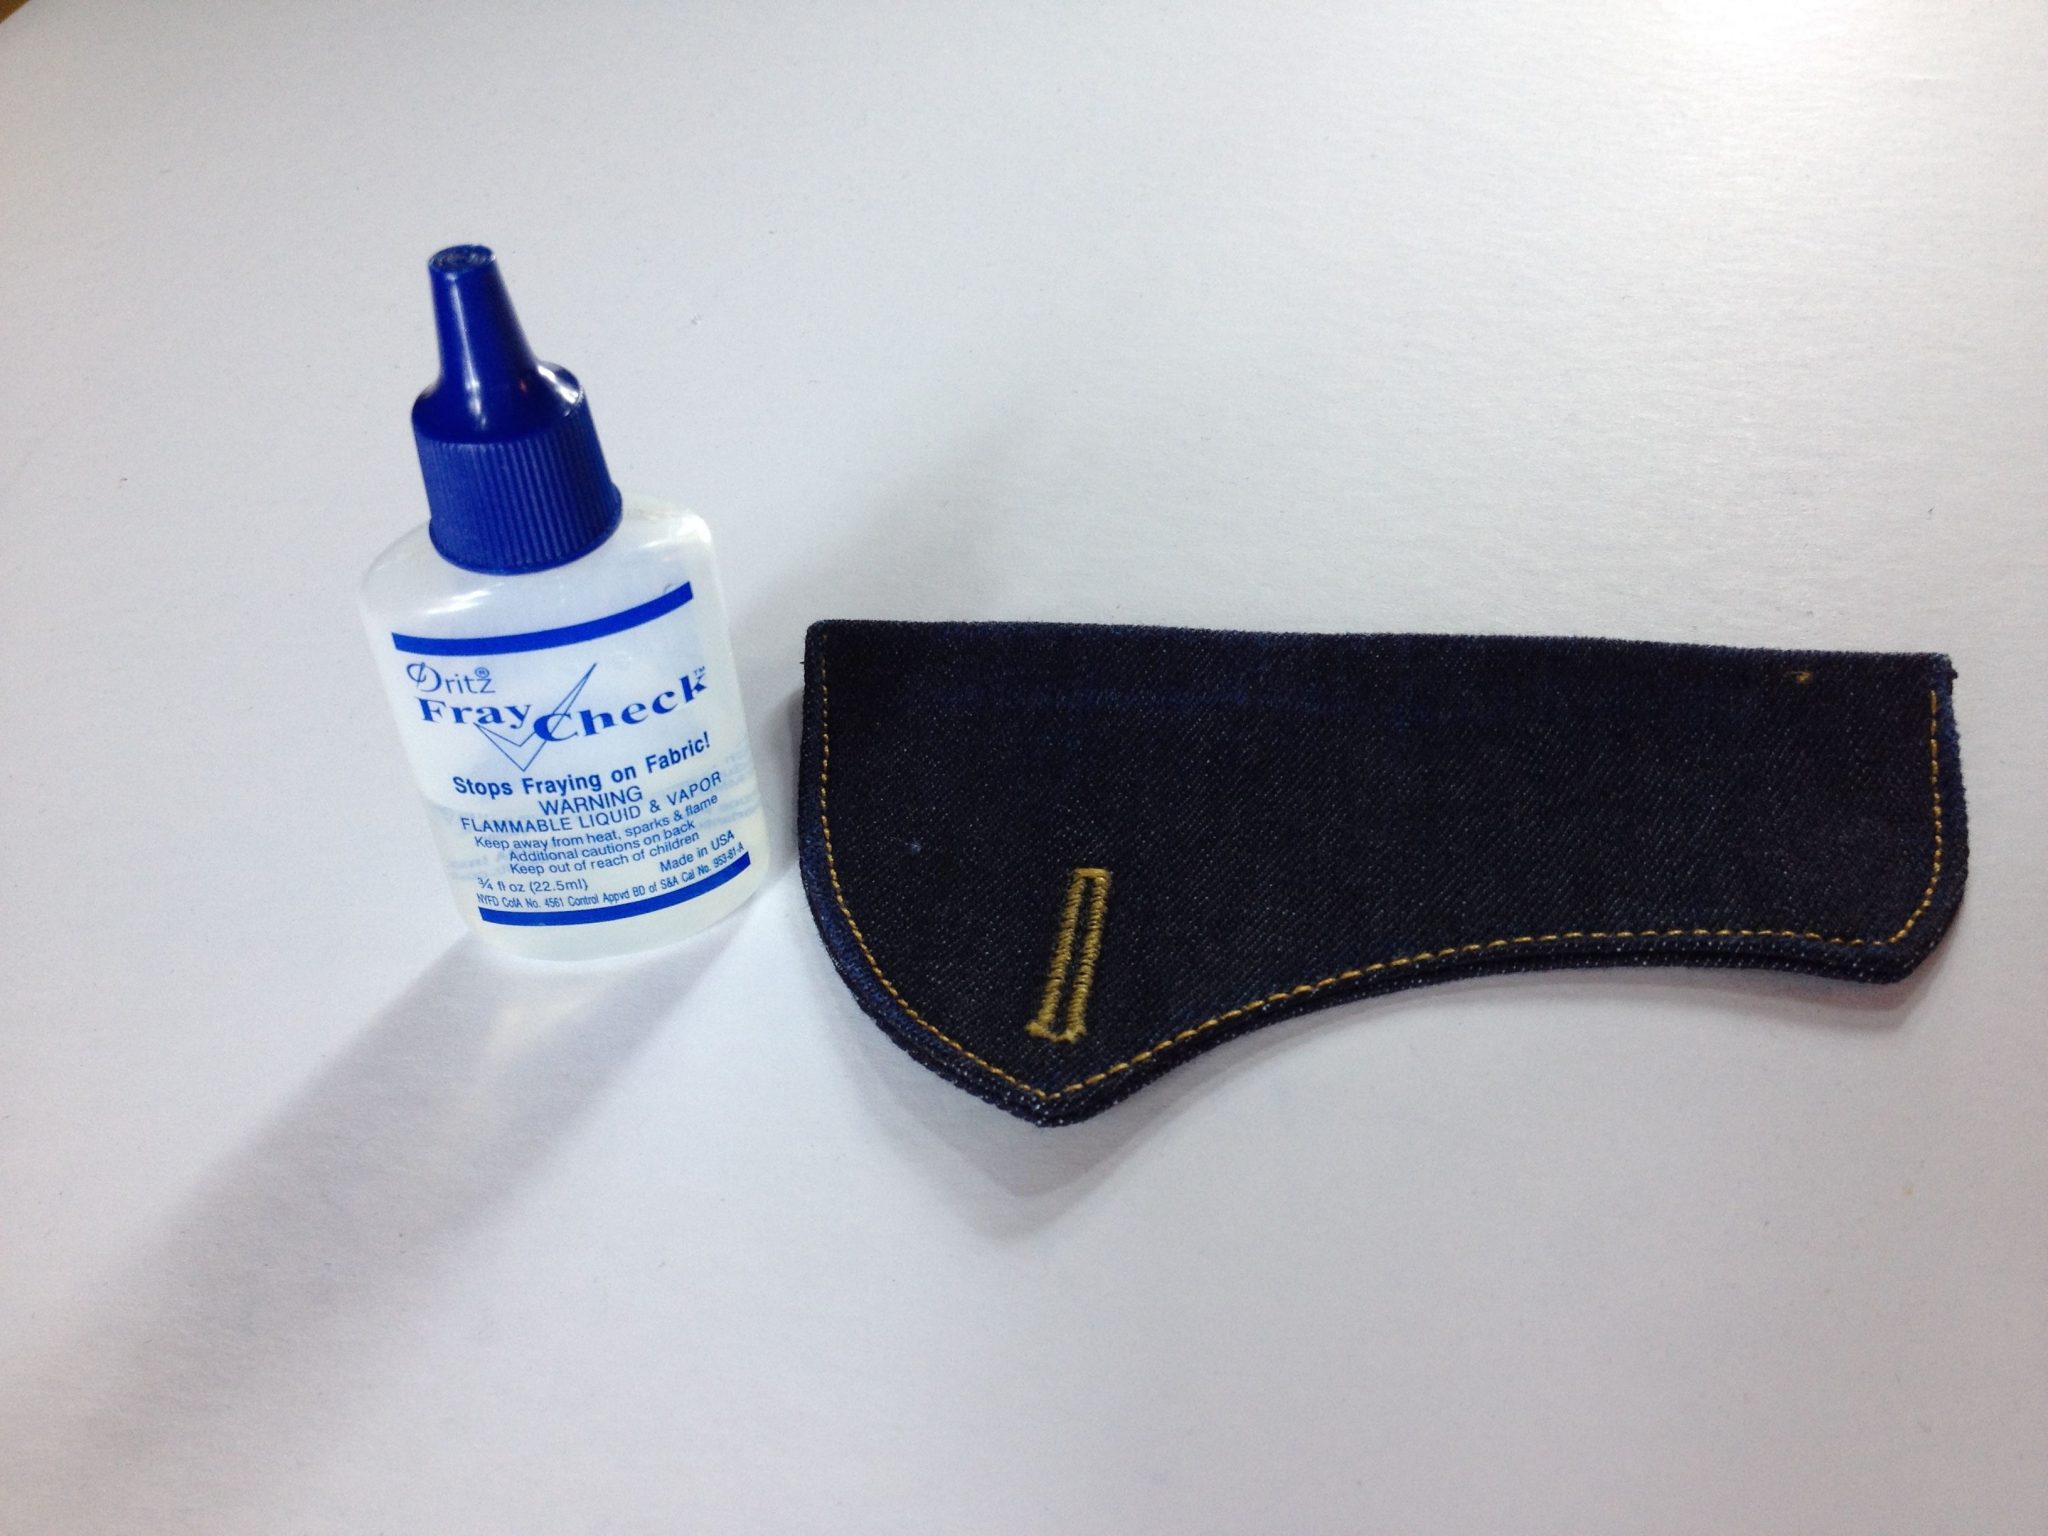
Back Pocket & Flaps
- Don’t forget to use some Fray Check on the buttonholes. I applied it front and back of the buttonholes.

Fray Check on buttonholes


Stitch Back
Now it’s time to stitch the back of the jeans. That process is pretty much the same as the way we stitched the test jeans, except this time I am distressing, serging the seam allowances and topstitching the seams.
- Stitch Back Yoke to Back, matching notches.
- Press seam allowance down.
- Distress if you want.
- Serge seam allowance.
- Topstitch seam.
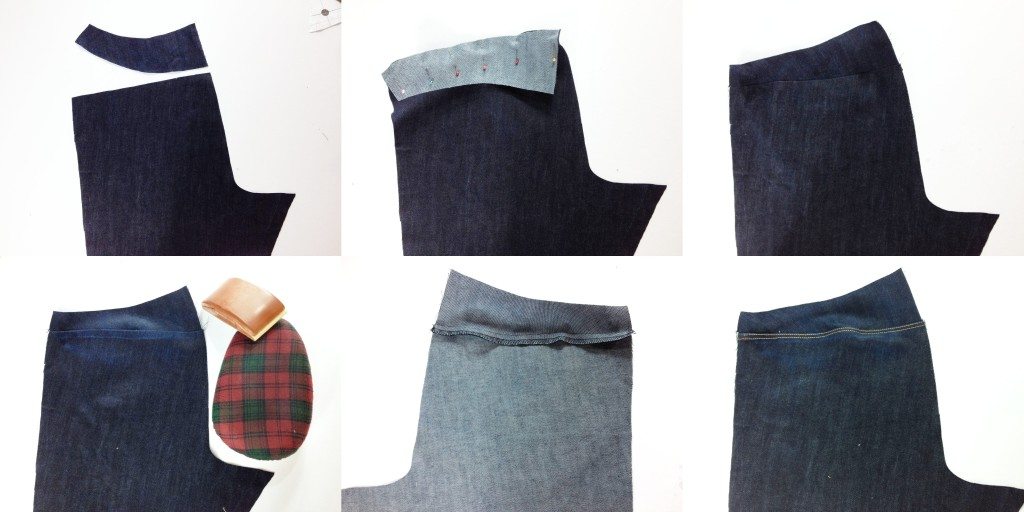
Stitch Back to Back Yoke
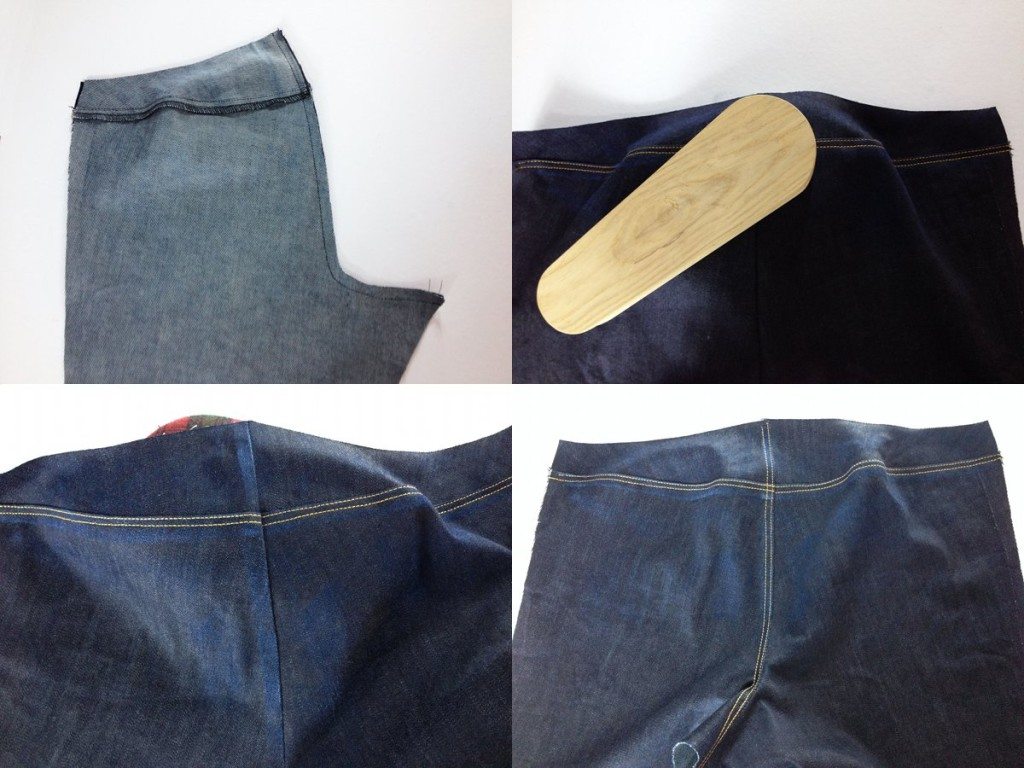
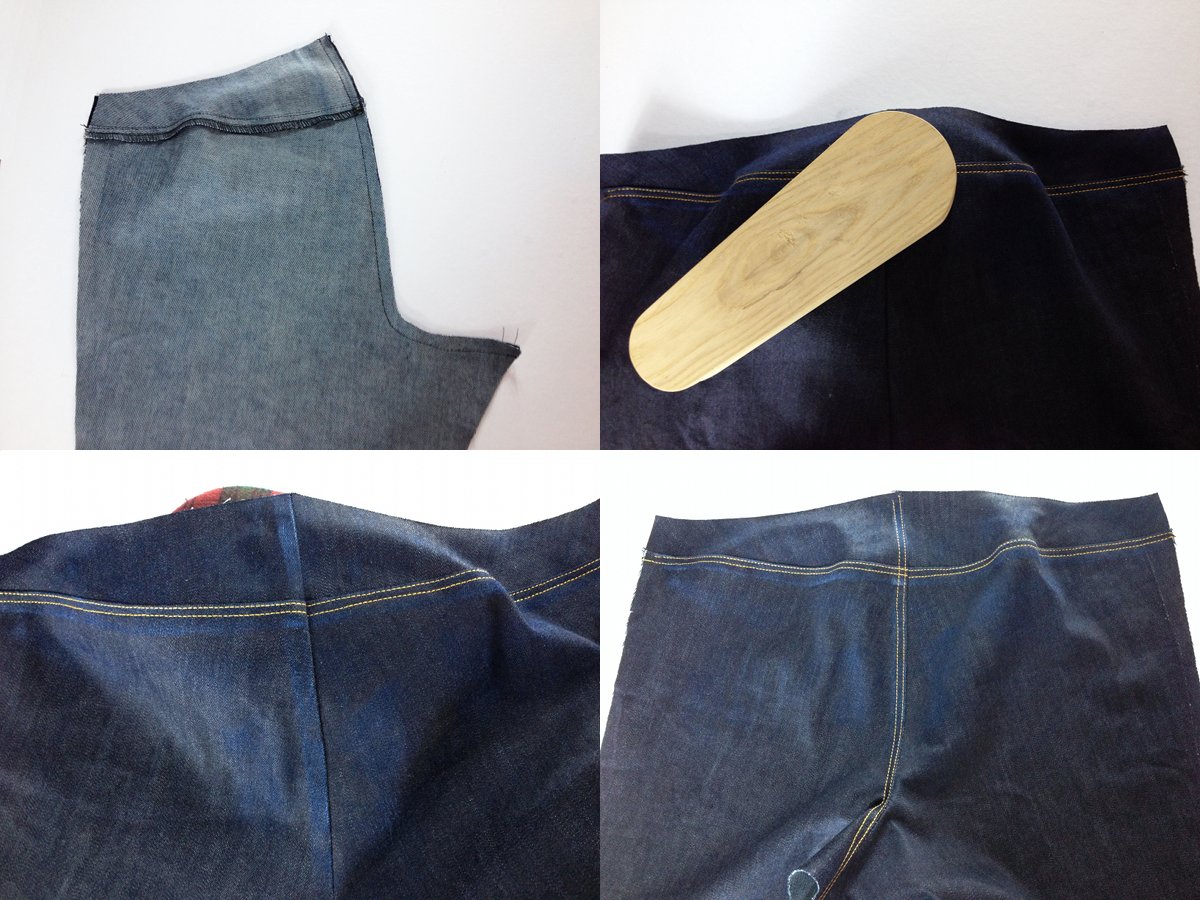
- Repeat for the other side and stitch the two together.
- Press the seam allowance toward the left side (as if you are wearing the jeans). The four-way intersection of Back Yoke/Back seams will be THICK. I pressed them and used my clapper to reduce the thickness. I also whacked them several times with my hammer.
- Distress if you wish, but watch out for the topstitching already in place and don’t rub them off.
- Serge the seam allowance.
- Topstitch.
Stitch Center Back Seam

The instructions of Liana Stretch Jeans have you put the Back Pocket on the Back at this point, because it’s easier to sew them on while the jeans can be laid flat. But I am going to do this a little differently. I will put the Back Pockets at the end so we can adjust the placement of the Back Pocket while we have the jeans on.
One More Tip
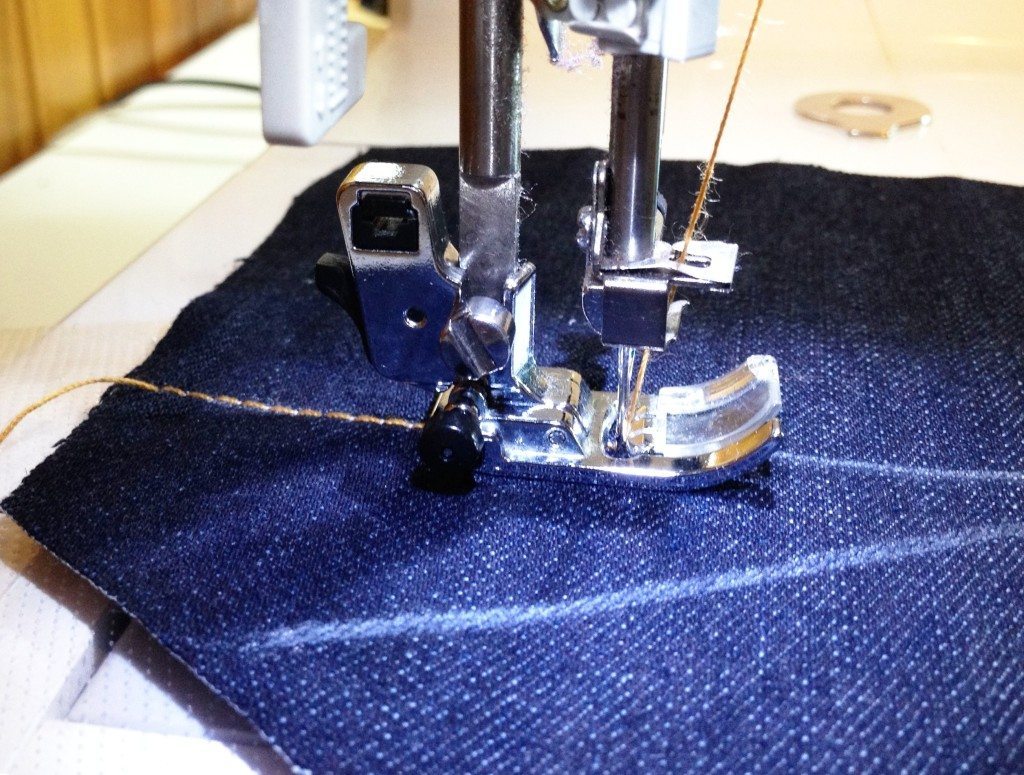
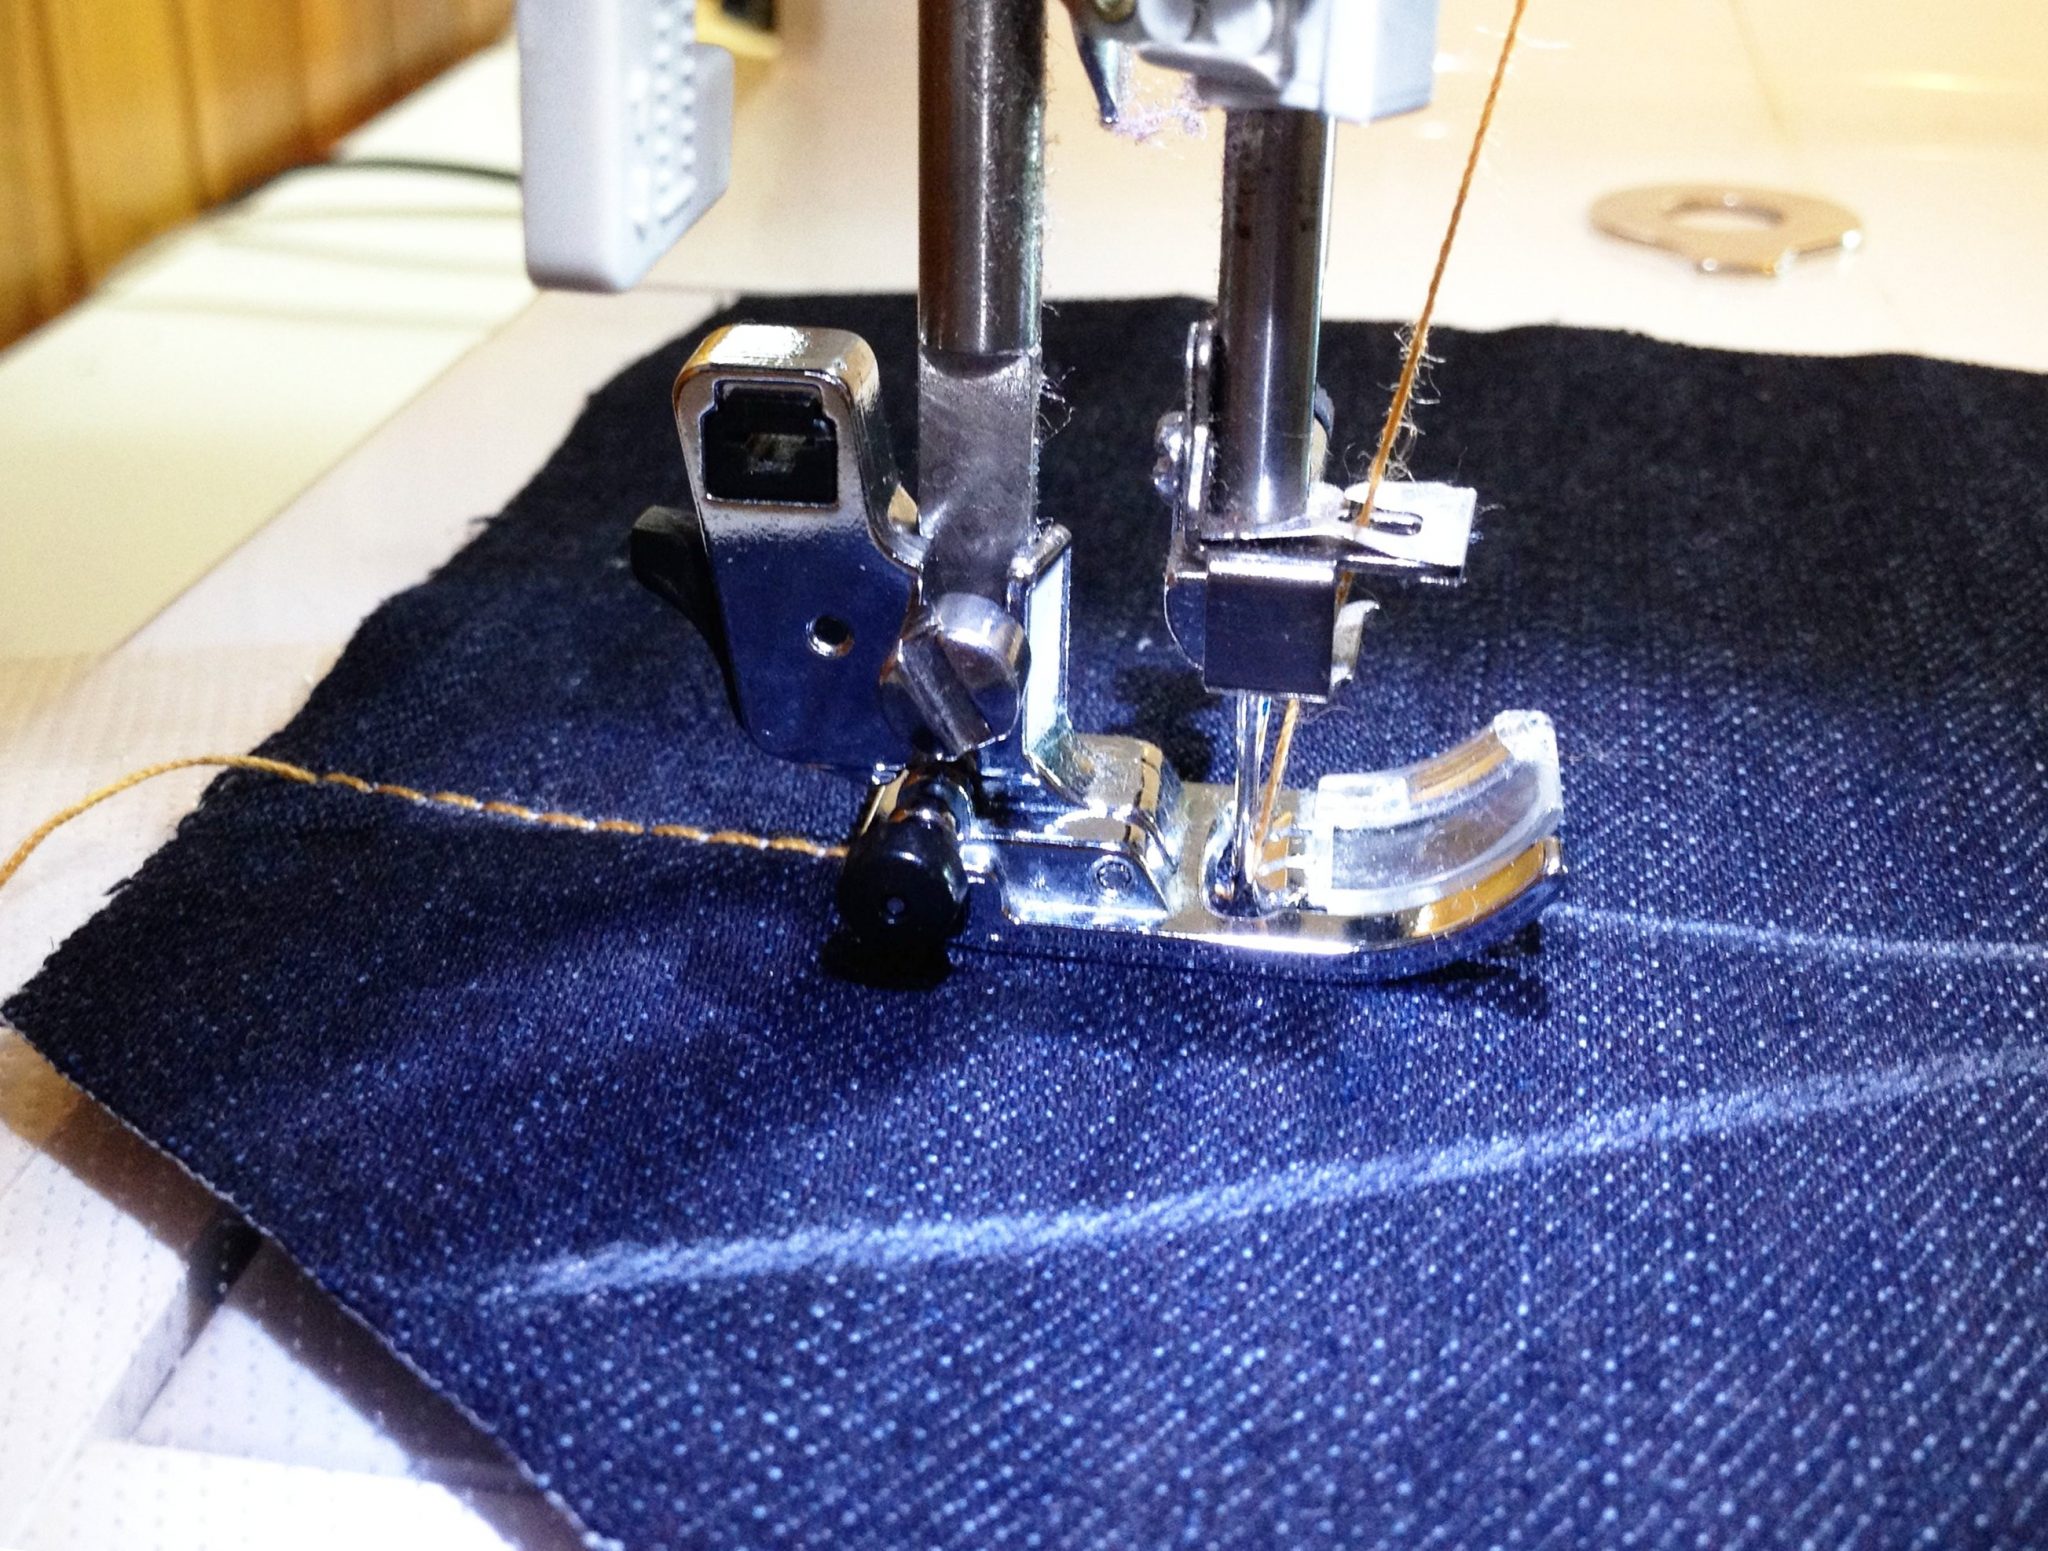
My sewing machine chocked and refused to go forward when I started stitching a thick piece of fabric at the beginning. You see how my presser foot is slanted?
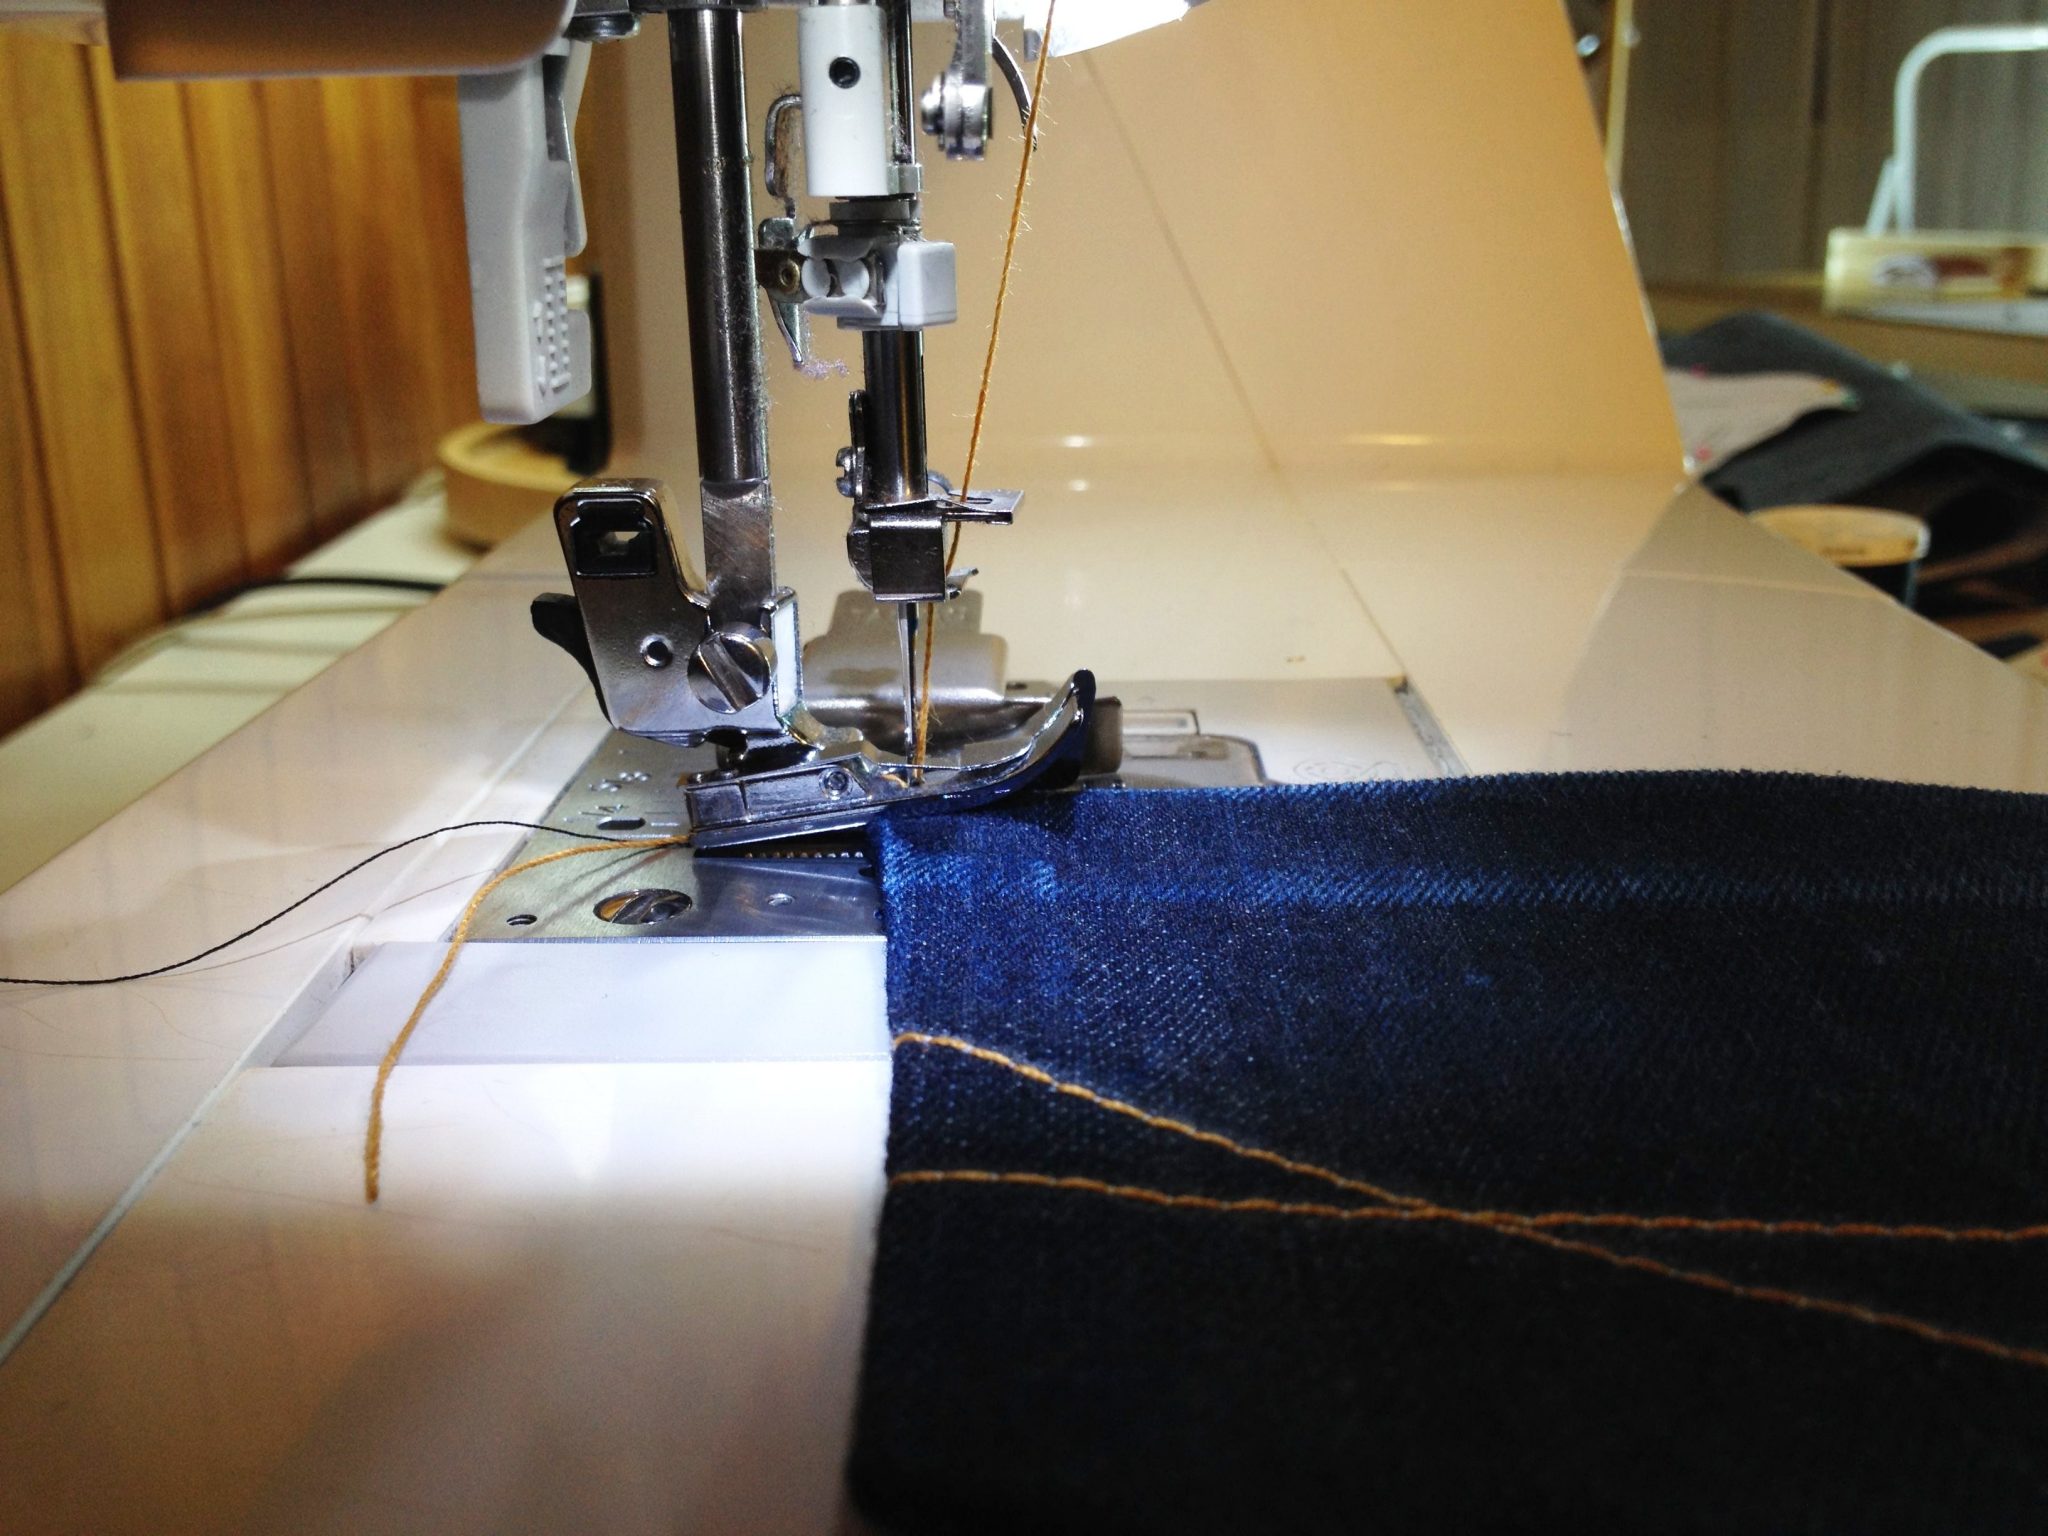
Presser foot is slented when beginning to stitch thick fabric
If you use a regular presser foot, there’s a little black button on the side that you can use to keep the presser foot flat. But when I topstitch (actually edge stitch), I use a different presser foot that doesn’t have that little black button. So here’s my solution:

Use a piece of fabric to prop the presser foot up
I prop the presser foot up with another piece of fabric, so that it stays flat. And my sewing machine can stitch without problem.
I found that some brands of sewing machines (e.g. Bernina) don’t have as much of a problem with this than others. But my Brother does need this assistance.
That’s all for today! Next, we’ll be stitching the Front Pockets.
Here’s the schedule of the Liana Stretch Jeans Sew Along, be sure to look at other posts too!
Day 0: Get Ready!
Day 1: Intro, Material and Supplies
Day 2: Topstitching & Distressing
Day 3: Choosing a size & Cutting Test Garment/Muslin
Day 4: Fitting Part 1
Day 5: Fitting Part 2
Day 6: Sewing the Back (this post)
Day 7: Sewing Front Pockets
Day 8: Sewing Fly Front Zipper
Day 9: Sewing Back to Front & Waistband
Day 10: Hemming and Finishing

Catching up today. hehe. Great instructions and tips Kennis. Thank you!
You are almost there!