
Liana Jeans Sew Along: Day 5 – Fitting Part 2
Yesterday, we basted the test jeans and did some some adjustments to the side seams and inseams, as well as removing fabric by putting darts on the jeans. Today we are going to focus on the seat area, which is one important area for us to feel comfortable in our Liana Stretch Jeans. Since I don’t have many of these issues, so I can’t show them to you on the body, but I’ll go directly pointing you to the alterations on the pattern.
Low Seat
I do have one more adjustment to my figure that I didn’t go over yesterday. My seat seems to be lower than the pattern’s. You see that I have a wedgie and a deep horizontal wrinkle under my seat.
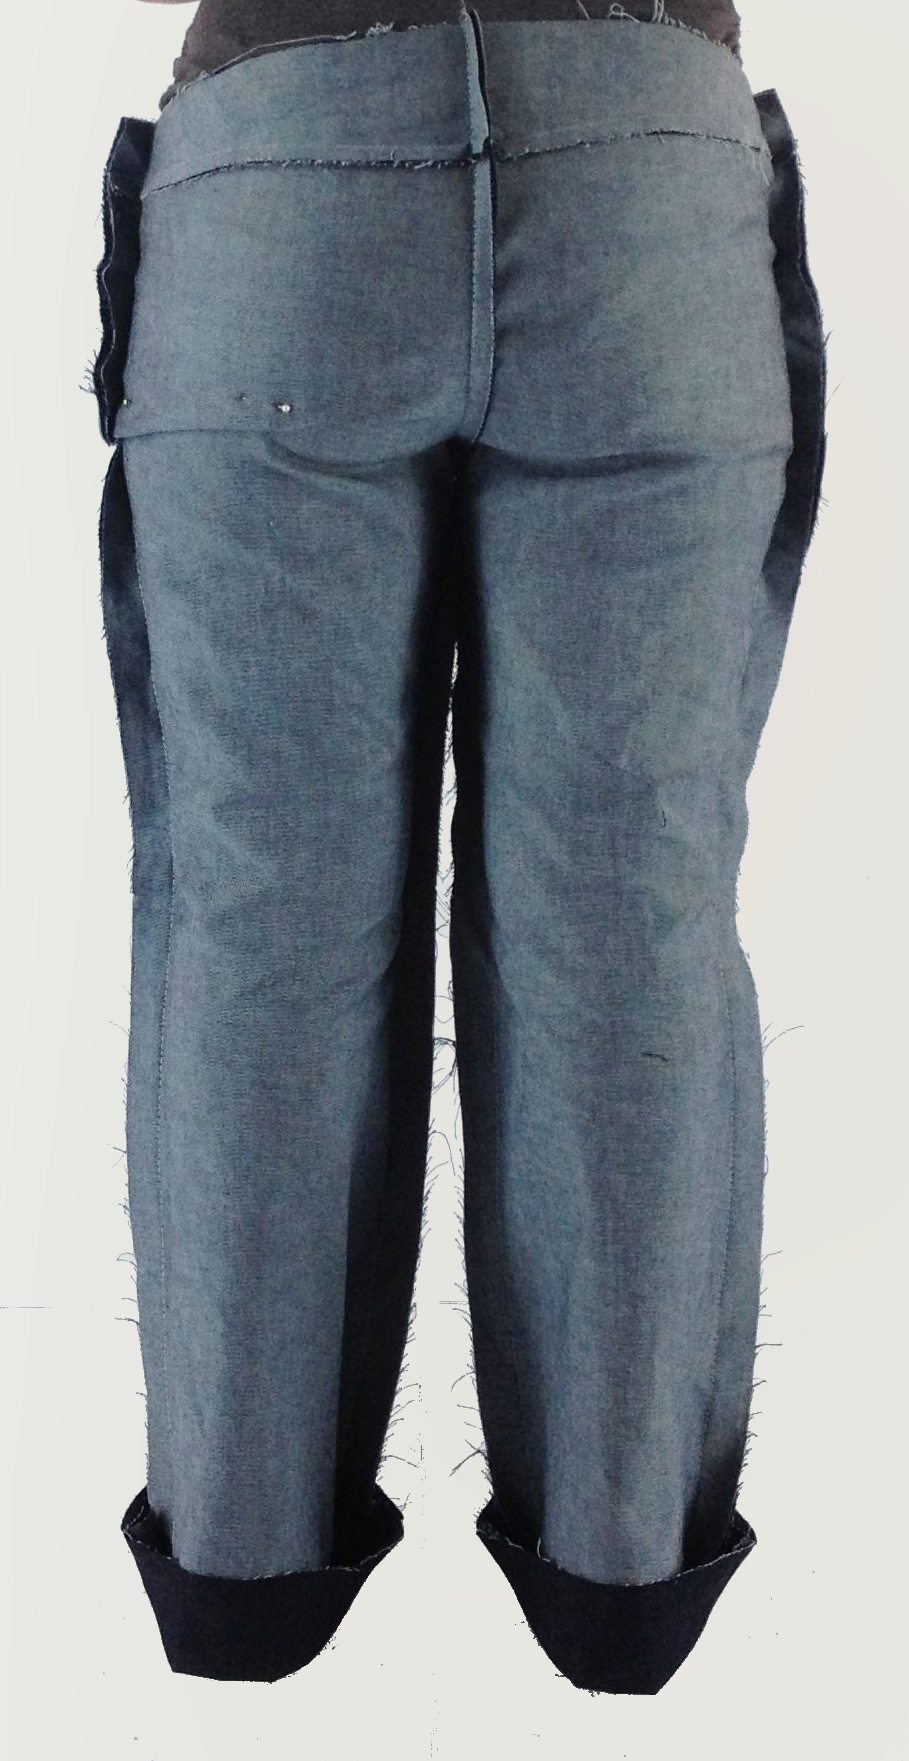
My seat is lower than the pattern’s
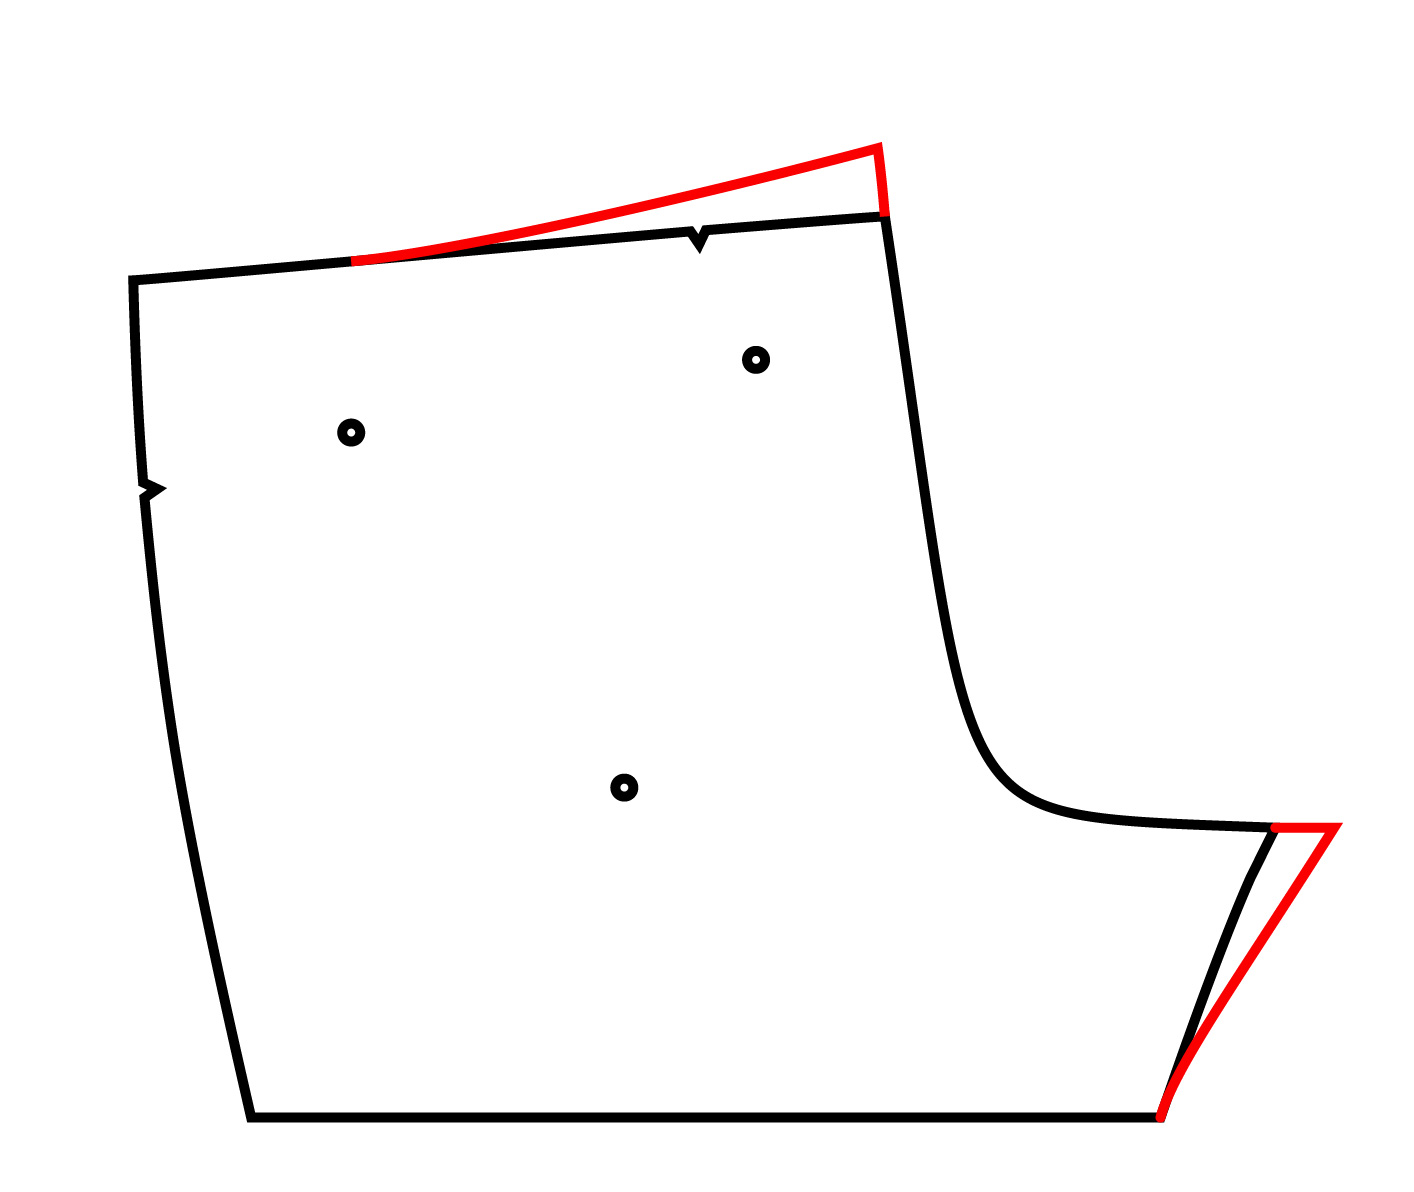
To remediate this issue, I am dropping my back crotch curve. It’s difficult to determine exactly how much to drop, but the great thing is that I could drop more even after I finish the pants, since all I am doing is removing fabric, not adding fabric. I am going to drop mine 3/8″ (1 cm) for now. This is how it looks like on the pattern – you are lowering the bottom of the crotch curve slightly but maintaining the original crotch point.

Low Seat Adjustment
This is how that adjustment is interpreted on an existing pair (or on your test jeans). It would be easier if you slip one of the pant leg into another to make this adjustment.

Low seat adjustment on jeans
The added benefit of this adjustment (to me) is that the crotch curve is longer too, which I also need. This adjustment is seemingly counterintuitive. You’d think that if you need space, you’d add more fabric. But by scooping out the crotch (remove fabric), you actually make more room for your seat. The way I like to think is to imagine a butt right next to that curve (feel free to imagine using the photo above). You see that when I move the red dotted line inward (to the right of the photo), there’s more hollow for the butt. However, if you do too much, you would have to expand the side seam to accommodate your hips.
Large/Protruding Derriere
If your seat doesn’t feel low like mine, but it feels that there’s not enough fabric to cover your behind. You see that the top of the back waist is not high enough, and when you sit down, the jeans want to slip off your butt. Then you will need the large/protruding derriere adjustment on your Back pattern.
There are two areas to add fabric:
- Top of the Back inseam
- Top of the Back
You could do one or the other, or both. Please note that after you extend the top of the Back, it’s possible that you need to control the gaping, which was addressed in the last post.
Add room at the top of the Back and/or at the top of the Back inseam for large derriere.
Small/flat Derrierre
Conversely, if your back side is small and/or flat, then you will need the opposite adjustment. The way you know it is that your small back and/or the bottom of your seat have excess fabric.
There are two areas to remove fabric:
- Top of the Back inseam
- Top of the Back
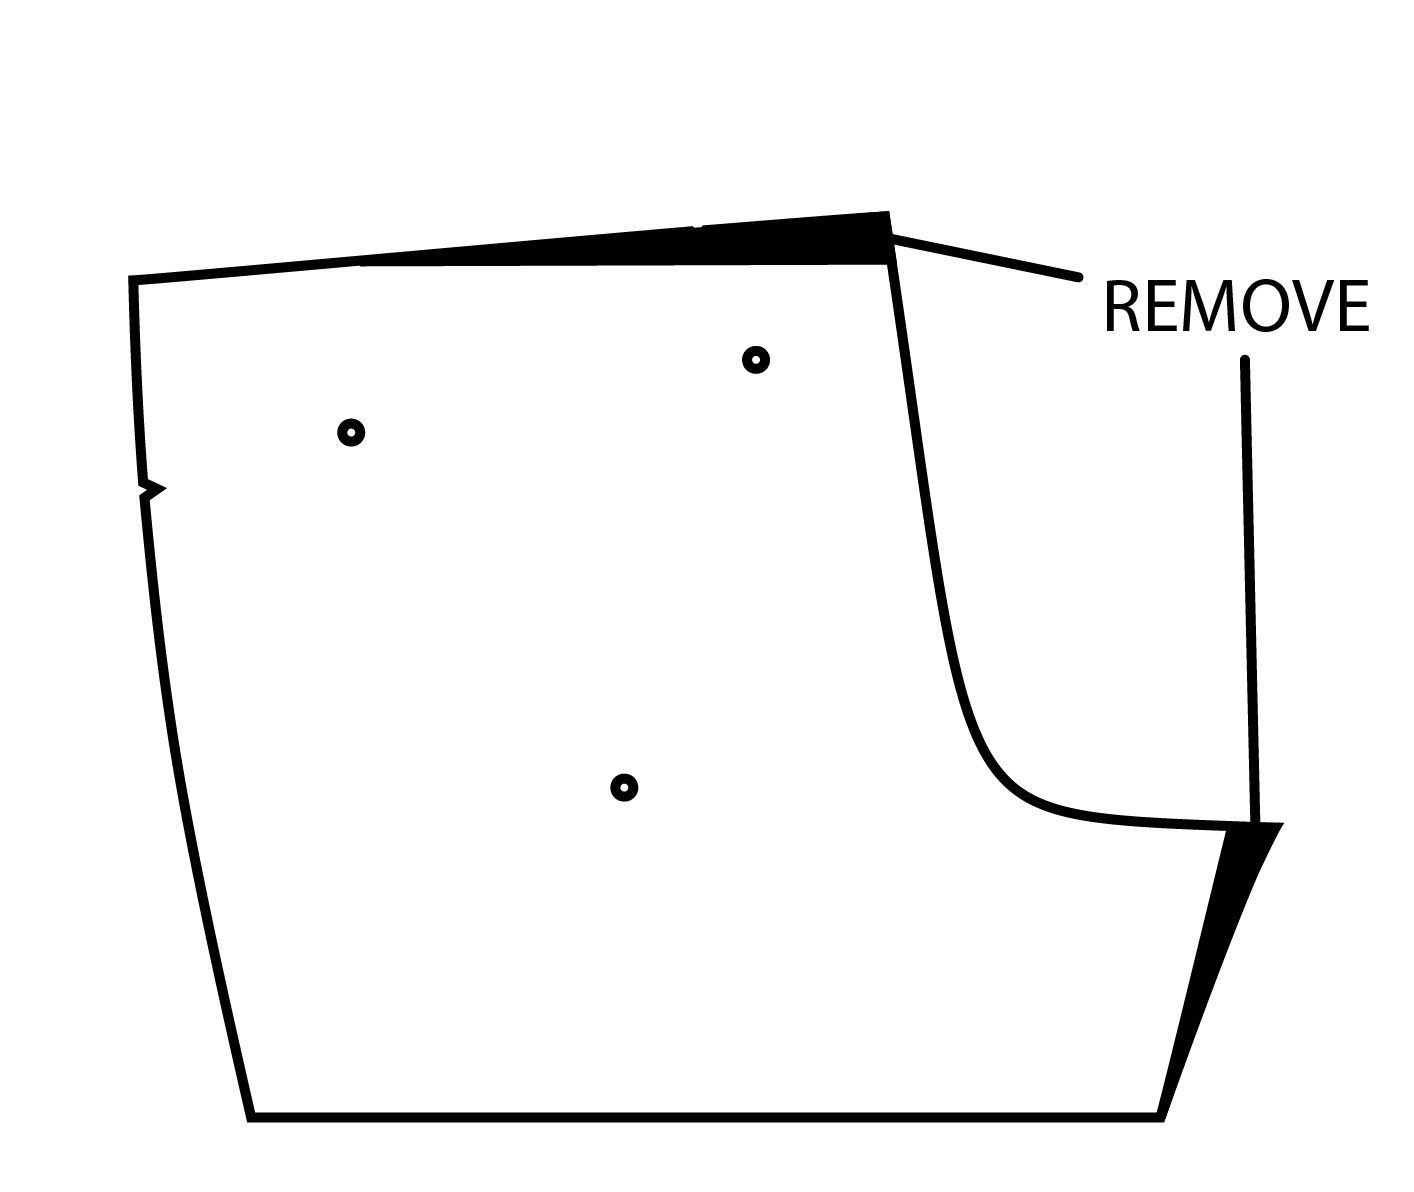
Remove room at the top of the Back and/or at the top of the Back inseam for small derriere.
Other Adjustments
Most of other adjustments you may need should have been covered in the last post. By expanding or contrasting using the side seams and inseams, you should be able to address:
- Full/slim thighs
- Full/slim calves
- Full/small hips
- Full tummy
- Large/small waist
If you need to lengthen or shorten the jeans at the knees, go ahead and do that following the instructions on page 7.
Transfer Adjustments to Pattern
For the darts you pinned out or the seam adjustments that you made yesterday, you need to put them onto the paper pattern. For me, the hip darts that I pinned out start 7″ (17.8 cm) from the top of the Front and 5″ (12.7 cm) from the top of the Back (seam allowance accounted). And I took in 3/4″ (1.9 cm) for half of the dart. For my front dart, the dart point tapered to zero at about the bottom of my front crotch. And my back dart is horizontal.

Transfer darts onto patterns
I then cut one leg of the dart and close the dart. I need to cut a “hinge” in the seam in order to keep the pattern flat.

Cut one leg of the dart and overlap to close them
Using the same method, I also closed the dart for the Back Yoke to address the gaping issue. I will smooth out the top and bottom jogs too.
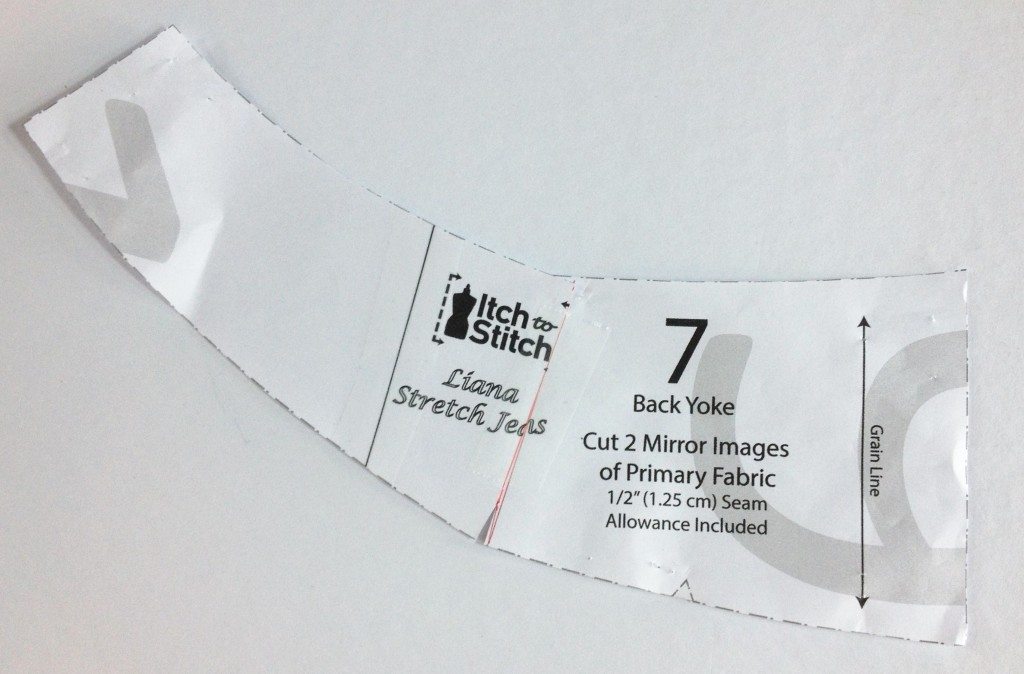
Close back yoke dart
I also need to add 1/4″ (6 mm) to both sides of the front thighs.
Add 1/4″ to both sides of front thighs
If you add to or remove from the upper side seam, you will also add/subtract that width on your Font Pocket Facing (3) and Front Pocket (4) and Front Pocket Yoke (5).
Re-establish Grain Line
Because the way I needed to adjust my jeans, the grain line has been distorted. Yours might be too. To re-establish the grain line, find the mid point at the hem and the mid point of the knee notches. Draw a line to connect the two mid points. Then you can extend the grain line all the way up.
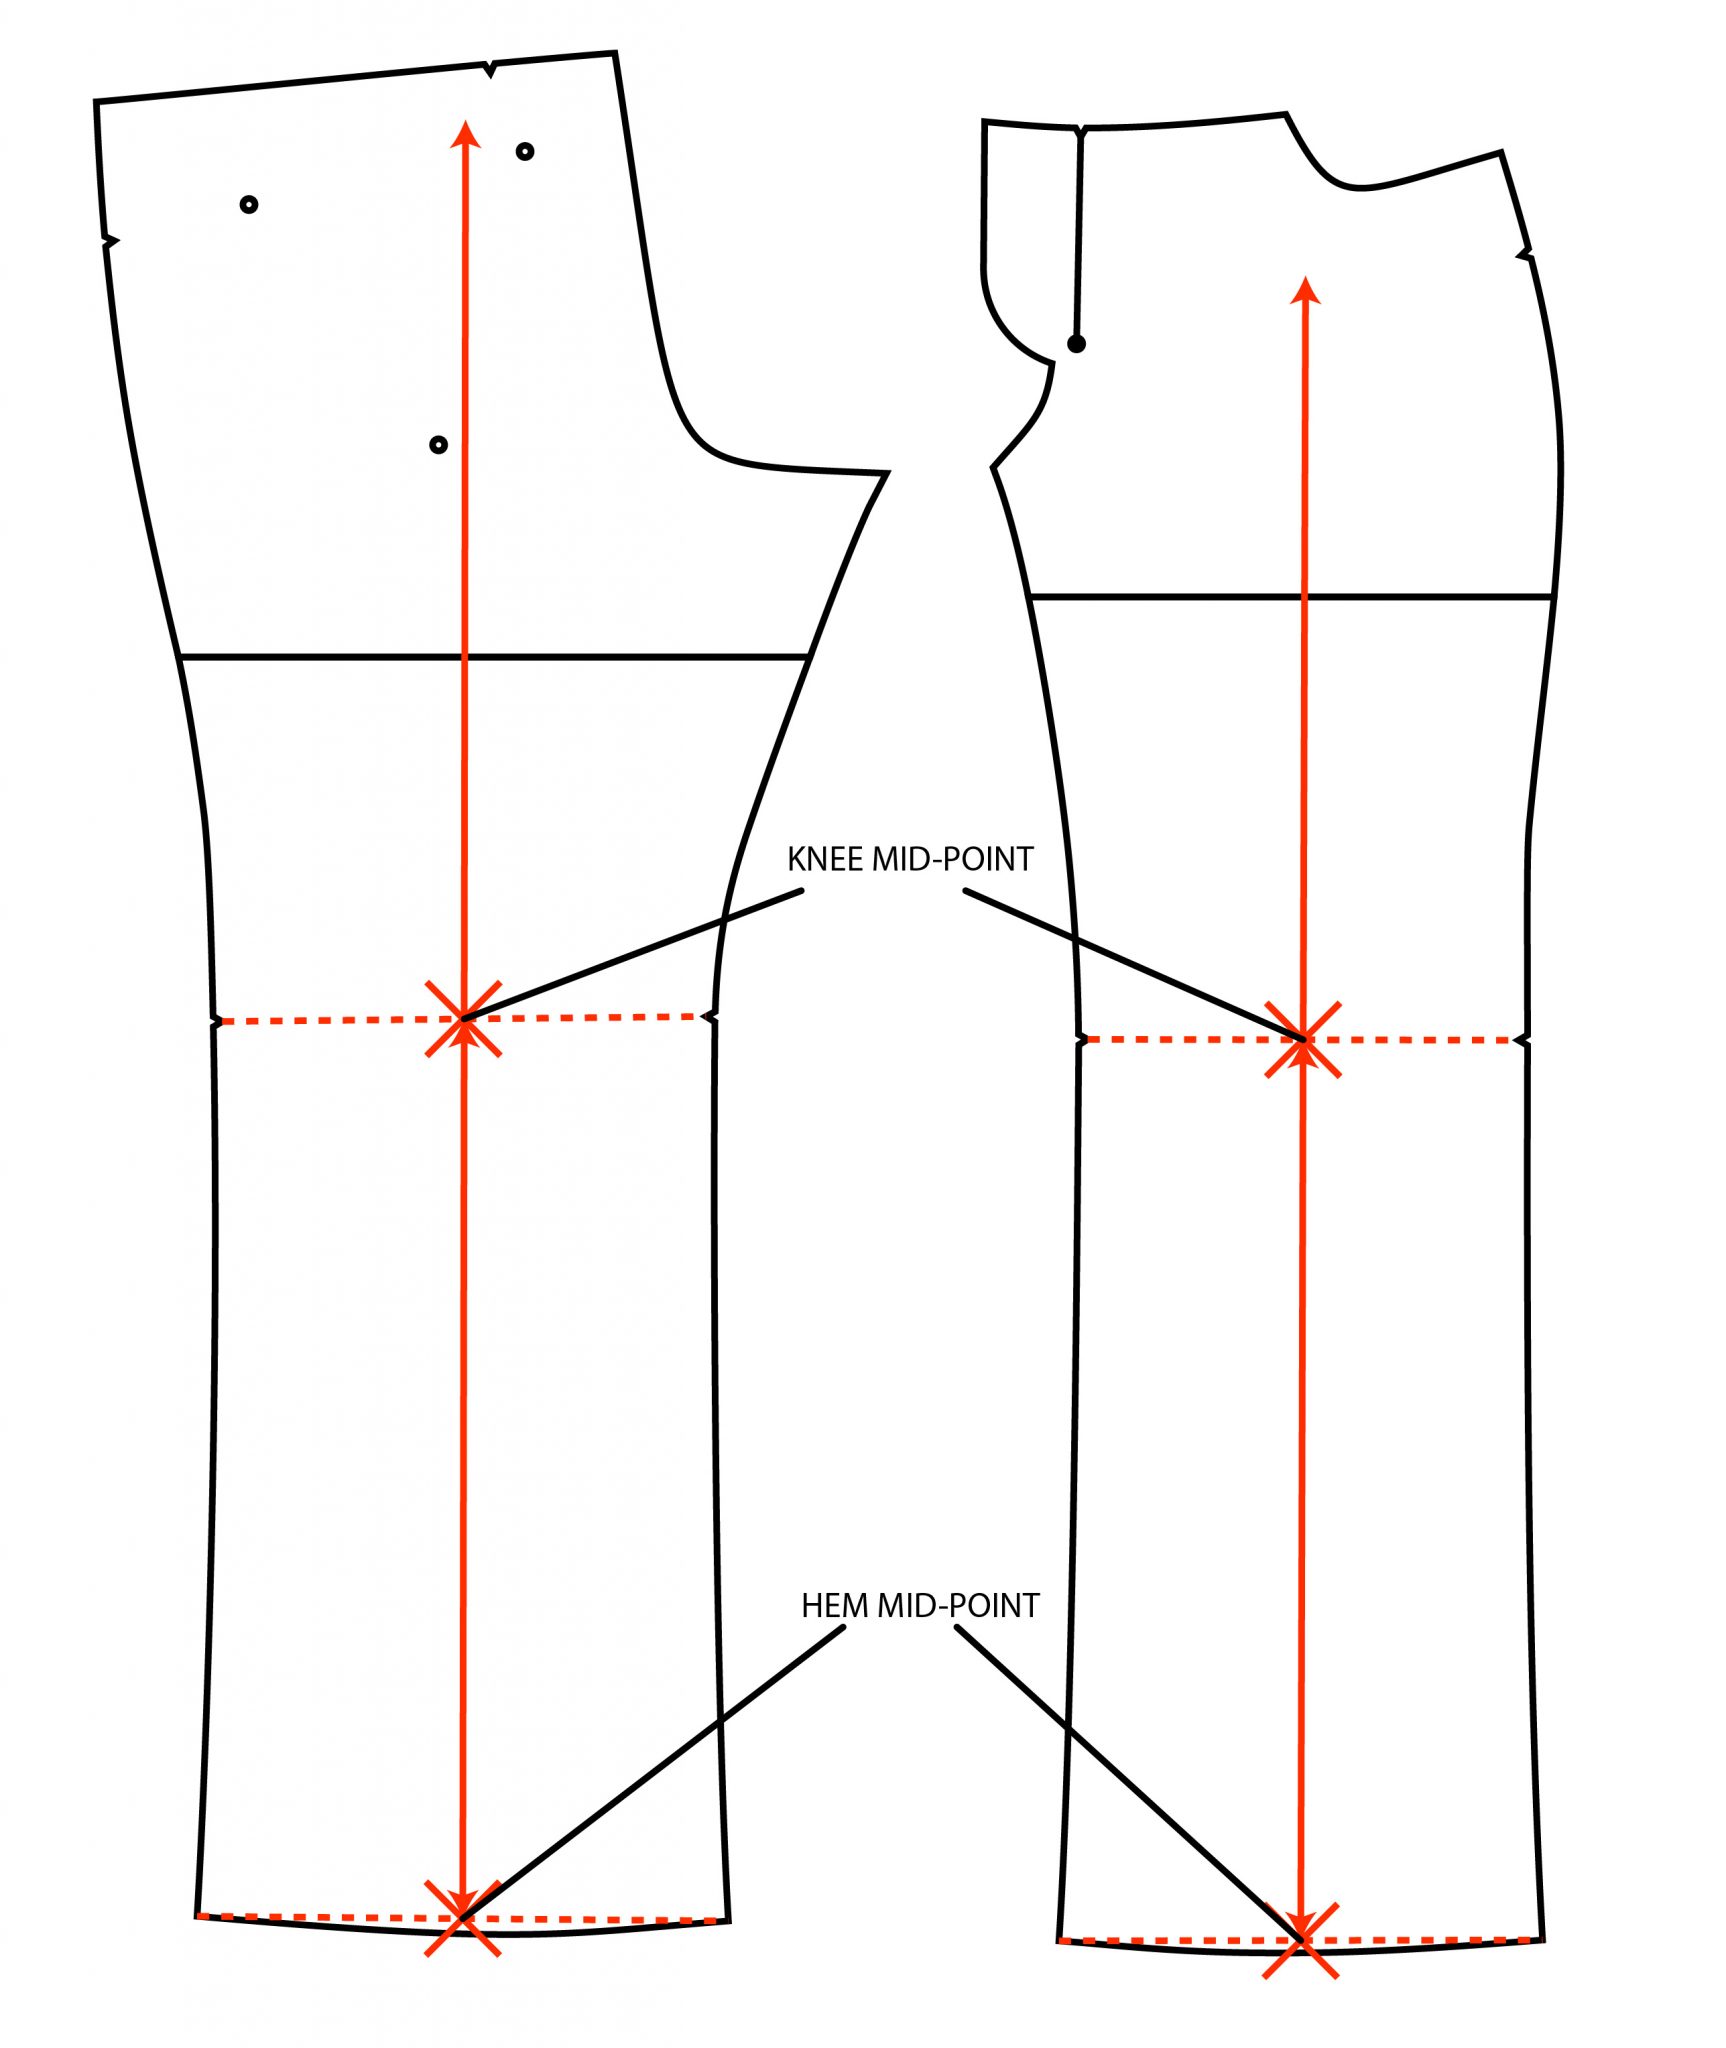
Re-establish grain line – connect knee mid-point with hem mid-point, and extend the grain line up.
If you are interested in learning about pants fitting, I recommend these books (affiliate links):
- Fast Fit by Sandra Betzina – this book covers more than pants fitting. I like the fact that each issue has a “fast fit” solution at a glance. But the down side is that some of the issues are labeled by their names, and not necessarily teach you to read the symptoms, so you may not be able to recognize that’s the issue you have immediately. I found it useful regardless.
- Pants for Real People by Pati Palmer & Marta Alto – this book looks really outdated with its photos circa 1985, but do look beyond the the photos to find really great information. The book proposes tissue fitting to find your fitting issue, which obviously is not applicable to PDF patterns where you don’t have tissues. But you can use the same method to look at your test garment.
Yay! We are then ready to make our real Liana Stretch Jeans!
Here’s the schedule of the Liana Stretch Jeans Sew Along, be sure to look at other posts too!
Day 0: Get Ready!
Day 1: Intro, Material and Supplies
Day 2: Topstitching & Distressing
Day 3: Choosing a size & Cutting Test Garment/Muslin
Day 4: Fitting Part 1
Day 5: Fitting Part 2 (this post)
Day 6: Sewing the Back
Day 7: Sewing Front Pockets
Day 8: Sewing Fly Front Zipper
Day 9: Sewing Back to Front & Waistband
Day 10: Hemming and Finishing

Thank you for taking the time to give such detailed fitting suggestions with the relevant pictures and explanations of how to transfer changes to the pattern.
Excellent work!
I just love those adjustments!!! Once I’m back to selfcare sewing, I’ll do my jeans!!!
Love self care sewing. 🙂