
Liana Jeans Sew Along: Day 4 – Fitting Part 1
Today is the exciting part of making jeans: fitting. You may not share my excitement, but you should! This is the part that makes your Liana Stretch Jeans truly yours. You can’t buy a pair of jeans off the shelf that fit as well as something you make.
Many people, especially ones who are new to sewing, would pick up a pattern and sew it as is. If the garment doesn’t fit their bodies immediately, they give up and declare failure. But our bodies are unique. I might have the same waist and hip circumferences as you do, but my butt could be a little higher/lower; my thighs could be a little more muscular in the front/slimmer in the back/overall bigger/smaller; and my belly could protrude/be flatter. The combination literally is endless. To me, fitting is part of sewing. The more closely fitted or less stretchy the garment, the more likely it needs to be adjusted to accommodate our bodies. When you buy clothes from a store, you have the luxury of trying on a dozen different garments from various stores to find something that works best for your body. But when we sew, we can’t do that. Luckily what we do produces even better results, although it takes time and patience.
On the other end of the spectrum, some sewists are on an endless pursuit of pants that fit like a glove, exactly like the ones shown on the magazines – no wrinkles, smooth as silk. I don’t know how else to break this news to you: majority of the images on the magazines are photoshopped. Our bodies are three dimensional, and the legs change angle at every curve; there’s only so much we could do using merely two seams (at the legs area; but you could do more on some pant designs that have more seams at the leg). Furthermore, we do need some ease (i.e. extra fabric) to sit and bend our knees. As mentioned, most of the stretch denims don’t have vertical stretch, so you do need that room to move. Let me give you a homework assignment: observe people’s jeans (or pants) on the street and check out how they are fitted on the bodies. You will be amazed at how critical we are on our self-made clothes.
Baste the Jeans
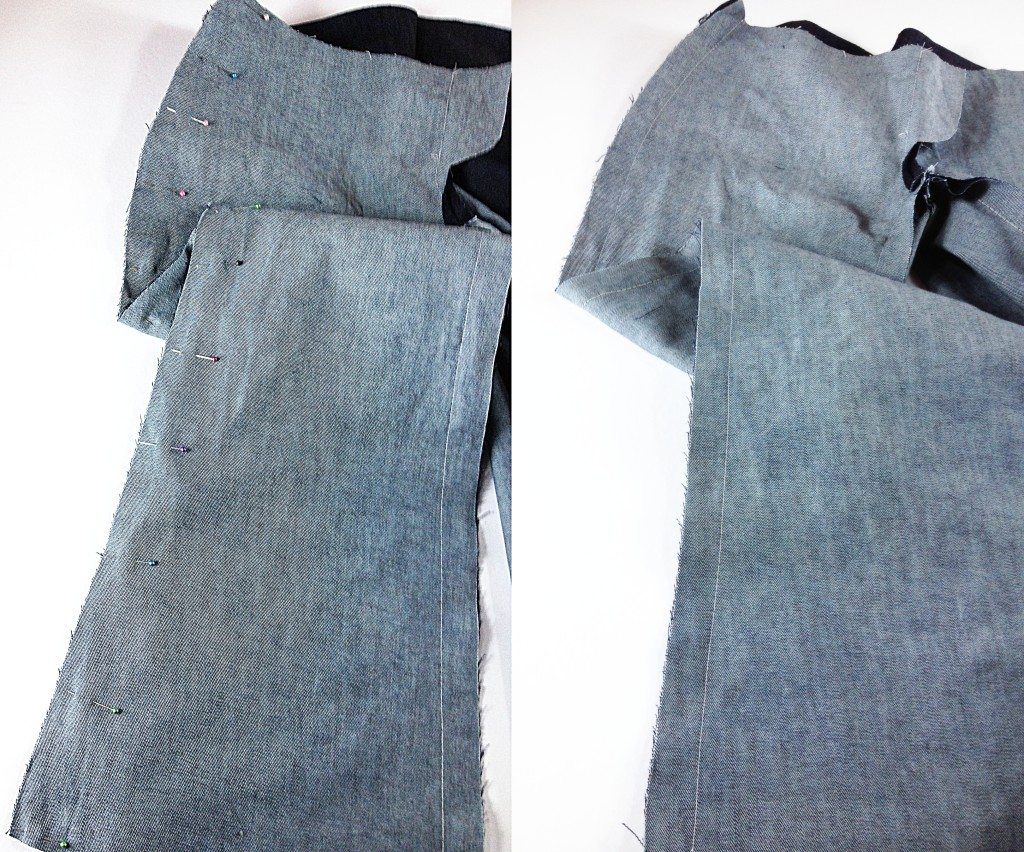
Ok, enough talk and let’s get into action. On Day 3, we cut out our test Liana Stretch Jeans. We only have three pieces to deal with for the test – the Front, Back and Back Yoke.

These are all the pieces you have for the test jeans.
Before we baste them together, I need to sew on one more marking to facilitate fitting. I use my longest stitch length to stitch from the fly notch to the fly circle for both Front pieces.

Baste on zip fly to facilitate fitting
Also using the longest stitch length, I baste the pieces in this order (back stitch the beginning and the end so the seams don’t fall apart during fitting):
- Stitch the Back Yoke to the Back. Beware that the thicker end of the Back Yoke is the center back. Remember that the seam allowance is 1/2″ (1.25 cm). Do it on both sides and press the seam allowances down.
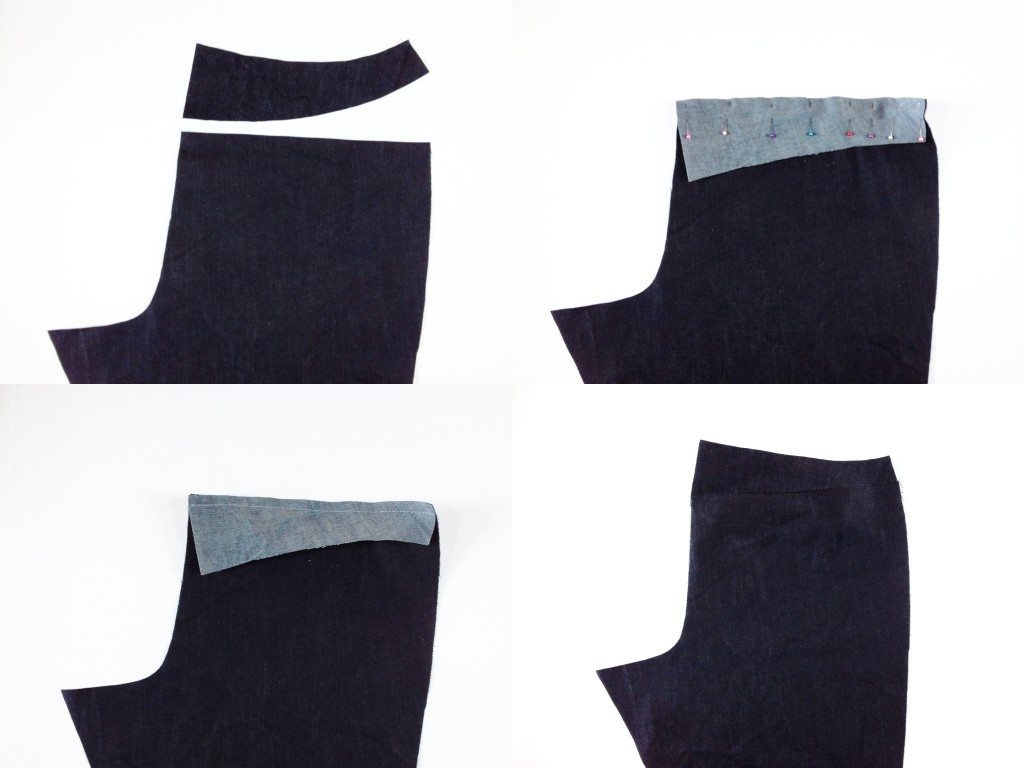
Stitch Back Yoke
- Stitch the front crotch from the circle to the inseam.
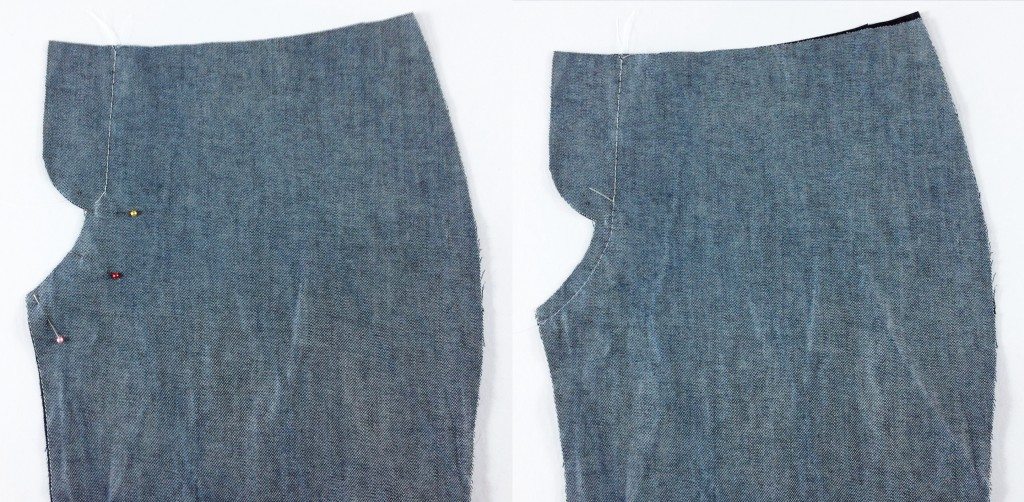
Stitch front crotch from the circle to the inseam
- Stitch the back crotch from the top to the inseam.
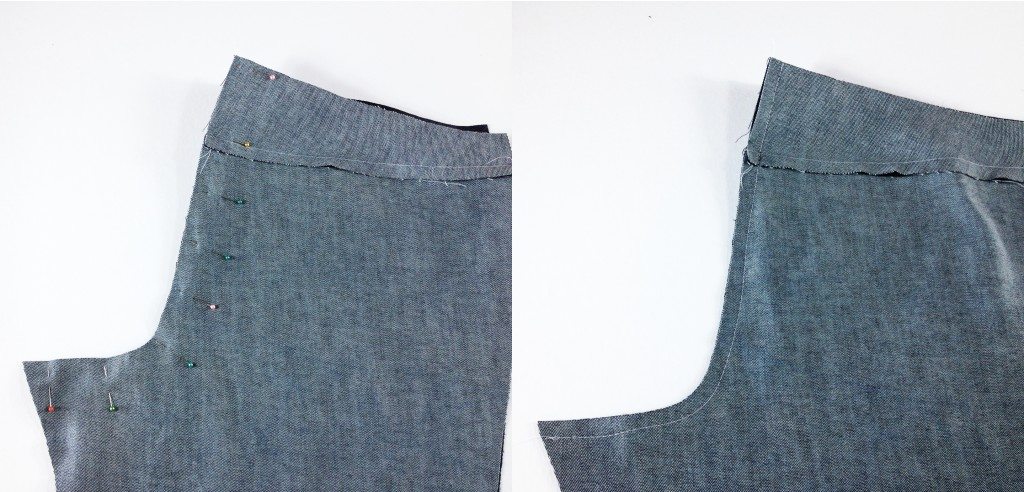
Stitch back crotch
- Stitch the inseams together in one swoop using a 1″ (2.5 cm) seam allowance (remember we made the seam allowance bigger on the previous day?). You will need to stretch the back inseam a bit to fit the front inseam above the knee notch, i.e., match the bottom edges, knee notches and crotch intersections, and stretch the shorter side to match the longer side. Stitching the crotch area is going to be a bit difficult with so much seam allowance, but do as best as you can.
Stitch inseams
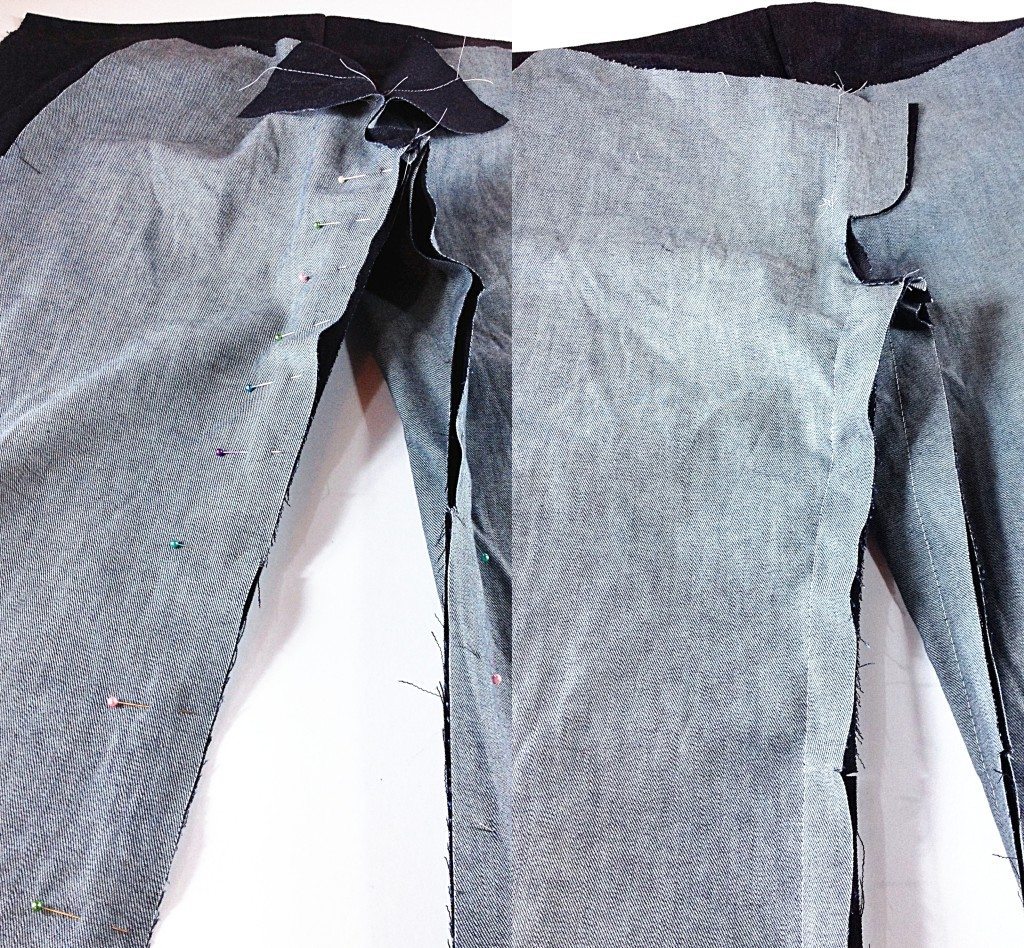
- Stitch the side seams using a 1″ (2.5 cm) seam allowance.
Stitch side seams


Nip and Tuck
That’s all! We are ready to put the test jeans on. I am going to go over the process with my adjustments; your specific adjustments will be different, but the process is the same. I will go over other common adjustments in the the next day, but let’s look at this first.
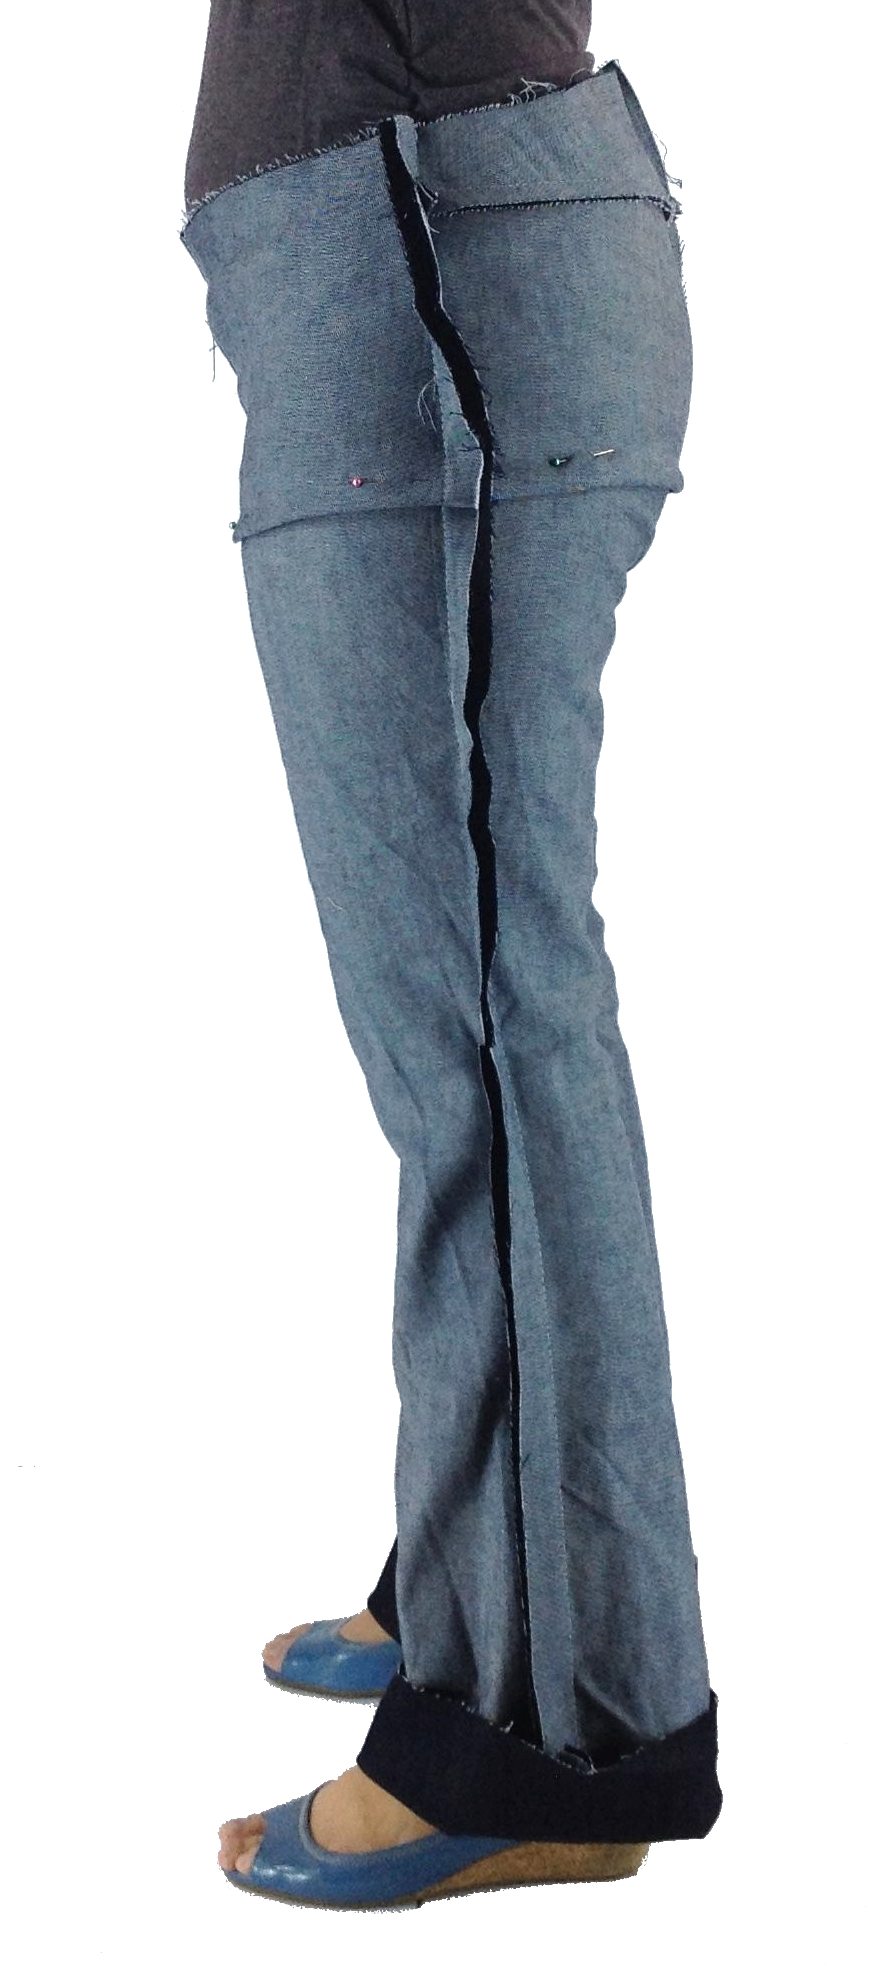
I put on my jeans wrong side out so that it’s easier to rip the seams and pin. Also, I don’t want to have to put a zipper in, so pin closing the fly is good enough for the purpose of fitting. Remember we put a line of stitching in the fly front on each side? I use them to align and close the fly. Please be careful with the pins and don’t hurt yourself, especially when getting in and out of the jeans.

Pin close the fly front
First and foremost is to make sure that the crotch is where you want it to be, which, to some extent, is a personal preference. But how high your pants sit will affect the waist and hip circumferences. I pulled up my jeans, and I am pretty happy with the circumferences at the waist and the hips. If you are not happy with yours (too loose or too tight), you can pin the side seams or release the side seams to make them smaller or bigger.
Here’s what I have.

My Initial fit

My Initial fit critique
Let’s go over my fit point by point:
- I have full calves, and they flare out a bit, which almost look like bow legs. Hence the fabric get pulled toward the outside.
- My front thighs are big, and you see the fabric is pulled toward the thighs.
- My seat is a little low (see the deep crease below the seat). It also looks like I could have extra space there.
- The waist gapes a little. It also feels a bit low, but keep in mind that the waistband will add 1 1/2″ (3.8 cm), so I think I am fine there in terms of height.
- The jeans are too long for me.
If I bought jeans that fit like this, I actually wouldn’t be unsatisfied. That’s in fact pretty typical for me. I also notice that the side seam hangs pretty straight, which I am happy about. But I know the fit could be better. I am doing my adjustment one at a time, because one adjustment might have compound effect, which changes the overall fit enough that I might not need the next adjustment.
What I am going to do is to pin “darts” and release fabric to improve the fit on one side only; essentially I am doing “draping” on me. The darts, of course, won’t be in the finished garment. They will later be transferred to the patterns.
Flared Calves/Bow Legs
Typically for bow legs, many fitting books have you shift the leg below the knee outward, but I am going to do something different that works for me. I pin a dart at the hip, starting from nothing at the center seam, to about 1 1/2″ (3.8 cm) total at the side seam. Through the side seam, I taper the dart back to nothing at the center back. This dart shifts my pant leg toward outside, and you can see that the wrinkle at the knee disappear (compared to the side that doesn’t have the dart). The compound effect is that the pulls at the front thighs are reduced. I think that’s because I take up some fabric at the back thigh, which lift the fabric up. Also, I thought that I might need to add some width at the inseam around the calf after the change, but it turned out that I didn’t need to. See? You wouldn’t really know until you give it a try.

Pin a dart at the hip level
Full Front Thighs
Although the pulls at the front thighs are better now, but I still want to do more. I ripped the side seam and inseam out, and then added 1/4″ (6 mm) on each seam for the front piece only. Yes, I did have to undo the dart that I pinned above to add the width, and then I re-pinned the dart back.

Add 1/4″ (6 mm) at thigh level on Front

Add 1/4″ (6 mm) at thigh level on Front inseam
And the result is good.
The pulls are almost all gone after adding 1/4″ (6 mm) to side seam and inseam at thigh level
Gaping Back Waist
The adjustment for reducing gaping at the back waist is pretty easy and standard. I pinned a dart in the middle of the Back Yoke, starting at about 1/2″ (1.25 cm) at the top and taper to nothing at the bottom of the yoke. That amount works for me. But yours might be more or less.

Pin a dart at back yoke to fix gaping
If your gaping is severe, you will have to remove some width at the center back too, where you could go below the Back Yoke.
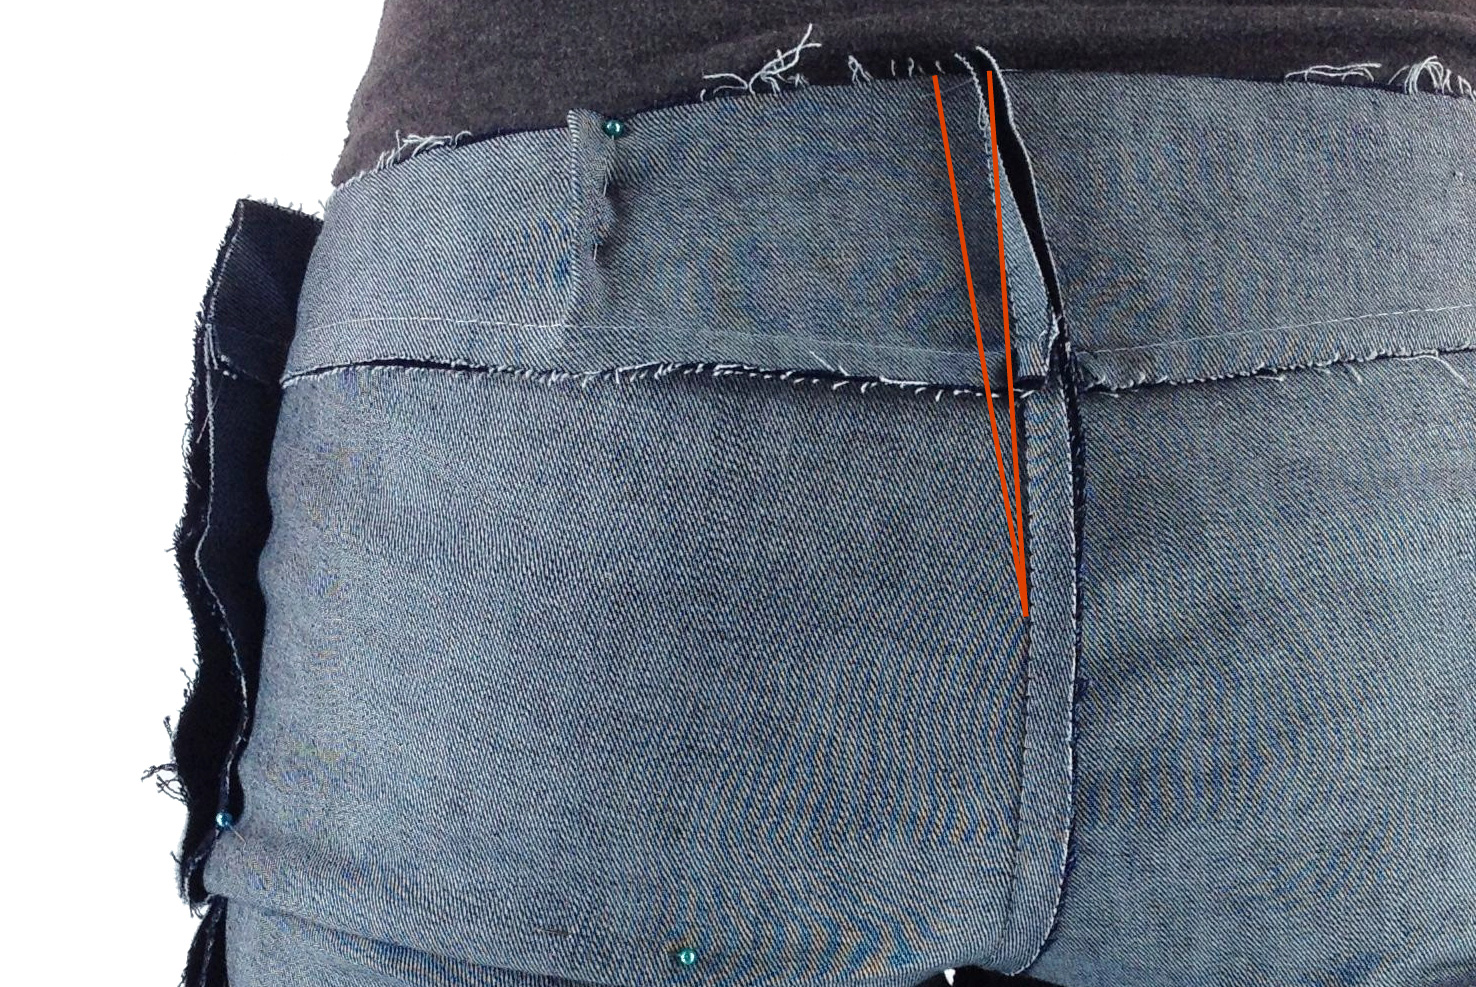
Also remove width at the center back if gaping if severe.
Length
I need to remove 1.5″ (3.8 cm) from the length. What I should do is to remove it at the knee (basically using the lengthen/shorten line of the pattern). However, I decide to remove the length at the bottom, which in effect, reduce the width at the hem. Remember these are my/your jeans, so I/you could break the rule if the result is what I/you like!
That’s all for today. I still have the seat issue to address, but I will go over other seat/crotch related issue in the next part, so I am going to discuss that then.
We have done a lot today. Take your time to experiment with yours. Try creating darts and releasing fabric to address your particular issues. It doesn’t hurt to pin something to see, and if it doesn’t work, remove the pins! It’s that simple. Keep these in mind when you adjust your jeans:
- Remove excess fabric by pinning a dart.
- Release fabric where you need more room. If you see pulls/strain somewhere, that’s usually an indication you need more room.
- We are doing flat pattern making, hence after the adjustments, the pattern still needs to be able to lay flat. Your dart needs to take some width on one side and tapers to nothing on the other side in order to keep that integrity. In other words, the dart can’t be curved. But, it’s perfectly fine if the dart is diagonal.
- Whatever you do, your side seam on the front should match the side seam on the back so you can sew them together. For me, by adding the 1/4″ (6 mm) width at the thigh, I’d be adding a minuscule amount of length (1/16″ or less; 3 mm or less) to the front leg. I could easily ease that amount back in.
- Below the knee notches, the front and back inseams are the same length. But above the knee notches, the back inseam is 1/2″ (1.25 cm) longer than the front inseam. So you need to keep that integrity after all your adjustments.
Happy sewing and fitting!
Here’s the schedule of the Liana Stretch Jeans Sew Along, be sure to look at other posts too!
Day 0: Get Ready!
Day 1: Intro, Material and Supplies
Day 2: Topstitching & Distressing
Day 3: Choosing a size & Cutting Test Garment/Muslin
Day 4: Fitting Part 1 (this post)
Day 5: Fitting Part 2
Day 6: Sewing the Back
Day 7: Sewing Front Pockets
Day 8: Sewing Fly Front Zipper
Day 9: Sewing Back to Front & Waistband
Day 10: Hemming and Finishing

This does not work if you have two different shapes (left side of body versus right side of body). You need to make adjustments with right side facing out.
This is the best post ever for the exact same fitting problems that I have. I found it on Pinterest in Nov 18. I have been looking for a couple of years for anything on the body shape and fitting problems that I have and I accidentally tripped over your post c/w photos of my exact fitting problems. I have since pinned darts out and scooped out my bottom on a couple of toiles that I have made over the last year or so and it’s as if by magic that my problems are pretty well fixed. Thank you so much for your detailed fitting photos and post. Sheila, Australia
I dont understand. Are you going to wear the darts at the hips horizontally across the front and back of your Jean’s?
No, there won’t be any actual darts. Those are the places you remove fabric from the pattern pieces before cutting the real fabric.