
Clipping or Notching? That is the Question.
When sewing a curved seam, you are supposed to be clipping or notching the seam allowance, so that the seam can stay flat and smooth. The rule is that when the seam is concave, you clip the seam allowance; when the seam is convex, you notch the seam allowance. This is an important step. Without clipping or notching the curved seam allowance, you end up with an ugly bulge or awful pull. Worse yet, this may involve your neckline, so the mistake is front and center.
However, quite frankly, I never remember what is a concave curve and what is a convex curve. These are not words that I throw out in my daily conversations. They mean barely more than “blah blah blah” to me. So they are not how I remember when to clip or to notch a curved seam. Besides, my memory has gone down the toilet. It used to be so good (if I remember correctly), but the good ol’ days are gone. Now I rely on logic. If it makes sense to me, then I will know what to do.
That’s why I prefer to think of this problem as allocating space for the seam allowance.
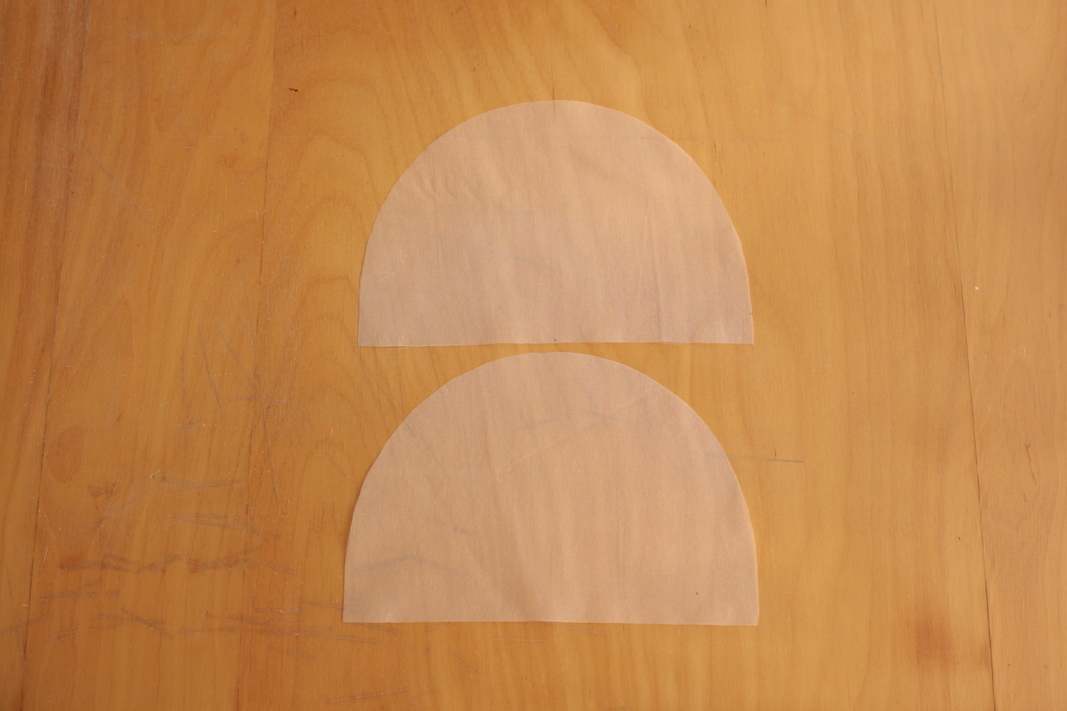
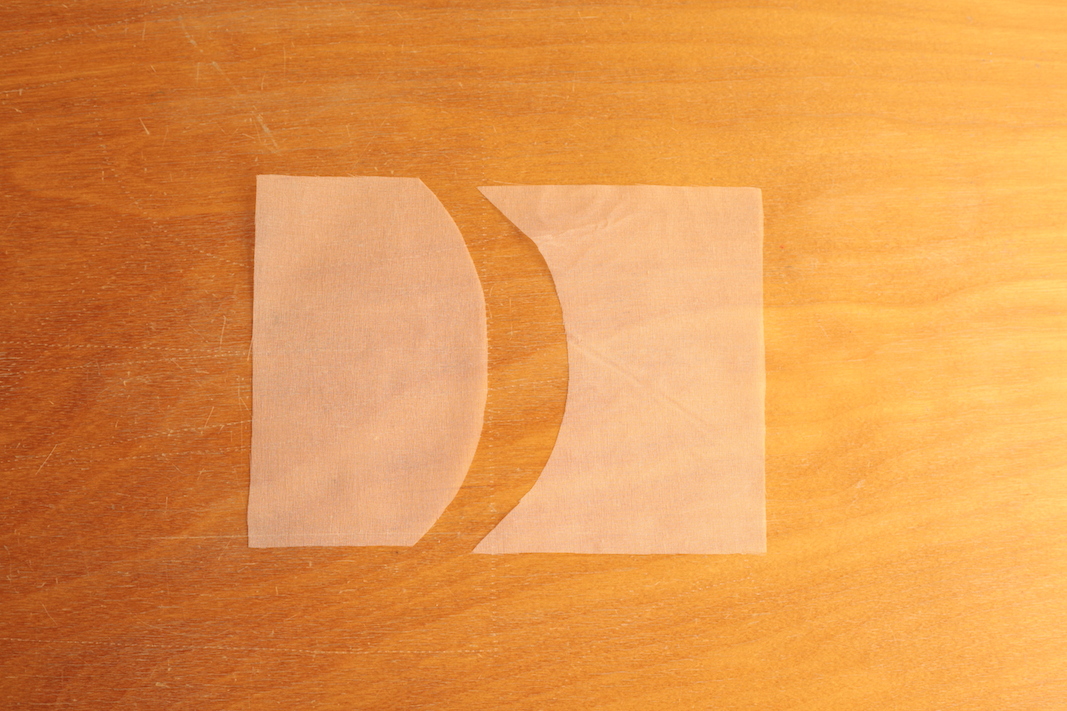
Let me jump in by showing you an example.
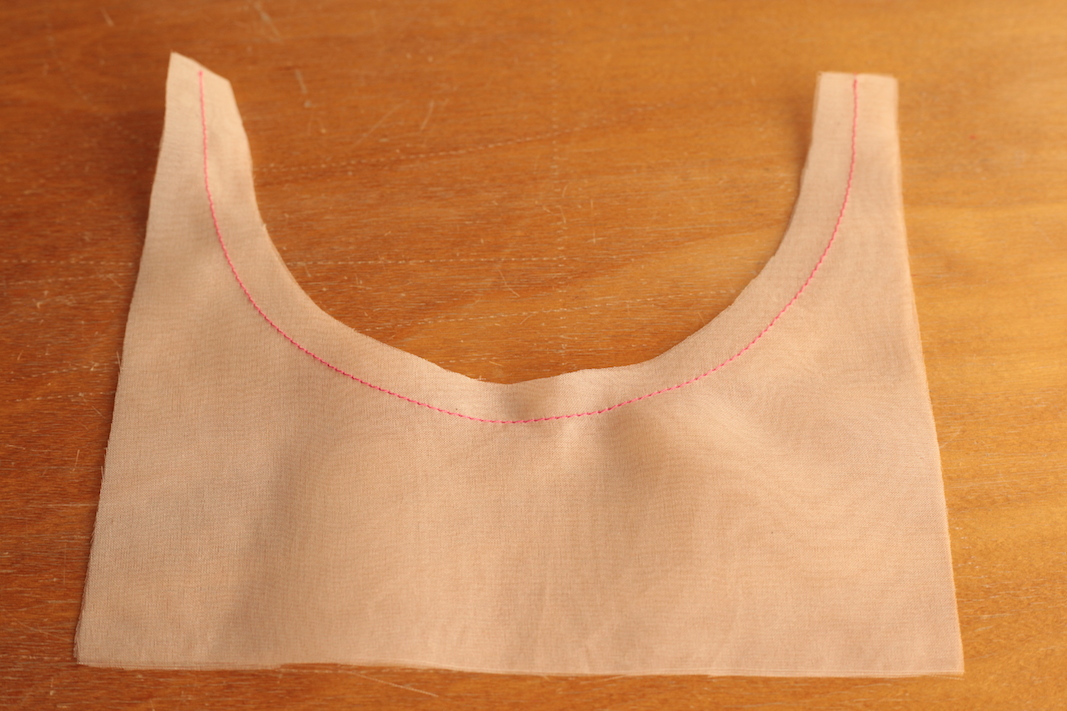
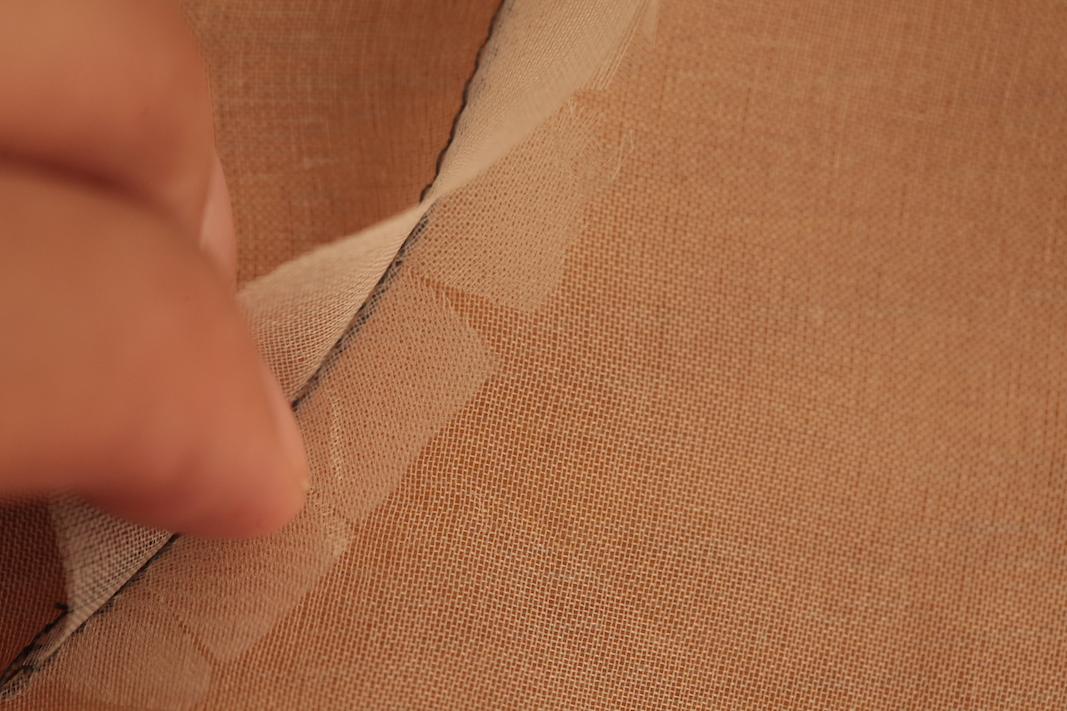
I am going to sew these two pieces together along the curve.
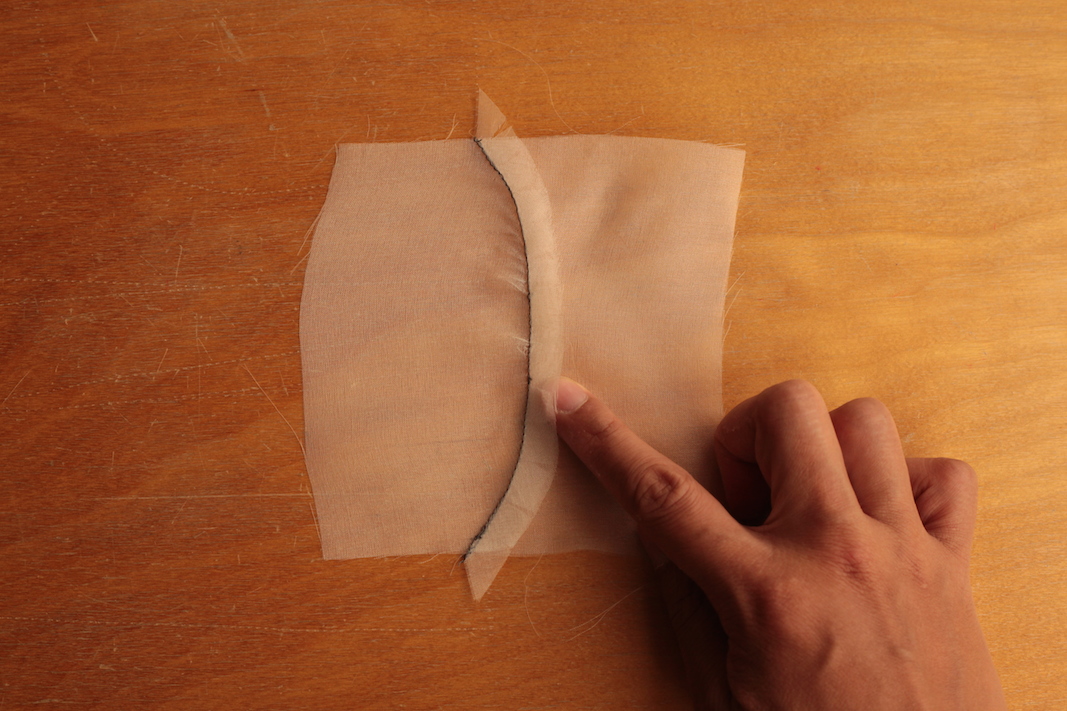
So I stack them right sides together, and sew the seam. (In this case, I am using a silk organza, so the right side and the wrong side look the same. But I want you to be able to see through the fabric, hence the silk organza.)
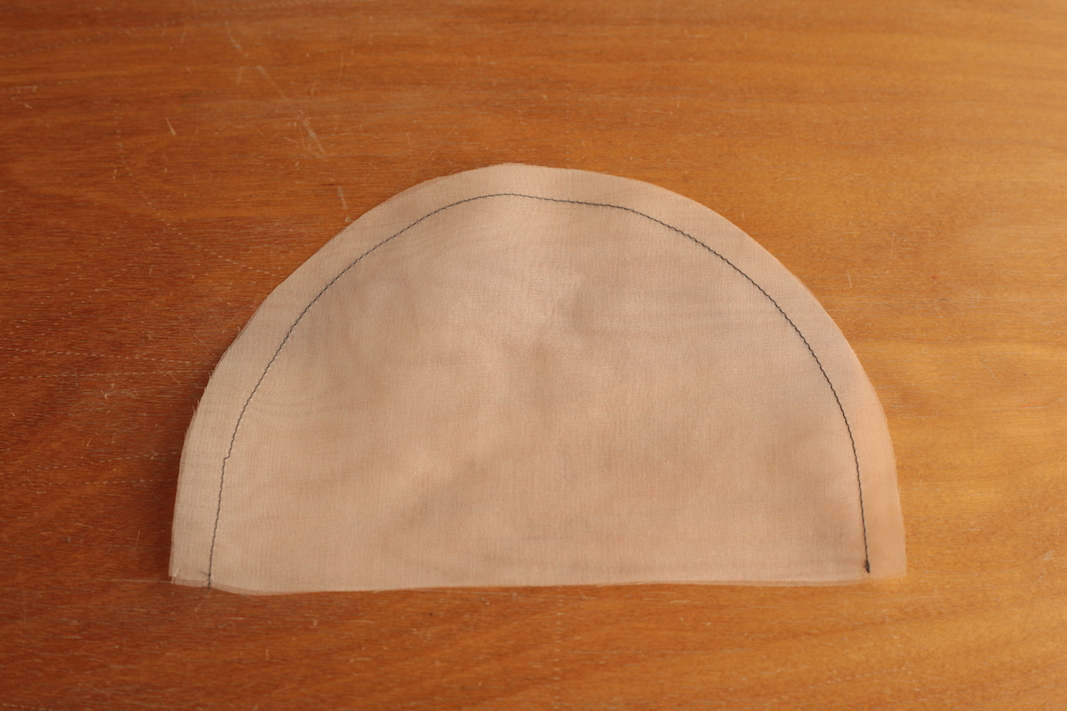
Let’s disregard whether this is a concave or convex curve, and let me show you two versions of how I handle this seam allowance.
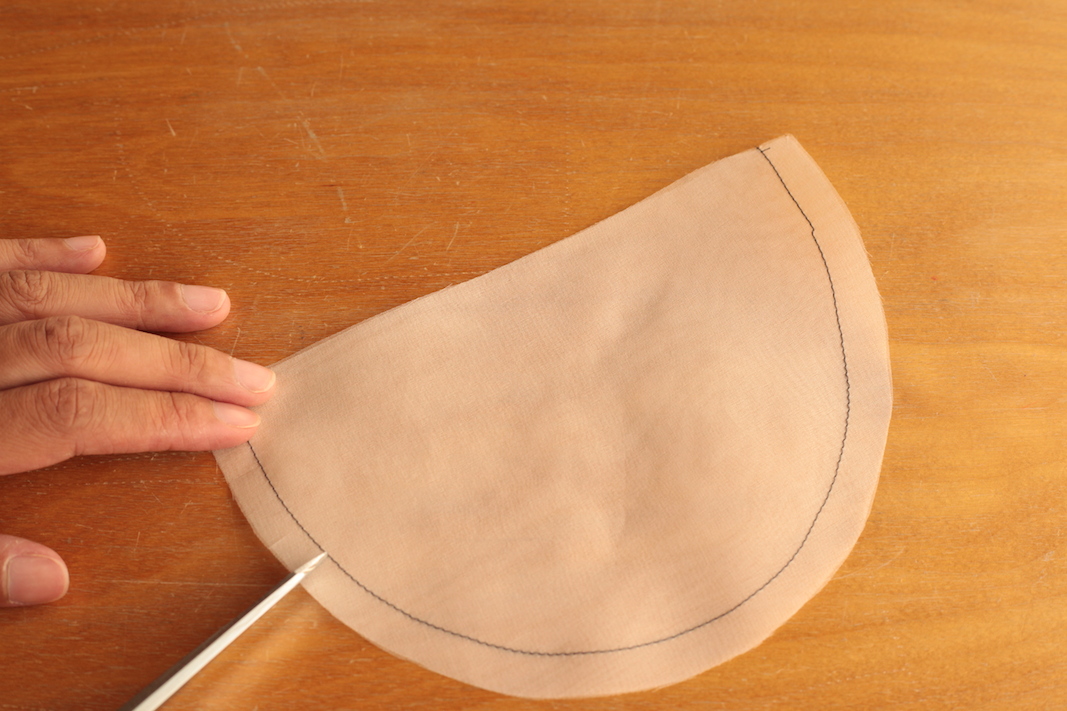
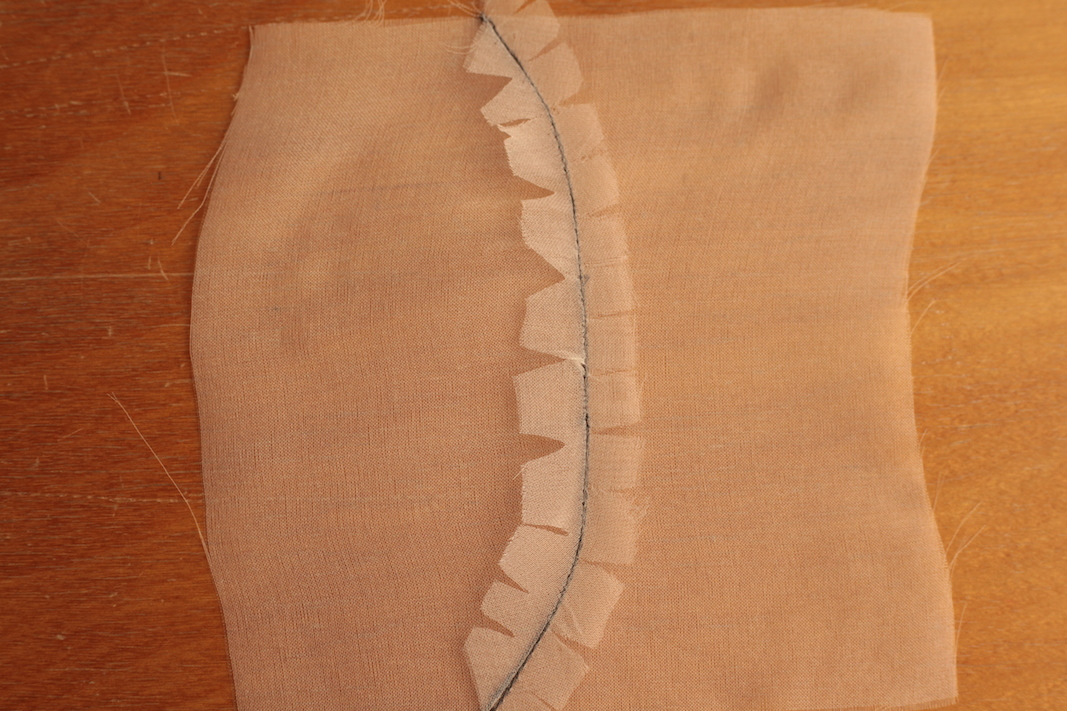
In the first version, I am clipping the seam allowance.
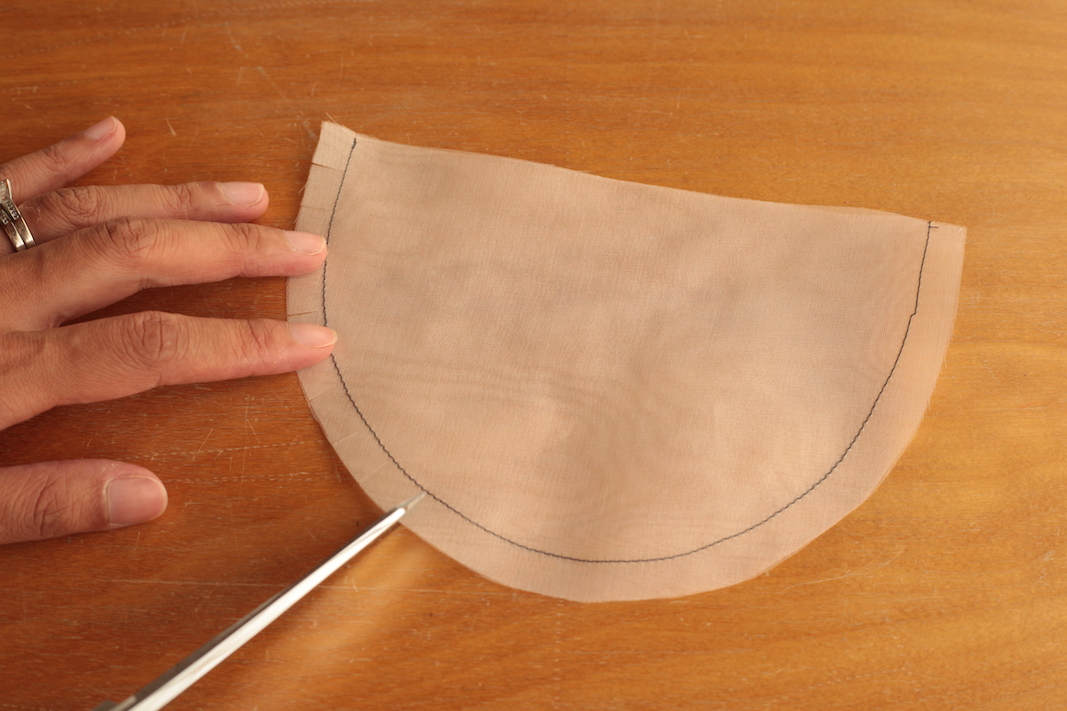
Clipping is pretty easy. Take a snip somewhat perpendicular to the stitch line (or tangent to the stitch line, if you want to get technical). Be careful not to snip through the stitch line though. I snip both seam allowances at the same time, but for thicker fabric, you can stagger the clips.
Clip clip clip clip clip. The curvier the seam, the closer together the clips should be.
Now we turn it right side out. By doing so, the seam allowance is being flipped to the inside.
Notice what happens here through the transparent fabric? Now the sections of seam allowance are overlapping each other inside. This is not ideal because we want to reduce bulk. Having the sections overlapping each other is bulky!
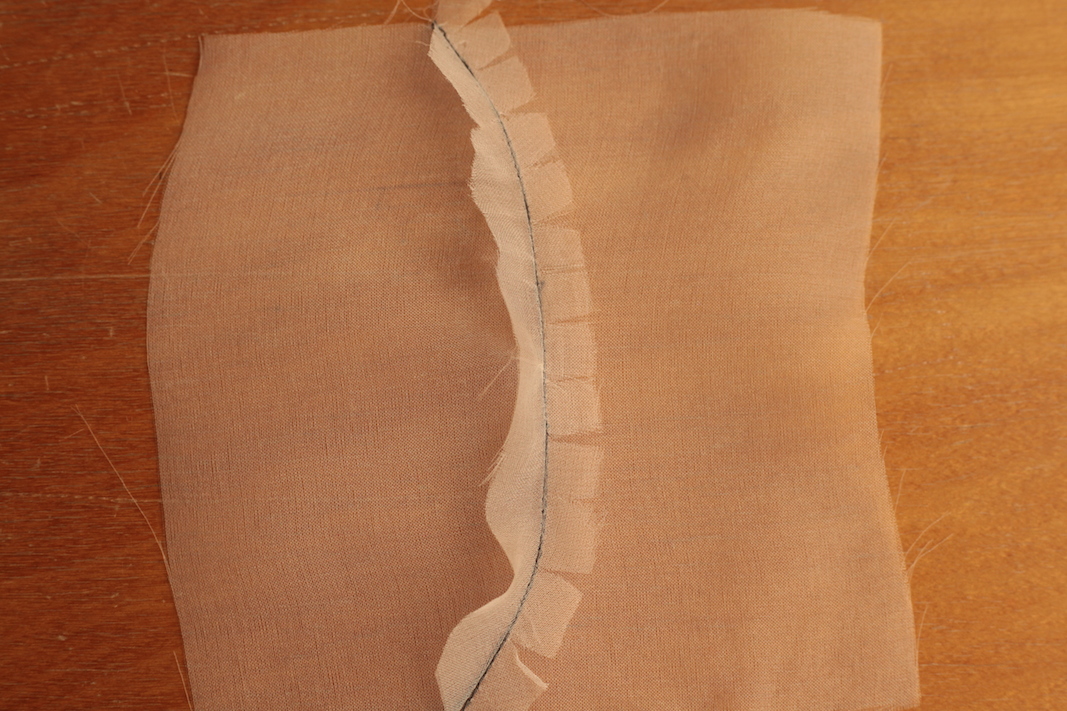
So instead, let’s look at version 2. In this version, I am notching instead.
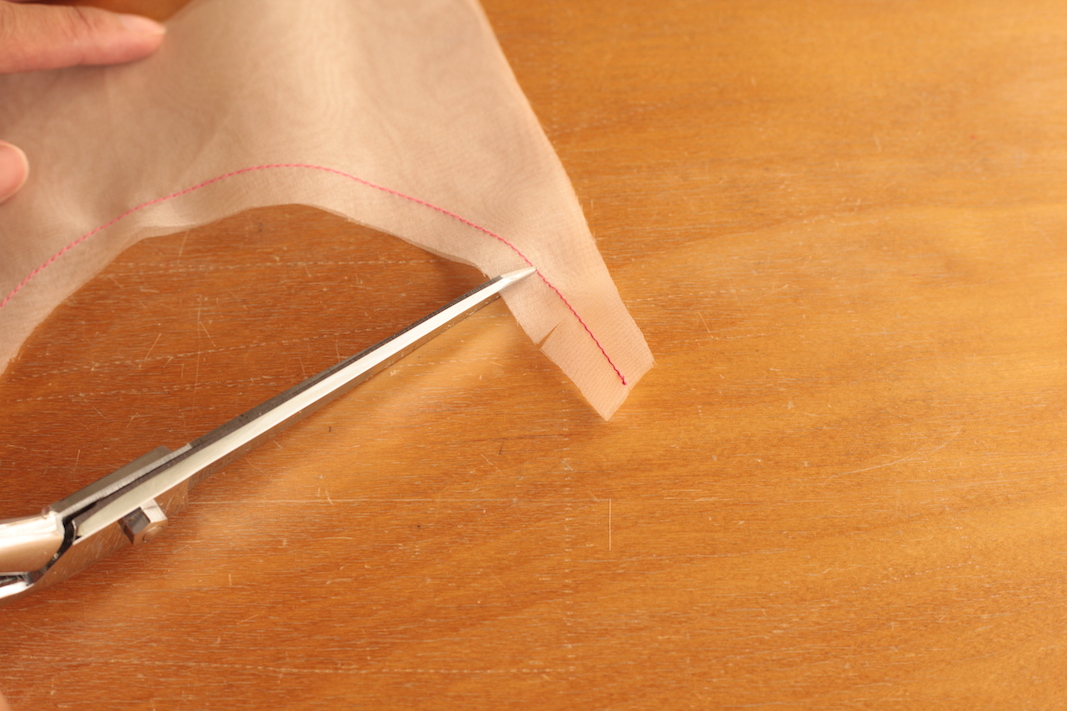
Notching is basically cutting triangle pieces out of the seam allowance. Obviously, do not cut through the stitching line.
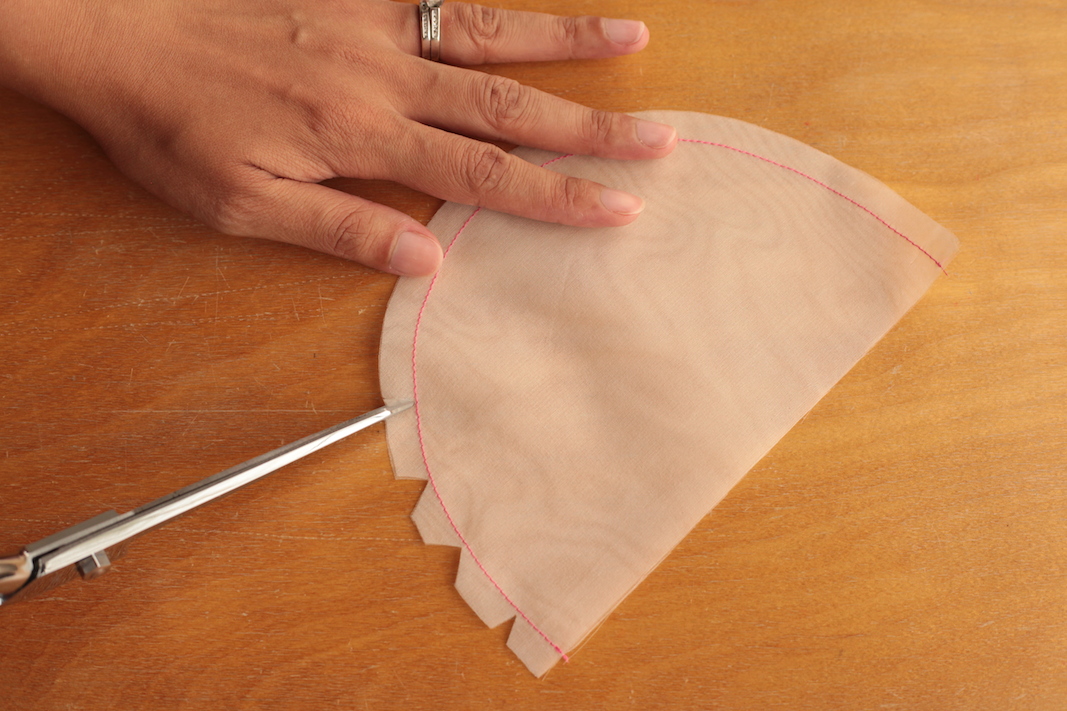
I also do it this way. I fold the seam allowance and cut it at an angle in one snip.
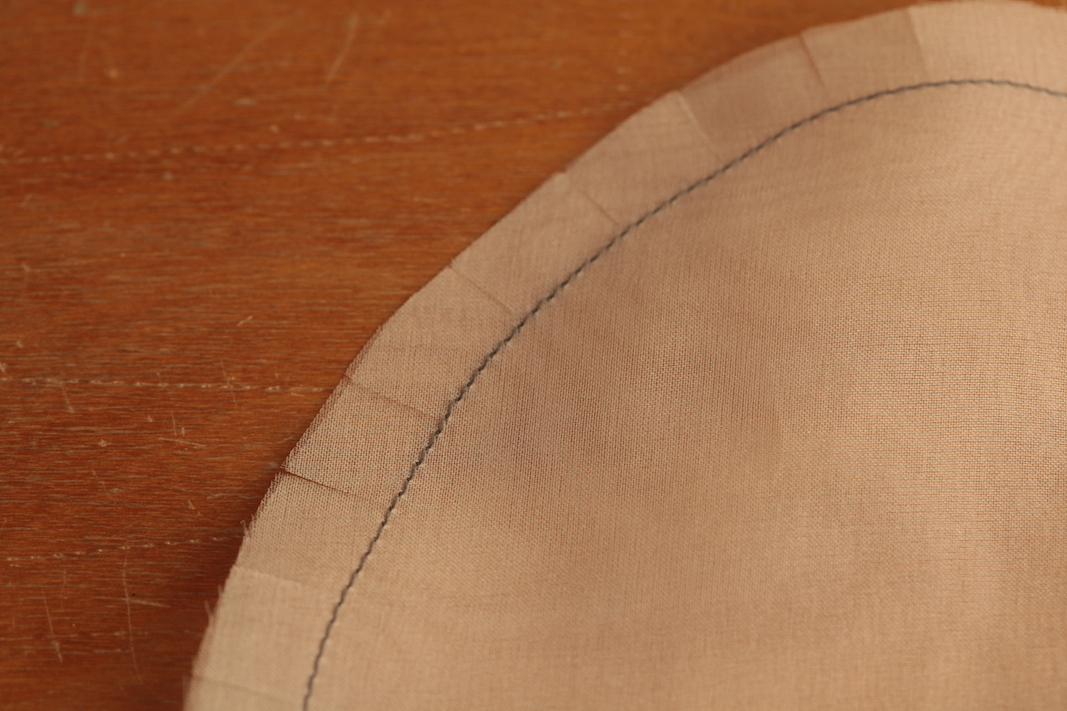
Keep doing it until you notch around the entire curve. (Yes, I know they are uneven. In real world, you wouldn’t be able to see these seam allowance sections, so it’s not a big problem if you are an uneven notcher like me.)

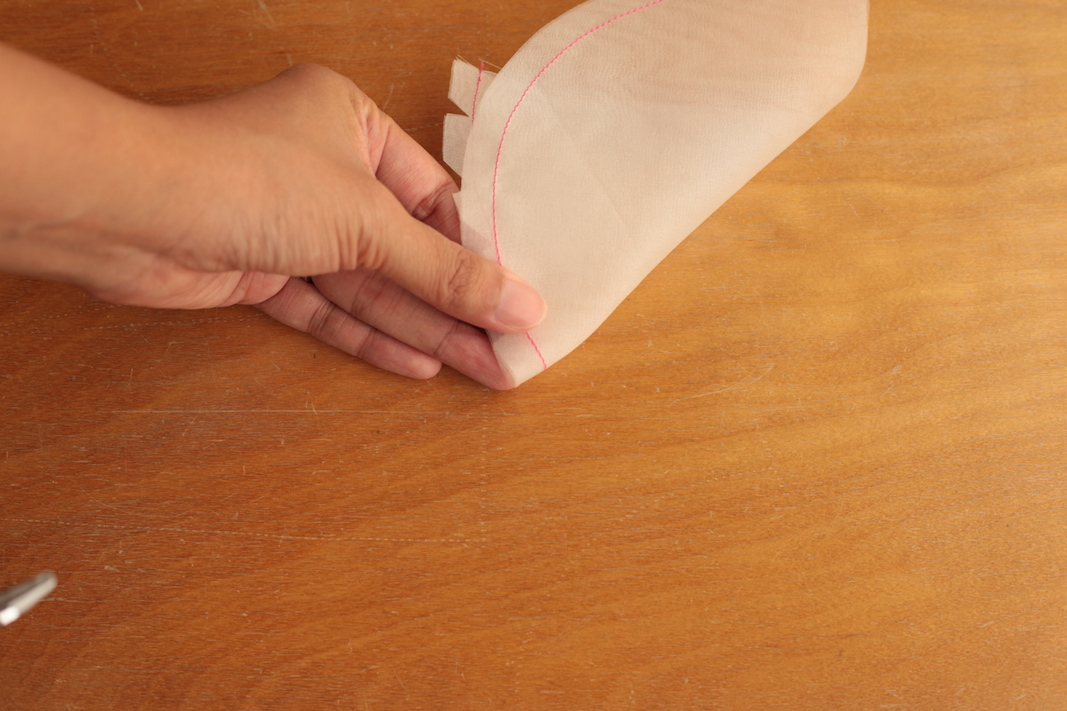
Now, I turn the piece right side out. That means the seam allowance will now be inside.

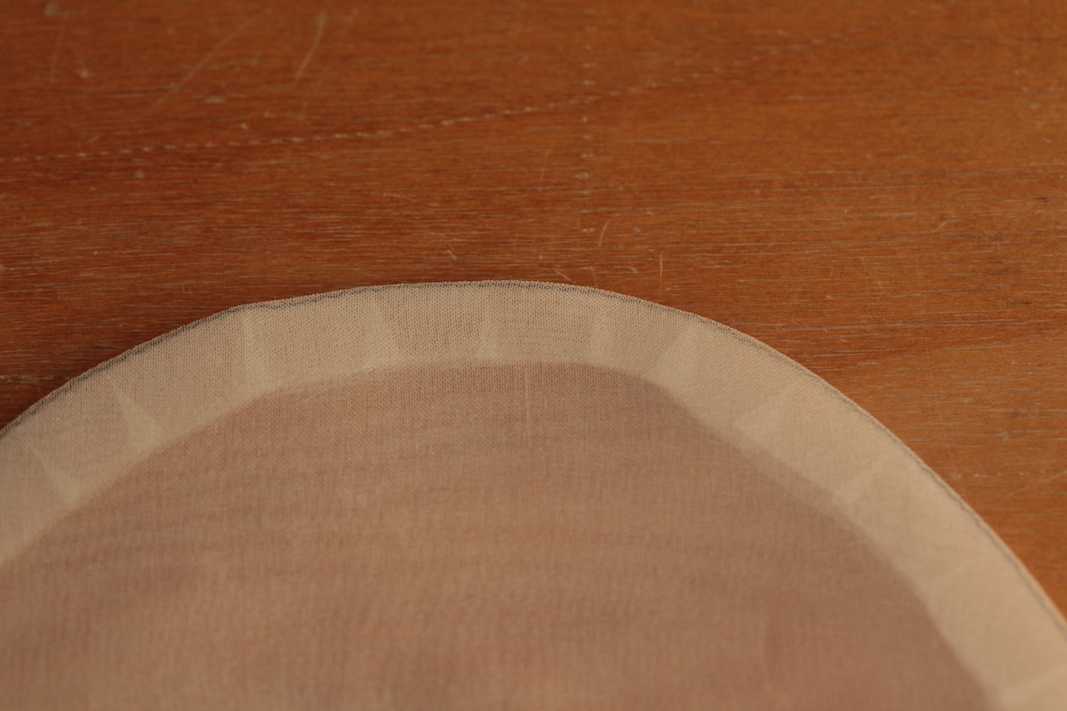
Even without the closeup photo, you see that the seam allowance sections are not overlapping each other. But here’s the closeup anyway.
So this is essentially what happened. When you are turning the fabric right side out, you are moving the seam allowance from the outside to the inside. Notice that outside has more space (peach color), and inside has less space (lavender color). To jam a seam allowance that occupies a big space into a smaller space, you need to remove some fabric (notching) in order it to fit. It’s like moving from a 3-bedroom house to a 1-bedroom house. You’d better get rid of some of your stuff or it won’t fit. Make sense?

By the way, if you do not clip or do not notch that seam allowance, the excess fabric of the seam allowance will bulge up like an eyesore.
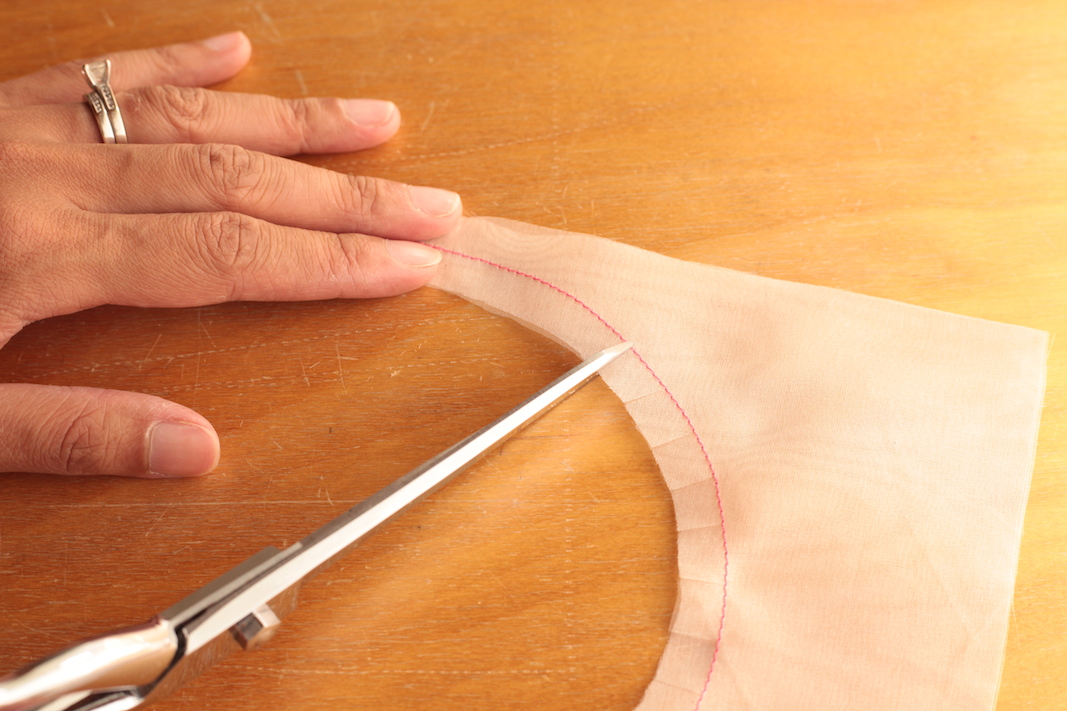
Now let’s look at the seam allowance of another type of curve. This one looks different.
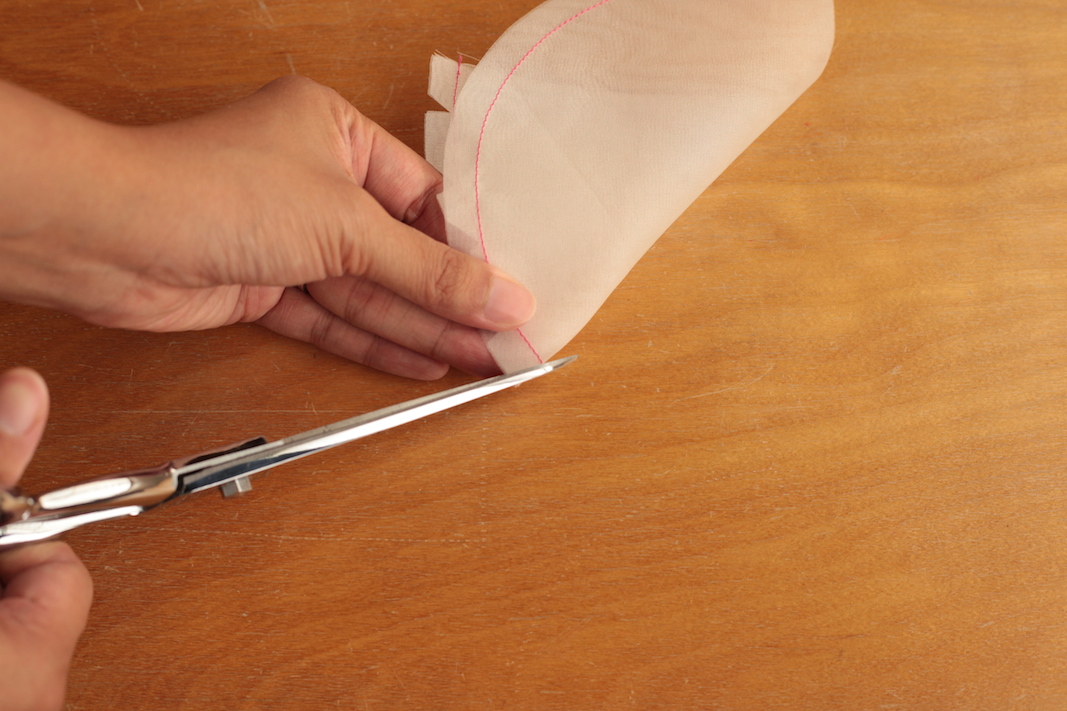
There are two layers here, and I stitch them right sides together along the curve.
I clip the seam allowance along the curve as before.
Clip, clip, clip. Be careful not clip through the stitch line.
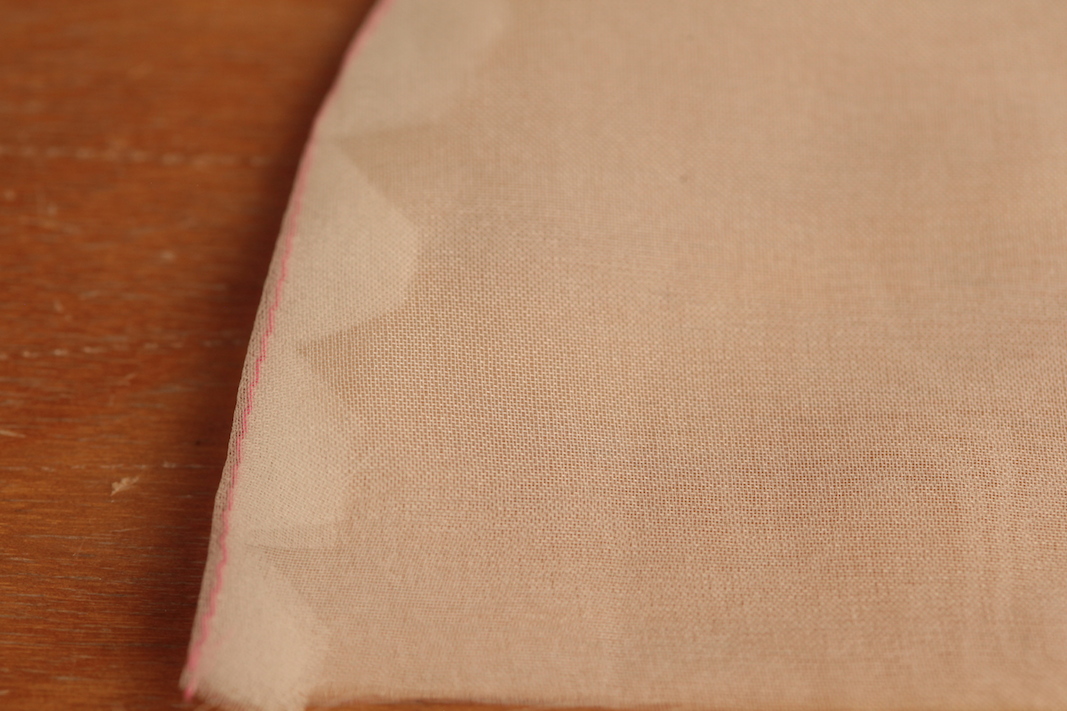
Now I turn the fabric right side out. You see that the clips spread apart when the seam allowance is turned to inside?
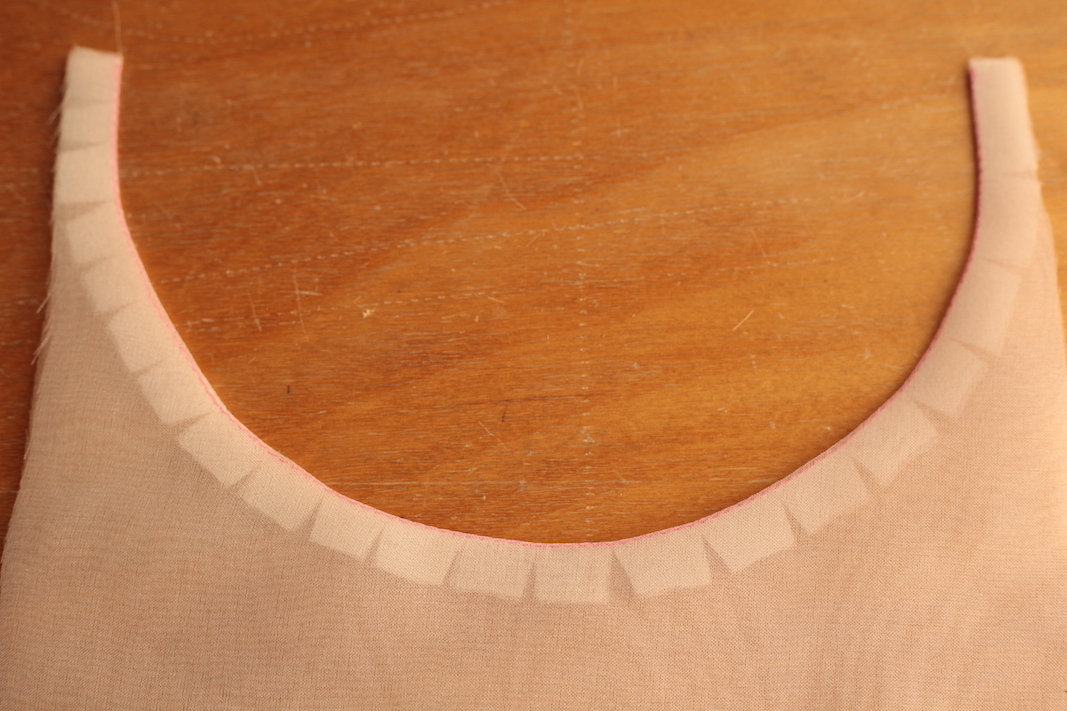
In this scenario, clipping is sufficient. There are no overlapping seam allowance sections.
The rationale is this: when turning the fabric right side out, the seam allowance again is being moved from the outside to the inside. However, in this scenario, the outside space (peach color) is smaller than the inside space (lavender color). Therefore, I do not have to remove any fabric (notch) to make it fit. But I do need to clip it, so that the seam allowance can be spread apart to occupy the now bigger space.

By the way, if you do not clip or notch, the seam allowance can’t spread open like it wants to and the curve can’t lay flat.
The concave and convex categorization gets confusing when you have one concave curve and one convex curve, as such:
(How to sew a seam like this is off topic, but if you are interested, you can read this post about how to sew a smooth princess seam, which essentially represents this scenario.)
It turns out the theory of allocating space for the seam allowance is more appropriate. Here I am pressing my seam to the right-hand side.
You can see that only one seam allowance needs to be clipped in order for the seam to stay flat. Because the other seam allowance is not turned, nothing needs to be done to it.
However, if I decide to press the seam open, the unclipped and un-notched side of the seam allowance is now wavy due to the excess fabric.
And you’d have to remove some fabric by notching the seam allowance.
So in this scenario, the concave/convex guideline doesn’t even work. However, if you look at it as allocating space for the seam allowance, then it works.
The reality is that after a while, you are not going to think about this exercise as allocating space for the seam allowance or using the concave/convex rule. You only have three options: 1) notch it, 2) clip it, and 3) do nothing. If you have excess fabric bunching up, you notch it. If you have pulls along the seam, you clip it. And if you have no problem at all and it lays flat perfectly, do nothing. As simple as that.
I also like to point out that you can also trim the seam allowance. By doing that, you may not have to clip or notch as much for the curved seam to lay flat.
Am I complicating things and confusing everyone? I’d love to hear from you.

I was taught to sew a narrow hem (i.e. 1/4″) and avoid clipping if at all possible. I typically modify my seam allowances to a 1/4″ around necklines, etc… and then I don’t need to clip or trim.
This makes total sense. I finally understand which technique to use when. Thanks!
Hello, thank you for explaining this so well. I am making a silk satin wedding dress with a light weight organza for support as an underlay. I really understand the importance of these notches around the princess seams. However the silk satin will fray. I am hoping and praying that a fine French seam will help as it’s quite close to the seam. I haven’t found anything online about dealing with curves in silk satin.
Wonderful tutorial. Thank you very much. I have been sewing for years and like you my memory isn’t what it use to be, but thanks to you I am still learning new things.
Thank you sooooo much. I am replying to you from MALTA, my native country. I have been sewing for quite some time thanks to watching my late mum every now and then. I am so happy with your guidance as I never knew this before. Thanks again and keep it up.
Thank you soooooo much for this!! I’m relatively new to sewing and will be making a baby ring toy, and the pattern involves both clips and notches. Thank you for explaining what to use and when!!! I’m a very visual learner so this is incredibly helpful.
This is hands down the easiest post that I have seen for notching or clipping curves. I have been sewing garments for 50 years, and when I have a new student, I watch their eyes glaze over when I try to explain the concept of convex or concave curves. Showing what is actually happening with the seam allowance is much easier to understand. Thank you so much,
What are your thoughts on using pinking shears instead of notching?
I know some people use pinking shears with success. I see it would work as well.
What a great tutorial! I never realized the visual part of this! I’m a visual person so this is a game changer for me! Thank you!
What a great tutorial! Thank you for taking the time to explain this so thoroughly
Thank you thank you thank you!! This info is priceless!
Great examples, I tend to stitch over the seam a second time and trim very close less than 1/8 if I can and it solves a lot of problems.
Being sure the fit is perfect is a must before trimming the seam allowance super close, there are no second chances.
Hi I am just starting out in the dressmaking, sewing and quilting world. I have dabbled with sewing over the years since I was a child, however, I decided to expand my knowledge and repertoire of all sewing in all its forms. I always struggle with what to do with curved seams and your article has really helped me with this dilemma. Your article is very well laid out and explained. I will now remember it as notch out (curve outwards), clip in (curve inwards). Now I have probably confuddled everyone. Thanks for the wonderful explanation it will really help with my rag dolls. Blessings.
This is just a great visual, thanks!
I’m a serial serger. I’m curious: do you still attempt to notch away when you have a serged seam?
I don’t, because the seam allowance is trimmed away and should be narrow enough not to need notching/clipping.
Hi! Have just discovered your awesome blog. This tutorial is fab: so clear in both the explanation and the illustration. Thank you
Your tutorials are fantastic!! Thank you for taking the time to write these 🙂
Another awesome post =D Thank you
Incidentally.. conCAVE curves go in like a cave mouth…. conVEX curves are as vexing (annoying) as an unsightly bulge =)
While I am at it, this reminds me of stalagtites (holding tight to the roof of a cave) and stalagmites (who one day might reach their friends) =D
I always learned that stalactites and stalagmites are like a ballerina on an ant hill…up go the mites and down go the tights!! 😛
This was so helpful 🙂 I read that before – clip on this curve, notch on that and I could NEVER keep that straight! But thinking about seams overlapping – now that I can remember! Thank you for this post and the pics were extra helpful.
I trim with a pinking shear and have my notches done for me!!
What a great idea!
I was thinking about doing this very thing yesterday as I was clipping around a neckline I sewn a bias tape to (silk) – that I should get out my pinking sheers! Thank you for validating that impulse 🙂
I love your method for remembering. Great tutorial!
This is a brilliantly clear tutorial! One question: are there ever occasions where it makes sense to clip or notch before sewing two pieces together? I’ve come across a few situations where the pieces don’t match up because the clipping makes them match up. Does that make sense? So now I never know if I should clip/notch before sewing or after.
Hi Donna, you do have to clip when you are stitching a concave curve to the convex curve like in the last photo. I didn’t want to dwell on that because that wasn’t the topic of this post. But you would have to clip one side in order to spread that side and match the seam lines before you can sew. For curves as curvy as I show here, it’s pretty much impossible to not clip before you stitch them together, unless you have a minuscule seam allowance (1/4″ or less). If you want to see more, go to the post about how to sew a smooth princess seam (https://itch-to-stitch.com/seven-steps-to-sewing-smooth-princess-seams/).
Awesome. Thanks!
Once again, you have made this totally understandable to me – thanks for the very clear tutorial!!
Great post, that was very helpful 🙂
So sensible..think I will be notching more now I get the reasoning about where and when.