Assemble PDF Patterns the Quick Way
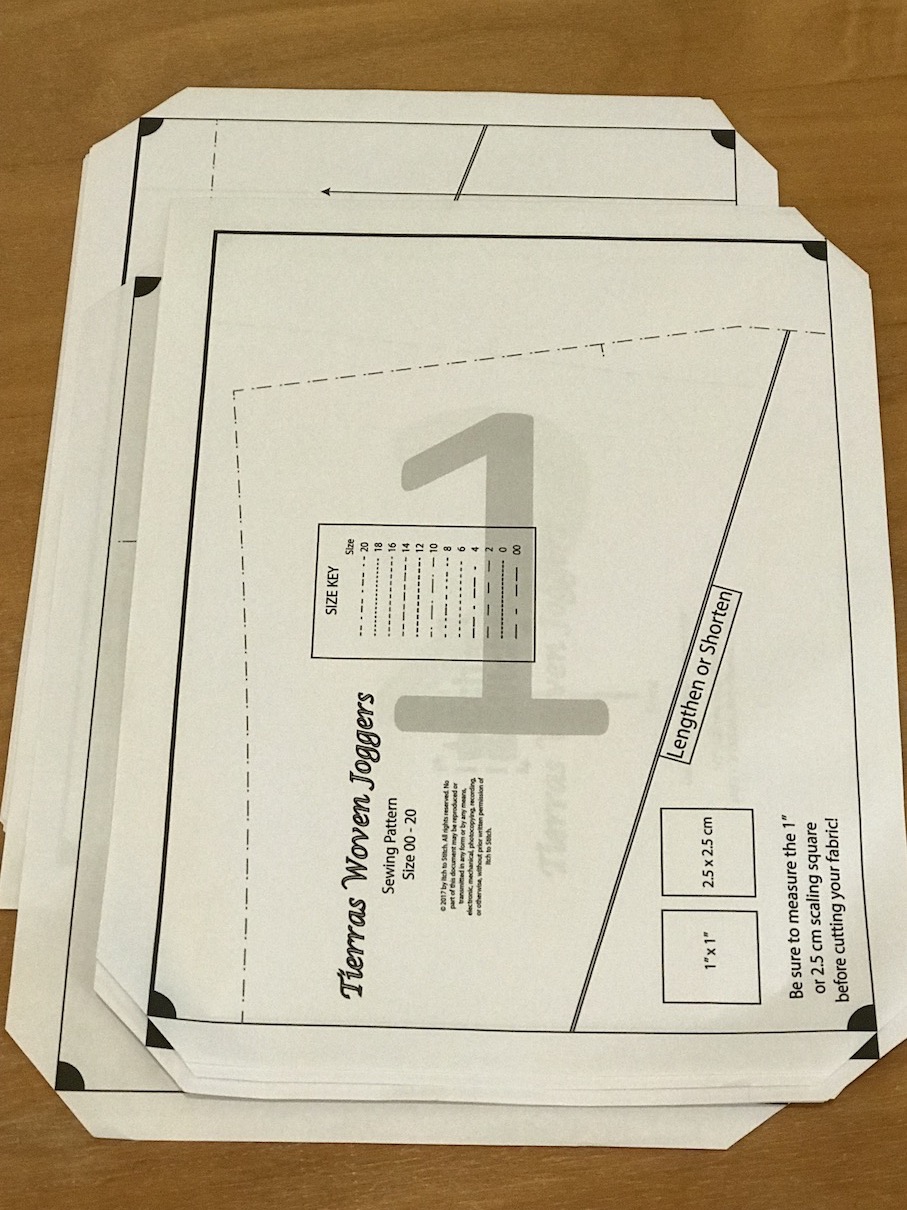
Do you want to see how I assemble my PDF patterns at home? Unlike most people, I print and assemble my patterns many times. When I draft a pattern and place it in the proper format, I print my pattern. Then if I have any changes, I revise, print and assemble the pattern again. I don’t have a large-format printer at home. The way you print and assemble a pattern at home is the way I print and assemble my patterns. I think this is a good thing because I catch a lot of errors and find areas of improvement just by doing it exactly as what my customers would do. Sometimes I have to print and assemble MANY times. Therefore, speed is paramount. The best way is to have a large-format printer at my disposal, but since I don’t, I think this method works for me.
Some people stack their printed pages together and use a rotatory cutter to cut all the edges/margins off. But for my printer, I can’t do it because the pages don’t always print at the exactly same spot. I think it has something to do with the printer feeder. Hence this is a good alternative.
One disclaimer though—I am not saying this is the best way to assemble print-at-home patterns; in fact, this method has some pitfalls. But what makes up for it is speed.
It might not be for you, but I’d like to share this with you anyway in case you find it helpful too.
I learned this method of assembling print-at-home pattern from a German video that Rita referred me to. (Rita is my friend and trusty proof-reader for almost all of my patterns. Thank you Rita!) The video is in German; not that I understood a word of it, but I was able to just see what she was doing. The bummer is that I no longer have the link. If any of you know the original video, I’d love to link to it so I can give the lady proper credit. I knew some of you must know! Thank you Deva. The video is here. Please go over there and give the video a thumbs up!
Assemble PDF Patterns the Quick Way
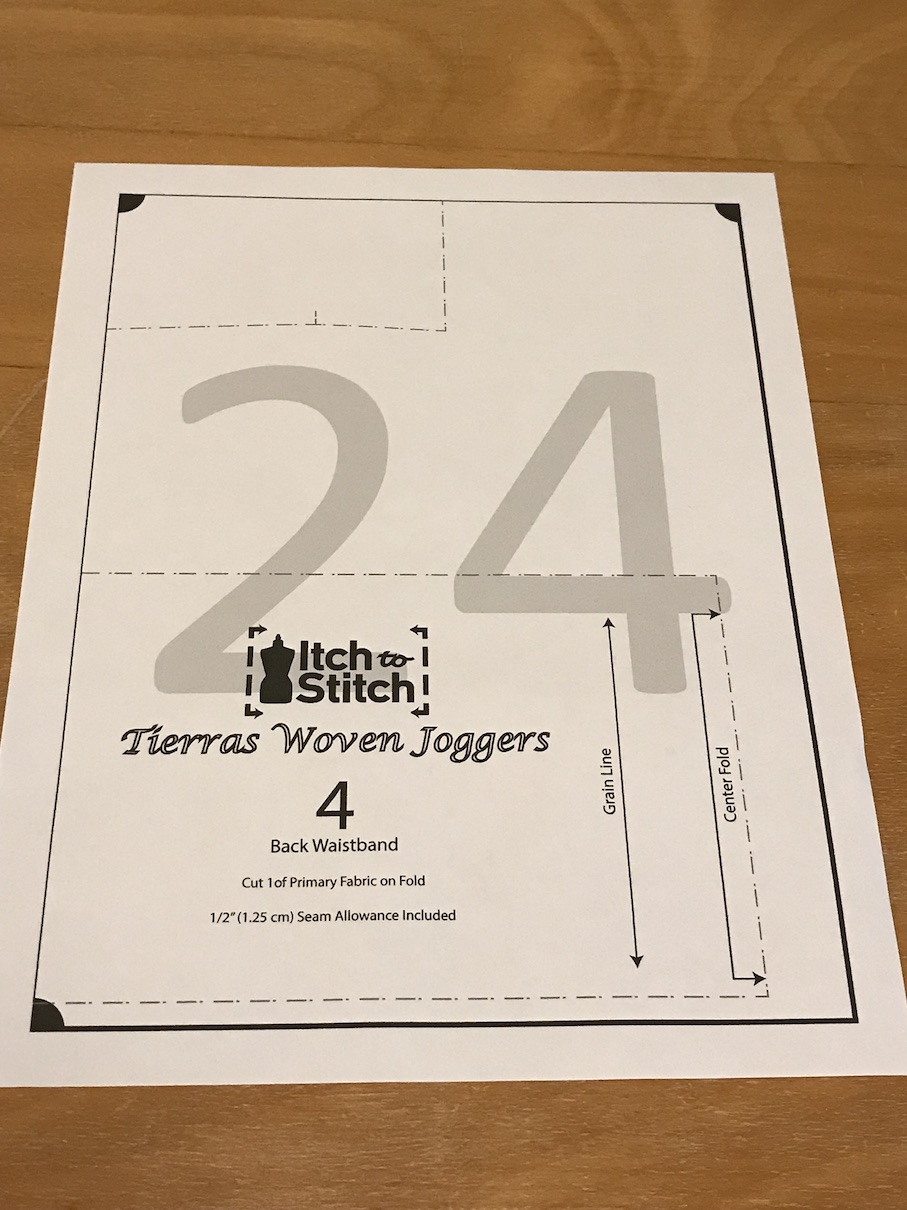
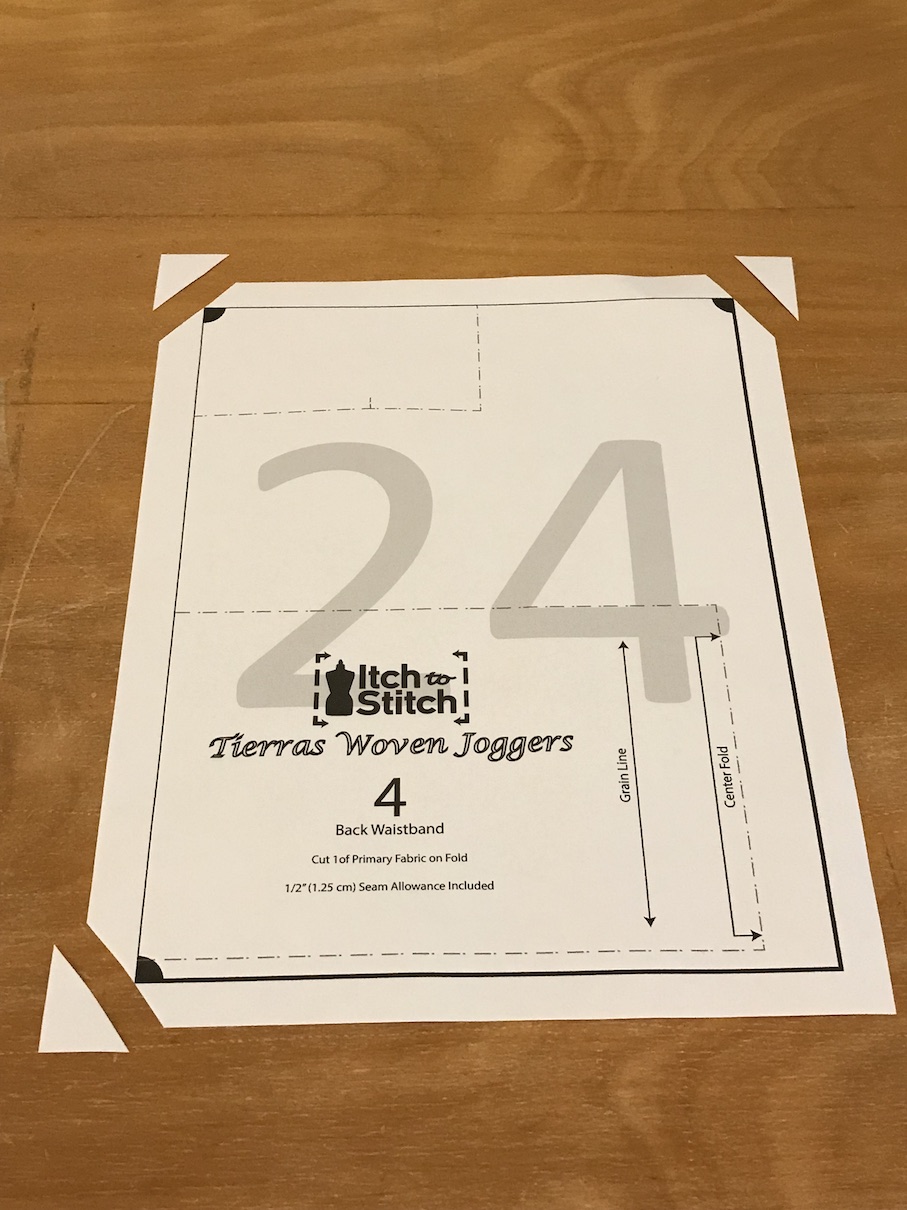
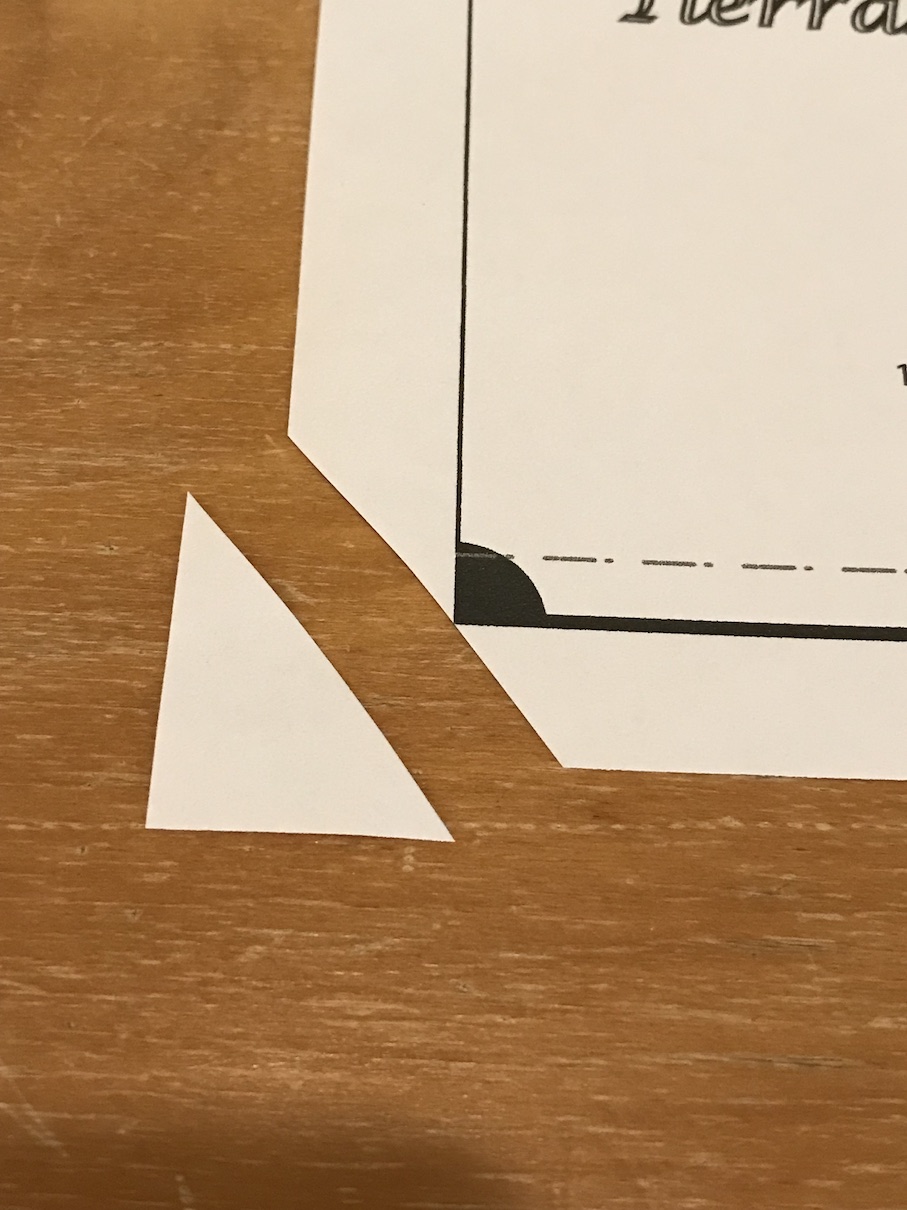
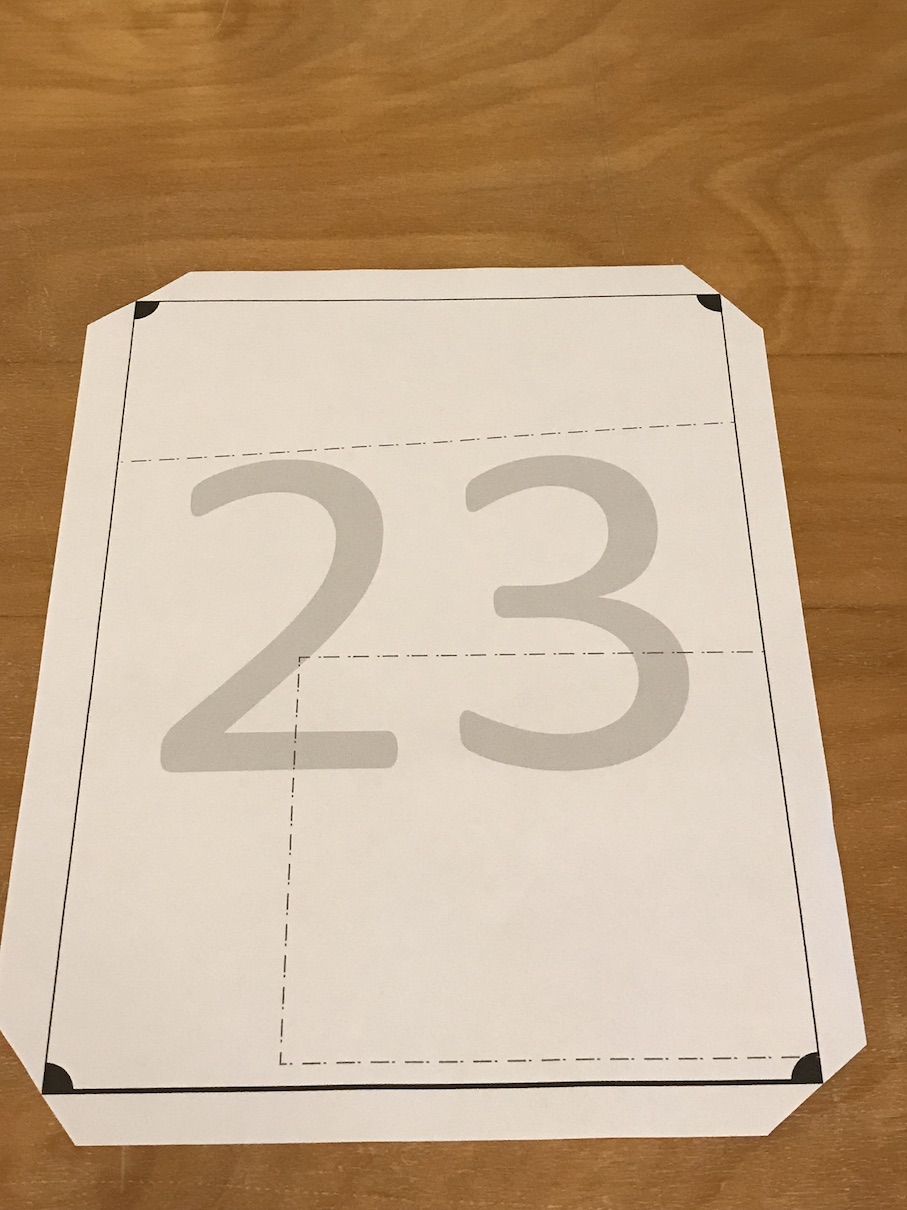
Make sure the pages you print are correct. You should see all four lines of the rectangle on the page. On this page, I trim the corners so that the cut touches the very corner of the rectangle. The angle does not matter at all, so you can do this quickly. Bam bam bam bam!
You might notice that I didn’t cut all four corners on this page. I know that for the very outer corner (on Itch to Stitch’s patterns, that would be one without the quarter circle), I will not have to align it with any other pages, so I did not cut it. Actually, you would not have to trim some corners too, but that would require me to plan and think about the sequence of my assembling. By the time I finish planning and thinking, I would have trimmed many corners, so for all other pages, I just go ahead and trim all the corners.
Assembly time! I use a glue stick. I used to use scotch tape, but once I tried glue stick, there’s no turning back. I found that this brand of glue stick, Pritt, is durable and the pages don’t come apart. You probably can’t easily find it in your country (mine comes from Costa Rica), but I am sure you can find a good brand where you are. If you like to tape, it’s perfectly fine too.
I apply glue on one margin. Precision is not necessary when you put on the glue. If you put some glue beyond the line into the pattern, it’s not the end of the world. You’ll see that the pages actually do overlap, so the glue would be under the margin of another page. Just don’t put the glue on the table. It’s a bit of a mess if you do.
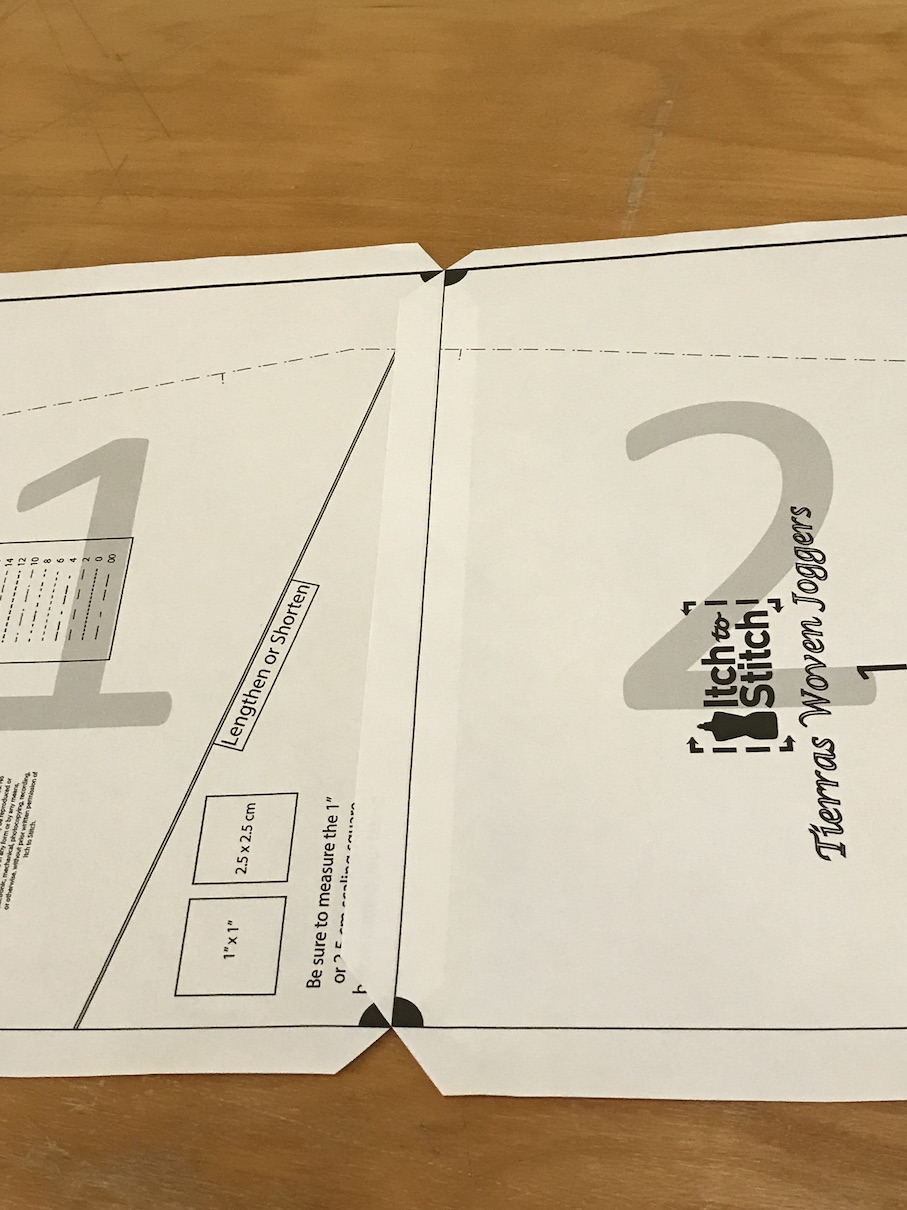
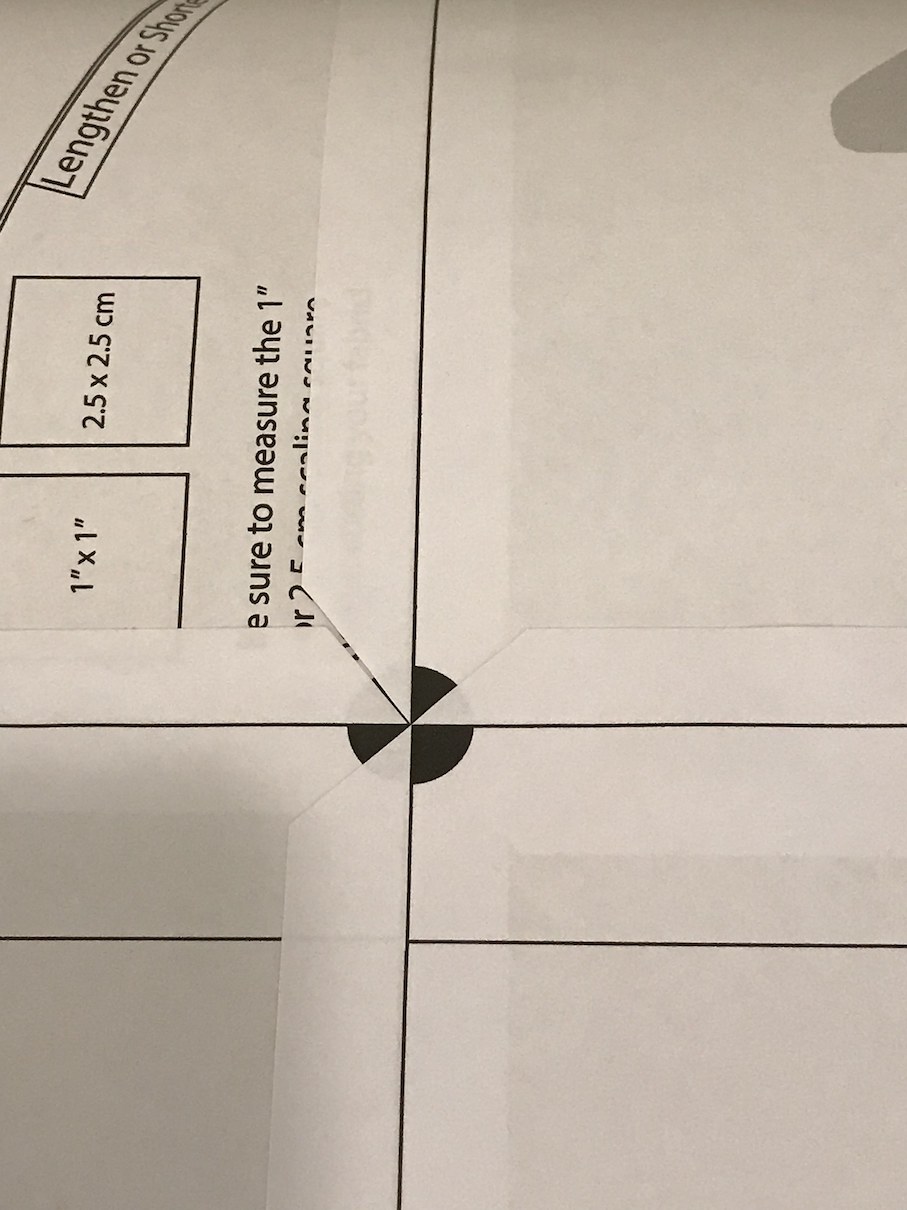
Now let’s put the other page next to the first one. You line up the very corners of the two pages like this:
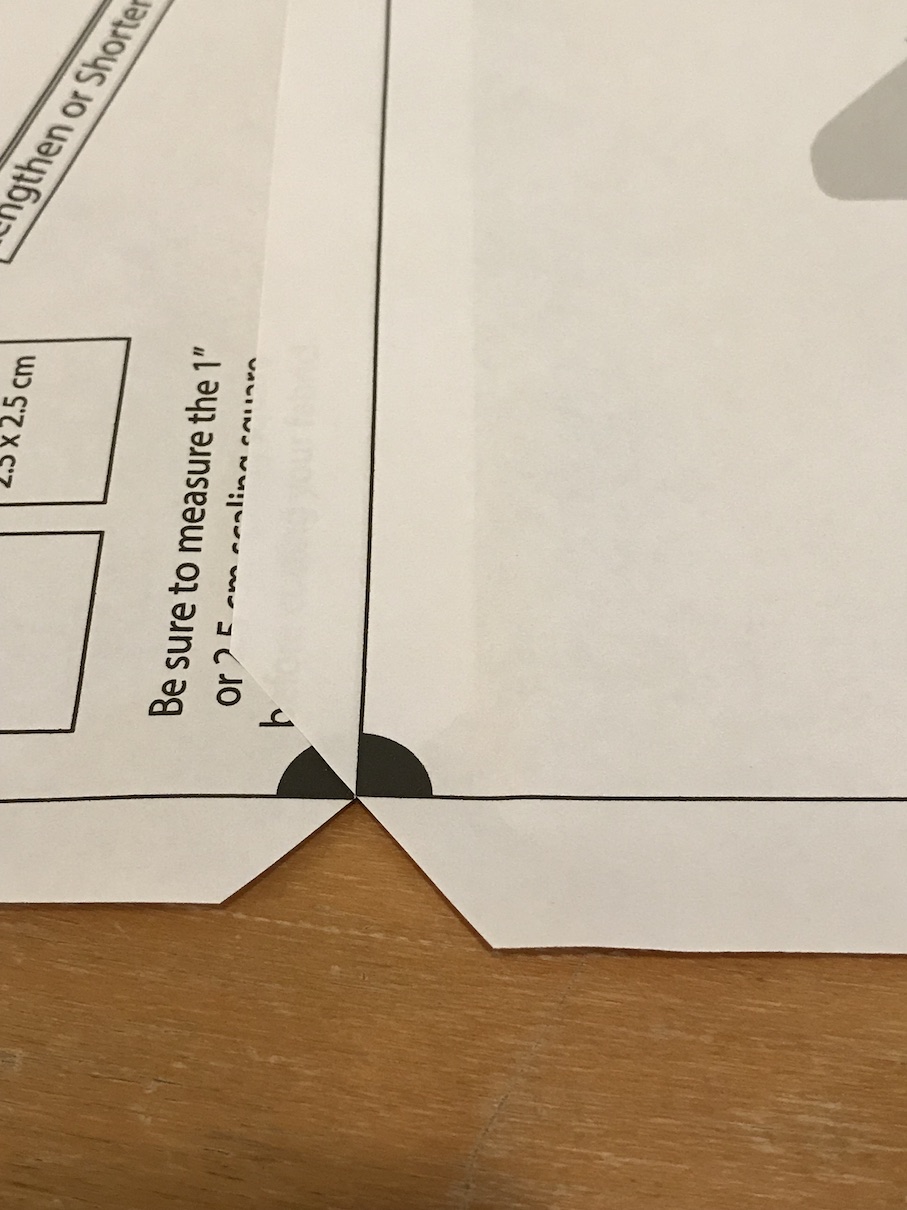
A close up:
(Now that I am looking at the photo, I think I was half a millimeter off, but I’ll live.)
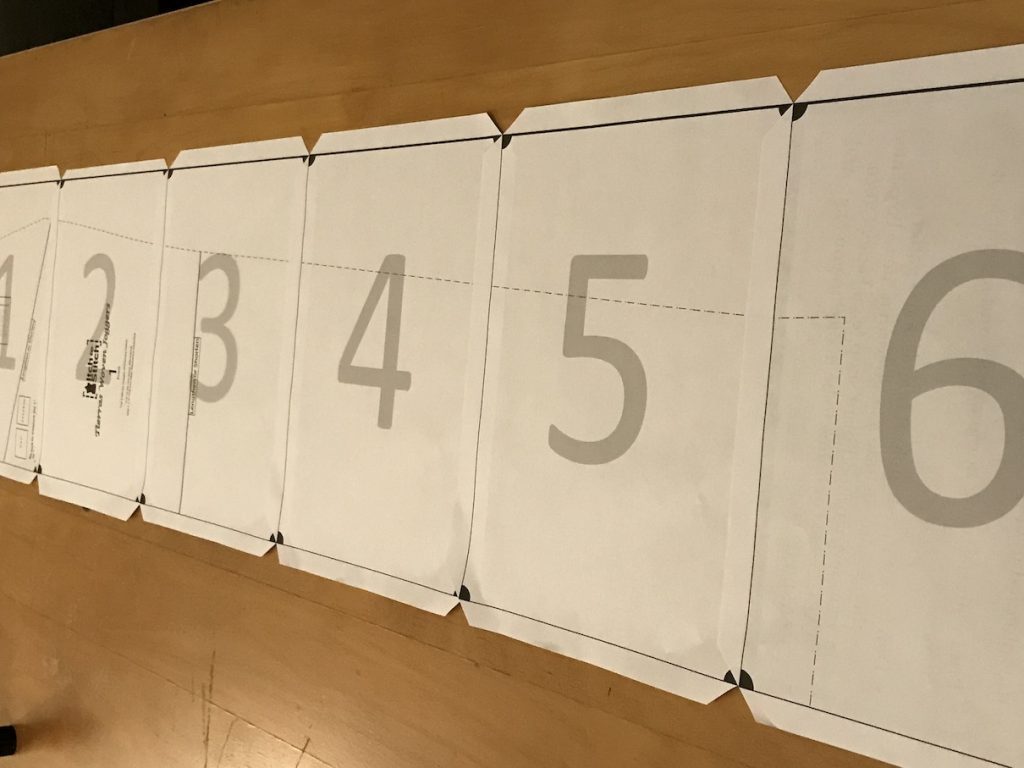
You keep repeating the process for the same row.
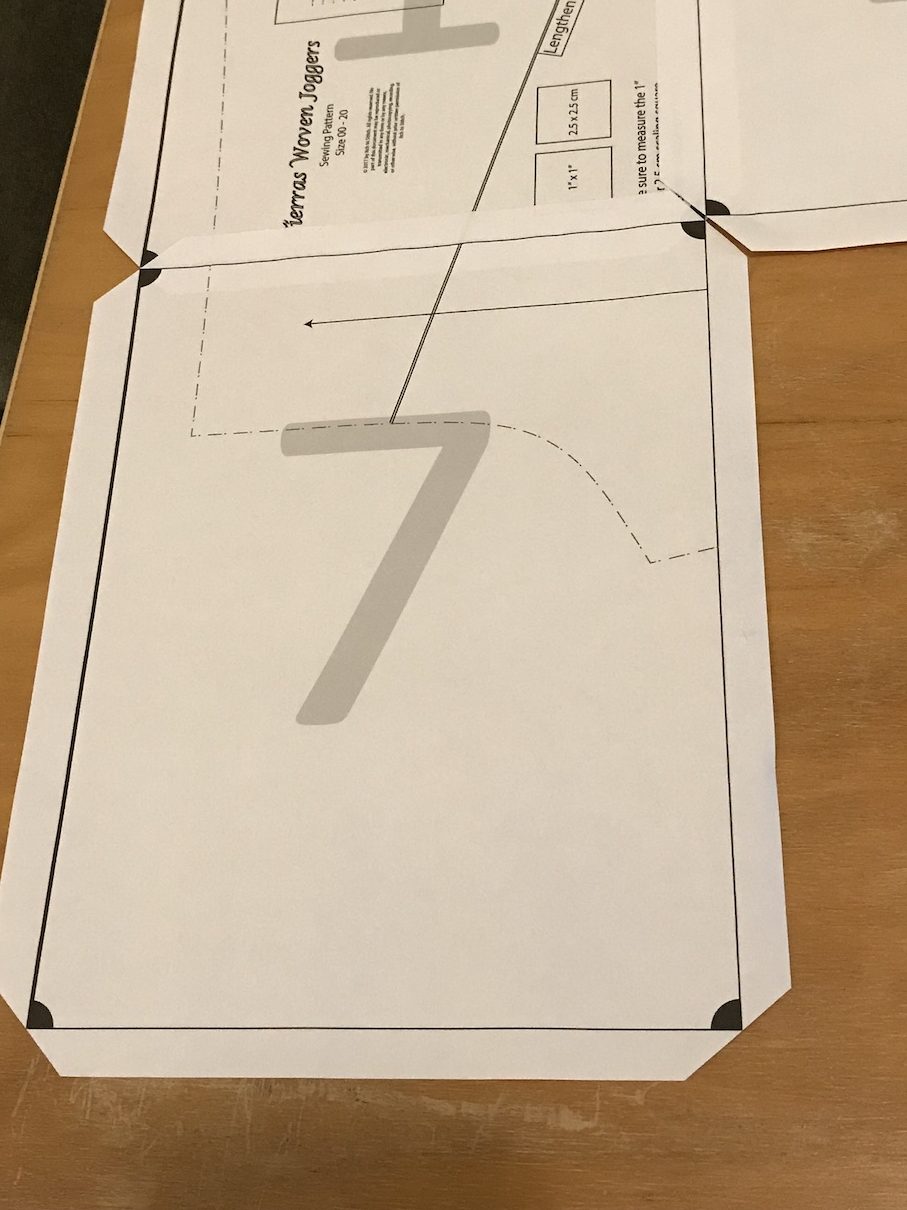
Then you start a new row. The idea is exactly the same: you line up the corners.
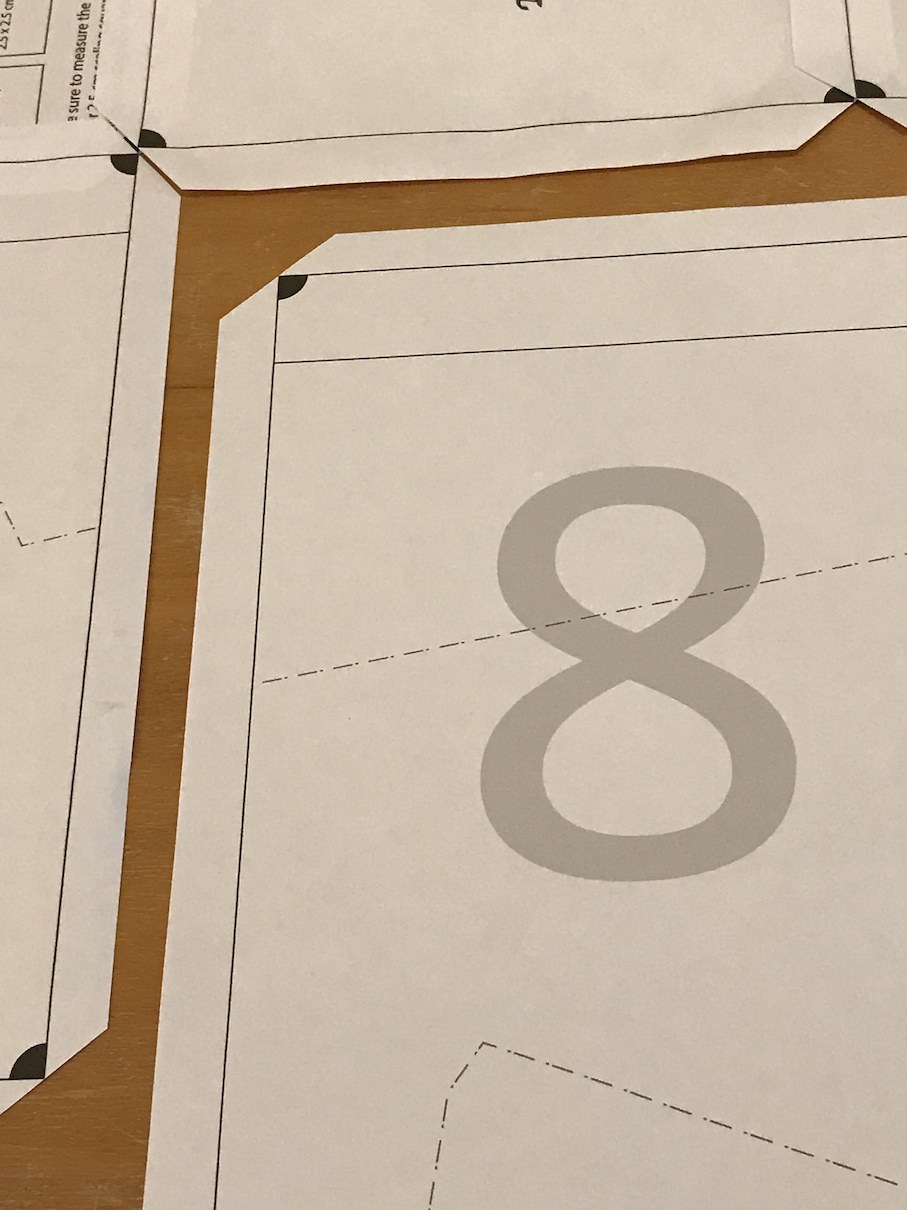
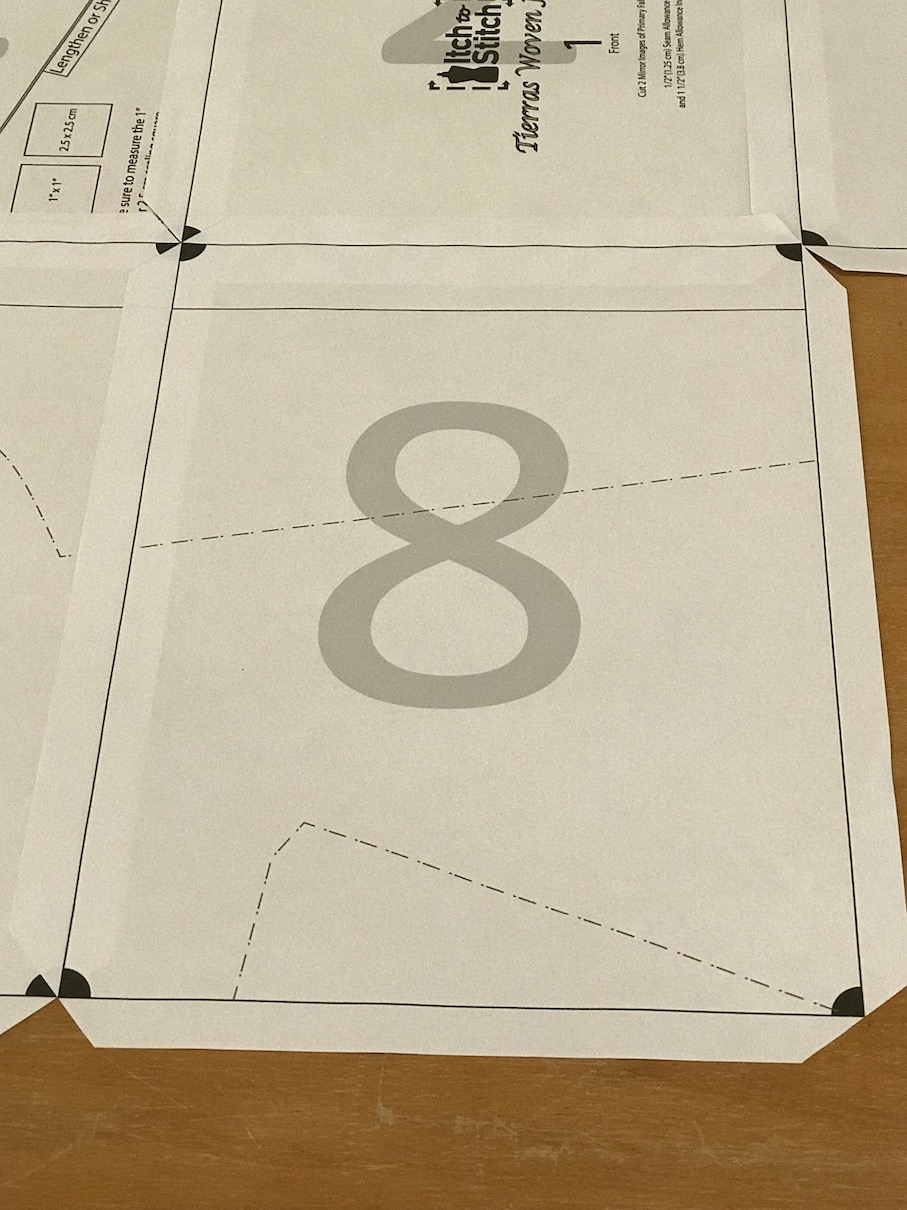
On the next one, you’ll have to glue/tape two sides.
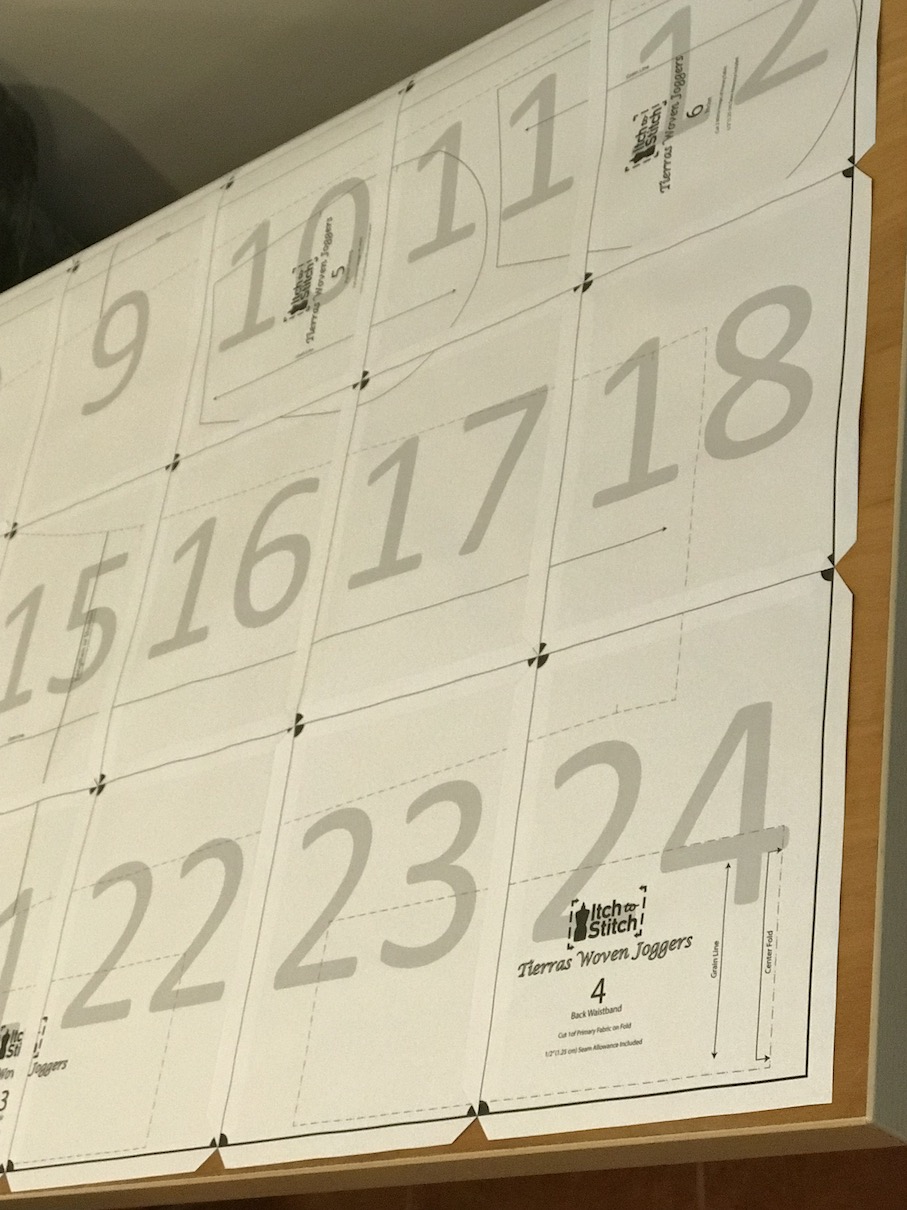
Keep doing it until the whole pattern is assembled!
So what’s not to love about this method?
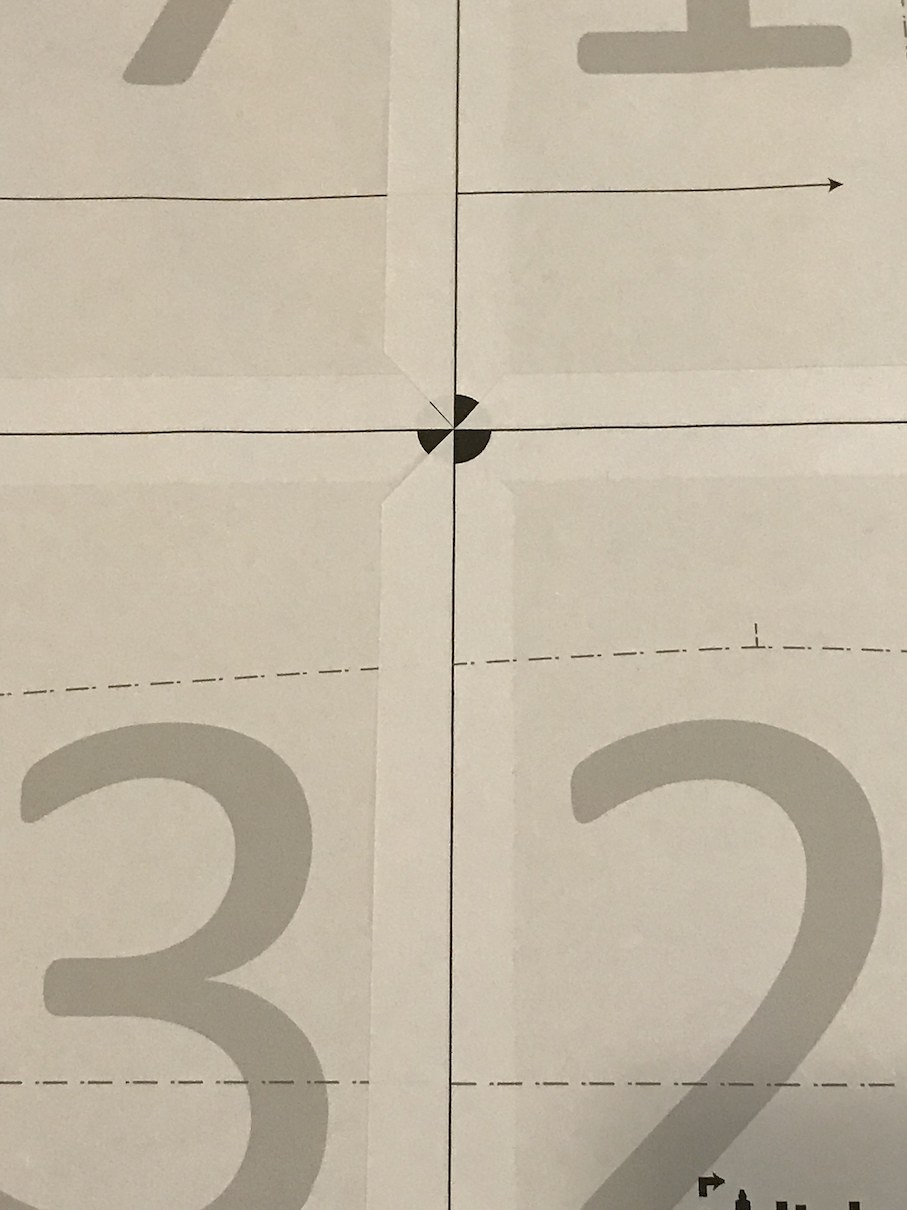
You see here? Some of the lines are covered. For this one, it doesn’t take a genius to connect the end of one line on one page to the beginning of another line on another page. I think I can manage it.
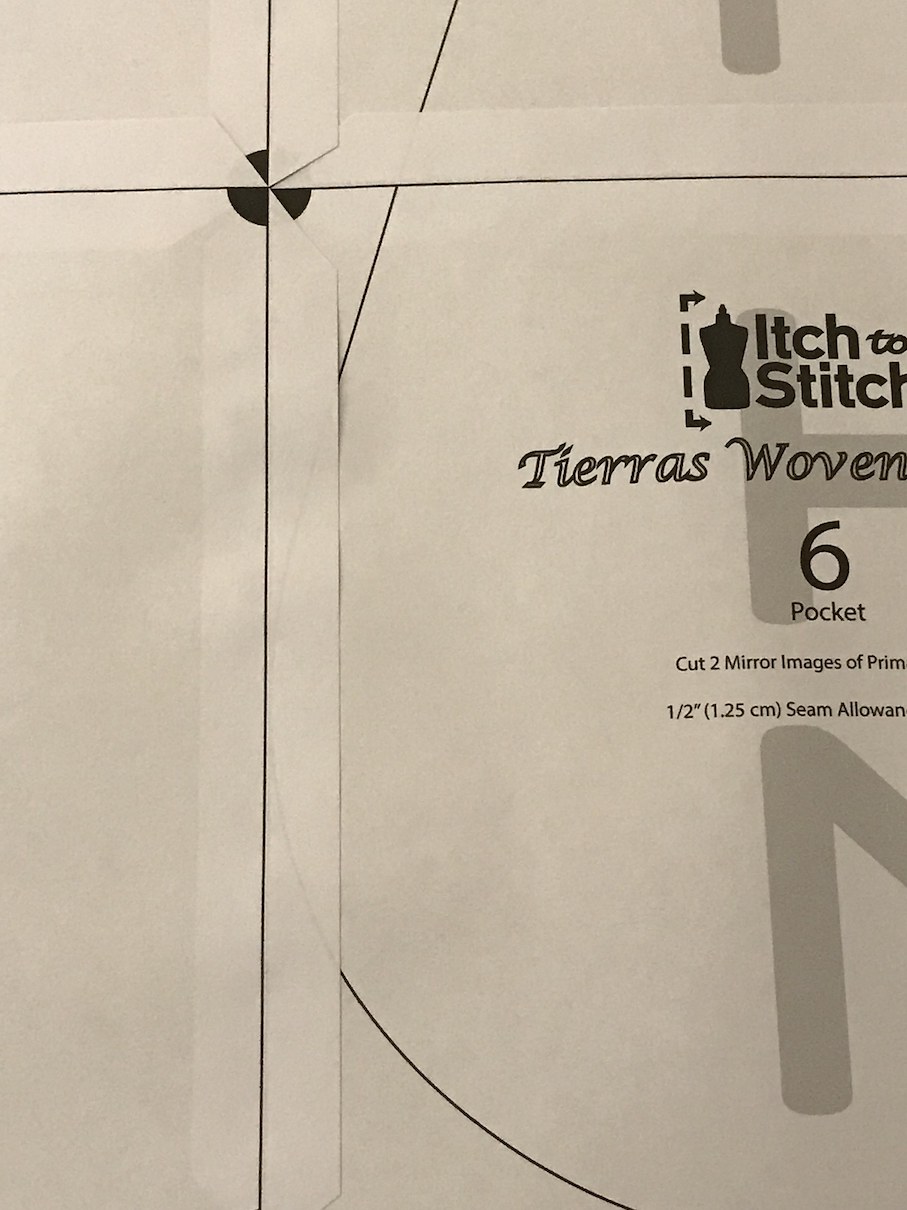
Some other lines might be more covered. For example, this one runs along the margin and it is curvy, so it’s more tricky. But my paper is pretty thin and I can see through it. Even if I can’t see through it on the table, I hold it up with a light behind, and I can see through it.
This could be a deal breaker for some people. Some of you might not mind.
So that’s all the good, bad and ugly of a quicker way to assemble a PDF pattern at home. What do you think? Do you want to give it a try?



WOW, I wish I would have know this a lot sooner. I have several patterns that need putting together and now I can get to it without anymore procrastination. Thank you for the tip.
WOW! Wish I had read this about 2 years ago… I have been having my daughter cut and assemble patterns for me as my hands and knees are now arthritic. All that time wasted cutting off whole sides and taping.. I could have been sewing. ( My daughter always gets her pick out of my fabric stash for pattern assembly for me. She knows she is getting a great deal!) Sad thought is I have been waiting to assemble patterns as I ran out of tape, happy thought is that I have multiple packages of glue sticks and I can start this now.
I am both astonished and delighted. I sit there with a little paper cutter/guillotine and fiddle around, and this is a great method.
I also just love the engaging way you write your commentary – it feels like we are friends, and I just love the sewing community!
Thank you for this, Kennis! Really helpful. 🙂
Hi! You could also save to a flash drive and take (or email) it to a print shop, like Kinko’s, if you have anything like that where you are. This comes from my son who is an artist and often makes large color posters that need to be printed from a large printer.
Thanks so much for this tutorial. Won’t mind putting together PDF patterns so much any more!
great tip…. have been using ‘cut 2 margins’ …. assemble…. using temporary glue stick…… after dis- assembling sheets, can be stored flat….. will try the corners method….
thanx…..
Glue stick is genius—temporary glue stick even more genius!
So glad I’ve come across this method. I’ve not printed out any of my PDFs because I found the task so daunting. Thank you for sharing this method.
Oh my God, you are a diamond. I love this method. You are going to save me so much time doing this.
Glad you were able to find the link- this is the best method I have ever seen for putting PDF’s together.
This exactly what I want to do but I can’t seem to figure out how to draft and format the pattern first.. any advise?
Hi Kate, you mean how to draft a pattern from scratch? I’d recommend taking Suzy Furer’s class on Craftsy. And for digitizing a pattern, I recommend Lauren Dahl’s Pattern Workshop class (you can find it easily by googling). Both are not a matter of a blog post. You will need a month or two of studying to learn them. This blog post is for people who purchase a PDF pattern and are assembling at home. That is the format you’d get when you buy a PDF pattern.
I’ve seen this method a couple of times before, but can’t remember if I ever tried it. I just might have to, although I’m pretty quick at taking two sides off with the paper trimmer gadget thingy.
So clever! I am so excited about trying this. I recently ordered some of this glue and couldn’t remember for what when I got it, so this is solution. I LOVE the less trimming. I’ve found I really like PDF patterns after sewing with flimsy tissue for 40 years. Thank you for your tips.
Hi Jodie, I am glad to hear that you are going to give it a try. I’m also glad to hear that experienced seamstresses like yourself who are used to tissue paper all their lives are using pdf patterns too!
What a marvellous method. No more trimming the margins. I can’t wait to try it.
I use 16 lb paper to print my PDF patterns. It’s thinner and therefore lighter weight and takes up less storage space. Since it’s thinner, it’s easier to trace through. I love this method of joining and will have to give it a try. I also use a glue stick and I like it much better than taping.
Where did you find the 16lb paper? I saw it on Amazon once upon a time. Unfortunately, when I looked again, they were out of stock. They were also much more expensive than regular paper.
I bought it on Amazon and it was $40 for 8 reams of paper. I see that the price has gone up slightly. I remember comparing to the normal 20 lb paper and it was only slightly more expensive. I was willing to pay the extra since I keep my printed out patterns and wanted to save on storage space. Here’s the link to get it today: https://www.amazon.com/dp/B00OL06L6C/ref=sxr_rr_xsim_1?pf_rd_m=ATVPDKIKX0DER&pf_rd_p=3008523062&pd_rd_wg=TeNtn&pf_rd_r=DGVFW67TBAZM8BYJMHHT&pf_rd_s=desktop-rhs-carousels&pf_rd_t=301&pd_rd_i=B00OL06L6C&pd_rd_w=9OduB&pf_rd_i=16+lb+paper&pd_rd_r=9d9f92d1-9516-435c-a3a2-afc03746c10f&ie=UTF8&qid=1511217769&sr=1
Thank you, Rhonda! I didn’t know there was less than 20#.
Also, look at the number of sheets of paper. Just now I was looking at the number of reams: the 20 lb paper has 10 reams and the 16 lb paper only has 8 reams but both boxes have 5000 sheets of paper. The difference per sheet of paper works out to less that a tenth of a penny at Amazon prices today. I also like that since the paper is thinner, less wood pulp is used to make it and therefore is more eco-friendly.
Thank you for your tutorial. I just printed off 46 PDF pages so now I’m not dreading it as much.
Terrific! So much easier than what I was doing!
Thank you Kenni! This is a HUGE time saver 🙂 I have a couple of your patterns yet to be printed out and usually I do that at my copy place (or recently have discovered Pattern Review offers a print service which is basically the same cost for me with shipping as having it printed here!). But for some free patterns that take few pages this would be a fast alternative for sure. I have been cutting off one part and using the single layer left to glue but cutting off just corners would be much faster.
If I have a place to print the large format at a reasonable price, I’d probably do it. But it’s also nice to be able to stay home and not go out to do it.
Thank u, for sharing. Much easier way ?
You are welcome!
This is great! I am totally trying it on my next PDF. Thank you!
Let me know how you like it!
This is great. Sometimes I tape mine on a big glass door so I can easily see through the paper to adjust any lines
It’s good that you have a glass door to work with.
Thank you, thank you. I cannot wait to try this!
You are welcome! You are already a super fast seasmstress; this will make you even faster!
I will definitely try this method. In the past, after I’ve taped everything together, then I trace off the pieces that I want, blending the size changes I need so that I can retain the “master” in case I change sizes myself and want to make new individual pieces. How do you store your taped up master?
I am not very helpful here Carol. I mostly don’t store my paper pattern. I hardly sew them again once I release them. And if I do, I reprint it.
I do a master and trace off as well since I don’t want to waste the paper and ink (and time!) to print, assemble, etc, especially if I might need to adjust sizes. To store the master: I cut the pieces apart and fold them, sharply if I can, and slip them (and the tracings) into a 9×12 envelope. I label the envelope with pattern name, designer, and whether it was a digital file or traced off from a printed pattern, and make any notes about the pattern (fitting issues, sizes I’ve traced off) in the extra space on the envelope. I file the envelopes by type of garment and pattern name in file boxes. I’m really strict about labeling all the traces pieces too as I’ve often got a few things happening at once and organization is a must for me!
Some month ago I learned this methode by watching this YouTube video:
https://m.youtube.com/watch?v=PwjRo7vxLxk
Greetings from germany
Deva
Yes!!! That’s the video. I knew someone must know. Thank you. Let me update the link.
Life saver !!! Thank you
Hhmmmm I think will also give it a try. I’m not to anal about lines
not quite lining up and not seeing everything perfectly. Thanks!
Oh my gosh. So much easier than cutting margins off! This is pure genius! 🙂
I’m going to give this a go!! Thanks so much.
I cut out the pattern pieces w/o attaching the pages together first. Butt the edges together and run my tape dispenser over the seam. I wouldn’t recommend it for a beginner, but if you have a good idea of what completed pattern pieces look like and are careful to keep the pieces stacked in the order they were printed, it goes really fast, and you never have to deal with a huge pattern sheet.
I did that once, as well, and really liked it. Gluing 24 sheets together usually [always] results in big-sheet buckling. Ack! Thanks for the reminder.
Thanks Kennis. I’ll try this on my next project. Certainly far less cutting/trimming than I’ve done in the past.
This is genius!
Never thought of this before. Thanks for the idea! <3
Thanks – sounds quicker than what I have been doing – will give it a try!!
Wow, that will be a game changer. So much easier than trimming the margins on two sides of each. I also use tape and will try glue next time. We can get print stick in the UK too