
Understitching Tutorial: The Sometimes Forgotten Technique
I haven’t been sewing for too many years, but one thing I noticed when I first started was a movement to #topstitchallthethings. I’m telling you, it didn’t matter what group I was in, if you were sewing, you were topstitching. What I later discovered was the lost art and technique of understitching.
Understitching is the process where the seam allowance is sewn down to the lining or facing or your project, but does not include the main fabric/layer. The stitching is visible only on the lining side. This tacking down of the seam allowance keeps everything in place without the need to topstitch. I’ve put together a little tutorial to demonstrate the technique.
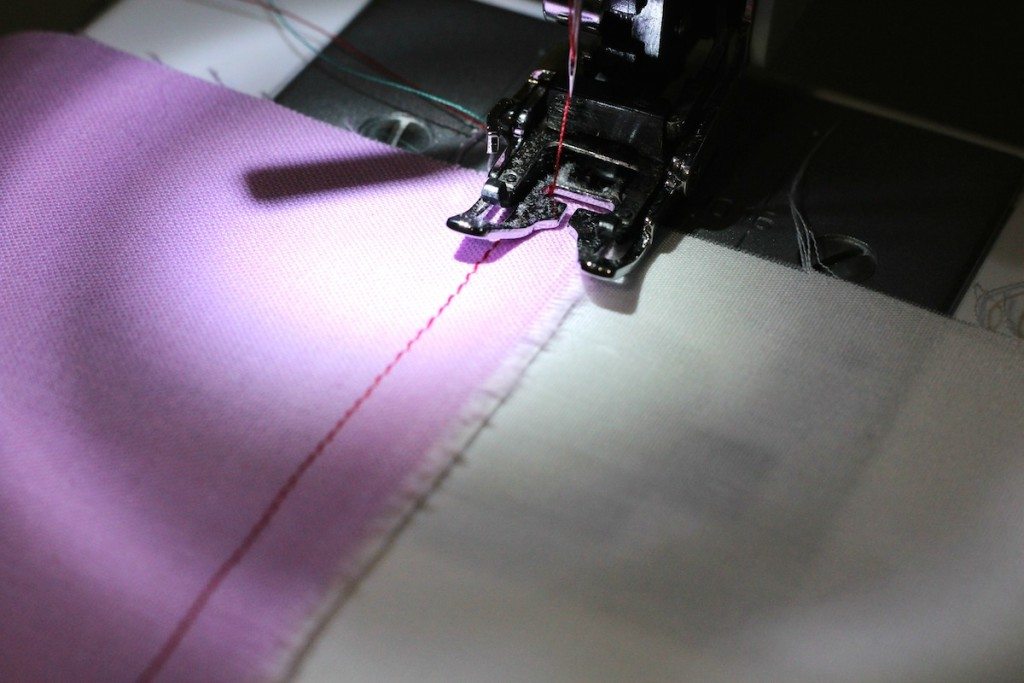
For today’s tutorial I’m using the pink fabric as the main, and the white as the lining. I’ve also selected a clashing red thread to help with visualizing.
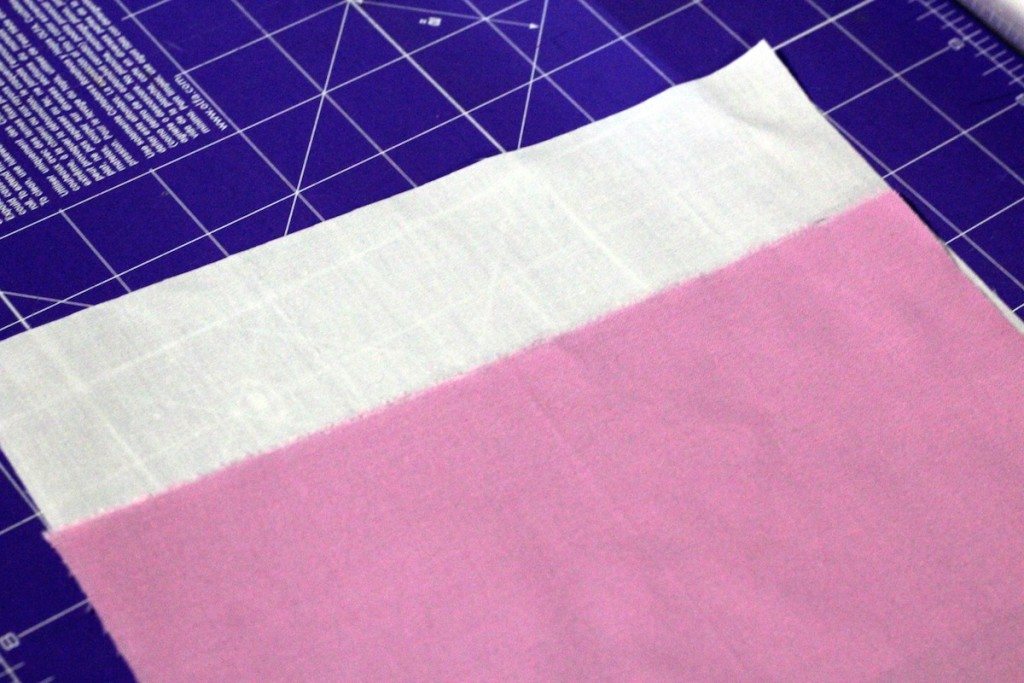
First sew your pieces RST using the desired seam allowance for your pattern.
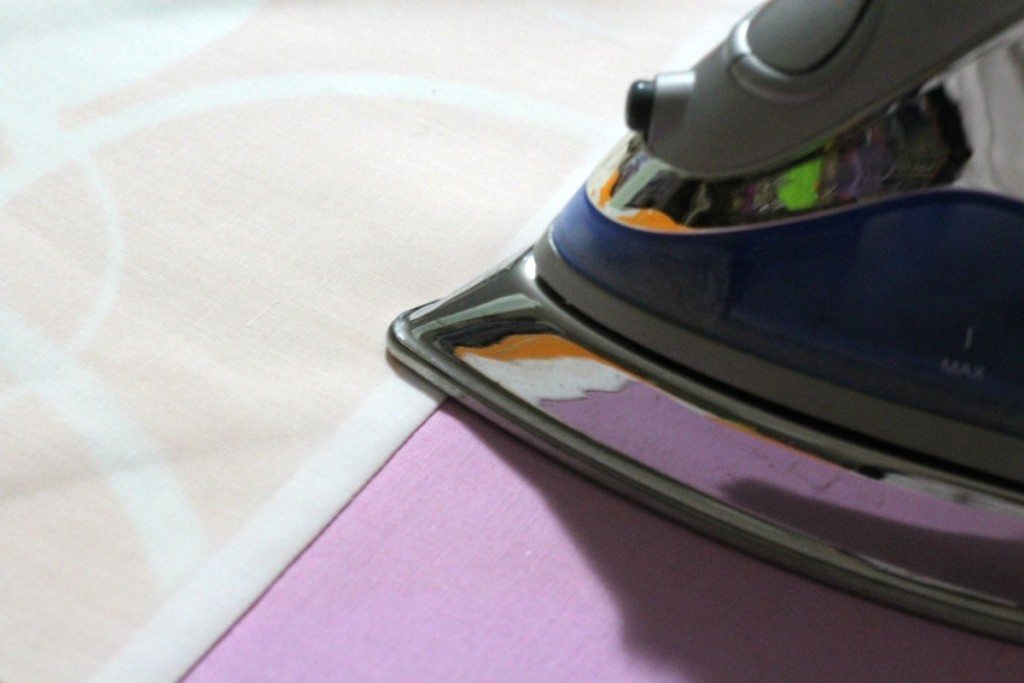
Now head to the iron. It’s time to press. Press the seam allowance towards the lining.
I like to turn my project right side up and press from this side towards the lining. Make sure the seam allowance is still laying against the lining. You can see it peeking through the lining here. After some good pressing, head back to the machine, it’s time to understitch!
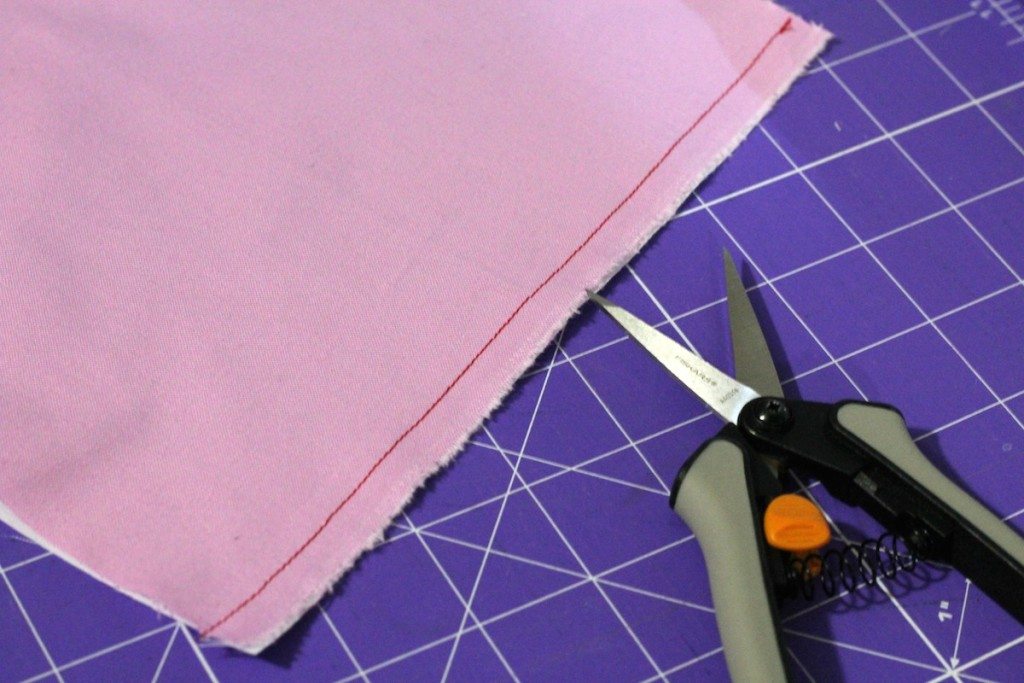
I like to turn my fabric wrong side up to keep from mucking things up, but you can totally stitch from either side. Here we are going to stitch the seam allowance to the lining. This line of stitching should be between 1/16” – 1/8” (1.6 – 3 mm) away from the original seam. I usually lengthen my stitch here too, just like if I was topstitching.
When you are finished, there should now be two rows of stitching visible. The original seam and the seam you just stitched.
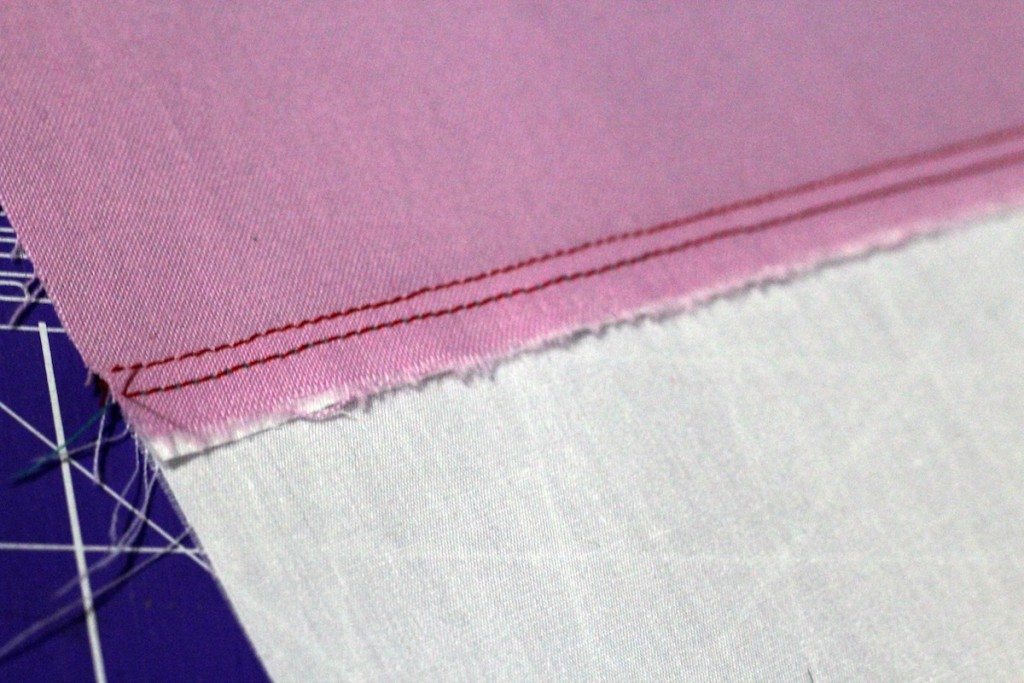
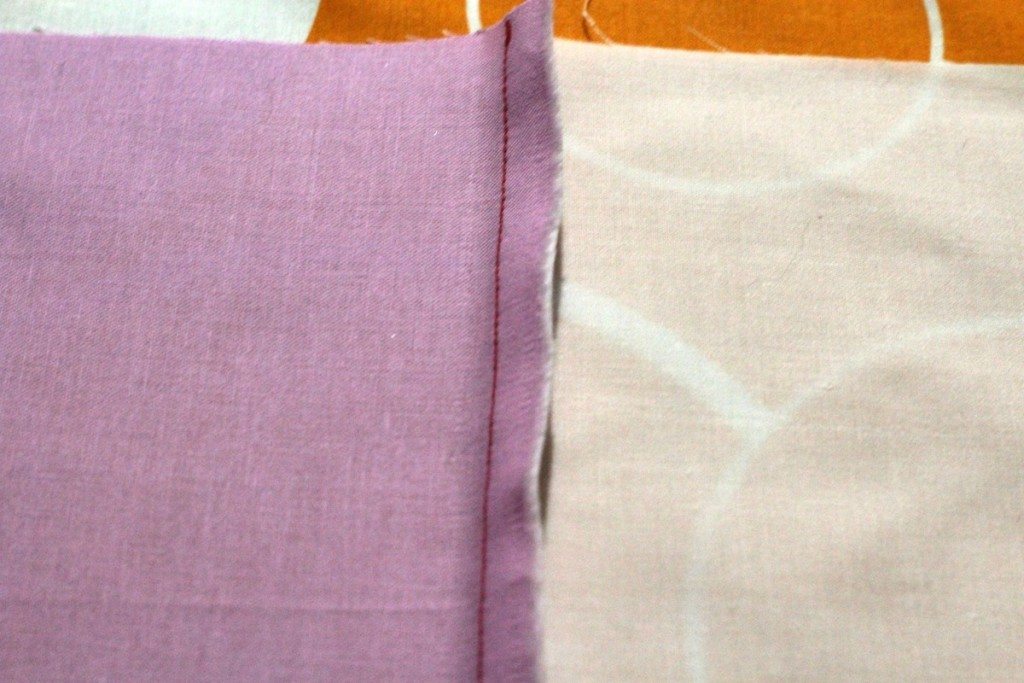
This is the view from the right side of the fabric. You should only see stitching on the lining side.
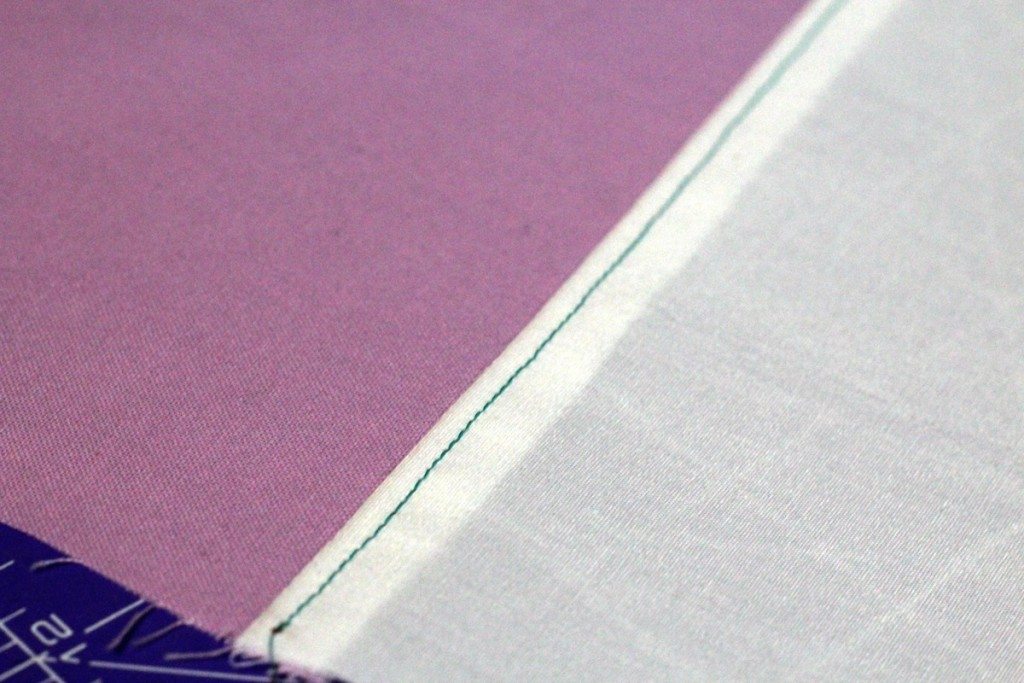
All we have to do now is press one more time. Here is the final view from the right side. Notice how crisp the seam is and that there isn’t any lining trying to peek out. The understitching worked!
Tadah! You can understitch! My favorite thing about understitching is how it makes so many things seem more classy and polished. There is just something about looking at a top and recognizing that it is looking great because of some fabulous understitching.
If you want to take a stab at using this new skill, check out these Itch to Stitch patterns that include understitching in their construction. Be sure to share what you’ve made in the Facebook group or on Instagram!
This post was written for you by Cassy Gobin of Pear Berry Lane Blog. Be sure to check out her other posts here at Itch to Stitch and stop by Pear Berry Lane for a visit too.

Could this be used on a serged seam that has a lining? Could I cover stitch the seam and lining together to keep the seam stretchy? Or maybe a zigzag stitch? I hate my lining showing and I don’t think I sew well enough to coverstitch. This seems like a great option to hold down my lining
Hi Tiffany, if I am understanding you correctly, your lining is stitched to the outer fabric at the armhole or neckline, and you want to use the understitching to prevent the lining from rolling out? I think you could definitely give it a try. I think it will depend on how soft your knit fabric is. For example, in my Kathryn Dress, the neckline has a woven facing (I don’t need it to stretch because the neckline is very wide), which is stitched to the lining. It’s designed that way because understitching alone will not prevent it from rolling out. But in my Davina dress, there’s understitching in the armhole, and that’s sufficient for the lining not to roll out. So I think it will depend on the fabric and the shape of the seam. You don’t know until you give it a try.
If a pattern doesn’t include understitching in the instructions, I have a huffy moment of condescension, then proceed as I know it should be done. I can’t imagine a lining or waistband done any other way.
Understitch all the time!
I’ve had a few patterns recently that have called for topstitching that I just know would look better with understitching, so I completely get your point!