The Glenelly Top & Dress has a square front neckline and raglan sleeves. Because of these features, the narrow shoulder adjustment is different. In this post, I will detail it step-by-step on the Glenelly.
(Here’s the “normal” narrow shoulder adjustment on other patterns if that’s what you are looking for.)
How do you know you need a narrow shoulder adjustment? Basically, if your bra straps show when you wear your Glenelly, it means you need a narrow shoulder adjustment. If you typically make a narrow shoulder adjustment when using Itch to Stitch patterns, you also likely need a narrow shoulder adjustment (but not always…of course, the best way to decide is to make a muslin using fabric that is similar to your final garment’s fabric). You can also measure the top front neckline and compare the measurement to the distance between your bra straps (however because the fabric is stretchy, this method is only an estimation. Again, the best way is to make a muslin.
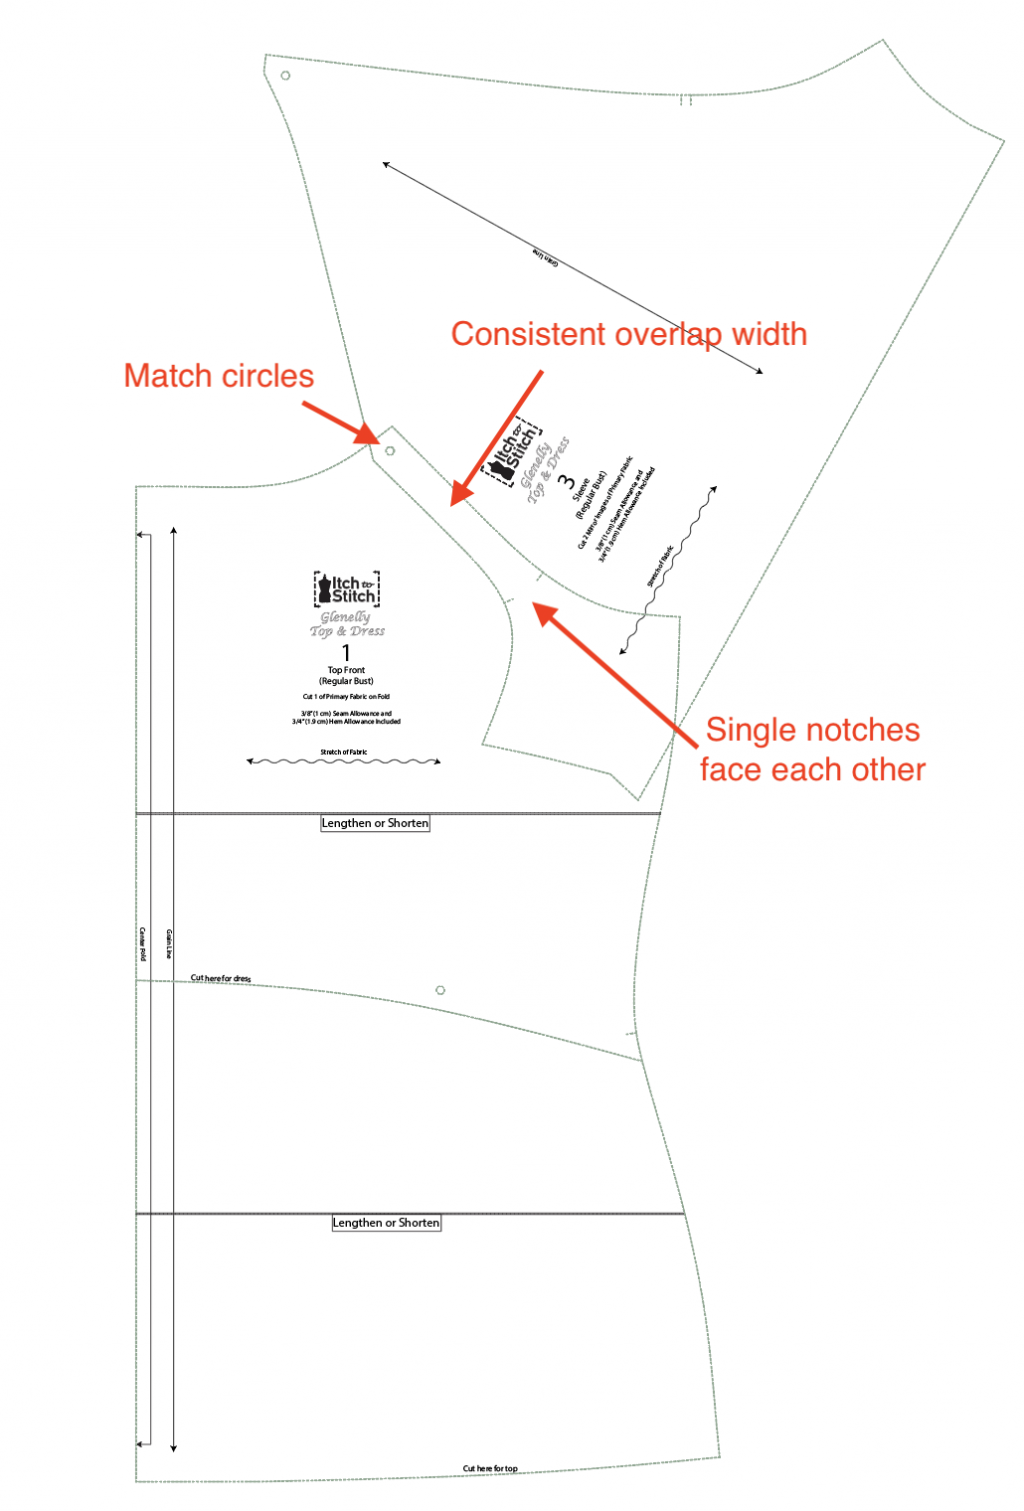
First, overlap the Sleeve (3) onto the Top Front (1), matching the circles that are closest to the single notches (note that there’s another circle on the Sleeve too, but that one is closer to the DOUBLE notch, which is not what we want.) When you overlap the two pieces, pay attention to keep the overlapping width somewhat consistent and the single notches will end up facing each other.
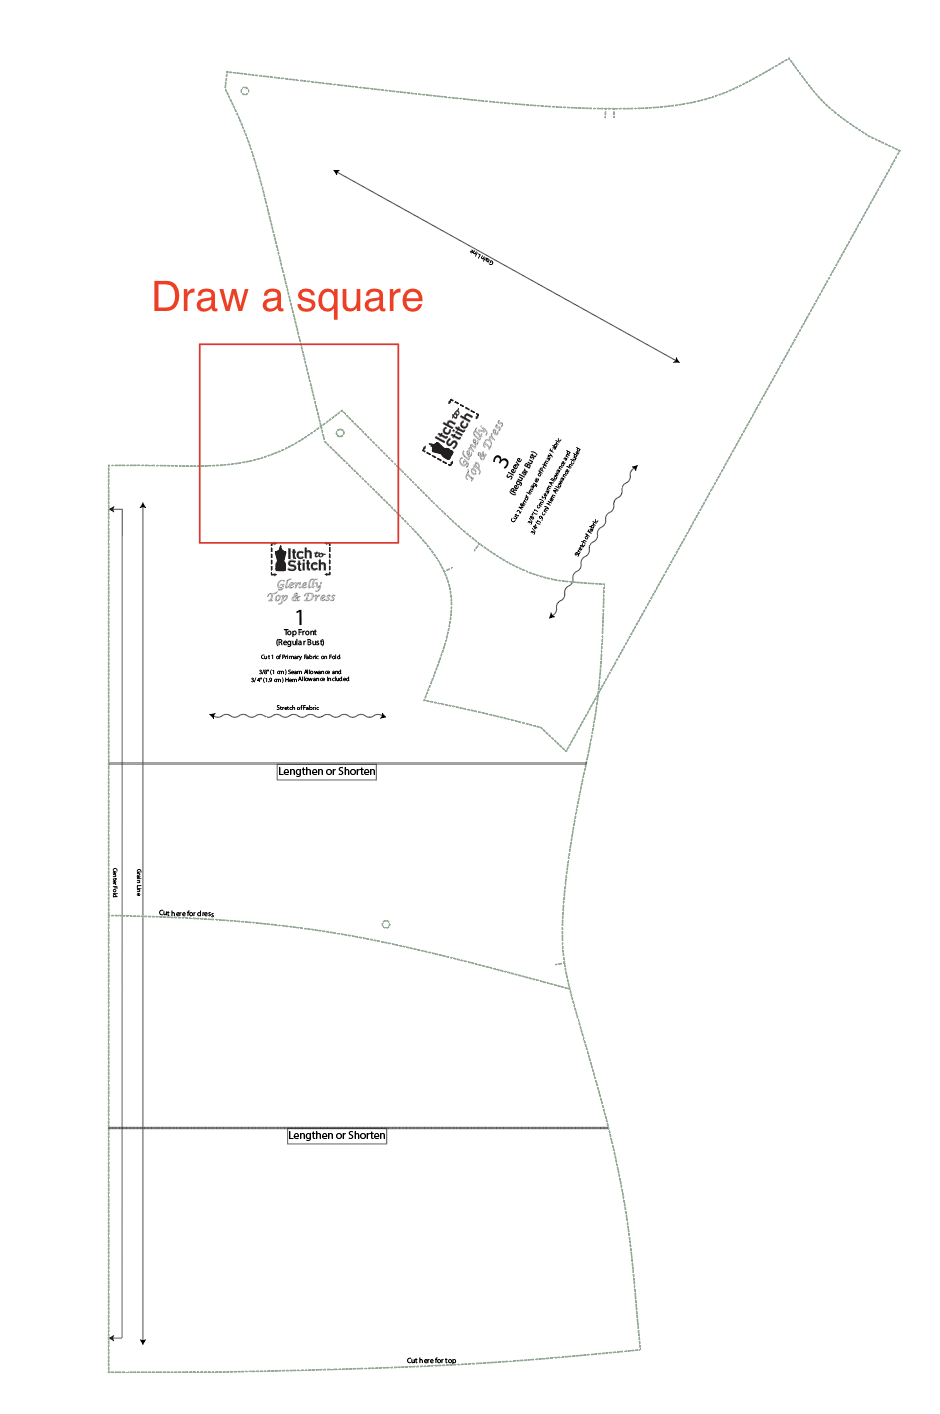
Draw a square over the two pieces. It really doesn’t matter too much how big the square is. Roughly similar to what you see in this illustration below is fine. Now, you see that part of the square actually is not on either piece; that is OK, and you don’t need to put any paper beneath the two pieces just yet. So in reality, all you need to do is to draw part of the square that is on the pieces.
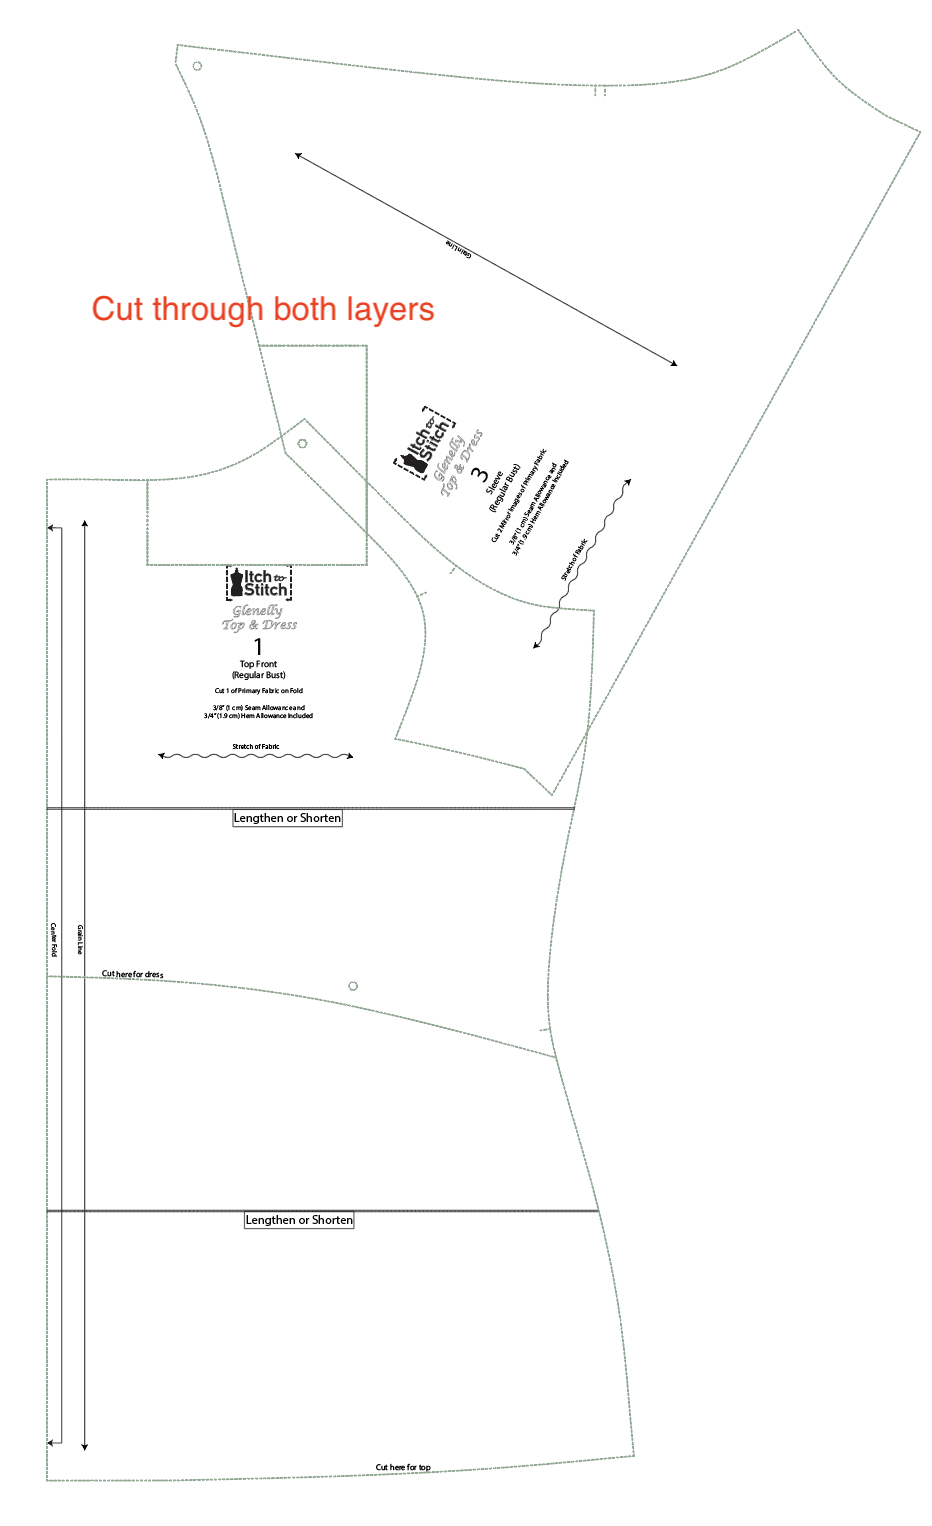
Cut the square out through the pieces.
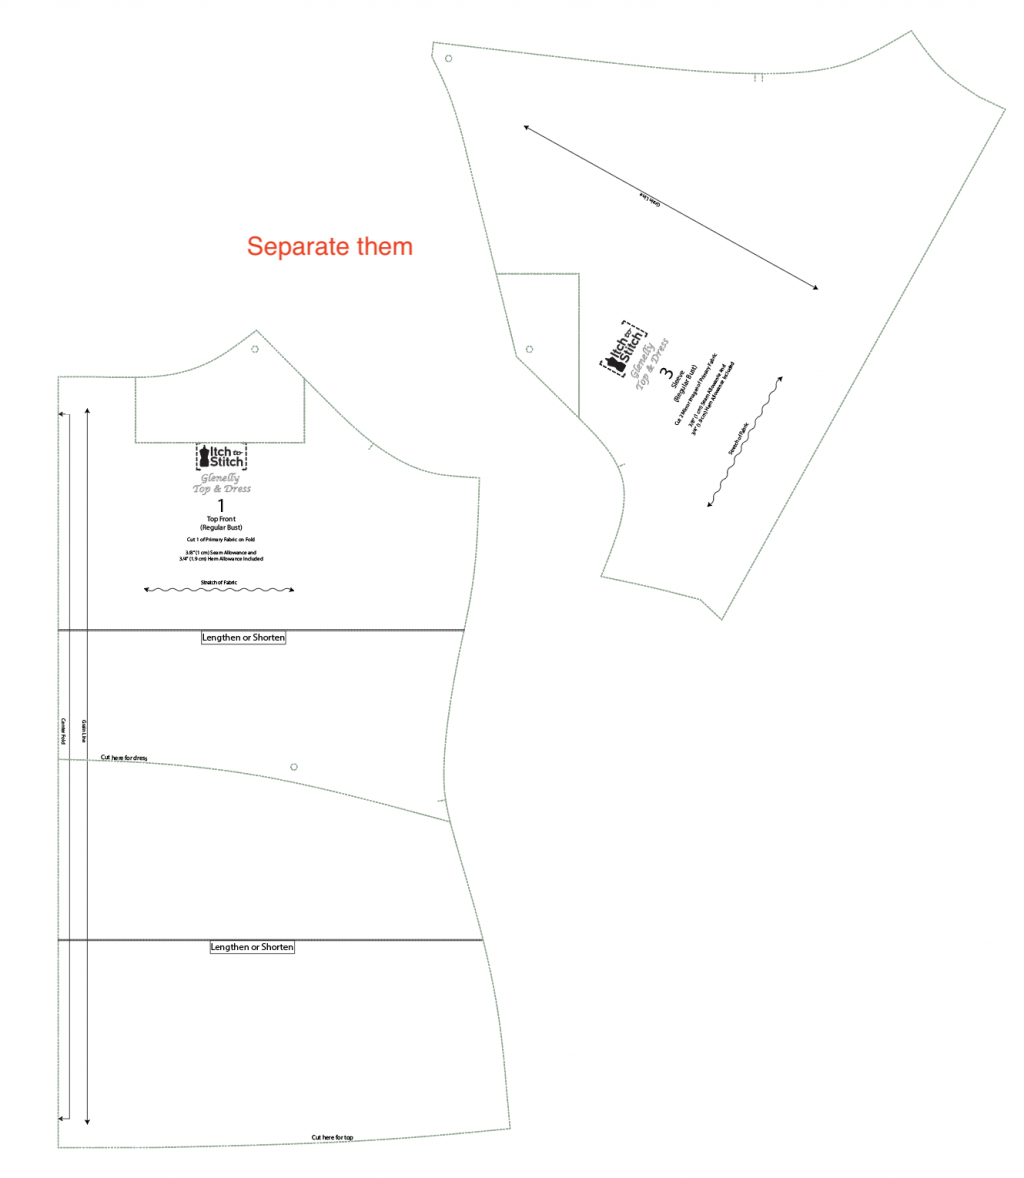
You can now separate the two pattern pieces.
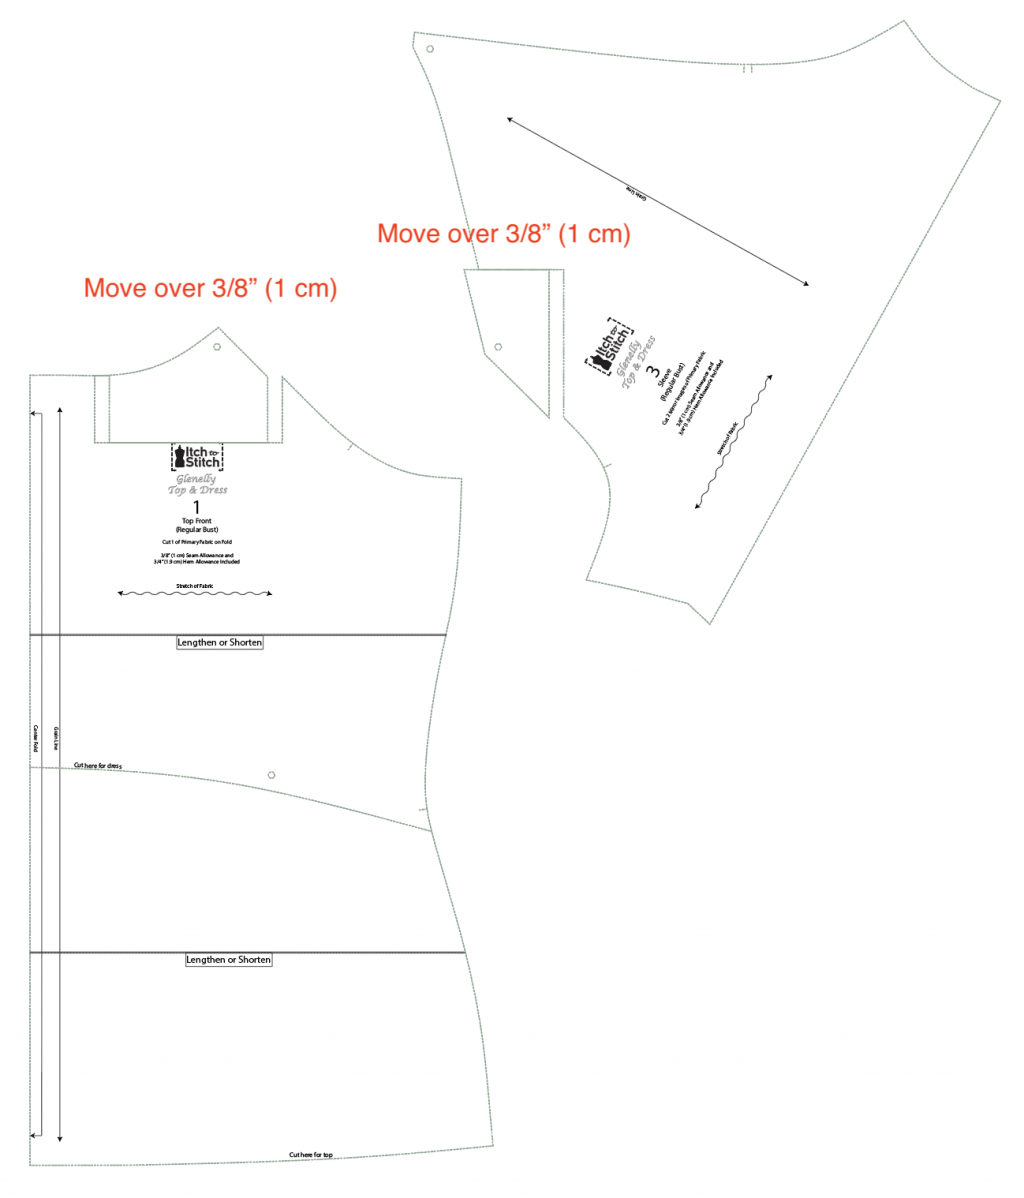
Move the cut-out sections to the left by the amount of narrow shoulder adjustment you need. In my example, I am making a 3/8″ (1 cm) narrow shoulder adjustment. But don’t go too crazy though; I suggest you make an adjustment that would JUST cover the bra straps. The Glenelly’s design (its beauty and elegance) is from the wide front neckline, so if you make too much adjustment, you will lose the esthetic.
Do you see there is a jot on the Top Front piece and two jots on the Sleeve piece? Draw a line that smoothes them out like this. You will need to tape some paper underneath so you can draw the lines.
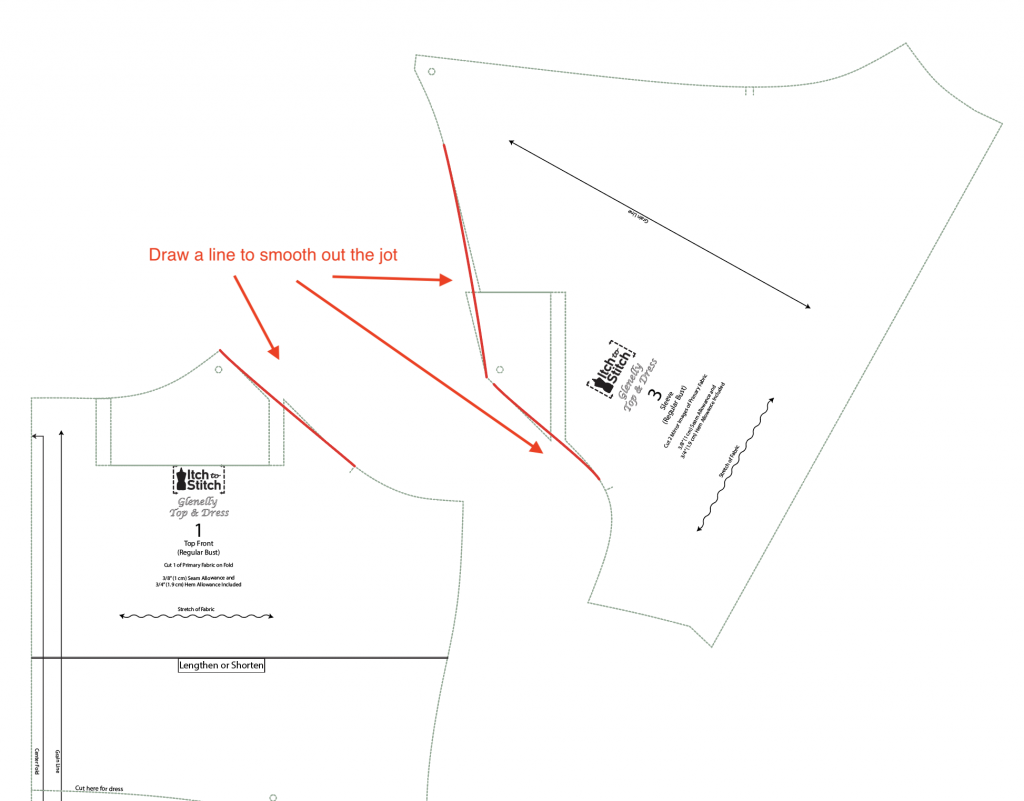
You are done with the Top Front and Sleeve.
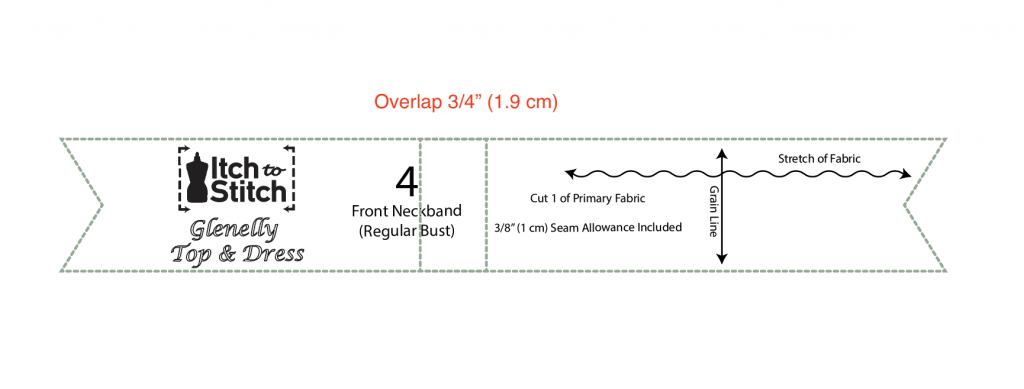
Now you just have to shorten the Front Neckband and Back Neckband. The Front Neckline is for the entire front, so you have to adjust two times the amount. In my example, because I adjust 3/8″ (1 cm) on the Top Front and Sleeve, that means I have to adjust 3/4″ (1.9 cm—or 2 cm…I am just converting 3/4″ to centimeters) on the Front Neckband.
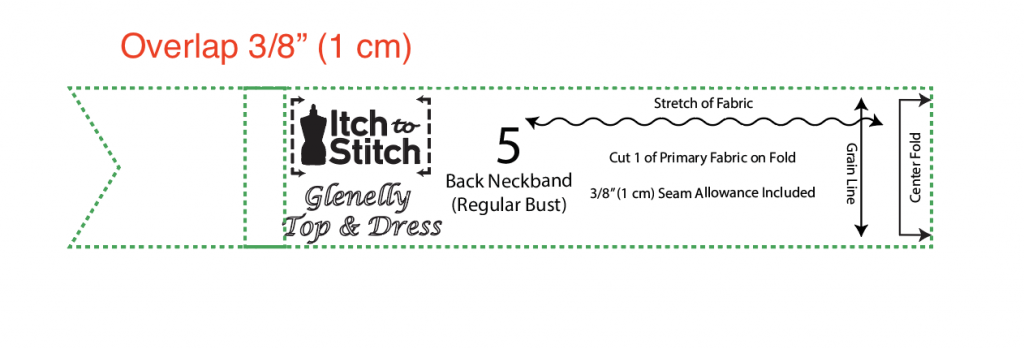
Then on the Back Neckband, you will just adjust by 3/8″ (1 cm) because that piece is cut on the fold.
That’s all you need to make a narrow shoulder adjustment on the Glenelly!

