
How to Finish Bias Binding in the Round
When using a bias tape to finish a garment, you will have to connect the two ends if you are finishing something in the round, such as an armhole, a cuff, or a bottom hem.
A common way to connect the two ends is at an angle. The advantage of this method is that you can reduce bulk at this connection point. It is especially useful if you are binding a thick fabric. One disadvantage I can think of is that the connection seam will be a bit more conspicuous, but really, I don’t think it’s such a big problem. I would, however, still position this connection seam in a spot that is not front and center of the garment if possible. Also, I would position it away from other seams on the garment so you don’t have a seam on a seam to minimize bulk.
Let’s get into the tutorial!
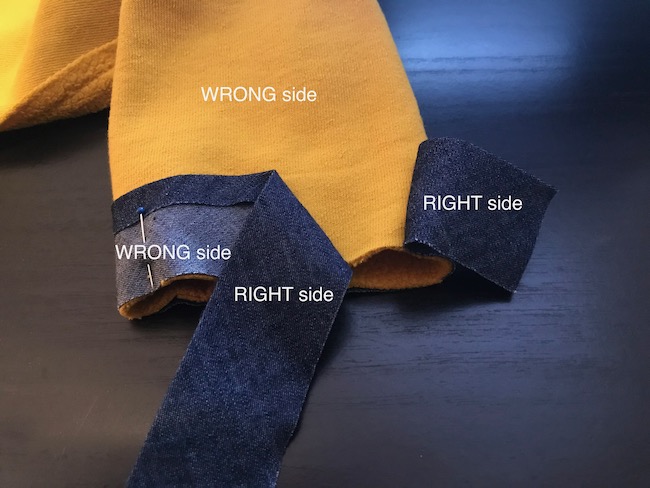
Here I have a piece of bias tape wrapping around the bottom of my sleeve. See that I am putting the right side of the bias binding to the WRONG side of the sleeve. Depending on your pattern, this may or may not be true, but I think it’s a very good method. I have also pressed in the seam allowance at the top long edge of the bias binding.
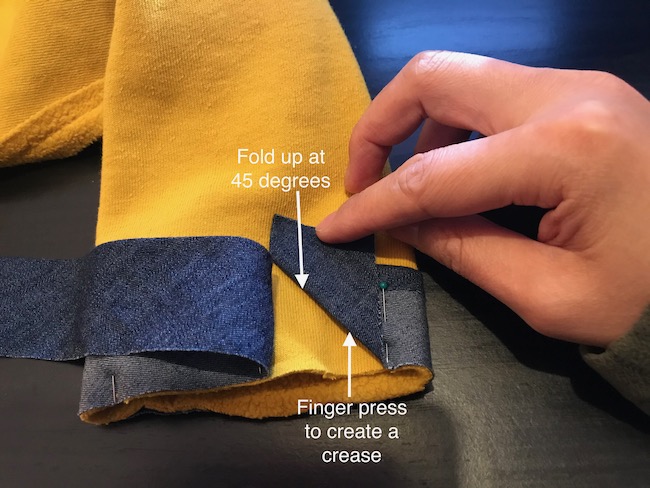
Fold one end of the bias tape up at a 45-degree angle and finger press a crease (it’s much easier if you choose a fabric that can result in a sharp crease when pressed. This means a natural fabric, such as cotton, would be much easier than a synthetic fabric, such as nylon).
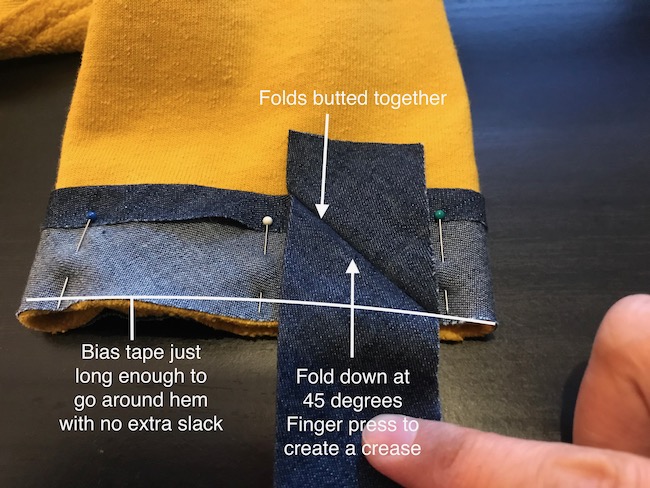
Similarly, fold the other end of the bias tape down at a 45-degree angle. Note that the diagonal folds are now butted against each other. Also, note that the bias tape should not have any slack—it should be the same length as the circumference of the hem.
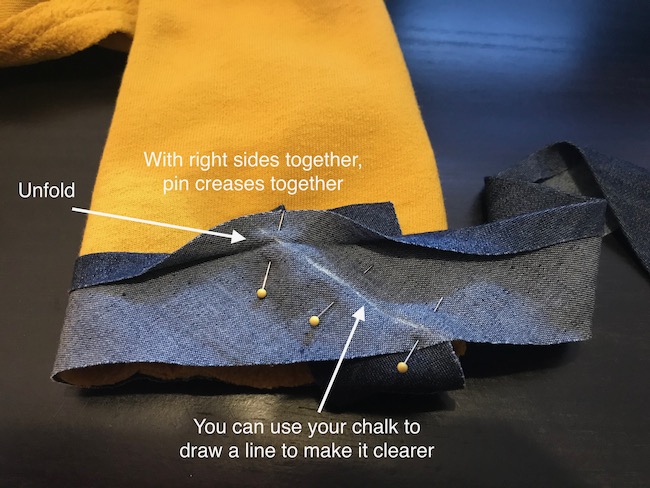
Now with the right sides together, overlap the creases and pin in place. As for the other pins that were on the sleeve, you can remove a few of them to make it easier to maneuver. I use my chalk to draw on the crease so it’s easier for me to see. Note that I unfold the seam allowance on the bias tape that I pressed earlier.
Stitch on the crease through both layers of the bias tape.

Now I can cut off the excess bias tape and press the seam open. I leave about 1/4″ (6 mm) of seam allowance on each side of the seam.
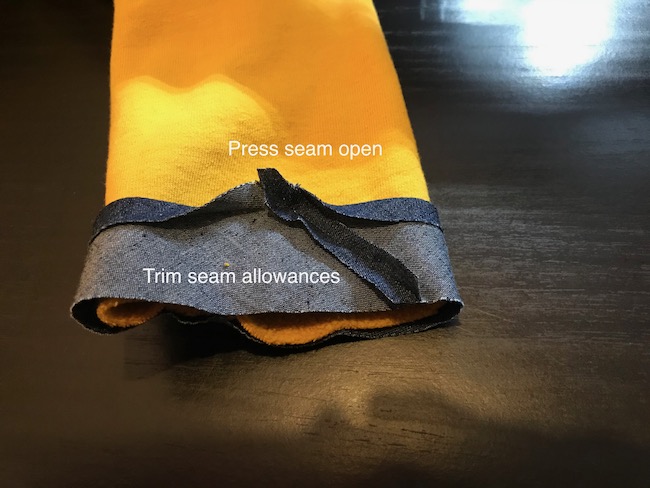
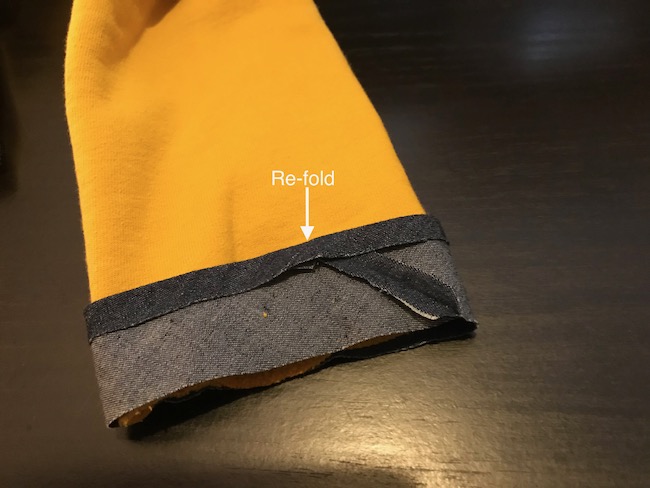
I also re-fold the top seam allowance.
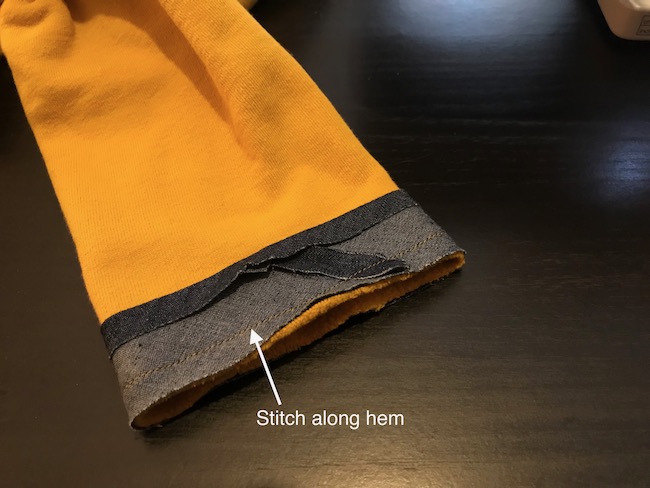
Stitch the bias tape to the sleeve hem all the way around.
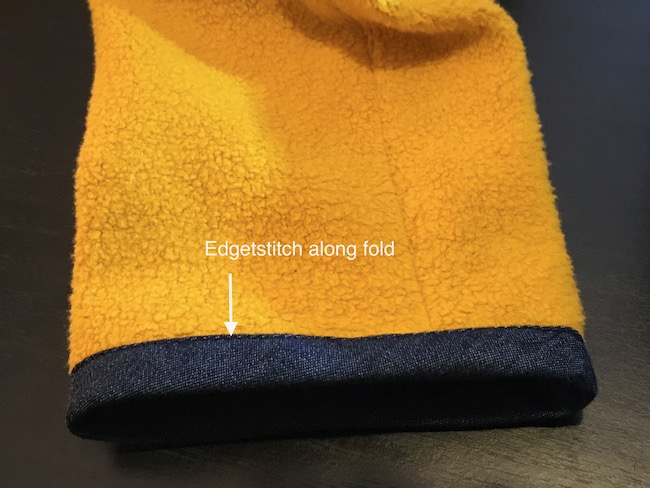
Press the bias tape toward the seam allowances, and continue to wrap it over the edge. Place the fold on the bias tape to slightly cover the stitch line. Note that in this photo, I already turned the sleeve right side out.
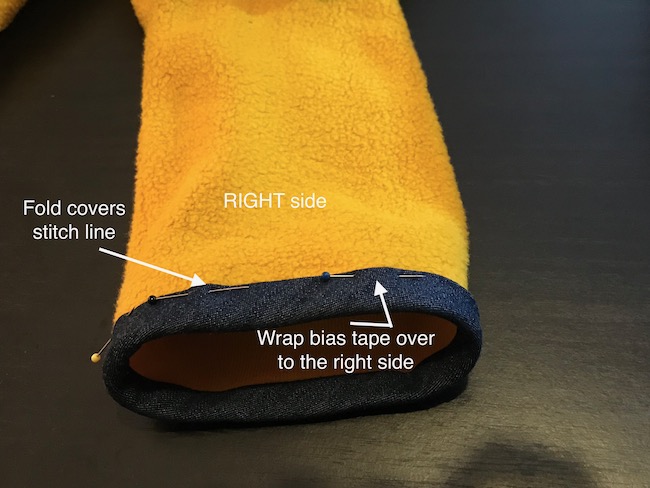
Now edgestitch along the fold all the way around. Yes, I edgestitch very close to the fold. I’d say about 1/16″ (1.6 mm). But if you have to stitch 1/8″ (3 mm), I think it’s perfectly fine.
There you have it! That’s how you finish bias binding in the round!

I struggle with this join in binding my quilts. Am so excited to use this method. Will make my binding finish so much less a puzzle for me! Thank you for providing these useful tutorials 💕
Good day Kennis. This is very neat. Do you maybe have a tutorial on how you do the bais binding on the Kauai Top?
Thank you.
Magda
Hi Donata, the tutorial is included with the pattern. The Kauai is in fact finished with a bias binding.
Guys – this technique is easily explained with “Quilt Binding techniques”, where you measure the width of the strip, sew the two edges together to join the fabric ends, and voila your binding is perfect. just google quilt binding techniques MSQ has a great tutorial
Definitely going to give this a try. I need all the help I can get with bias binding finishing. Thanks for the tutorial 💕🧵
I can’t wait to try this out! For years I have been applying bias edgings from the garment front, and never gave one thought to doing it the way you do. I guess its the way we were taught in the past that makes us sewers not always question why we do things the way we do Hahaha!