
Fearless Set-in Sleeve
Not to brag or anything, but to me, sewing a set-in sleeve is not much more difficult than sewing a sleeve flat. I know that many don’t share my sentiment; I have seen sewists going great length avoiding sewing anything in the round, even when the end result would be better otherwise.
Knowledge is power. The first step to overcome fear is to learn more, and you don’t truly learn without understanding. That’s why I’d like to discuss some aspects of setting in a sleeve.
Sleeve Cap Ease
Woven Garments
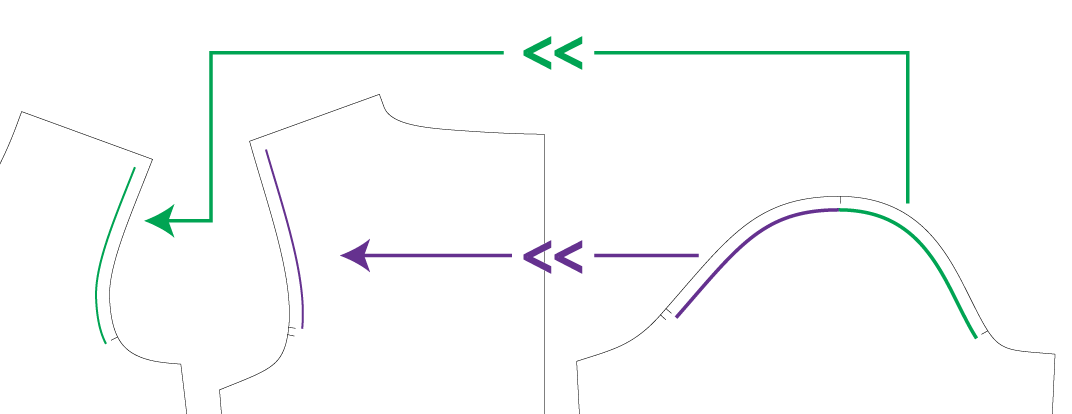
Most of the patterns for woven garments have sleeve cap ease. That is, the length of the seam on the sleeve between the front and back notches is longer than the length on the armhole. You can see in the illustration below – the green line on the sleeve, which is the front sleeve cap, should be longer than the green line on the front, which is the front armhole. The purple line on the sleeve, which is the back sleeve cap, should be longer than the purple line on the back, which is the back armhole.
There are debates whether this sleeve cap ease is needed, even among the most experienced pattern makers in the industry. But that’s beyond the point of this post. Most of the sewing patterns for woven garments you encounter have this ease.
The amount of sleeve cap ease is not absolute. Some have more and some have less. The sleeve cap ease on a shirt could be 1″ (2.5 cm), and the sleeve cap ease on a coat could be 2″ (5 cm). It really depends. And if you have loose-fitting dropped shoulder style, there may not be any sleeve cap ease at all.
To tell you a secret, if I need a larger sleeve due to a large bicep, I sometimes could up a size on the sleeve while using the armhole of a smaller size. I usually am able to ease the extra in without any drama.
If you find a pattern that requires you to ease 3″+ (7.5 cm), then be very suspicious (unless it’s a gathered or pleated sleeve cap). Sometimes it’s not your fault when a set-in sleeve doesn’t turn out.
Knit Garments
A lot of knit garments have minimal or no sleeve cap ease, especially loose-fitting one (think men’s T shirts). Typically in knit garments, the sleeves are sewn in flat (as opposed to sewing in the round, a.k.a. set in sleeve), although there are circumstances that require you to set in the sleeve anyway (for example, in Davina Dress, the sleeves are set in because of some design elements preventing it from being sewn flat.)
Setting in sleeve on a knit garment without having to deal with the sleeve cap ease is a good starting point to those who fear set-in sleeves.
The armhole should not be larger than the sleeve. I suppose it could happen on a gathered armhole with a non-gathered sleeve, but that hasn’t been a style that I see often. If your pattern has such thing going on, be very suspicious, and try to figure out why before you proceed before potentially wasting your time and fabric.
Seam Lines vs. Cut Lines
Another topic I’d like to touch upon is matching seam lines vs. matching cut lines. In sewing, you should be matching the seam lines anyway no matter which seam you are sewing. For example, if you are sewing a princess seam with pretty acute curves, matching the cut lines, instead of the seam lines, would give you less than ideal result. You would be essentially shifting the pieces and then wondering why there is extra fabric at the end.
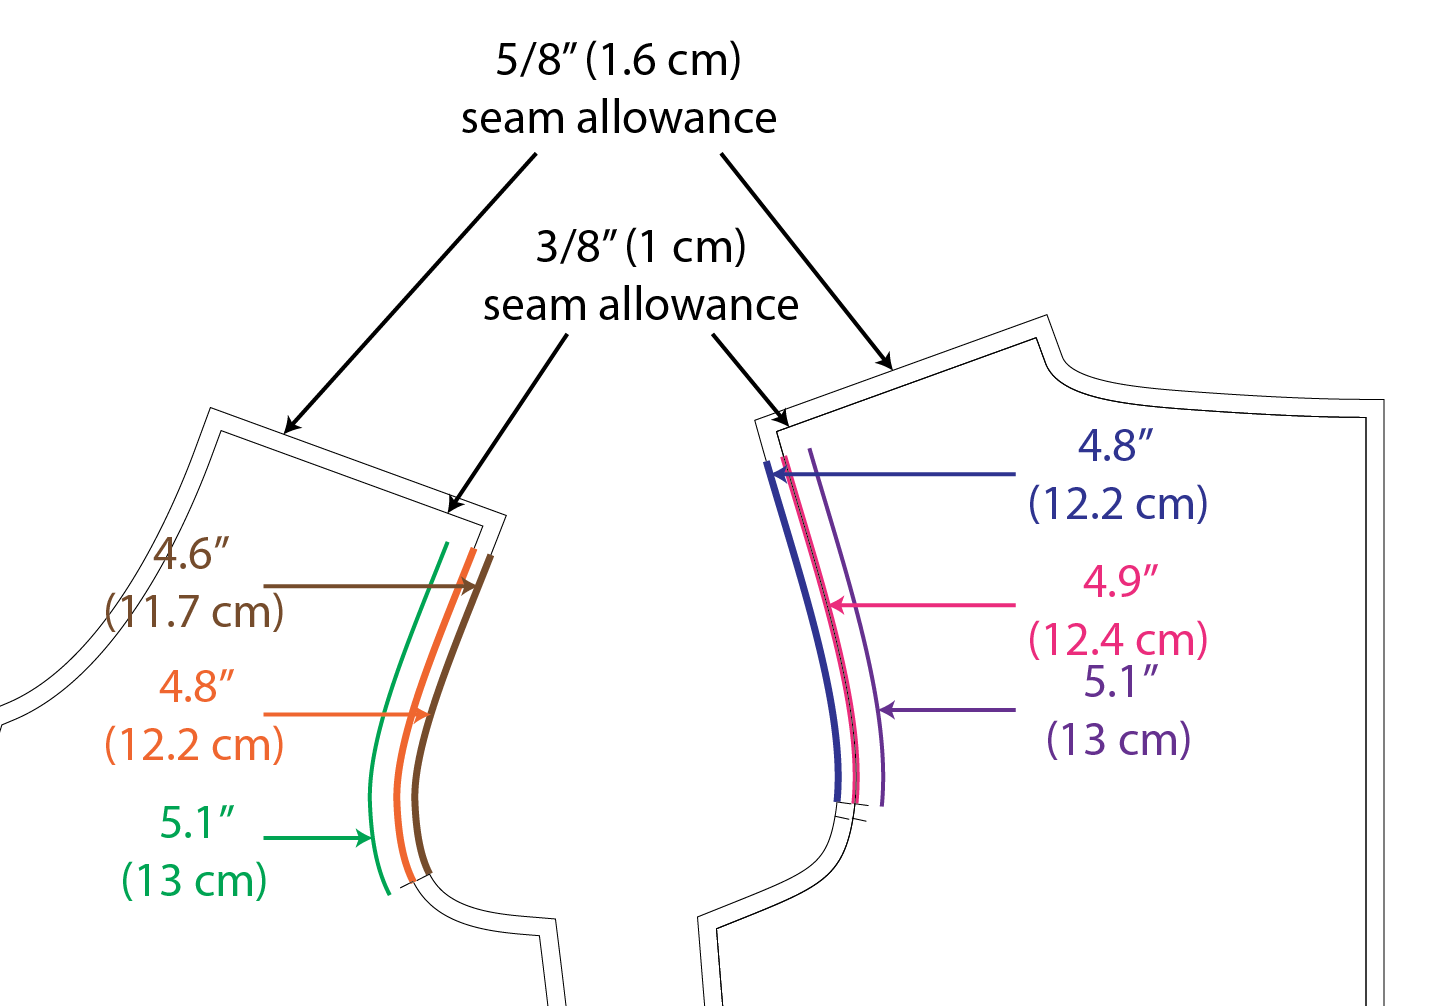
This is as important when you are setting in a sleeve. Notice in the illustration above, the purple and green lines are not at the edges? That is not a coincidence. I did that on purpose.
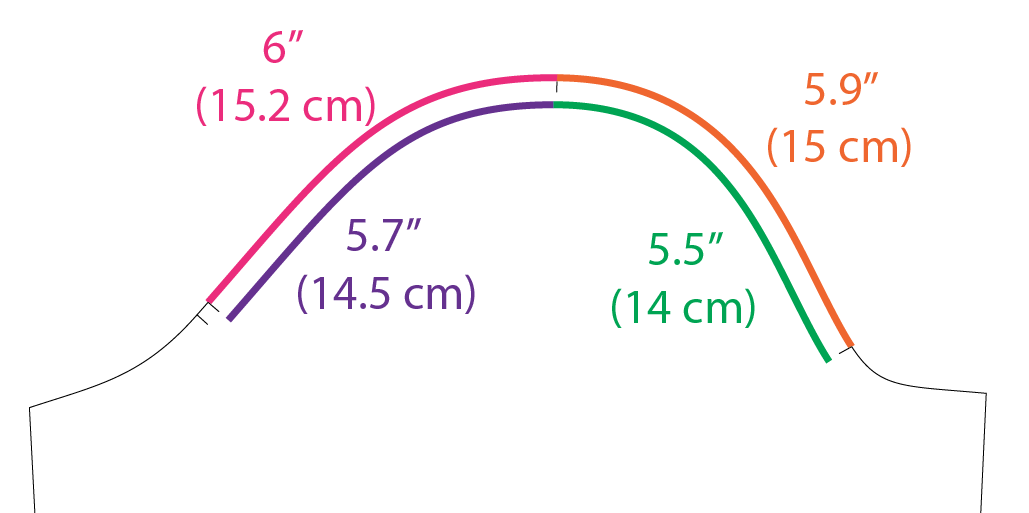
To illustrate this point, showing you some actual numbers is the best way. You see that the back sleeve cap is 6″ (15.2 cm) at the cut edge vs. 5.7″ (14.5 cm) at the seam line? For the front sleeve cap, it is 5.9″ (15 cm) at the edge, vs. 5.5″ (14 cm) at the seam line. For those who tend to glaze over numbers, the point is that the cut lines are LONGER than the seam lines.
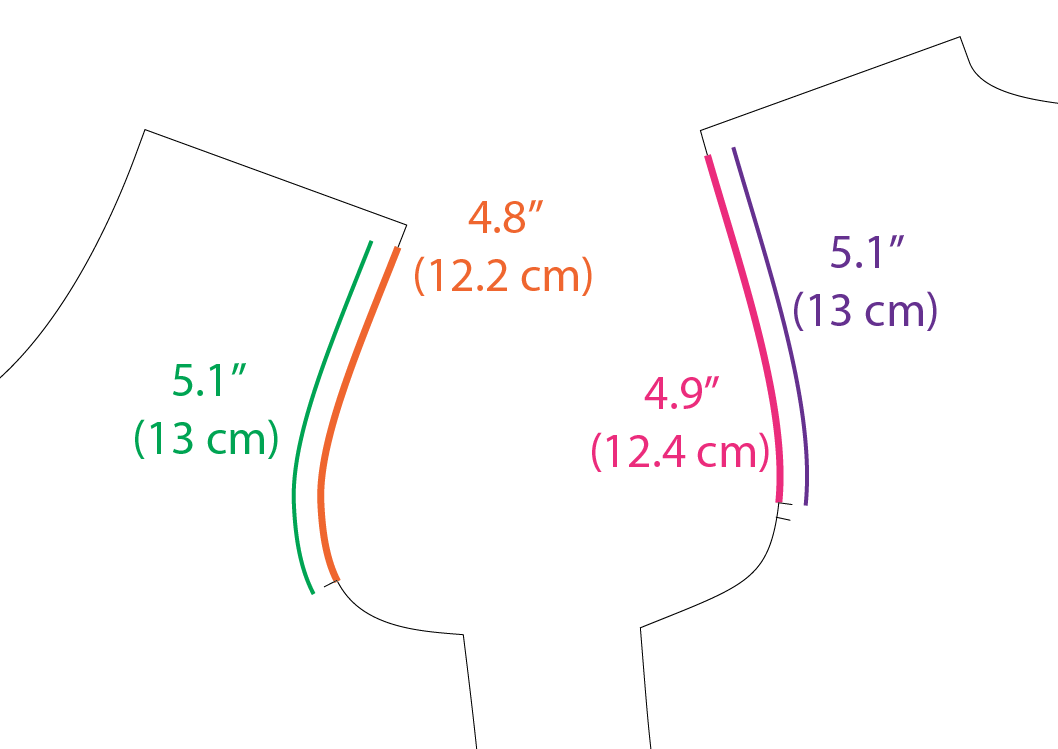
This may not be enough to drive the point home until you see the armholes. The front armhole (above the notch) is 4.8″ (12.2 cm) at the cut line, vs. 5.1″ (13 cm) at the seam line, and the back armhole is 4.9 (12.4 cm) at the cut line, vs. 5.1″ (13 cm) at the seam line. If it hasn’t clicked yet, let me point that out: the cut lines are SHORTER than the seam lines. A moment ago, on the sleeve, the cut lines are LONGER than the seam lines.
You see how matching cut lines will make your sewing life miserable? Let me beat the dead horse and go one step further. The seam allowance I used in the illustrations is 3/8″ (1 cm). Let’s say my pattern has a 5/8″ (1.6 cm), since the big pattern companies use this seam allowance. You see that with the 5/8″ (1.6 cm) seam allowance, the cut lines are even longer on the sleeve.
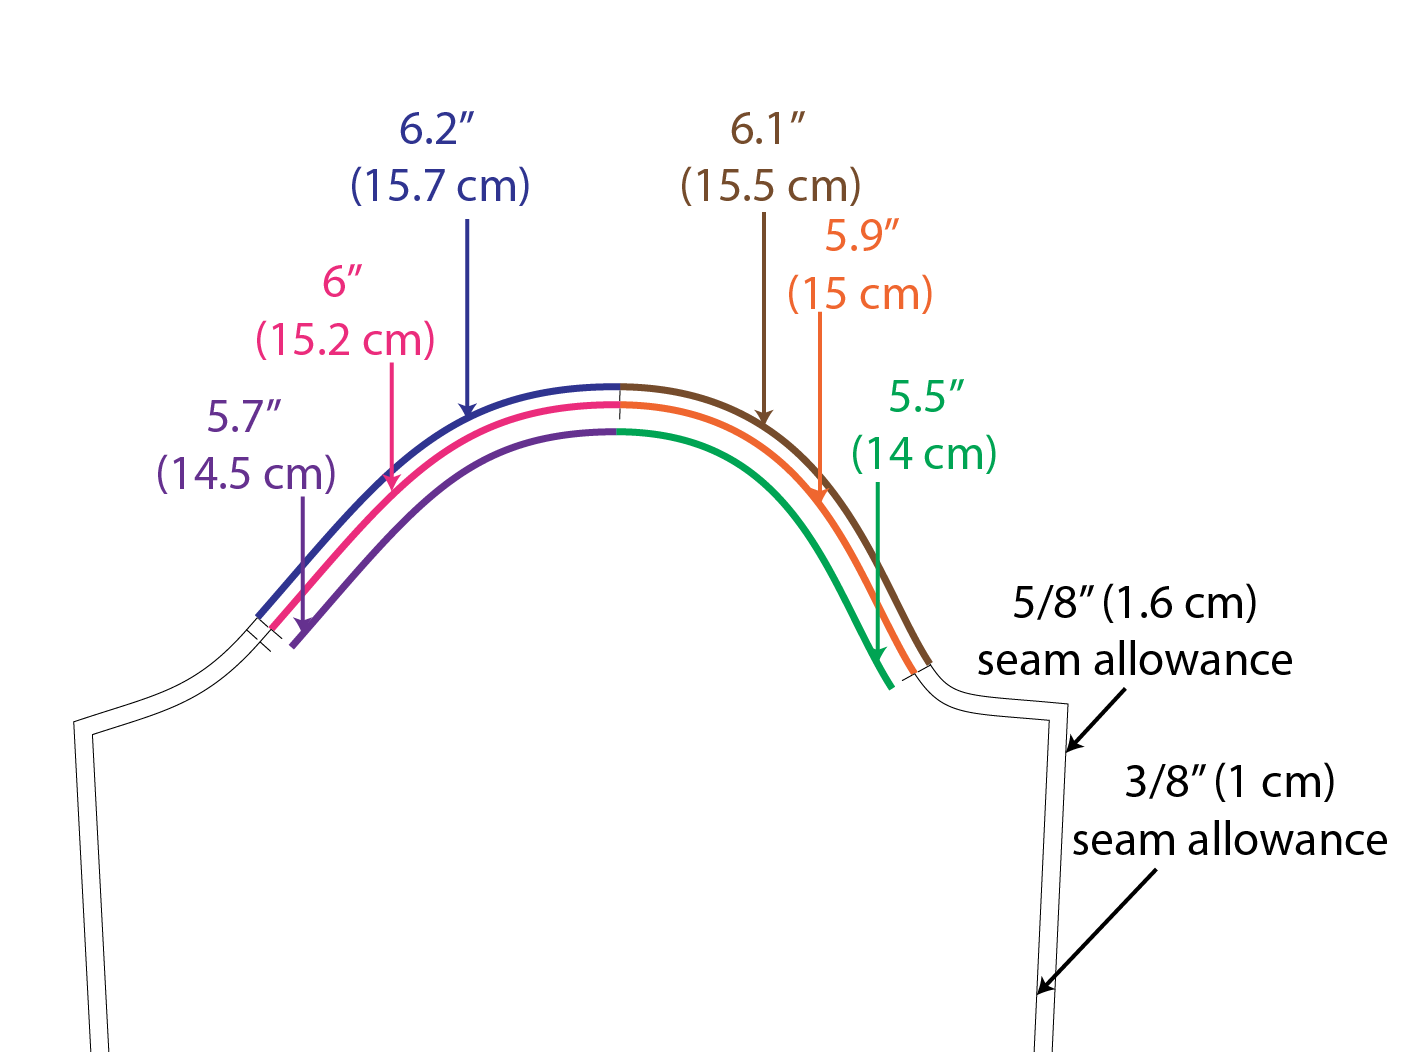
And you might already have guessed it; with a 5/8 (1.6 cm) seam allowance, the cut lines are even shorter on the front and back armholes!
If you don’t disregard the seam allowance and match the seam lines, with a bigger seam allowance, you would feel that it’s extra hard to ease in the sleeve.
Fabric
Some fabrics are easier to ease than others. I already mentioned that knit is easier, not only because there is minimal to no sleeve cap ease, but it’s also because of the stretch. You can stretch the fabric ever so slightly and voila, the seam lines are matched effortlessly.
Natural fibers are also easier to ease. Cotton, wool and linen, for example, tend to be submissive when it comes to pucker-free easing, whether in set-in sleeve, or other easing exercises (like in princess seams).
Fabric with some texture also work well. If you have a bouclé or a tweed, the chance is that you won’t even notice if there is any pucker.
Don’t even think about using a polyester broadcloth or vinyl. Or use it and learn the lesson of how to maximize puckers.
How to Start
If you are among the group who fear set-in sleeve, I suggest you start here:
- Set in sleeves for knit garments. Davina Dress has set-in sleeve and it’s a knit, but you can also set in any sleeve for a T-shirt even though the instructions ask you to sew the sleeve flat. I promise nothing horrible would happen.
- Set in sleeves that has gathers in the sleeve cap. This is very easy too.
- Use a fabric with natural fiber and with some texture.
- Set in sleeves for a shirt; shirts have less sleeve cap ease than, let’s say, a coat.
Let’s Do It!
There are a million and one tutorials out there for set-in sleeves, but perhaps I could add some extra color and cement the process in your head? There are also many different methods; below is the simplest and most common method. You may see easing using a sleeve head, with just pins or with steam. I also ease just using my finger to stop the feed while sewing the easing stitch. But I am not going to go there this time.
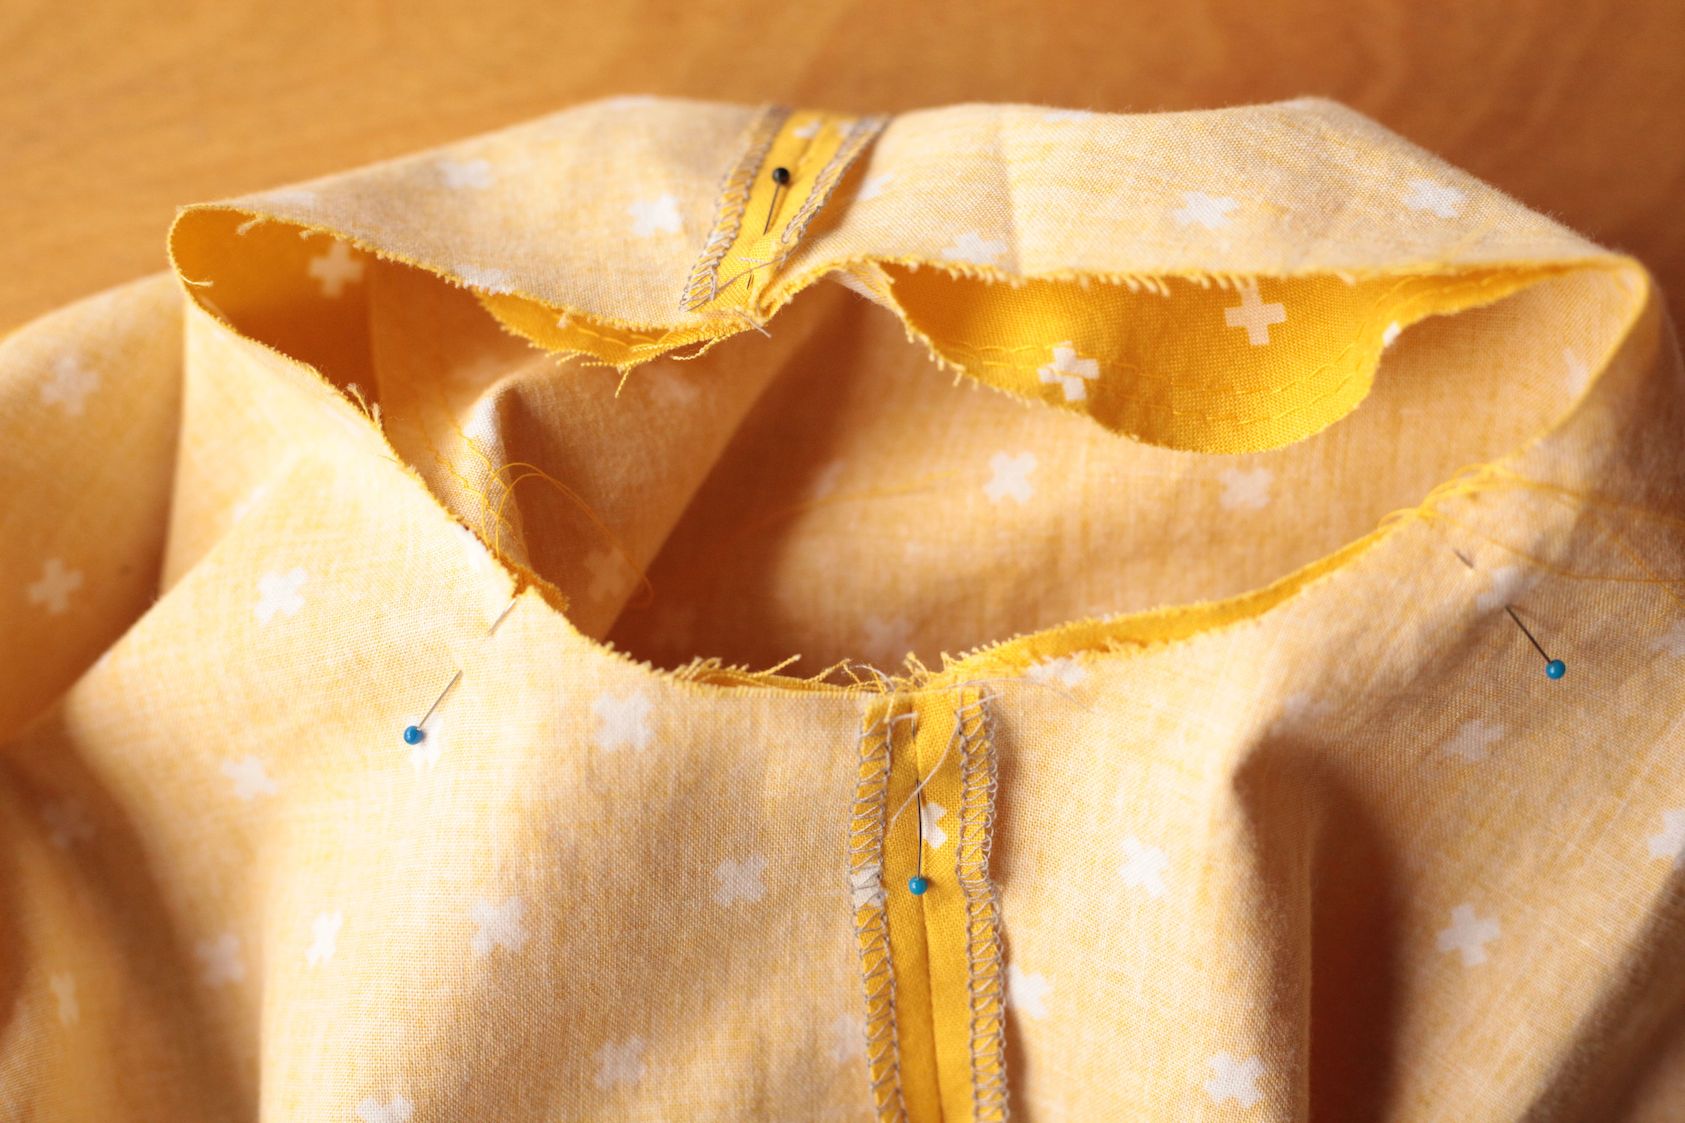
First and foremost, mark the notches on the sleeve and on the armhole. Don’t skip this step; it’s important. Usually there’s one notch at the top that matches the shoulder seam, one notch that indicates the front of the sleeve, and one double notch that indicates the back of the sleeve. You see that I do a little snip. Snipping within the seam allowance never caused any trouble for me, especially when I serge finish the raw edges. But it won’t hurt my feelings if you don’t want to snip. Just mark them however you like and are comfortable with.
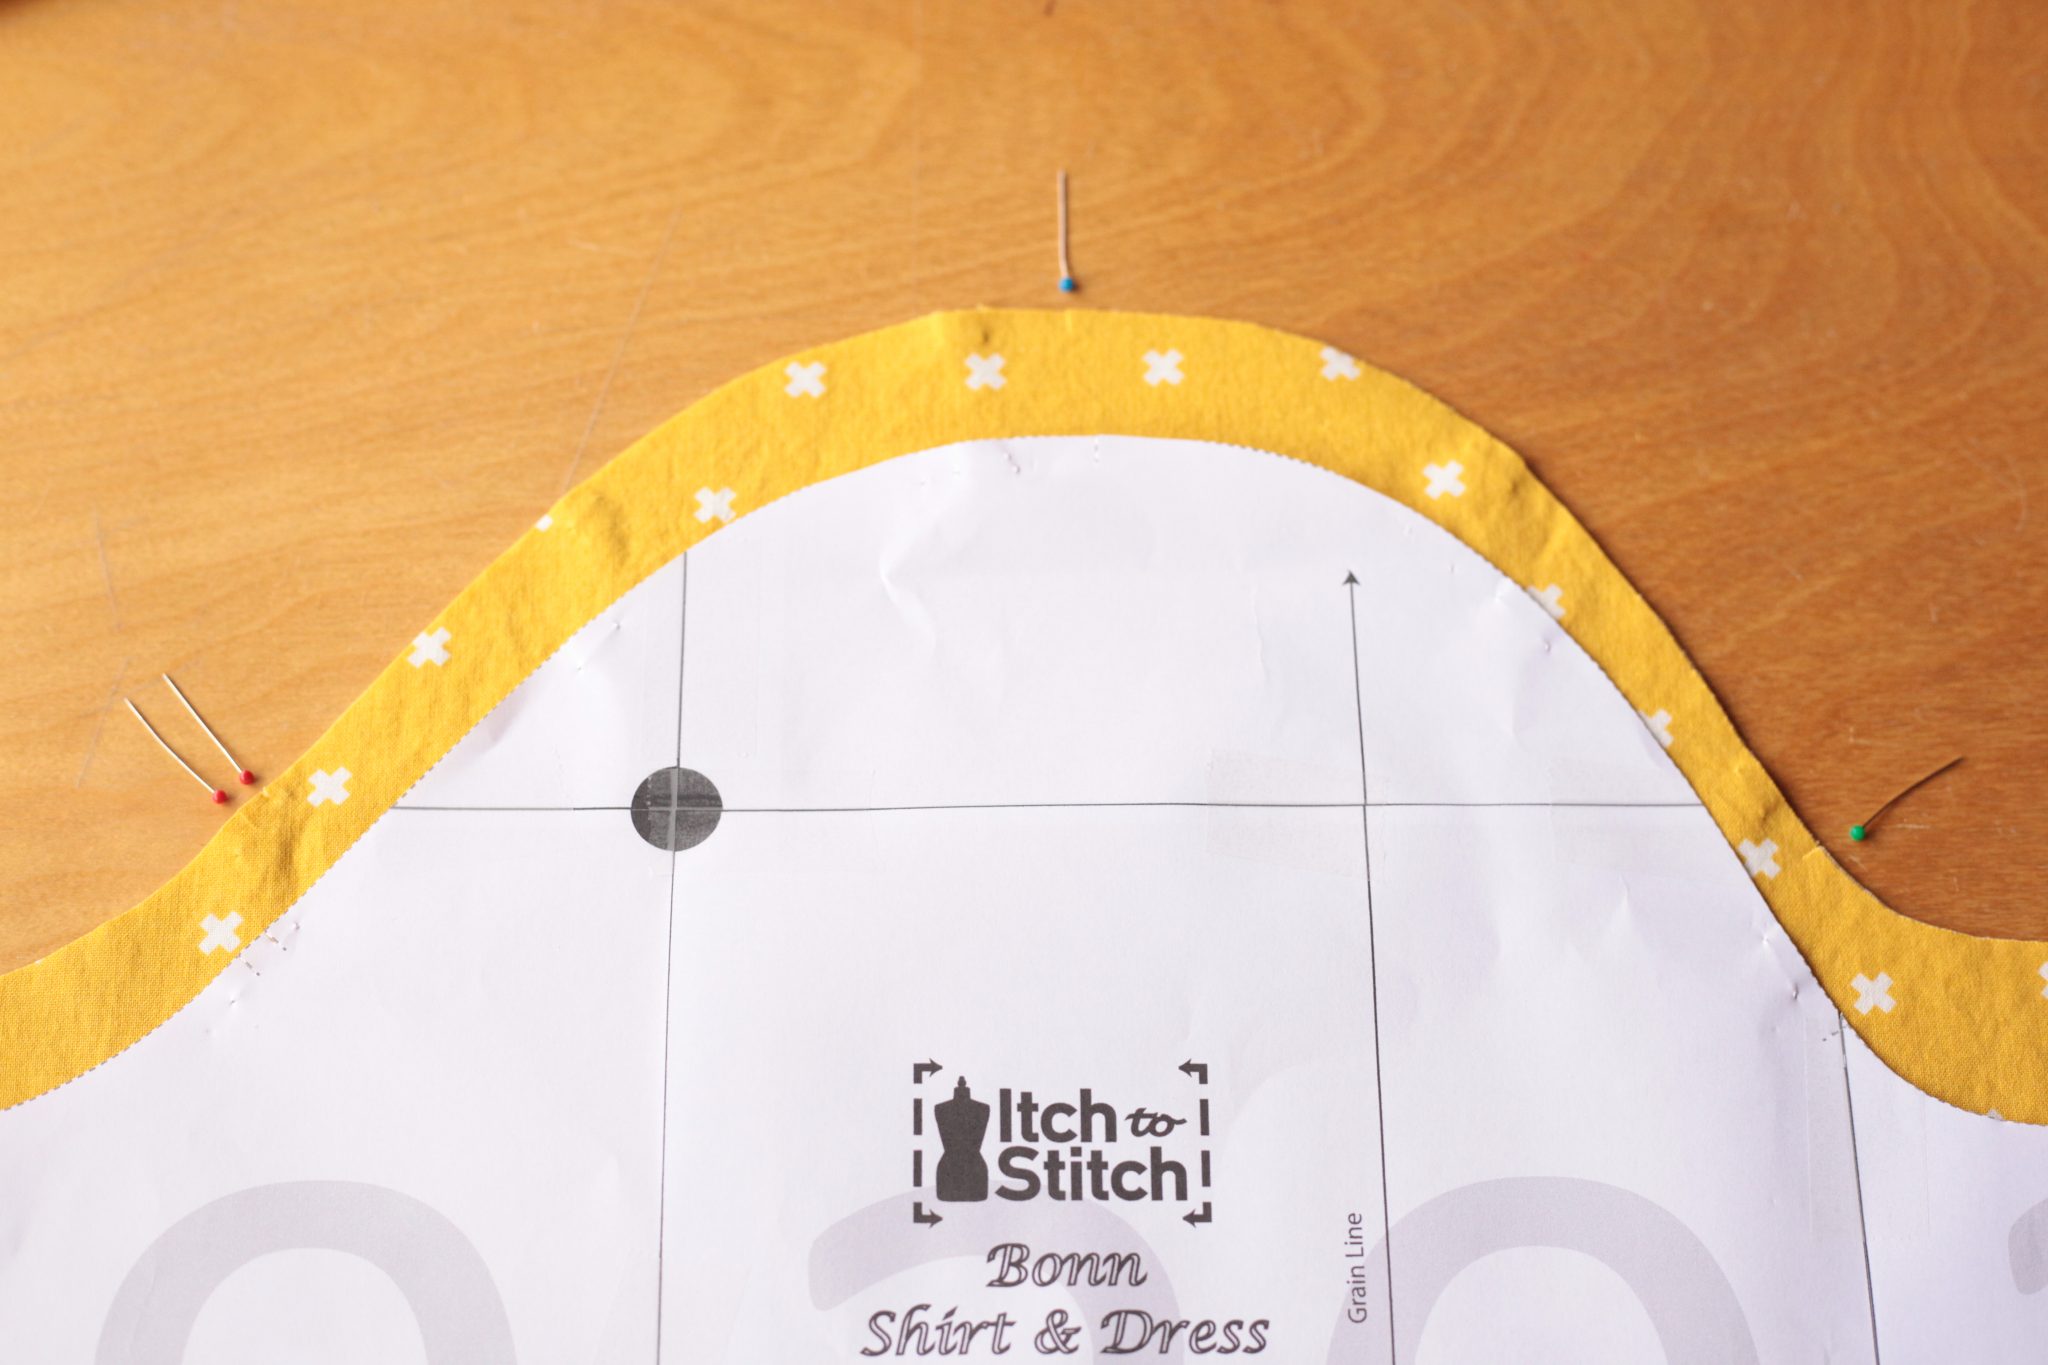
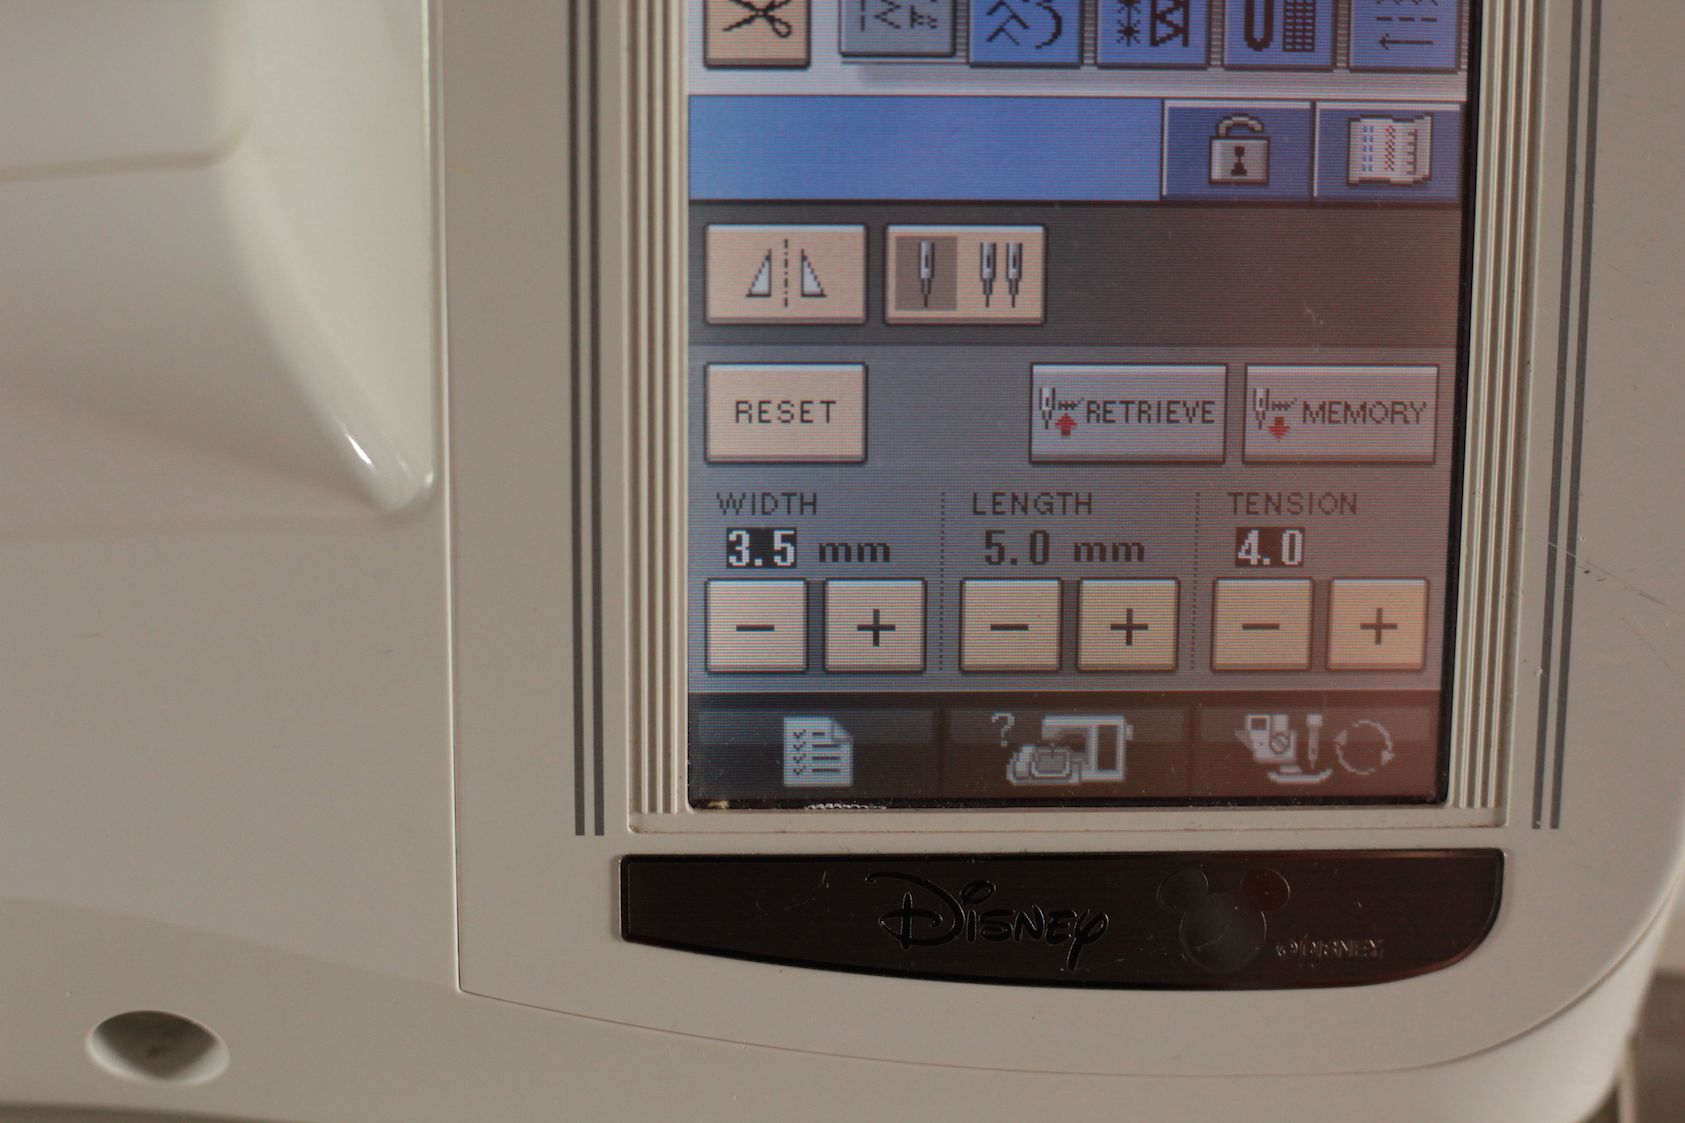
Before sewing the sleeve seam (the long vertical one that makes the sleeve a tube), I sew two lines of easing stitch on the sleeve cap, one is a hairline next to the seam line in the seam allowance, the second one in the seam allowance. They are about 1/4″ (6 mm) apart. They run from the front single notch to the back double notch. I use a 5 mm stitch length. Don’t forget to leave long tails on both ends; we will need them later.
With that done, now I can sew the sleeve into a tube. Don’t forget to press the seam (open or toward one side based on your instructions). Always press before sewing it to an intersecting seam. If you are finishing the raw edges, now is that time to do it.
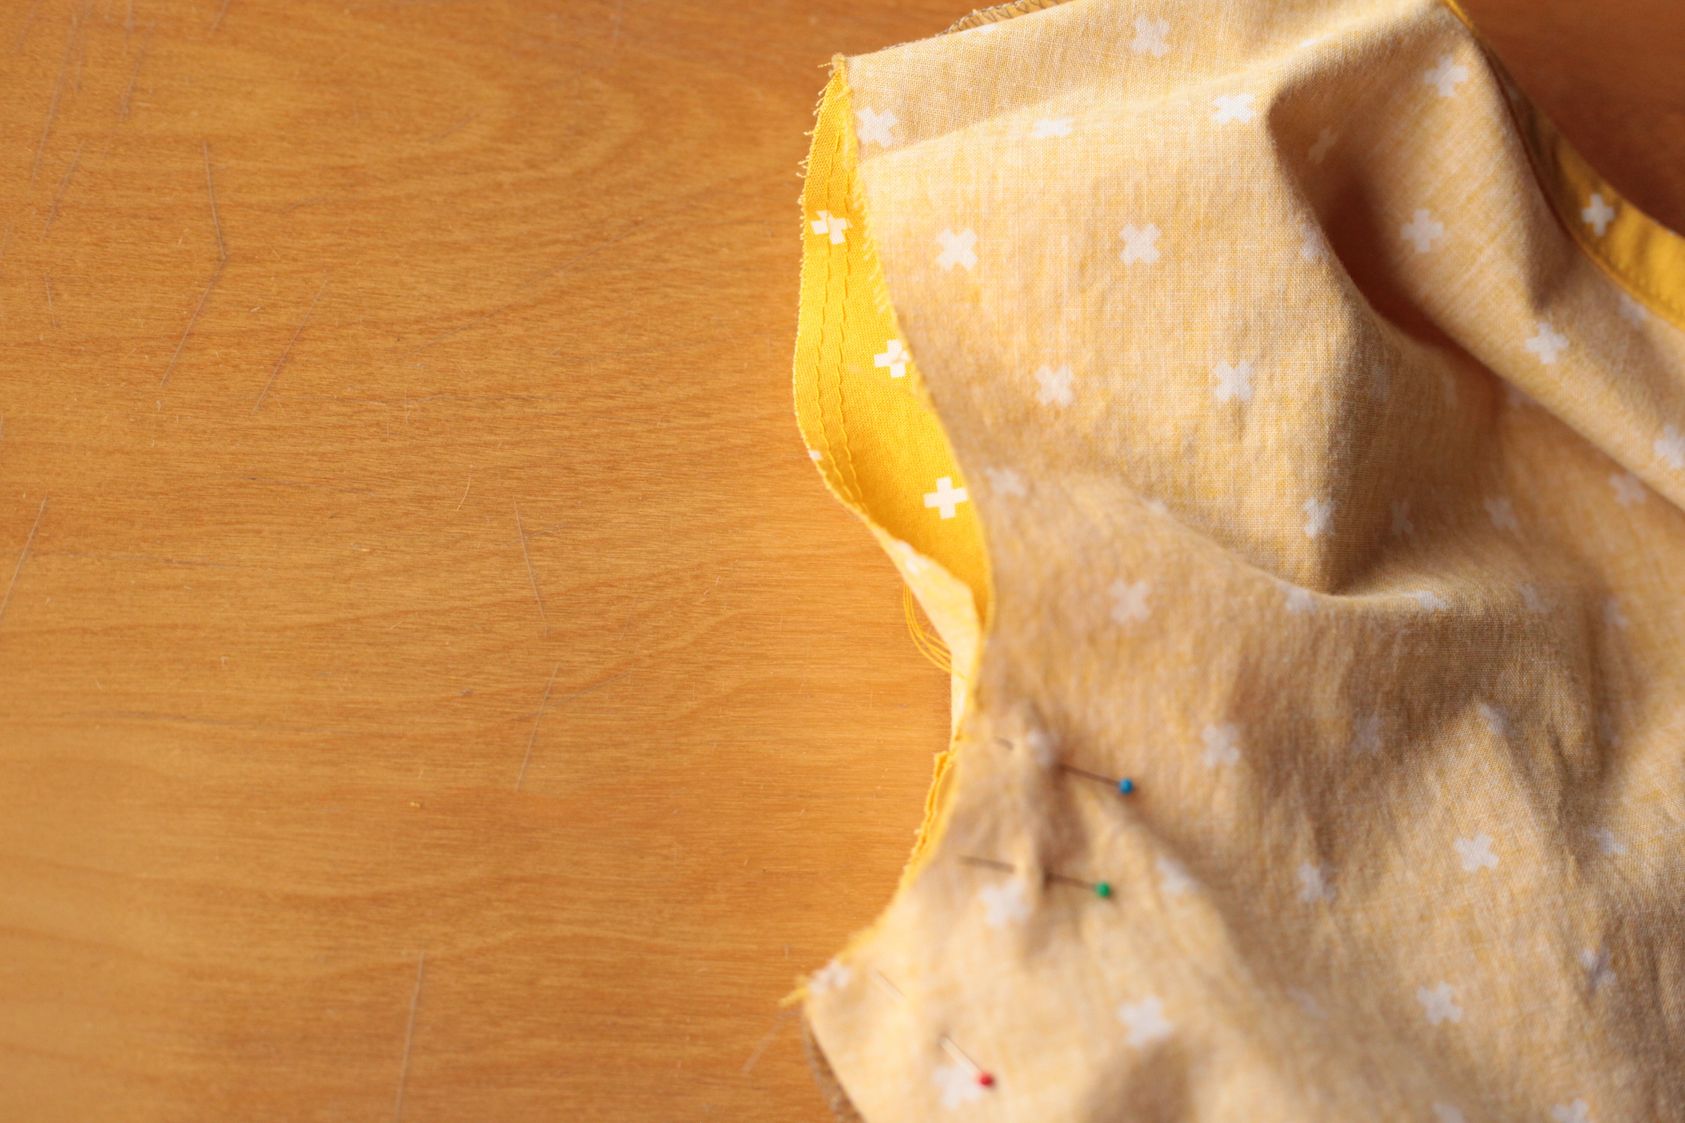
Now I turn sleeve and the bodice to the right side. Put them next to each other and make sure that the sleeve is in the correct position: the single notch is in the front and the double notch is in the back. I think this is a common problem; people sew the sleeve backward.
With that verified, I can put the right sides together. I usually open the bodice and turn it to the wrong side to make its right side against the right side of the sleeve.
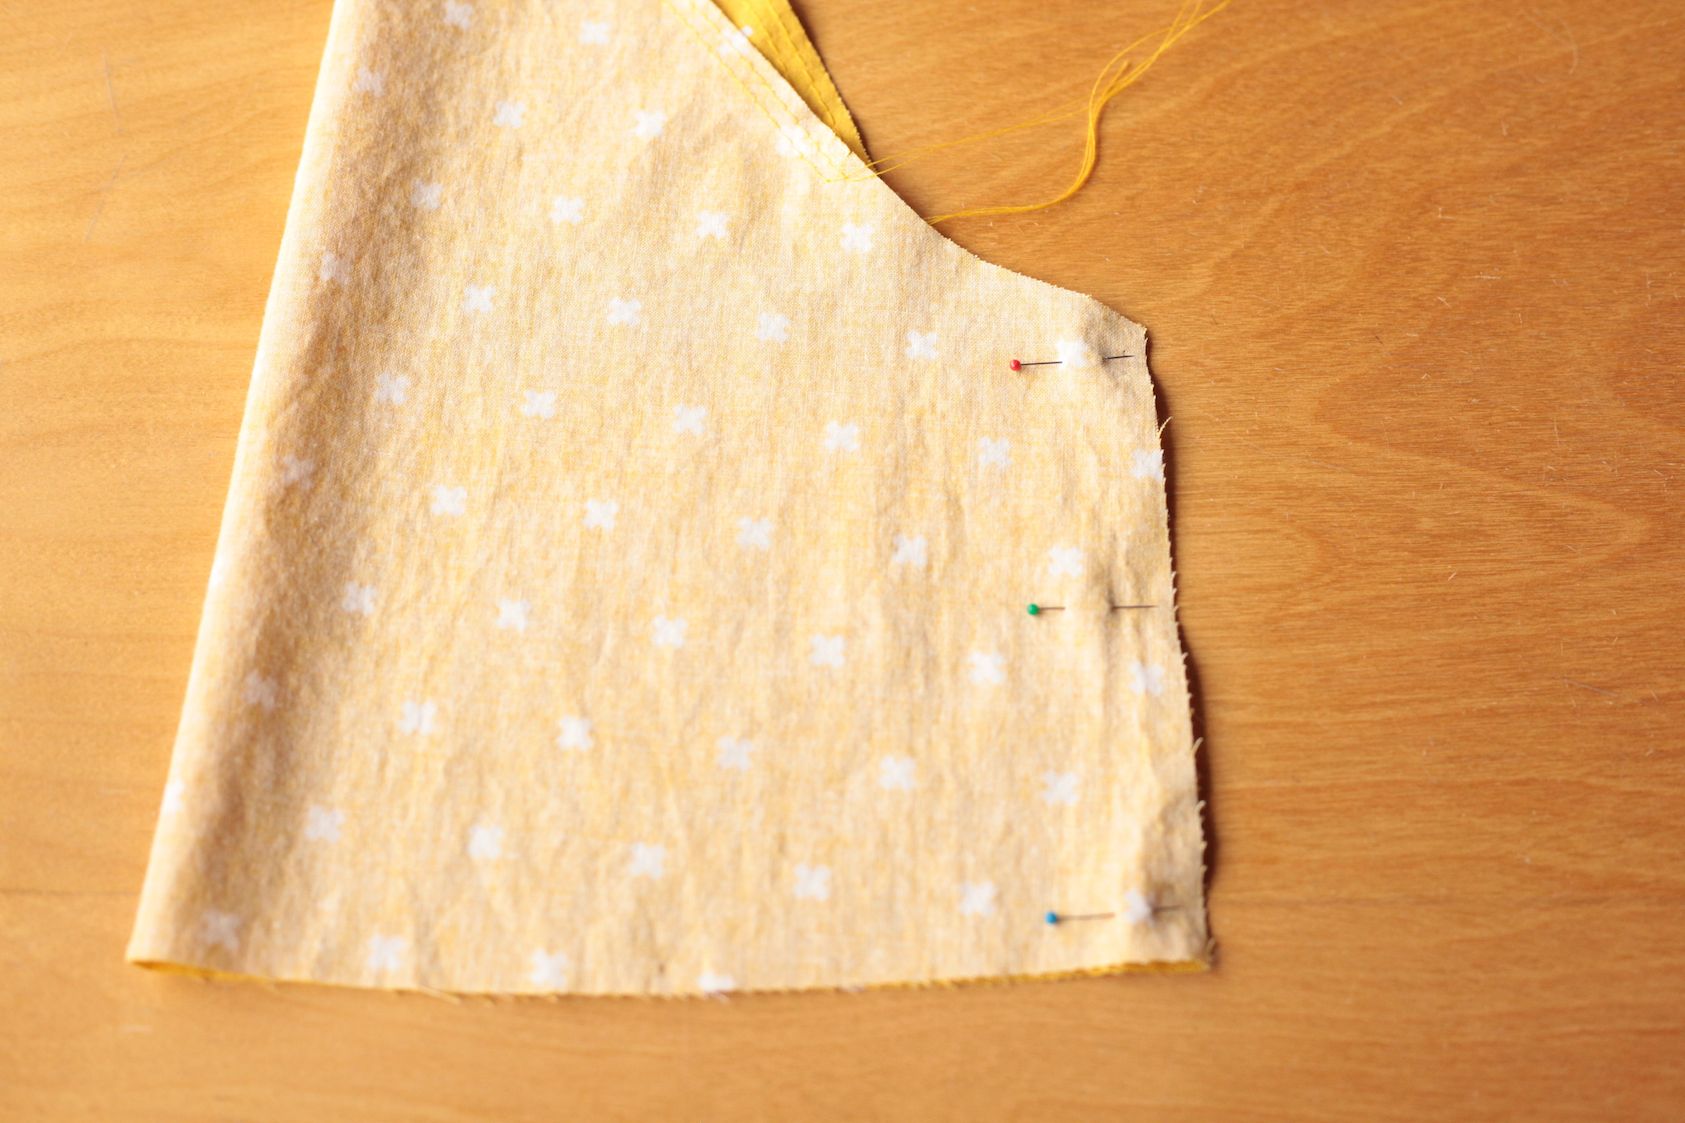
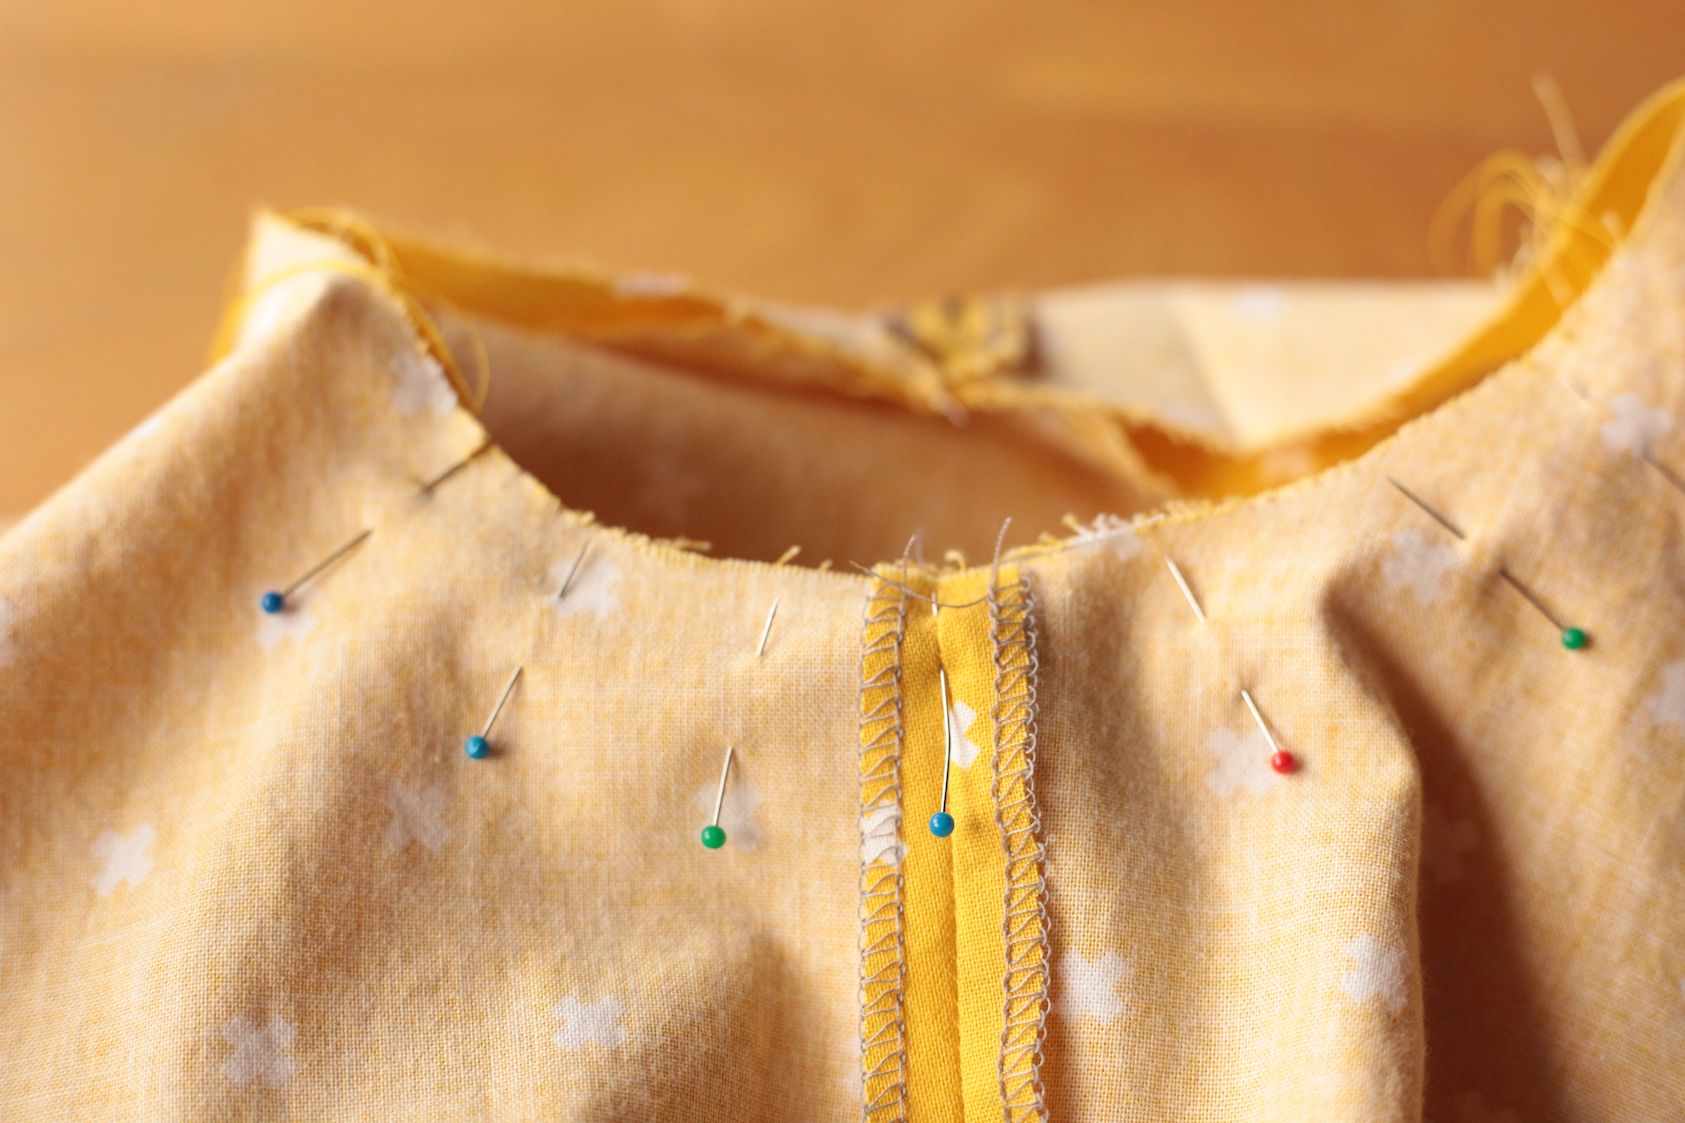
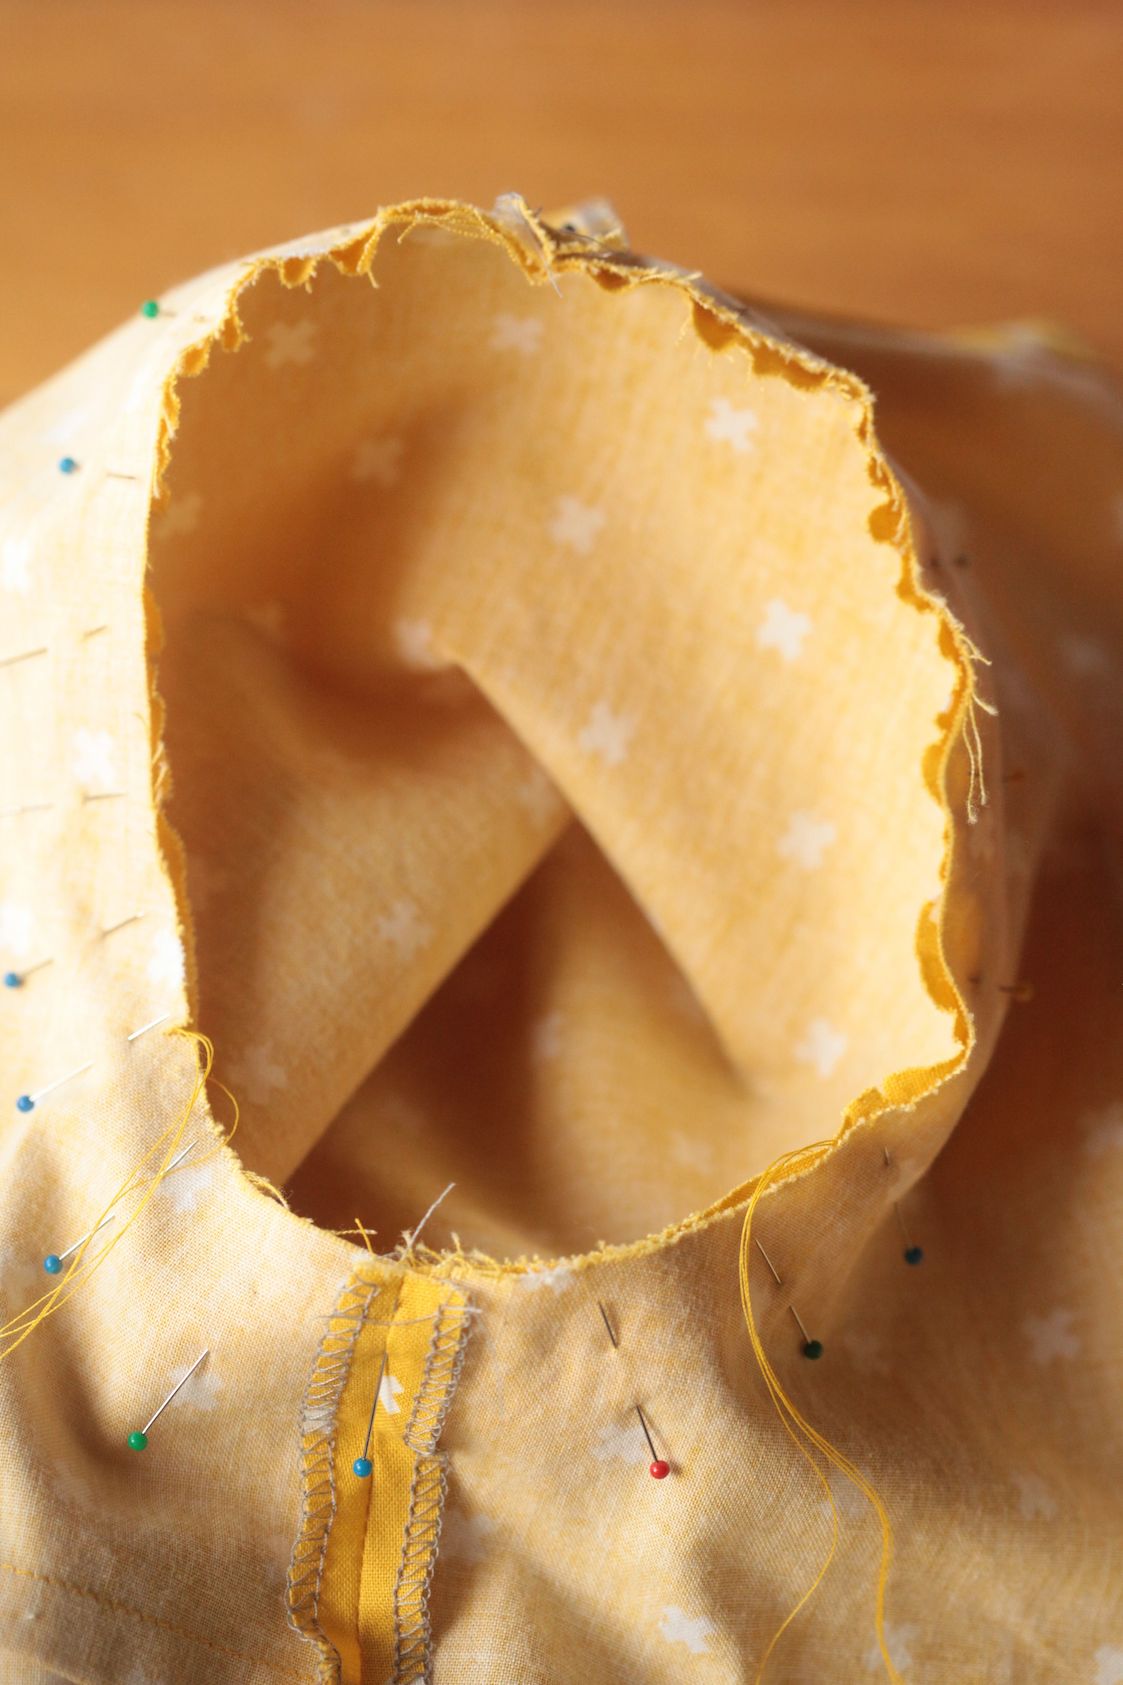
The spots I pin first are: 1) the top notch of the sleeve to the shoulder seam; 2) the single notch on the sleeve to the single notch on the armhole; 3) the double notch on the sleeve to the double notch on the armhole; and 4) the sleeve seam to the side seam of the bodice.
Then I can pin to my heart’s content between the single and double notch around the underarm. Note that there’s no easing involved. They have the same length and should match exactly. Yes, I do have a pinning problem, but I have no intention of getting rid of my habit, unless someone can convince me it would produce better result otherwise.
However, the sleeve cap part is what we need to pay attention to. Notice that the sleeve cap is longer then the armhole.
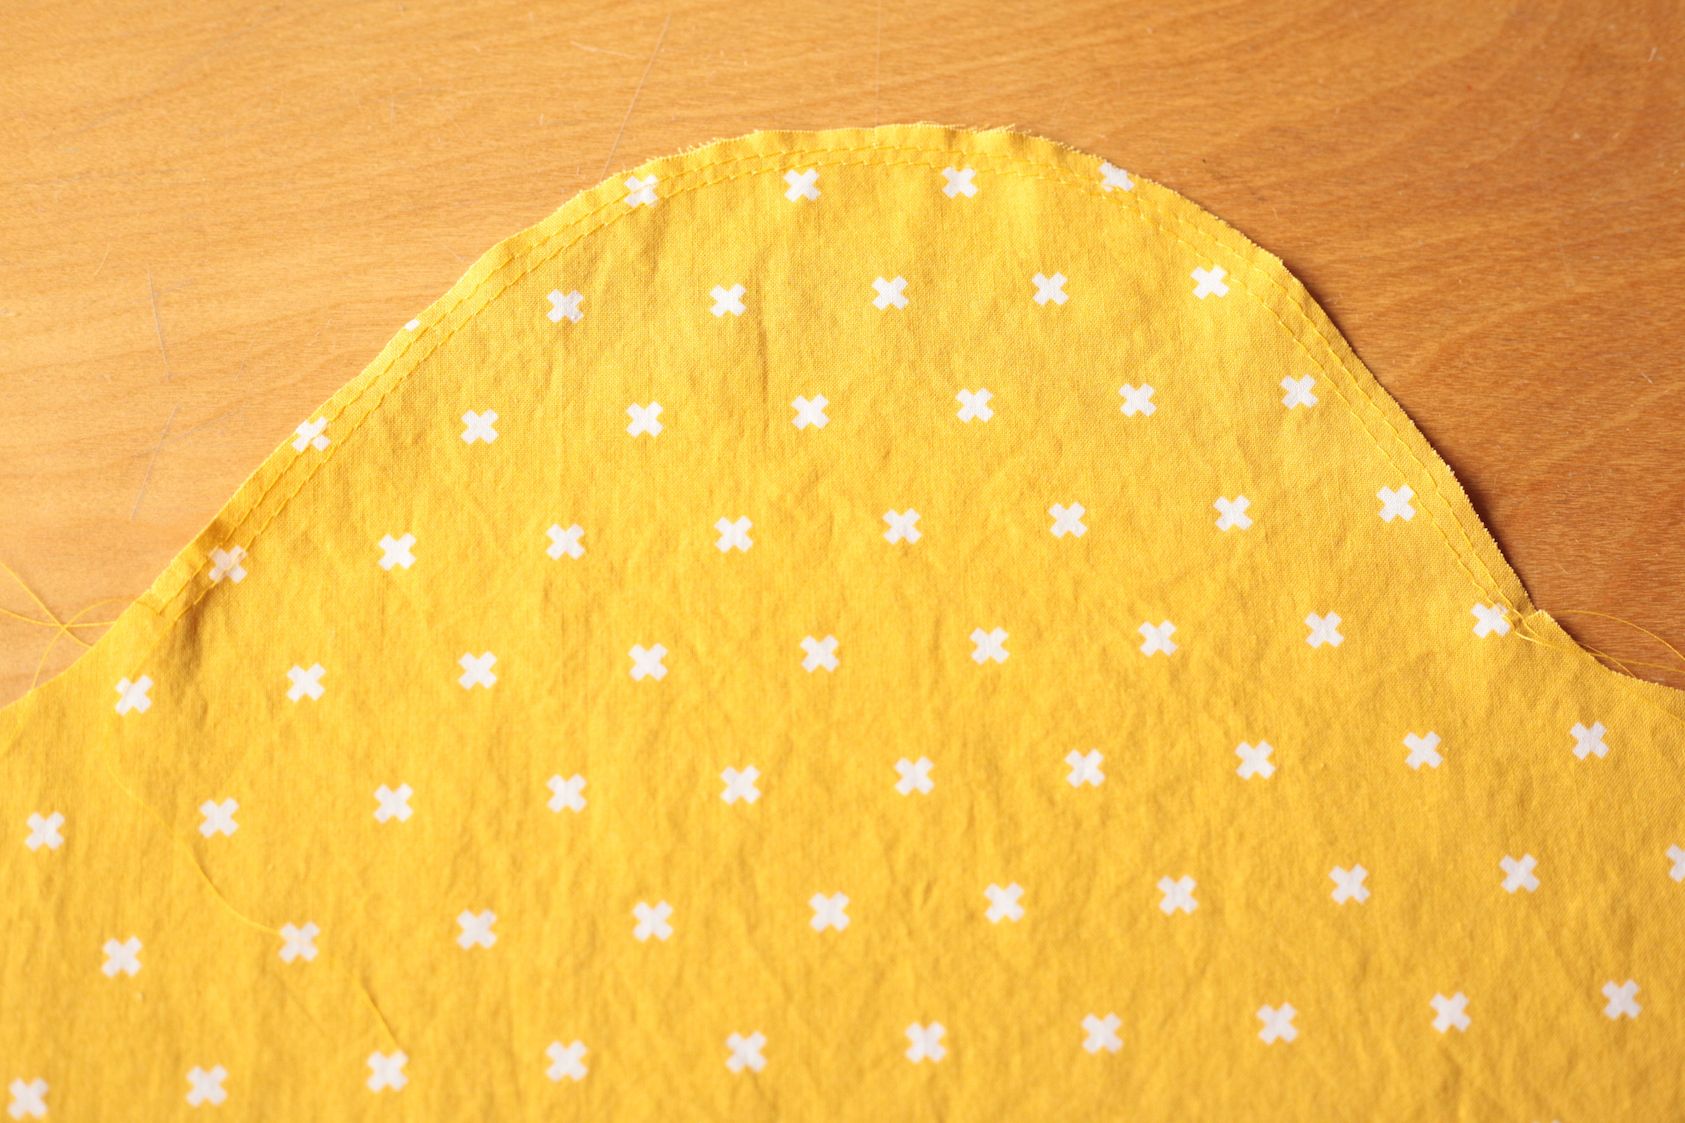
This is when I pull the bobbin threads as if to gather the sleeve cap, except I do it so evenly and ever so slightly that they don’t actually gather. They only “wrinkle” a little if you will.
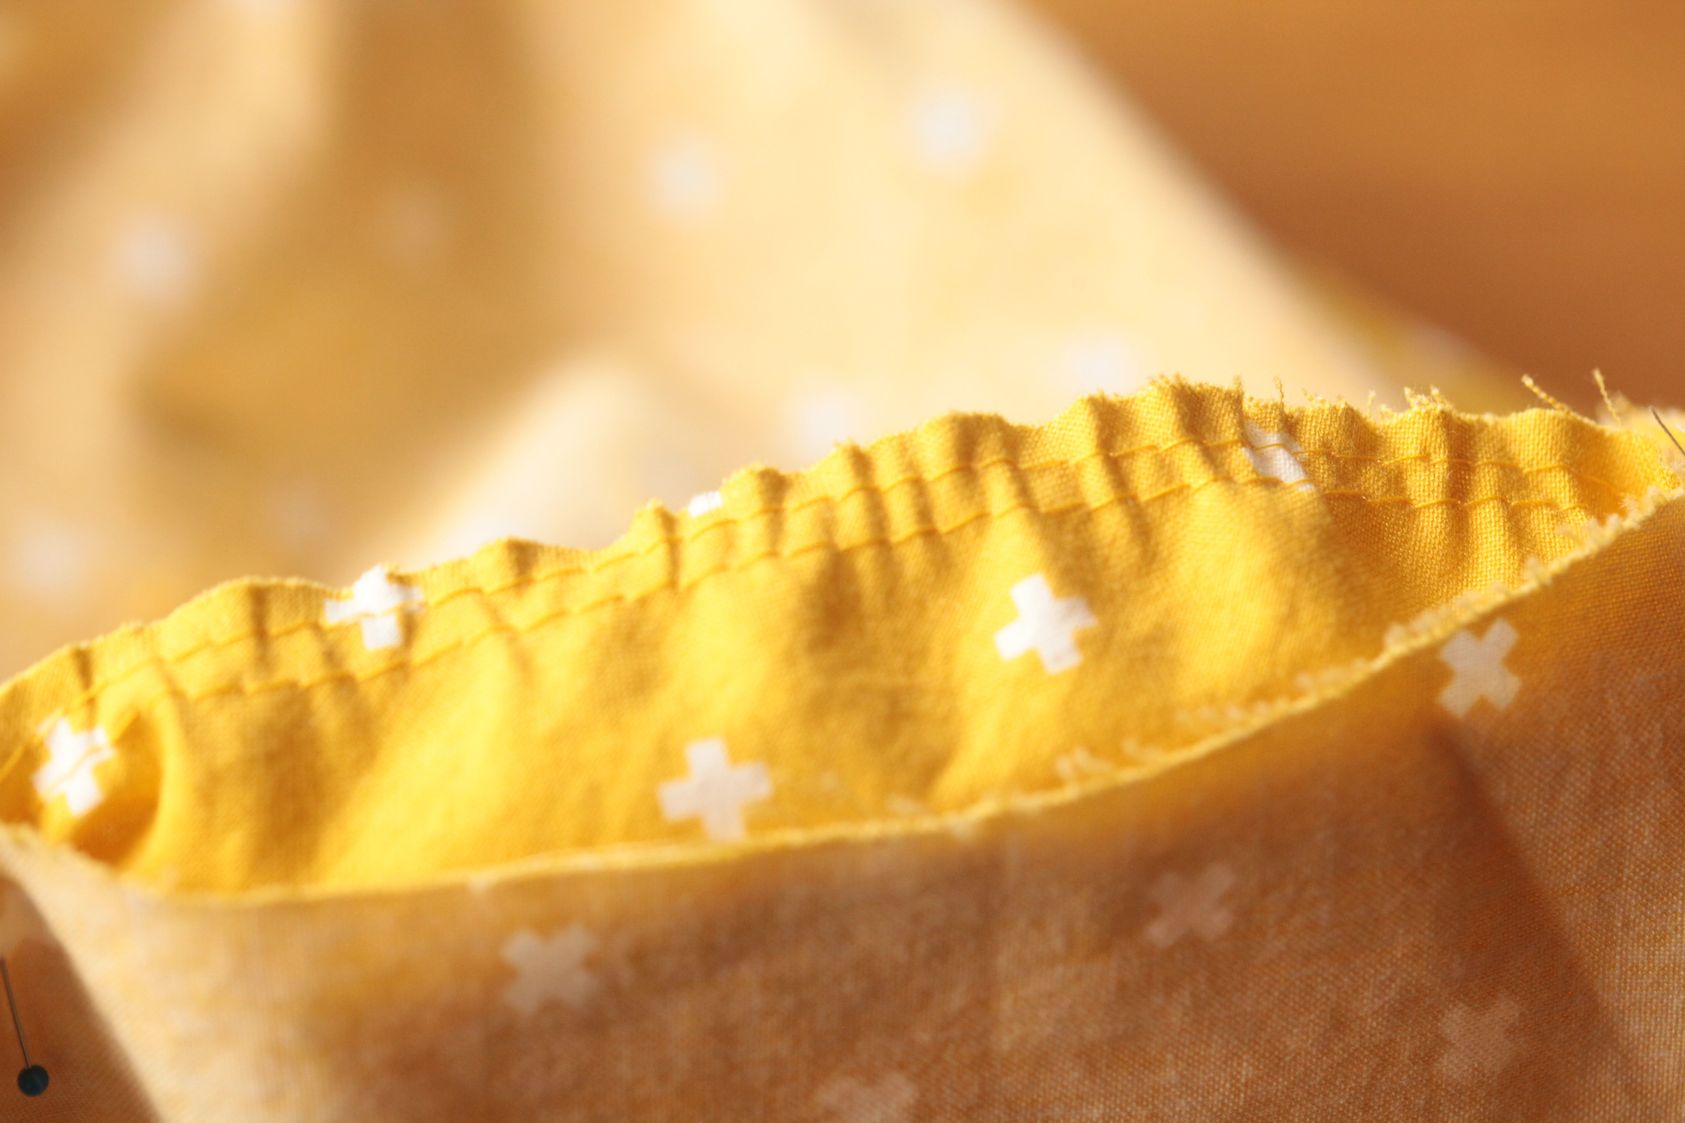
Pull and distribute until the length matches the armhole. You do that for both the front and the back. And then pin pin pin pin pin.
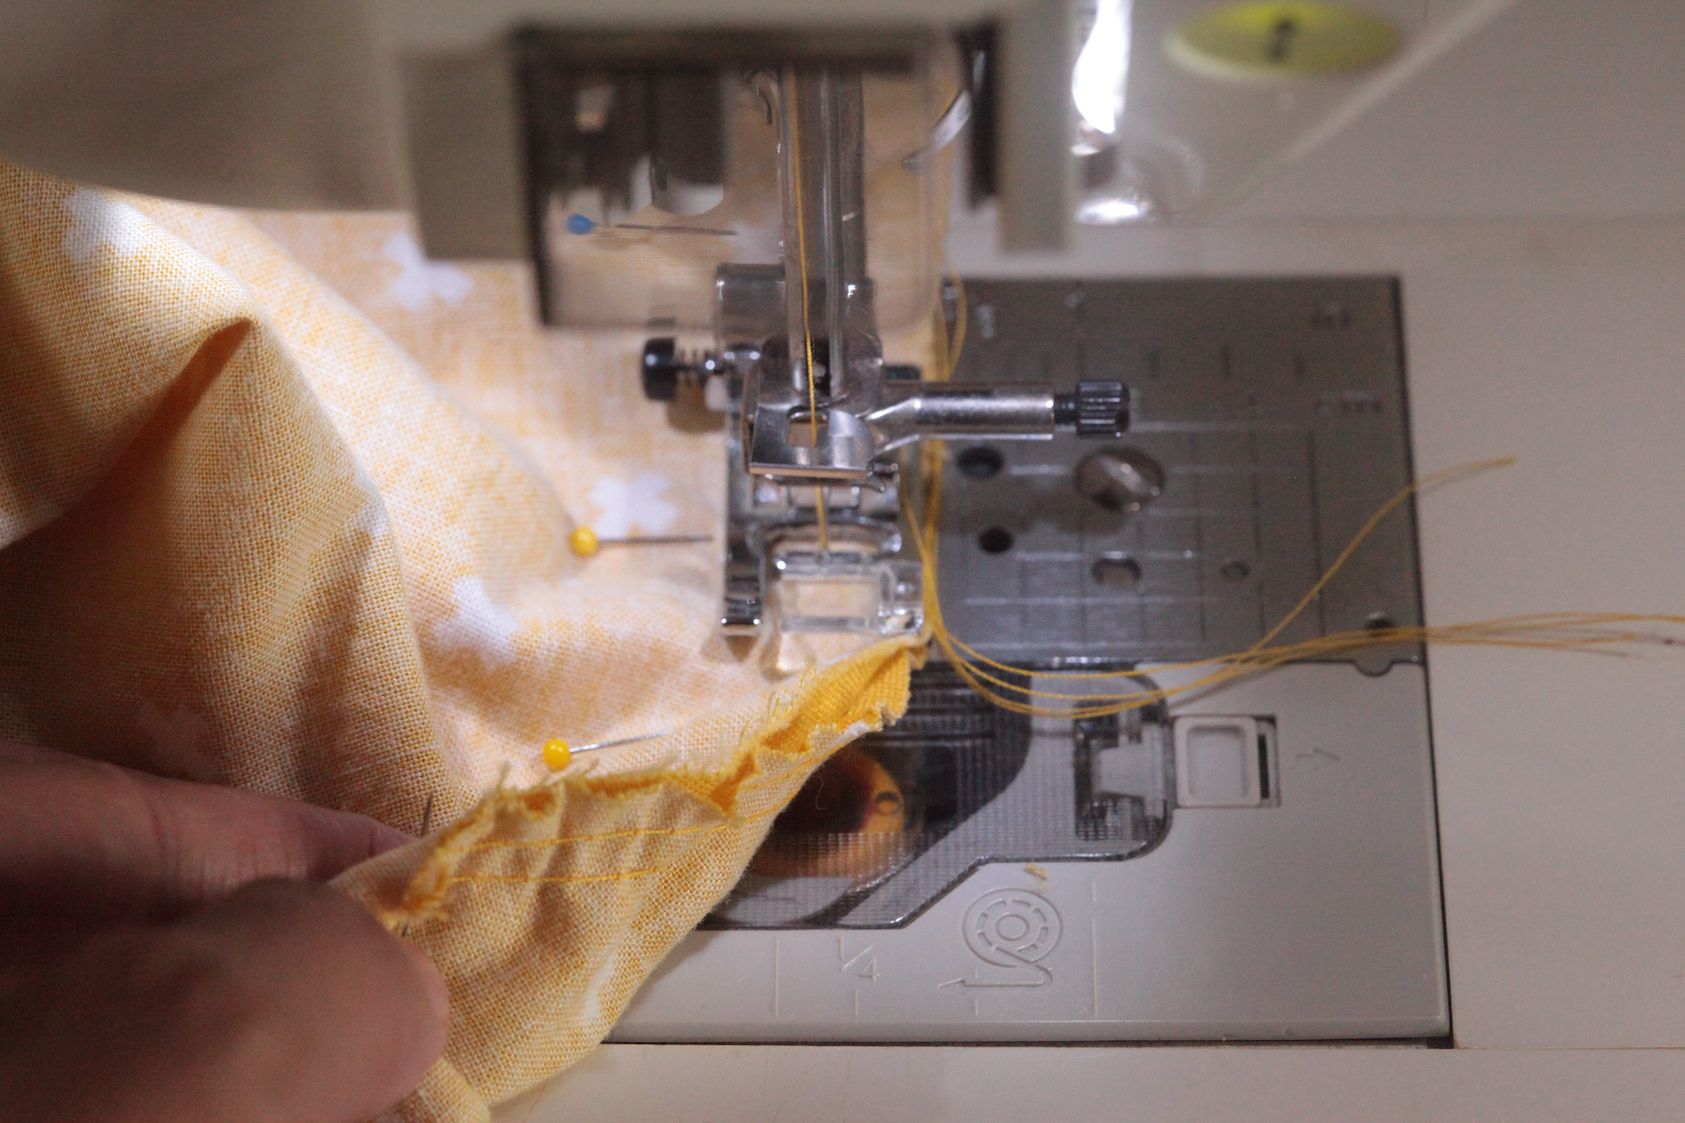
Now you can take it the sewing machine. I know that some people hand baste it so they can take the pins out; they don’t like having to deal with the pins at the sewing machine. It’s up to you. I don’t baste. I go straight to the sewing machine.
Also let me take a bit of a detour. Some people like to have the armhole side against the feed dog. Some like to have the sleeve side against the feed dog. There are arguments for each method, and I think both are legitimate.
The former group thinks that when the sleeve side is visible, one can manage to distribute the easing stitch better. And if a potential pucker is approaching, one could straighten it a little and may be able to prevent the pucker from happening.
The later group thinks that when the sleeve side is against the feed dog, the feed dog can help ease the fabric ever so slightly.
I have done both. I found that either way works well for me. I encourage you to try both and see which one you like best.
Let’s keep on going. Now I stitch around the armhole. A couple of tips I’d like to give you.
- First, don’t bother to try to straighten the seam while you are stitching. I think this is the part that most people dislike about stitching in the round; they want to have the seam lay out straight ahead of time. They pull and skew the seam, trying to “beat” it to submission. Don’t. Just focus on the next inch (2.5 cm) at a time. You can then have the needle down and rearrange things a little before proceeding to the next inch (2.5 cm).
- Talking about having the needle down, if your sewing machine has the function to set the needle down by default when it stops, by all means use it. That’s my default setting and it’s not only for sewing sleeve. It really does make more sense to have the needle down, especially when you are doing back stitch (start and end a seam). Try it and you will understand why. And in this case, you don’t want to move or disturb the fabric until you have the needle down, or you risk having a jagged seam. If you can’t set your machine that way, you have to manually be sure to do that.
- I put my thumb underneath and my finger on top of the fabric as it is sewing. My thumb can feel if something is wonky. With the needle down, I sometimes even flip it over to look to be sure the little upcoming portion looks good.
- Slow down and you will get a better result. And because it’s not a race.
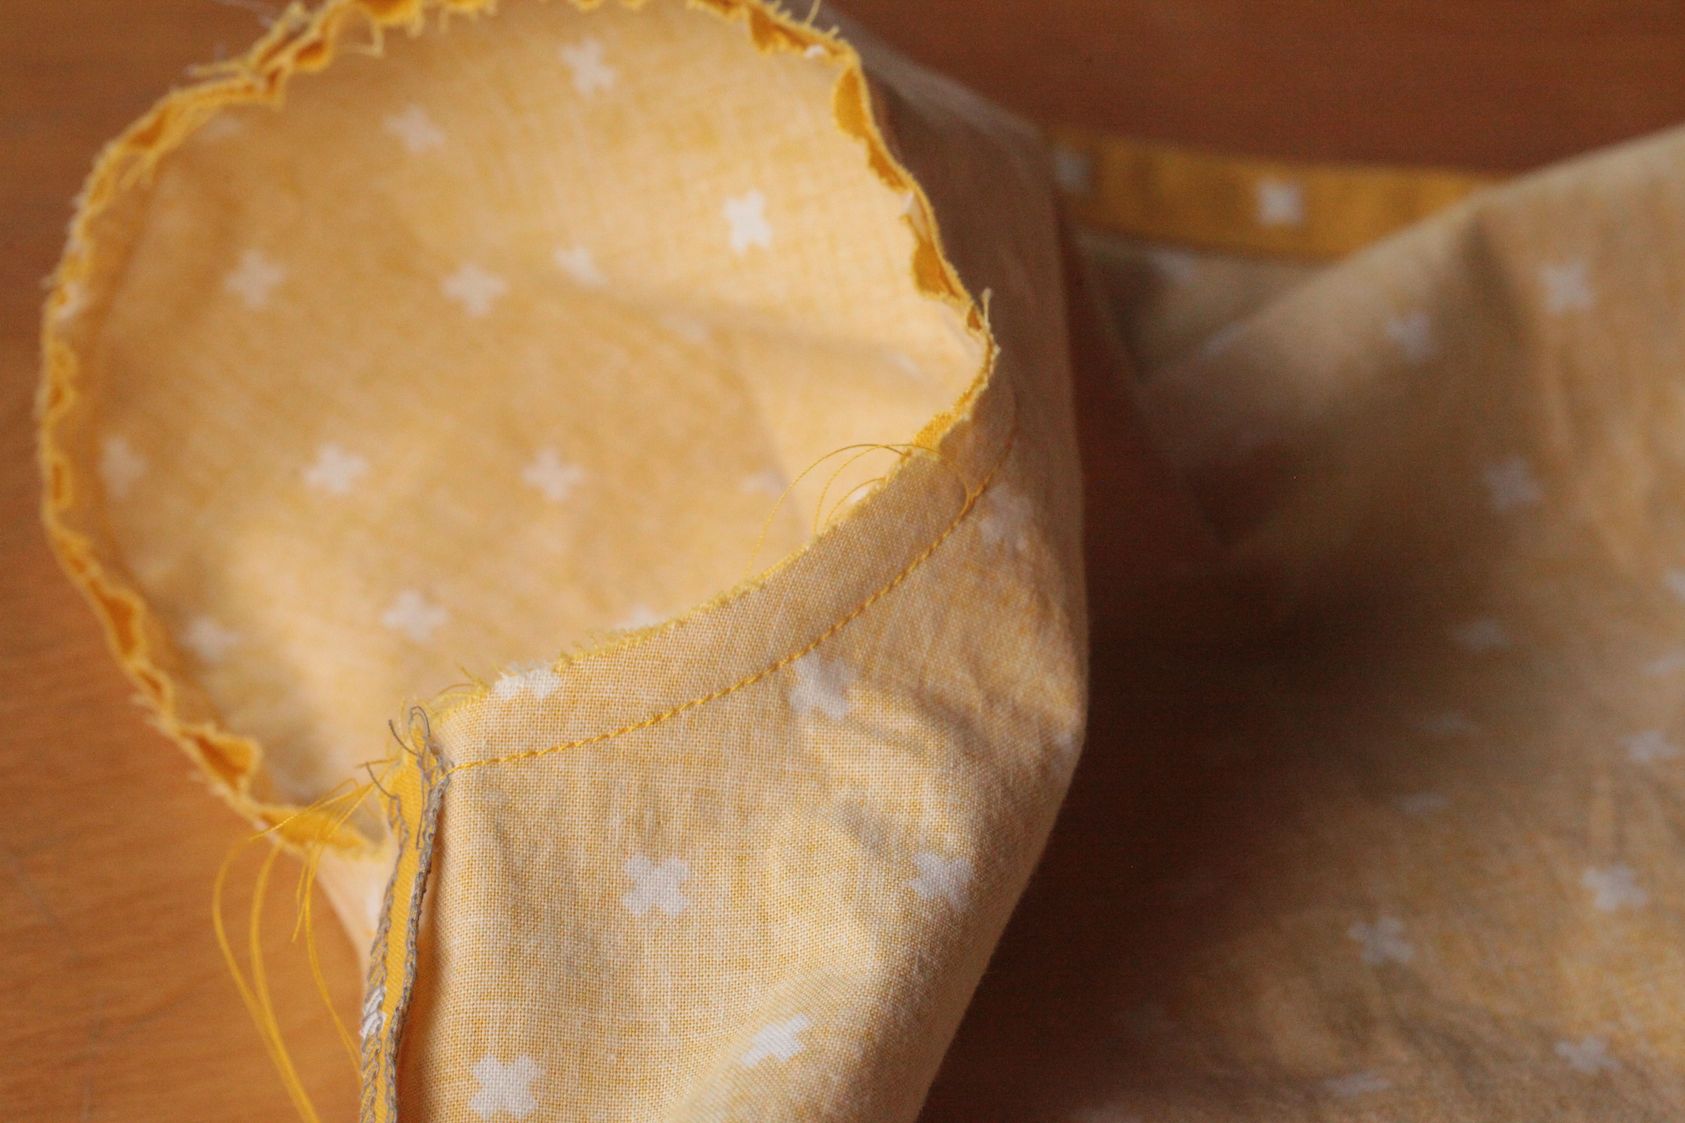
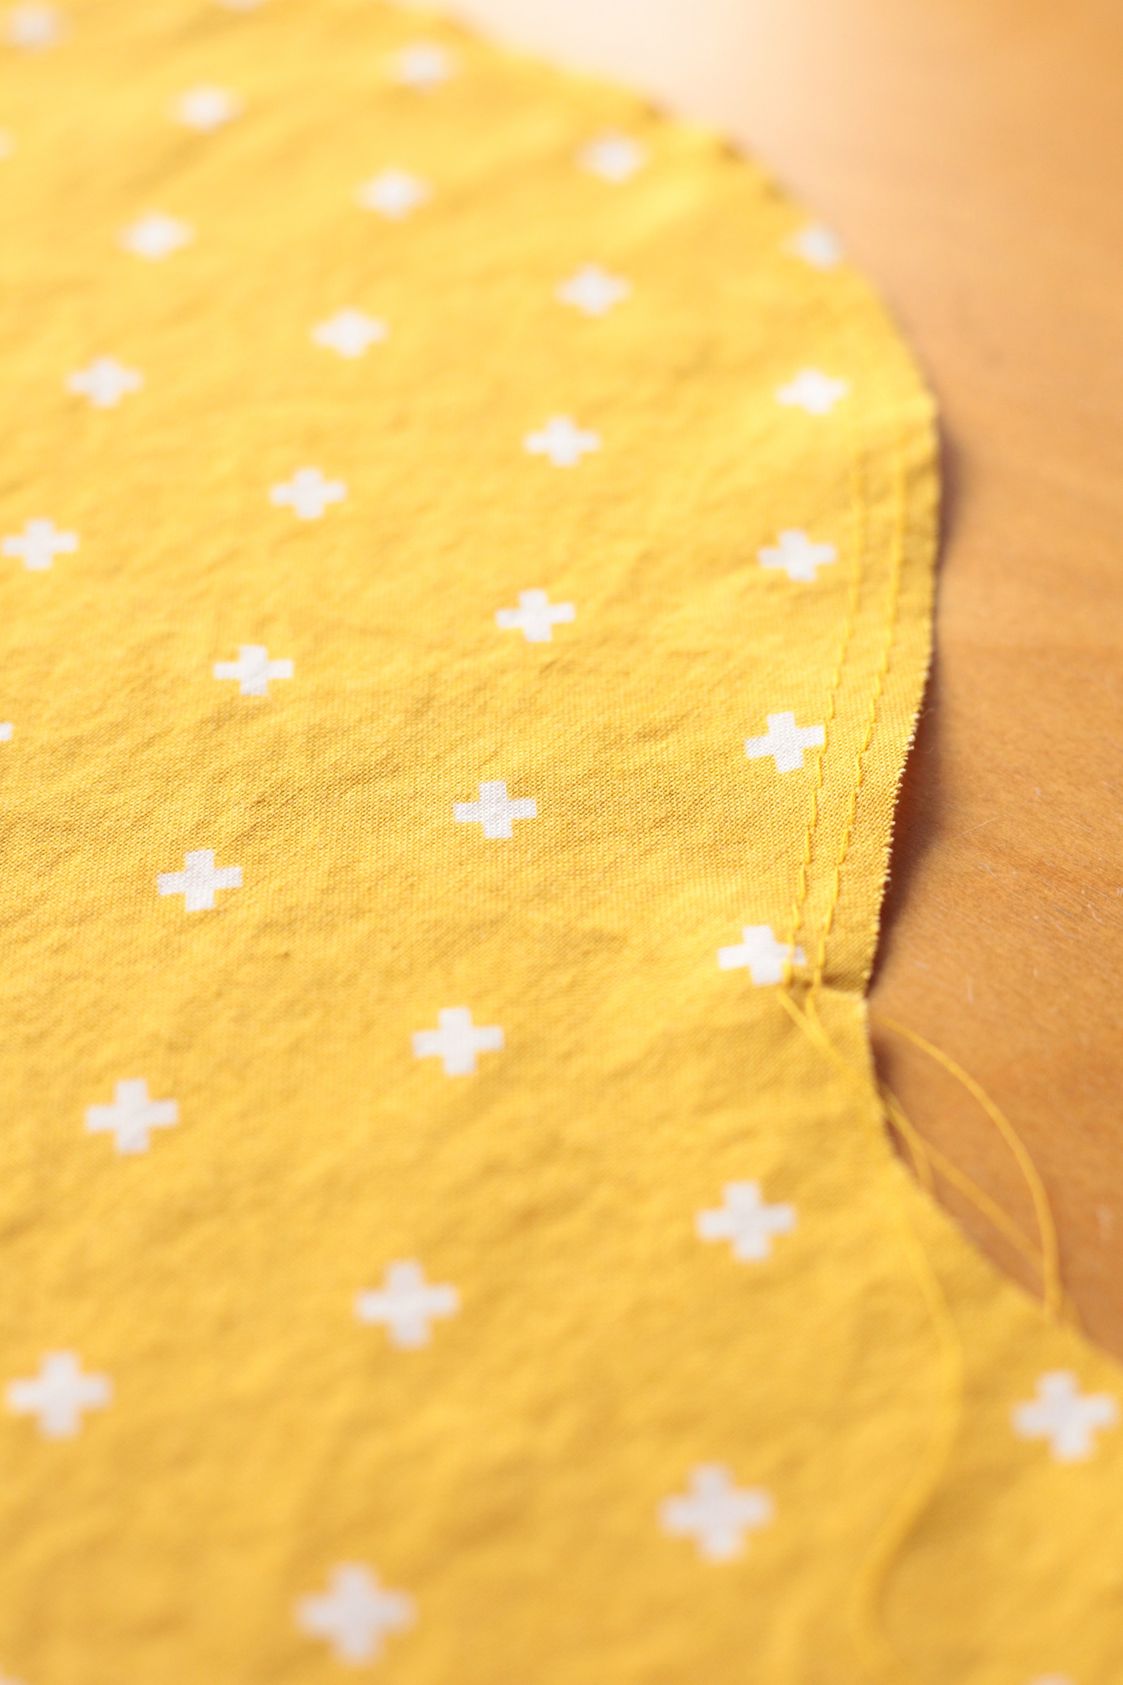
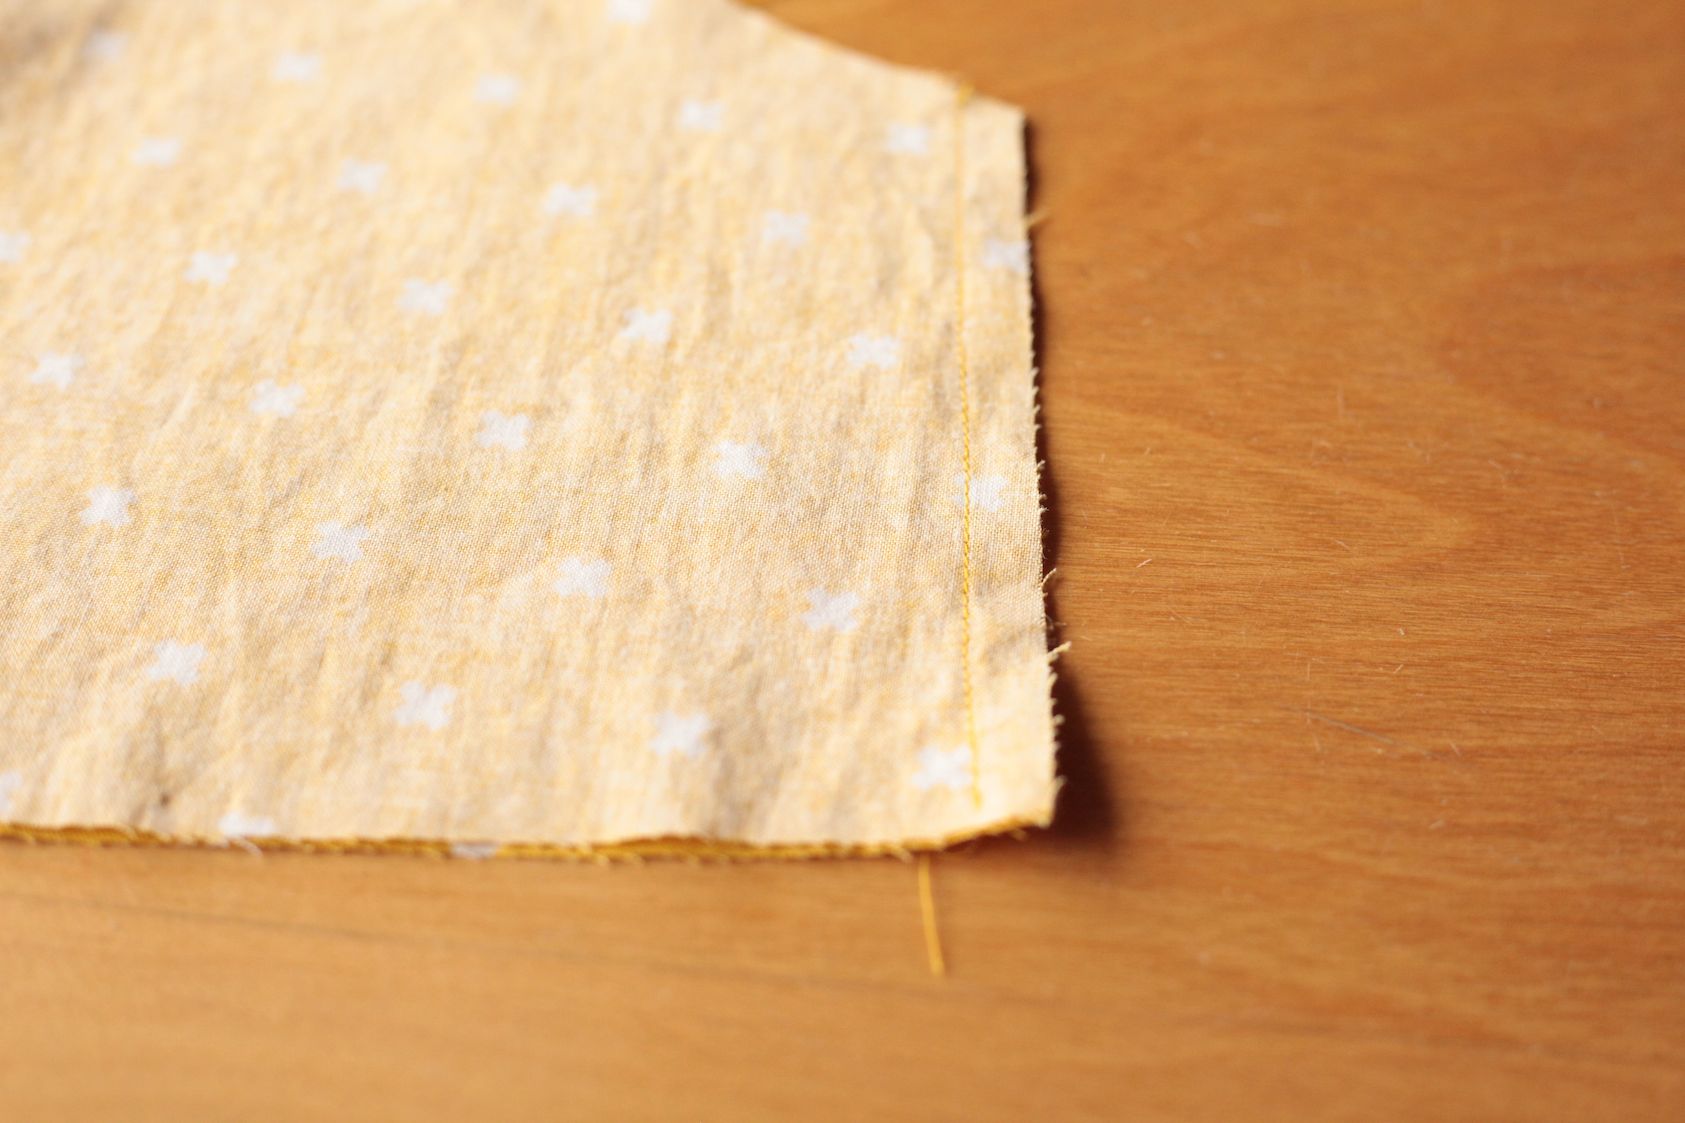
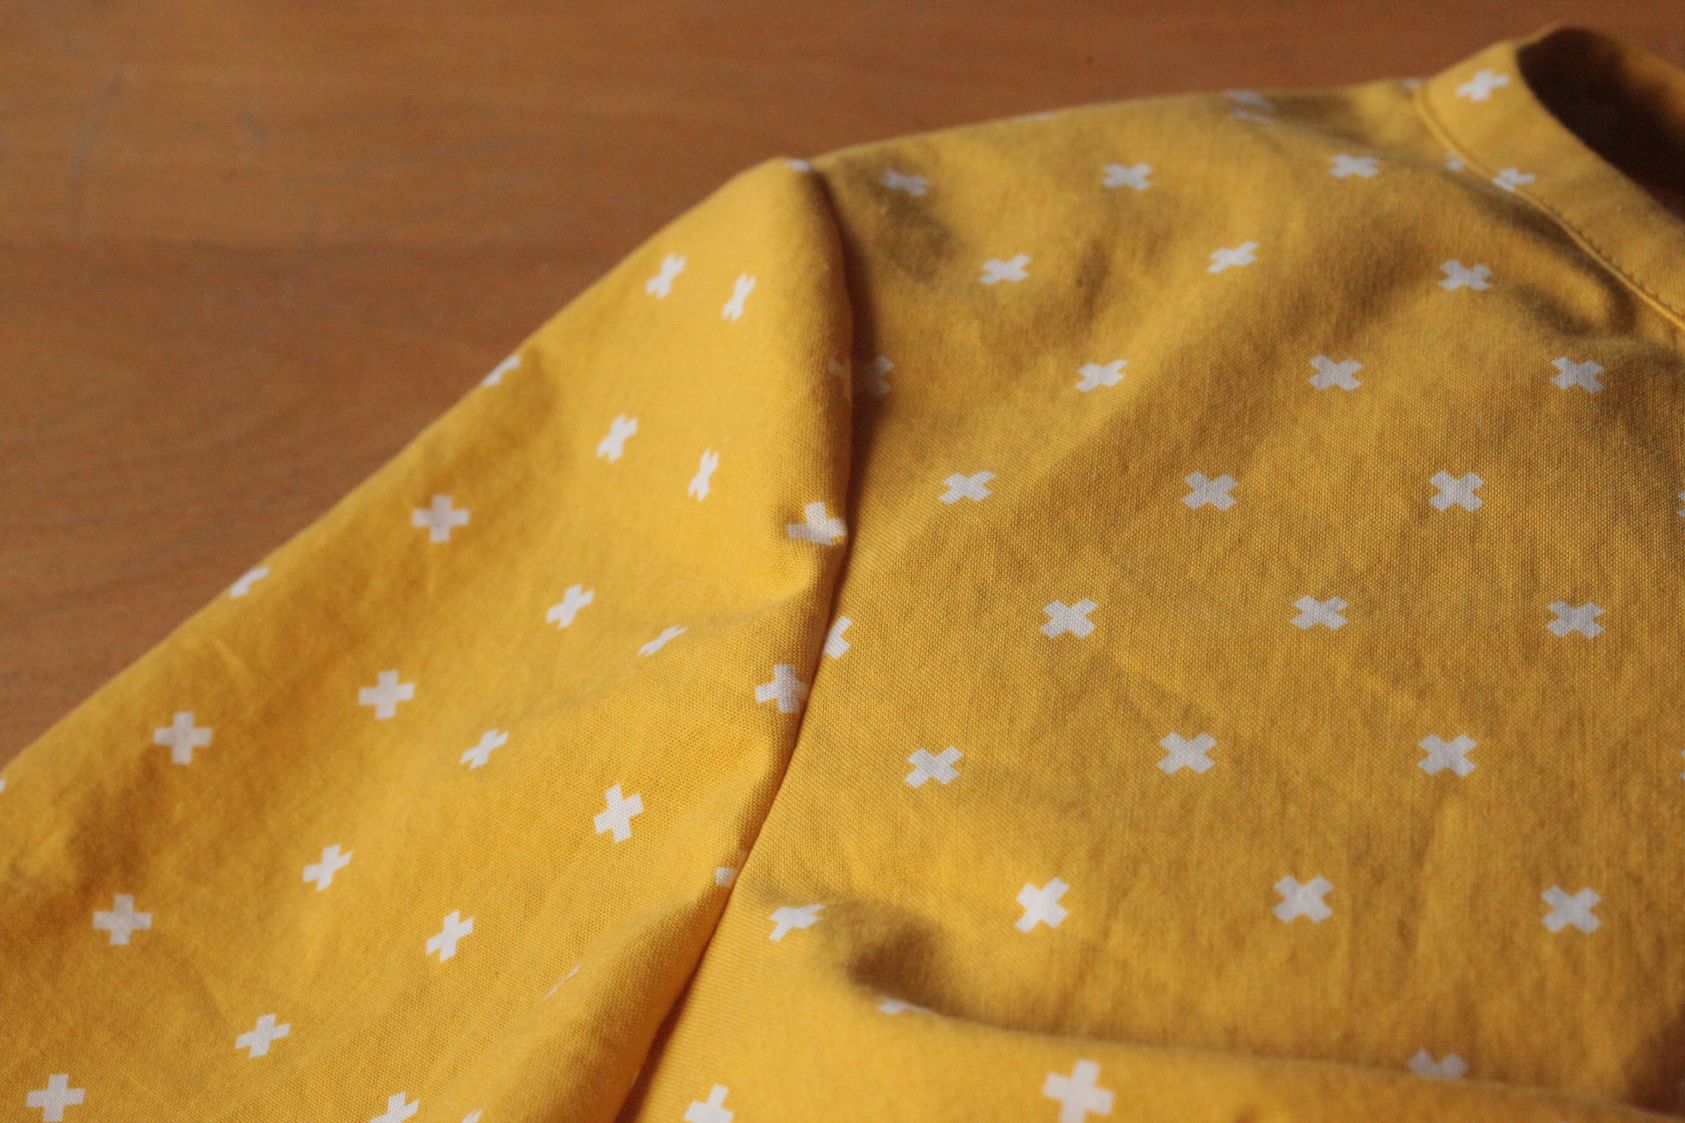
Tada! Done! Now turn the right side out and check for puckers.
What happens if there is a pucker (or two or five)? Don’t distress; it’s not the end of the world. You can undo that little portion and retry. There’s no need to redo the entire seam. And for some minuscule pucker, you may be able to steam it out even.
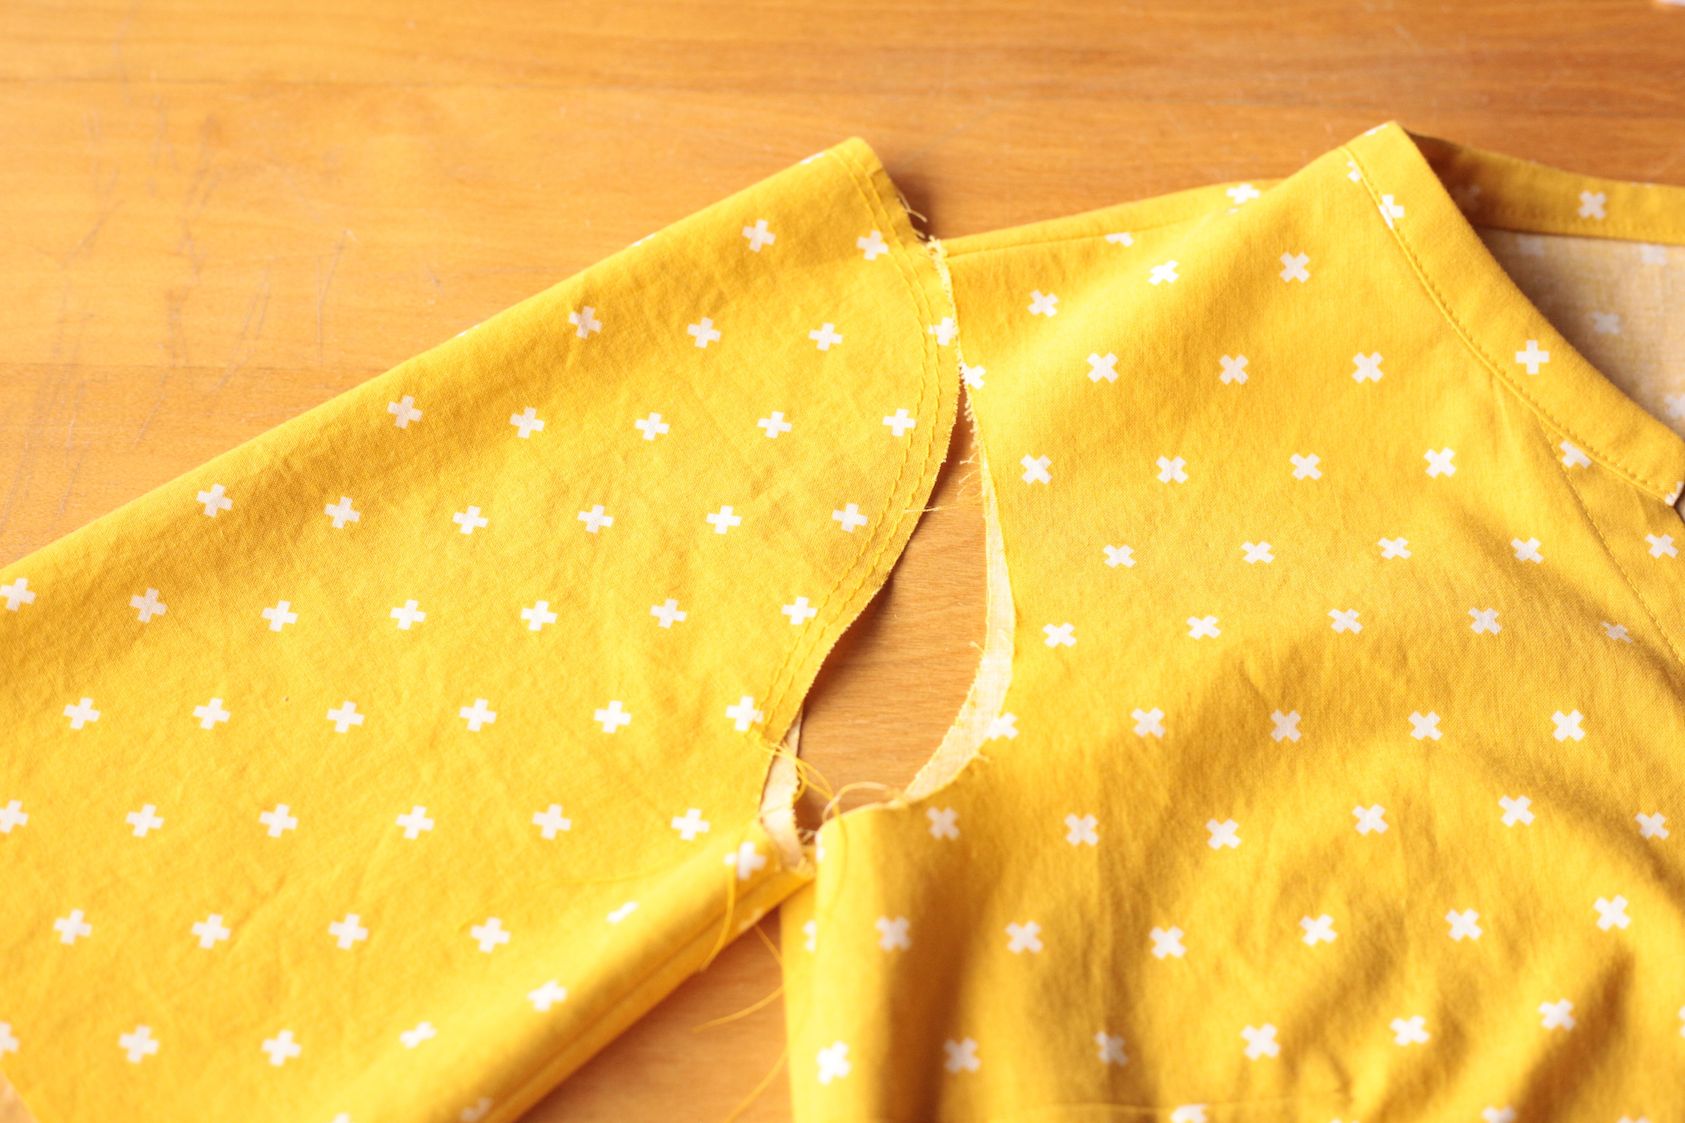
Even though the two lines of easing stitch are supposed to be invisible (in the seam allowance), I’d like to remove them before I serge the seam allowance. I find that they could create some light ruffling shadow underneath the sleeve. Oh, I press the seam toward the sleeve to support the sleeve cap, but I heard people pressing it open or even toward the bodice. Follow the instructions of your pattern, or experiment. You might like one look better than the other.
That’s all for today. I hope it’s been helpful. Until next time, keep stitching!

This is a very helpful tutorial. Thank you so much.
I would be interested to see / know exactly how you serge the finished seams for an armhole. Especially when instructions often tell you to trim close to the seam under the arm. DO you keep the two pieces of fabric together, and serge as one? What kind of stitch do you use?
Great tutorial Kennis. Thank you. Can I ask you in which direction do you press serged sleeve seam allowances when using knit fabric?
I’ve read your set in sleeve tute with great interest. Looks like my next sleeve will work sew much better.
Just one thing. I think that perhaps the text to the second illustration has the back and front reversed.
Thank you so much! It’s been corrected. 🙂
Thank you. The set in sleeve is my nemesis. The patterns say to gather between the dots, but on and a cotton woven, there is too much fabric to ease without puckering. I spent the whole afternoon with one sleeve yesterday! I will unpick the stitching and ease between the notches (clips) today. I also now have permission to reduce the seam allowance on the sleeve cap if necessary! Wish me luck!
I’m reading all your blog post as I want to improve my sewing skills and they are so helpful! I learned to sew with knits which is a whole other world, but now I’m gravitating to wovens so all these tips are helping a lot. Thank you so much for such clear explanation and pictures 🙂
Great tutorial! May I know how much ease you used in this tutorial? 😊
Hi Mitzi, my sleeves usually have less than 1/2” of ease in the front and less than 1/2” of ease in the back of the sleeve cap. Have a great day!
This is an EXCELLENT tutorial with the perfect level of detail.
Thank you!
Great post and tutorial! I’m a flat pattern maker recently revisiting tailoring and fit issues. I’m working on my sleeve Sloper and realized I may have removed too much of the side seam ease at the armpit on the bodice. Which would seam to restrict arm movement. For a cotton with minimal stretch approximately how much ease do you leave at the armpit area of bodice. Just to be clear any ease I’d at at armpit (underarm) I’d taper to waist. I’d love any thoughts you may have. Thanks Brianna
Wow, wow, wow!!! This really is a brilliant tutorial. You’ve explained things so well I can’t wait to go and unpick the puckered sleeves from the vintage pattern dress I’ve just made for my little girl ? I’m going to cut out a few practice sleeves from scrap fabric and get some practice in!
Thank you so much for this tutorial. You’ve honestly made my day when i was just about to give up Sewing for my little girl for good. Thank you x
I appreciate this so much! I am new to garment sewing, and this is by far the best tutorial on sleeves for wovens that I have read (and I am reading all I can find).
I have an elementary question: why is it better to sew woven shirt sleeves on the round rather than the flat? Why isn’t sewing them on the flat the default, like it generally is for knits?
Hi Lori, nice to hear from you! Knit sleeve head usually does not have extra ease because the knit fabric has stretch and can give you the movement you need. Because it doesn’t have extra ease, the seam line is the same length as the armhole. Hence you can sew it flat. For woven sleeve, extra ease is built in for movement, and you will need to ease the extra in. Because of that, a more “3-D”, so it is best done in the round.
The 3-D explanation for the ease makes sense. I do better when I understand the “why” of things, so that helps a lot! Thank you!
Thank you! This really helped me take the process slower and not mess it up because I was hurrying. I just waltzed through the living room shouting “Today marks the first time in my life I sewed a set-in sleeve that I did not have to unpick! Let us bask!” My boyfriend and cat were really impressed.
Congrats! Just know that needing to unpick is not the end of the world either. Enjoy!
Thanks a lot for another excellent tutorial! it is so much easier to set in a sleeve this way!!
Very nicely written and clearly presented!
Fabulously written and illustrated, thanks for taking the time to do this. This is a beautiful summary of what it’s taken me about 3 years to figure out! The only thing that really helped me on my journey was to abandon pins for basting, because the basting allows so much more control and moves with the fabric. Pins seemed to work against me in their hard, rigid, no-movement holding together. Thread (basting) moves with the fabric and makes the sewing at the machine (inch by inch, as you noted) a non-stressful, even joyful event where the manipulation I do brings such satisfaction.
Thank you so much for this tutorial. I have always had trouble with set in sleeves, so I followed your instructions to the letter. First time two perfect sleeves with no unpicking!! Pin, pin, pin, ease slowly and stitch and adjust slowly, it works!
I am glad! 😀
I just can’t get enough instruction on sleeves 🙂 I do it just as you’ve described here except when I gather I do lock stitch at the beginning and end and pull the threads up from the sleeve cap which I understand shouldn’t be more than 1″ or 1.25″ and I like to do knits the same way (not so much easing for sure). But it’s always fun to read how someone else does it!
This is wonderful! I’ve got a Craft Gossip post scheduled for later this morning that features your set-in sleeves tutorial:
http://sewing.craftgossip.com/?p=89501
–Anne
Thank you!
Lovely clear instructions. I also pin, pin pin and sew with the garment side down, less chance of catching a pucker. When I learned to sew knit garments didn’t exist, so I had to learn to set in sleeves with sleeve cap ease. I can’t say I’ve ever had any major problem. Maybe the teeniest pucker once in a while, but practice makes perfect as they say. As for trimming down the sleeve cap, I wouldn’t dare!
Great summary! I, like you, have no problem getting sleeves set in smoothly and I think many sewists make this a bigger problem in their heads than it really is. Additionally, I have seem many who measure the sleeve and trim the cap down on every single garment to have no ease. I think there is very little discussion about why this ease is needed in non-knit garments to allow the arm to move freely. Yes, the sleeve will be easier to set without ease, but in a woven garment you are compromising fit and comfort by doing so.
Trim the cap down? Horror!