
Button Placket Adjustment for Larger Buttons
Does this ever happen to you? The pattern calls for 5/8″ buttons, but you see some 3/4″ buttons that are just PERFECT with your fabric of your shirt? What do you do?
Let’s be honest, sometimes I just slap the 3/4″ buttons on, making the buttonholes longer, and call it the day.
No one can tell when I just fudge it a little. But sometimes, when the difference in size is too much, the buttons end up looking like they would fall off the edge.
So what is the proper way to increase the button placket of your shirt to accommodate the larger button?
Let’s look at the anatomy of the button placket to understand. I am using a modified pattern piece for the Chai Shirt & Dress in this example. It has an integrated button placket.
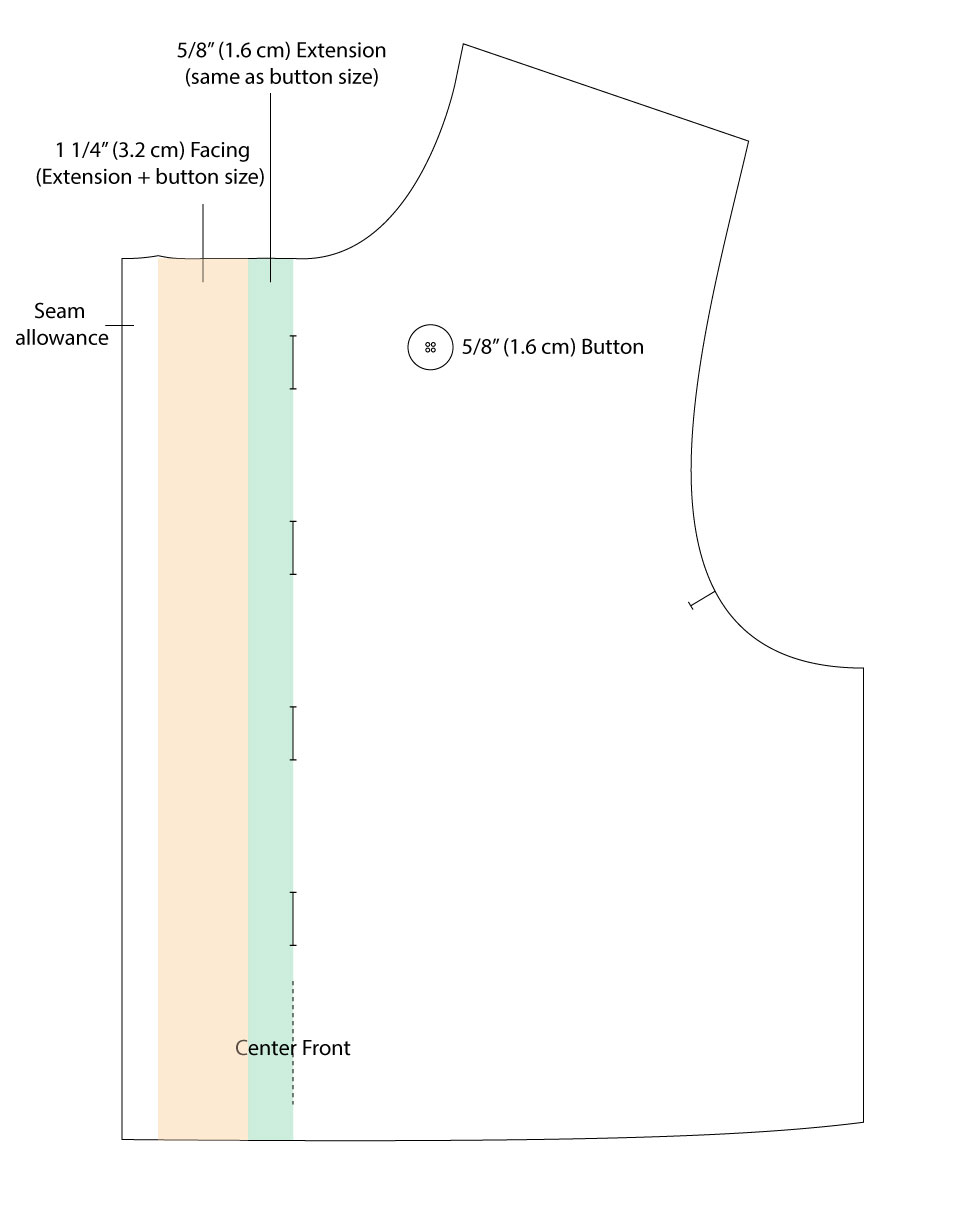
First of all, the green shaded section is the extension. This is the part that is beyond the buttonholes but before the folded edge of the placket. The extension is usually the size of the button when your buttonholes are vertical (in this example). When your buttonholes are horizontal, the extension can be 1/4″ (6 mm) larger.
The yellow shaded area is the facing. This is the part that will be supporting the buttons. It sits behind the buttons.
Let’s say instead of a 5/8″ (1.6 cm) button, you want to put a 7/8″ (2.2 cm) button there.
What you need to do is to slice the button placket between the yellow and the green shaded area (it’s likely that your pattern says “fold line” there). Then you add the amount you need to add. In my example, the difference of a 7/8″ (2.2 cm) button and a 5/8″ (1.6 cm) button is 1/4″ (6 mm). So that is the amount I need to add.
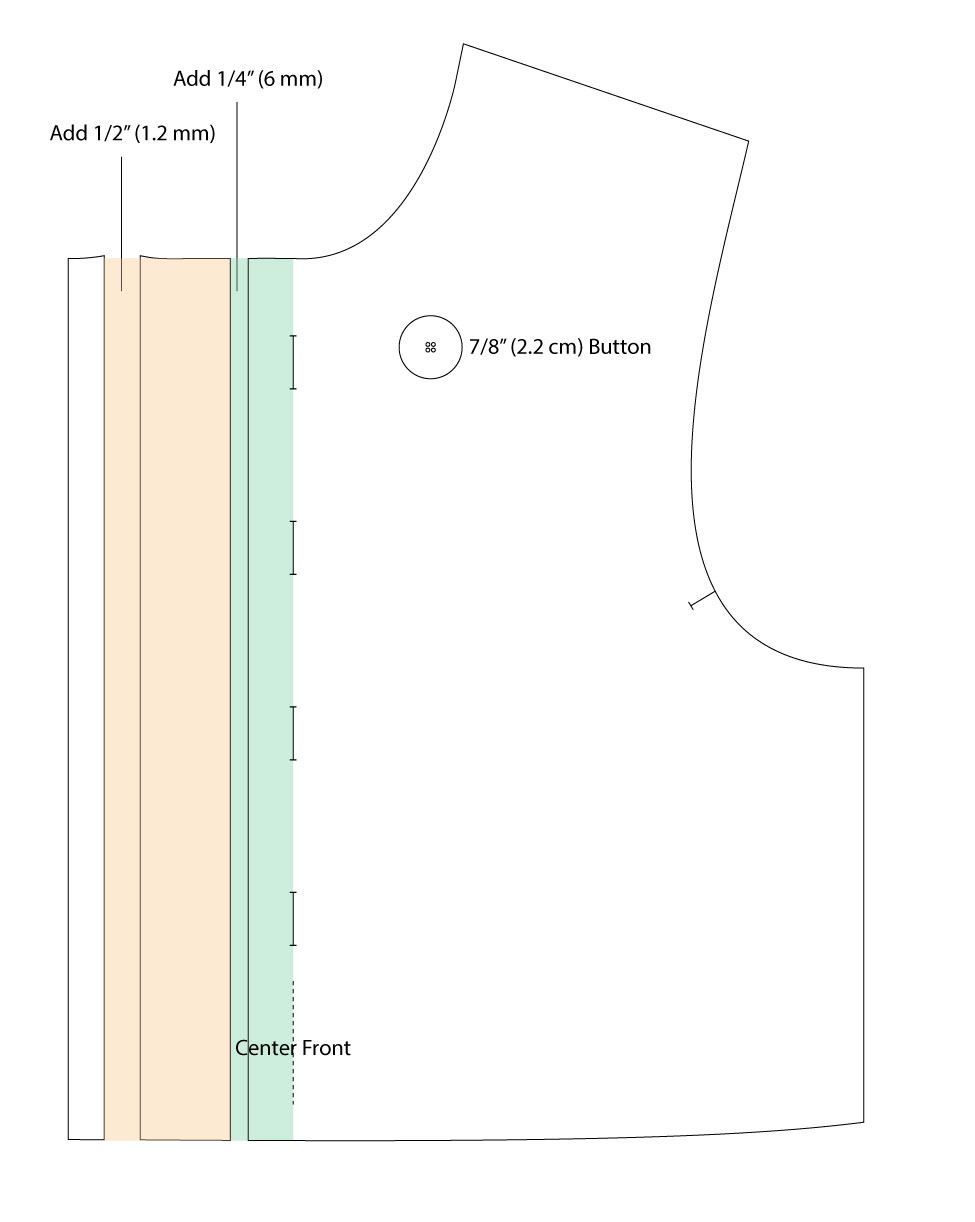
Because of the increase in width, you will also need to make the facing bigger. Remember that the facing is the button size plus extension? In this case, it is 7/8″ plus 7/8″ (2.2 cm plus 2.2 cm), which equals 1 3/4″ (4.4 cm). Since pre-sliced facing was only 1 1/4″ (3.2 cm) wide, I need to add an additional 1/2″ (1.2 cm) between the seam allowance and the facing.
It does seem like a lot of numbers, doesn’t it? But it’s just simple arithmetic. I swear that if you sit down and think about it, it’s not difficult to understand.
You use the same method for horizontal buttonholes too.
Check out another post about button and buttonhole placement.
I hope it helps!
Happy sewing!

How does this change impact the collar, since more fabric has been added to the center front?
It depends on your collar. If it’s just reaching the center front, then you don’t need to change it, because the center front remains the same. The added fabric doesn’t change where the center front is (it’s folded behind as the placket or it’s beyond the center front).