
Awesome Patch Pocket – The Smarter Way
My mom told me, if I wanted great results, I had to work hard for it, because beautiful things never came easy. Now that I am a grown woman with my own experiences, I have realized that, most of the time, my mom is right. However, I’ve also learned that working smarter sometimes is more important.
Patch pocket is one of those things.
Typically patch pocket is not my pocket of choice. I like in-seam pockets such as the ones in Marbella Dress; they are not very visible, so the lines of the garment remains unobstructed. I also like welt pockets because they look refined and elegant. And since they are harder to do, so they must be nicer, right? (Refer to my mom’s rule above.)
But patch pockets have their places. If you have a somewhat fitted garment, in-seam pockets and welt pockets are not ideal; you really don’t have the space to accommodate the pockets (and the things that you are putting in the pockets) between your body and the garment. Also, sometimes you just want some surface interest on your garments.
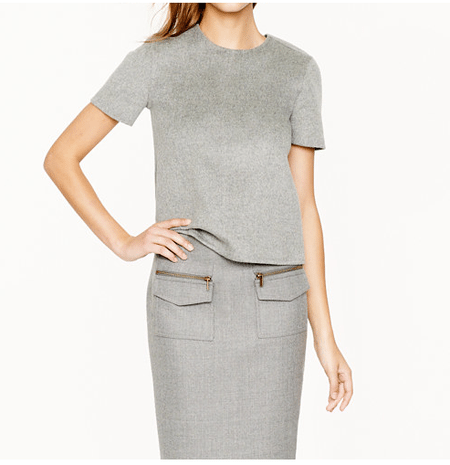
These fancy patch pocket are the focuses of the whole garment (credit: J Crew)
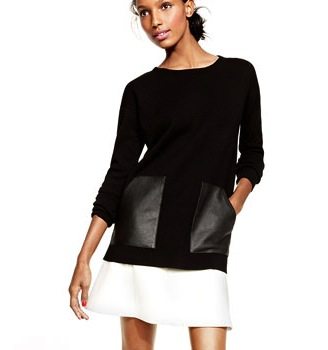
This top would otherwise be quite plain without the patch pockets. (credit: J Crew)
That’s why in addition to the welt pocket option, I included the patch pocket option in Emily Culottes. To make them more interesting, the opening of the pockets are slanted. The button closure also gives you an opportunity to place another accent on top. And even if you use thin fabric, your pockets can remain closed with the button.
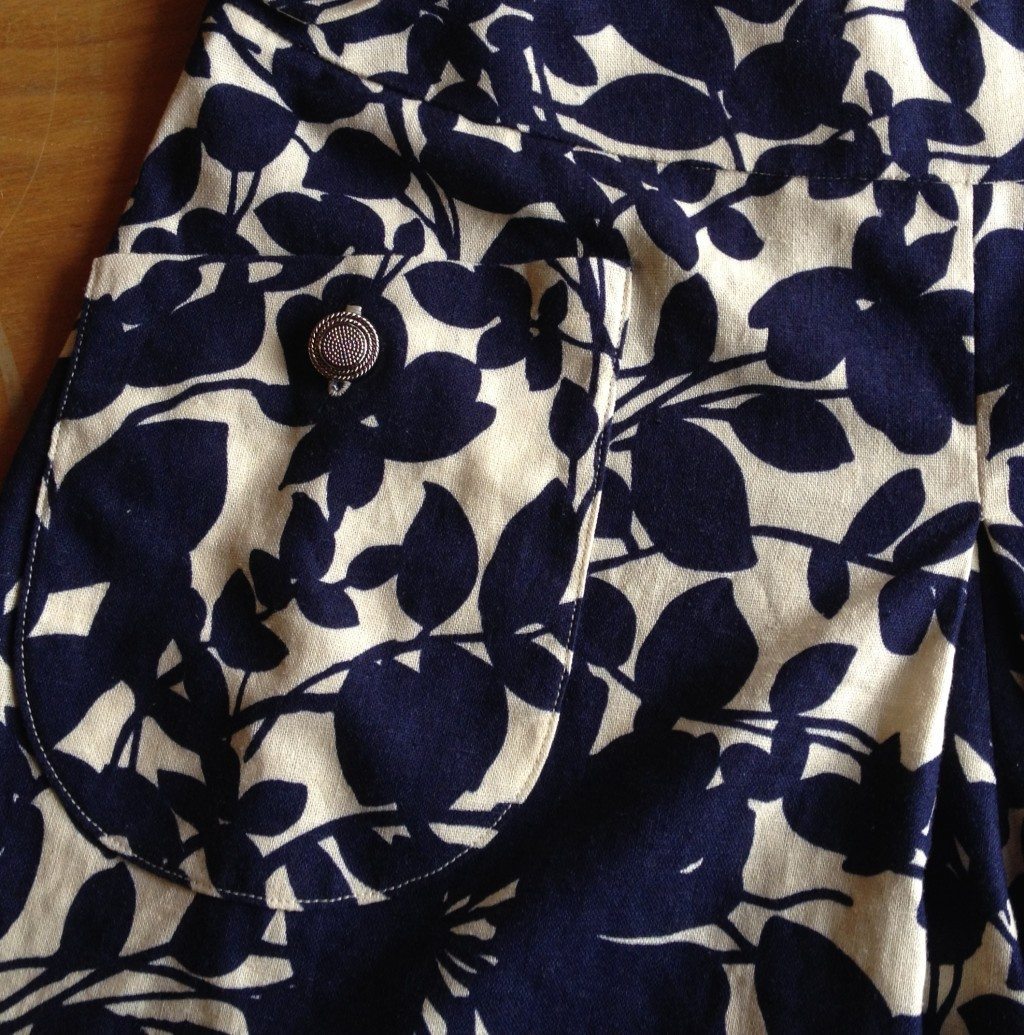
Patch pocket on Emily Culottes
But this post is not just about the patch pockets on Emily Culottes. It’s about any patch pockets in general.
Let me tell you, the secret to a beautiful, yet easy-to-sew patch pocket is lining.
You might think “Wait a second, how is adding a lining easier? I would have to cut and sew it. Having one piece of fabric is simpler than having two.” Very true: if you want a lousy-looking patch pocket, yes, it’s easier to have an unlined one. If you want a *beautiful* pocket, then a lined one takes less time to complete than an unlined one. Doing an unlined patch pocket is what I called “false laziness.” You skimp on something thinking it’s faster and easier, but it ends up taking longer and more difficult. Our goal here is “true laziness;” we want to do it right using the right material and skill, so it’s perfect the first time around.
Two benefits of lined pockets are easy to explain: 1) They are more durable, and 2) your hands won’t feel the seam allowances when they are in the pockets, which adds to the luxurious feel to the garment. But these are just icing on the cake. The real benefit is harder to explain without drilling into the details.
Let’s examine how you sew an unlined pocket. You turn and press the seam allowance around the pocket to the wrong side. A lot of patch pockets have rounded corners, which are great features since they prevent lint from accumulating at the corners. Some are rounded just for the look. Some even have irregular shapes. Now think about how you are going to turn and press the round seam allowances to the wrong side. It’s very difficult to do evenly without any jagged edge. And please watch your hands with that hot iron.
Some instructions may have you stitch a line along the seam around the pocket, so you can leverage the stitching to turn the seam allowance. Or they may have you use a cardboard template to make it easier. At this point, the process is taking you almost as much time as using a lining. And these solutions cause further problems down the line.
It doesn’t matter what method you have used to meticulously turn the seam allowance, to have a smooth look, the next step is to clip along the curves, otherwise you could see bulk from the right side of the pocket. With a clipped seam allowance, you can no longer finish it with you serger nicely. You may choose to trim the seam allowance, but you would be making the next step more difficult, which is sewing the patch pocket on the garment.
If you care about the look of your patch pocket, at this point, you are screaming to yourself and asking why you are doing the pockets to begin with. You are starting to pull your hair out.
It doesn’t have to be this way. Just use a lining. Seriously.
Just follow these simple steps. I am using Emily Culottes’ pattern pieces, but these steps are applicable to any patch pockets.
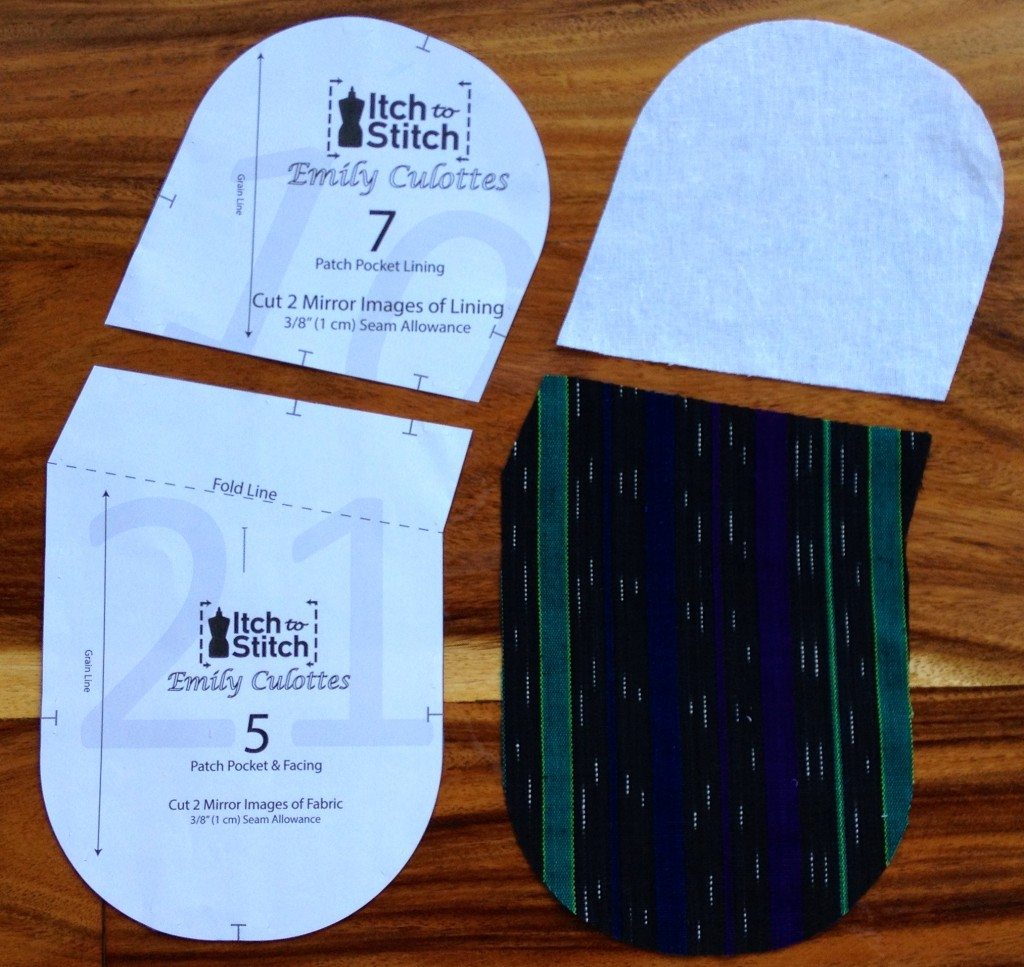
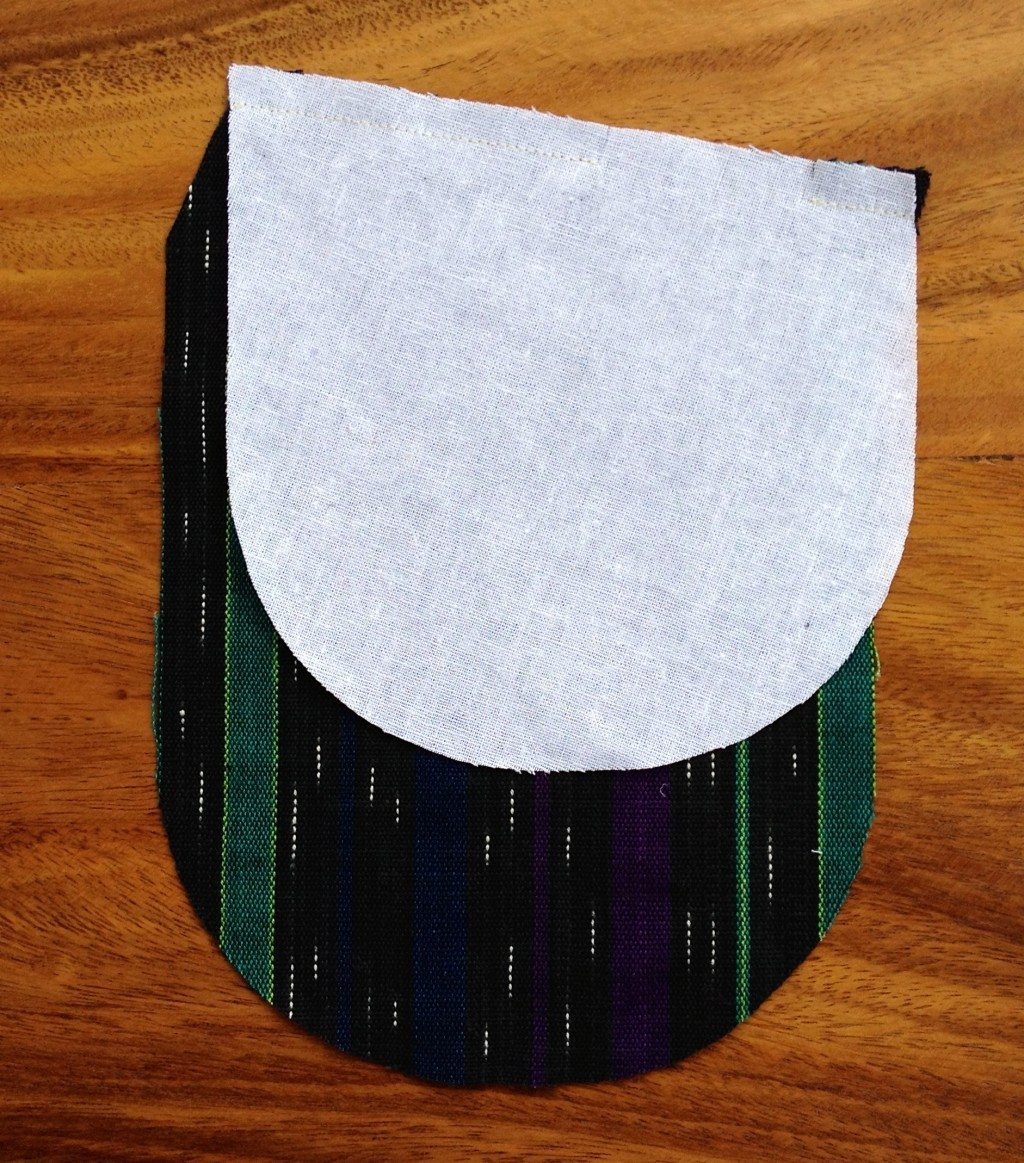
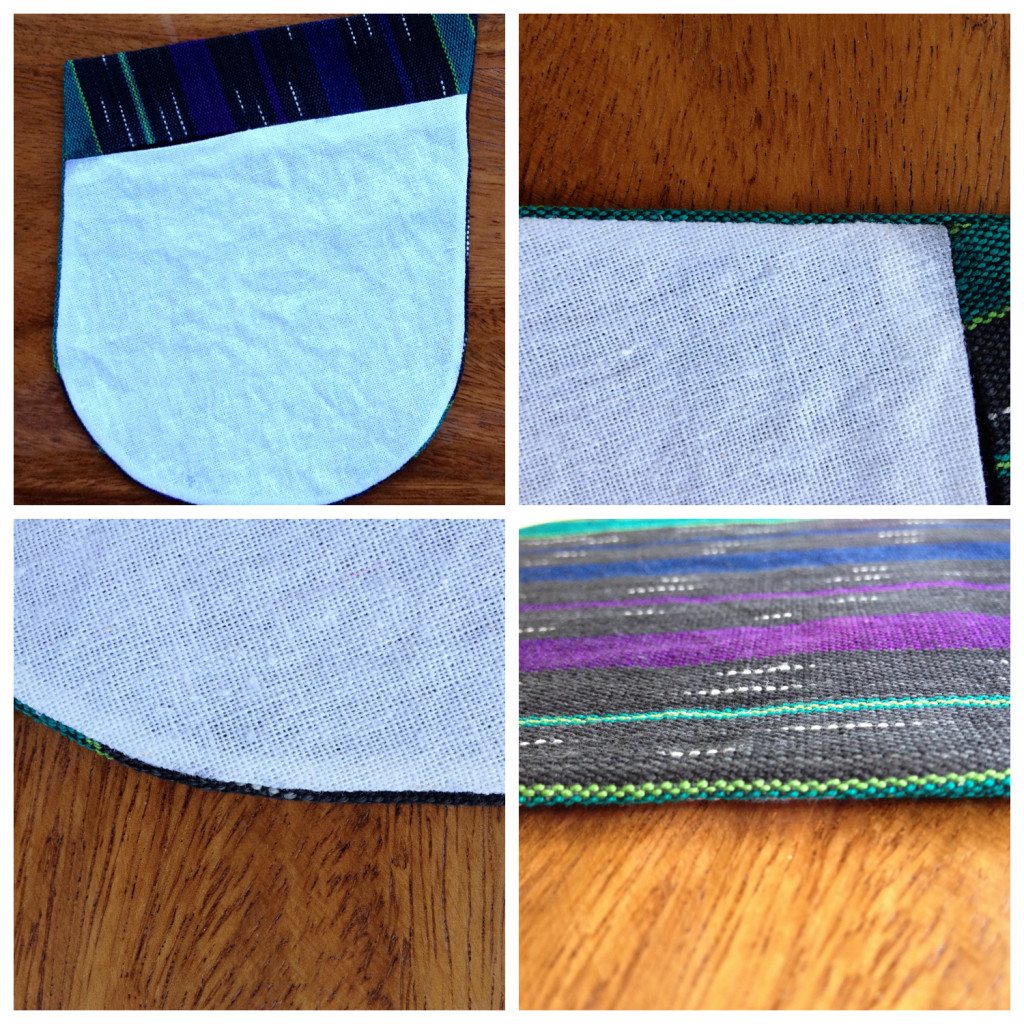
Step 1: Sew lining to pocket (or more accurately, to the facing part of the pocket) right sides together. Remember to leave a gap for turning. A 2″ (5 cm) is about a right size gap.
Step 2: Press the lining up. Typically, you would press the seam allowances toward the lining to reduce bulk since the lining is usually a lot thinner than the pocket. Here I press my seam allowances open since both of my fabrics are about the same weight.
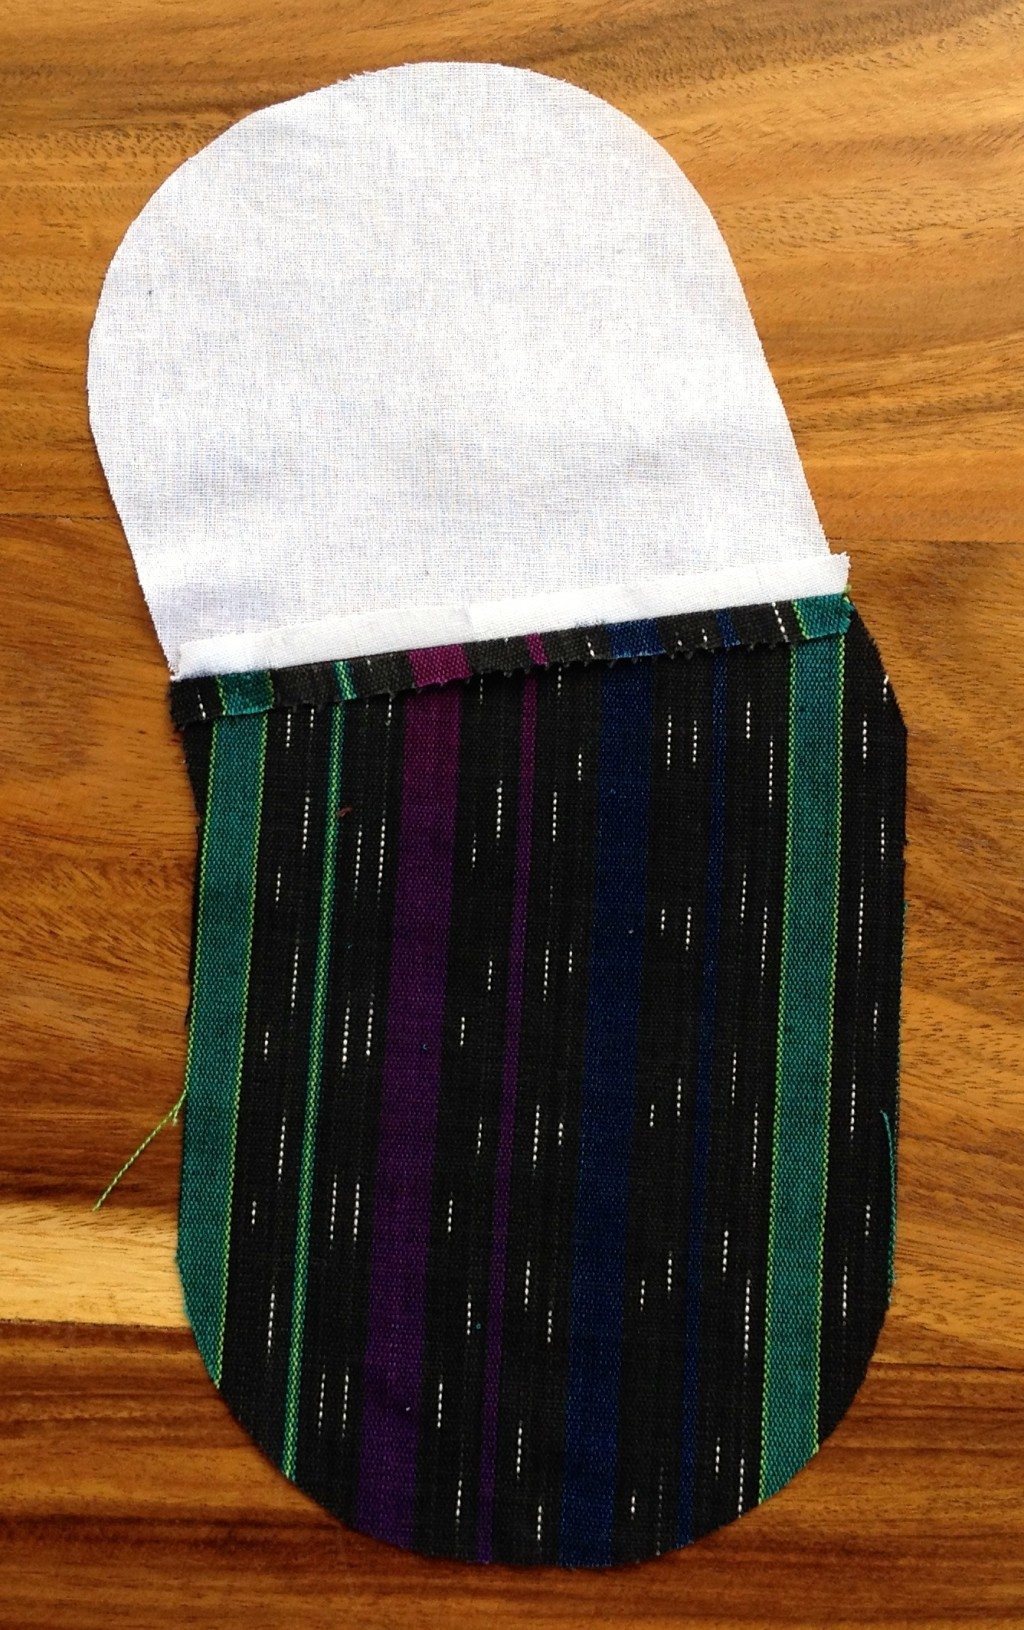
Step 3: Put right sides together folded at the fold line. In this photo, you can see that the lining is actually a tad smaller the pocket all the way around, by 1/8″ (0.3 cm) to be exact. This technique is called “favoring.” You will see the result of this in later steps. Most of the patterns don’t have this nice feature in their patch pockets. What you would have to do is trim the outer edge by 1/8″ (0.3 cm) (but not the side attached to the facing). Emily Culottes have this feature build in already.
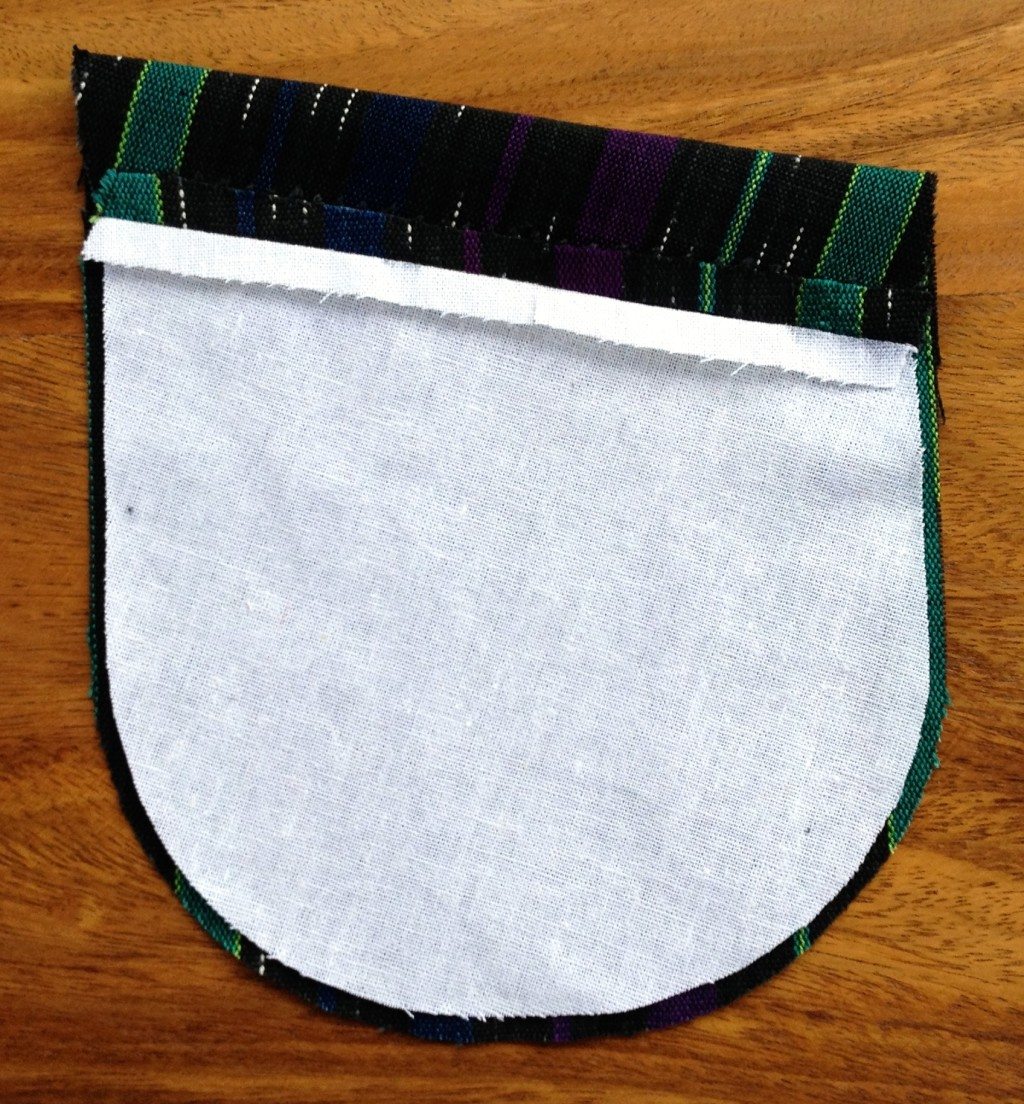
Step 4: Pin the lining to the pocket matching cut edges. Because the lining is smaller than the pocket, the pocket will “bubble up” a bit. Also, make sure you are pinning from the lining side, since later on we want the pocket to be laying against the sewing machine bed/feed dog.

Step 5: Stitch around the pocket. Remember the pocket should be against the feed dog when you sew so the excess fabric is eased into the lining.

Step 6: Trim the seam allowances. I trim to about 1/8″ (0.3 cm).
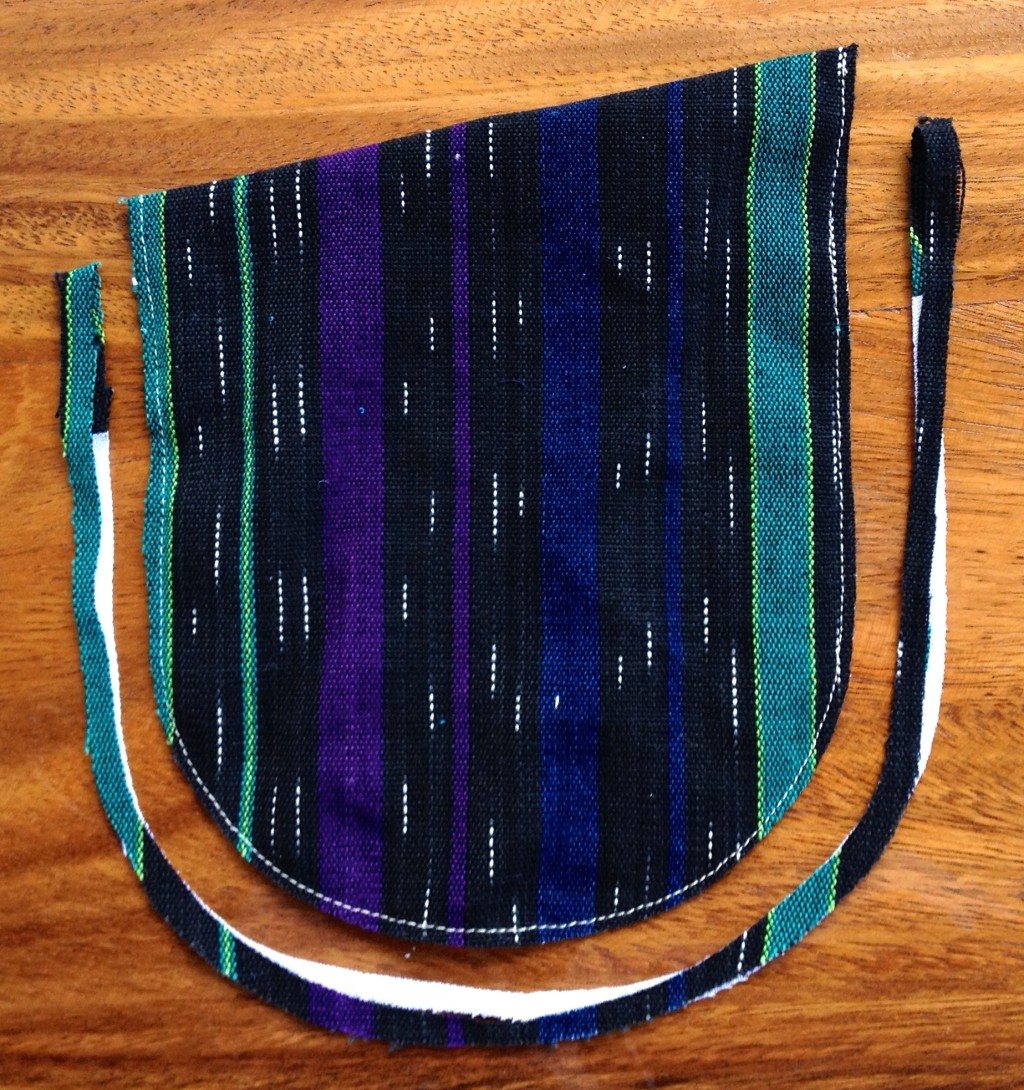
Step 7: Turn the pocket right side out through the gap between the lining and the facing. Press the seam very carefully. You can now see the result of the “favoring” technique. Because the lining is smaller, it’s pulling the seam in naturally. From the right side, you won’t be able to see the seam.
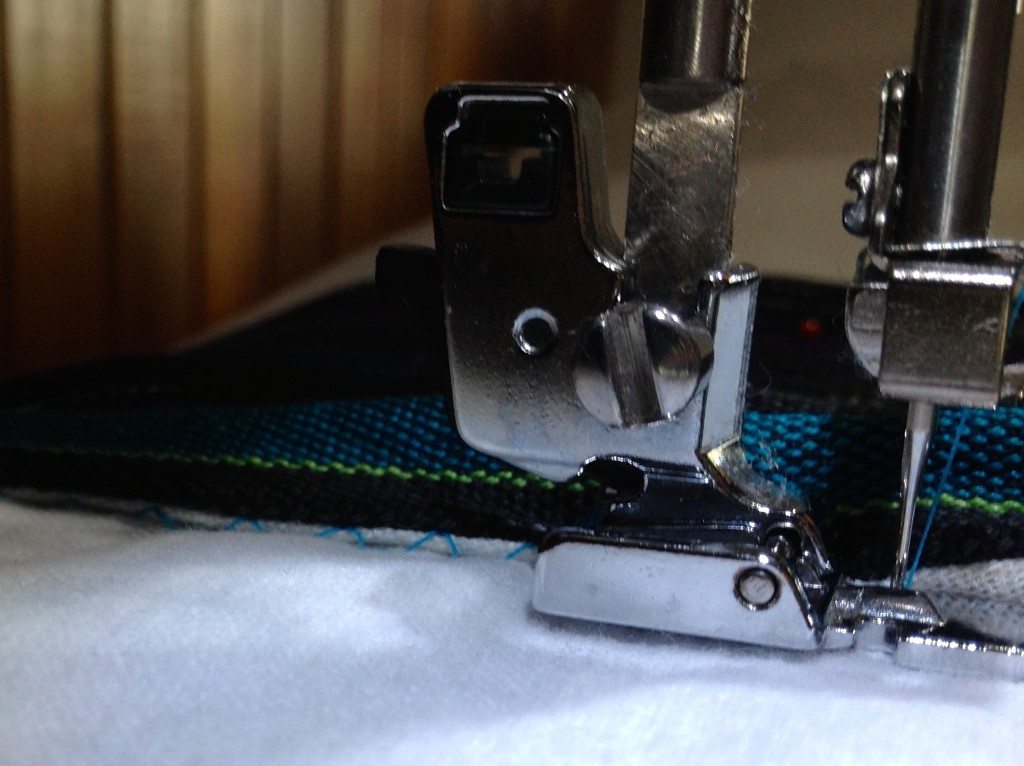
Step 8: Top stitch (or edge stitch) the pocket to the garment. The result is what you see on the Emily Culottes pocket above. I don’t have a photo for it because I was feeling particularly adventurous, so I used another method to attach the pocket. I pin the pocket to the garment first, then I pull the pocket slightly out of the way and use a blind hem stitch to attach the lining to the garment. This method is great if you want the pockets to be invisibly attached. It works better if your fabric is of a heavier weight. This method is possible because you are using the “favoring” technique; the stitches will be covered up by the edge of the pocket.
Emily Culottes didn’t use this method because I wanted the pockets to be very flat against the garment. I think it gives the pants a “lighter” look. However, the blind hem stitch method would be more desirable when making a jacket or a coat.
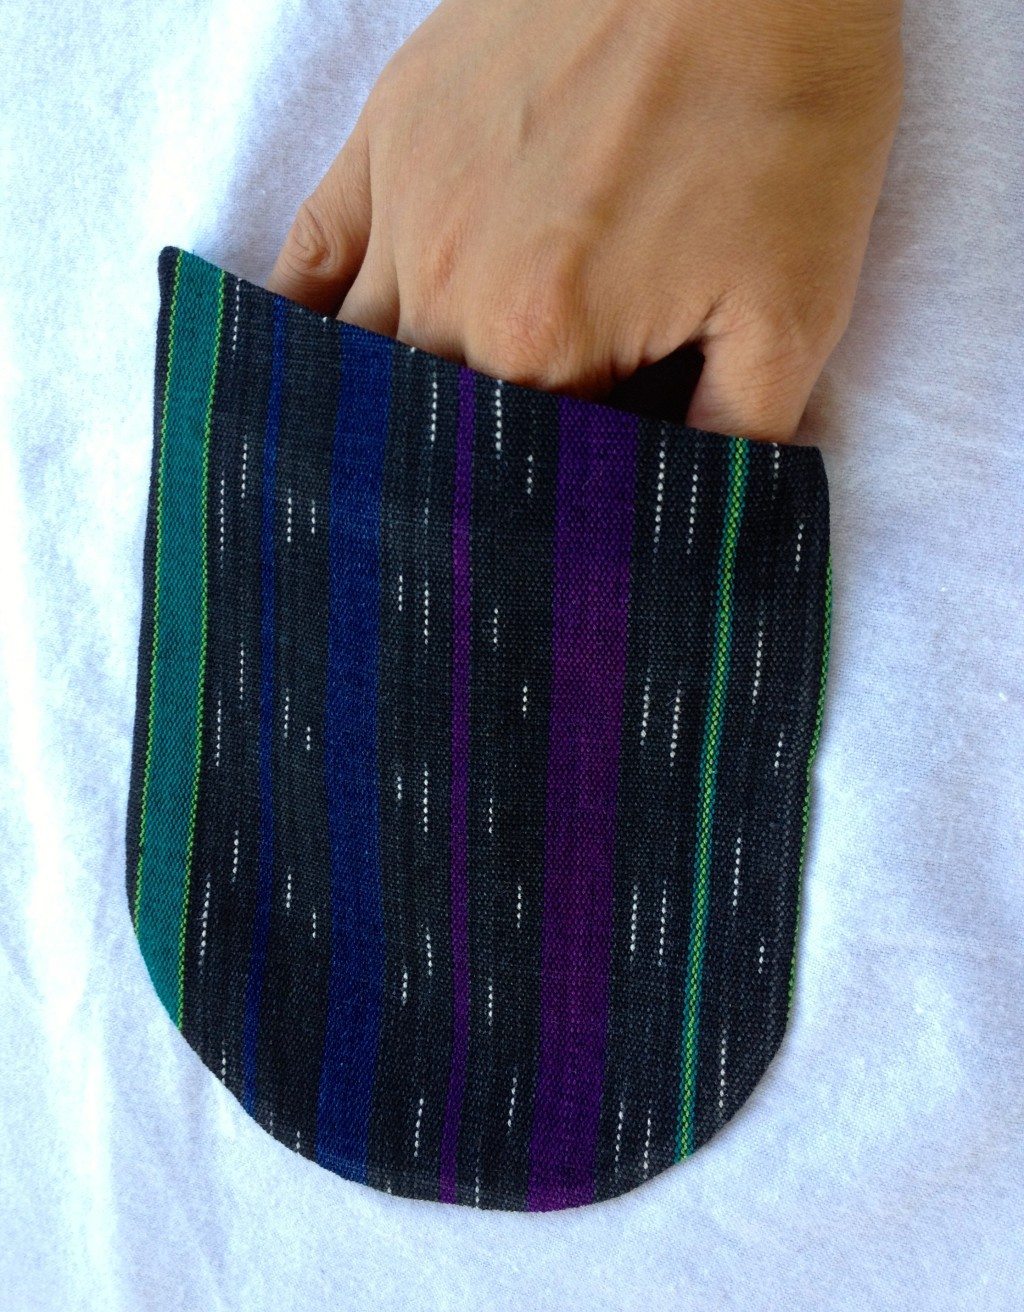
Give it a good press on the pressing ham to give a subtle nice curve.
Ta-da!
I hope you give it a try! Until next time, happy sewing!

could u send the pattern for the patch pocket or make it available with your instructions?
Hi Joann, this pocket pattern is available with the Emily Culottes pattern (https://itch-to-stitch.com/product/emily-culottes-digital-sewing-pattern-pdf/). 🙂
Hi Kennis – pockets have been a problem for me for a long time. I’ve avoided adding them and the question for me was fashion vs function? Side seam pockets added bulk to dresses and bottoms. Patch pockets looked wonky because I found it difficult to consistently get an exact match for shape and size, while maintaining both.
The Celeste pattern has a great pocket that worked well. I was pleased with the result and decided I really needed to include pockets in the half-dozen or so dresses that I am making for this summer. Then I found your post!
I have never lined a pocket or used the “favoring” technique until now. I thought I’d give it a go. What a total game changer! I have used it several times in the past couple weeks, using your downloadable pleated pocket pattern. On two dresses, I just used the lining pattern and left about a 1.5inch opening to turn inside out.
The two dresses are prints and measuring carefully, I matched the prints on both the pocket and dress fronts. I stitched using an edge presser foot that sewed a 1-2mm edge stitch. Absolutely great technique and the pockets are barely visible!
Other pocket techniques that I’ve recently used successfully – I have an A-line shift dress block that I hacked with a dropped waist and included inseam pockets much like the Cielo dress by Closet Core and Aiko dress from Fabric-Store. I’ve mastered the shirt breast patch pocket using a cardboard pattern cutout, folding and pressing the fabric around the cardboard for an absolutely perfectly shaped pocket with straight sides and pointy tip. That was also a method I found online somewhere.
Thank you Kennis for the great tutorial!
How do you turn the pocket rightside out after stitching around the edge? There’s no opening.
Hi Jill, yes, there is an opening. Check out step 1.
Love this tutorial! Thanks for the pictures.
I used this method years ago to line curtains. I had forgotten all about it. Thank you!
I know this is like years and years later, but thank you so much for this tutorial. I’ve been working on a coat for ages, and as it was coming together the pockets just weren’t looking or feeling right… there is something wonderful about being able to put your hands into a smooth lined pocket, and the trick about sewing the lining a little smaller so you can flip and then edge stitch to hide it – would never have thought of it and you saved me so much time! thank you, again (from New Zealand of all places)
I prefer lining the pockets anyway but never knew about the favouring technique!! I’m so excited to try this, I haven’t seen it anywhere befor, thanks!!
thank you for the tutorial – cant wait to make for my daughter. I love your grey polkadot fabrics , may I know where you get those ? I live in Midwest 🙂
Hi Dennis, I am guessing you are referring to the Lindy Petal Skirt in the side bar. I bought that in the Los Angeles fashion district, if I remember correctly, in Michael Levine. I can’t quite pinpoint it on their website since I bought it in person. This is the link to their site with their polka dot fabrics. http://goo.gl/pzYb14. Mine is a polyester matte jersey knit. Good luck!
Thanks for the clear explanation. I always hated the feel of the seam allowance so I almost never use patch pockets.
Brilliant!!! I will start lining pockets. Thanks for a great tutorial and explanation 🙂
You are welcome Lorraine. I personally like to know why I am supposed to do certain things. I thought you might too.
Very nice tutorial! And it makes perfect sense. I usually add a lightweight layer of interfacing to patch pockets, but not a lining. I’ll have to give your method a try!
Let me know how it goes, Ann 🙂