
Add a Half Circle Skirt to Your Pattern
In the last post, I mentioned taking advantage of your tried and true pattern, and do some minor modifications to create a different look. Why not? You worked so hard to make a dress or a top that fits you perfectly, then it is only logical to make more of it. But it doesn’t have to be exactly the same. Use a different cuff or a different skirt, combined with different fabric, it can have a completely new style.
Adding a circle skirt is one option. Circle skirts are super easy to create, and they fit almost everyone since there’s no limitation on the hips.
However, I always thought that circle skirts are a bit too cutesy for my age. It’s especially true for full-circle skirts; there’s a lot of twirl factor and a lot of fabric. I really don’t need all that fabric to make my child-bearing booty look more expansive. Don’t get me wrong; I love my body, but I can still choose to wear clothes that flatters my shape. Fortunately, I found a happy medium. Half-circle skirts are perfect for me; they add enough sass and femininity without the burden of added volume.
Drafting a circle skirt is a math exercise. I believe it’s 6th-grade math that involves radius, circumference, pi (not pie) and all that jazz. I don’t blame you for not remembering. My brain has limited capacity, and whatever doesn’t get used has to leave. Luckily, Google is there when you need things like math equations. Or I can go over it here.
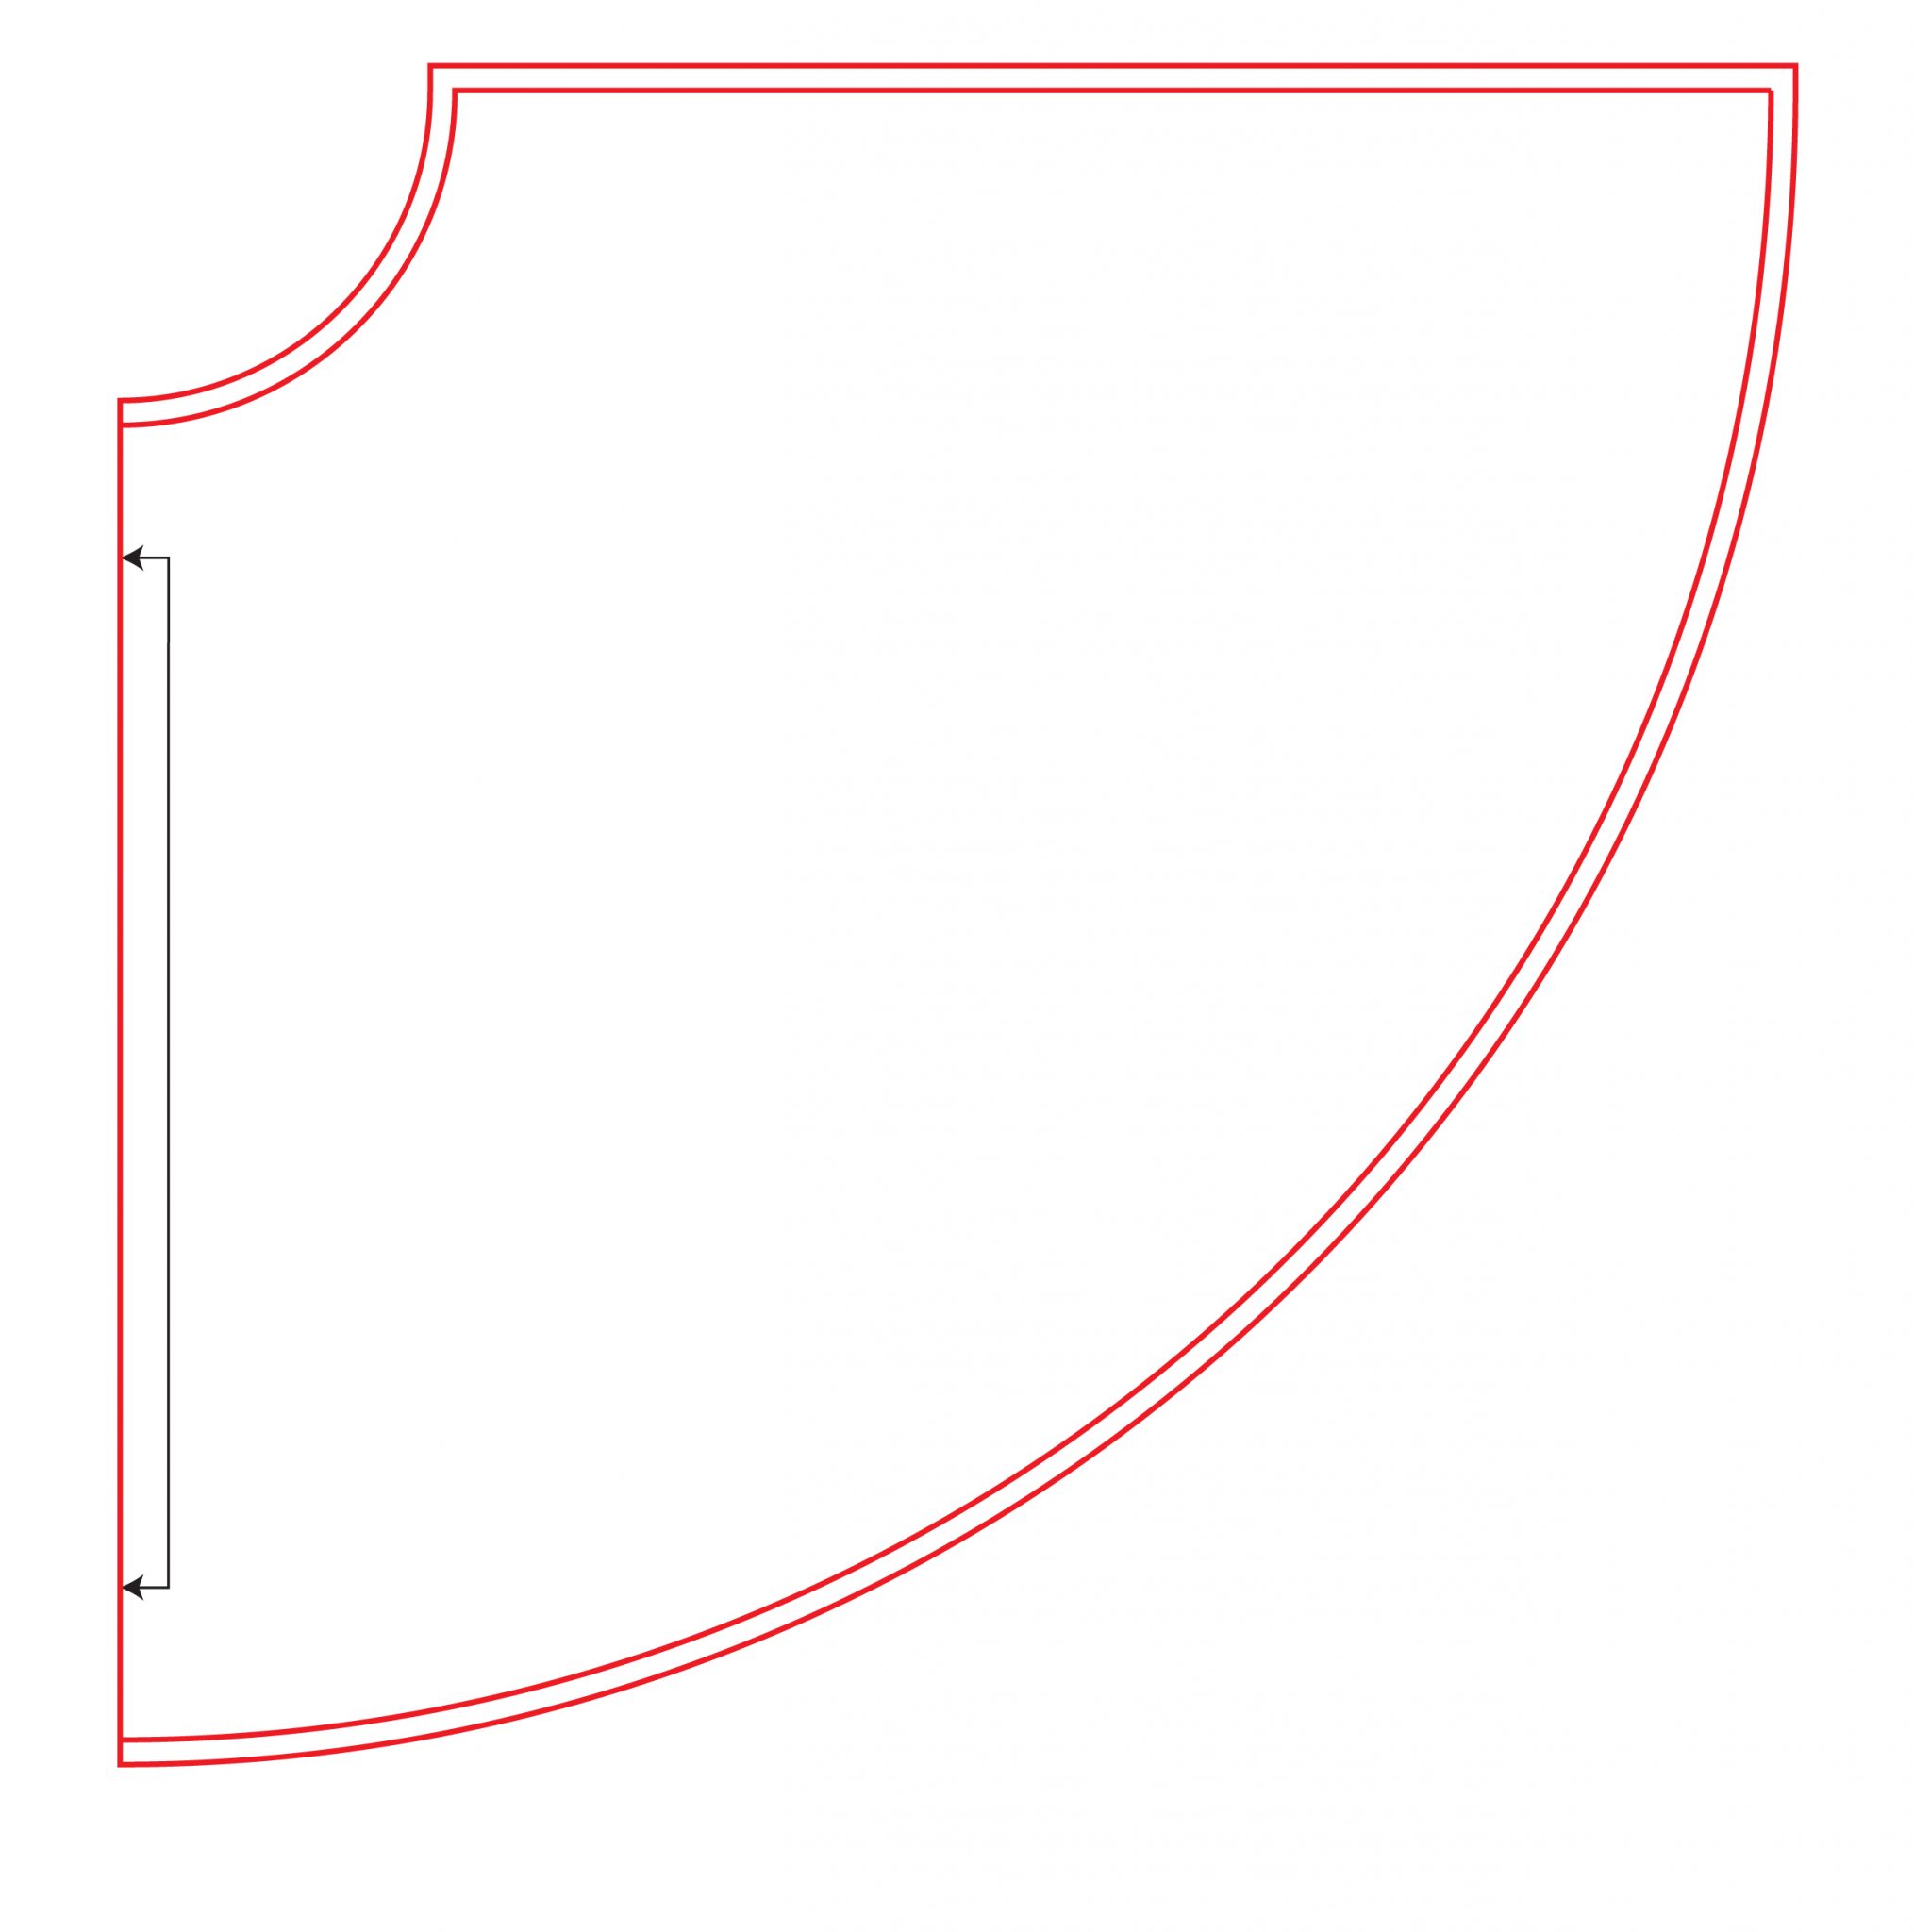
Let’s dive into the drafting of a half circle skirt. I think we should have the end game in mind. This is what we are trying to achieve.
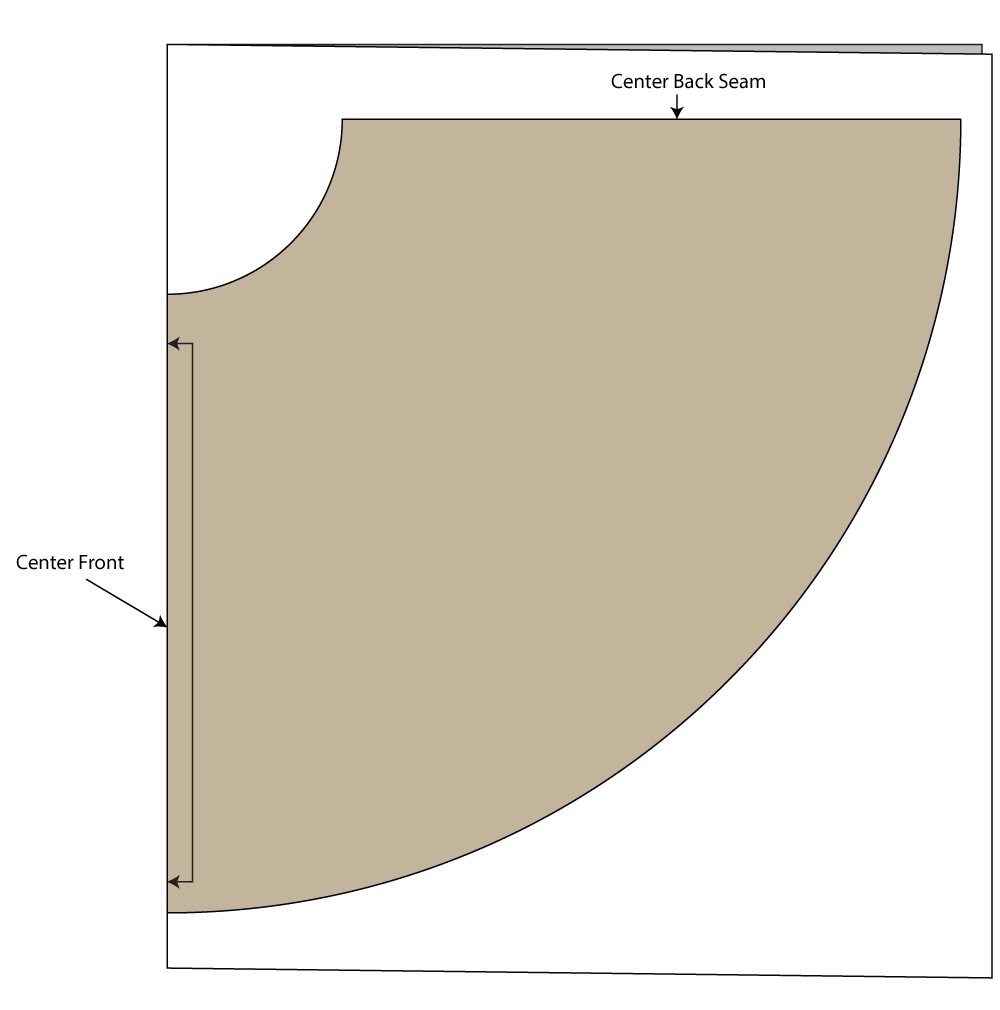
It is a “half” circle because we are cutting on the fold. When you open the fabric, you will get a half circle. Note that the fold is at the center front, hence there isn’t a seam. The other seam is the center back seam, which means there is no side seam. You very well could cut a side seam if you want to. In fact, you can cut it up into many slices if you want. But it’s not necessary. So let’s stick with the simple form right now.
You will notice that the top arc of the pattern is actually a quarter of a circumference of the circle.
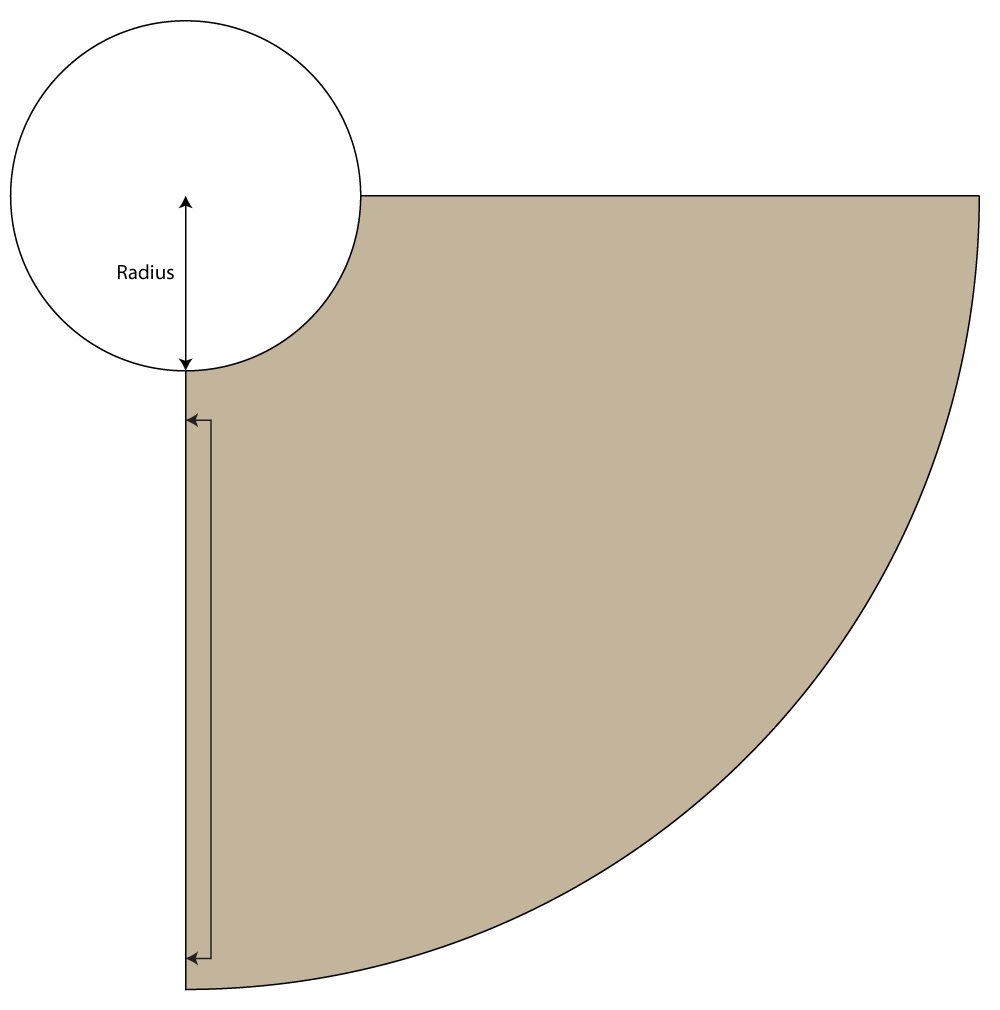
To draw that quartered circumference, we need to know:
- the circumference
- the radius
Did you notice that after we cut with the pattern and unfold the fabric, the waist is only half a circle? It means that half a circle needs to be the entire length of the waist. To do that, we need to double our entire waist circumference to calculate the radius. For example, if you are creating the circle skirt for your Marbella Dress, you need to measure the entire waist of the Marbella Dress of the chosen size times two. Remember to exclude the seam allowances when you measure (always measure the seam lines, not the cut edges).
(Lucky for you, if you are really drafting a half-circle skirt for your Marbella Dress, you can follow the waist of the finished garment measurement that is already included in the instructions. But we need to double that measurement.)
Since you know the entire waist measurement, it’s just a matter of math to come up with the radius. The beautiful math equation is:
Radius = Circumference / 2π
which is the same as:
Radius = Circumference / 6.2832
Now, it’s all reduced to a simple division. Pull out your calculator, and voila, there you have it.
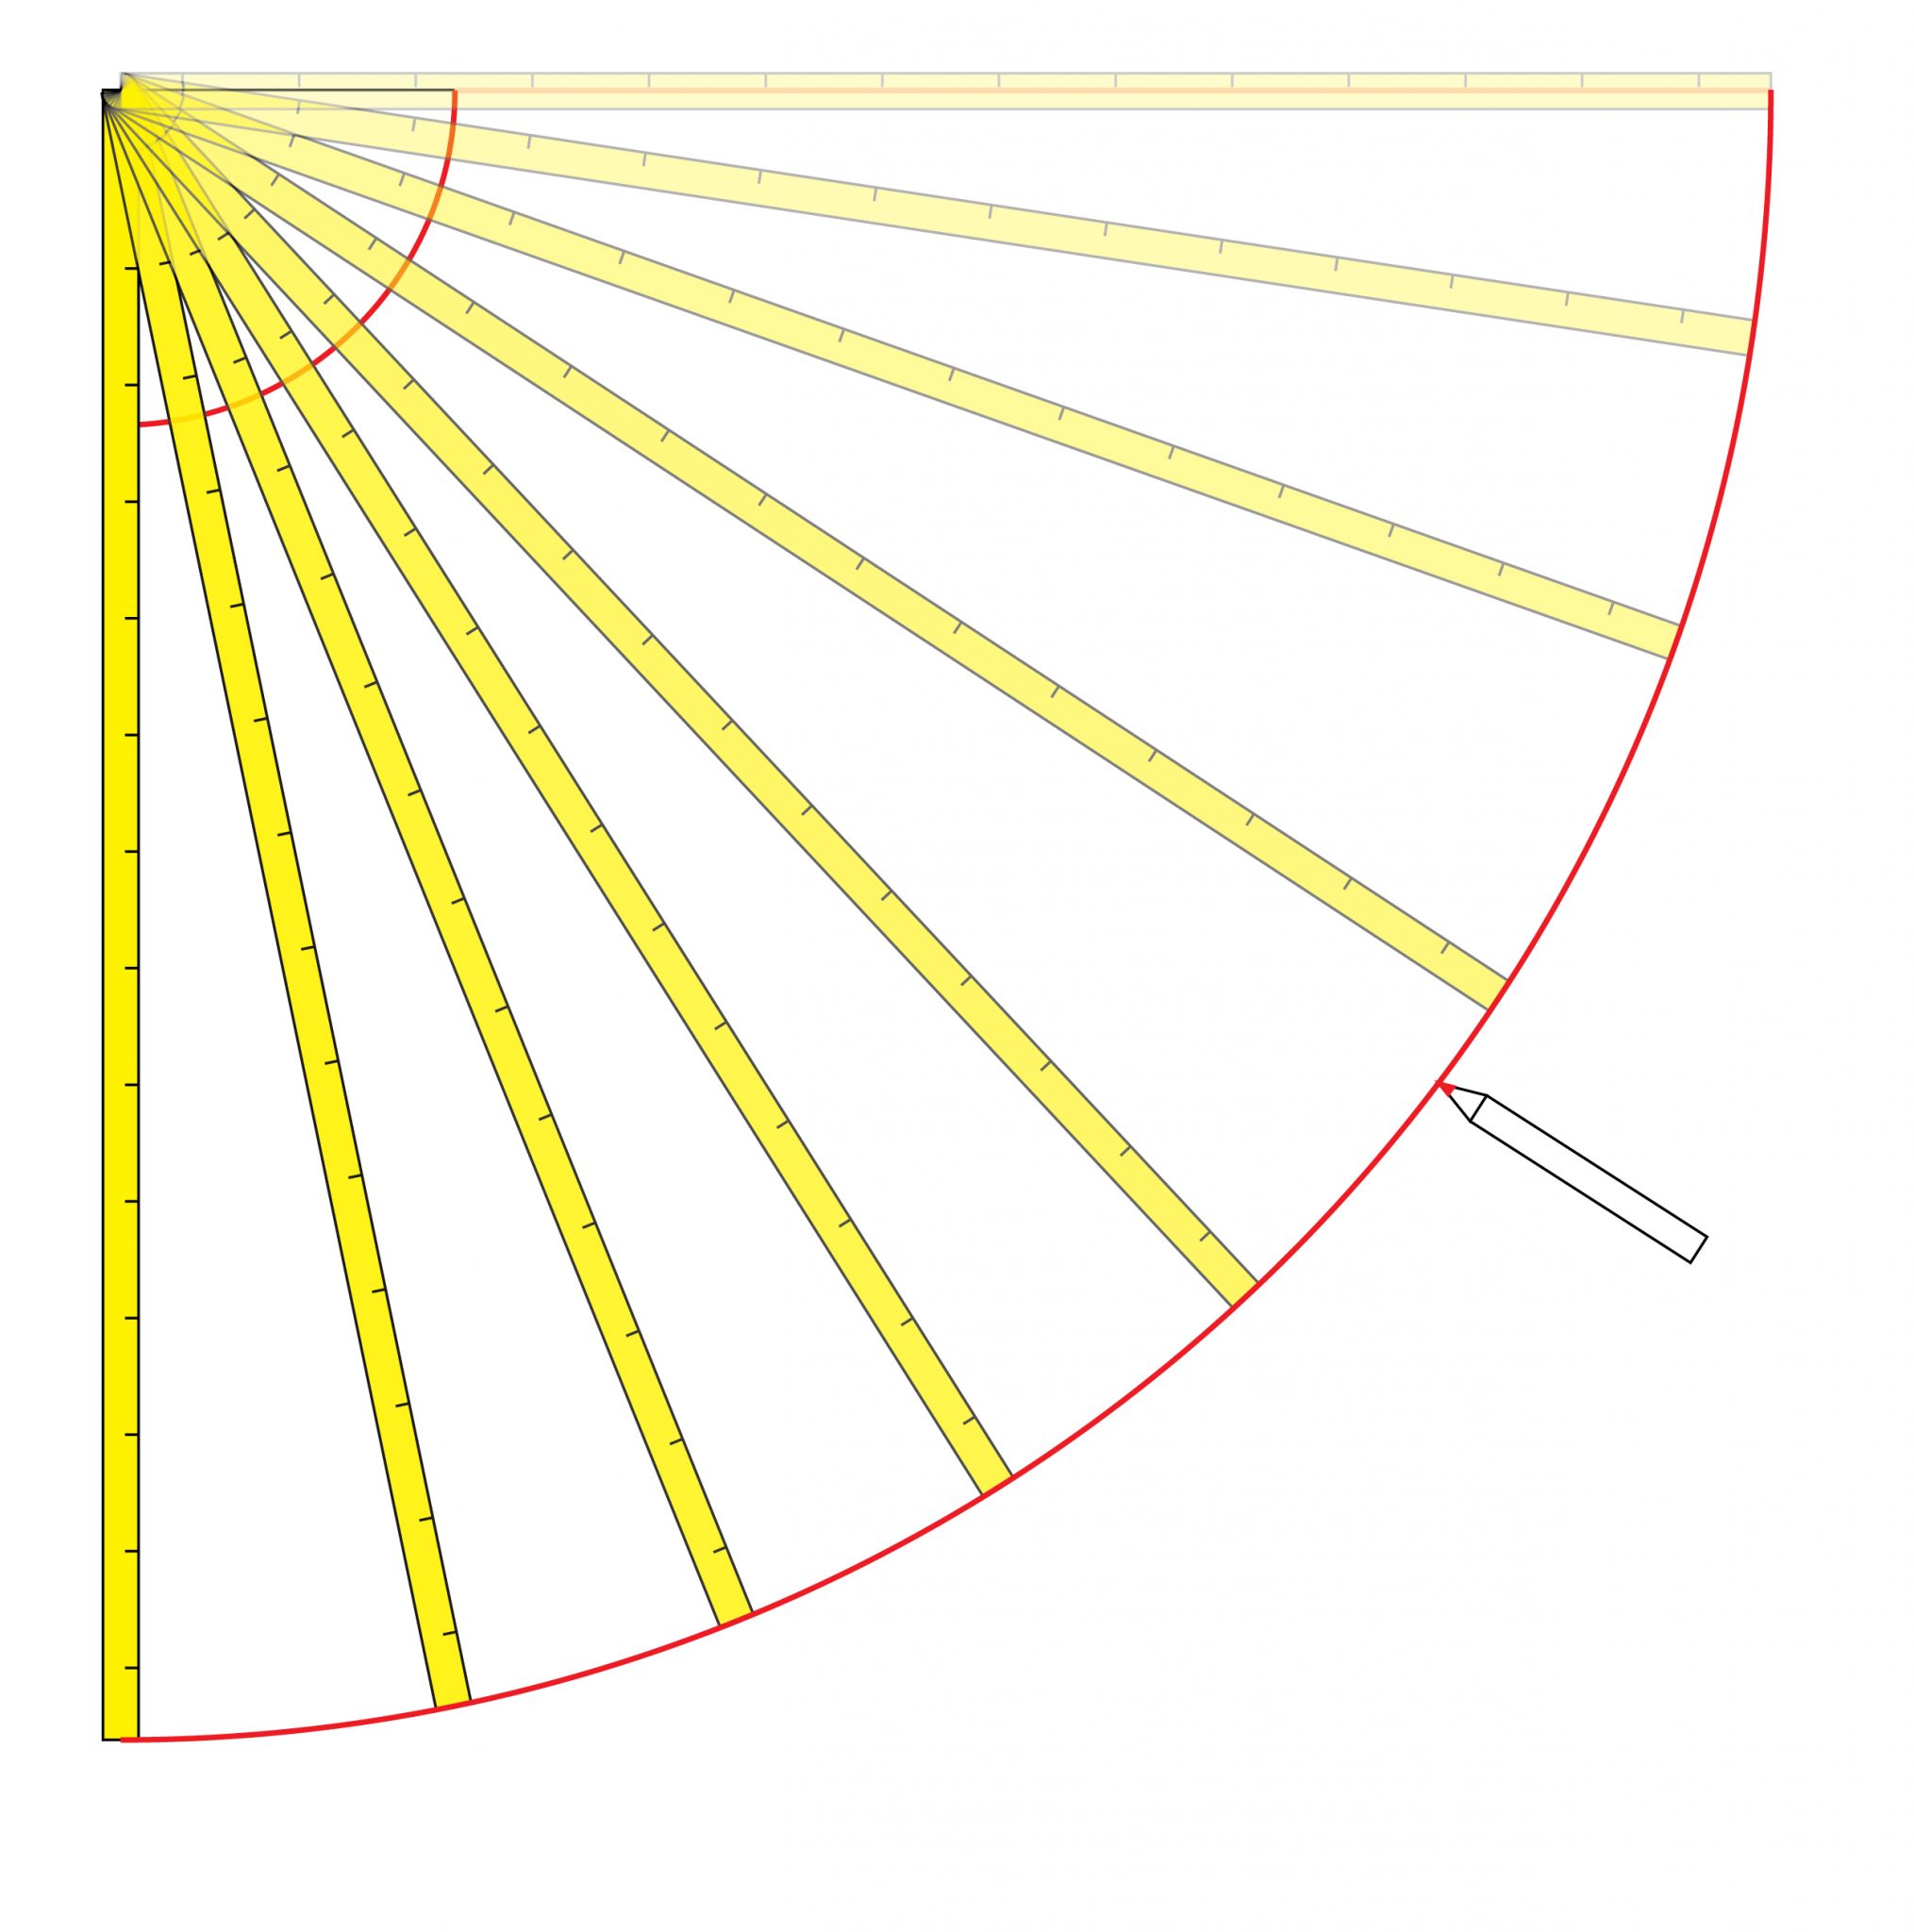
Armed with the radius, you are ready to rock and roll. First though, let’s draw a right angle as below. Each line is the same as the length is your radius.

Hold one end of your measuring tape stationary at the corner of the right angle, and pivot the measuring tape while marking the desired length. Mark every half an inch or so.
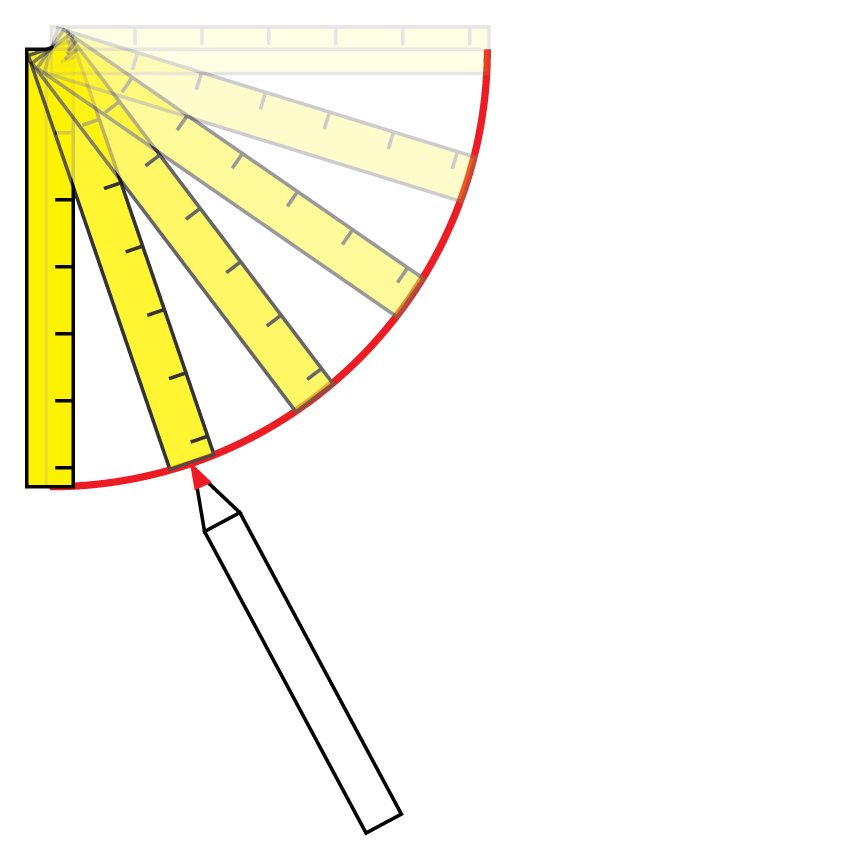
Connect the marks and you have the arc. It should be a quarter of the circumference. If in double, measure it.
Now you should decide how long you want your skirt. I’d like hold a measuring tape to my body and see how long it takes to hit my knee, which is usually where I want the hem of my skirt to end up. Keep in mind to measure from where the skirt will be sitting. Typically it’s the natural waist, but it’s not always the case. You could have a dropped-waist skirt, or an empire-waist skirt. It all depends on your top pattern.
In my case, I want 20″. So I draw two 20″ lines, one down from the left end of the arc, and the other horizontally from the right end of the arc.
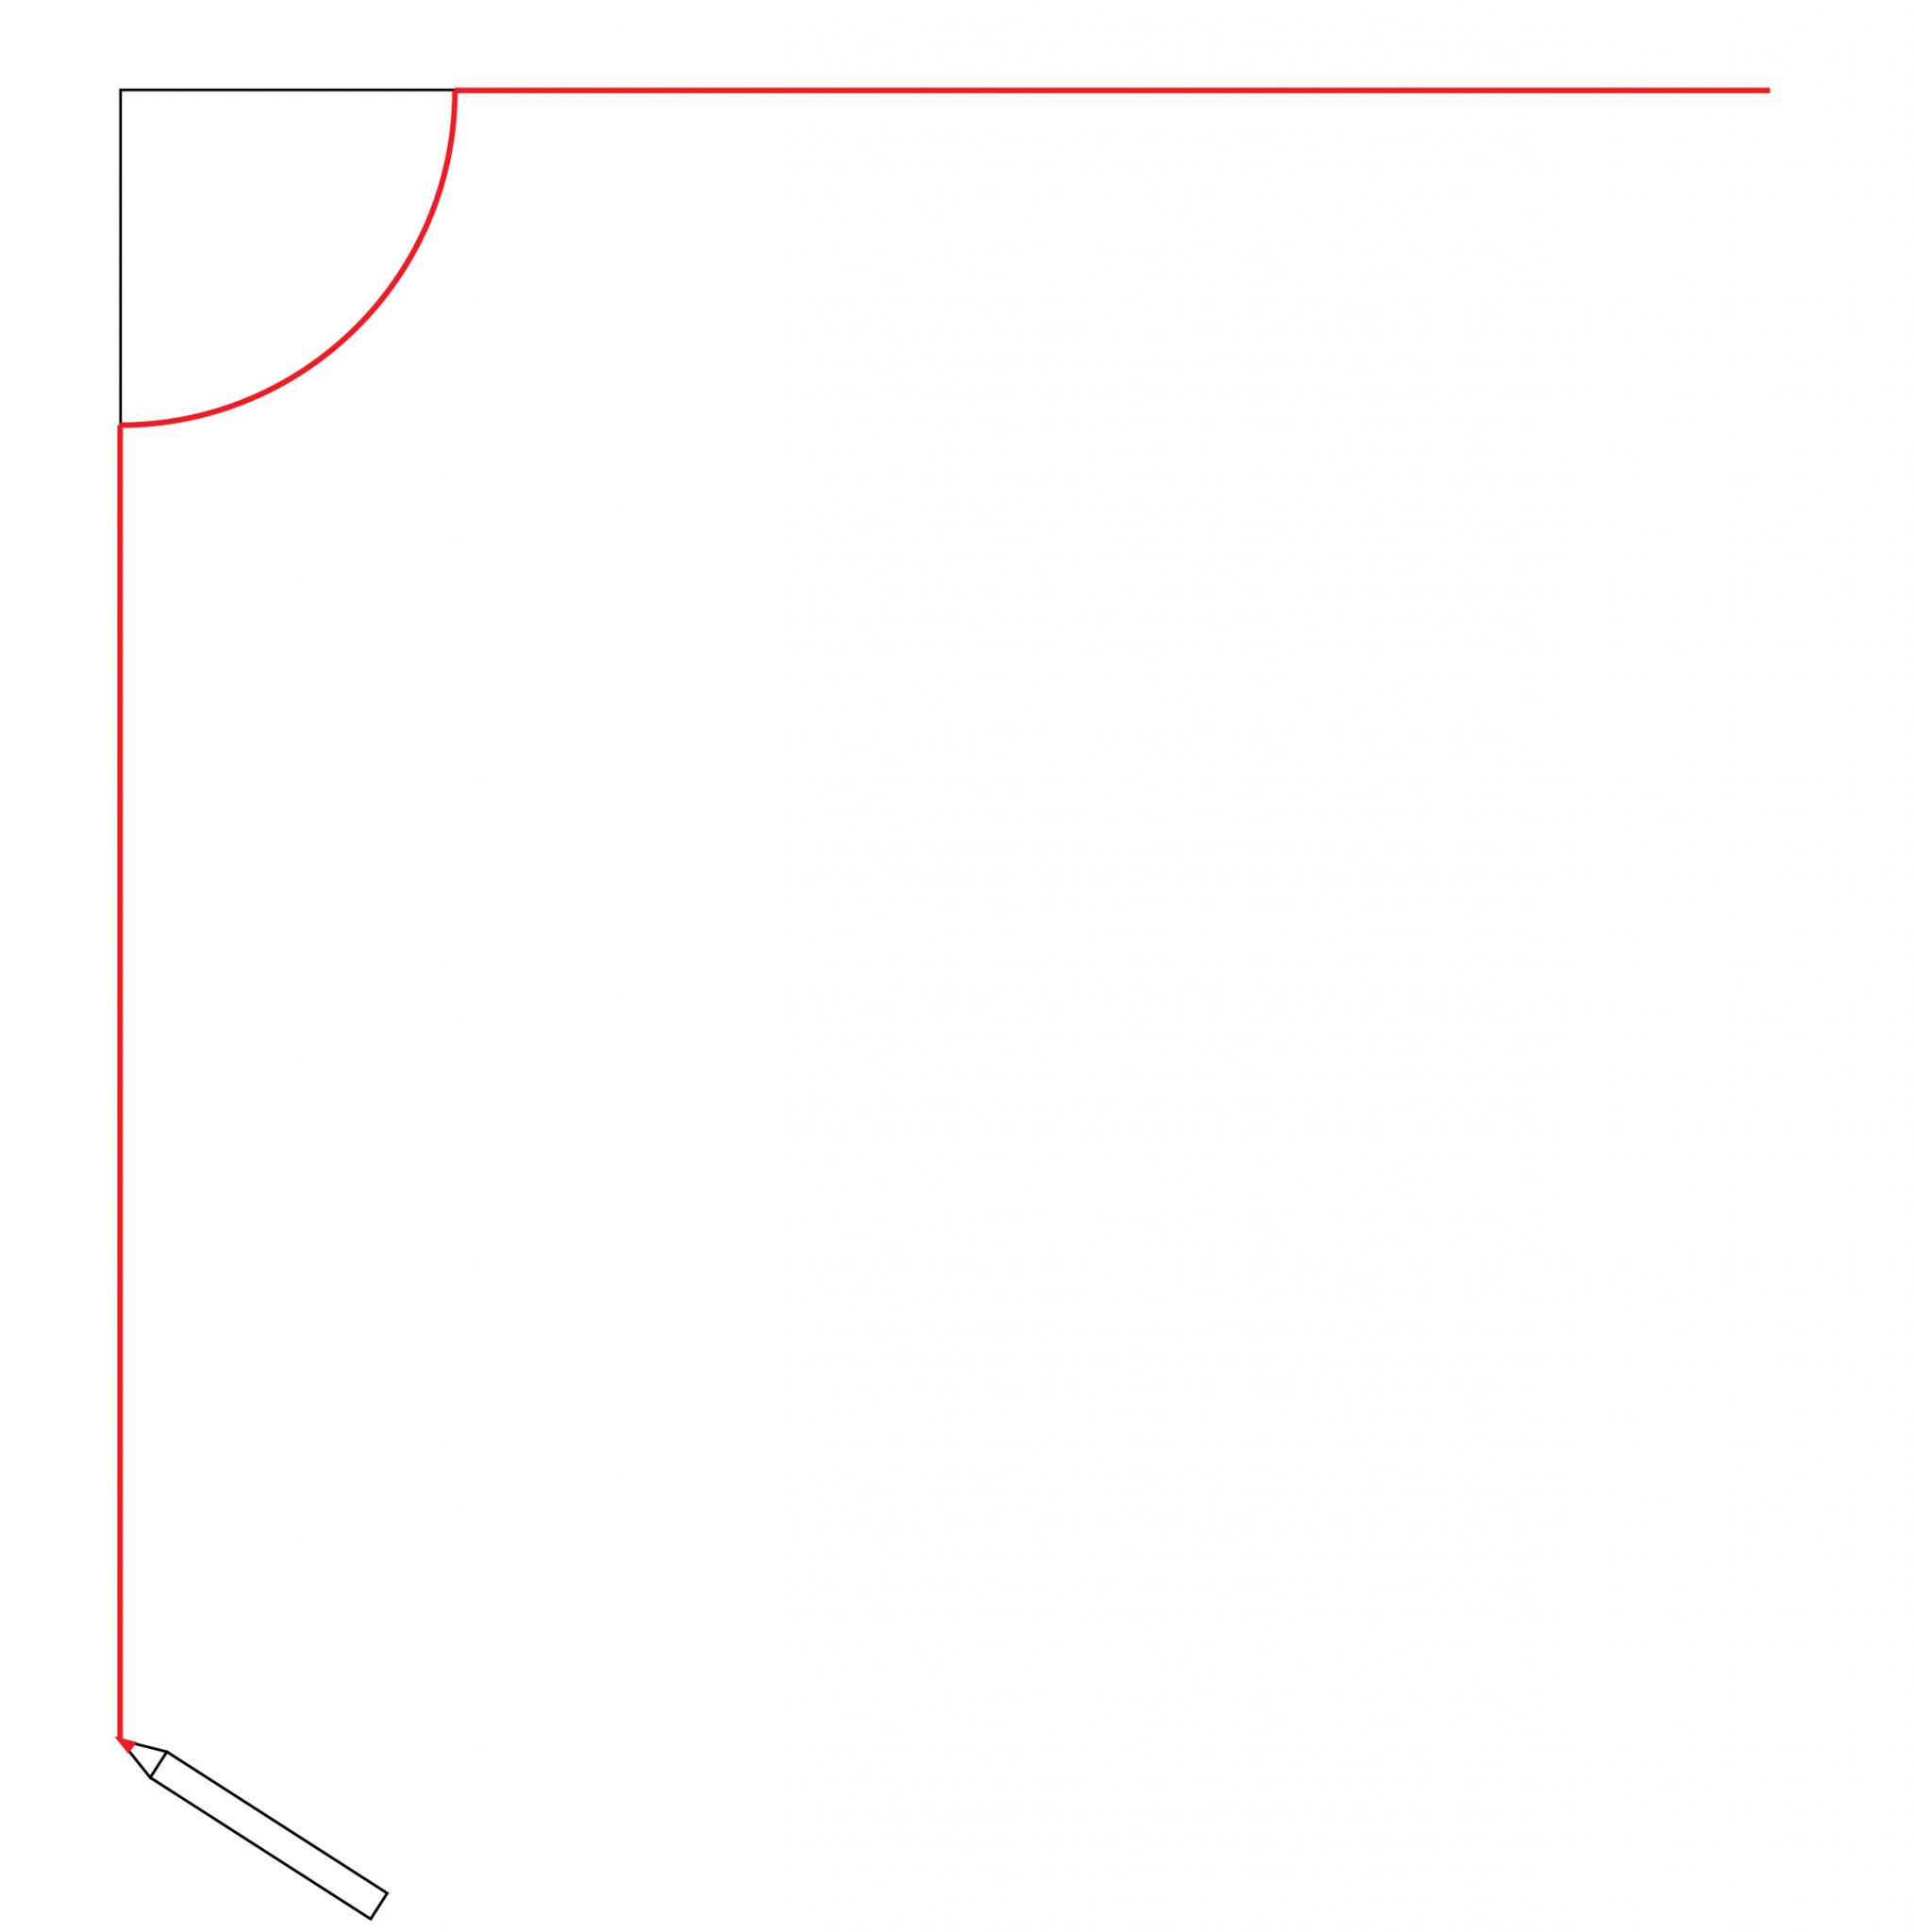
We have to connect the two end points with an arc. The easiest way is to repeat the same exercise we went through, which is to hold one end of your measuring tape stationary at the corner of the right angle, and pivot the measuring tape while marking the desired length. Only this time, the length you use will be the radius plus the length of the skirt.
You are almost done! All we have left is to add seam allowances. Remember that you don’t need seam allowance on the fold. I use 3/8″ seam allowances. Put your center fold symbol on it too, so you remember to cut it on fold.
It’s not too bad, isn’t it? I know you can make this half-circle skirt pattern!

If you’re calculating the waist, doubling it, then dividing by 2(pi), that’s the same as just dividing the waist by pi. You don’t need to multiply by 2 and then divide by 2 straight away.
I want to do a long skirt – you have just solved my dilemma with the comment ‘sections’. – I think that is my answer – very well explained – thank you very much ??
What do you do for the waistband?
Hi Annemarie, the post is about adding a half circle skirt to your favorite bodice, so no waistband is necessary. However, you could make a stand-alone half circle skirt too. Here’s an easy way: cut a rectangle as long as your waist, and as wide as you want it to be times two. Be sure to add seam allowances all the way around the rectangle. You stitch the short ends together (right sides together) to create a loop, then fold the waistband lengthwise in half. Also cut a piece of elastic as long as your waist, and sandwich it between the folded waistband. Stitch the raw edges to the waist of the circle skirt through all layers.
Perfect- look forward to trying it- as usual it is clear & well done- Happy Easter!
Happy Easter to you too!