
How to Install a Lapped Zipper with Facings
Even though my favorite zipper is the invisible zipper, occasionally, I’d venture into other types of zippers for different looks. Today I want to go over how to install a lapped zipper with facings.
Many tutorials out there go over the installation of the lapped zippers using different techniques, which are fine and dandy. However, most of them don’t tell you how to finish it with a facing (or lining). I don’t think it’s immediately obvious how the facings should be handled.
This technique is used on ready-to-wear clothing. It might look a bit strange to you (actually, in concept, it’s quite similar to the invisible zipper installation I posted earlier), but it offers a nice finish inside too. The bonus is that there’s no hand stitching!
I am using part of my pattern, the Beausoleil Top & Dress, for this demonstration. I am saying “part” because, for clarity’s sake, I cut it very short and narrow, so I don’t have to worry about capturing the long zipper in the photo frame. If you are not using my pattern, there are certain things you need to pay attention to.
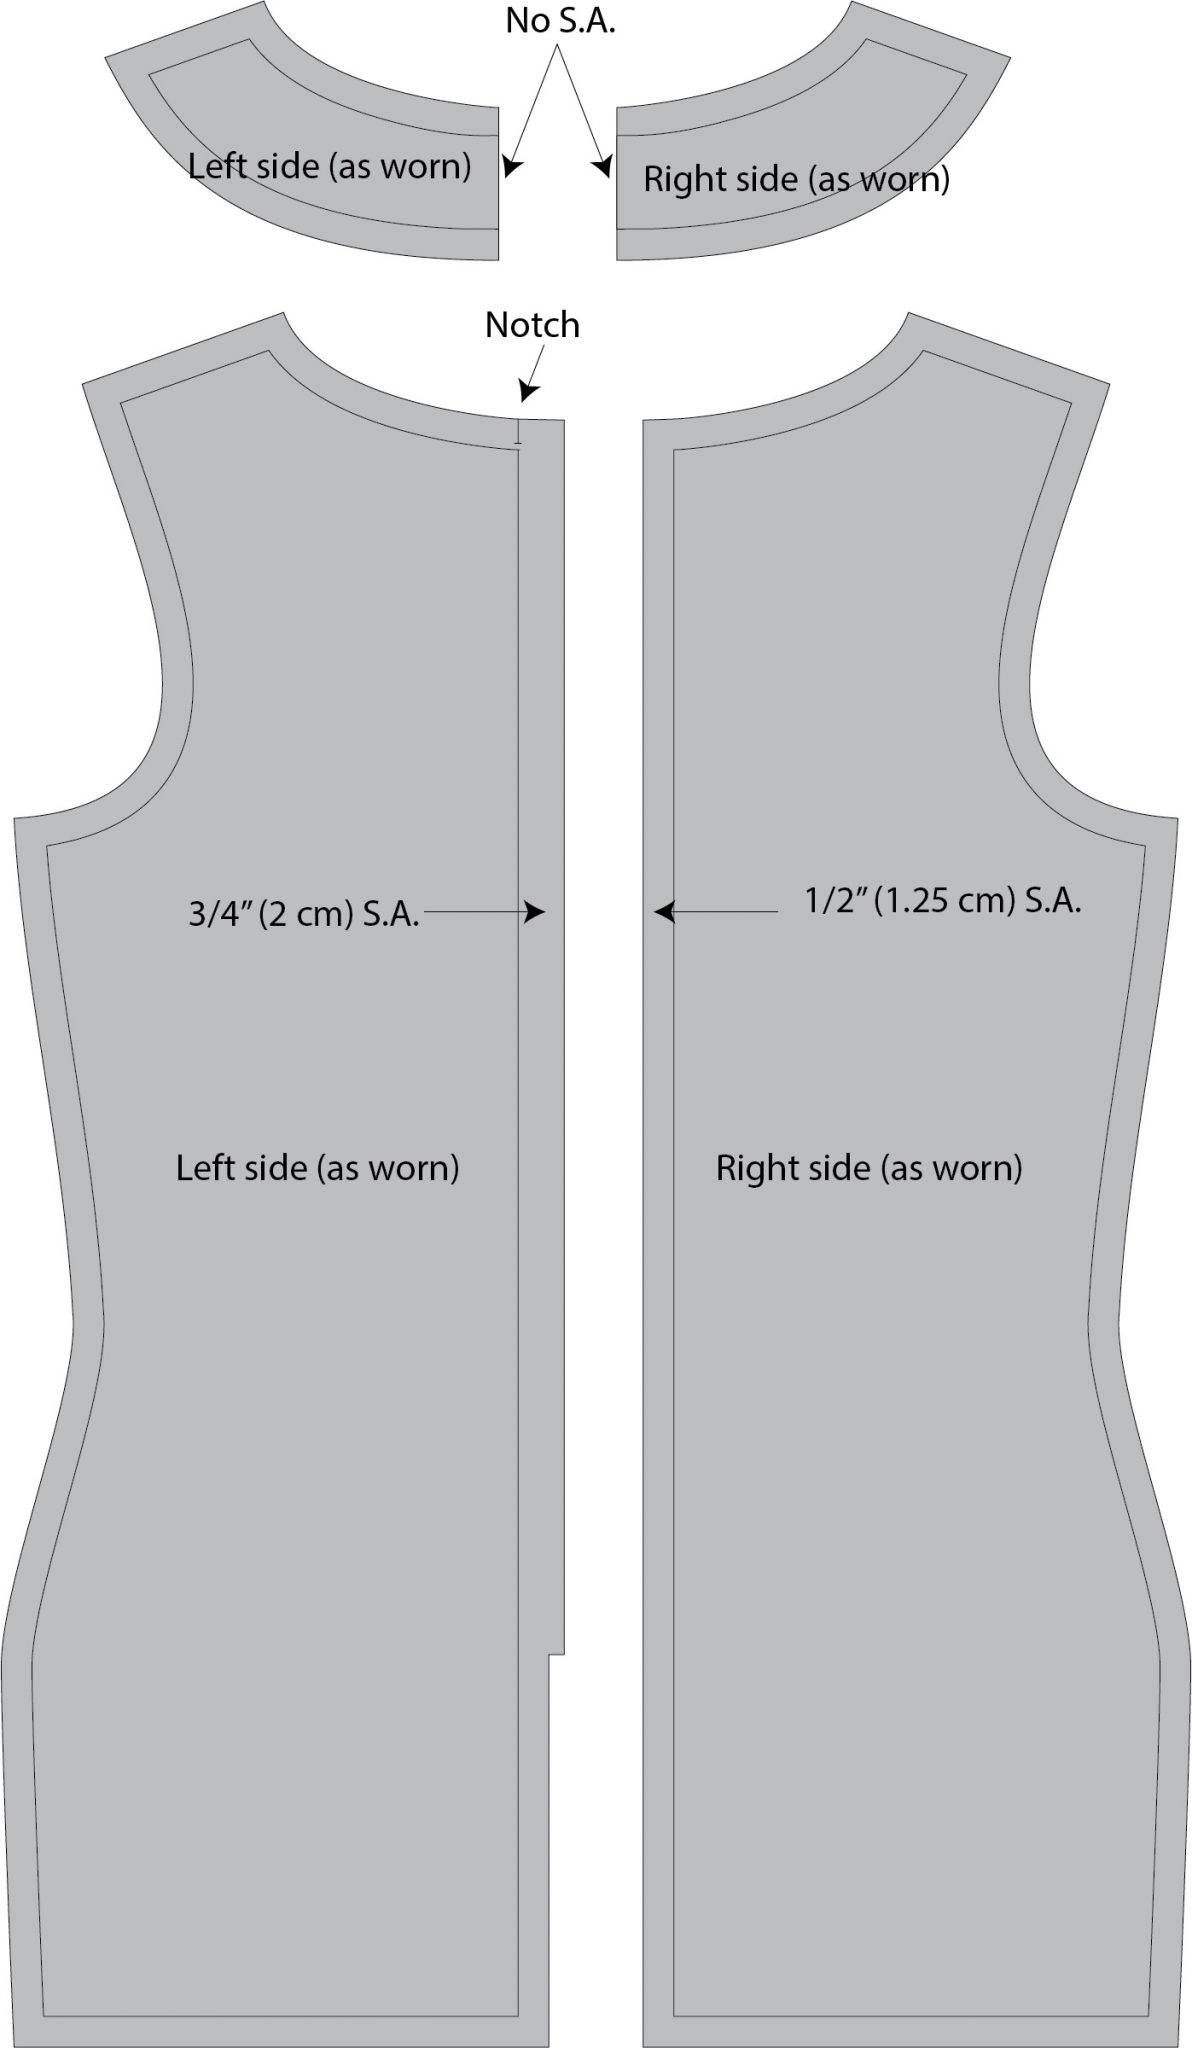
Seam Allowances & Notch
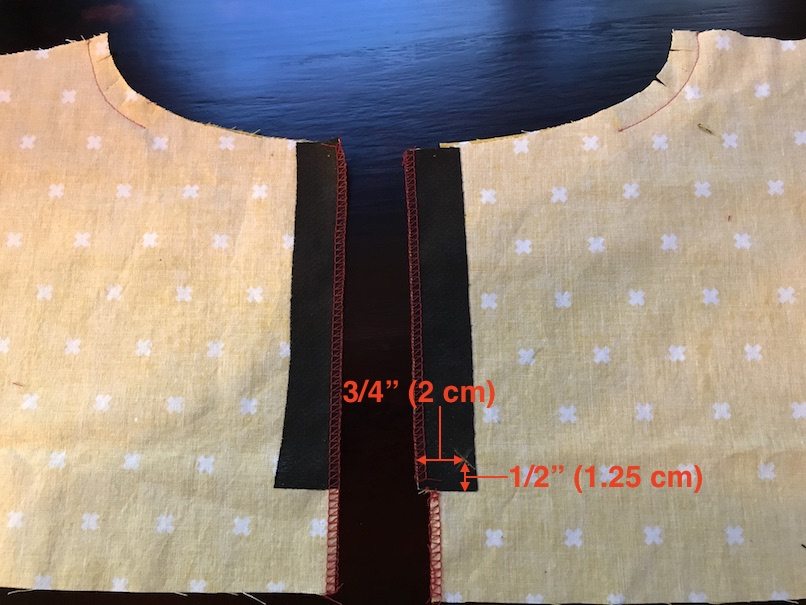
You will need to add or subtract seam allowances as such:
- Left bodice (as worn) of the zipper seam allowance is 3/4″ (2 cm)
- Right bodice (as worn) of the zipper seam allowance is 1/2″ (1.25 cm)
- Left back facing (as worn) has ZERO seam allowance
- Right back facing (as worn) has ZERO seam allowance
There is also a notch at the top of the left bodice 3/4″ (2 cm) from the edge.
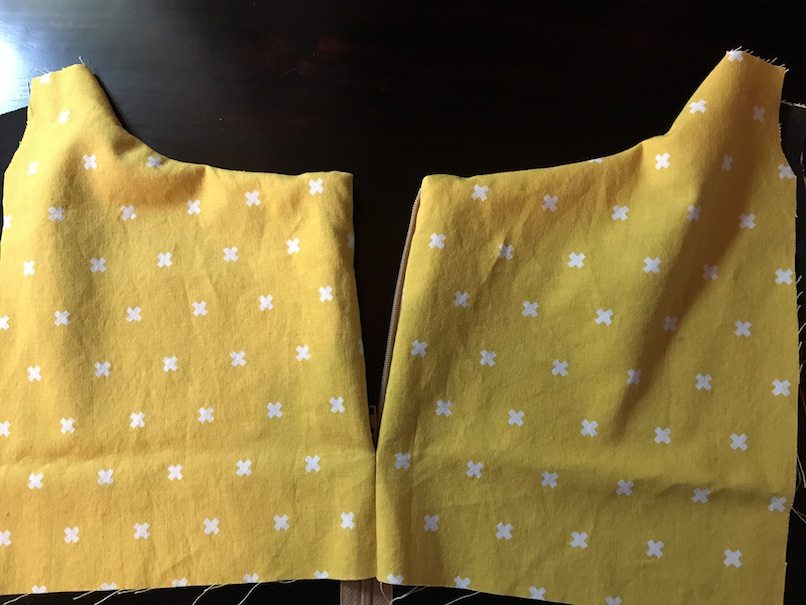
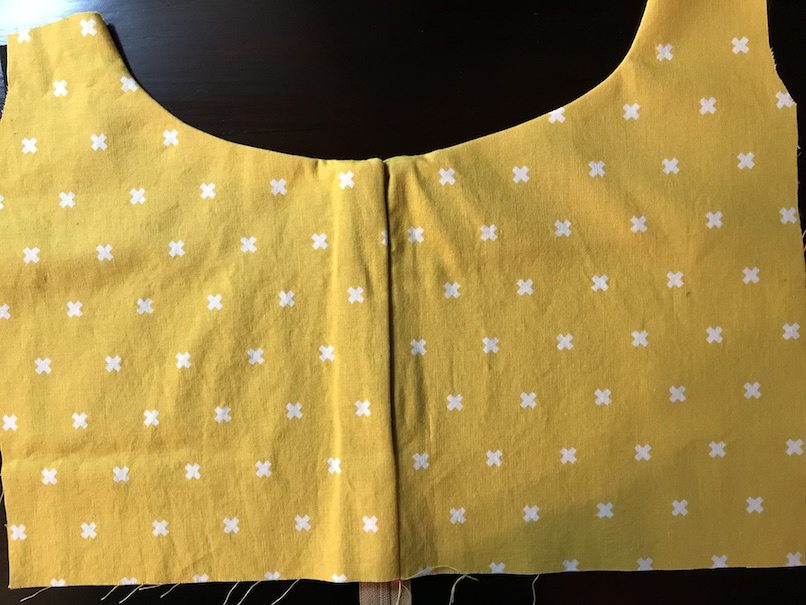
Here’s my impromptu super mini dress pattern pieces to illustrate the seam allowances and the notch placement.
Also note that the zipper used here is a regular, all-purpose (coil) zipper with a total width of 1″ (2.5 cm). That is the most common plastic zipper that you usually find.
With all the pre-requisites established, let’s begin!
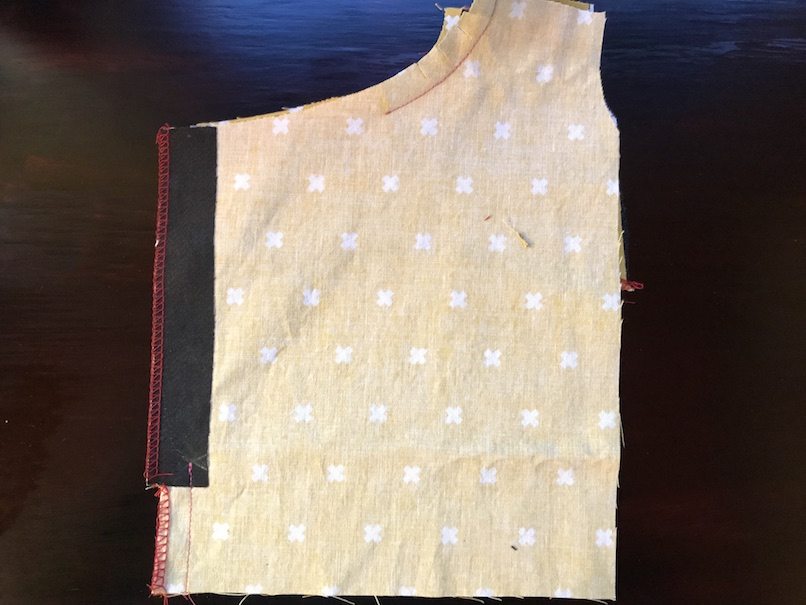
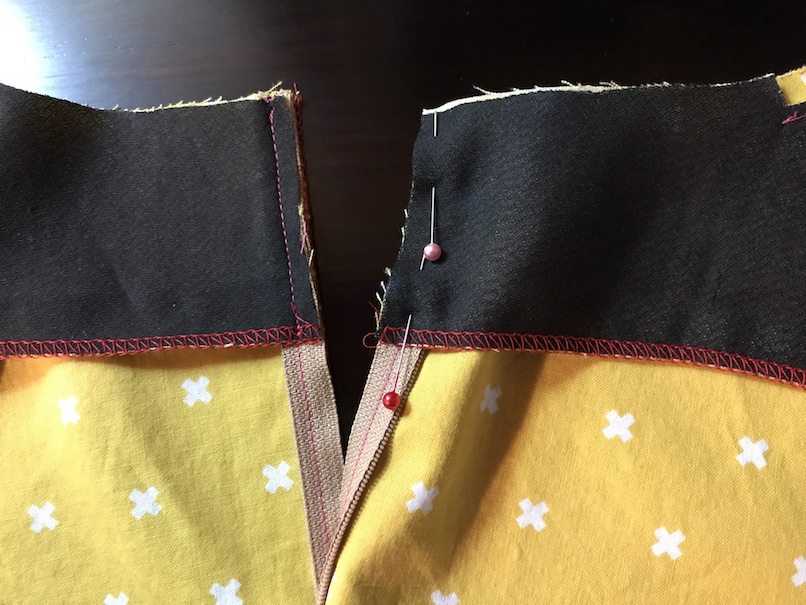
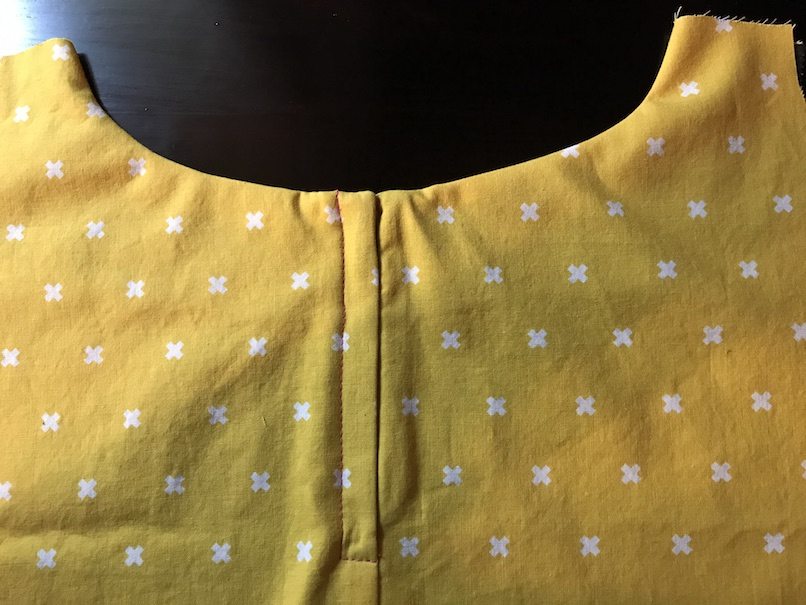
To start with, your back facing should already be attached toward the shoulders. In other words, when you attached the facings to the neckline, you should have left about 4″ (10 cm) unstitched from the center back.
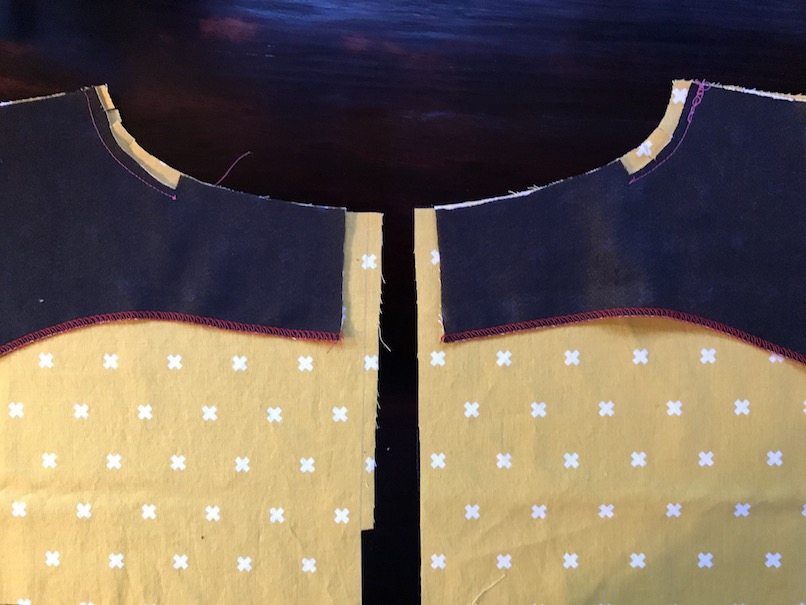
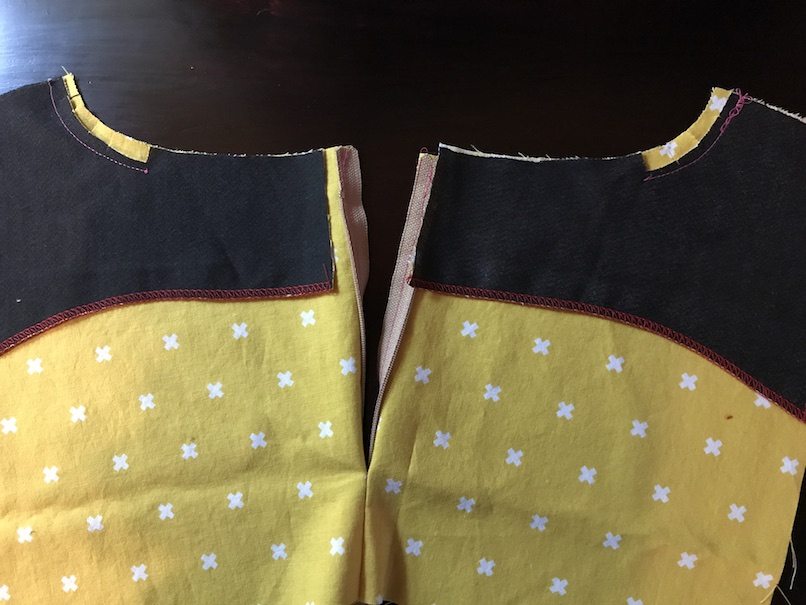
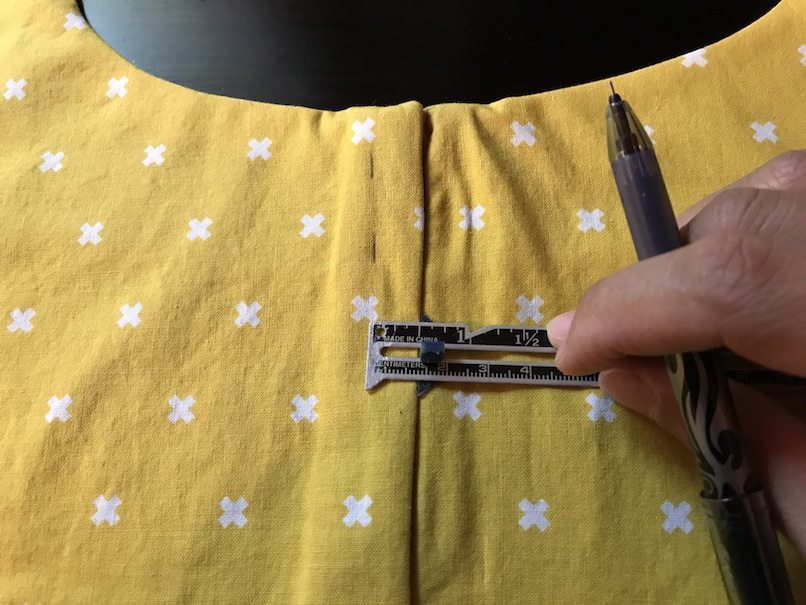
I’d also like to point that that there is a notch (as mentioned above) on the left side of the back. It is where the scissors are pointing. It is 3/4″ (2 cm) from the raw edge.
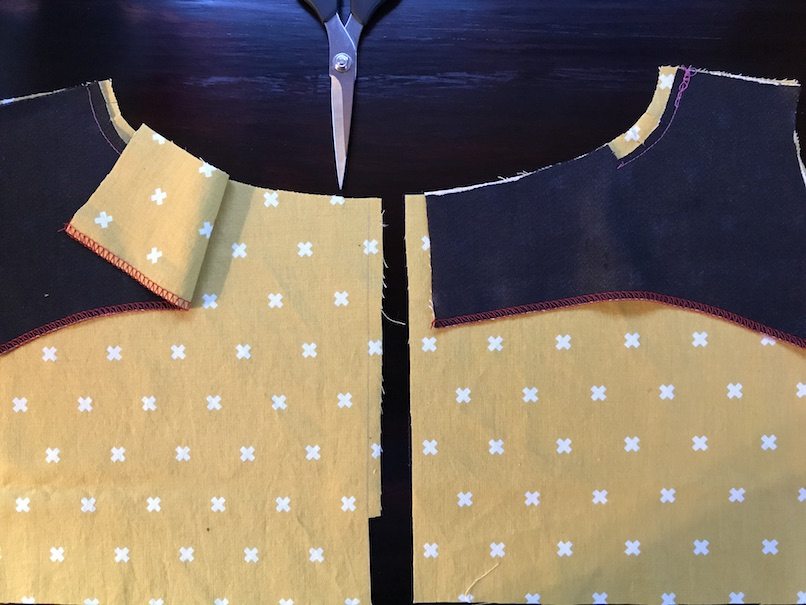
If you are going to finish the center back raw edge, now is the good time to do it. Though it’s possible, it will get a little difficult to do it later.

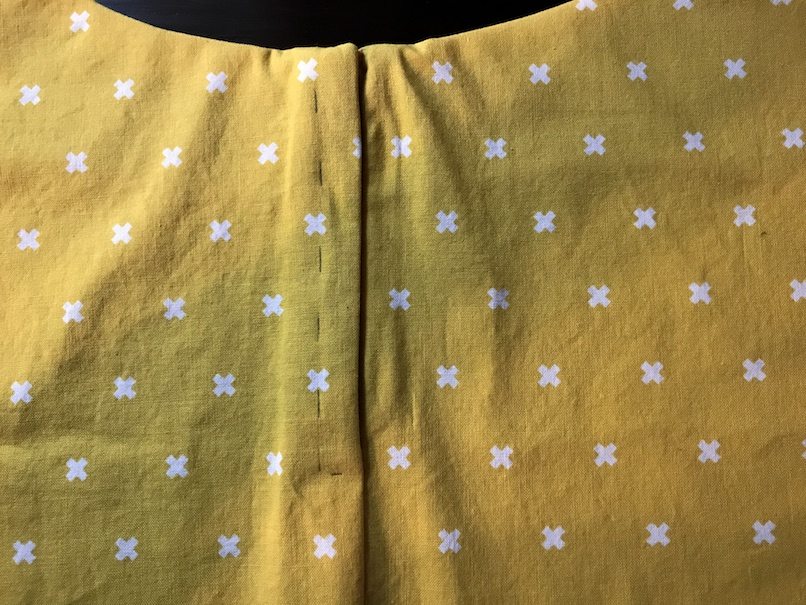
I’d also like to point out that your interfacing is also applied on the wrong side where you will apply the zipper. This is not just for lapped zipper, you really should interface for any zipper application.
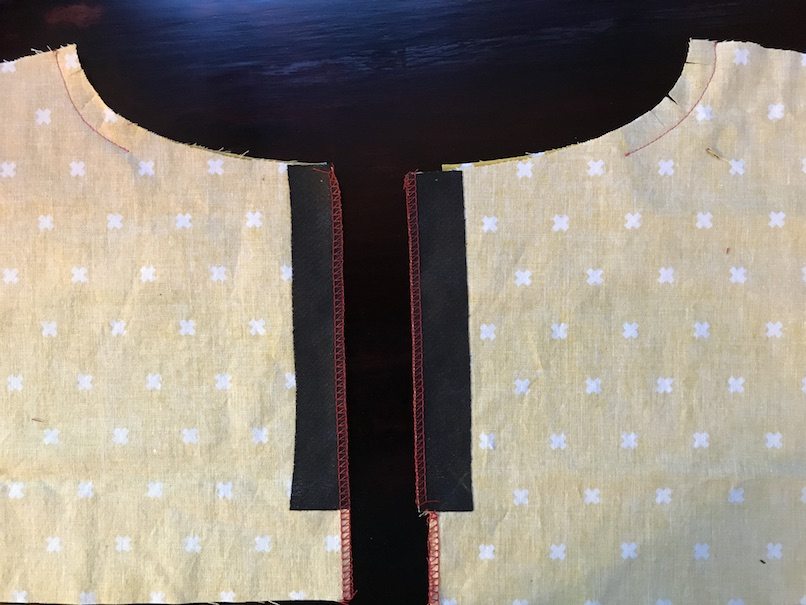
Do you see a little mark (cross) that I made on the interfacing? That is the end of the zipper. In the Beausoleil pattern, it is the circle. The mark is 3/4″ (2 cm) from the center back raw edge and 1/2″ (1.25 cm) above the bottom of the zipper seam allowance edge. Your pattern may have a notch there (or any other kind of marking).
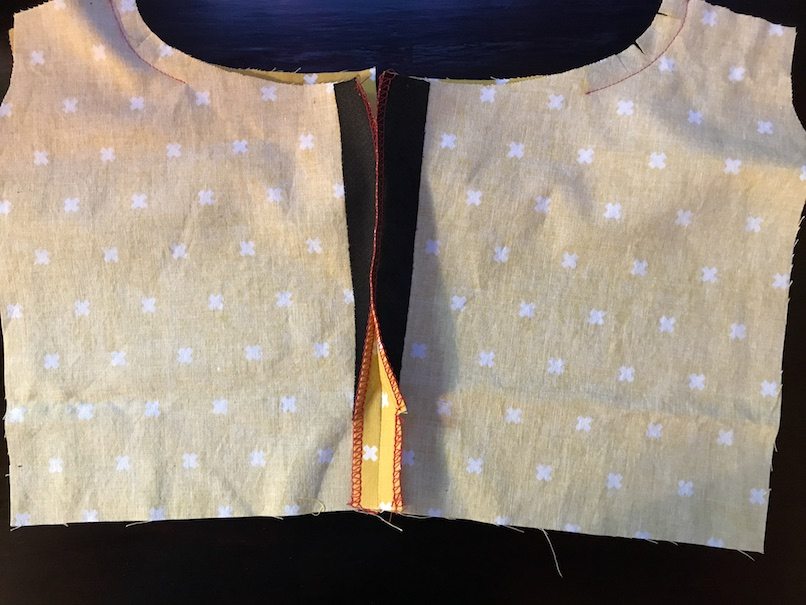
Now with right sides together, stitch the two backs below the mark.
Press the seam open (only the stitched part, not above it).
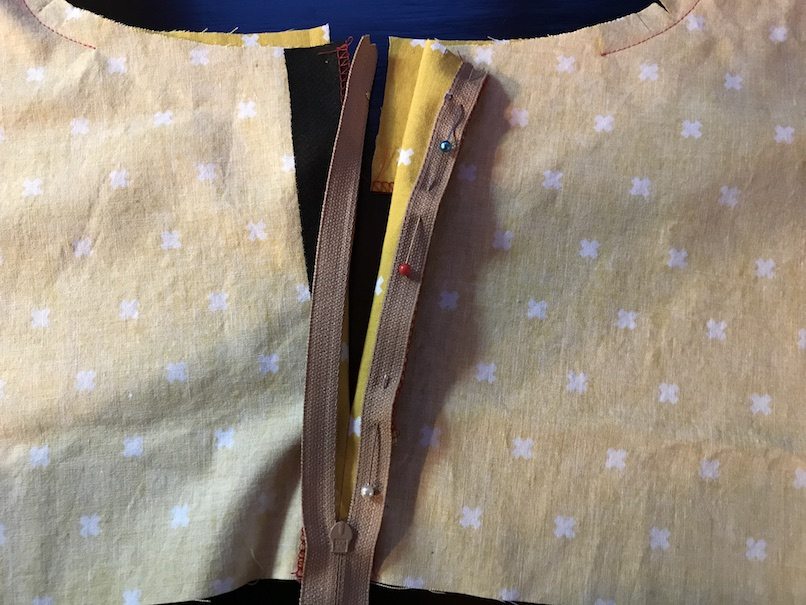
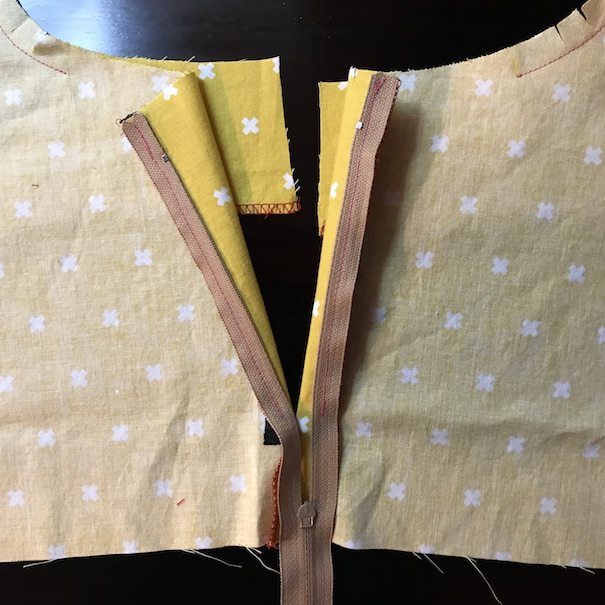
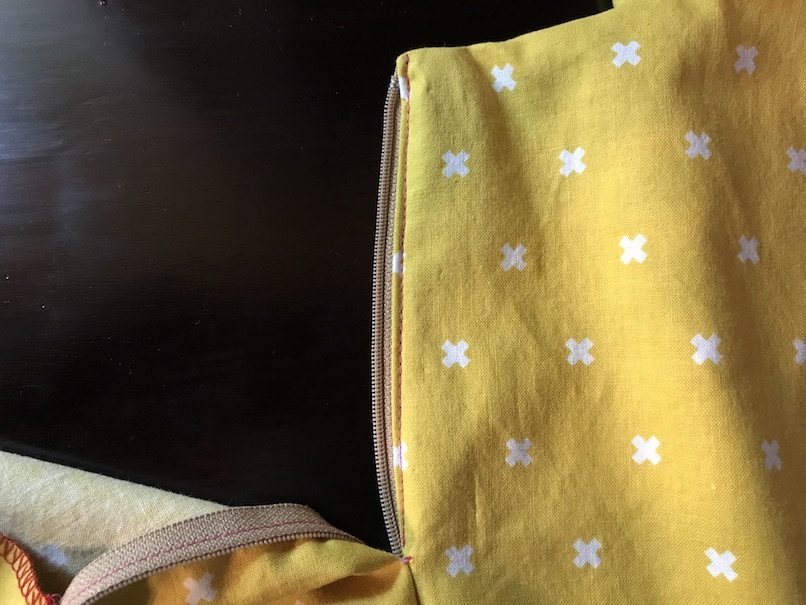
Here comes the zipper. You see the zipper pull is facing you.
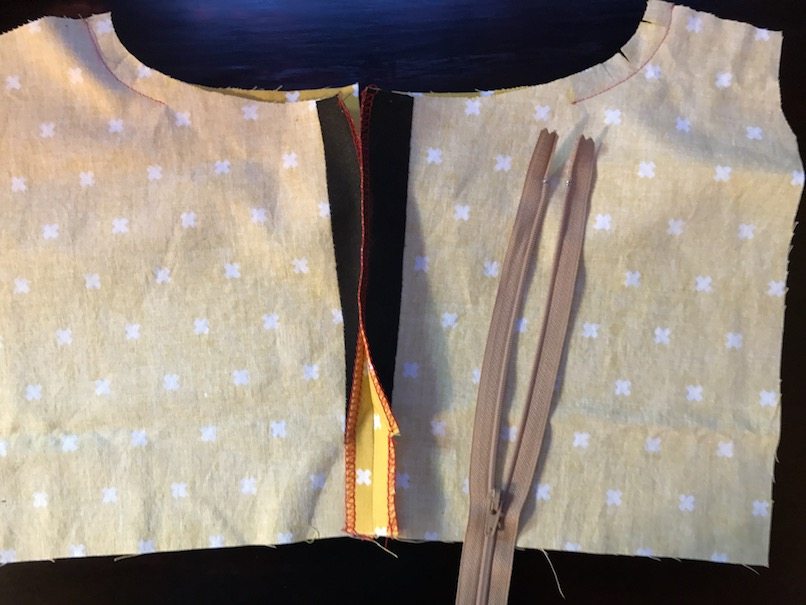
But! We want it to facing DOWN.
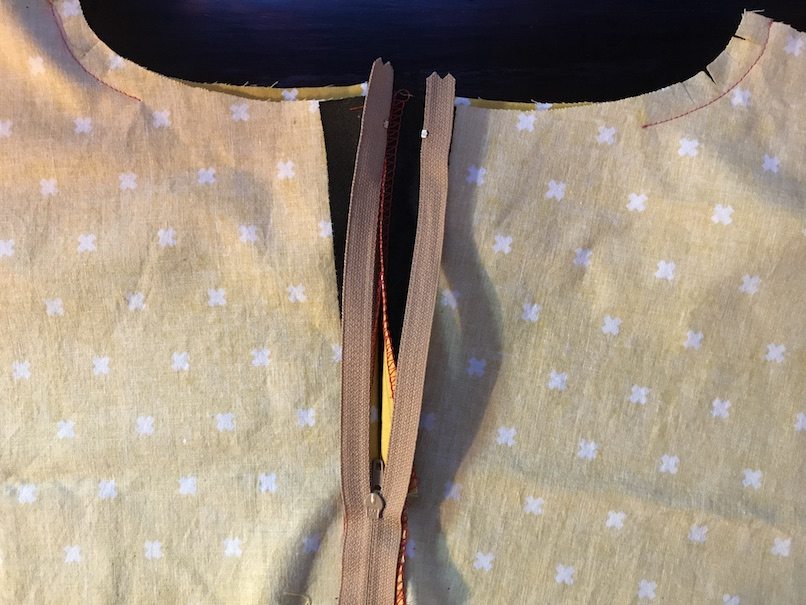
I mean, facing DOWN, like this.
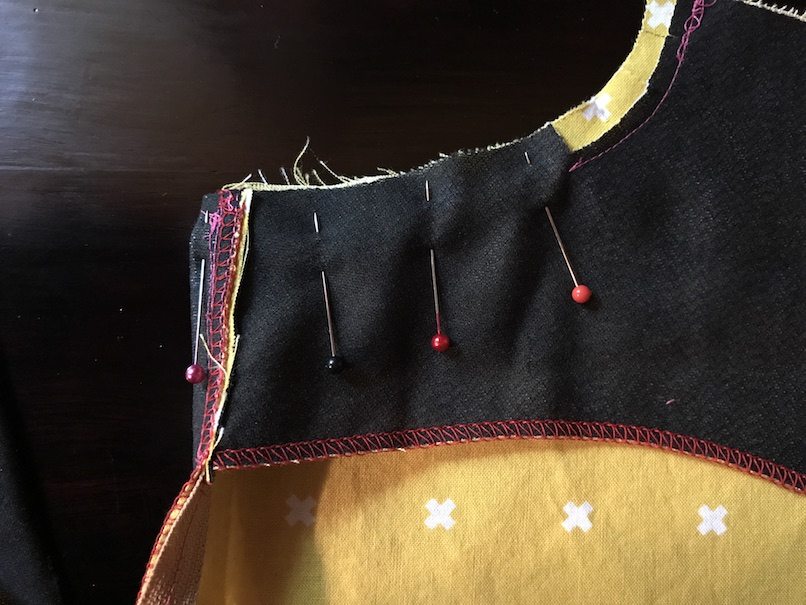
The back bodice is wrong side up, but by peeling it slightly open, you are pinning the zipper to the right side.
A couple of things to note are: 1) the top zipper tape is aligned with the neckline raw edge, and 2) the side of the zipper tape is aligned with the bodice center back edge. This will leave a little bit of room for you to sew on the hook and eye later. A zipper actually has a standard amount of room above the top stop; if you are reusing a zipper with its top already chopped off, you’d need to pin the zipper in a position that would be equivalent to an un-cut zipper.
Zoom out and the zipper tape is all pinned.
Stitch close to the zipper teeth. This is about 1/8″ (3 mm) from the zipper teeth.
Note that you are stitching to the same level of the circle/mark (a.k.a. the end where we sewed the center back earlier).
We repeat the same thing for the other side. Pin…pin…pin… Take care not to twist the zipper.
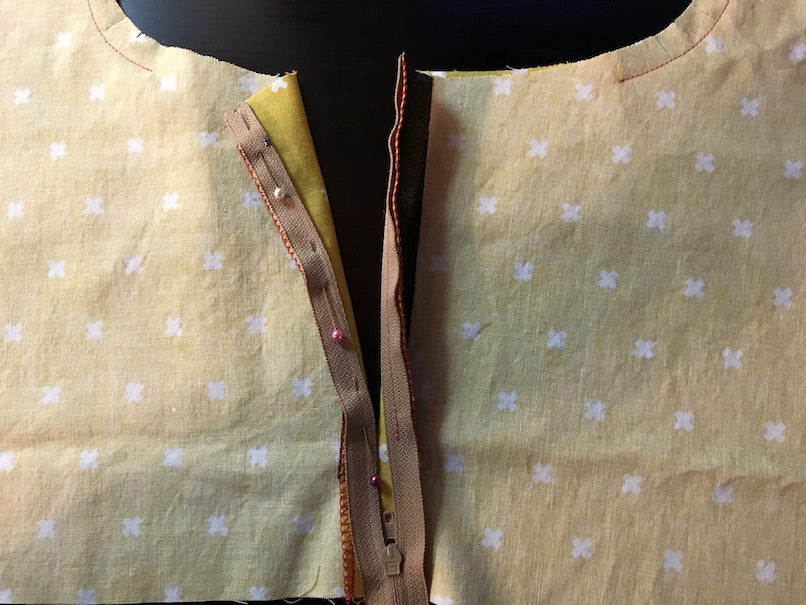
And then stitch.
Again, note that the stitch line stops at the same level as the other line.
Let me give you a little side-bar note about the zipper. If you have horizontal seam that you need to match, such as a waist seam, where the left-hand side should match the right-hand side, this little tip is going to help you.
After stitching the first side of the zipper, close the zipper and mark where the waist seam should be on the opposite side of the zipper tape.
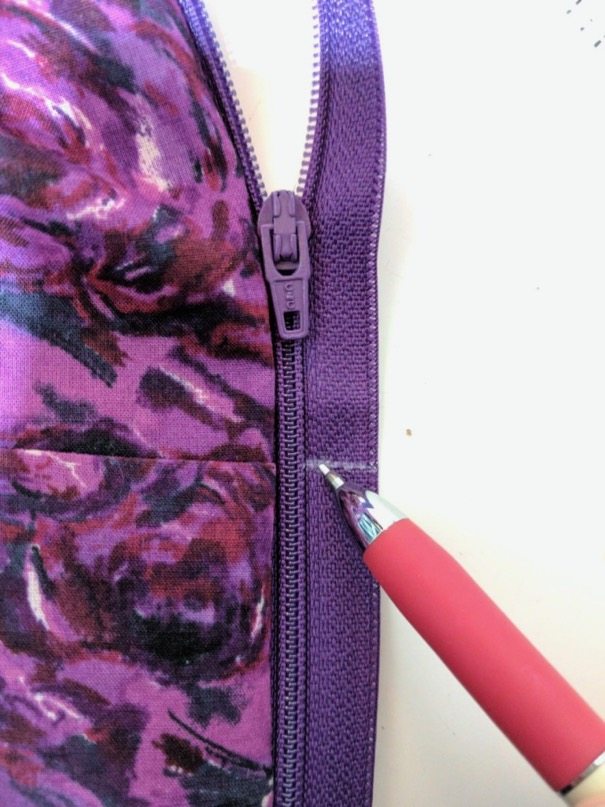
When you pin the second side of the zipper tape to the bodice, align that marking with the waist seam. You’ll then have a perfect match!

Thank you, Crystal, for the photos!
Now let’s go back to the main tutorial.
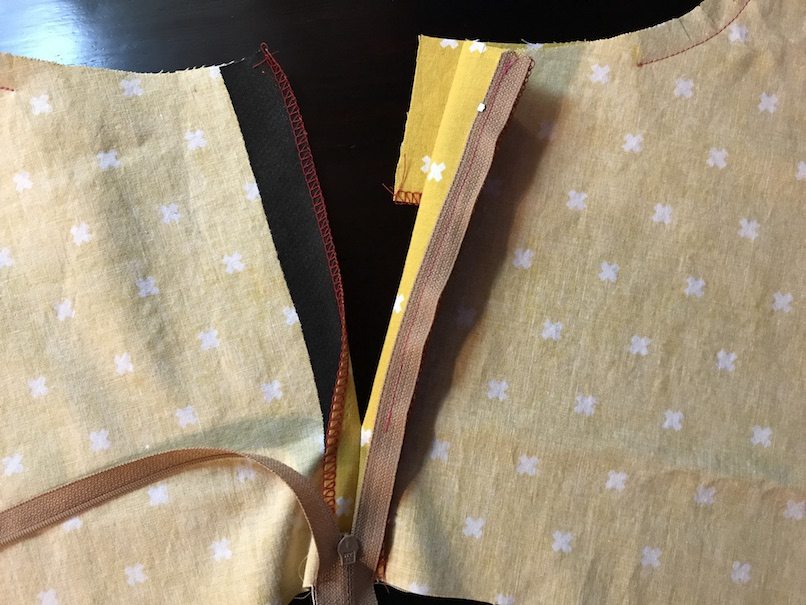
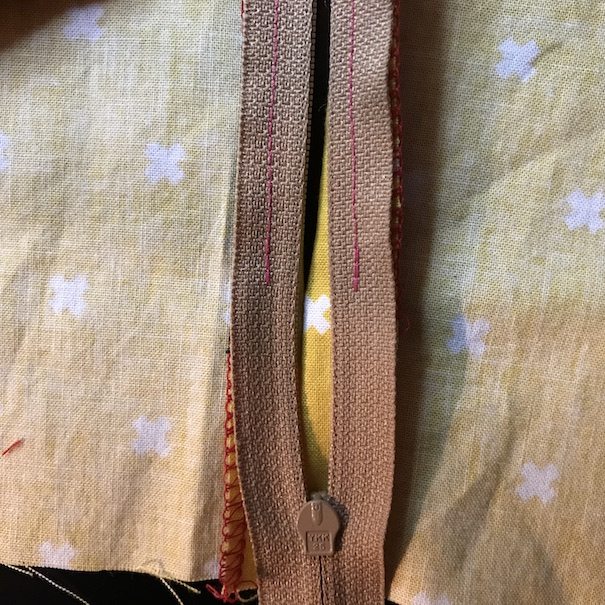
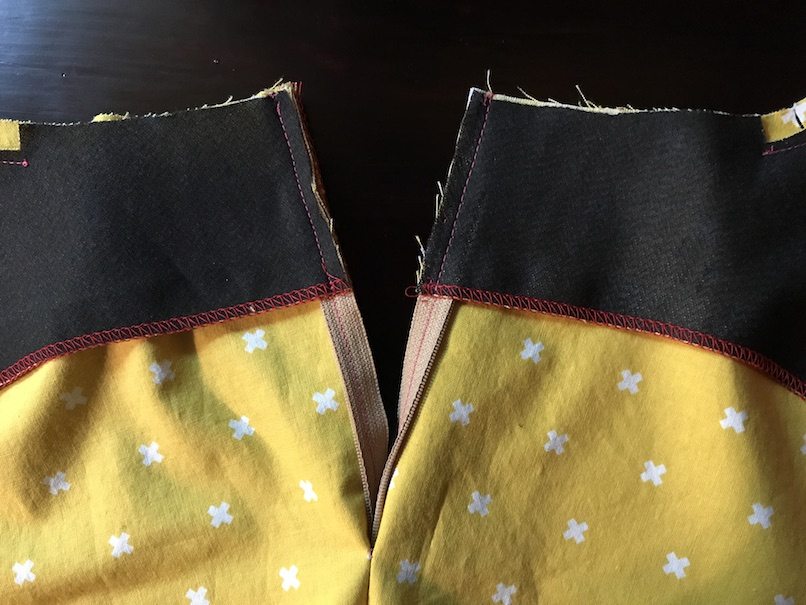
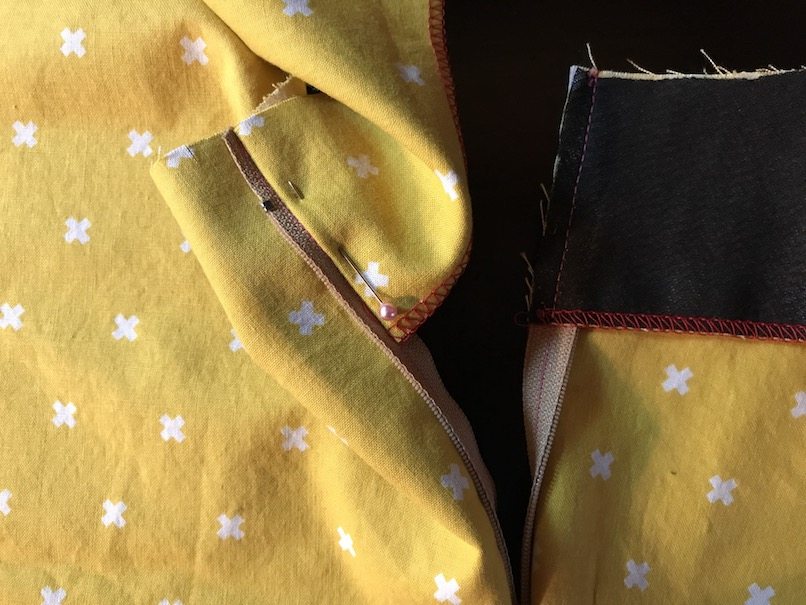
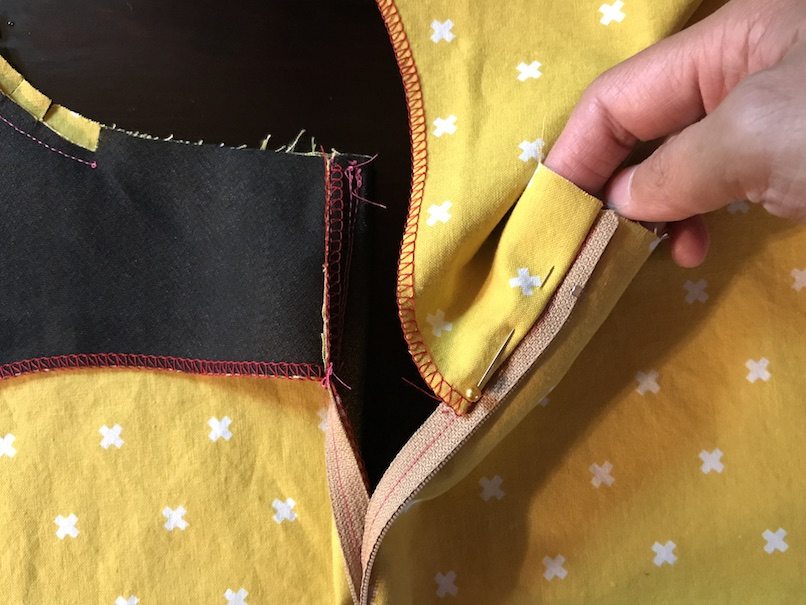
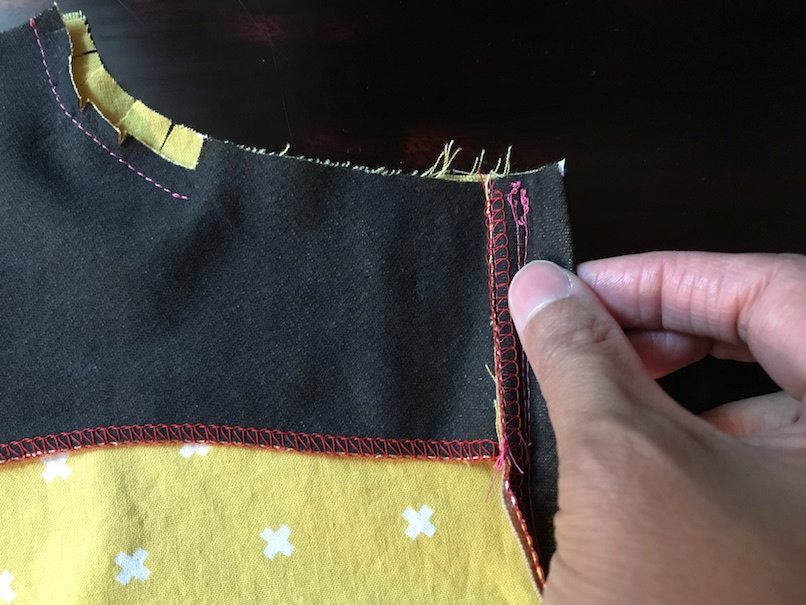
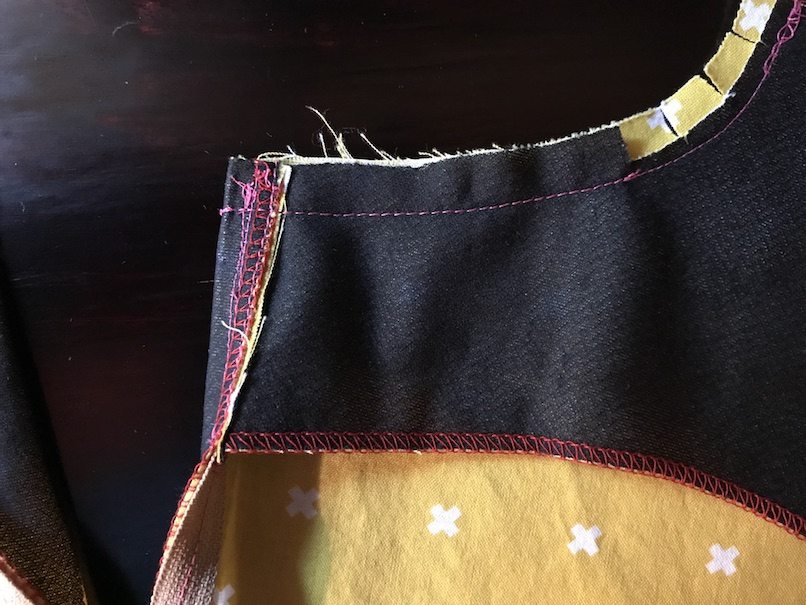
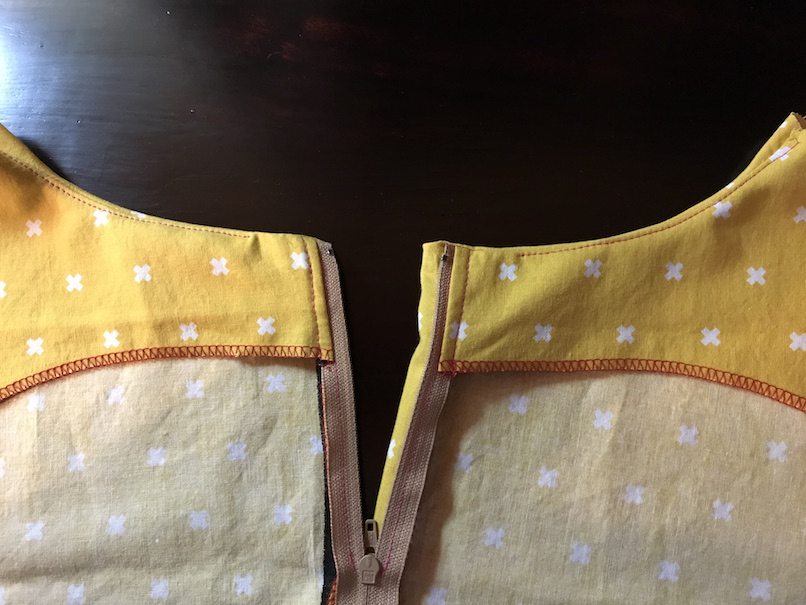
Flip the whole bodice and the other side looks like this. You see that the facing is shorter? It doesn’t reach the edge of the zipper. You didn’t mess it up, it’s supposed to be like this.
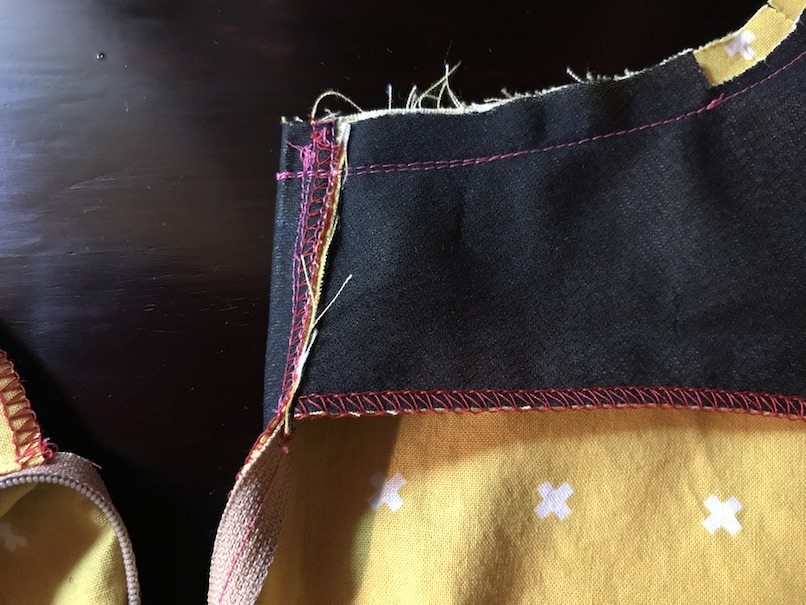
Now it’s the time to handle the facing. Pull the facing a little so that the edge of the facing is aligned with the center back edge.
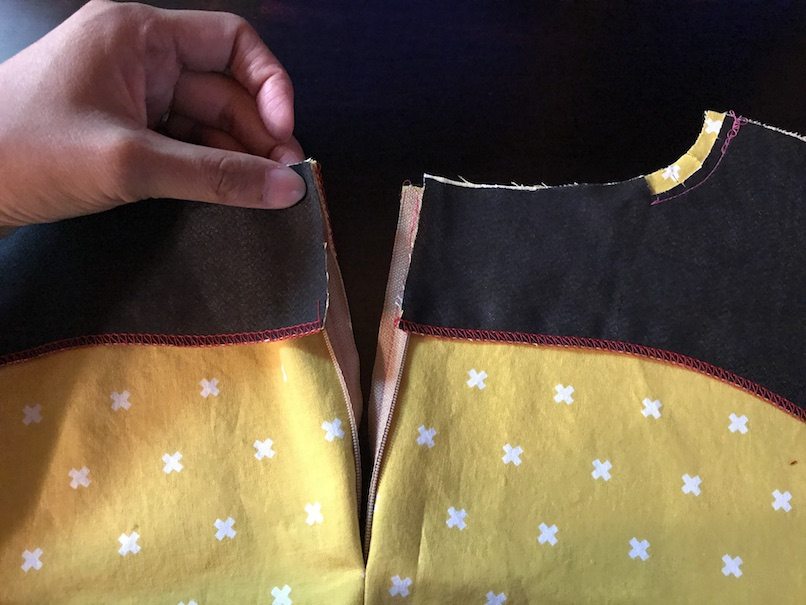
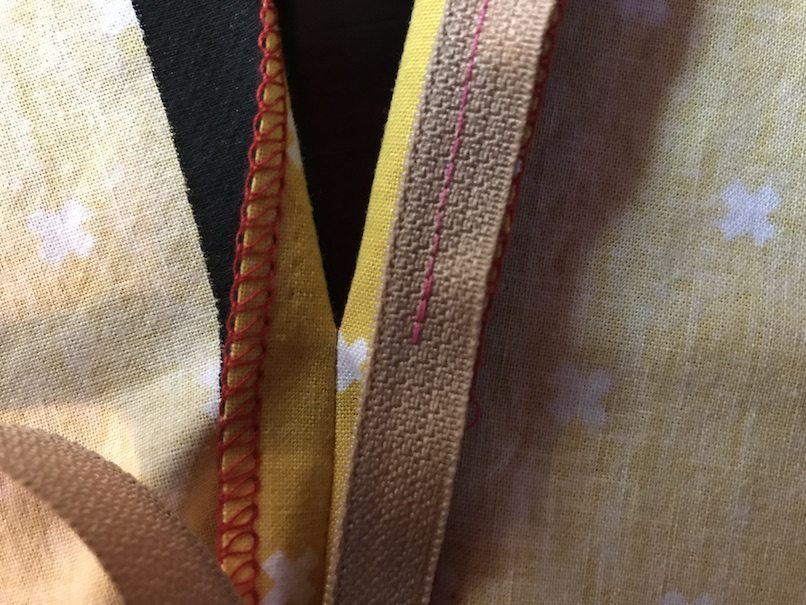
Here I put the facing to the bodice at the edge. You see that the facing does not lay flat. It’s supposed to be like that.
Just another angle to show you how it doesn’t lay flat.
Feel for the zipper teeth in between, and stitch close to the zipper teeth. It’s about 1/8″ (3 mm) from the zipper teeth.

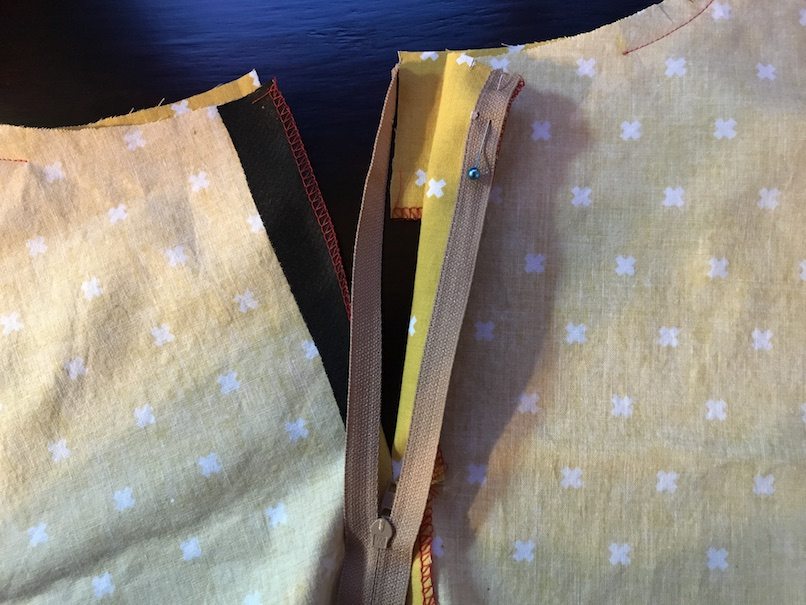
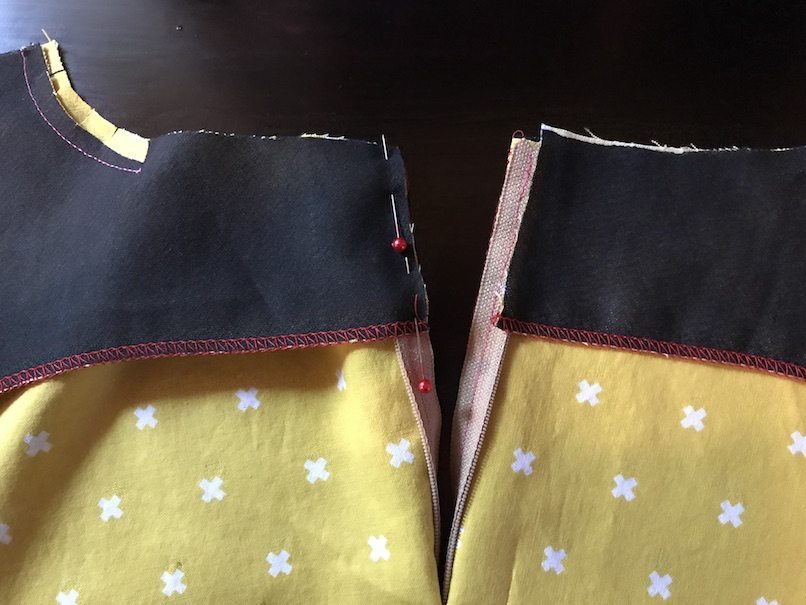
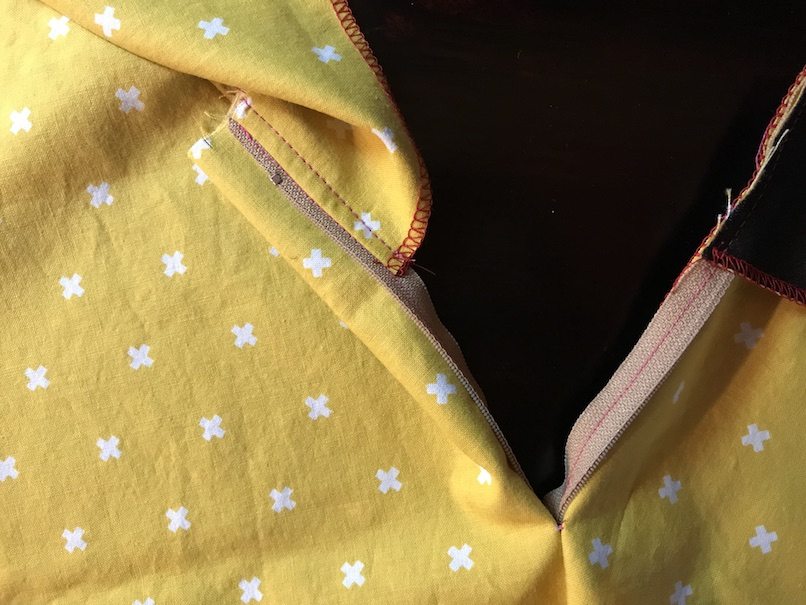
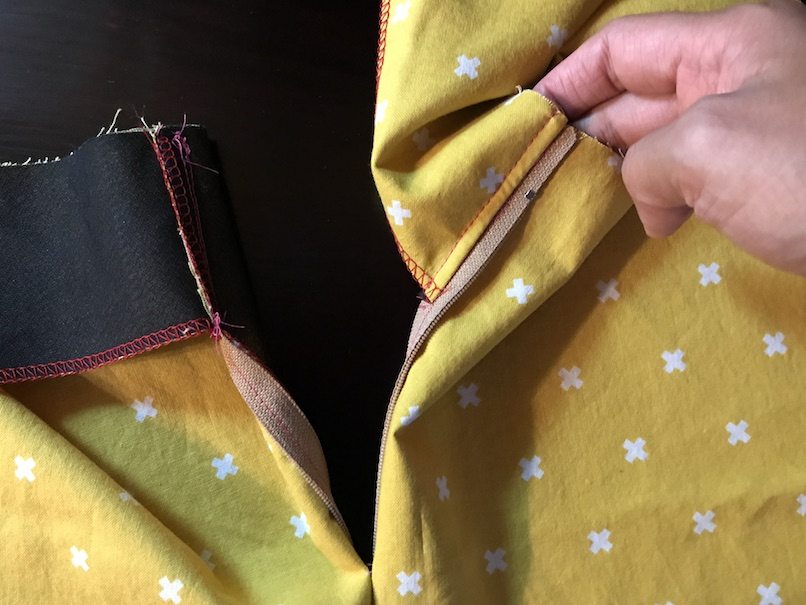
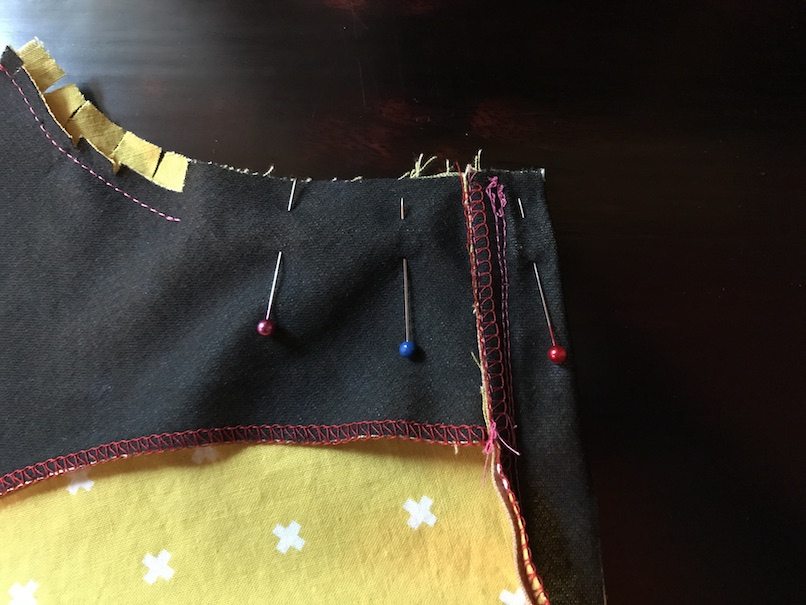
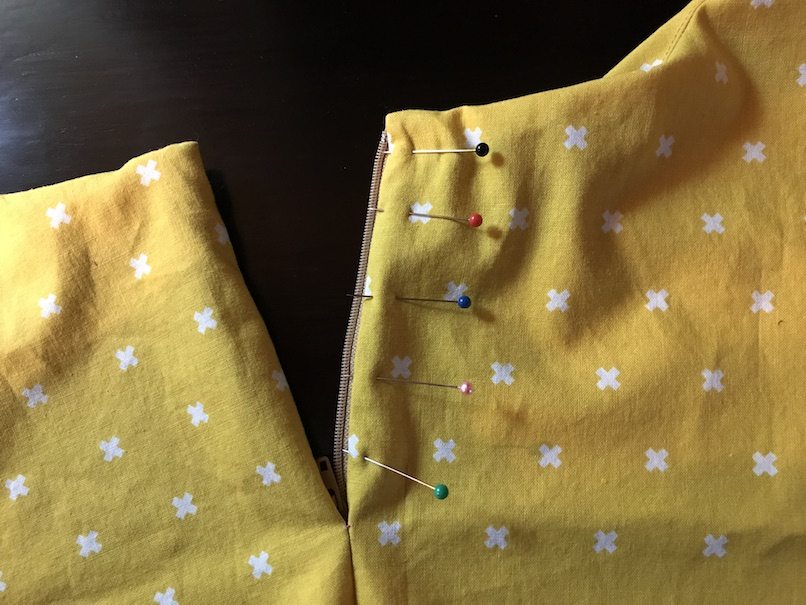
Now let’s handle the right-hand side. Actually it’s exactly the same way. Currently it doesn’t reach the center back edge…
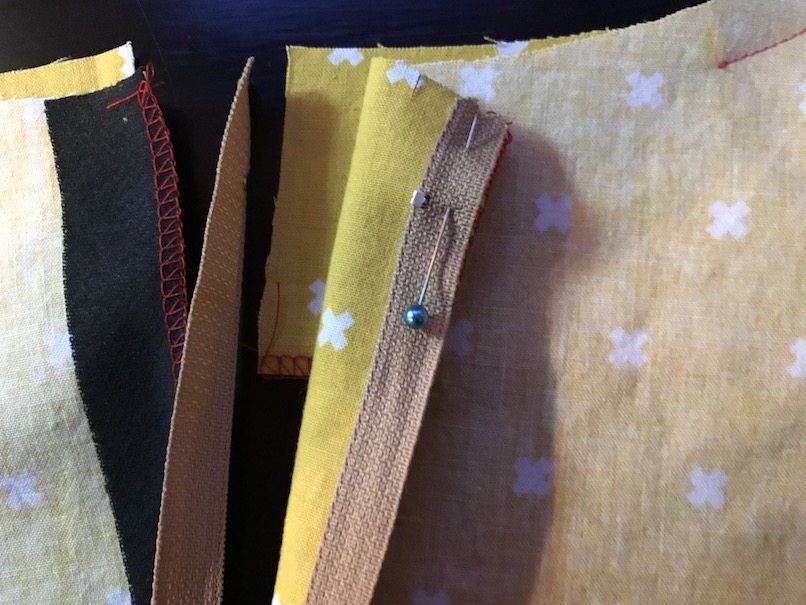
…but you pull it a little, so the two edges are aligned. Pin…pin…
Maybe this is excessive, but another photo to show you how it doesn’t lay flat. 🙂

Feel for the zipper teeth in between, and stitch close to the zipper teeth through all layers, just like before.
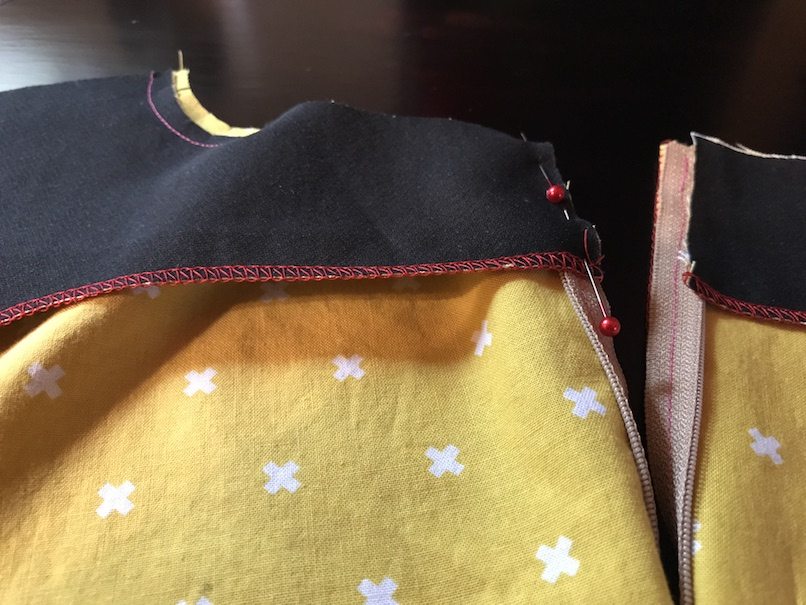
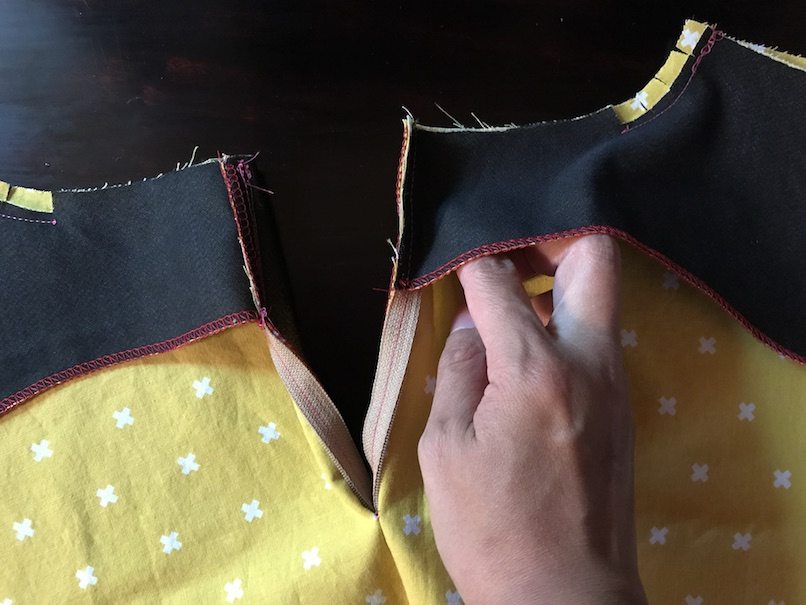
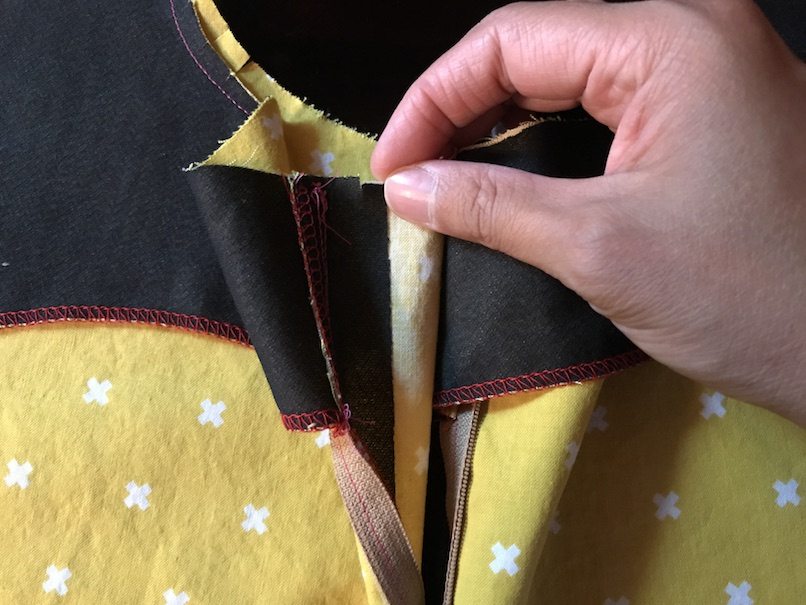
Now we want to understitch the facing. To do so, reach between the facing and bodice…
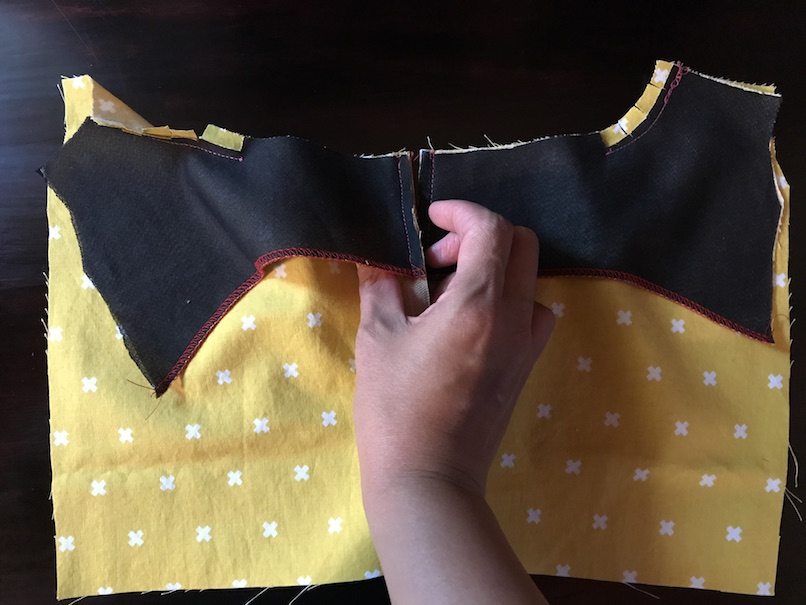
…to expose the zipper. Where my thumb is where you want to understitch.
Pinning is not so necessary, but I’d like to show you where I’ll be stitching.
Then stitch. You are stitching the facing to the zipper and seam allowances. Remember this is not topstitching, so it doesn’t show on the public side.
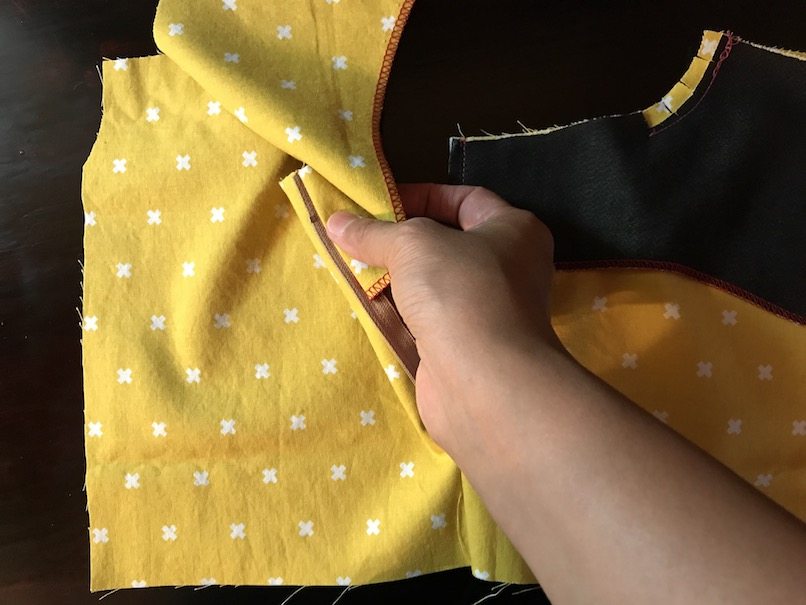
Do exactly the same thing for the right-hand side too. Reach in…
…and expose the zipper.
Again, I pin it just to show you.
Understitch the facing to the zipper tape and seam allowances.
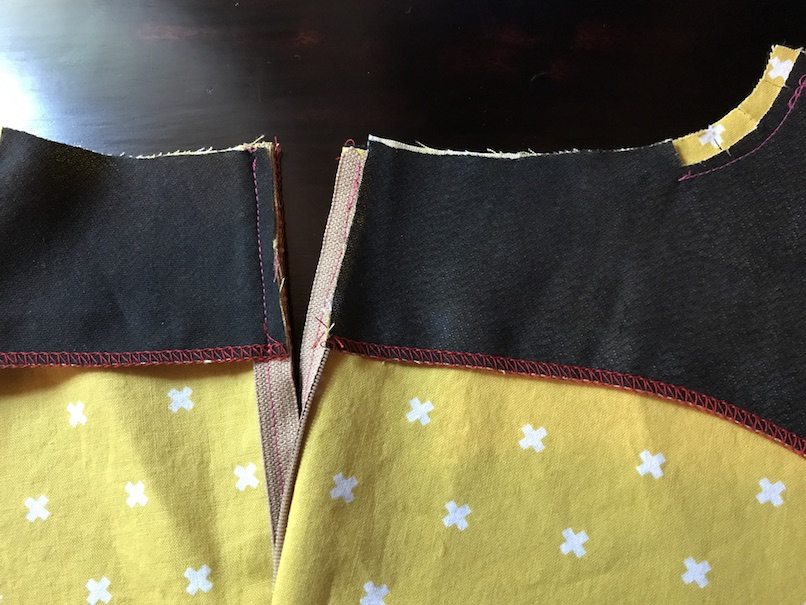
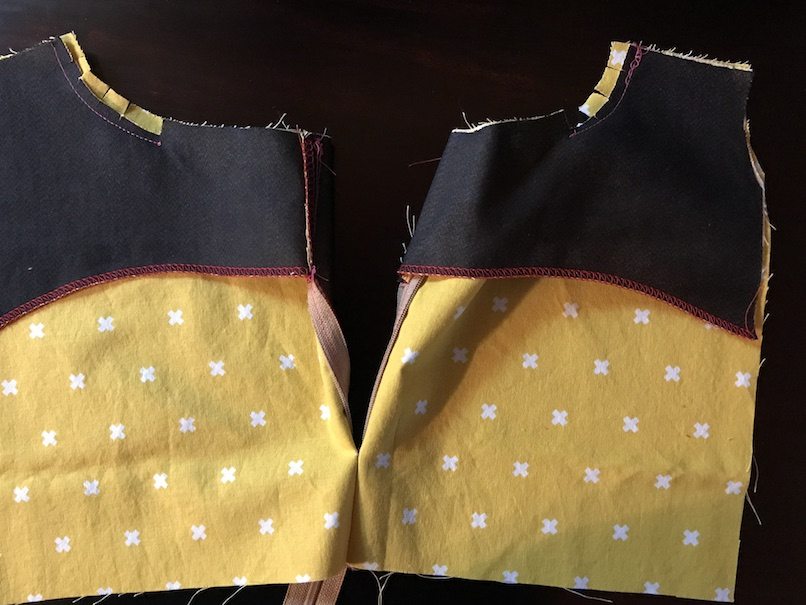
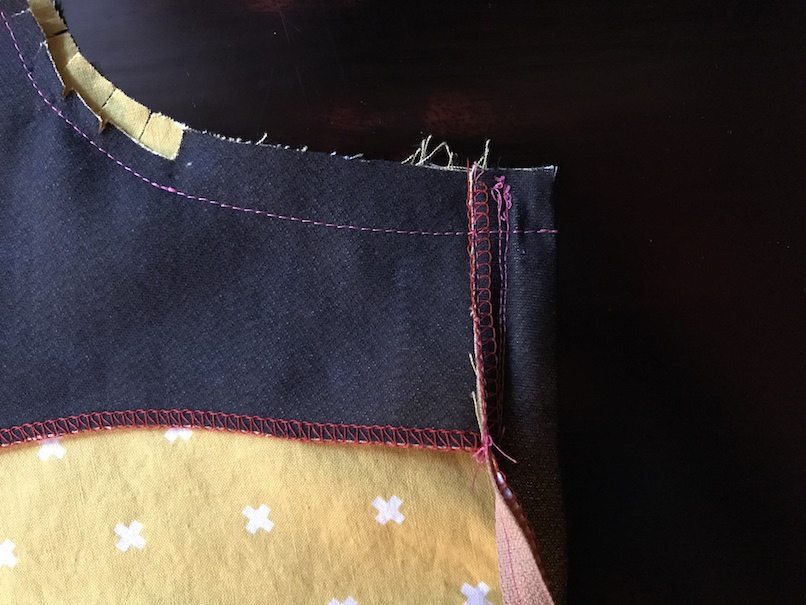
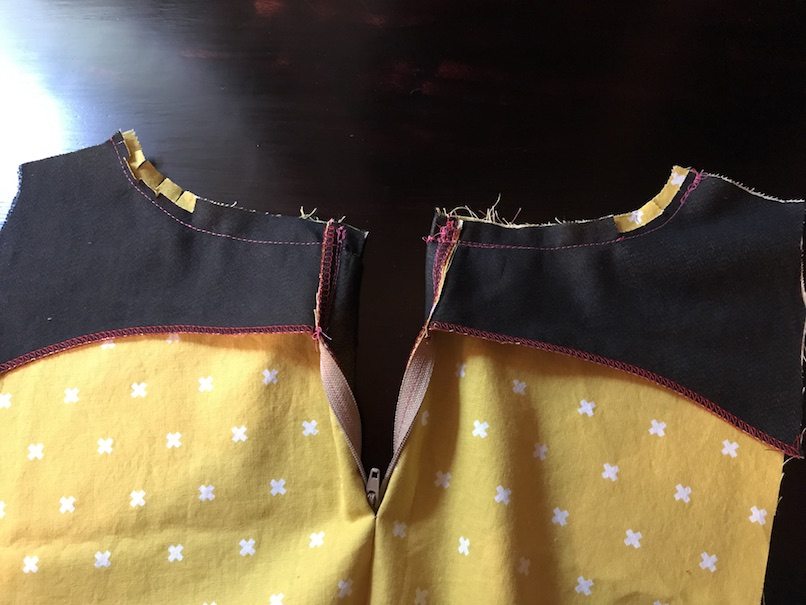
Let’s zoom out and this is what we have at the moment.
Hey remember we have a notch on the left side? This notch now comes in handy.
Now I am making the facing lay flat by folding the facing/zipper at the notch. And finally the facing can lay flat.
It’s time to stitch the remaining neckline. I am the queen of pins, so let’s pin first.
Then stitch, continuing from the previous stitching line, and go all the way to the edge.
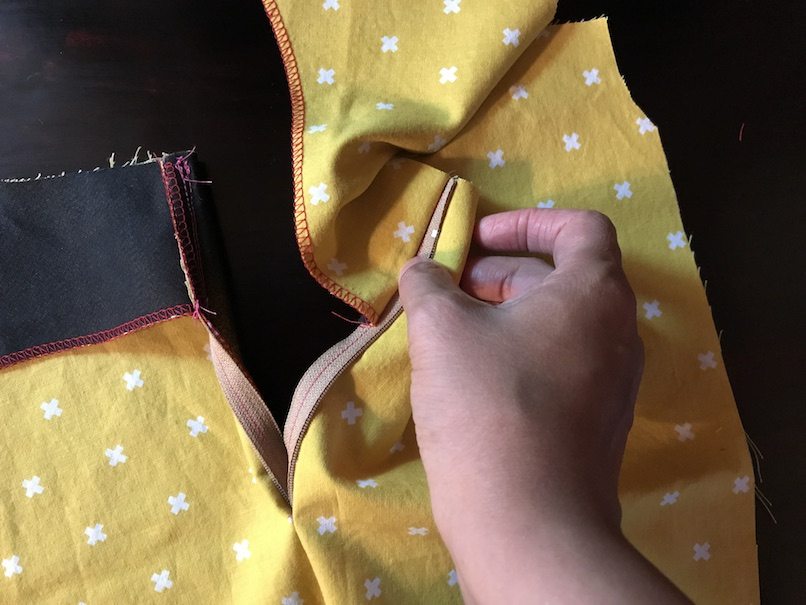
On the right-hand side, there’s no notch. But what you do here is to fold the facing/zipper back, so that the zipper teeth in between is at the very edge inside the fold. Right next to the tip of my finger nail is the zipper teeth (inside).
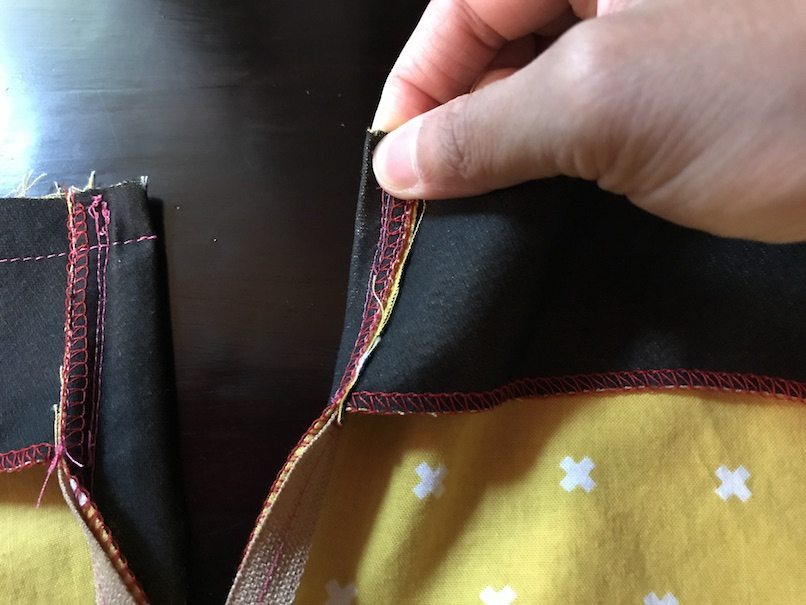
Note that the facing now can lay flat. Pin, pin and pin the neck line.
Stitch, continuing from the previous stitch line to the edge.
I still have to do all the trimming, grading and clipping. But before I do those, I’d like to check my work. Turn the facing right side out and see if both sides are leveled. In my case, no, it’s not! The right-hand side is slightly higher.

So what do I do? I turn it back and stitch another line a hairline lower.
Check again and now they are leveled!

With the checking out of the way, I turn everything back to the previous position.
And let the trimming, grading and clipping begin. You want to eliminate as much bulk as possible.
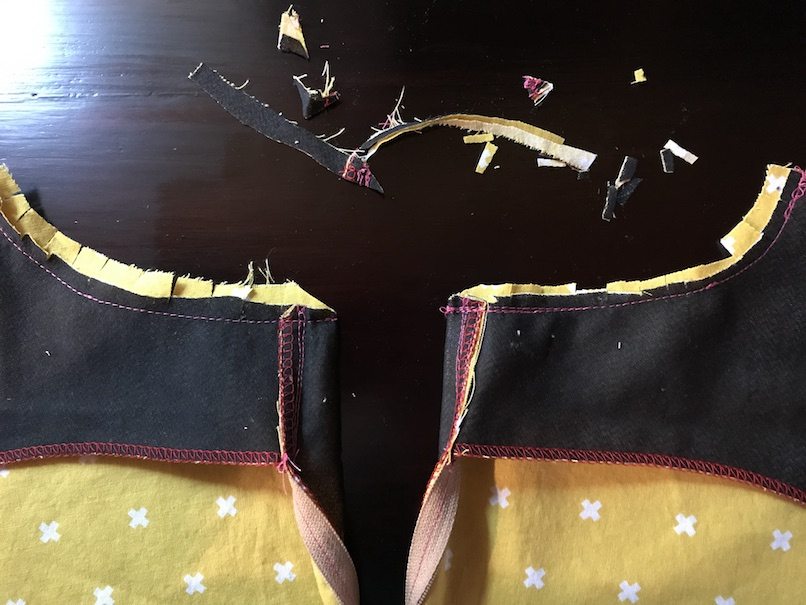
After that, understitch the neckline. You won’t be able to understitch all the way to the corner, but go as far as you can.
Turn the whole thing over, and this is what you have.
Next, we edge stitch right next to the right-hand side zipper. Pin first.
Then I stitch through all layers.
Pull up the zipper and give everything a good press. But don’t melt the zipper. The left side “flap” should cover the stitch made in the previous step.
On the left side, I measure 1/2″ (1.25 cm) and mark along the opening.
At the same level of the circle/mark, I pivot and mark to the center back seam.
A little trick I use is to use masking tape. This tape doesn’t leave any residue. I can stitch right at the edge for extra precision.
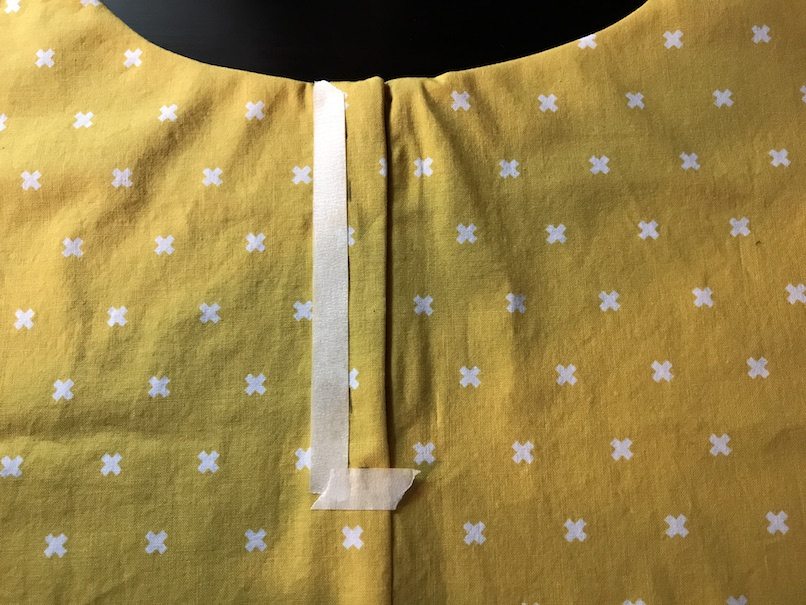
Topstitch through all layers and there you have it.
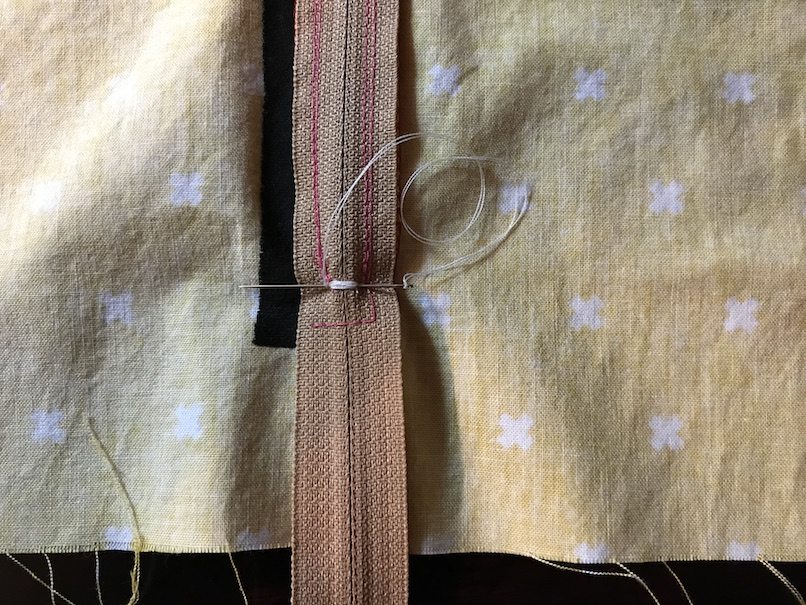
If your zipper is very long, you can hand stitch a stop at the end (where the circle/mark is).
Then chop off the end below the hand stitched stop.
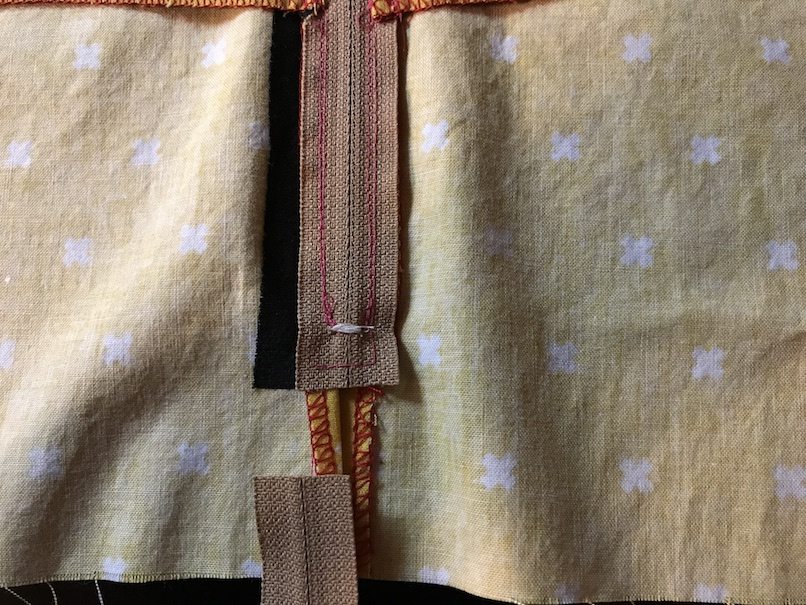
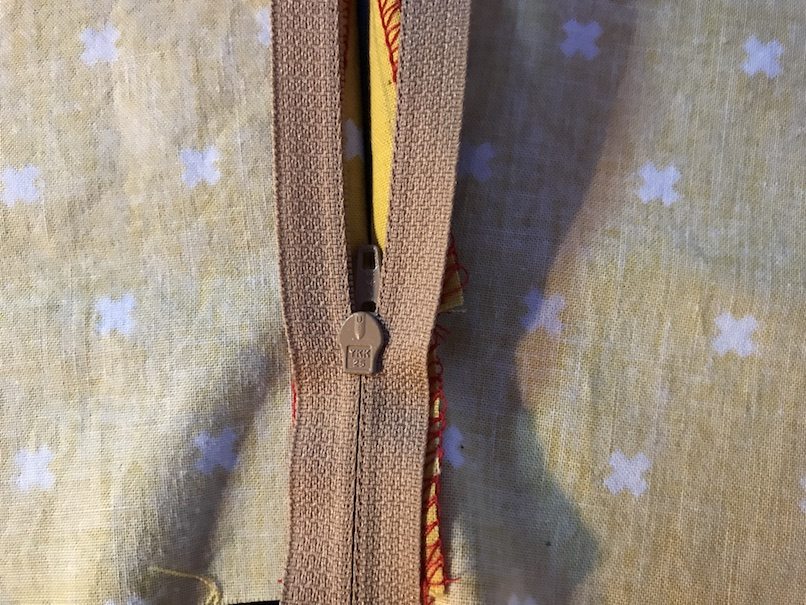
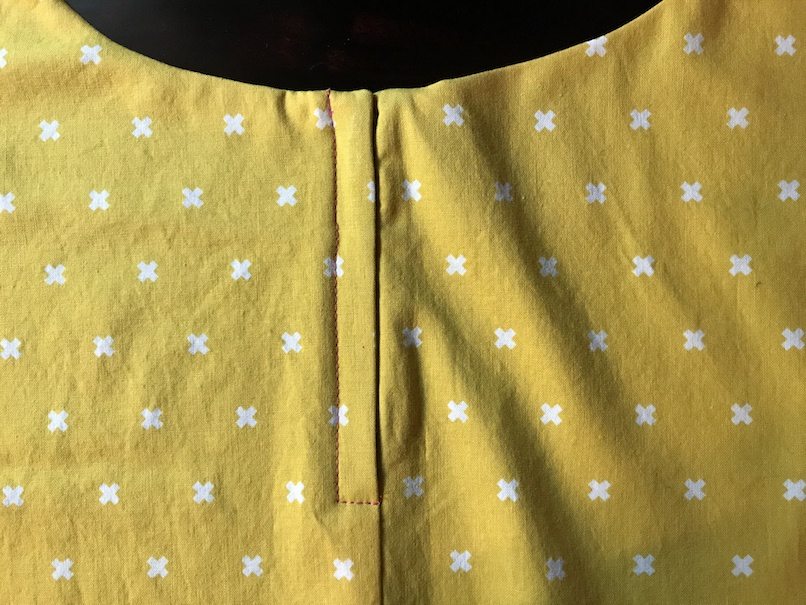
This is how it looks inside.
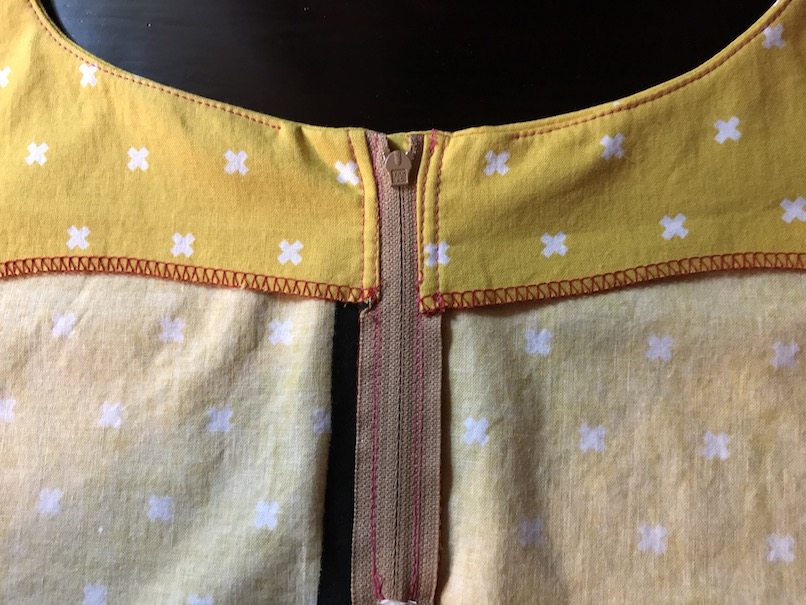
This is how it looks outside.
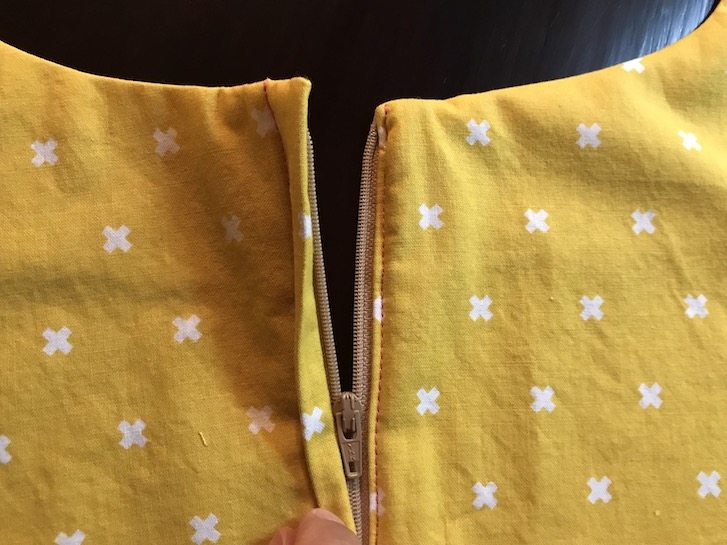
This is how it looks open.
You will then proceed with the eye and hook right above the zipper on the inside.
Until next time, happy stitching!

Thank you for this brilliant tutorial. I have only once before installed a lapped zipper and it was a disaster. This time, following your step by step instructions, it went in like a dream.
Excellent totorial! What if there was a lining attached to the facing? Would it work the same?
Yes, it would be the same.
Thank you so much for this simple yet elegant tutorial with excellent step by step photos and instructions. Can this technique be applied to install a lapped zipper with an all in one facing?
Sure, it can be.
Wow! Gorgeous and useful. Thanks so much for your efforts.
Thank you for this excellent tutorial! I love all the pictures – no overkill at all!! I am bookmarking this for future use! 🙂
I am glad it’s helpful Lisa. ?
This is getting bookmarked forever! This was such a big help, and it’s so clean. Thank you!
very helpful, thank you!
You are welcome Begum!
Thanks for this great tutorial!
Hope it’s useful Angela. You are welcome!