Description
See Pattern Release Announcement for more photos.

US$13.00
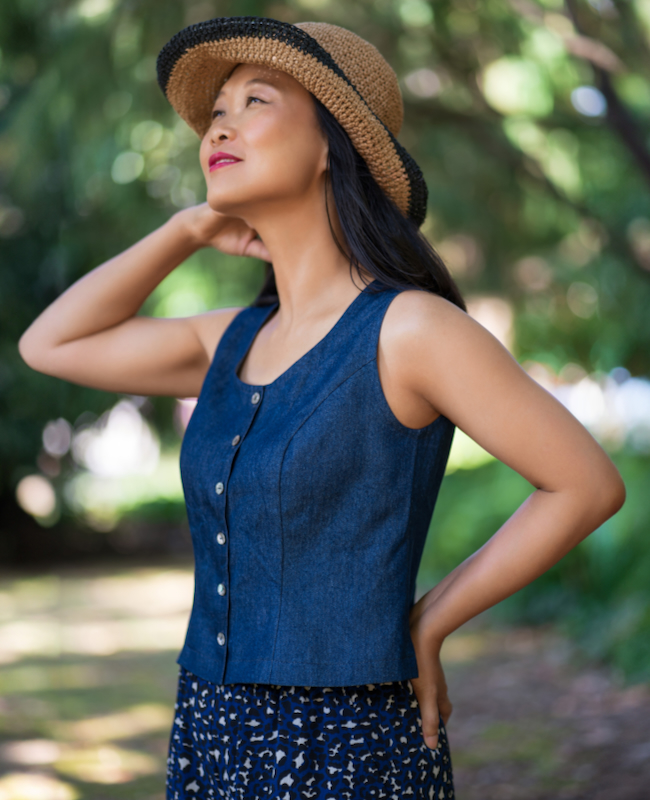
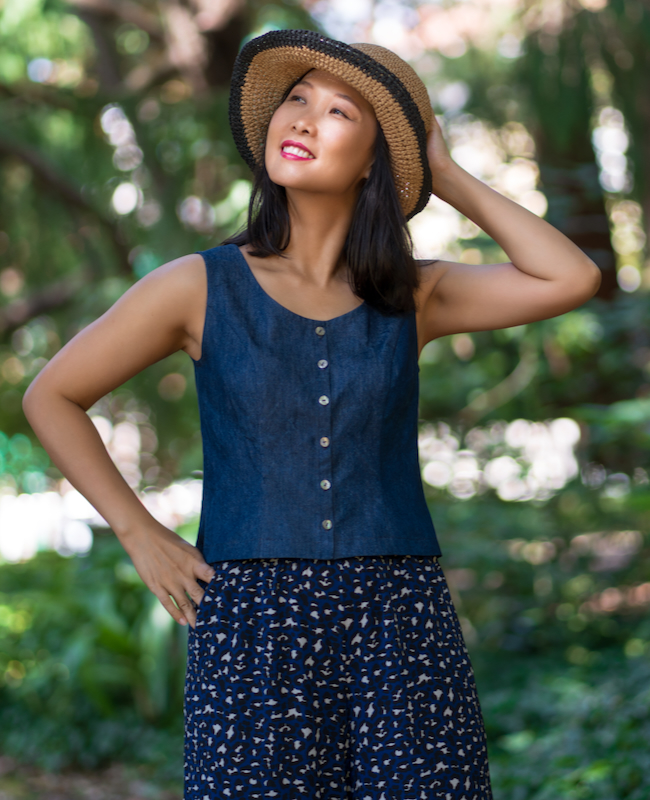
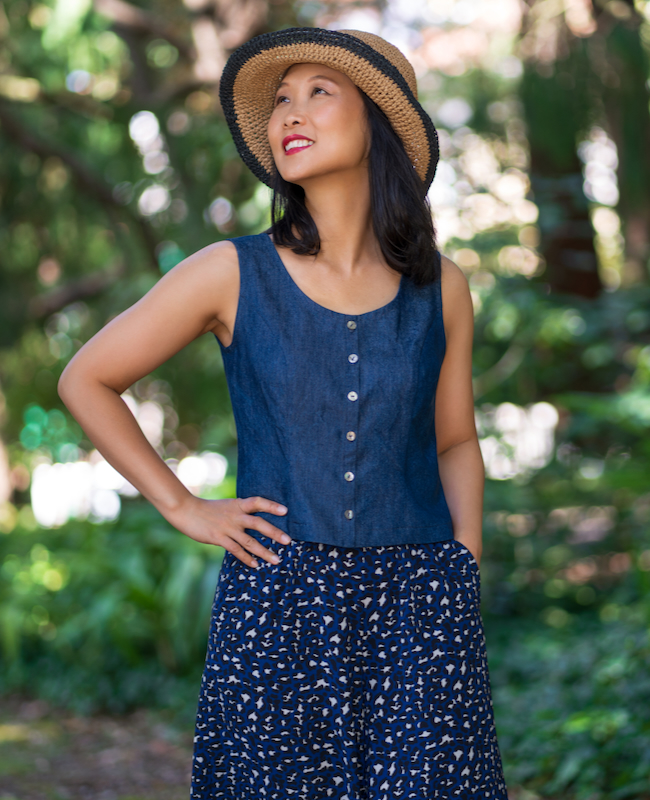
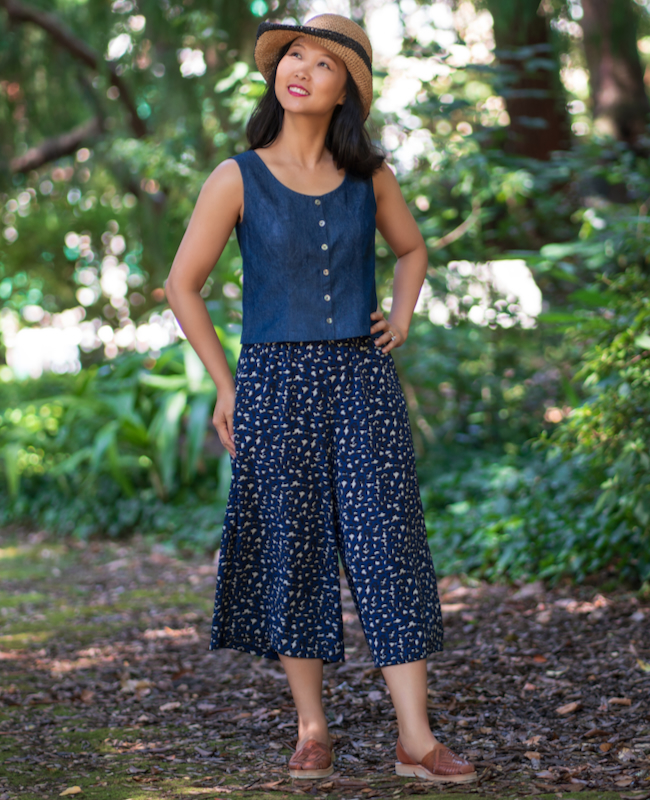
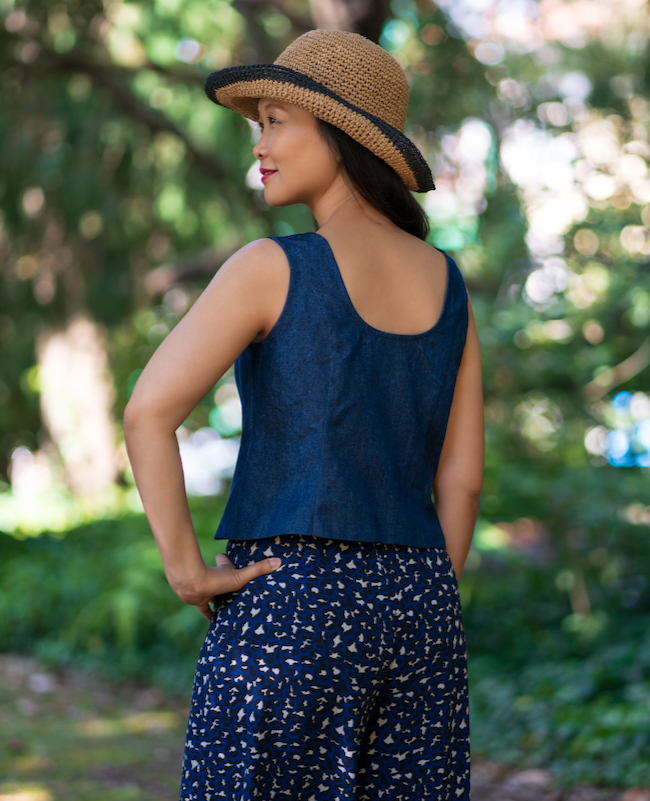
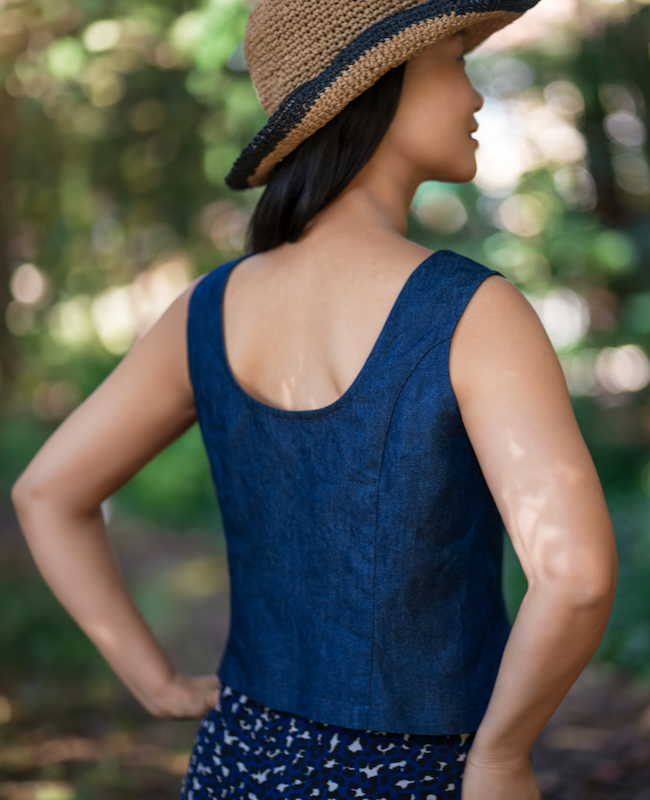
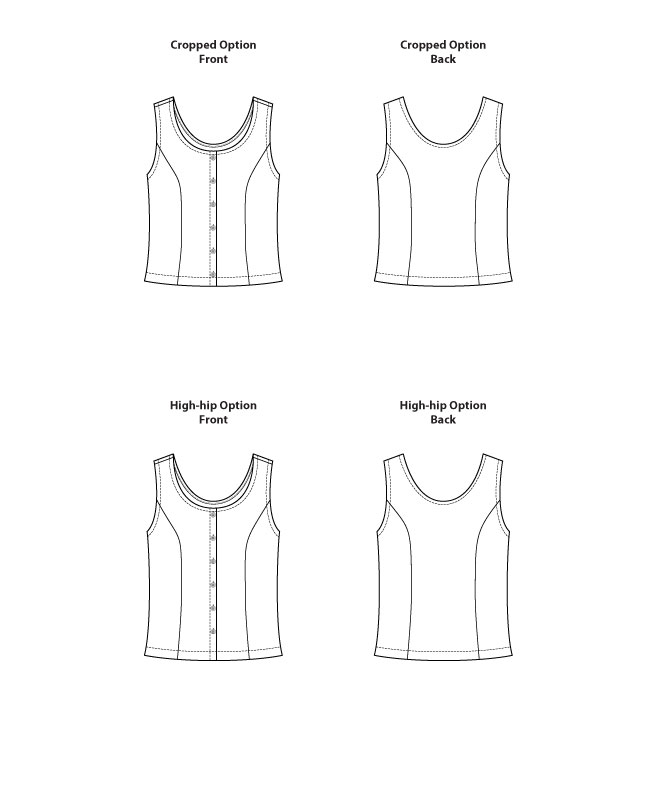
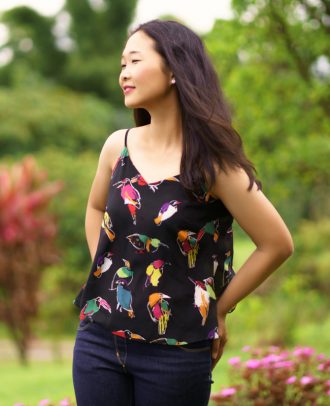
Introducing the Madalena Vest Top, a versatile, front-buttoned sleeveless tank top that’s perfect for summer. With its flattering princess seams and range of cup sizes, achieving a great fit is effortless. The trendy cropped length pairs beautifully with high-waisted pants or skirts, elongating the legs for a chic, modern look. For those who prefer a bit more coverage, the high-hip length option offers the same stylish appeal.
Madalena Vest Top Features:
Skill Level: Intermediate
Sizes: 00 – 40 (See “Size Chart” tab below for detailed measurements)
Don’t want to print and tape paper together? The Madalena Vest Top pattern now includes a large format file (size A0 paper) that you can send to your print shop to print!
| Buy More Save More Spend US$20 or more, get 15% off your entire cart Spend US$30 or more, get 20% off your entire cart Discount applies in cart automatically |
|---|
See Pattern Release Announcement for more photos.
| Sizes | 00 to 40 |
|---|---|
| Cup sizes | A, B, C, D & DD |
| Skill level | Intermediate |
| Knit or woven | Woven |
| File | A0, A4 / US Letter |
| Format | Digital download |
| Layers | Included |
| Seam allowances | Included |
Only logged in customers who have purchased this product may leave a review.
Primary Fabric Use medium-weight woven fabric such as linen, linen blend, twill and broadcloth.
Interfacing Use lightweight fusible woven or weft insertion interfacing.
Other Materials
Fabric Requirements
Most natural fibers shrink in the wash; be sure to have enough fabric. The requirements below assume that the fabric is already pre-shrunk.
| 00 | 0 | 2 | 4 | 6 | 8 | 10 | 12 | 14 | 16 | 18 | 20 | ||
|---|---|---|---|---|---|---|---|---|---|---|---|---|---|
| Primary Fabric | |||||||||||||
| Cropped Option | |||||||||||||
| 54″ Wide | yard | 3/4 | 3/4 | 3/4 | 3/4 | 1 1/8 | 1 1/8 | 1 1/8 | 1 1/8 | 1 1/8 | 1 1/8 | 1 1/4 | 1 1/4 |
| 135 cm Wide | cm | 70 | 70 | 70 | 70 | 100 | 100 | 100 | 100 | 100 | 100 | 110 | 110 |
| High-hip Option | |||||||||||||
| 54″ Wide | yard | 7/8 | 7/8 | 7/8 | 7/8 | 1 1/4 | 1 1/4 | 1 1/4 | 1 1/4 | 1 1/4 | 1 1/4 | 1 3/8 | 1 3/8 |
| 135 cm Wide | cm | 70 | 70 | 70 | 70 | 110 | 110 | 110 | 110 | 110 | 110 | 110 | 110 |
| Interfacing | |||||||||||||
| Cropped Option | |||||||||||||
| 20″ Wide | yard | 1/2 | 1/2 | 1/2 | 1/2 | 1/2 | 1/2 | 1/2 | 1/2 | 1/2 | 1/2 | 1/2 | 1/2 |
| 50 cm Wide | cm | 40 | 40 | 40 | 40 | 40 | 40 | 40 | 50 | 50 | 50 | 50 | 50 |
| High-hip Option | |||||||||||||
| 20″ Wide | yard | 1/2 | 1/2 | 1/2 | 1/2 | 5/8 | 5/8 | 5/8 | 5/8 | 5/8 | 5/8 | 5/8 | 5/8 |
| 50 cm Wide | cm | 50 | 50 | 50 | 50 | 50 | 50 | 50 | 50 | 50 | 50 | 50 | 50 |
| 22 | 24 | 26 | 28 | 30 | 32 | 34 | 36 | 38 | 40 | ||
|---|---|---|---|---|---|---|---|---|---|---|---|
| Primary Fabric | |||||||||||
| Cropped Option | |||||||||||
| 54″ Wide | yard | 1 1/4 | 1 1/4 | 1 1/4 | 1 1/4 | 1 1/4 | 1 1/4 | 1 1/4 | 1 1/2 | 1 1/2 | 1 1/2 |
| 135 cm Wide | cm | 110 | 110 | 110 | 110 | 110 | 110 | 110 | 130 | 130 | 130 |
| High-hip Option | |||||||||||
| 54″ Wide | yard | 1 3/8 | 1 3/8 | 1 3/8 | 1 3/8 | 1 3/8 | 1 3/8 | 1 3/8 | 1 5/8 | 1 5/8 | 1 5/8 |
| 135 cm Wide | cm | 110 | 120 | 120 | 120 | 130 | 130 | 130 | 150 | 150 | 150 |
| Interfacing | |||||||||||
| Cropped Option | |||||||||||
| 20″ Wide | yard | 1/2 | 5/8 | 5/8 | 5/8 | 5/8 | 5/8 | 5/8 | 5/8 | 5/8 | 5/8 |
| 50 cm Wide | cm | 50 | 50 | 50 | 50 | 50 | 50 | 50 | 50 | 50 | 50 |
| High-hip Option | |||||||||||
| 20″ Wide | yard | 5/8 | 5/8 | 5/8 | 5/8 | 5/8 | 5/8 | 5/8 | 5/8 | 5/8 | 5/8 |
| 50 cm Wide | cm | 50 | 60 | 60 | 60 | 60 | 60 | 60 | 60 | 60 | 60 |
| inch cm |
00 | 0 | 2 | 4 | 6 | 8 | 10 | 12 | 14 | 16 | 18 | 20 |
|---|---|---|---|---|---|---|---|---|---|---|---|---|
| Bust | ||||||||||||
| A Cup | 301⁄8 76.5 |
301⁄2 80 |
327⁄8 83.5 |
341⁄4 87 |
355⁄8 90.5 |
37 94 |
383⁄8 97.5 |
393⁄4 101 |
411⁄8 104.5 |
421⁄2 108 |
437⁄8 111.5 |
451⁄4 115 |
| B Cup | 311⁄8 79 |
321⁄2 82.5 |
337⁄8 86 |
351⁄4 89.5 |
365⁄8 93 |
38 96.5 |
393⁄8 100 |
403⁄4 103.5 |
421⁄8 107 |
431⁄2 110.5 |
447⁄8 114 |
461⁄4 117.5 |
| C Cup | 321⁄8 81.5 |
331⁄2 85 |
347⁄8 88.5 |
361⁄4 92 |
375⁄8 95.5 |
39 99 |
403⁄8 102.5 |
413⁄4 106 |
431⁄8 109.5 |
441⁄2 113 |
457⁄8 116.5 |
471⁄4 120 |
| D Cup | 331⁄8 84 |
341⁄2 87.5 |
357⁄8 91 |
371⁄4 94.5 |
385⁄8 98 |
40 101.5 |
413⁄8 105 |
423⁄4 108.5 |
441⁄8 112 |
451⁄2 115.5 |
467⁄8 119 |
481⁄4 122.5 |
| DD Cup | 341⁄8 86.5 |
351⁄2 90 |
367⁄8 93.5 |
381⁄4 97 |
395⁄8 100.5 |
41 104 |
423⁄8 107.5 |
433⁄4 111 |
451⁄8 114.5 |
461⁄2 118 |
477⁄8 121.5 |
491⁄4 125 |
| Waist | 253⁄8 64.5 |
263⁄4 68 |
281⁄8 71.5 |
291⁄2 75 |
307⁄8 78.5 |
321⁄4 82 |
335⁄8 85.5 |
35 89 |
363⁄8 92.5 |
373⁄4 96 |
391⁄8 99.5 |
401⁄2 103 |
| Hip | 331⁄8 84 |
341⁄2 87.5 |
357⁄8 91 |
371⁄4 94.5 |
385⁄8 98 |
40 101.5 |
413⁄8 105 |
423⁄4 108.5 |
441⁄8 112 |
451⁄2 115.5 |
467⁄8 119 |
481⁄4 122.5 |
| inch cm |
22 | 24 | 26 | 28 | 30 | 32 | 34 | 36 | 38 | 40 |
|---|---|---|---|---|---|---|---|---|---|---|
| Bust | ||||||||||
| B Cup | 475⁄8 121 |
49 124.5 |
503⁄8 128 |
513⁄4 131.5 |
531⁄8 135 |
541⁄2 138.5 |
557⁄8 142 |
571⁄4 145.5 |
585⁄8 149 |
60 152.5 |
| C Cup | 485⁄8 123.5 |
50 127 |
513⁄8 130.5 |
523⁄4 134 |
541⁄8 137.5 |
551⁄2 141 |
567⁄8 144.5 |
581⁄4 148 |
595⁄8 151.5 |
61 155 |
| D Cup | 495⁄8 126 |
51 129.5 |
523⁄8 133 |
533⁄4 136.5 |
551⁄8 140 |
561⁄2 143.5 |
577⁄8 147 |
591⁄4 150.5 |
605⁄8 154 |
62 157.7 |
| DD Cup | 505⁄8 128.5 |
52 132 |
533⁄8 135.5 |
543⁄4 139 |
561⁄8 142.5 |
571⁄2 146 |
587⁄8 149.5 |
601⁄4 153 |
615⁄8 156.6 |
63 160 |
| Waist | 417⁄8 106.5 |
431⁄4 110 |
445⁄8 113.5 |
46 117 |
473⁄8 120.5 |
483⁄4 124 |
501⁄8 127.5 |
511⁄2 131 |
527⁄8 134.5 |
541⁄4 138 |
| Hip | 495⁄8 126 |
51 129.5 |
523⁄8 133 |
531⁄4 136.5 |
551⁄8 140 |
561⁄2 143.5 |
577⁄8 147 |
591⁄4 150.5 |
605⁄8 154 |
62 157.5 |
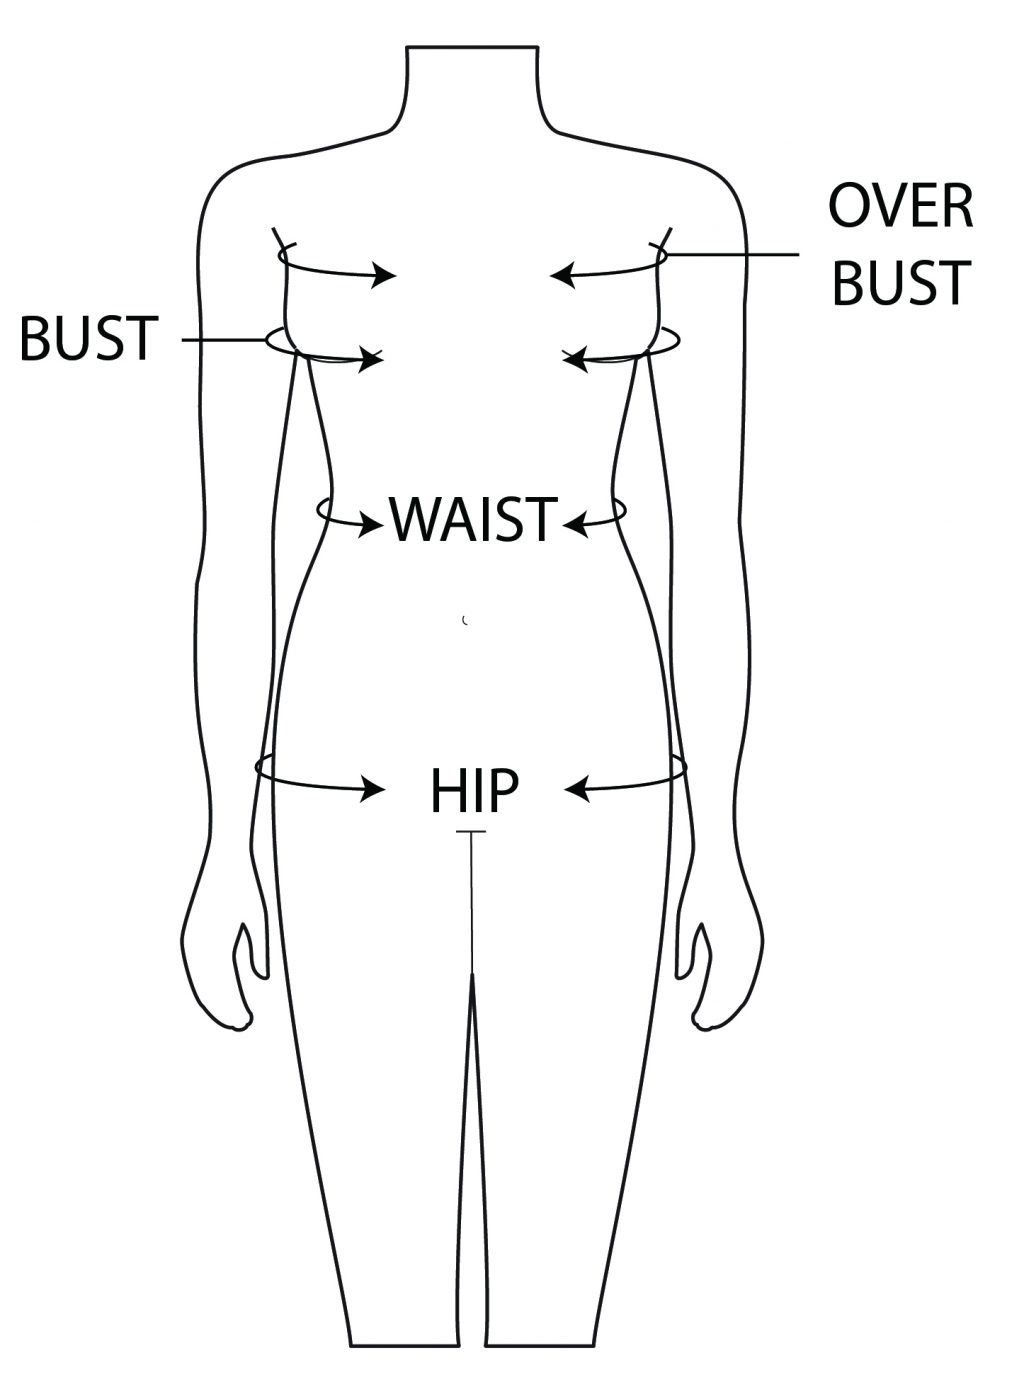
How to choose your size

Shawn –
I love the fit of this top! This was my first Itch to Stitch make. The garment came together beautifully, and it fits like a dream. This pattern will become a wardrobe staple. Thank you for the wonderful design, drafting, and instructions. I am itching to stitch more designs!
Mary Jane –
Love the fit and the look and it will be perfect for those hot summer days. I wish that there was another option with a higher scoop on the back neckline. Next time I make it I will try cutting out a higher back piece.
Anonymous –
Wonderful pattern! The pieces come together very easily. Instructions are excellent. The princess seams help simplify adjustments.
Jolene –
Greetings , I wanted to actually sew the pattern to its completion, which I did, twice even. Yes, the paper tiling is easy, and compared to other PDF vendors, it’s very accurate and saves paper around the edges. I love being able to print only the size I need. I this case, with the second Madalena Vest Top, I printed two sizes so I could easily “blend” size, which created a wonderful fit ! Would like to mention also, I love the different cup sizes bodices, since I have narrow shoulders, plus a size 32 A….its hard to find ready-to-wear clothing that fits Me, that actually flatters.
This particular pattern featured a lot of Bias tape. But Kennis well detailed instructions ( page 6) included information on how to make your own light weight, continuous strips of bias tape. I had previously purchased voile fabric, and this worked beautifully….I even had fun making yards and yards of it ( I got carried away, plenty for other projects) . This is So Much better then the 3 yard packages you buy. Bias vs. facings…for this vest top, it was perfect, wearing it feels effortless, and no worries about the facing poking out or show-through. Also like to mention that sewing bias tape is not difficult. The edge of my sewing machine pressure foot measures exactly 3/8 of an inch. So after pinning the bias tape to the edge of my fabric , I just let the pressure foot be my guide.
As for the Style, I like the polished look of it, a step-up from the usual tank top. On those really Hot days, the U shaped back is cooling without being revealing, as so the arm holes and neck line. Very nice.
True confession though….on my second top, I skipped steps #31 – 38. I like sewing my armholes / set-in sleeves “on the flat”. So before sewing the side seams, I sewed on the bias tape, then edge stitched it. Then I sewed up side seams (precisely matching the binding at the arm pit). After that, then I folded over the bias tape and top stitched it. That worked well.