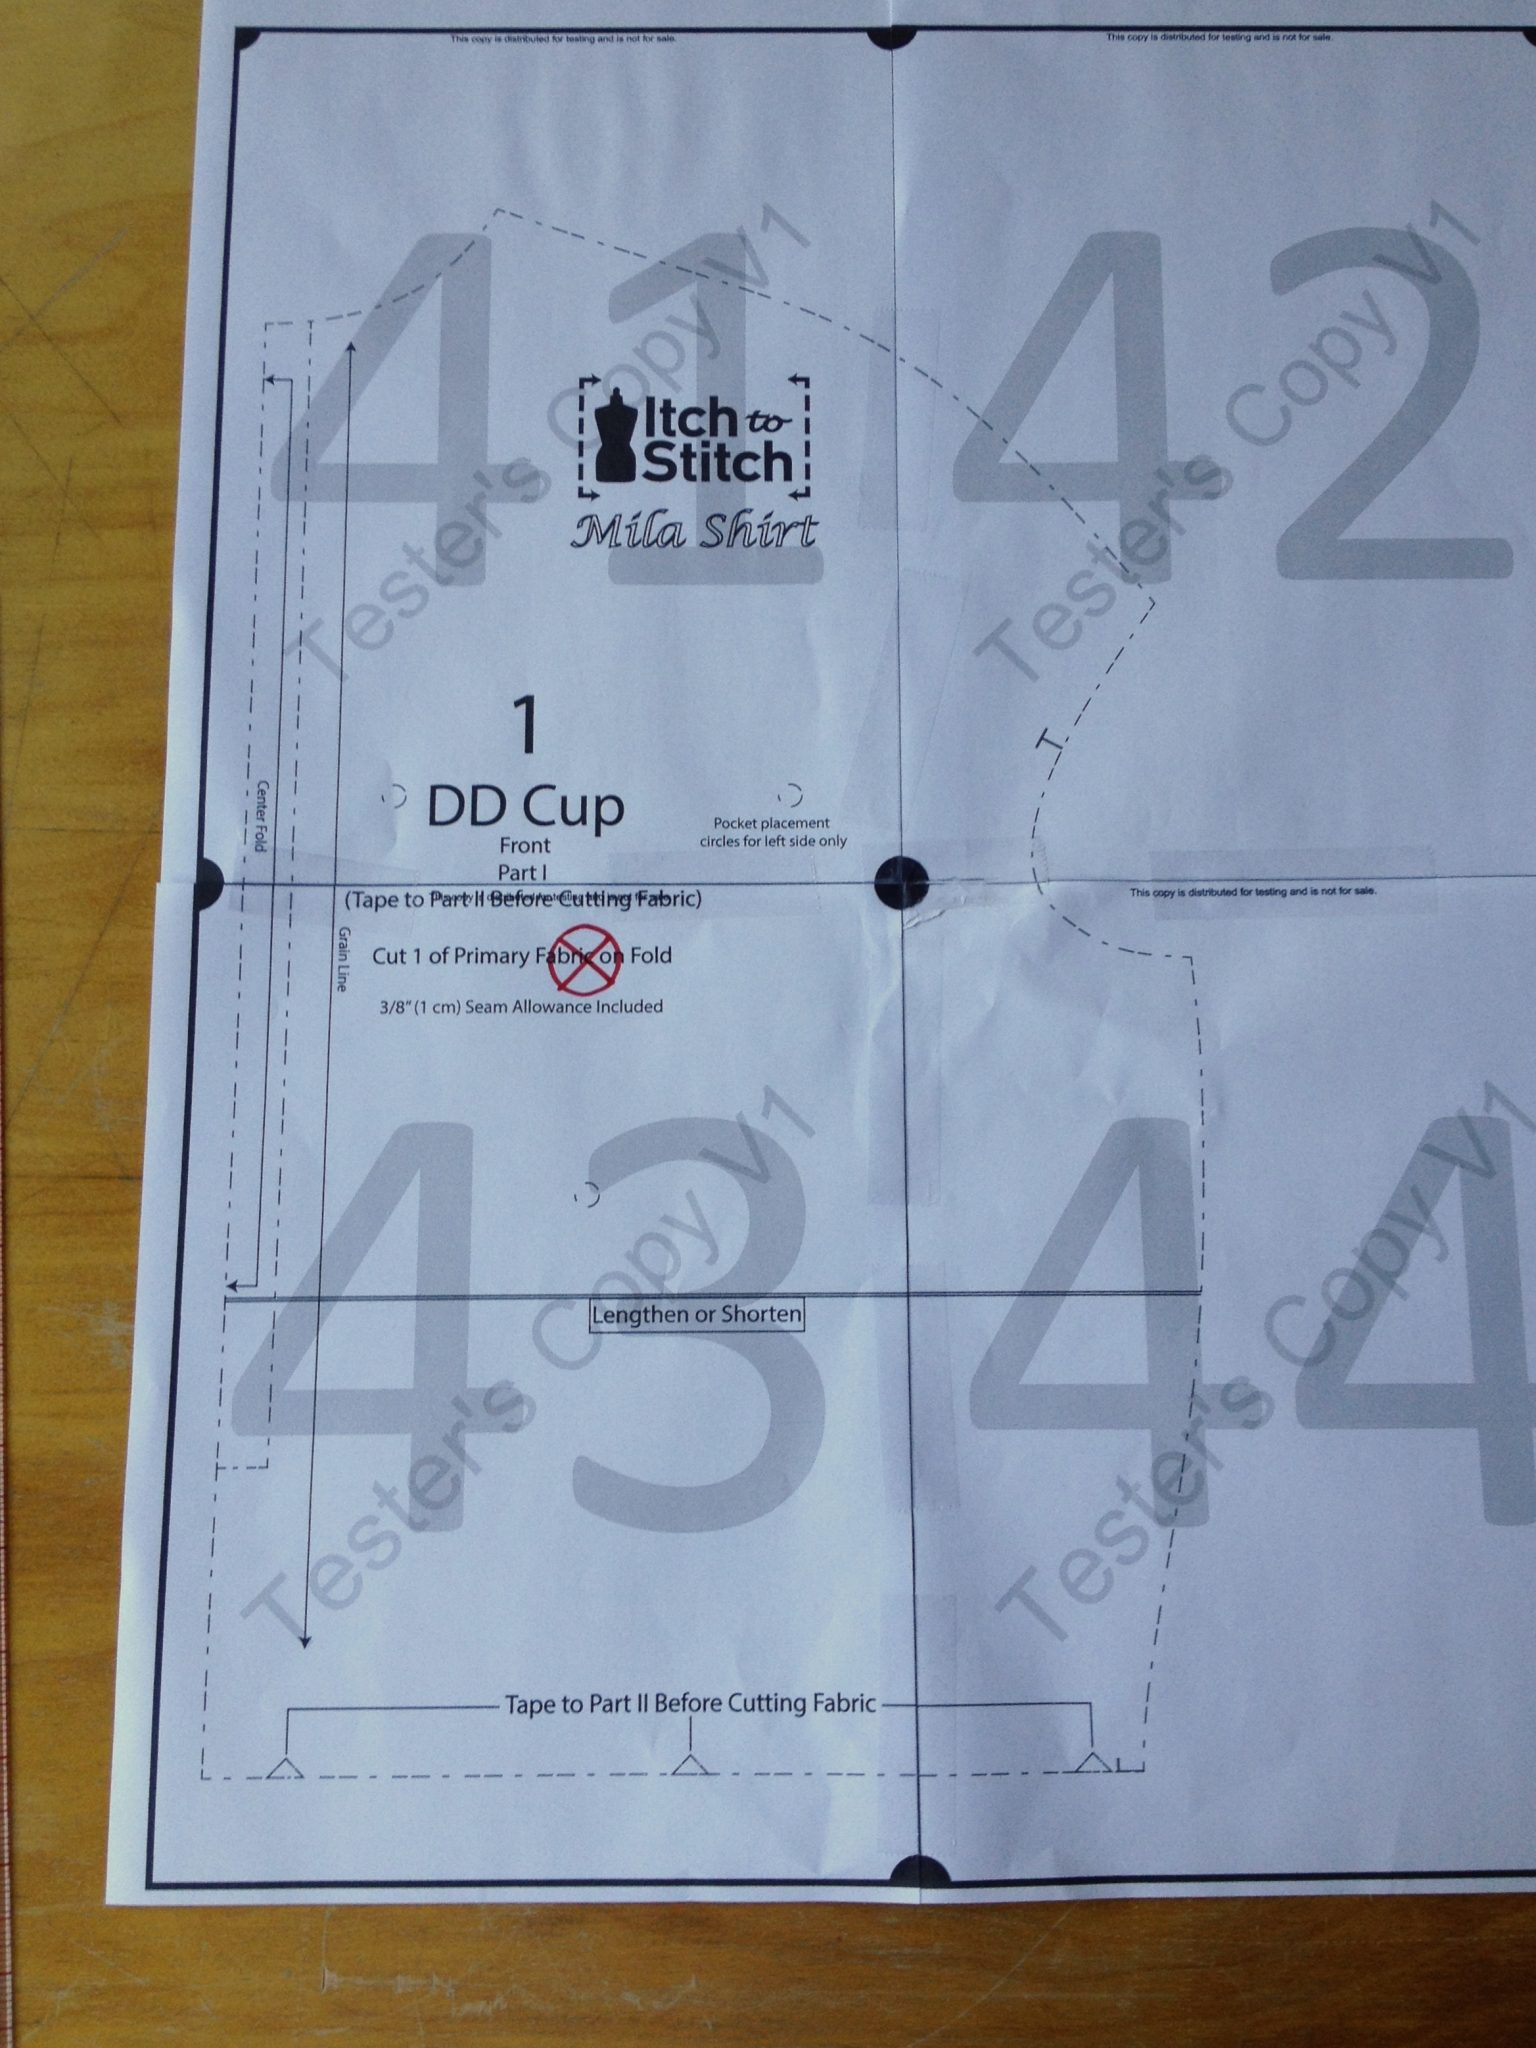
Mila Shirt Full Bust Adjustment (FBA)
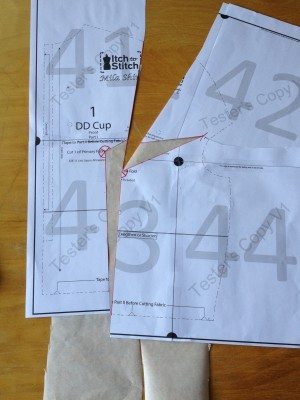
- Use the DD Cup row to determine your size.
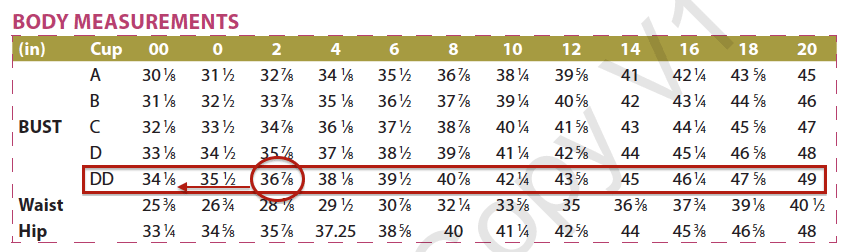
- Look at which size best fits your bust. Let’s say size 2 or 36 7/8″ fits you best.
- From that size, go down 1 size if you are about to do a one-cup adjustment. Go down 2 sizes if you are able to do a two-cup adjustment. Let’s say you are doing a two-cup adjustment now; we are going down 2 sizes.
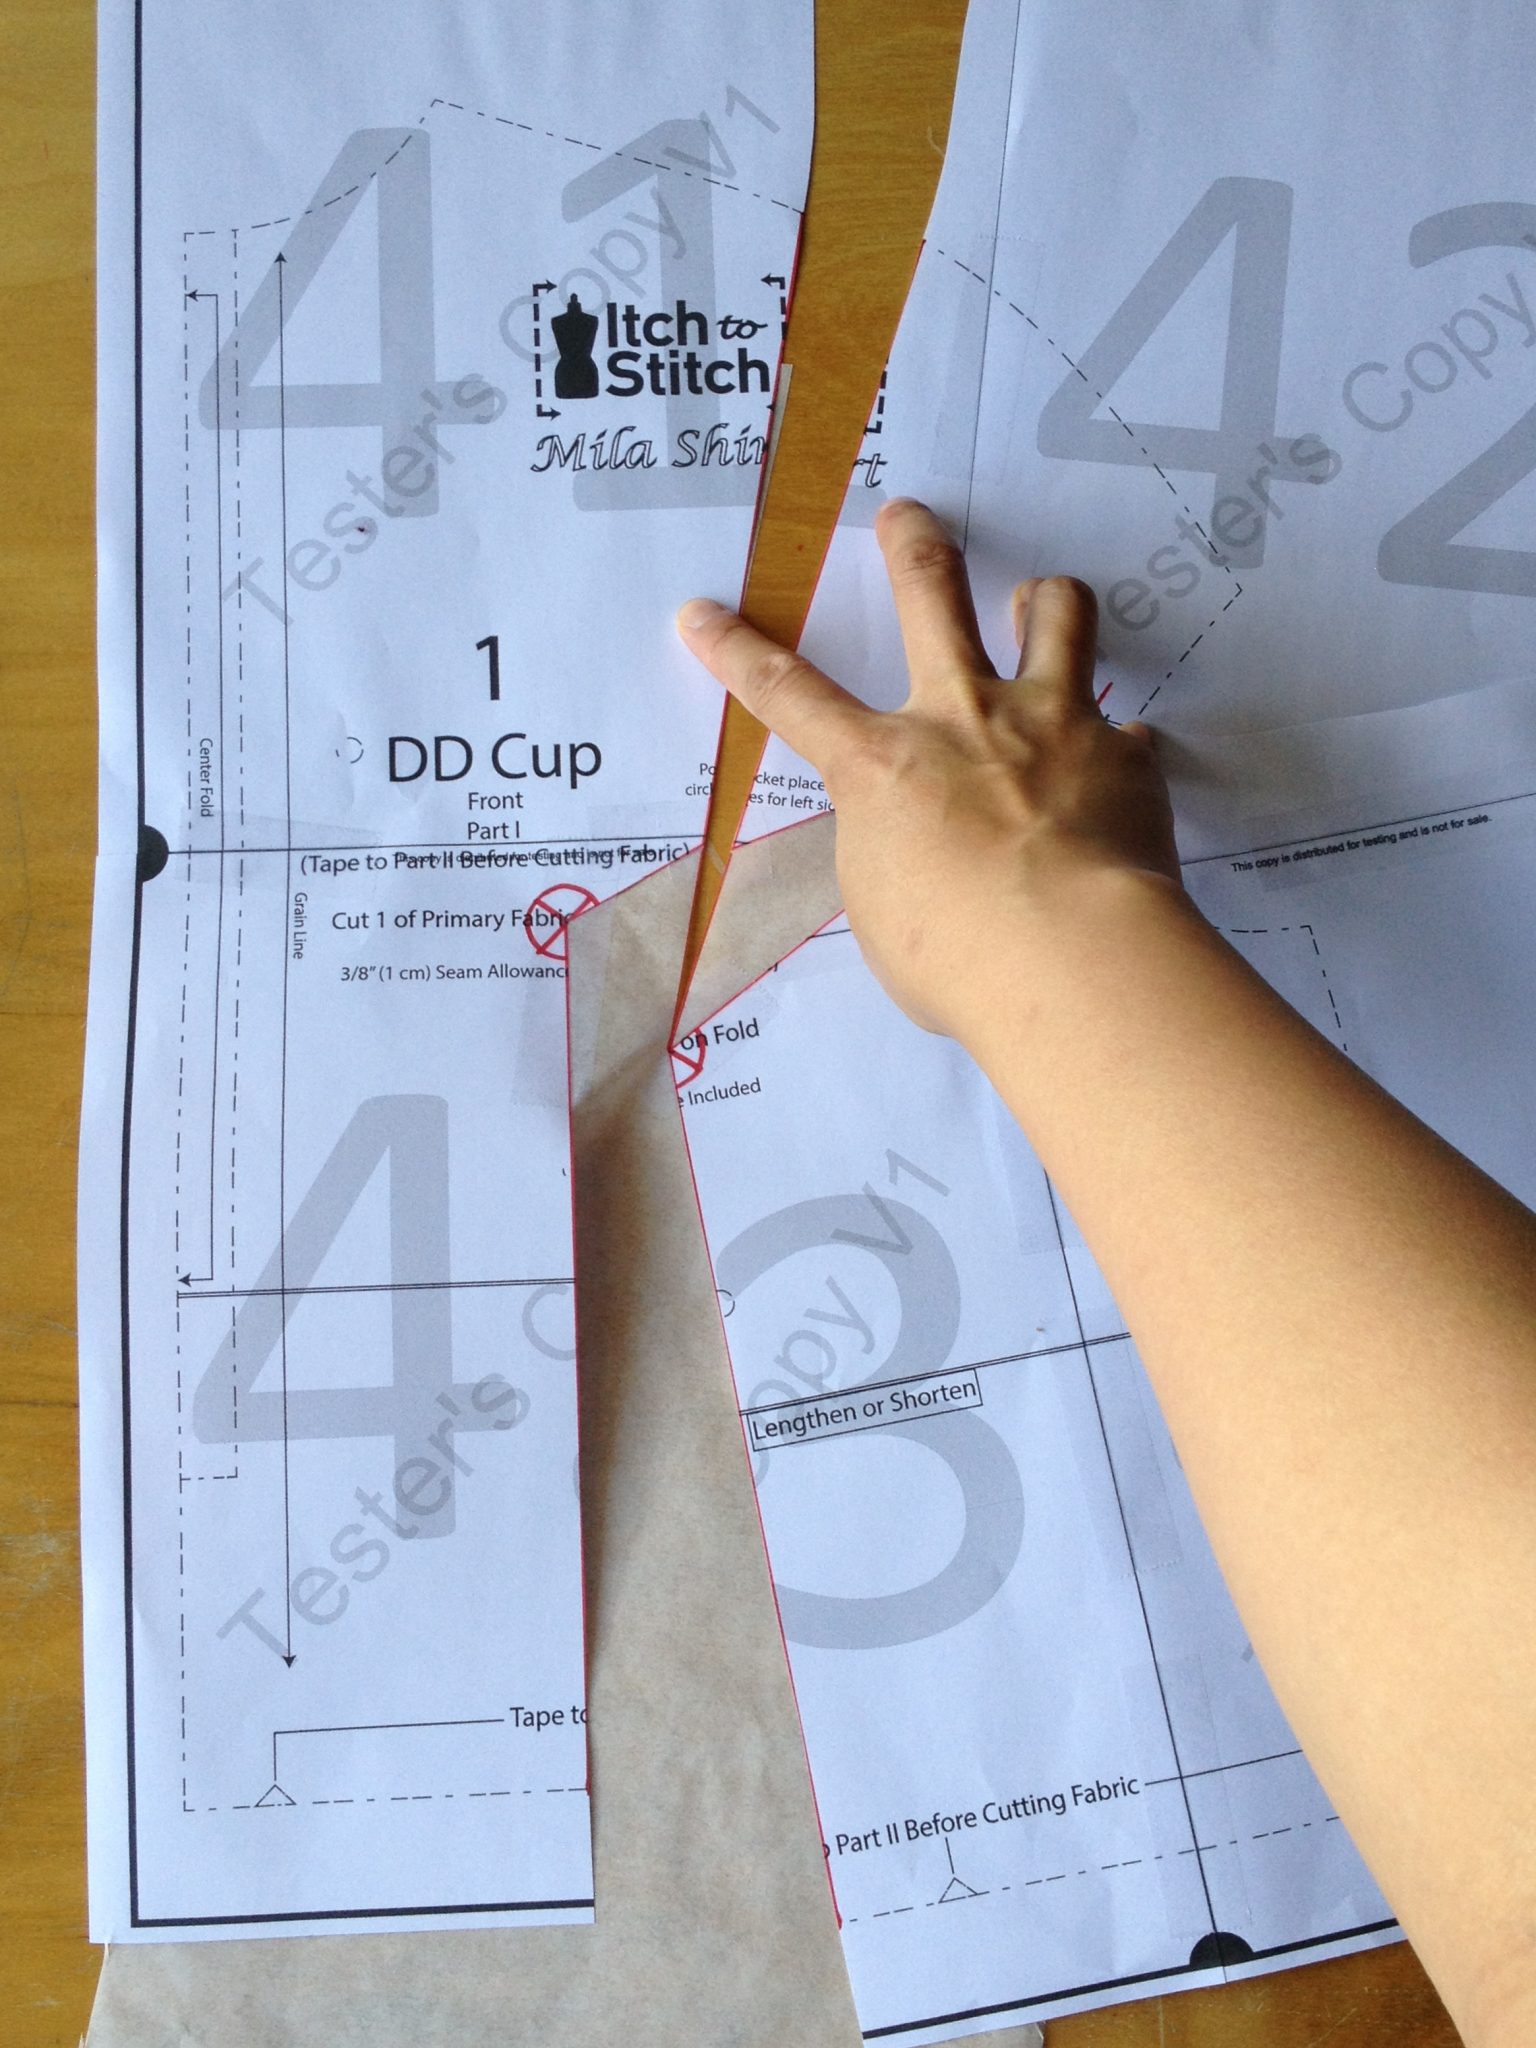
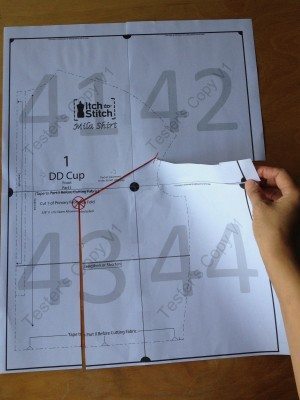
- Let the fun begin. Identify where your apex (nipple) would be. It’s supposed to be at the center of the pocket (see the pocket placement dots). However, yours might be different. If you did a muslin and can identify the real location, use that. If you haven’t done a muslin yet, use the center of the pocket.

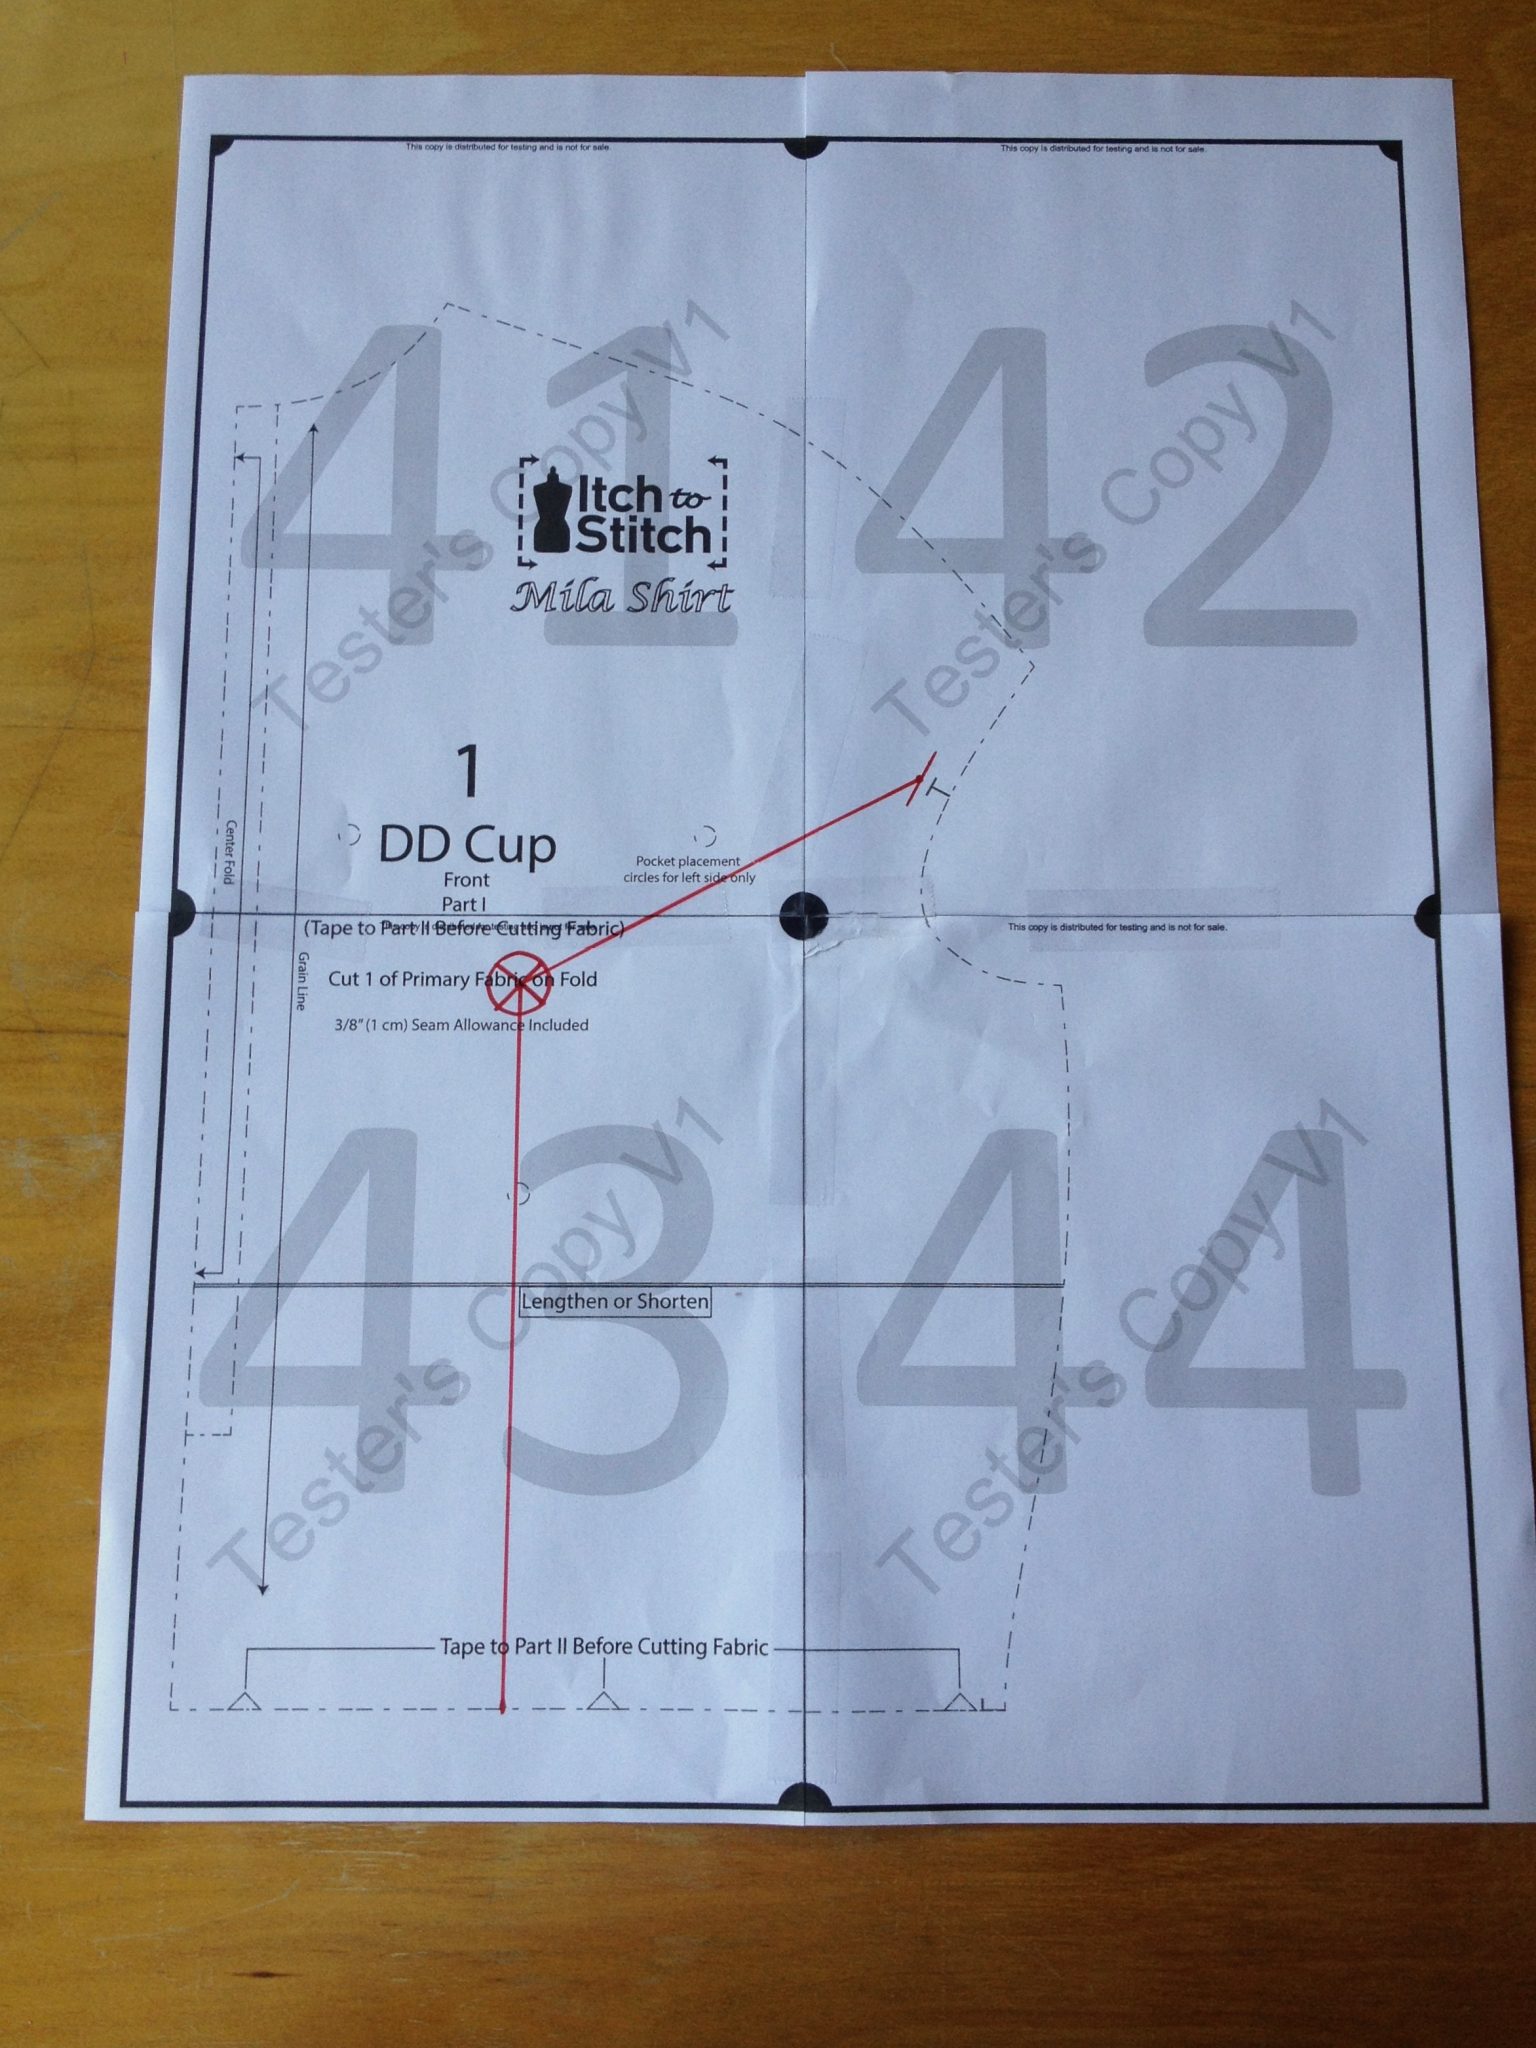
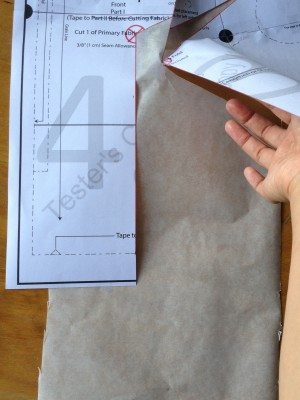
- Draw 2 lines – one from the apex to the base of the bodice (perpendicular to the center front), and the other from the apex toward the armhole notch. Note that there’s seam allowance (3/8″) on the pattern, so I am only drawing the line to the stitch line on the armhole, not to the cut line.
- Cut the line from the base, through at the apex, and toward the armhole.

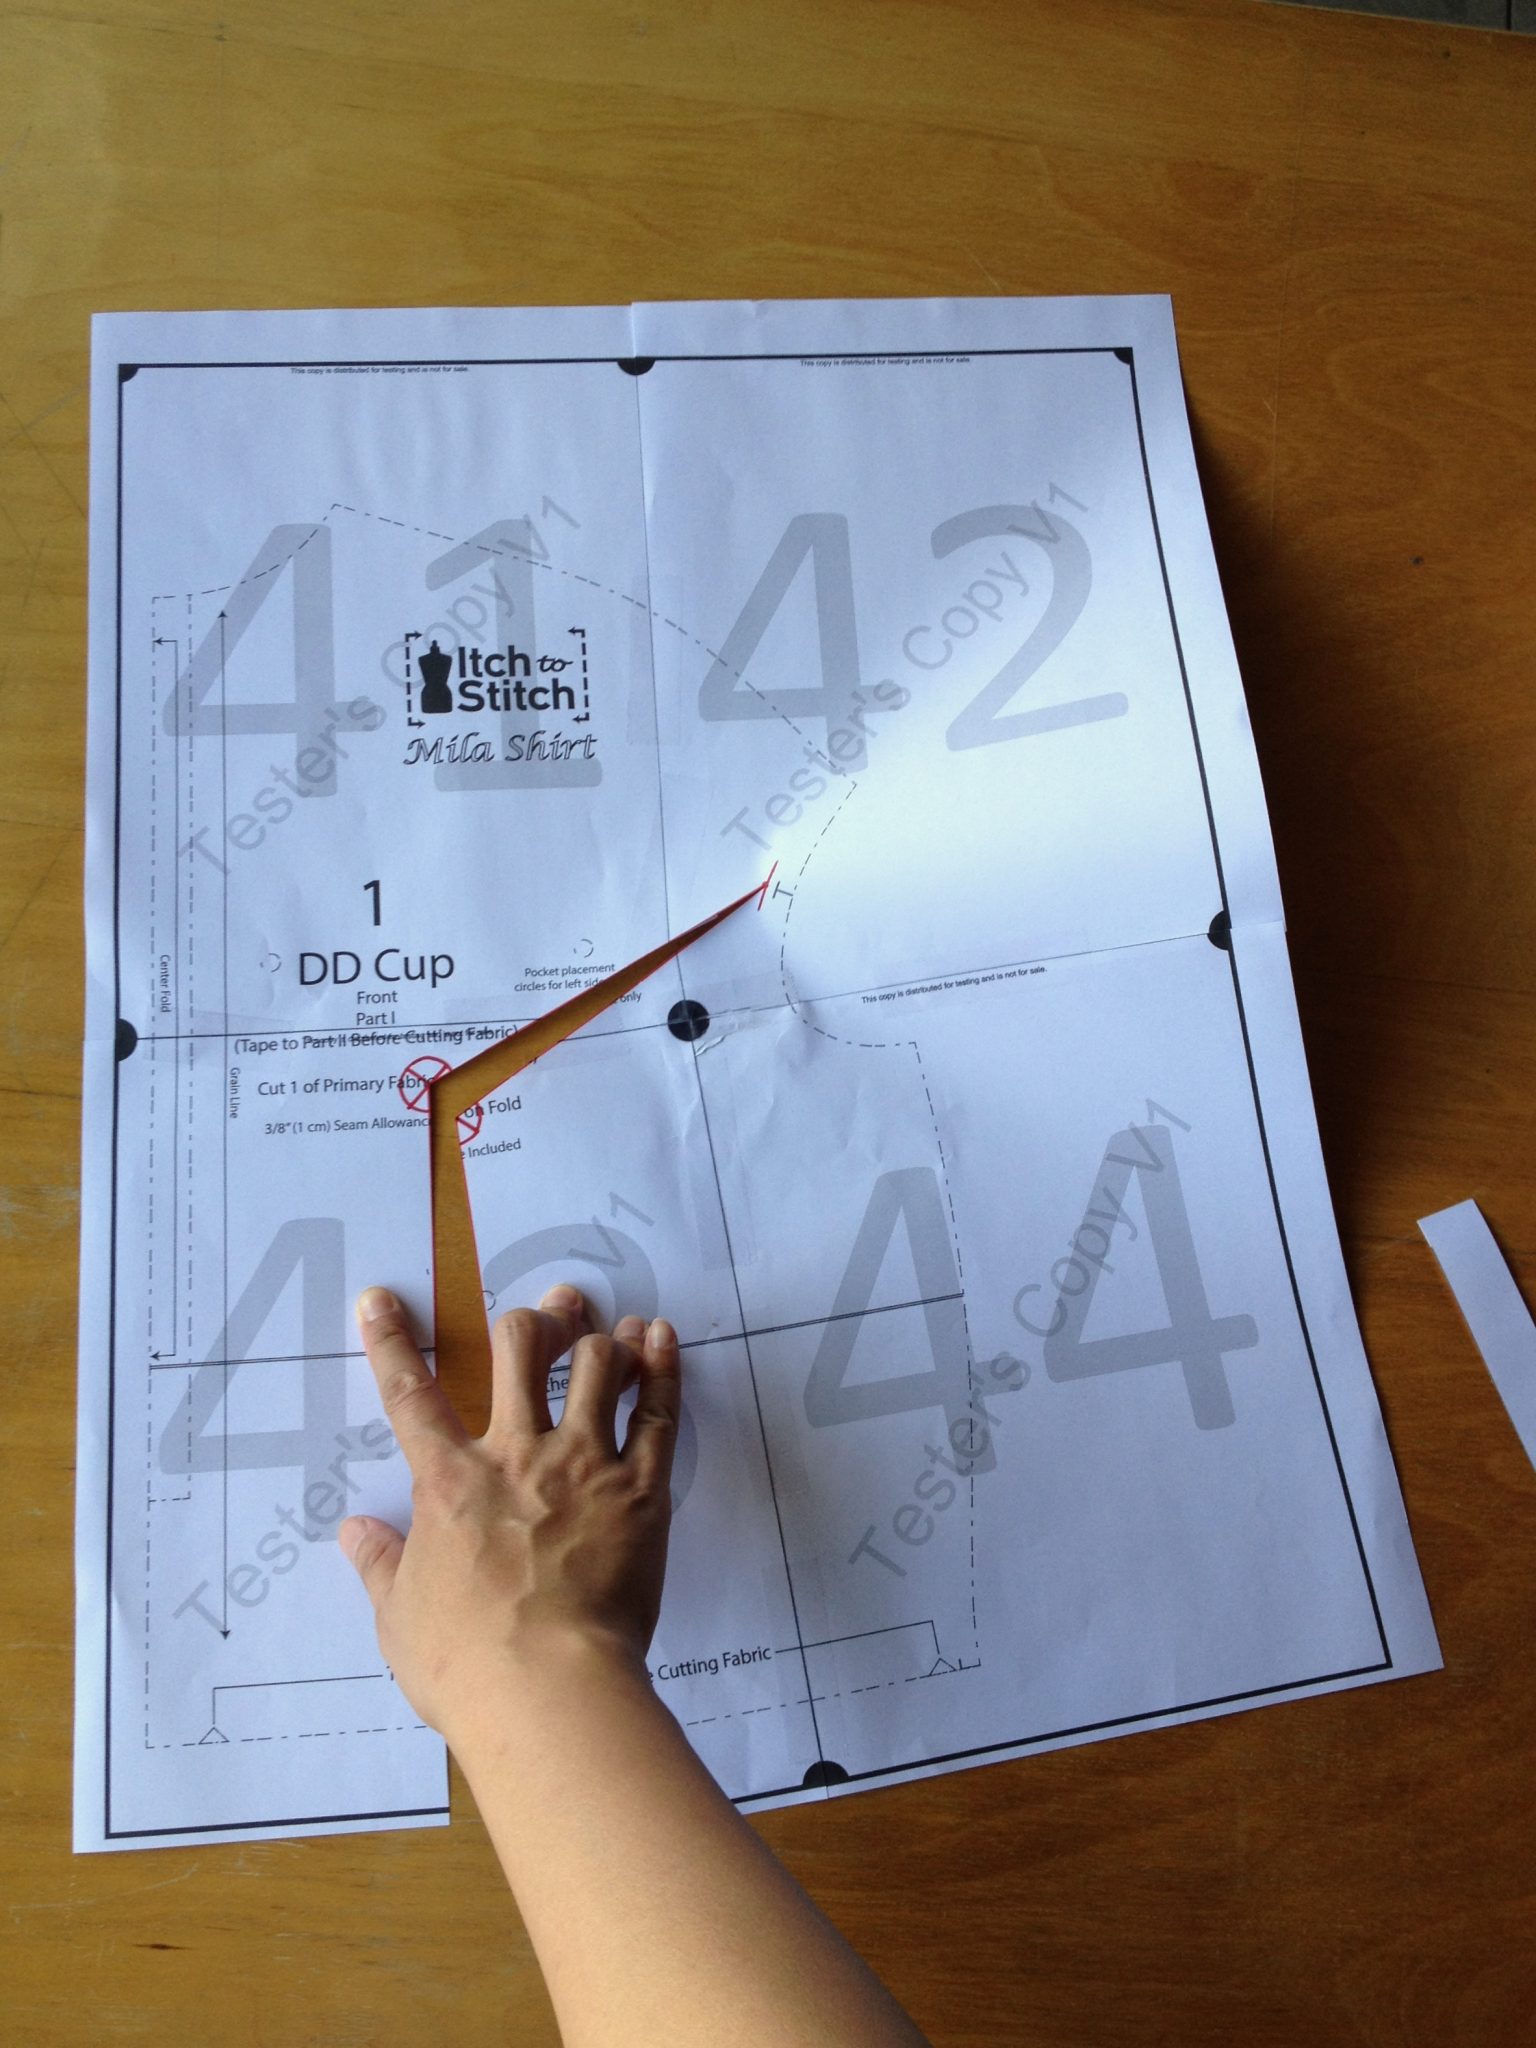
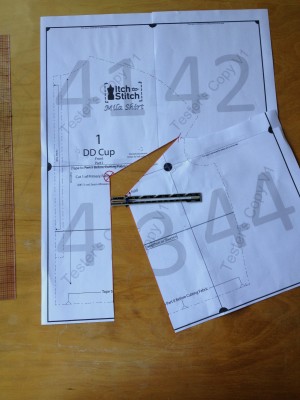
- Cut from the edge of the paper toward that end cut point, so that you can make a hinge at the armhole.
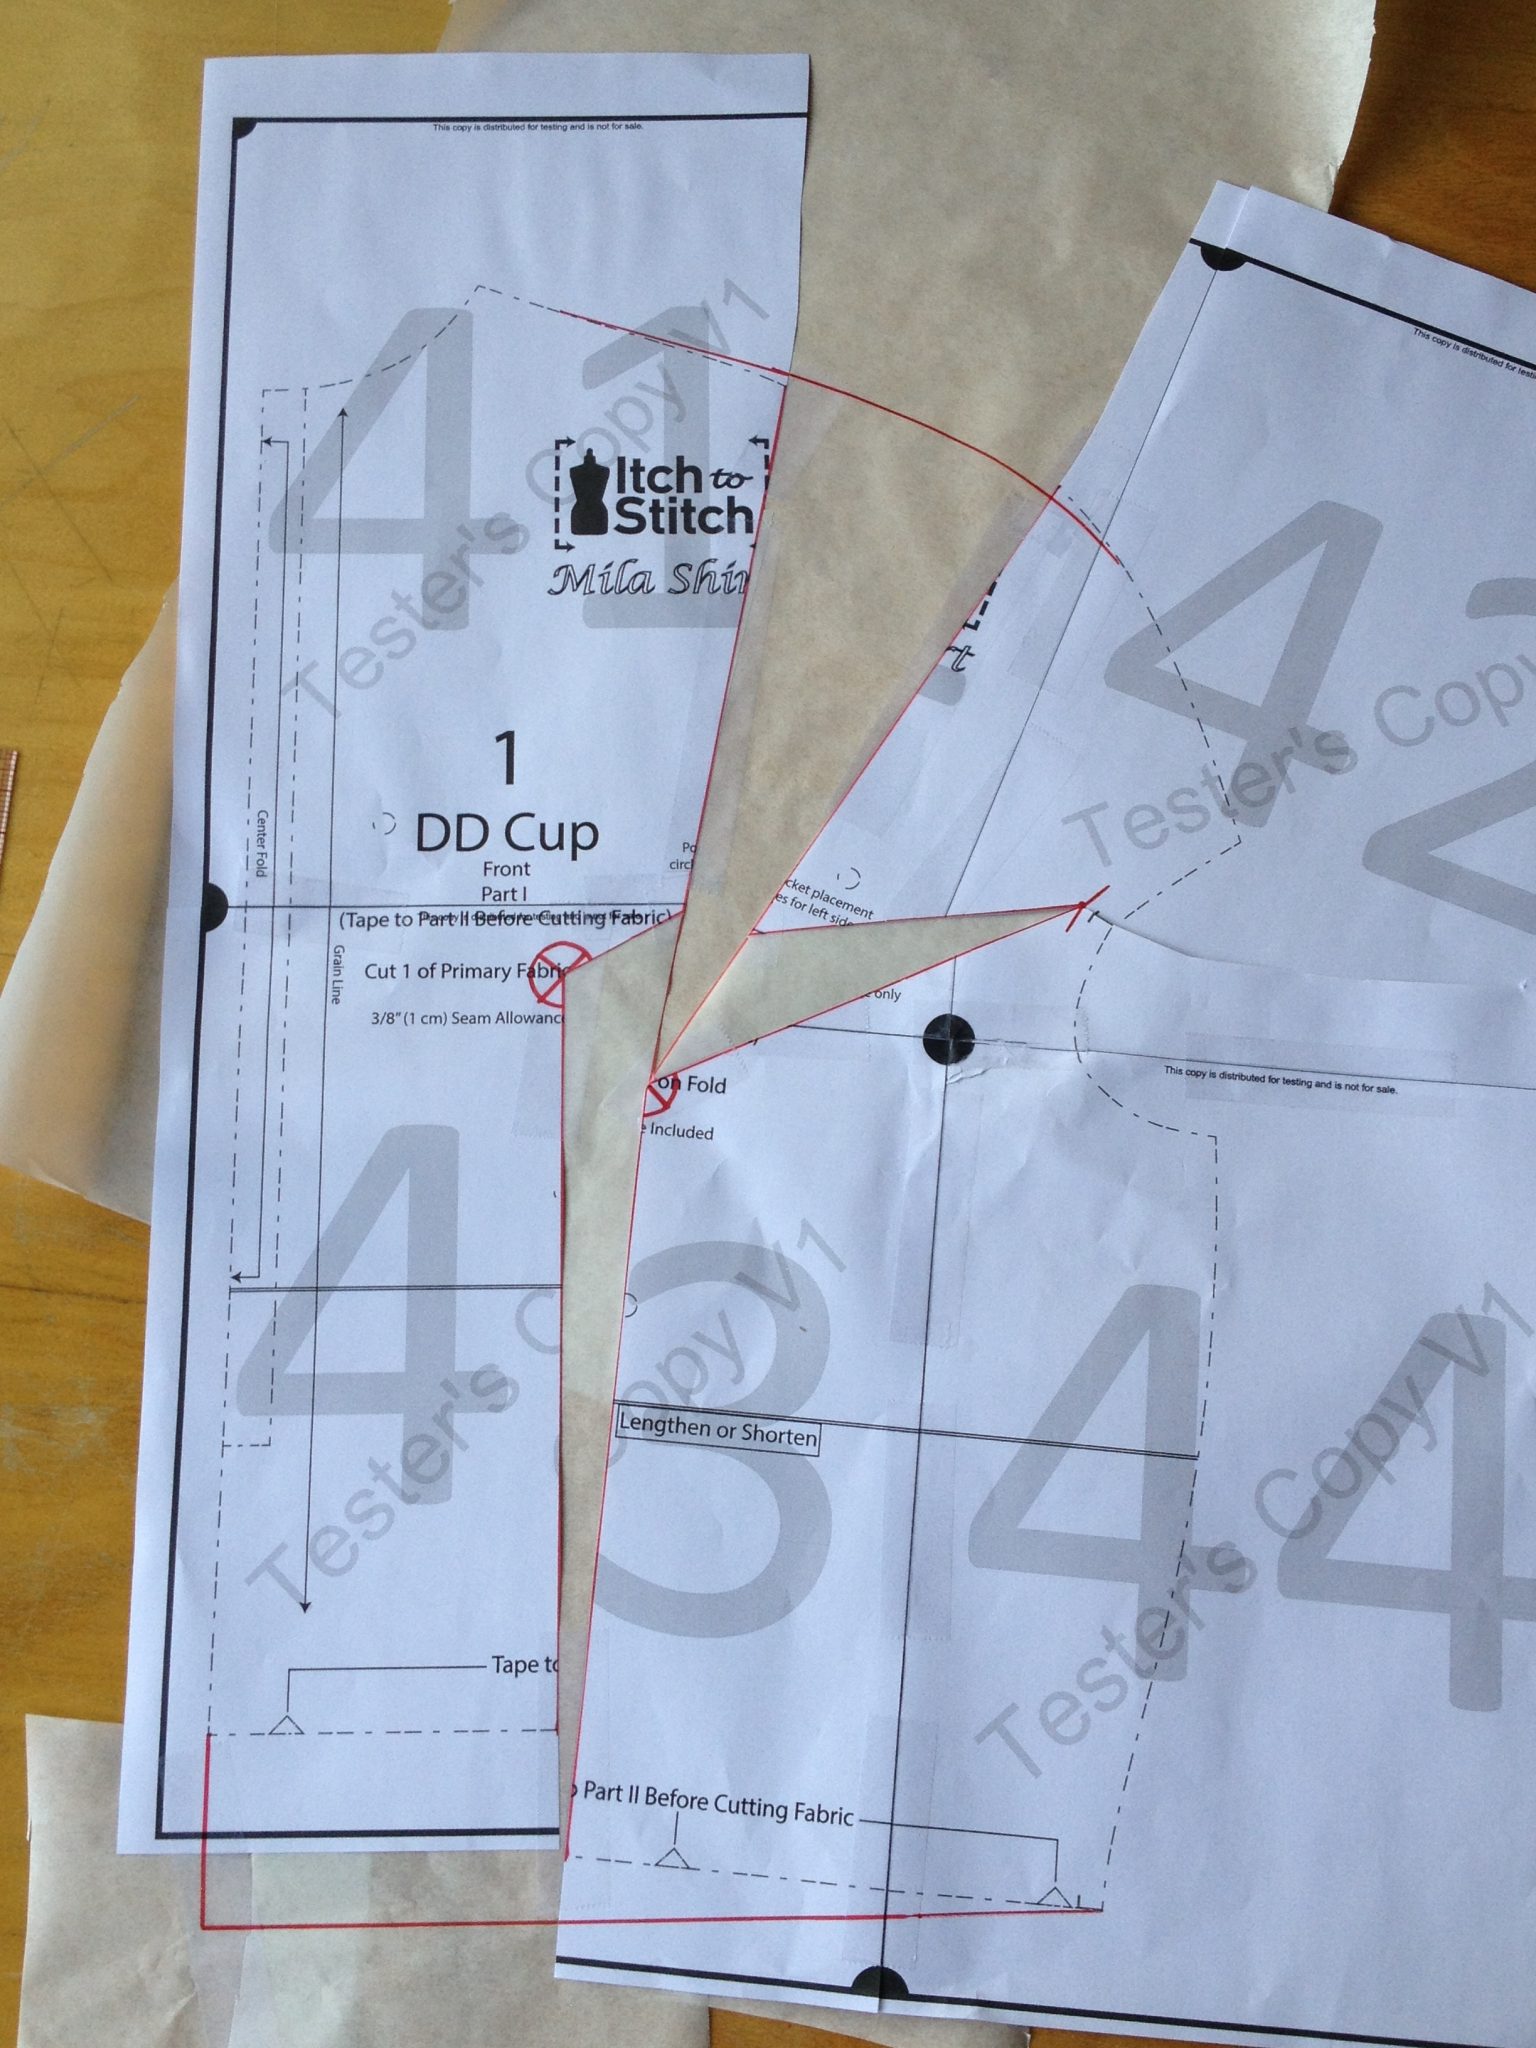
- Spread the cut lines for 1″ (1/2″ for each cup you are adjusting. We are doing a 2-cup adjustments here.)
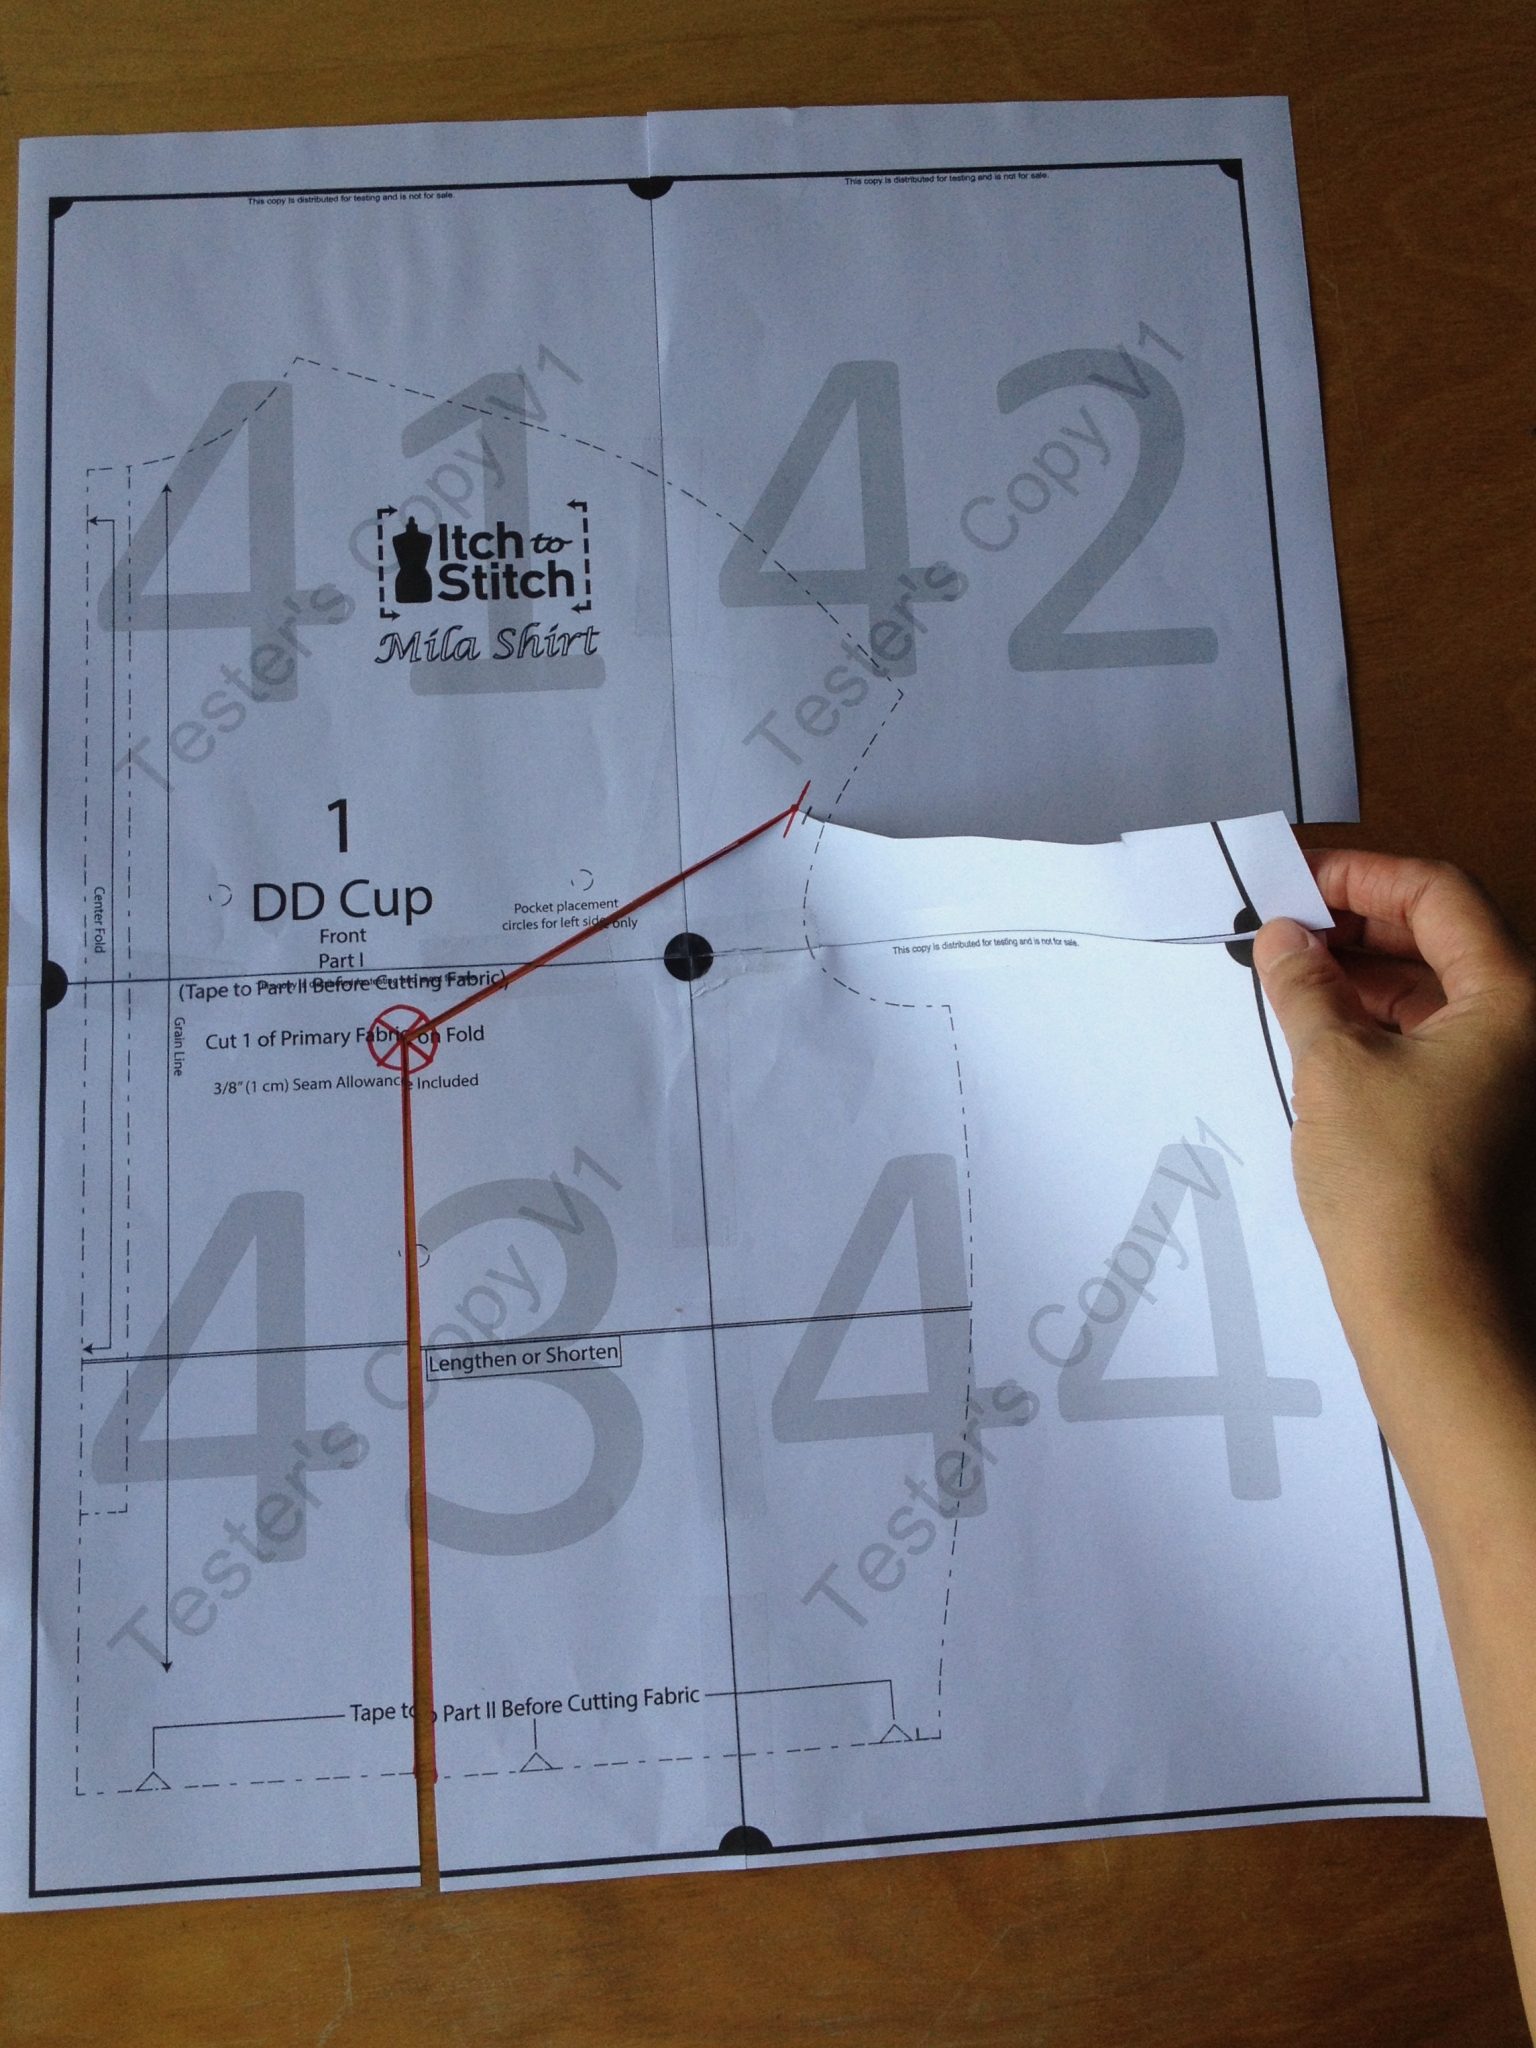
- Tape it to some paper to fill the gap. We’ll still have to move the right side of the paper, so only tape a lot on the left side, and just barely tape some to temporarily secure the right side of the paper.
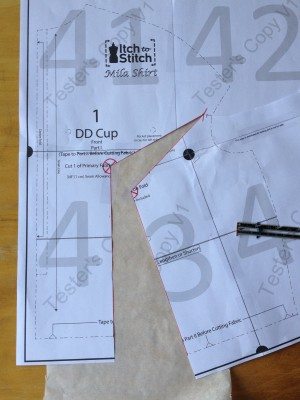
- From the new apex (not the original one, but the lower one that we split apart), draw a line to about the center of the front shoulder seam.
- Cut the line and leaving a hinge at the apex.

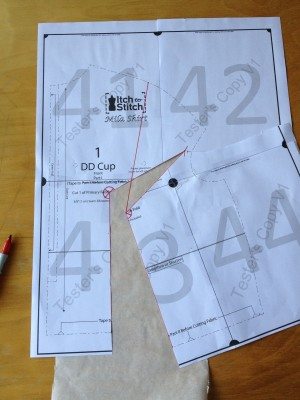
- Note that you’d have to cut the added paper underneath to release it, so that you can pivot the paper.
- Pivot the paper using the apex hinge to close the bottom gap. The waist seam on the right side of the paper is now directly below the waist seam on the left side of the paper. The goal here is to make the waist circumference the same as before.
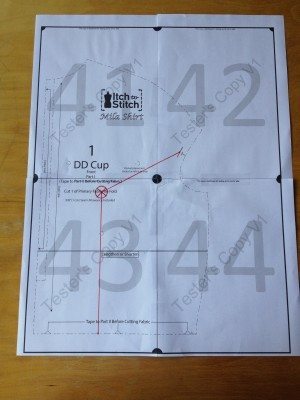
- Draw a line from the center front down and then across to the side seam. Note that the center front bottom needs to be a right angle.
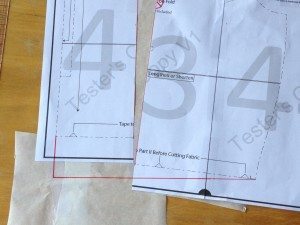
- Fill the gap with some paper. And draw a line to close to the gap at

- Ta da! You are done. With this pattern piece, you will have more gathers in the front shoulder for shaping as well as more length to accommodate your bust.