Hi! This tutorial is meant to accompany the Upland Trousers. Of course, the pattern itself has illustrated instructions, but this photo tutorial might help those who learn better with photos.
Actually, I use the same method to sew fly front zipper on my other patterns (I should say, it’s more or less the same. Over the years, I fine-tuned the way I describe the method, but the basic concept is pretty much the same).
So what’s different about the Upland Trousers? It has a waist facing instead of a waistband. And because of that, we need to leave 2″ un-stitched above the zipper. That’s it; there’s all the difference is.
Let’s jump into it.
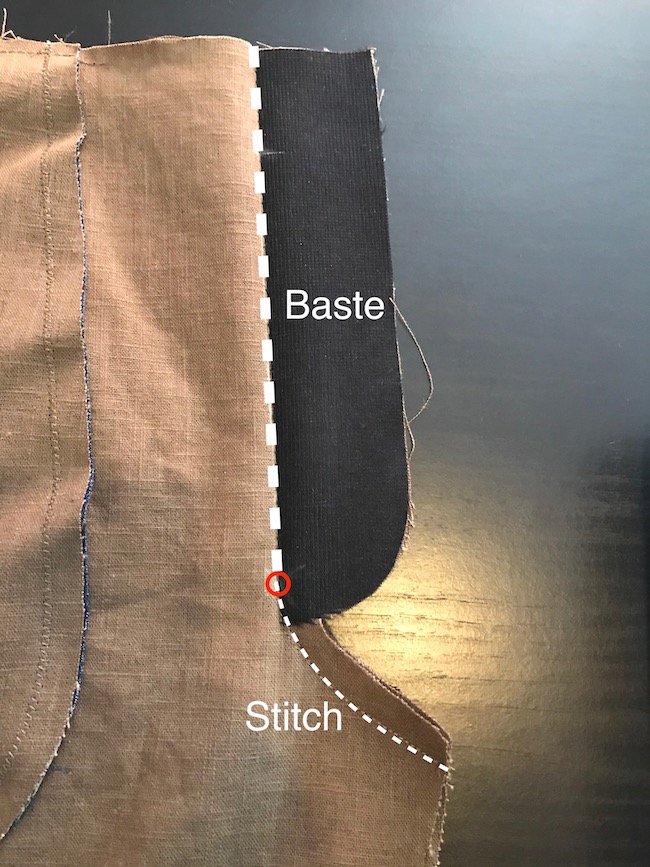
Put the two Front pieces right sides together. Baste from the top notch to the circle. Stitch back and forth at the circle to reinforce the stitch line. Then from the circle, stitch the front crotch curve. Note that both the left and right fly are already interfaced.
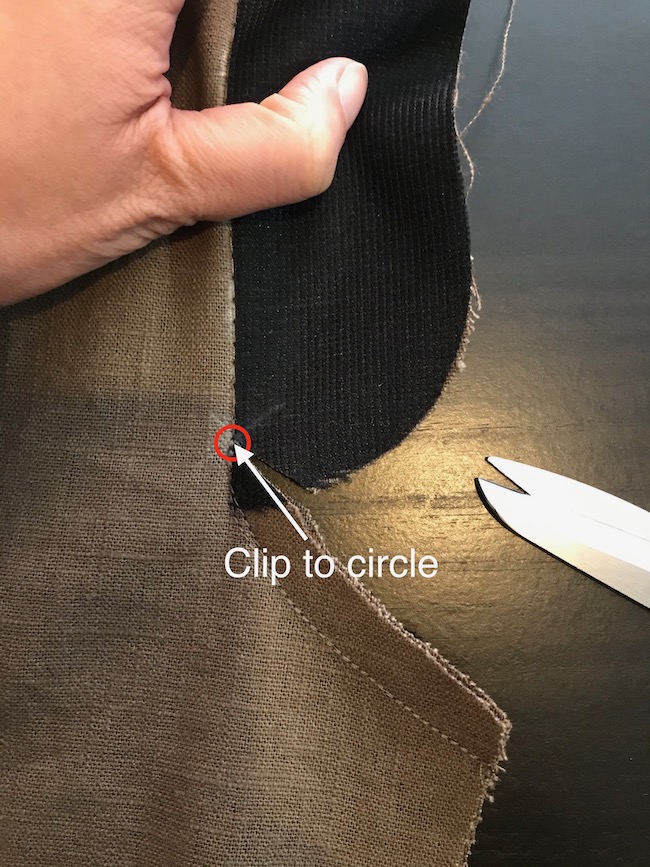
Clip to the circle (don’t snip the stitching though).
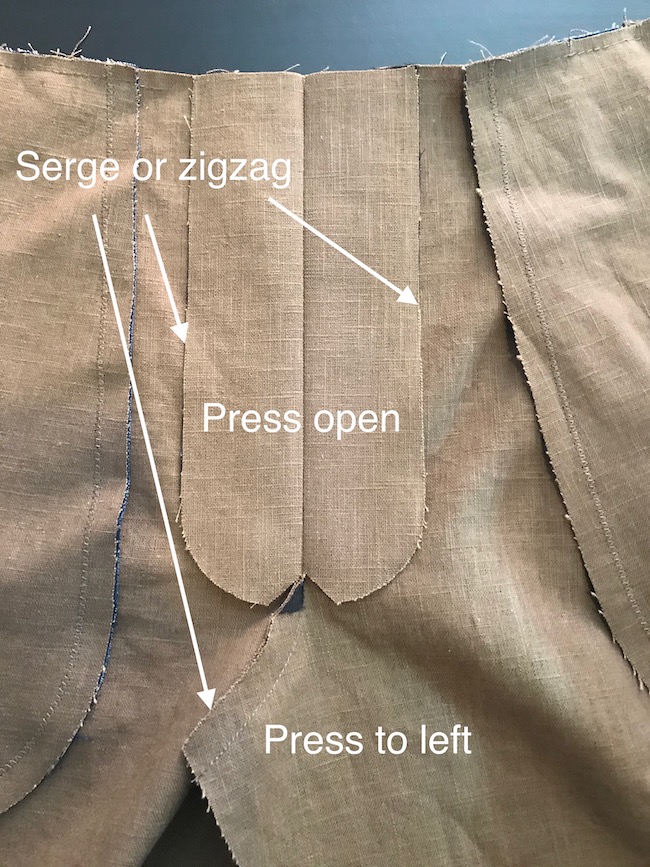
Now you can press the fly open. As for the front crotch seam allowances, press them to the left. At this time, you can also serge or zigzag the edges of the fly and the seam allowances (I did not do it in this example).
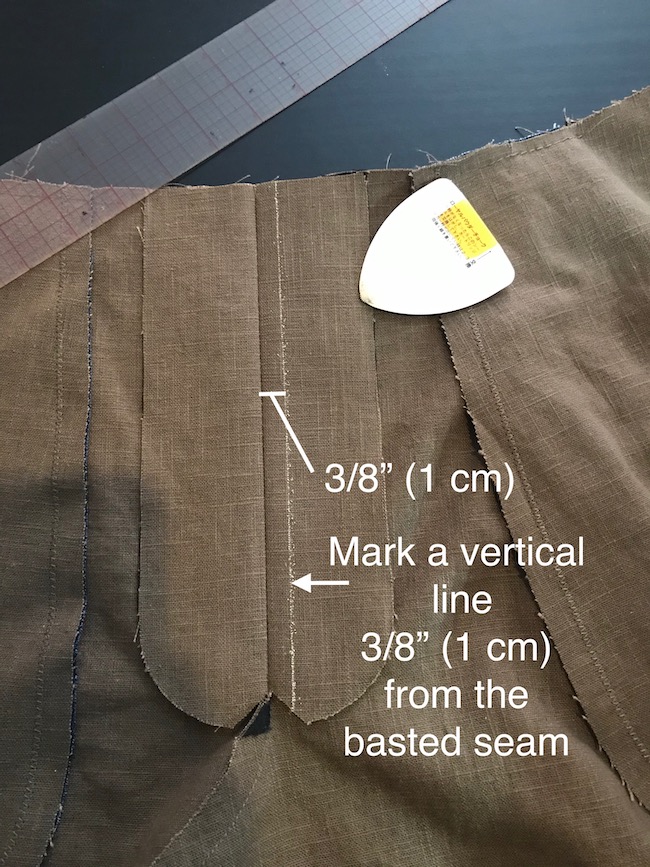
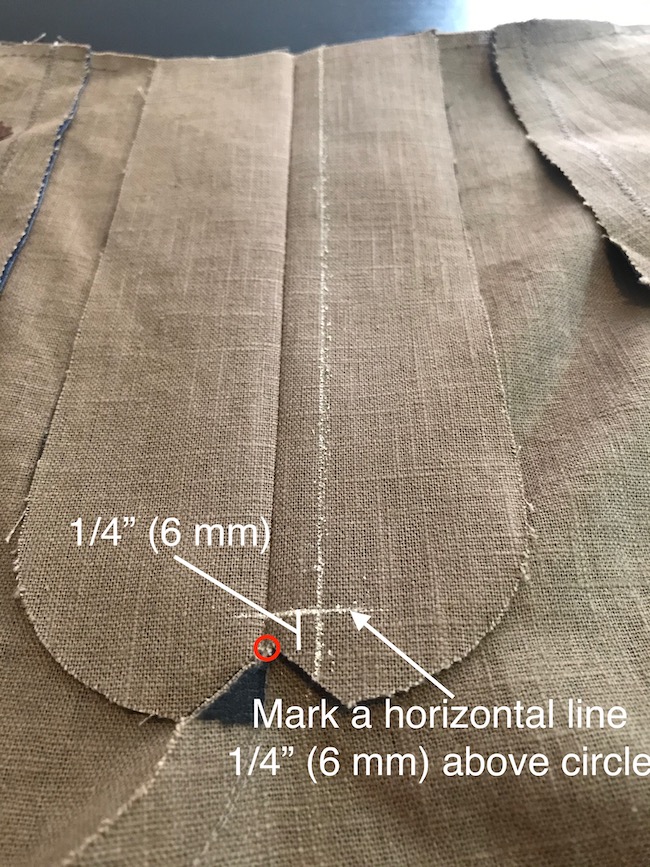
Using some chalk or removable marker (make sure it’s really removable! Test it on a piece of scrap on your final fabric), draw a vertical line on the right fly that is 3/8″ (1 cm) away from the basted fly seam.
Also, mark a horizontal line 1/4″ (6 mm) above the circle.
It’s time to include the zipper. With the zipper facing DOWN, pin it on the right fly and the right fly ONLY (do not pin it to the Front). The center of the zipper teeth should line up with the vertical chalk line, and the bottom zipper stop should line up with the horizontal mark.
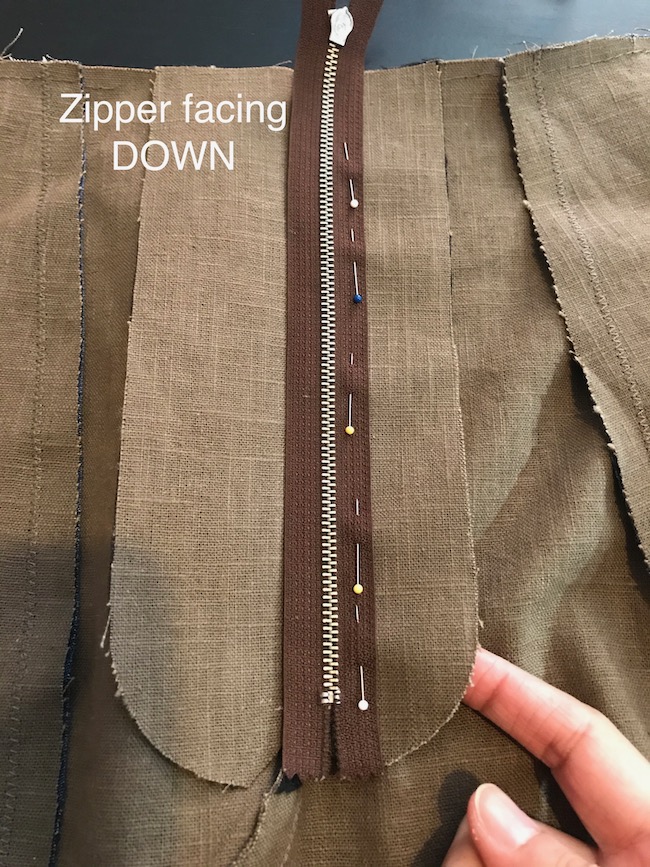
I also mark the top 2″. As I mentioned above, these Upland Trousers use waist facing and that’s why I need to leave 2″ un-stitched.
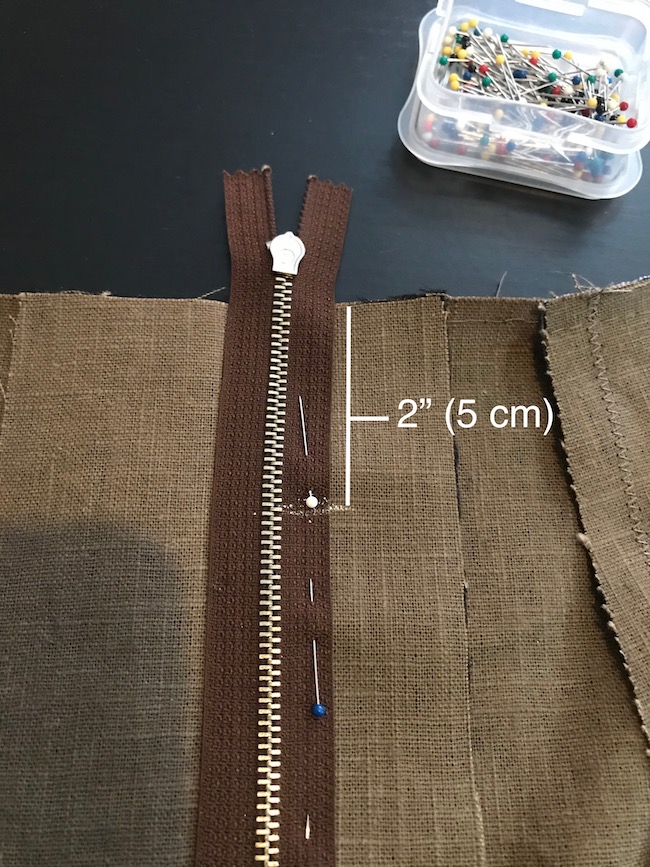
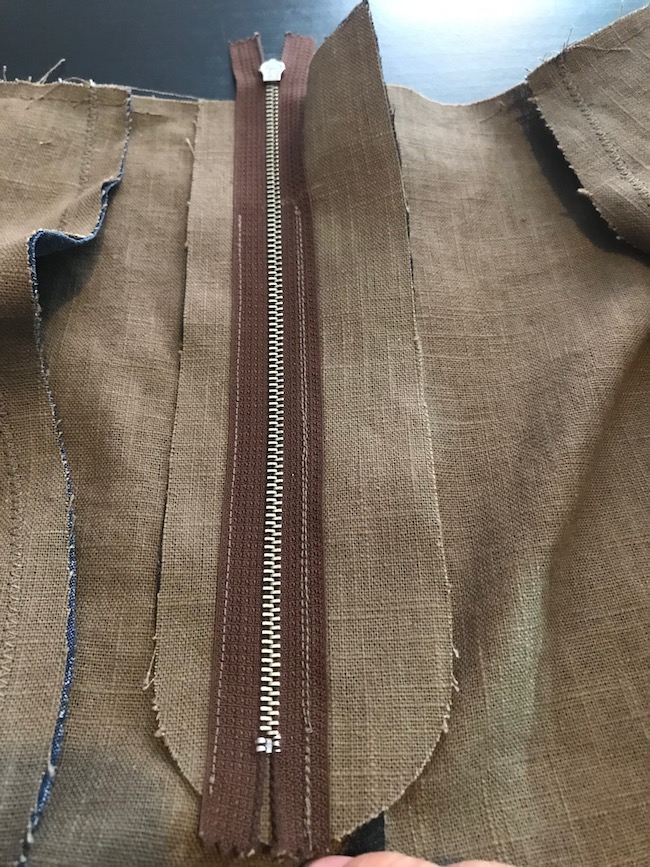
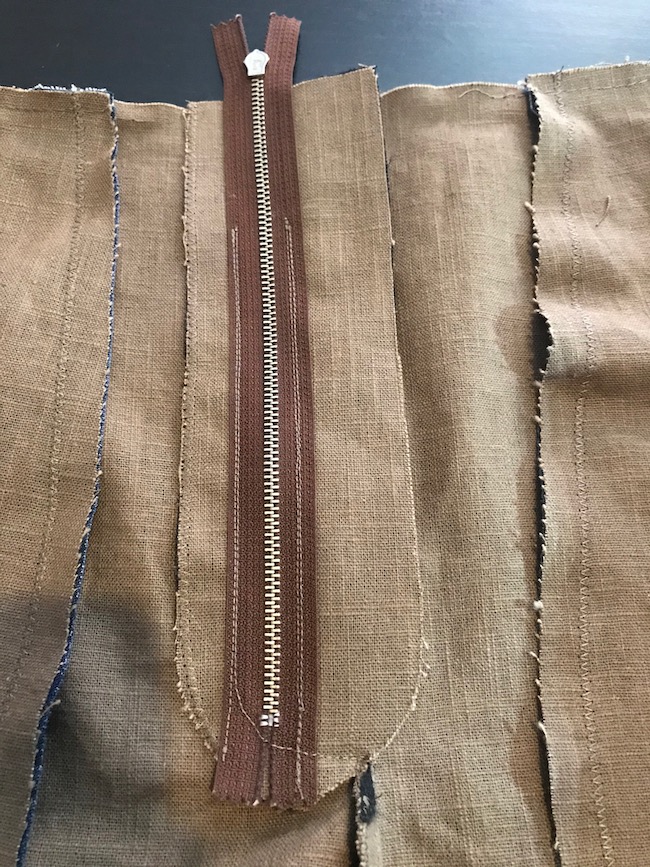
Now I can stitch. The stitch line is 1/4″ (6 mm) from the center of the zipper teeth. Remember to leave the top 2″ (5 cm) un-stitched, and you are only stitching to the right fly and NOTHING else. Stitch all the way to the bottom of the right fly.
This is how it looks with the stitching.
This is how it looks if I flip over the right fly.
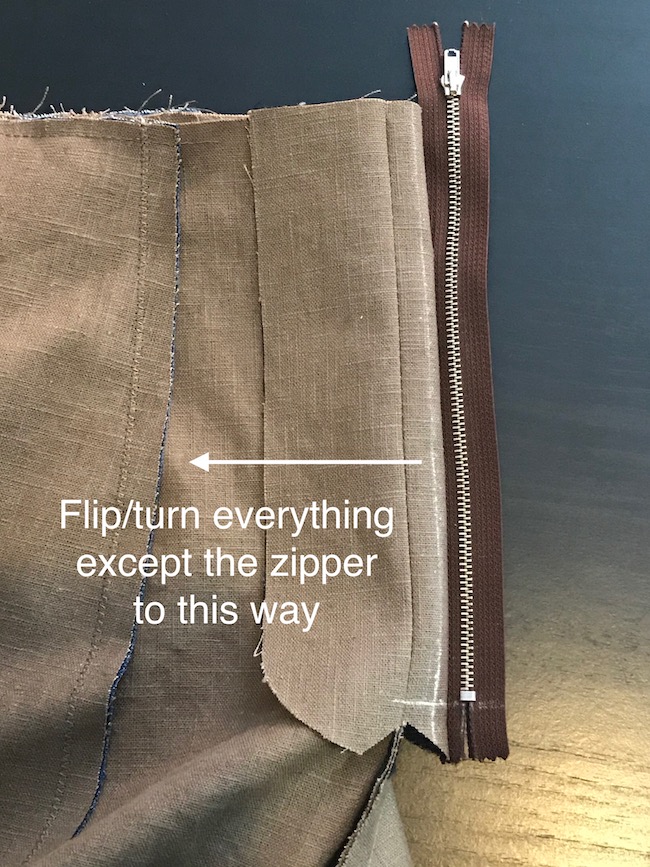
Now move/turn/flip all your fabric to the left side except for the zipper. The right side of the zipper is now facing you.
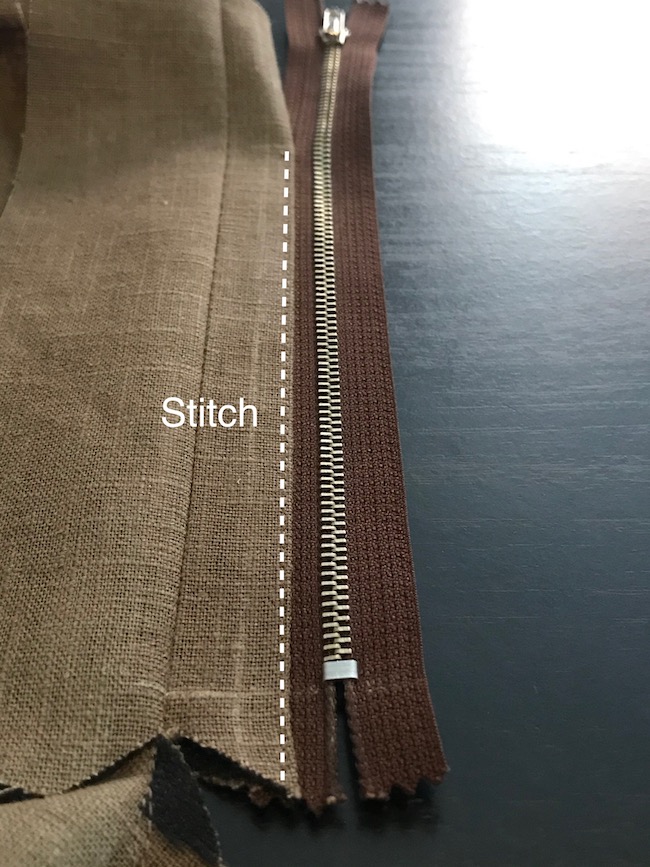
Stitch a line on the fabric that is 1/8″ (6 mm) from the fold. So what you are actually stitching includes two layers of the fly fabric and the zipper tape. Remember to leave the top 2″ (5 cm) un-stitched.
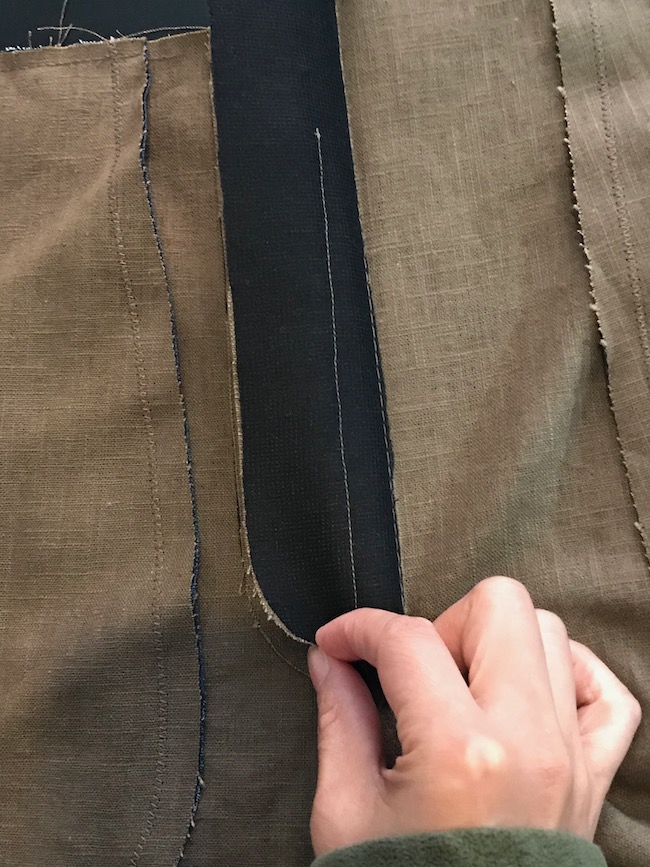
Now flip the zipper to the left side. The fly/zipper will naturally want to stay flat so it’s easy to flip. It sounds way more complicated than it actually is.
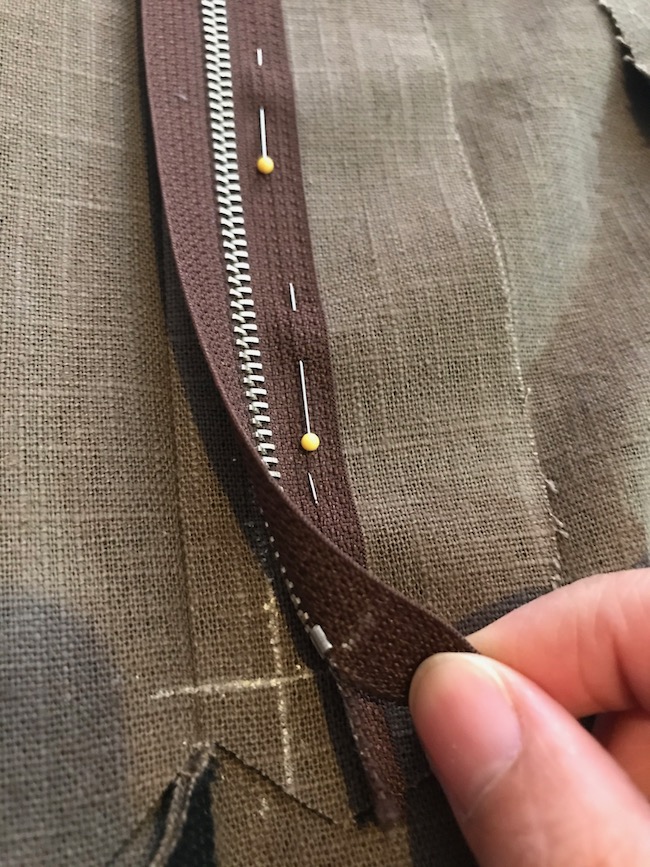
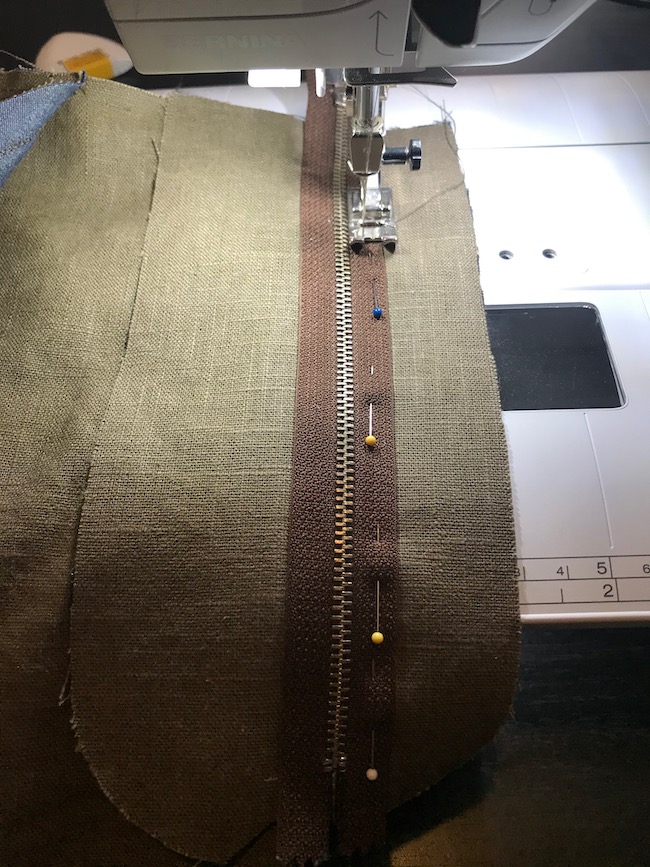
Pin the zipper tape the to the left fly. Do not pin through the Front though; only pin the the left fly.

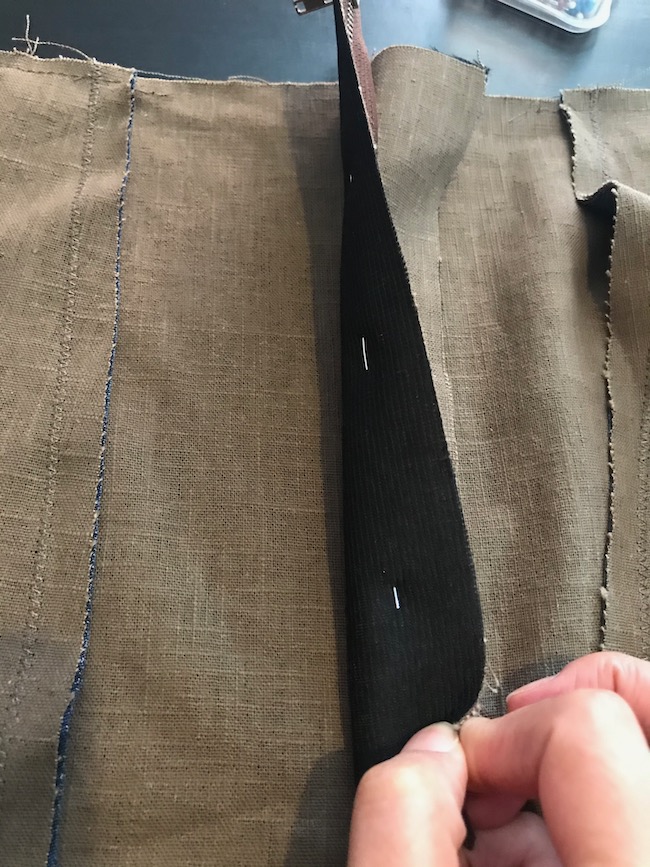
Now stitch on the zipper tape 3/8″ (1 cm) to the left fly. Remember to leave 2″ (5 cm) at the top un-stitched.

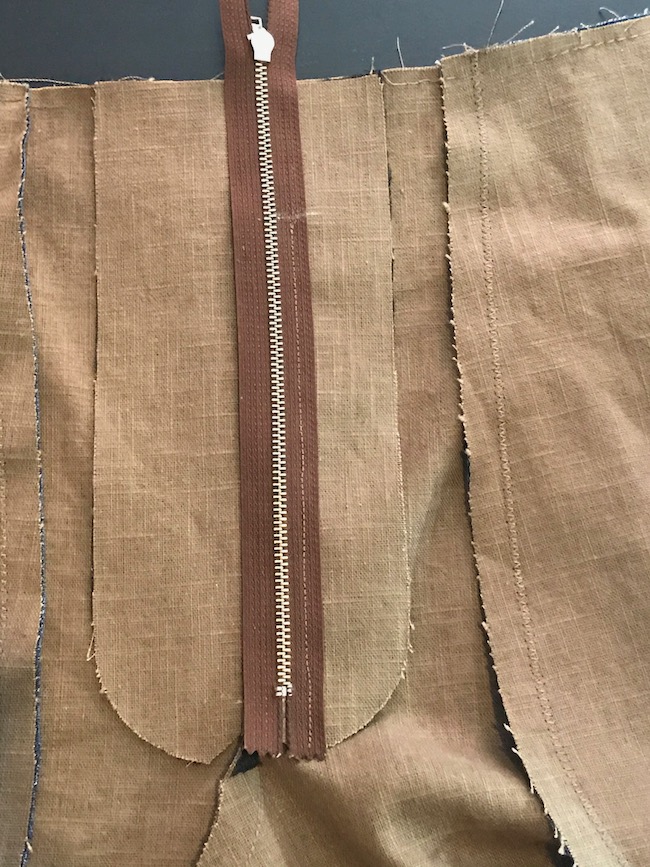
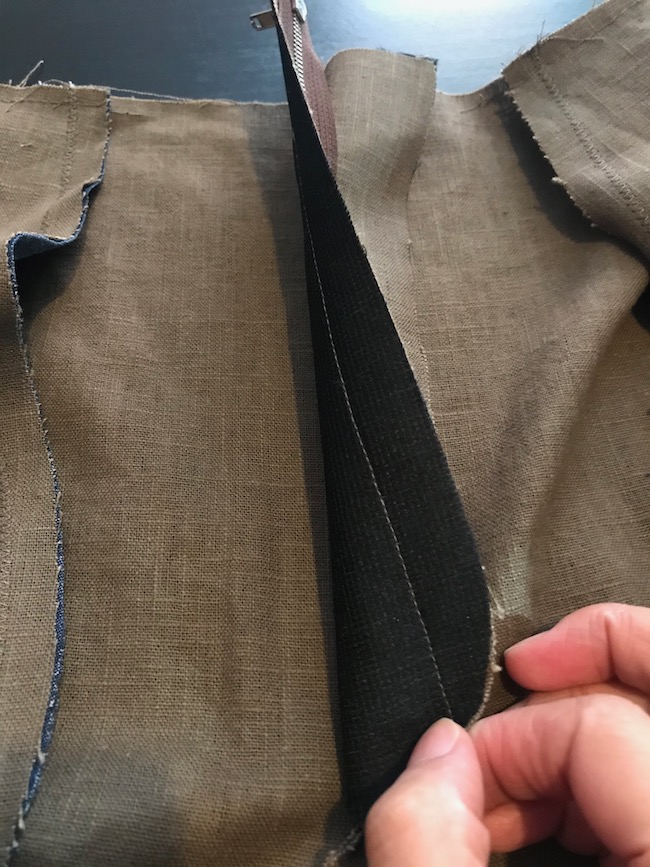
That’s how it looks when it’s done.
This is how it looks when I take a peek underneath.
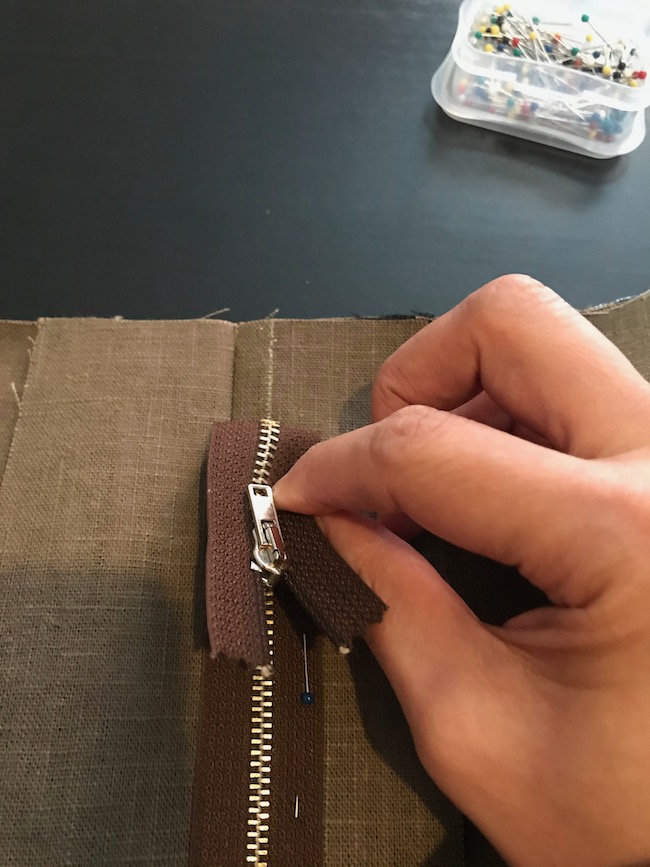
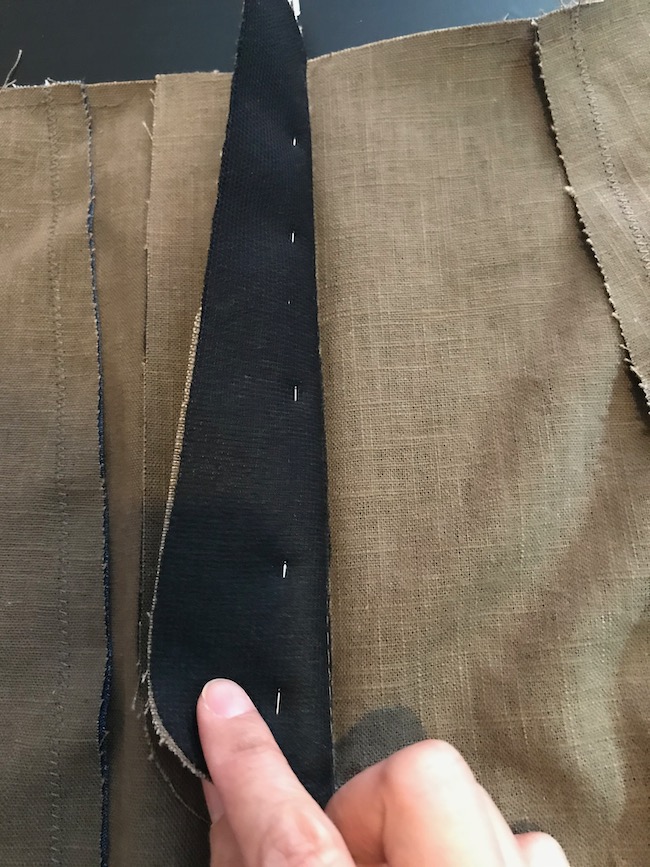
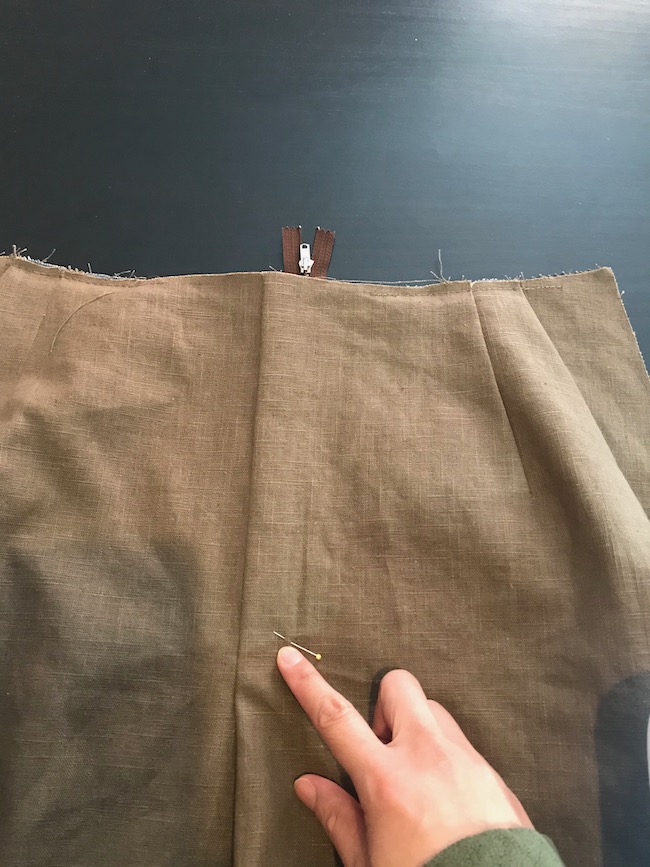
Now turn the whole thing over so you can see the right side of the Front. Make sure that the fly are not accidentally folded at the corner or something; the zipper teeth should hit the table. I use my finger to feel the zipper stop and I put a pin to indicate that.
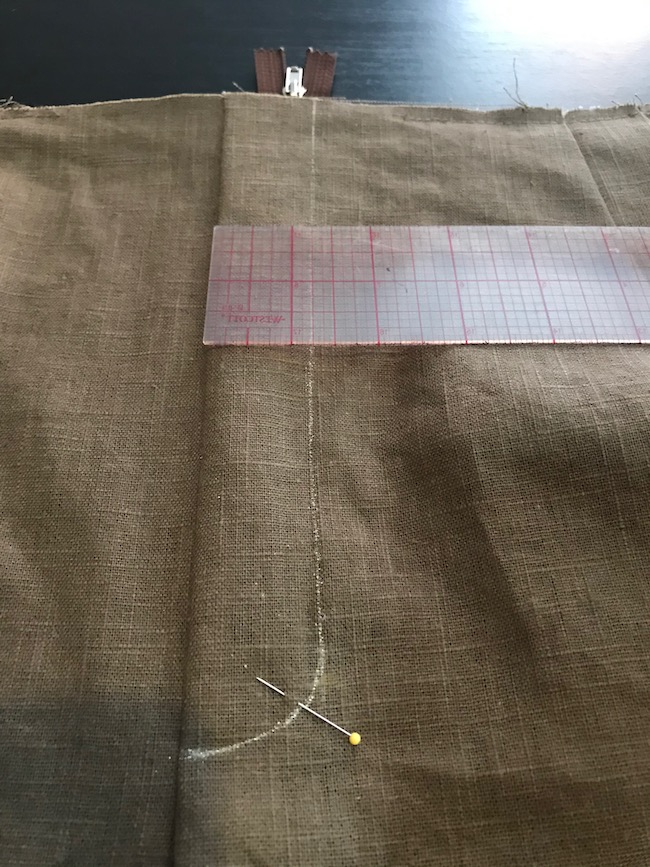
Now I am drawing a vertical line that is 1 1/4″ (3.2 cm) from the basted center front. When I get the pin area, I curve that line to the center front as such. You need to avoid the zipper stop/pin though.
I put pins to hold the layers down.
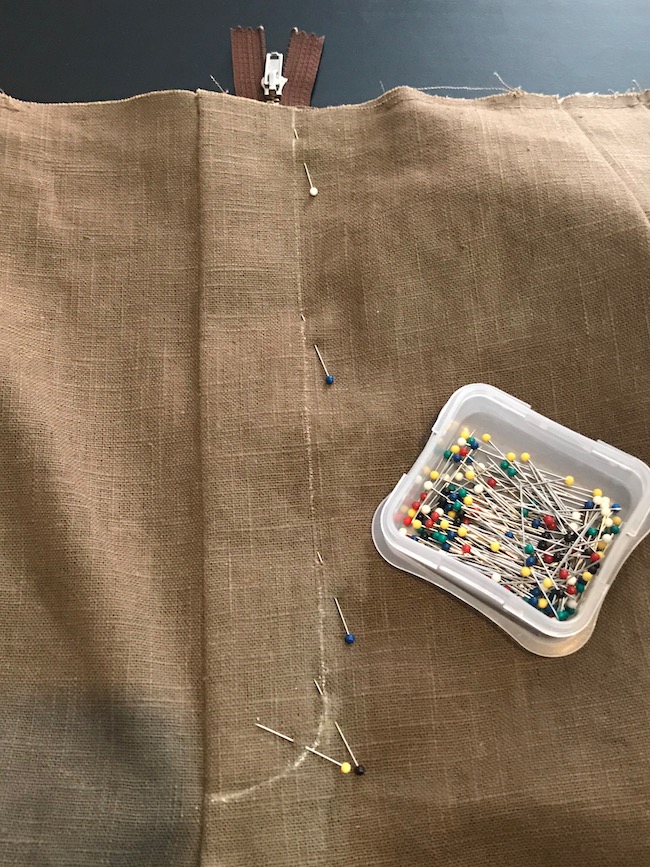
Now I top stitch through all layers according to this mark, but again, do not stitch the top 2″ (5 cm).
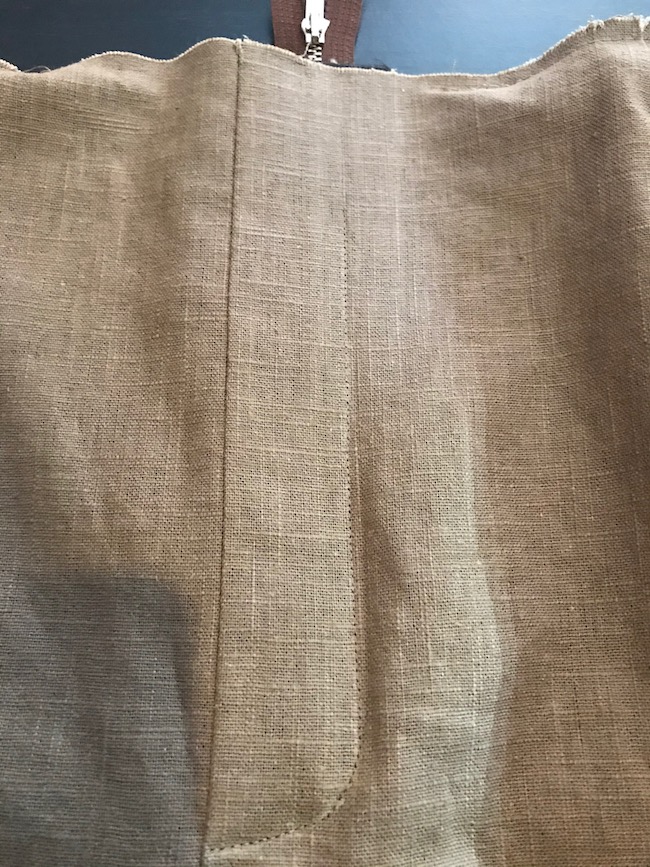
This is how it looks from the wrong side.
You can now remove the center front basting stitches.
That is! These are steps 11 to 22 in the Upland Trousers instructions. I hope they help!
