Although the Upland Trousers pattern already includes detailed, illustrated instructions for constructing the back double-welt pocket with button and button loop, I thought some people would benefit from a tutorial with photos. Without the constrain of space here, I can also elaborate and explain the reasons behind certain things. Even if you do not have the pattern, I think you can glean some insights when making this type of pocket using other patterns.
First of all, it’s useful to note that each finished welt 1/4″ (6.25 mm) tall—that means the upper welt is 1/4″ (6 mm) and the lower welt is 1/4″ (6). When you transfer the markings, you can re-measure to ensure they are correct. Welt pockets of any sort are about accuracy. If you take your time to be precise, you will produce a beautiful pocket!
Make quadruple sure that whatever pen or marker you are using to mark the fabric, it can be completely removed. Test it on a piece of scrap in your final fabric. Different fabrics can behave differently. Chalk is usually pretty harmless and can be removed completely.
This pocket also sits right on top of the back dart. It makes marking the fabric a little tricky, which in turns can make precision difficult. But let me show you my method.
Let’s get started!
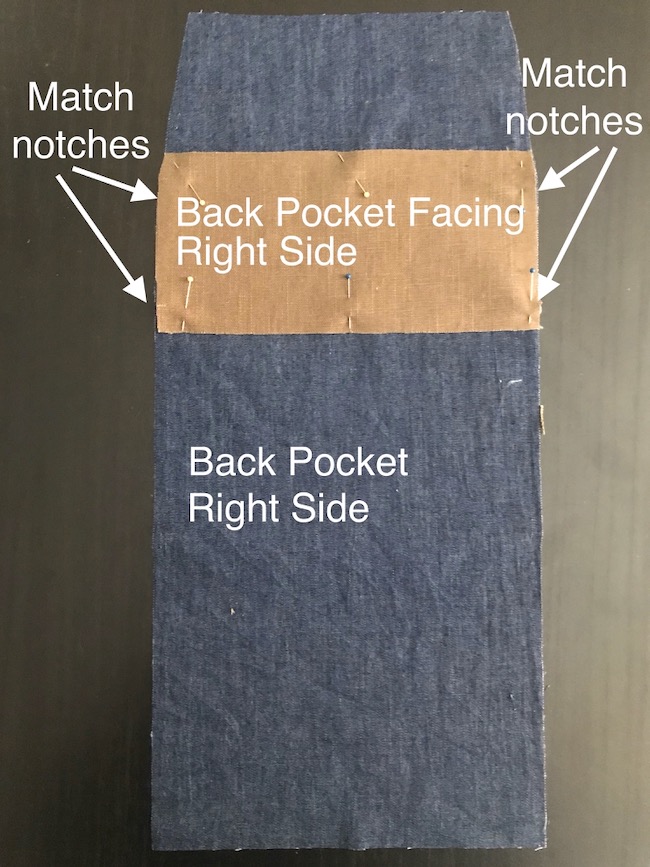
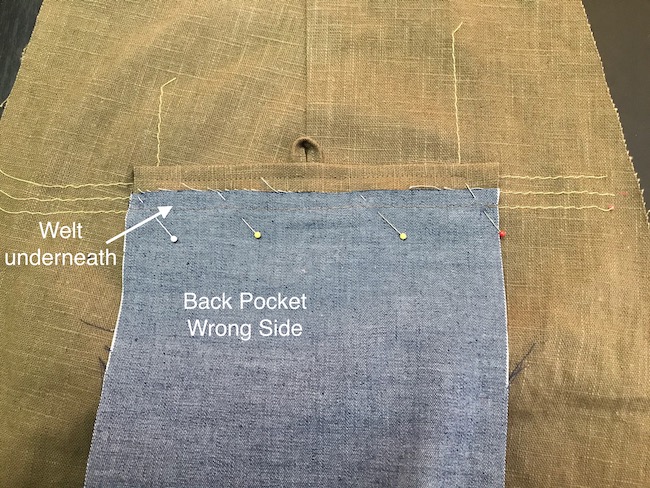
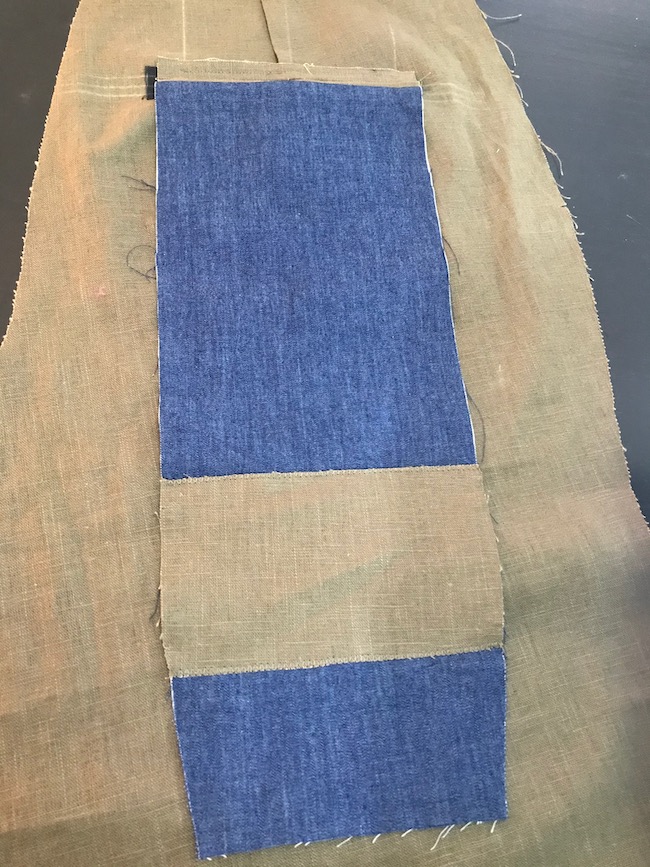
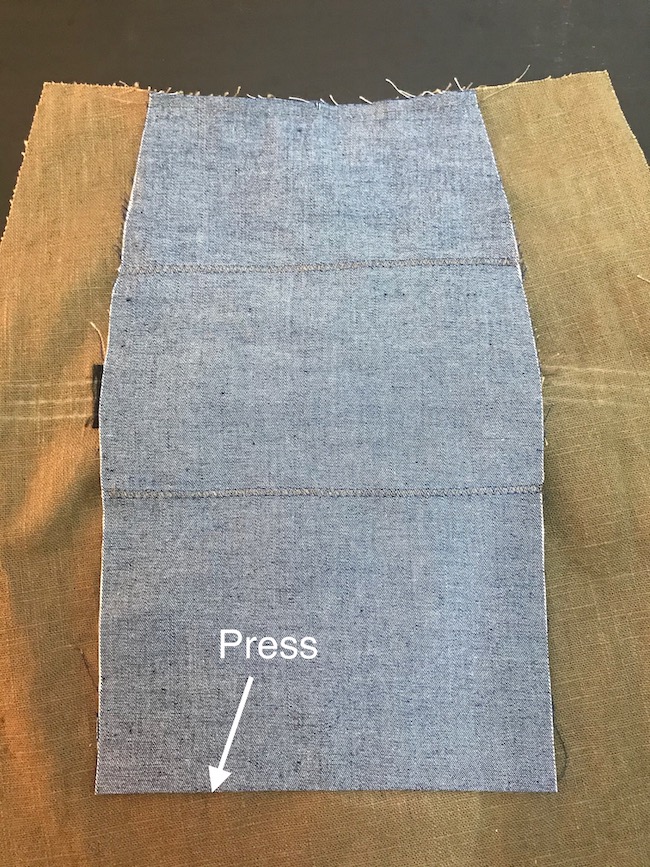
We will prepare the Back Pocket and Back Pocket Facing first. Note that the Back Pocket is made out of lining material (my lining is the chambray) while the Back Pocket Facing is made out of the primary trouser material. The Back Pocket Facing essentially is a little piece that is patched onto the Back Pocking lining, so when the pocket is in use, you won’t see the lining fabric.
Put the Back Pocket Facing on top of the Back Pocket, both of them’s right sides are up, matching four sets of notches.
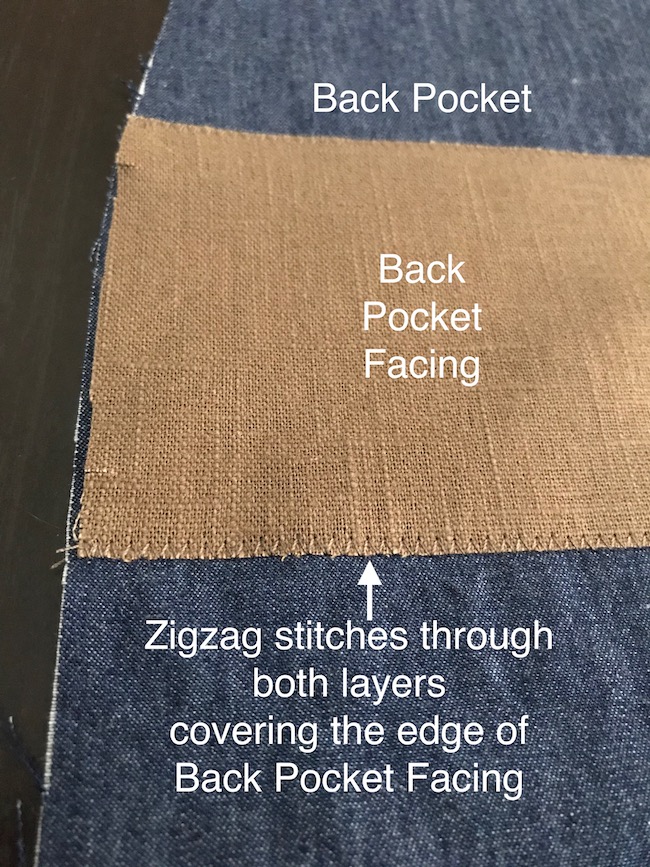
Use zigzag stitches to stitch the Back Pocket Facing to the Back Pocket. The length and width of the zigzag stitches are not awfully important; I use the default setting of my sewing machine, which is about 3.5 mm wide and 1.4 mm long. The zigzag stitches also covers the cut edges of the Back Pocket Facing, preventing it from fraying while keeping it bulk-free.
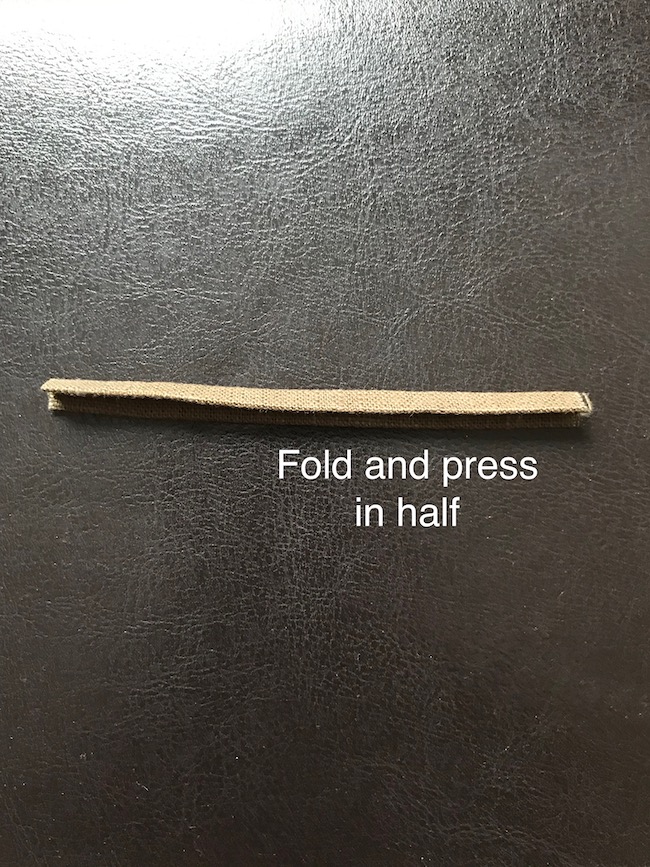
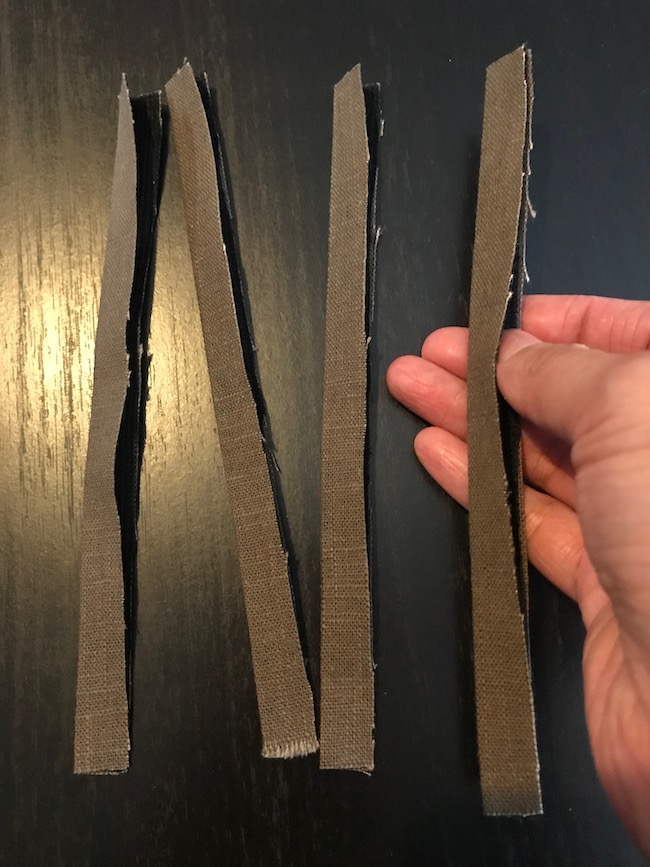
We then prepare the Button Loop. The pattern piece is a small rectangular piece that is 1″ wide and will create a 1/4″ (6 mm) finished strip. Fold and press 1/4″ (6 mm) of the long sides toward the center of the piece with the wrong side inside.
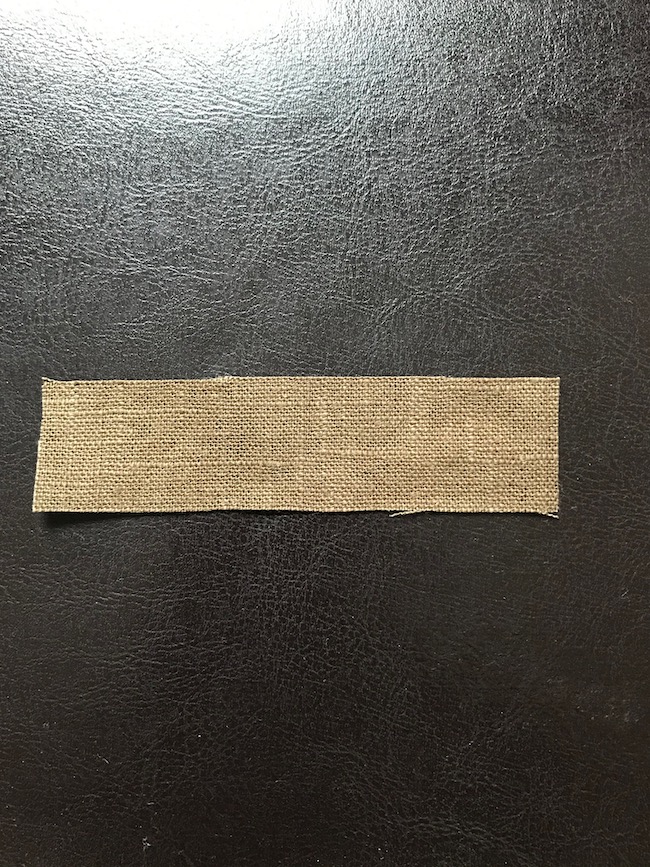

Then fold and press again in half. Now the cut edges are enclosed.
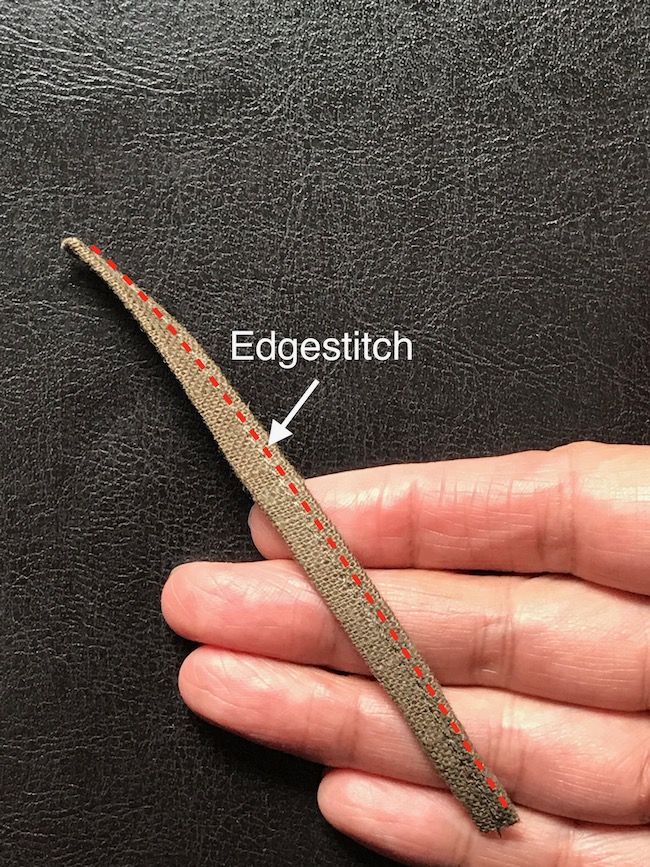
Edgestitch to enclose the piece.
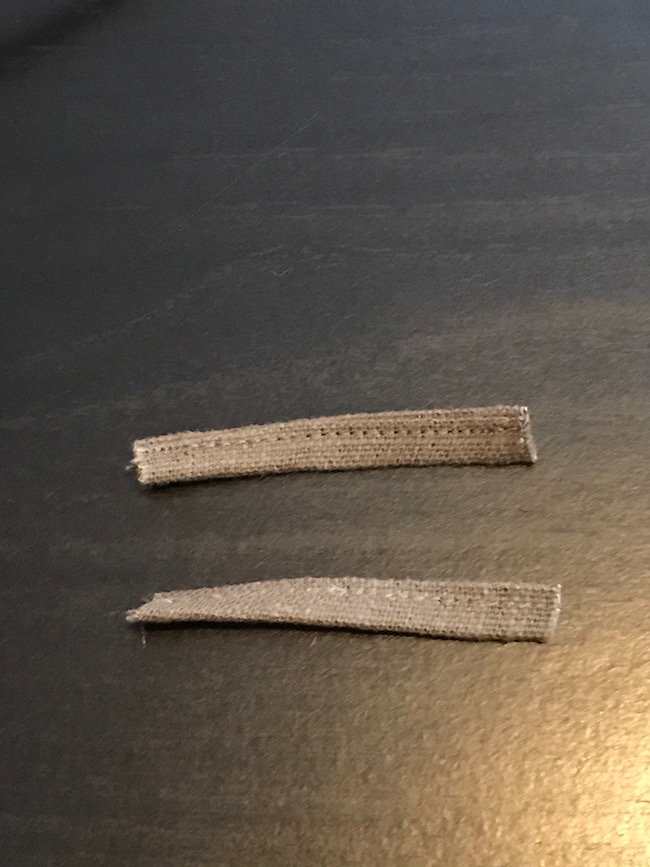
This long strip actually makes two button loops (one for the right back pocket and one for the left back pocket). So cut it in half. The easiest way to find the half is to fold the piece; the fold is the mid point.
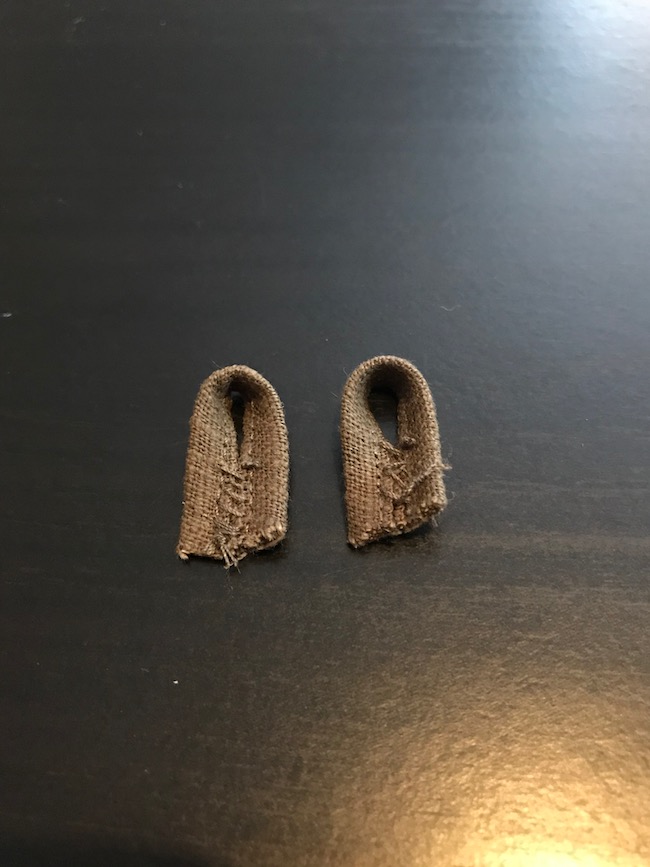
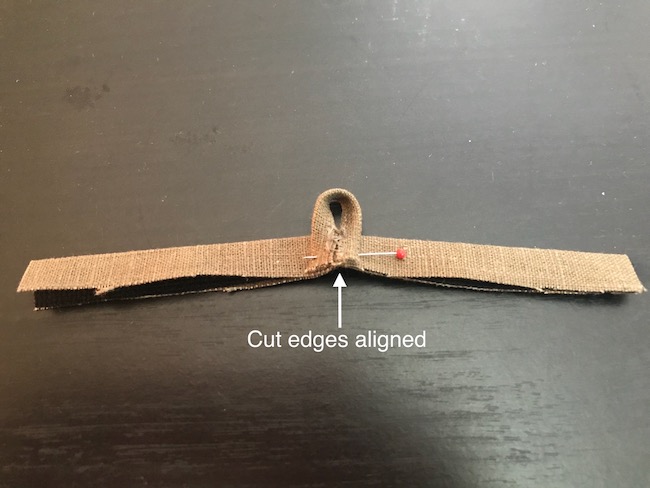
Take each piece and bend it into a real loop. Take a few hand stitches to hold the loop in place. The edge with the stitches is closer to the center.
Now let’s move to the Welts. There are four Welt pieces in primary trouser fabric. The same Welt pattern is also used to cut SIX pieces of interfacing. Why six? Well, four are used to interface the primary fabric, the remaining two will be used to interface the Back of the trousers—but don’t do that yet; the step will come.
These four Welt pieces are already interfaced. Fold and press them in half lengthwise with the wrong side inside.
Take one Button Loop and pin it to the middle of one Welt with the cut edges aligned. Again, to find the middle of the piece, fold it in half and the fold point is the middle. Baste the Button Loop to the Welt with 1/4″ (6 mm) seam allowance.
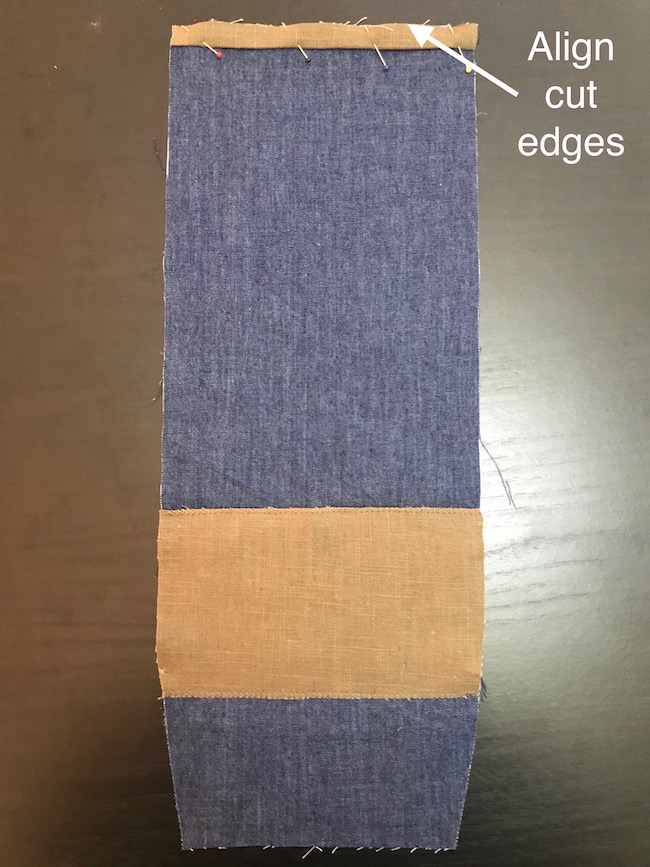
Then pin another Welt piece to the right side of the Back Pocket. The cut edges are aligned.
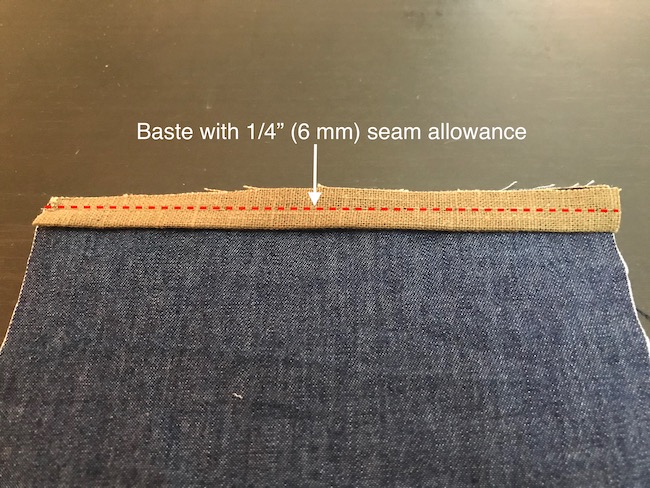
Baste the Welt to the Back Pocket with 1/4″ (6 mm) seam allowance.
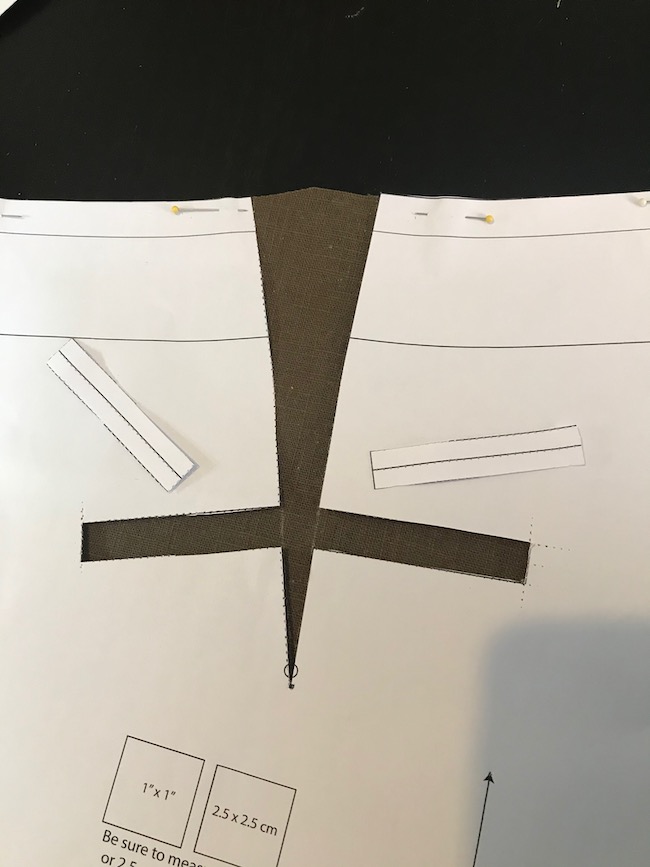
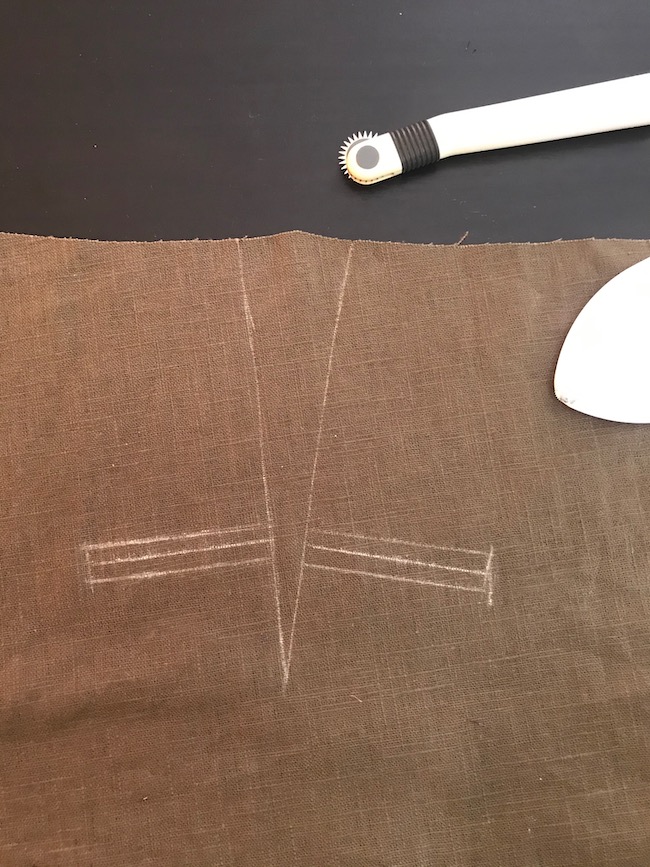
Now we can move onto the trouser’s back. Transfer the marking to wrong side of the Back. You can use tracing paper and tracking wheel; that’s usually how I do it. But this time, I cut the pattern pieces along the back dart and welt placement and use my chalk to mark.
Remember I said each Welt is 1/4″ (6 mm) tall? This is the time to remeasure the markings to make sure they are correct.
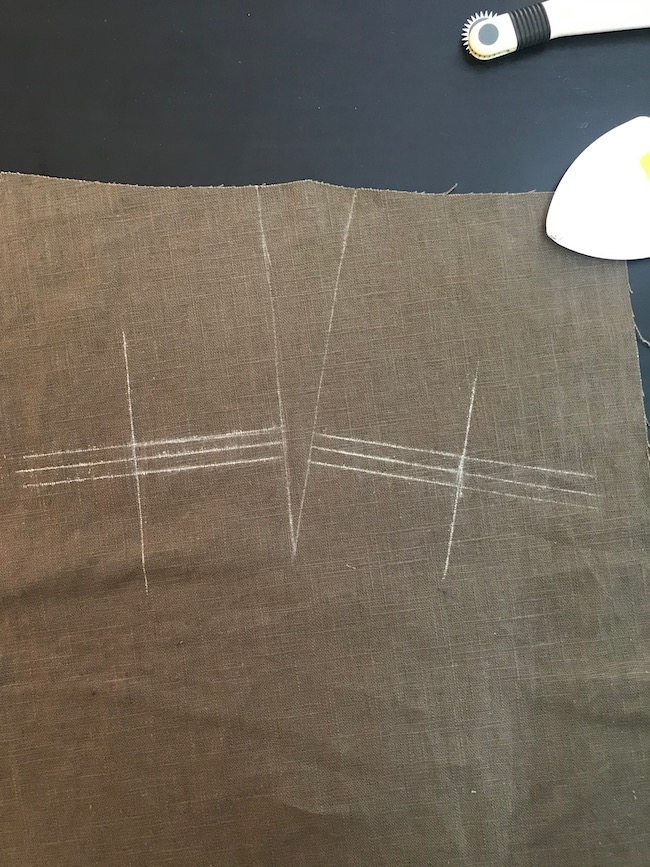
Now here’s the trick of how to make the markings survive. I extend each of the welt placement lines much longer.
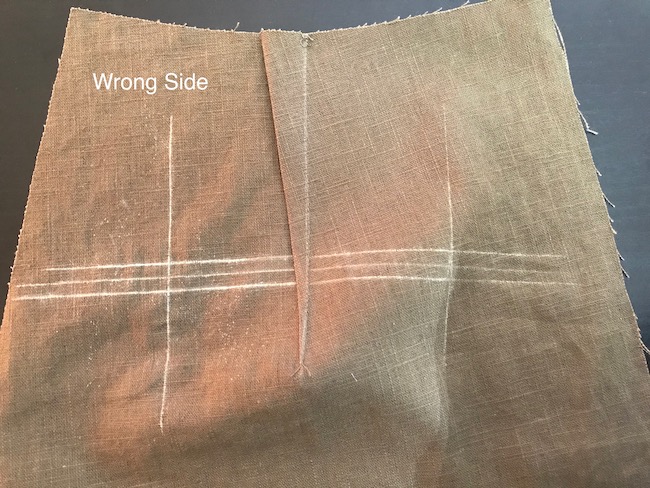
Now I can sew the back dart. Press the dart bulk toward the center back.
Now I can apply the Welt interfacing onto the welt pocket placement marking on the wrong side. (Interfacing is always applied to the wrong side.)

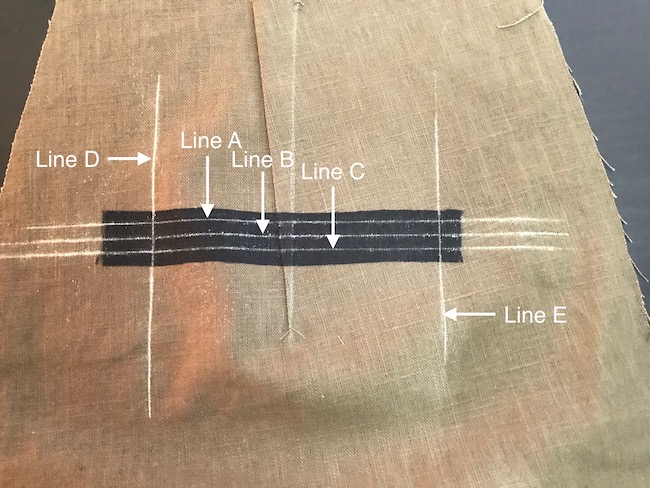
The interfacing, of course, obscures the marking, but because I extended the markings, I can re-draw the marking easily. And that’s exactly what I did with my chalk. I am naming these lines A, B, C, D and E, so I can refer to them easily.
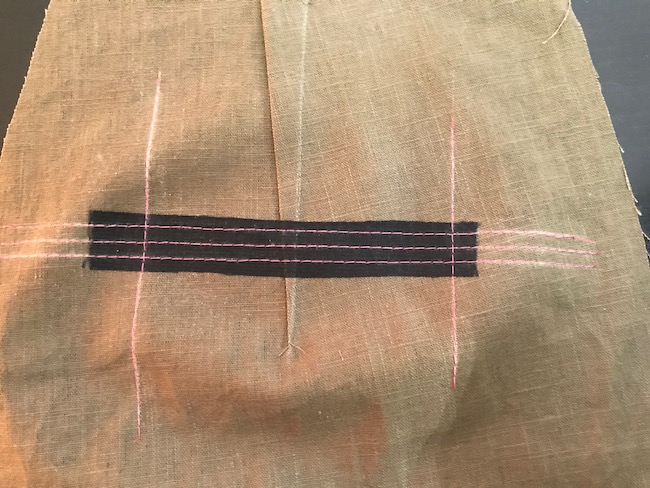
After marking, I then BASTE on these lines, so that I can see the lines on both the right side and the wrong side of the piece.
Flip the Back over so that the right side is up. Place the one Welt with the Button Loop to the Back. The cut edges aligns to Line B (the middle long line). The button loop matches the dart.
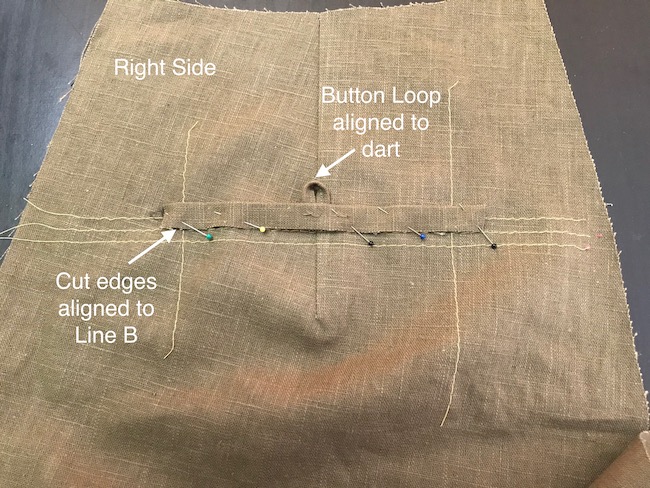
You should baste the Welt to the Back on Line A (sorry, I don’t have a photo of the basting) so you can remove the pins.
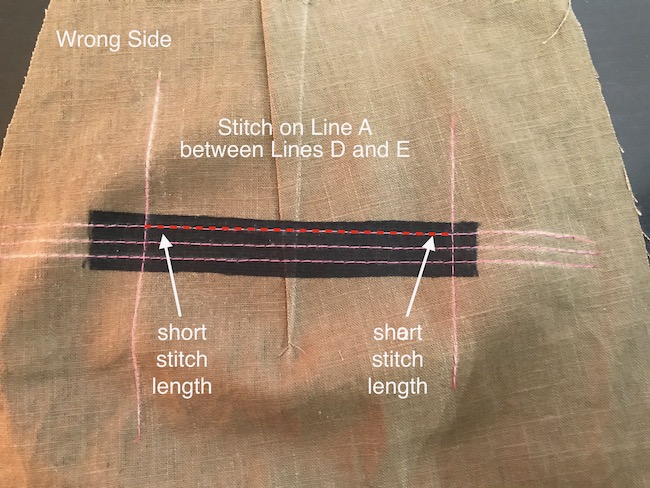
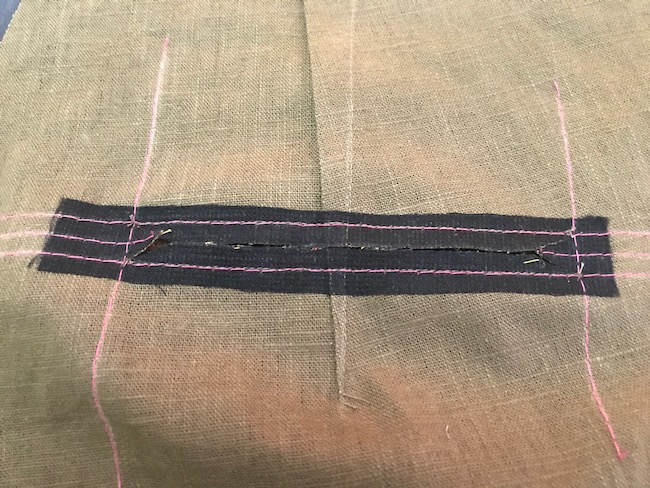
Flip to the wrong side. Now you can stitch EXACTLY on Line A (the top long line) between Lines D and E (side lines). You should use a short stitch length at the beginning and end 1/2″ (1.25 cm) of this stitch line (1 mm stitch length is good).
Flip back to the right side of the trousers. Now pin the other Welt with the Back Pocket attached to the marking with right sides together. The Back Pocket’s cut edge is aligned with Line B (the middle long line). Also make sure that this Welt is vertically aligned with the top Welt that’s already sewn.
You should baste the Welt to the Back on Line C (sorry, I don’t have a photo of the basting) so you can remove the pins.
Flip to the wrong side. Now you can stitch EXACTLY on Line C (the bottom long line) between Lines D and E (side lines). You should use a short stitch length at the beginning and end 1/2″ (1.25 cm) of this stitch line (1 mm stitch length is good).

Check if everything looks good, and that you didn’t accidentally stitch something that you are not supposed to. If something doesn’t look as good as you want to, this is the time to fix it. Trust me…don’t go “it will look better when it’s all done” because it won’t look good later if it doesn’t look OK now, so re-measure and be critical at this point. If you are happy with it, then let’s move on to slashing of the pocket.
Cut the Back piece (NOT the Welts) on Line B (middle long line), but don’t go all the way to Lines D and E (side lines). When you are about 1/2″ (1.25 cm) before the side line, cut to the corner. It’s easier to show you than to describe it.
Here’s the super-imposed version in case you couldn’t see clearly.
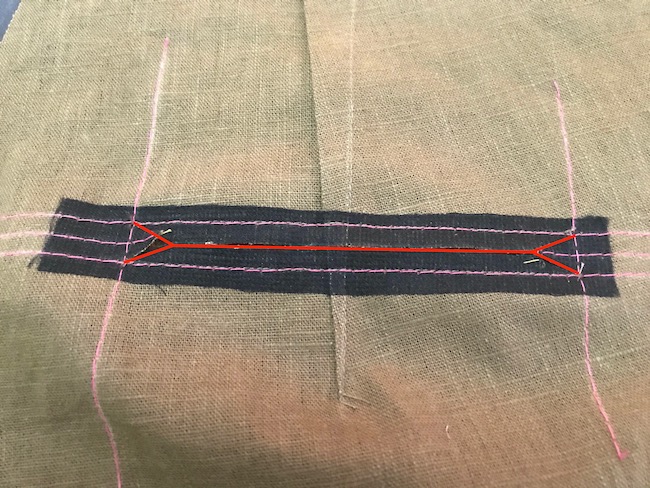
You have to cut EXACTLY to the corners or the finished welt pocket will look wonky. At the same time, do not cut beyond the corners though. Well as I said, precision is key to a pretty welt pocket; this is that time I was talking about.

After the Back is slashed, you can now remove all the basting stitching.
Through the slashed opening, pull the Back Pocket, Back Pocket Facing and Welts (yes, the Welts too!) from the right side to the wrong side. It will initially look like a mess, but keep pulling and re-arranging. When everything is properly pulled to the wrong side and you give it a good press, then everything will look good.

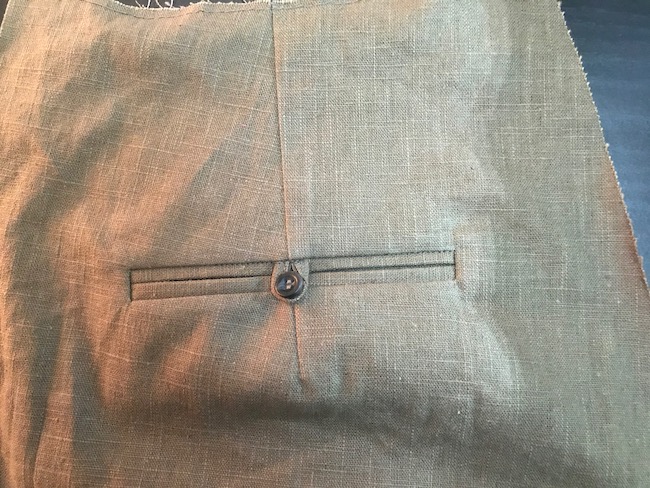
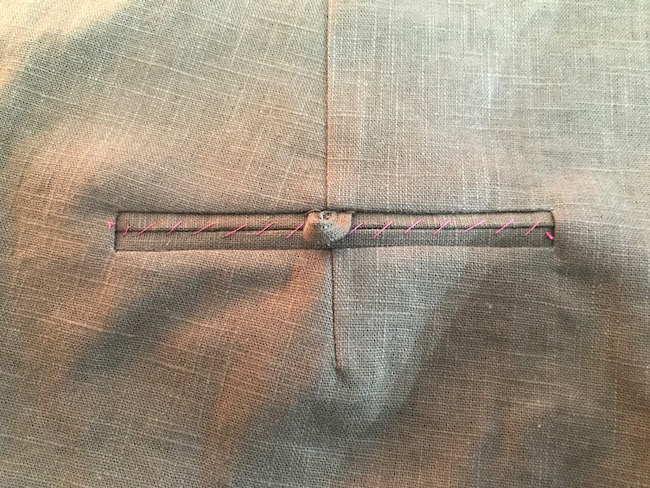
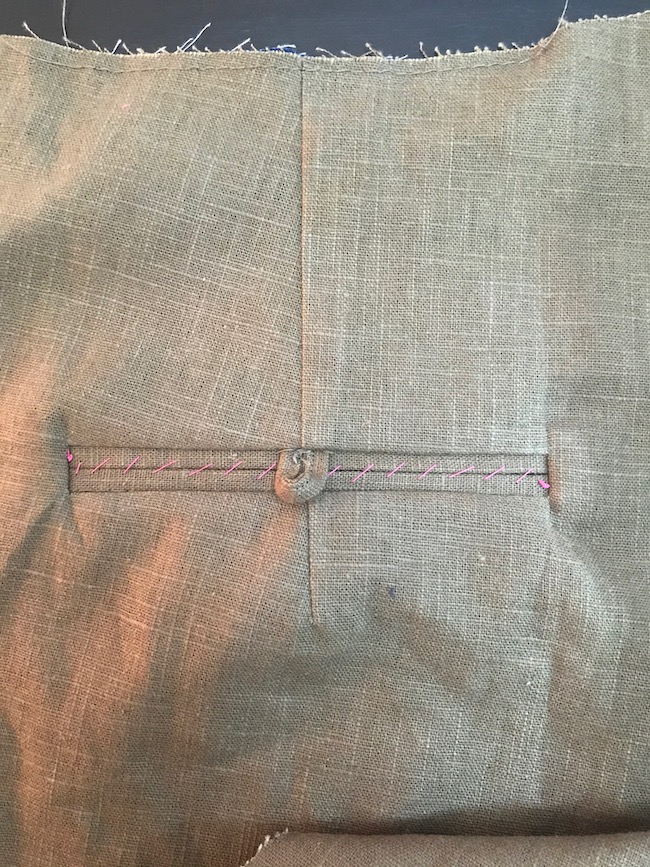
This is how it looks on the right side after you give it a good press.
Hand baste the top and bottom Welts together.
Flip to the wrong side and we’ll deal with the actual pocket. This is how it looks like on the wrong side now.
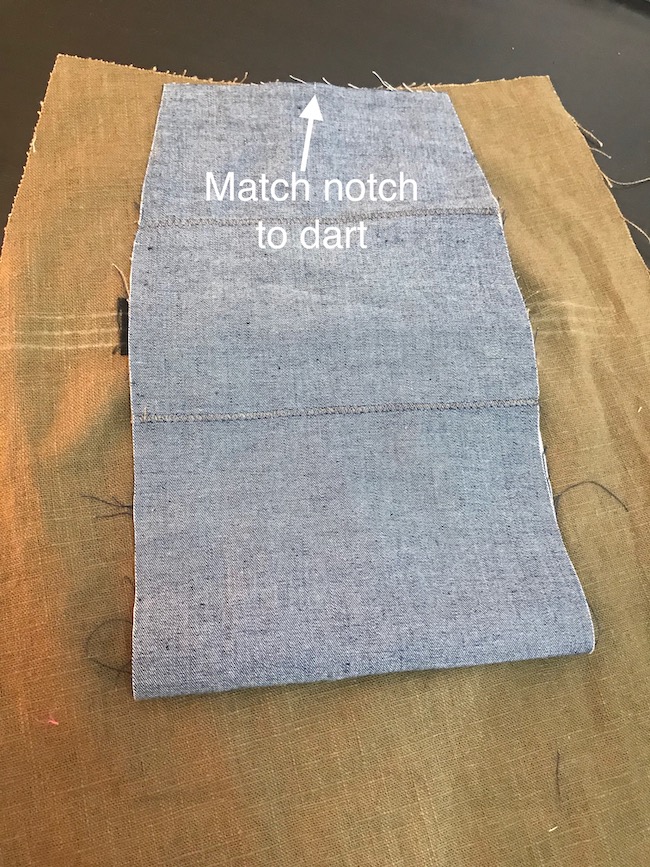
Fold the Back Pocket up so that the notch is matching the dart.
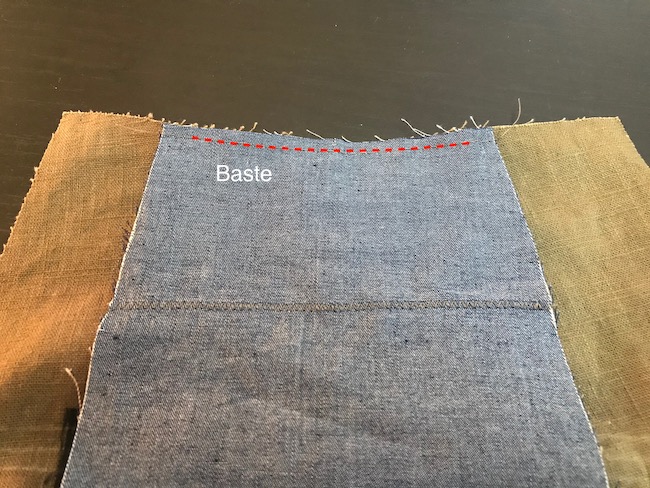
Baste the Back Pocket to the Back in the seam allowance. Leave about 1″ (1.25 cm) at the side un-basted. It’s actually not awfully important how much you leave un-basted; this is for you to finish the edges of the pocket more easily in case you are serging those edges later.
Give the bottom of the pocket a good press.
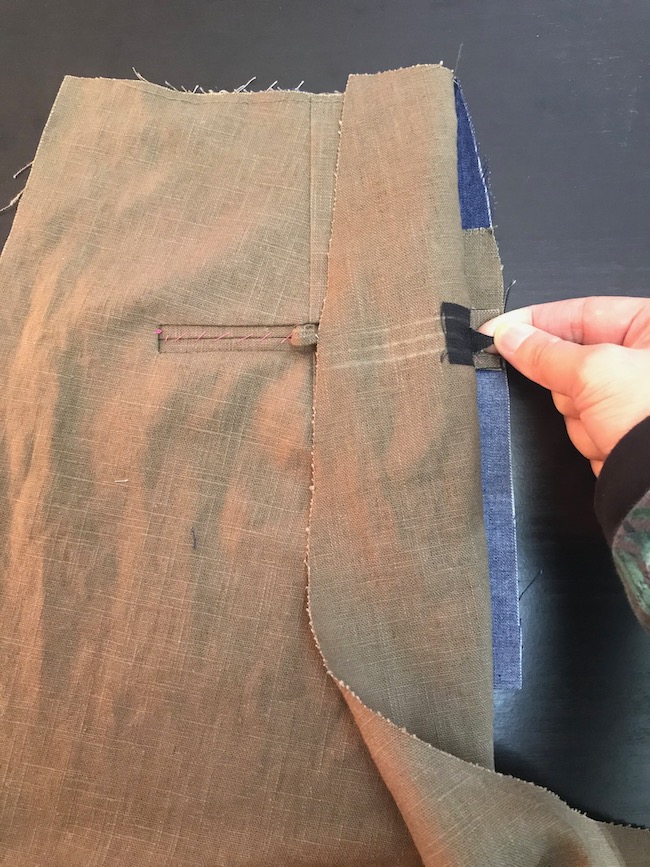
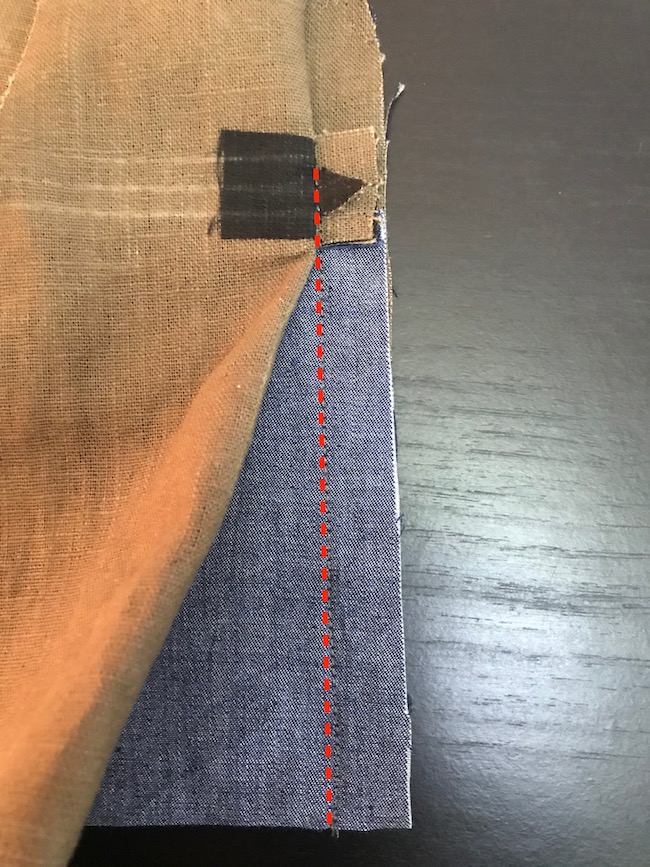
Flip the whole assembly to the right side about. “Peel” the Back piece at the side to expose the pocket. You can see the triangle we cut earlier on top of the Welts. You can also see the Back Pocket Facing and the Back Pocket.
Stitch from the top Welt to the bottom of the pocket, catching the baste of the triangle.
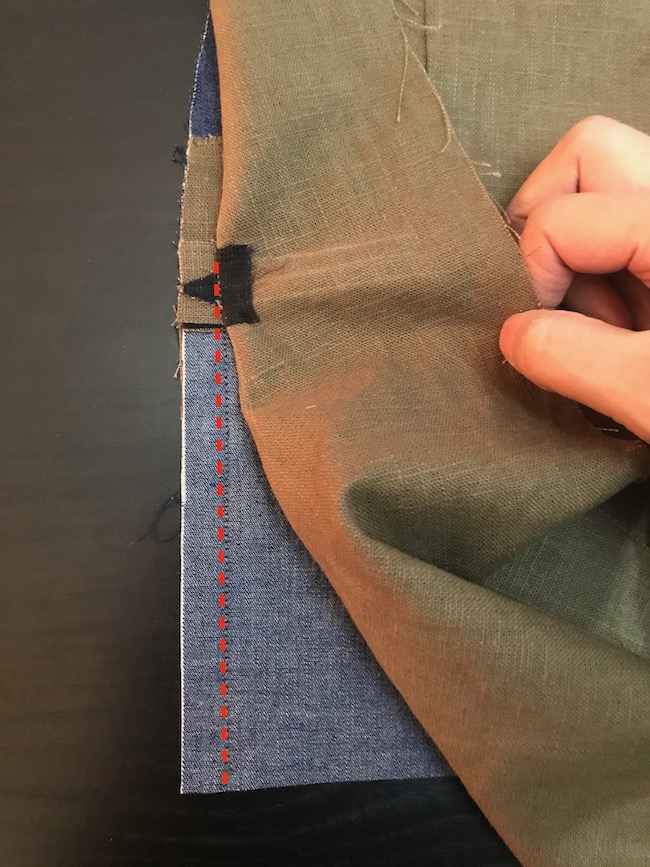
Do the same on the other side of the pocket.
Now you can finish the sides of the pocket from the top to the bottom if you wish. Serge them, zigzag them or pink them.
This is how the right side look now. It looks pretty much exactly as before…
This is how the wrong side looks like now.

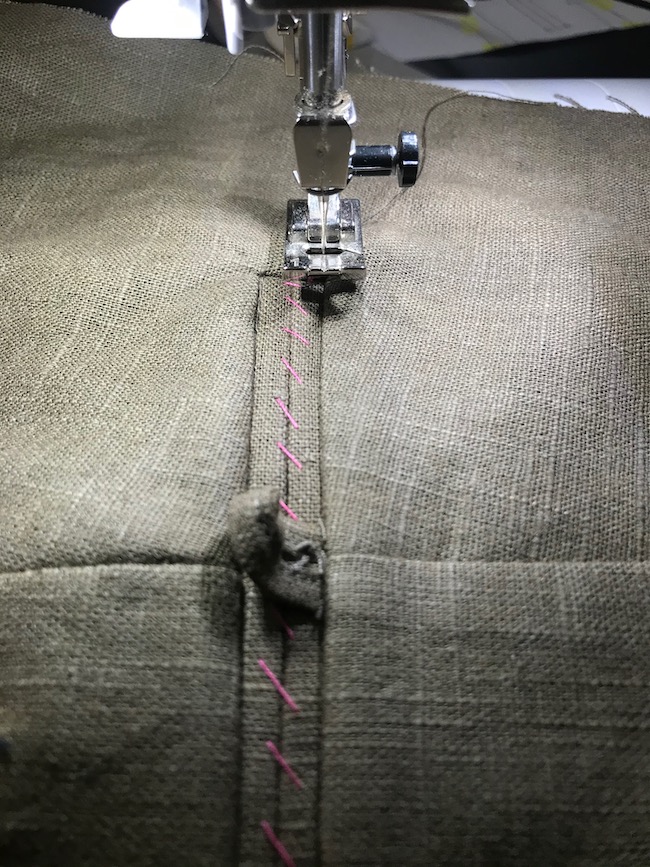
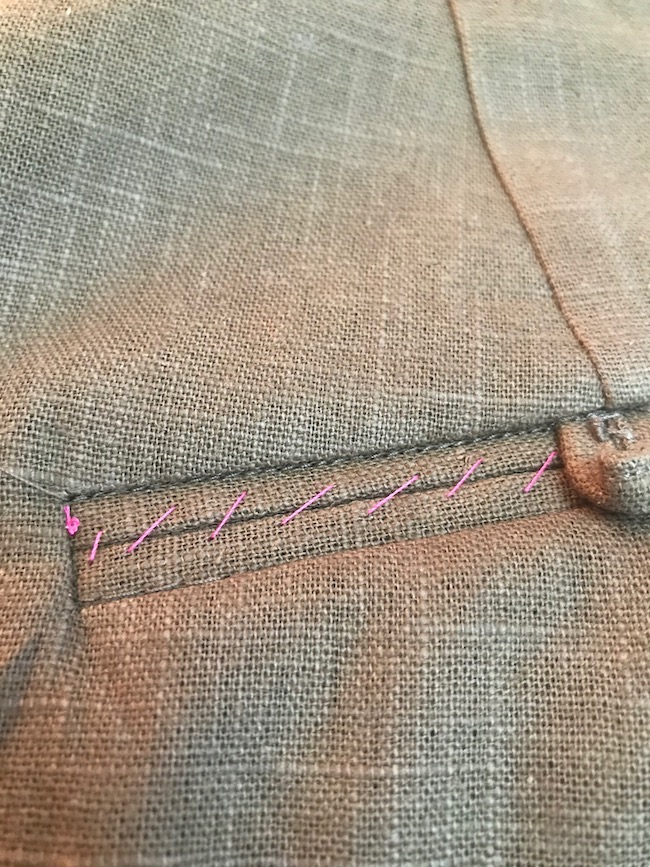
On the right side, stitch in the ditch along the top seam line (the seam right above the top Welt.
Remove the hand basting.
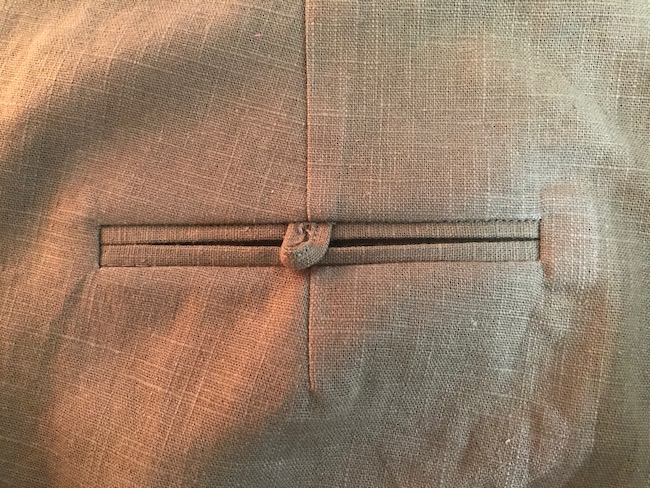
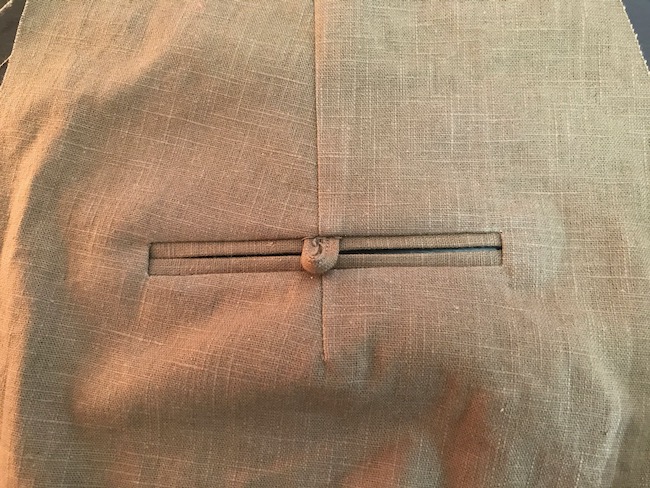
Now you can sew on the corresponding button. It should be sewn at the bottom center of the bottom Welt.
Ta da! We are done! This is how you construct a double-welt pocket with button and button loop on a dart. Doesn’t it look like a million bucks? I think it does.
