
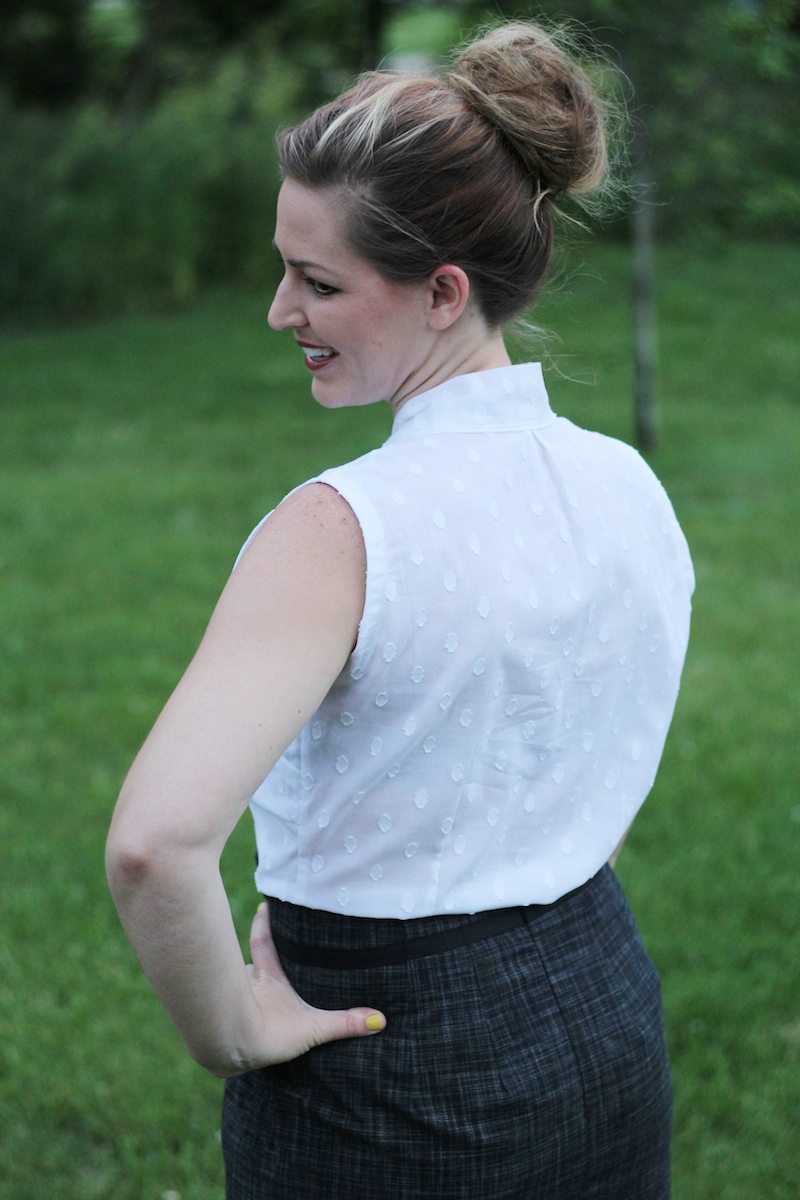
Zamora Blouse Goes Sleeveless
Since the release of the Zamora Blouse I’ve been wanting a sleeveless version of it. I love this style of this top and just knew it could make a great summer look. Why not go sleeveless with it?

For my sleeveless version I made the blouse exactly as the instructions stated through Step 25. This gets you through all the tucks, the neckline, and the side seams with the sleeves as the next steps. Rather than adding sleeves I decided to finish my sleeves with some single fold bias tape. You could use any packaged bias tape, but I really prefer to make my own. It is so much smoother sewing and feels softer to the touch too. Since the armholes aren’t too large, I just cut two 1.5” wide strips (on the bias) from my leftover fabric after cutting my pattern. I took an unofficial measure with my measuring tape around my arm hole to get an idea of the length. Sorry that isn’t too specific there, if I had a measurement chart I would provide it, but that’s not really how I roll.
To prepare the bias tape, first fold in half and press down the length of the tape.
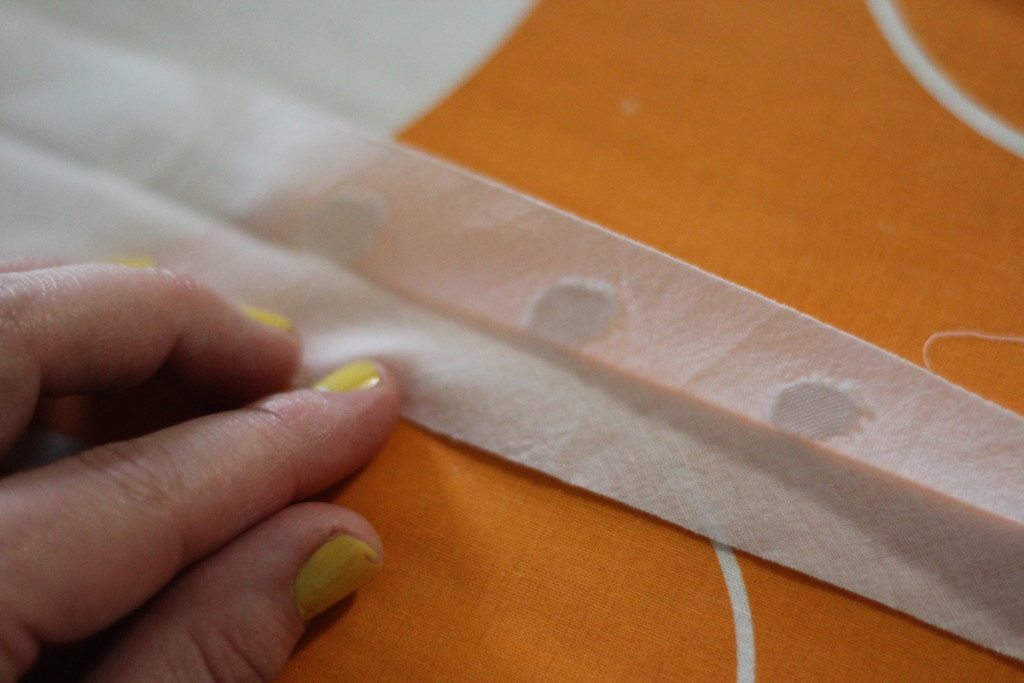
Open up the bias tape and fold the outside edges to the center and press. If you are super awesome you may have nice little tool (affiliate link) to help you with this. I have several, but none were the right size for me today, so I went with the burn-your-fingers-off method.
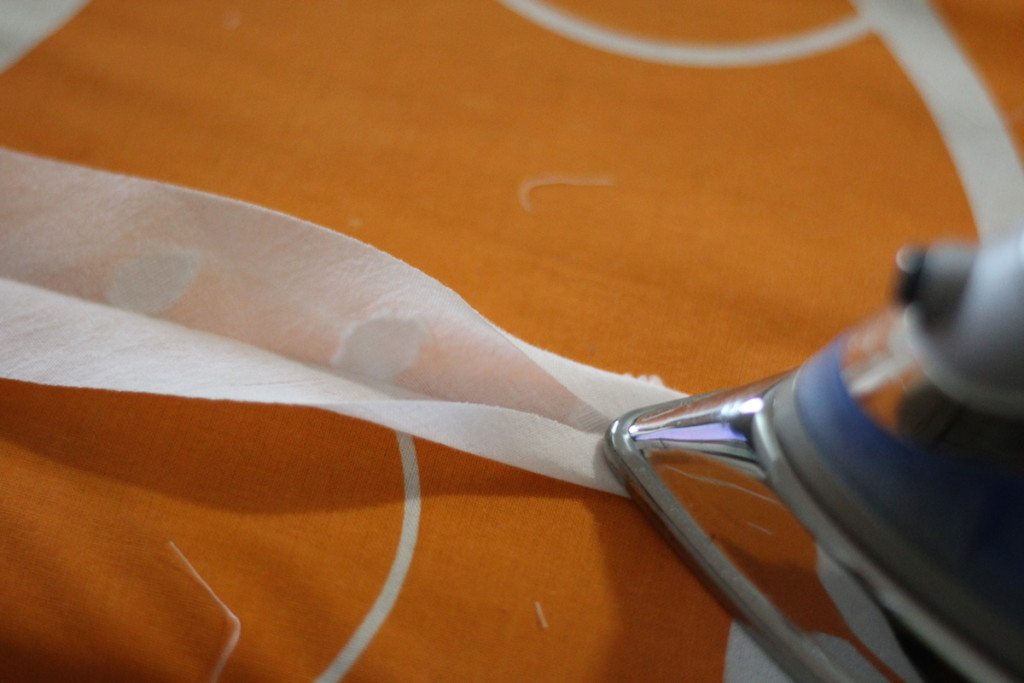
Doesn’t this look nice and pretty?! Next we need to turn down one end of the tape ¼ inch. I like to do this so I have a nice clean edge when I am finished. Open up the folds, then press down ¼ inch, then re-fold your edges to the center and press again.
Now that the tape is ready, we can grab our blouse. Starting on the back side close to the lower side seam, (but not on it because it gets a little bulky if you do that) pin your bias tape around your arm opening, right sides together. Be sure to start with folded end as you pin.
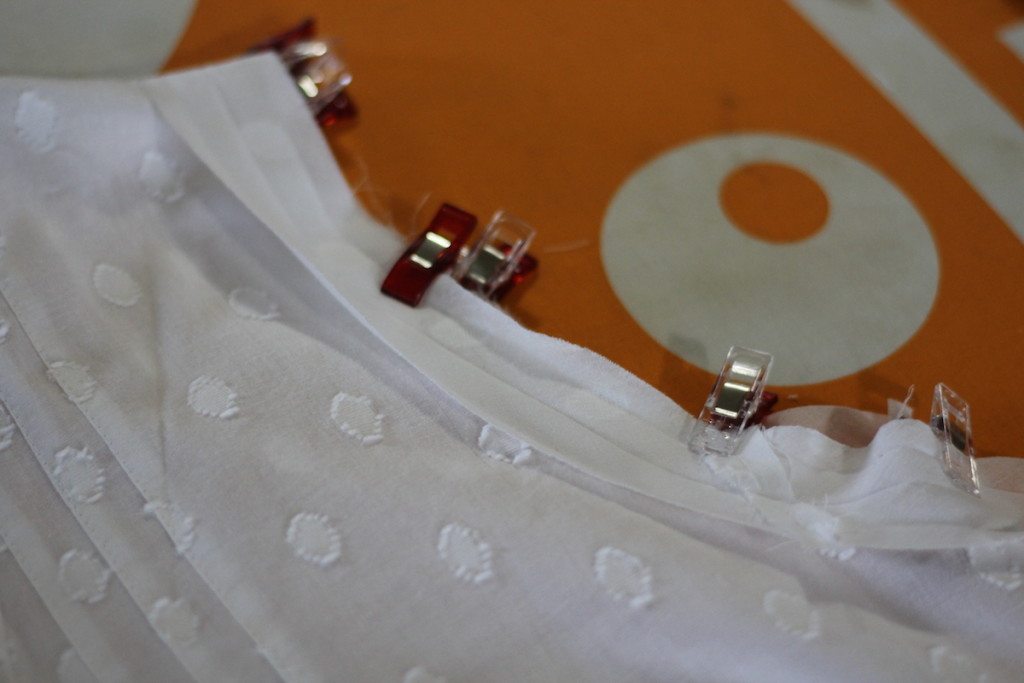
Once you are completely pinned, trim any extra bias tape, remember to leave enough to overlap slightly over the folded end. Head to your machine and sew around the arm hole. Use the fold in the tape as a stitching guide.
Now that you have the bias tape attached, fold the seam allowance and the bias tape into the inside of the shirt. Be sure to fold the edges of the tape under and press. I like to clip it here to keep everything cooperating with me.

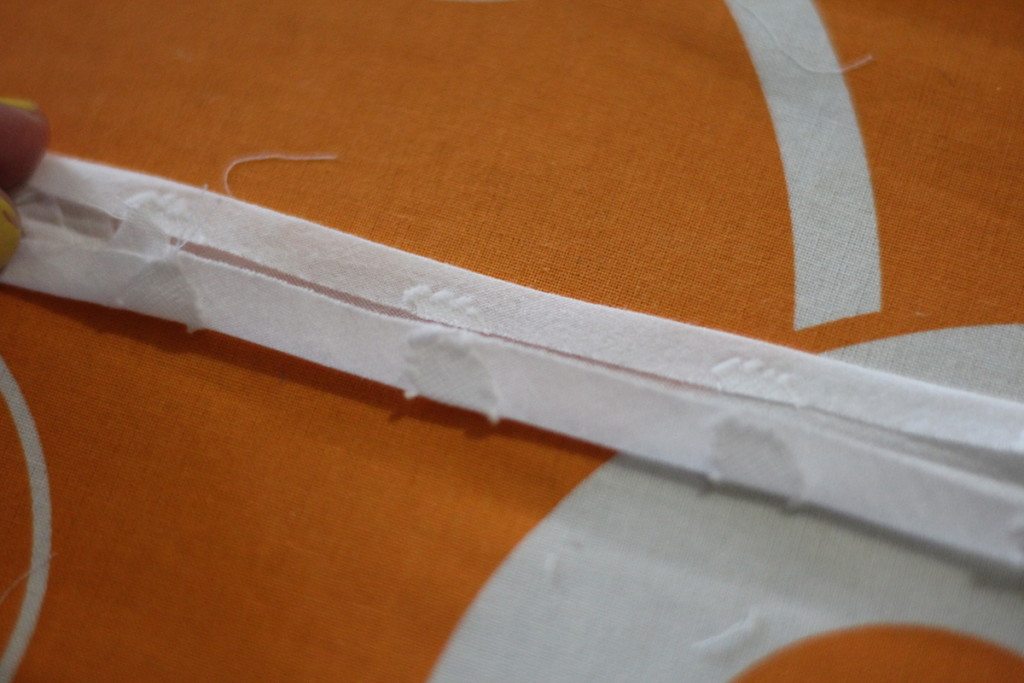
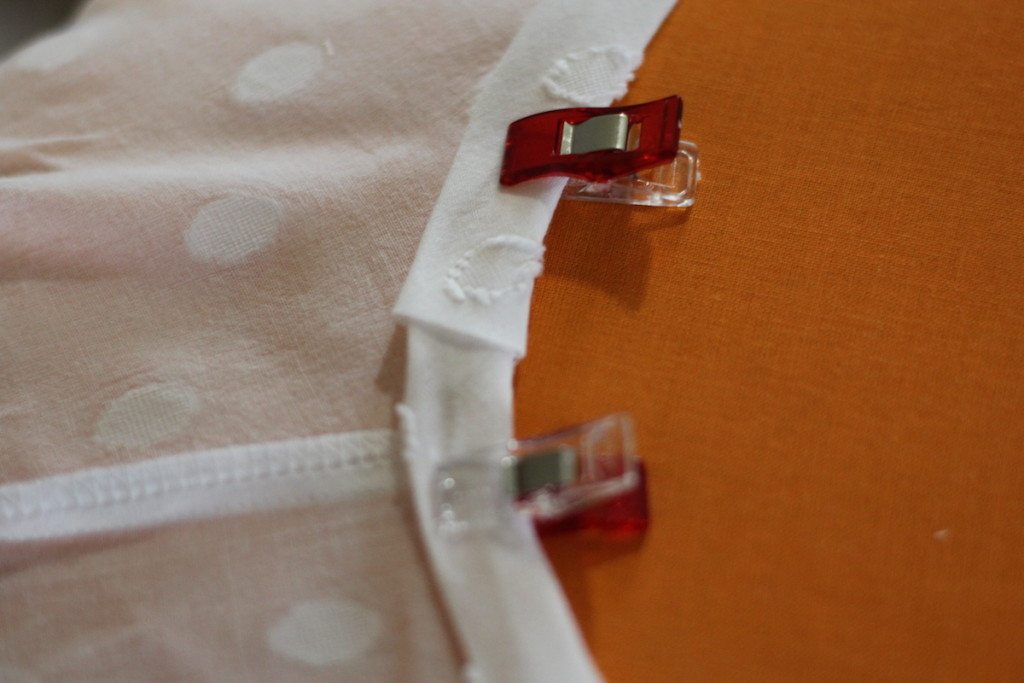
Here is what it should look like at the seam of the ends of the tape. Notice how it is close to the side seam, but not on it.
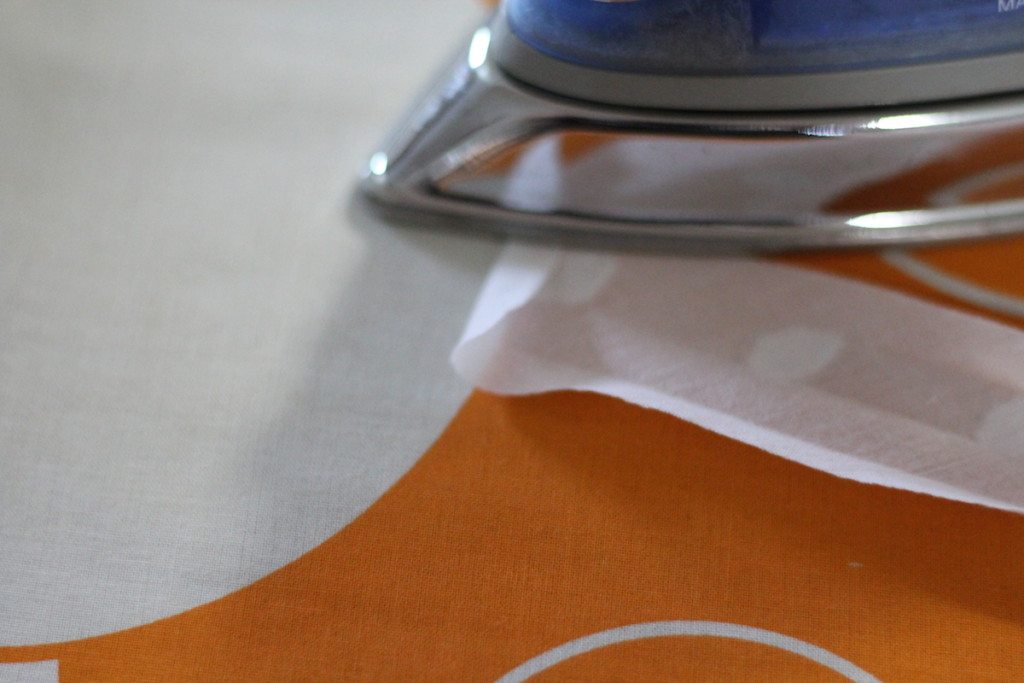
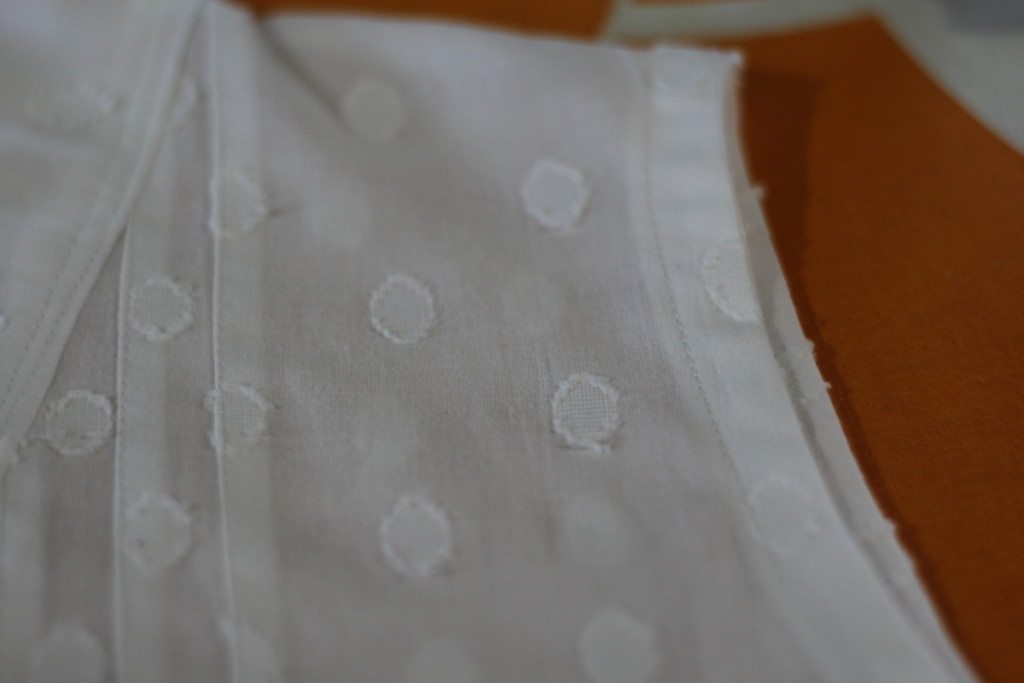
Edge stitch the bias through all layers. This encloses the seams and finishes the edges. Do the same with other side. Give everything one more nice press. And now we have a sleeveless Zamora. Head back to the pattern to finish up the buttonholes and hemming starting at Step 34.
This post was written for you by Cassy Gobin of Pear Berry Lane Blog. Be sure to check out her other posts here at Itch to Stitch and stop by Pear Berry Lane for a visit too.


And yet another reason to add Zamora to my must-get list…. Kennis, why are your patterns always to beautifully perfect? You are so talented.
Thank you Abigail. 🙂
That looks fabulous – another pattern on my wishlist!!!
Thank you Jan. 🙂