
Single Welt Pocket Tutorial
Hello sewing world! Today I’m going to share with you how to sew a welt pocket to the Belize Shorts, but you can really use this tutorial to put a welt pocket on anything that you think needs one. When the Belize Shorts were released I just knew I would love these shorts and adding a welt pocket would be a fun tutorial to share with all of you. I don’t know what it is about a welt pocket that makes it seem so complicated. Before I ever sewed one I thought for sure it would be extremely difficult. In truth, it is quite a simple feat. Let’s get to it.
Materials Needed
- Item to add the welt pocket to. (Itch to Stitch Belize Shorts)
- Piece of fabric for pocket bag. I cut mine 14” Long X 6.5” Wide. You can adjust this as you like. The width really depends on how wide you would like your pocket. My pocket will have a 5” opening when finished.
- Interfacing for both the pocket bag and the item pocket is being added to. I cut mine 2” Long X 6” Wide
- General Sewing Supplies: Machine, Scissors, Iron, Fabric Marking Pen, Quilter’s Ruler Coordinating Thread
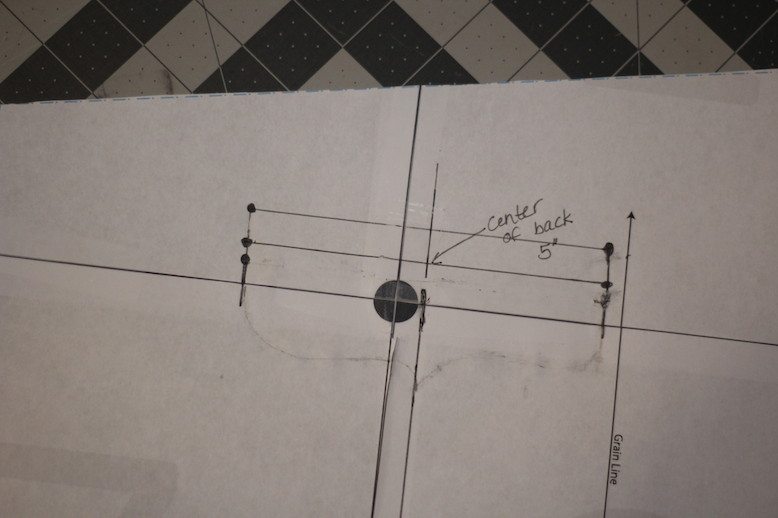
1. Determine where you would like your pocket located. For the Belize Shorts find the center of the back pattern piece, then marked where you would like the pocket to be. You can look at a pair of your own pants to help guide you to determine exactly where you would like your pocket placement to be. You may find you want it slightly closer to the center seam. This pocket will be 5” wide, so from the center mark use the Quilter’s Ruler to mark 2.5” from either side of the center, perpendicular to the grain line. After marking the first 5” mark draw another 5” mark ½ inch above the first. You should see these lines are parallel in the photo. Transfer these marks to your shorts. I think it is easiest if you mark this to the right side of the fabric.
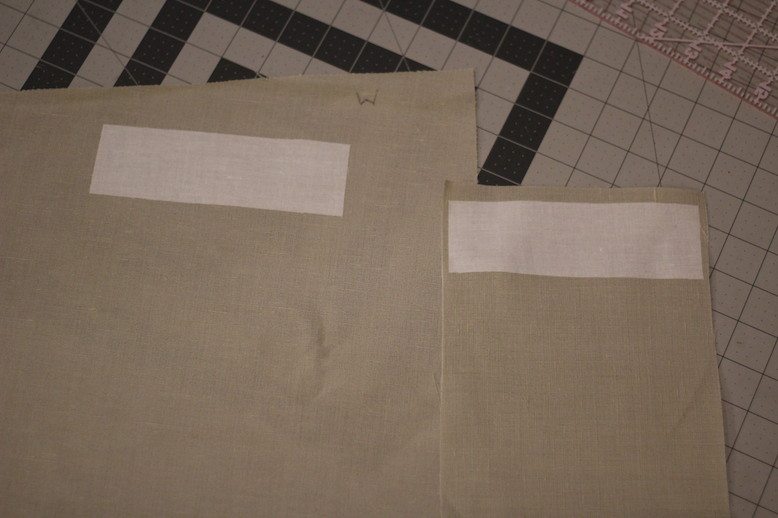
2. Apply interfacing to the wrong side of the pocket bag and the wrong side of the shorts. Be sure to place the interfacing over the pocket marks on the opposite side. Re-mark pocket placement if you can’t see it through the interfacing. For the pocket bag, apply interfacing ½ in down from the top edge.
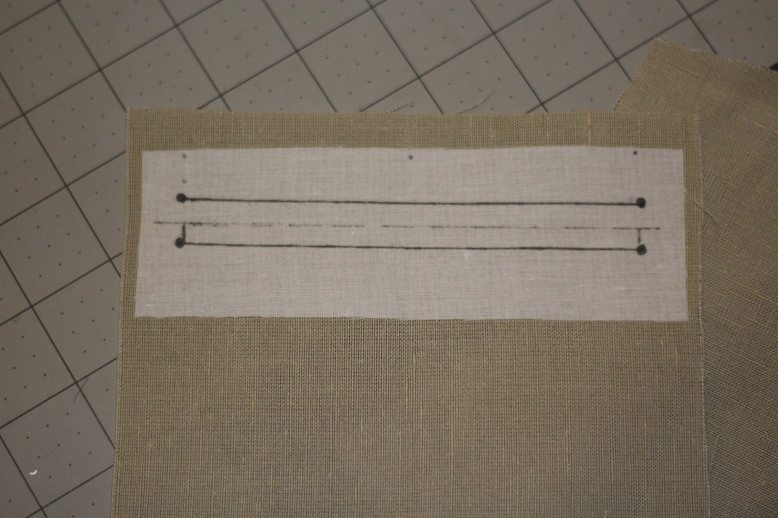
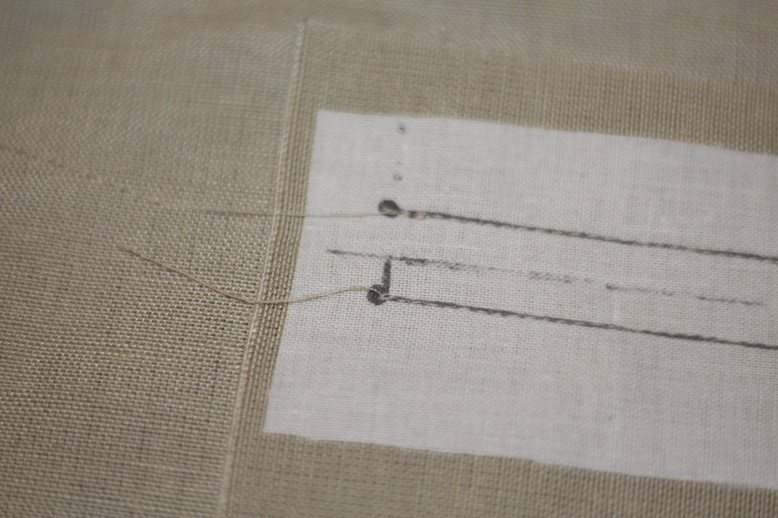
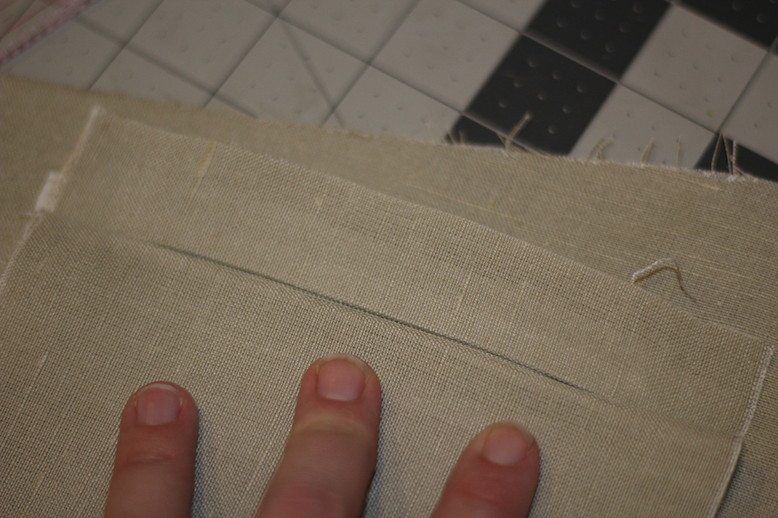
3. To mark pocket lines on the pocket bag, find the center by folding in half widthwise. Personally I get confused when people say fold widthwise or lengthwise, so if you are one of those people too, we call this hotdog style. When you fold it should be more the shape of a hotdog than a hamburger. Open your fold. Measure 1.25 inches down from the top of the pocket bag. (This is the lighter line you see in the photos.) This will be the center of the pocket. To mark the pocket location, measure ¼ inch above the center line and 2.5 inches on either side of the center. Then measure ¼ inch below the center line and 2.5 inches on either side of the center mark. You should now have two parallel lines that are 5 inches long with a center mark going down the center.
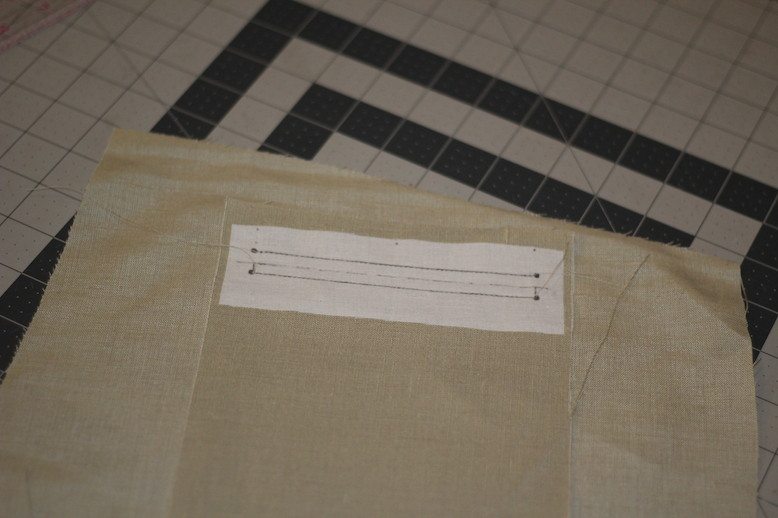
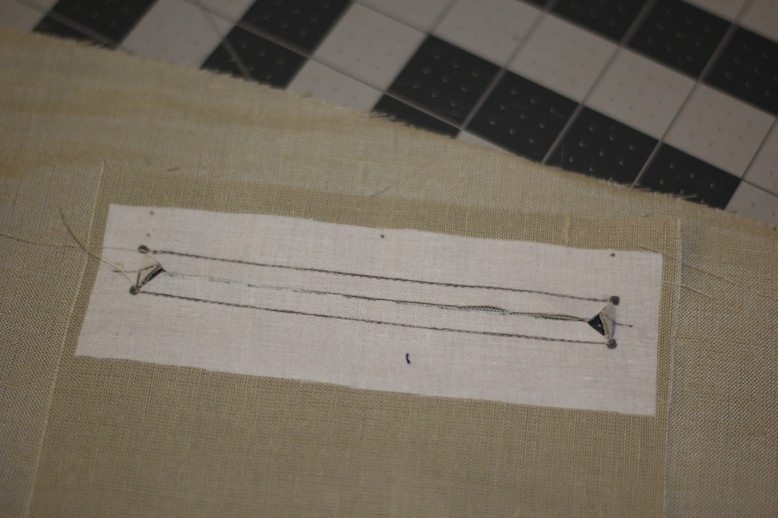
4. Place the pocket bag and the shorts right sides together aligning pocket placement marks. Sew along the two lines remembering to backstitch at the beginning and end of each line. It is super important that your lines match up here so your pocket doesn’t get ugly puckers.
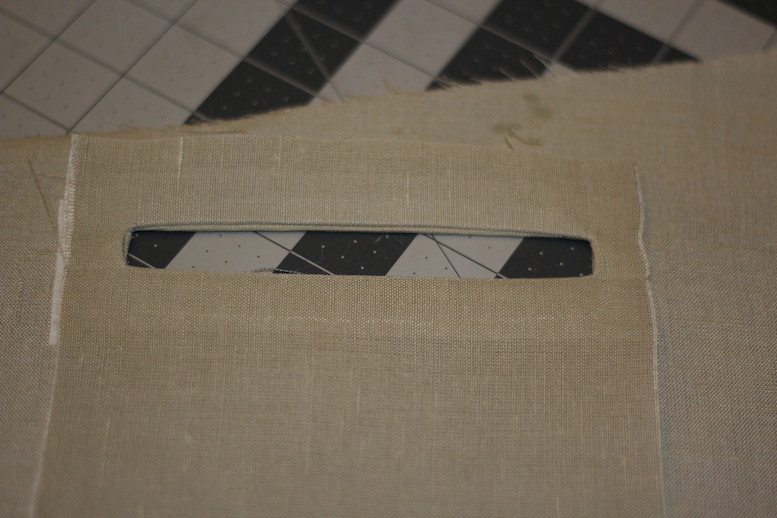
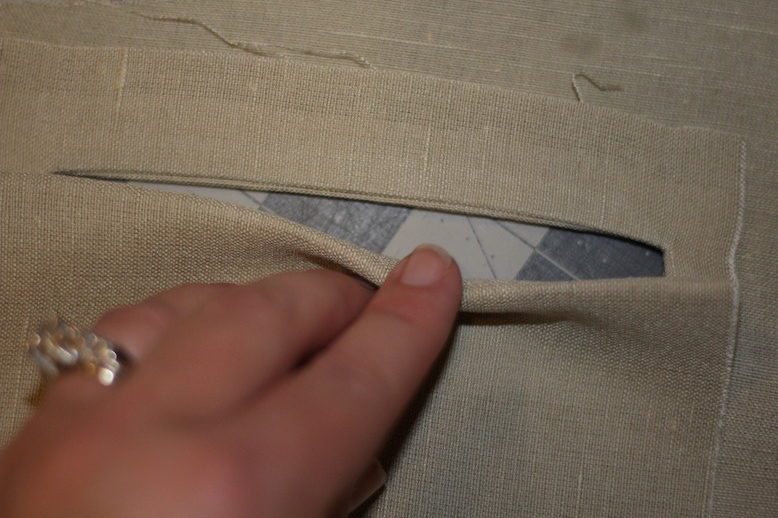
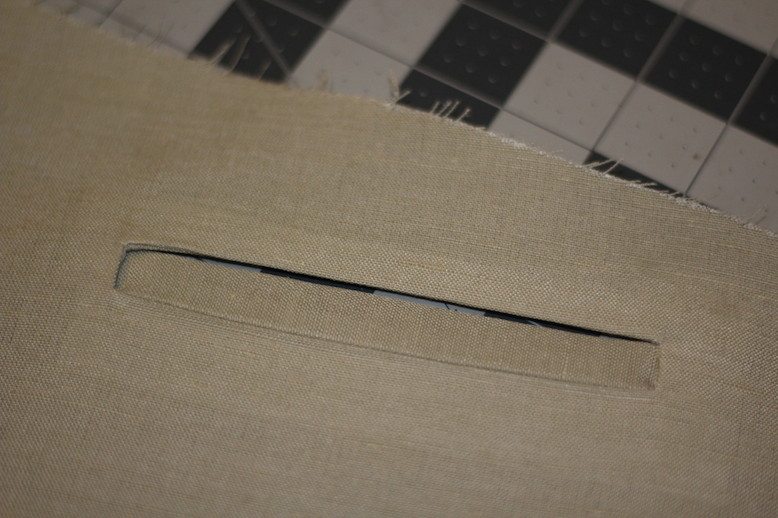
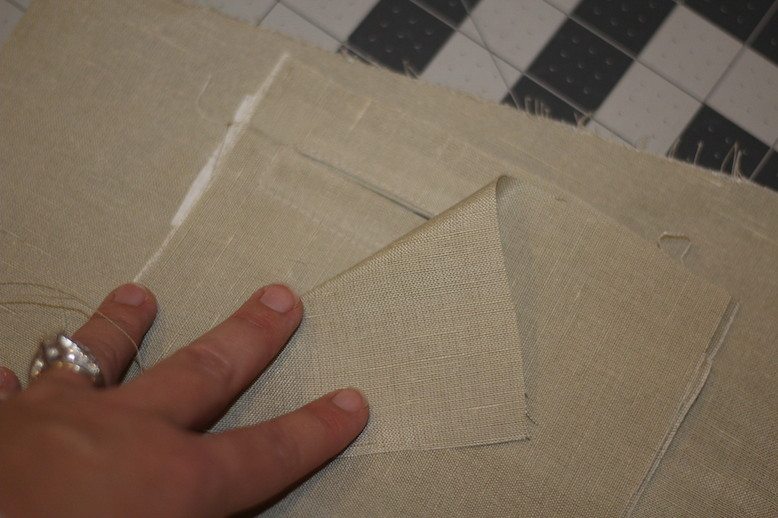
5. Snip down the center of the pocket stopping at ⅜ inch from the end of each side. From here, snip towards the endpoint of the pocket lines at an angle. Be careful not to snip the threads.
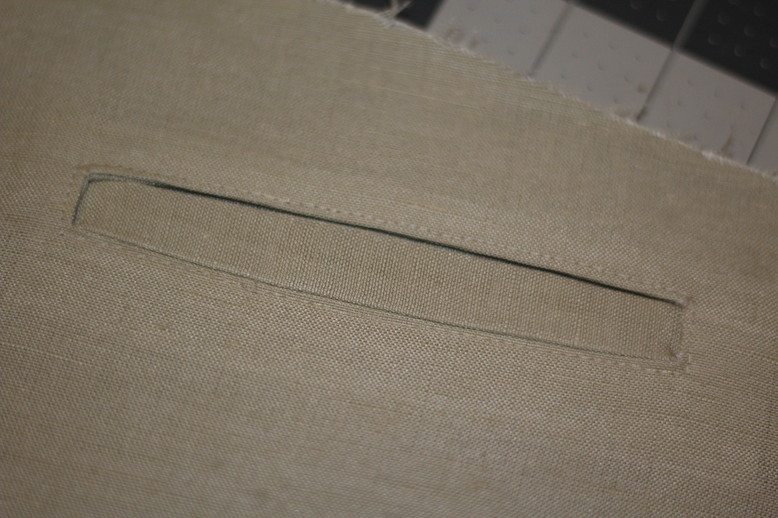
6. Pull pocket through opening to wrong side of the fabric. Smooth and press. You may find a little tug at the corners helps to make things look nice and tidy. I find that pressing the seams open before pressing them flat really helps to get a crisper edge. This was especially true for the linen I was working with. You can get a little excited here because your pocket is actually looking like a legit pocket. Pause to enjoy your success, snap a photo and share your work in progress with someone.
7. From the wrong side, fold the pocket bag up even to the top edge of the pocket opening. You are not folding up the bottom of the pocket here. You are putting a fold just below the pocket opening. Press.
8. From the right side of the pocket, edge stitch around the opening to secure. Remember to backstitch at the beginning and the end. Press again to set. I really like my iron, so I press A LOT.
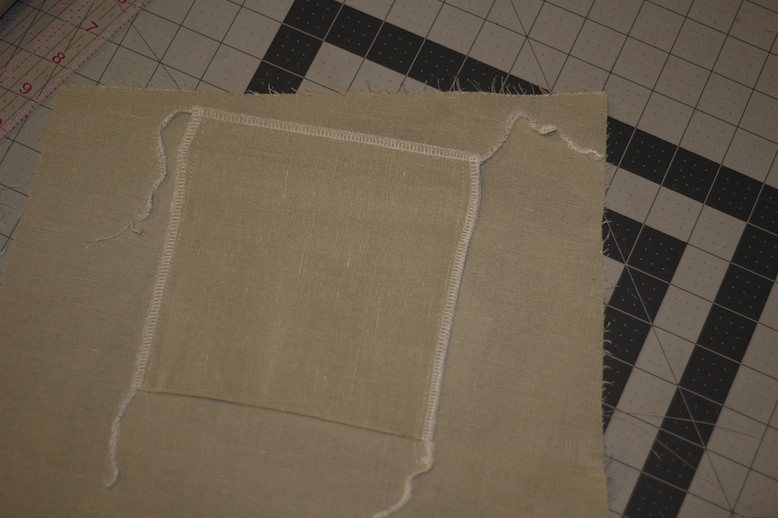
9. Fold the bottom edge of the pocket bag to the top edge. Sew along the the three open sides to close up the pocket. Be sure to keep your shorts out of the way as you work around the pocket bag. Finish pocket bag edges. Please don’t eat your shorts with you serger knife here, it is a little tricky. Tie off serger ends. Press once more for good measure and take another photo to share.
Yay, we did it! You have now hacked a pattern by adding a little something extra to it, be proud.
Continue shorts construction within the pattern. I’ll be sharing my finished shorts with you soon here at the Itch to Stitch Blog, so be on the look-out. They are going to be paired with a Lisbon Cardigan. I’m pretty excited about how this outfit coming together. Until then, happy sewing!
This post was written for you by Cassy Gobin of Pear Berry Lane Blog. Be sure to check out her other posts here at Itch to Stitch and stop by Pear Berry Lane for a visit too.
 src=”https://

That is just awesome, thank you so much, I know I can do one now