
How to Sew a Mandarin Collar – Demo with Bonn Shirt & Dress
One of my favorite features of the Bonn Shirt & Dress is the collar. For a lack of a better term, I call it a “modified mandarin collar”.
However, on a normal mandarin collar, the left and right front meet each other at the center. Also, mandarin collar essentially is the collar stand that supports the traditional collar.
But on Bonn, the collar is quite different. The left and right fronts of the collar don’t meet; they rest on the top of the V neck. Also the collar does not stand up; it is flat against the body. In a sense, they are more like a mini yoke rather than a collar. Because of these feature, the shape of the collar is very different.
Regardless, the sewing method is like sewing a mandarin collar, with a few nuances. Even if you are not sewing Bonn, I think you would find this tutorial very useful for your other shirts.
Obviously, there are other methods out there to sew collars. This one is my go-to method. I am not sure if this is the cause or the effect; the more I use this method, the better result I get. Or because I am getting good result, I keep going to this method. I don’t care one way or the other, but I do encourage you to try it out and evaluate for yourself!
Let’s get started.
I cut two pieces for the collar and only apply fusible interfacing on one of them. Be sure to transfer the circle marking from the pattern piece to the collars. You will be glad you did.
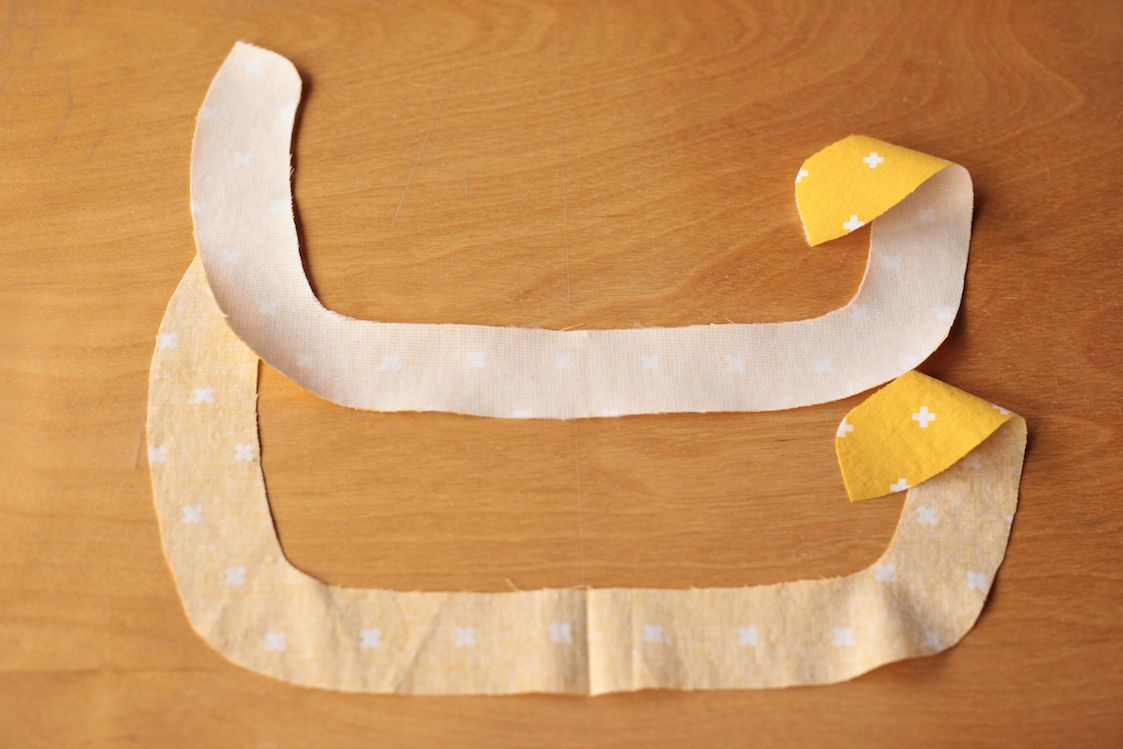
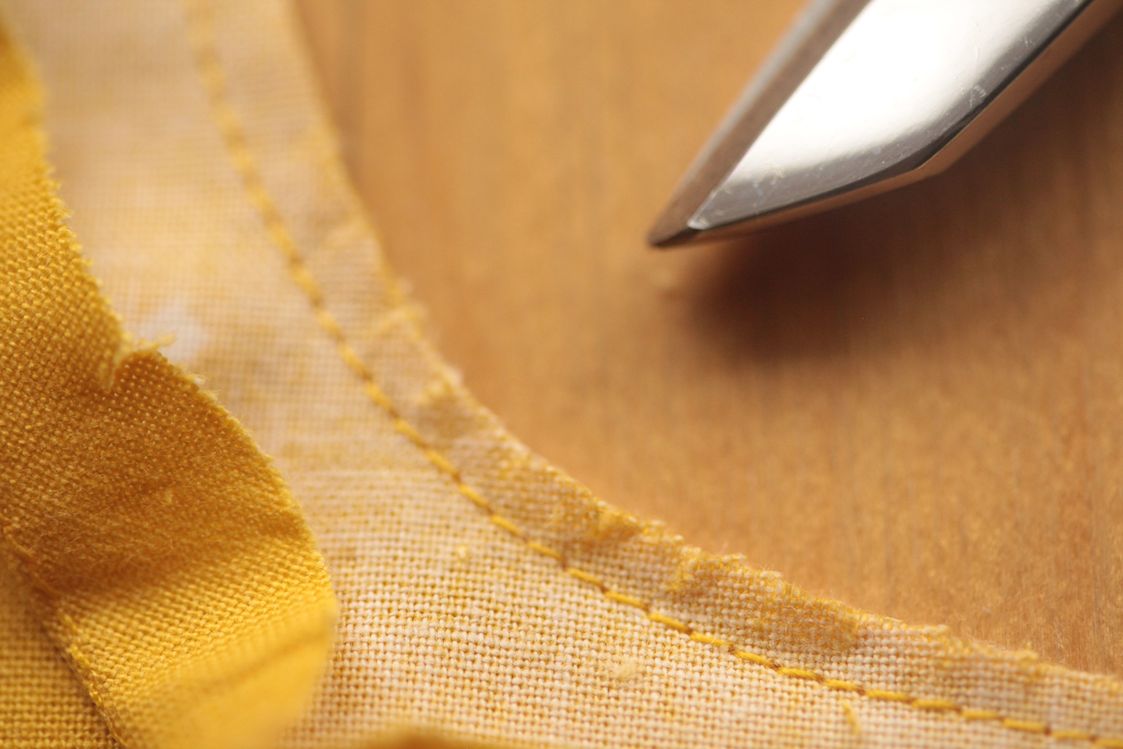
On the uninterfaced collar, I stitch one line of guiding stitch on the outer edge. It is at the seam line, which is 3/8″ in my case.
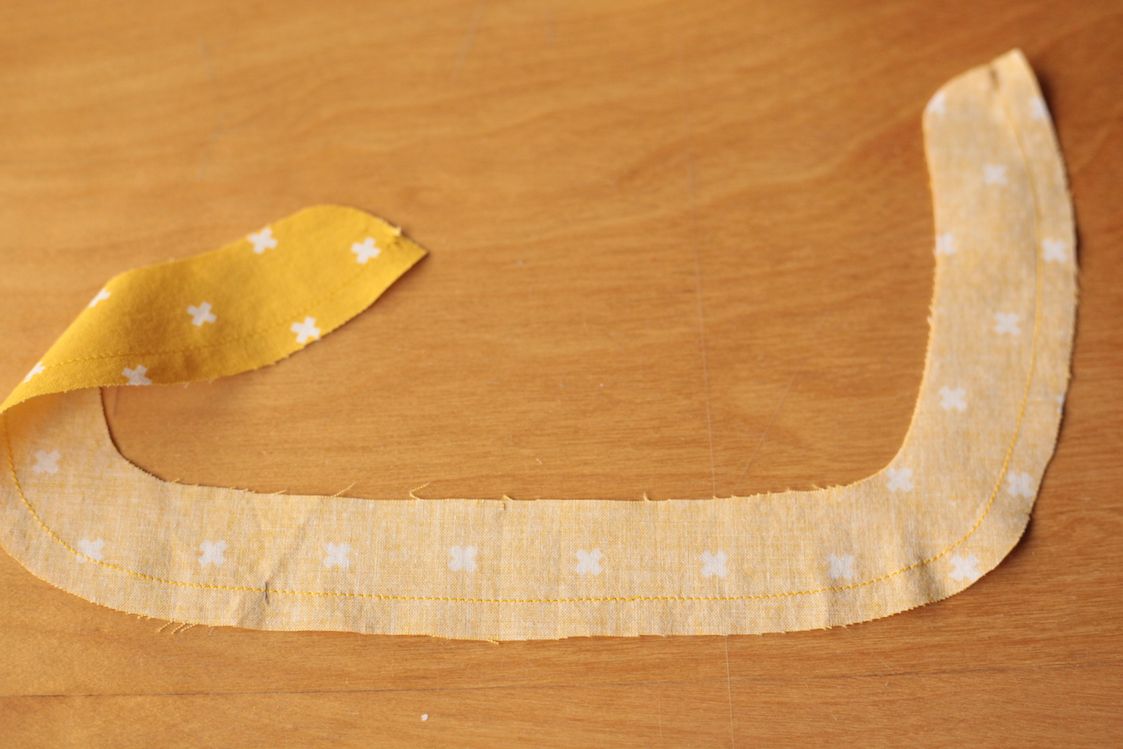
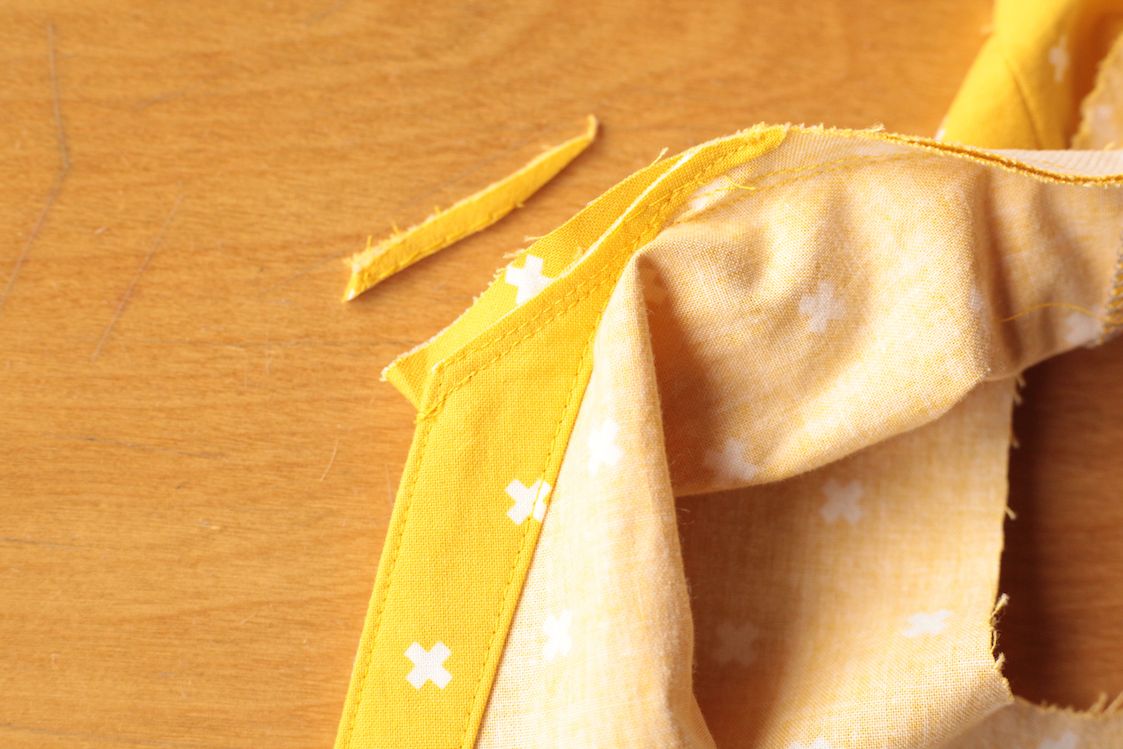
Leveraging this guiding, I press the seam allowance in. It’s a little tricky at the corner, but you can do it. Notice that a typical collar stand/mandarin collar doesn’t have as sharp of an angle, so you wouldn’t have any issue at all.
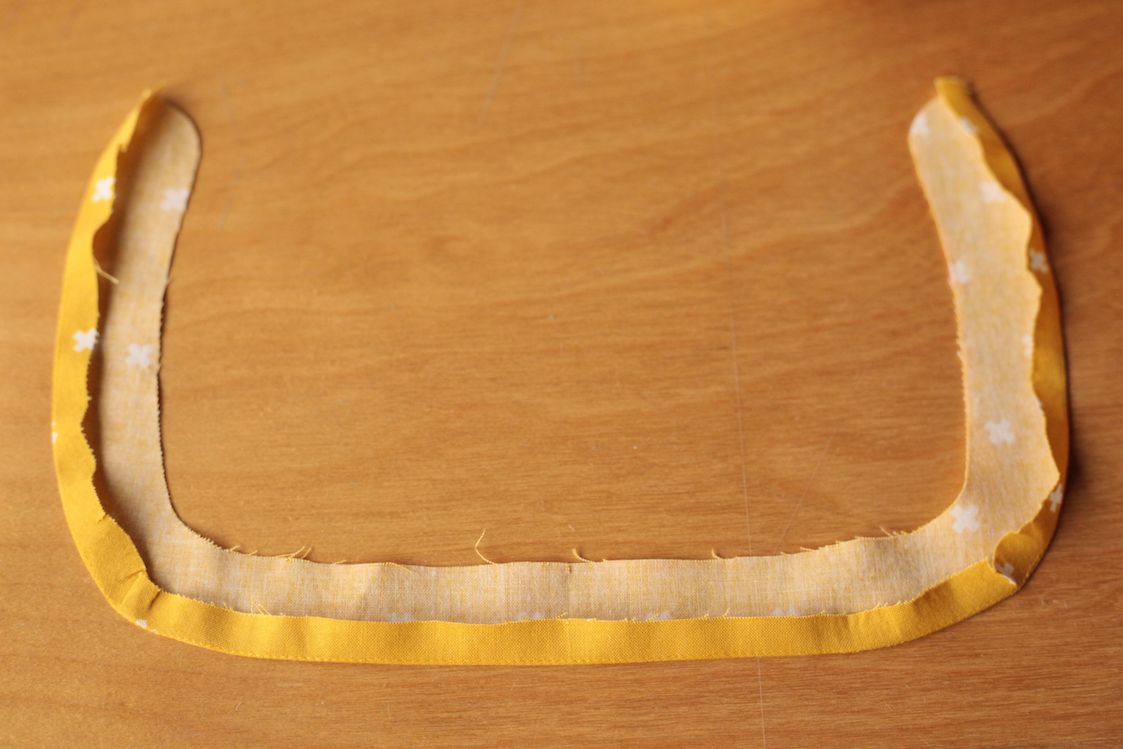
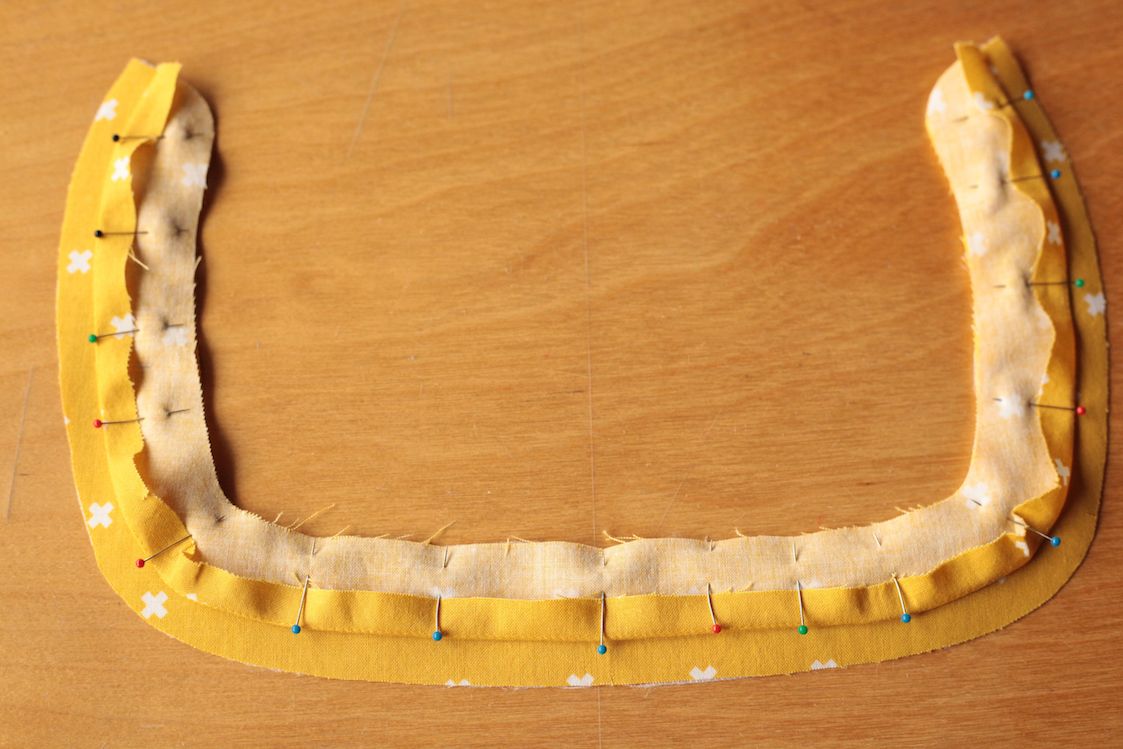
With right sides together, pin the uninterfaced collar to the interfaced collar, aligning the inner edge. I call this an “inner edge” just because as they lay flat here in the photo, they are in fact “inner”. But when the collar is made up, this “inner” edge actually becomes the top of the collar. So don’t think too much here. I put three pins first: the center and each rounded corner.
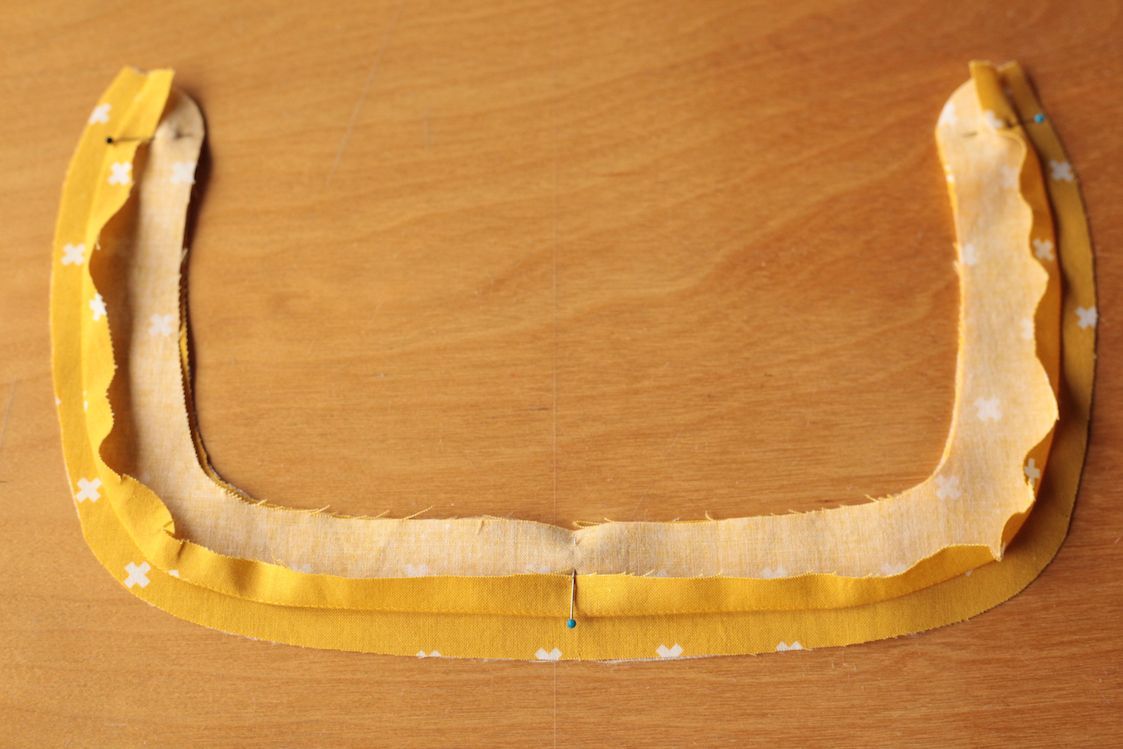
Then I pin more (yes, I like pinning!). Because these two pieces are from the same pattern piece, they should match exactly. But if you use a very loosely woven fabric, the interfaced piece can be more “stable” than the uninterfaced piece and may appear smaller. Try to squeeze (ease) the larger piece anyway so they match; you shouldn’t have too much problem.
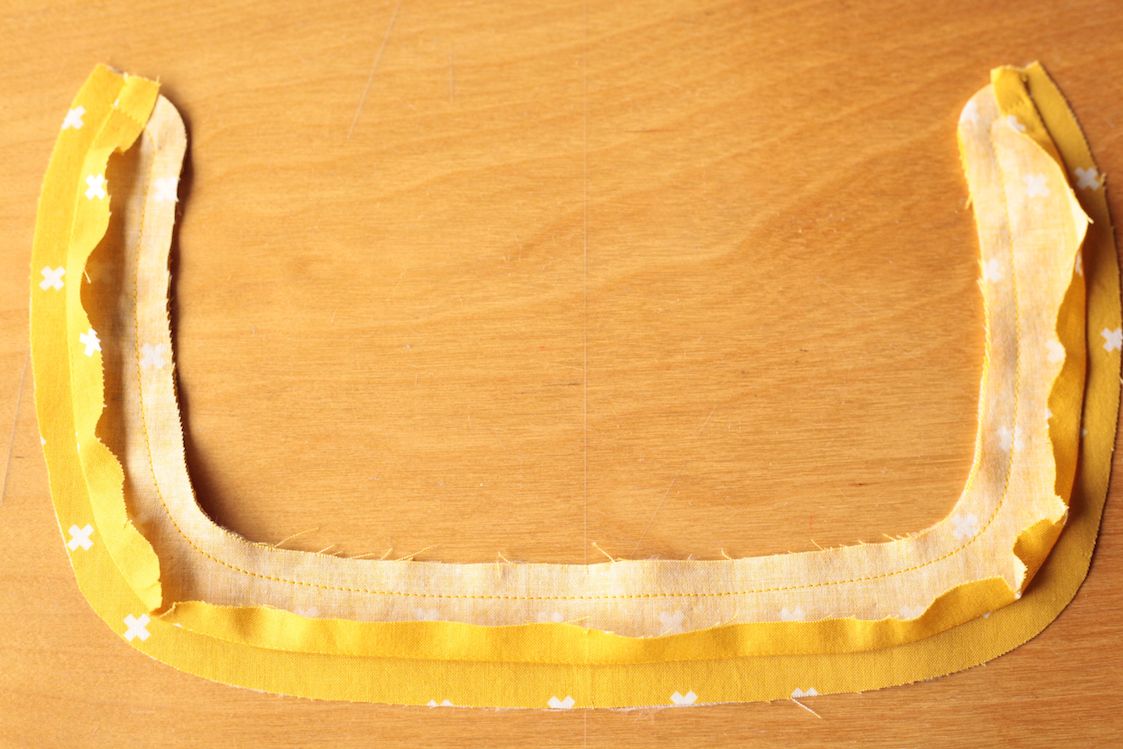
I stitch along the “inner” seam. See that I stitch over the folds too.
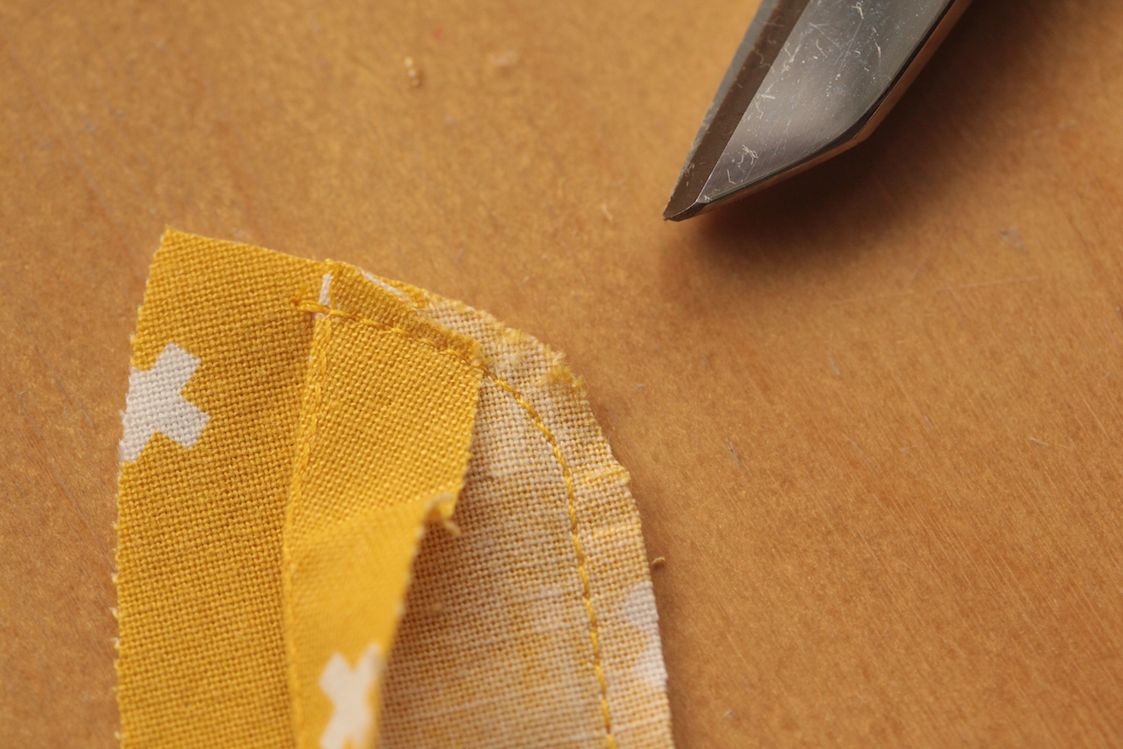
Trim the seam allowance.
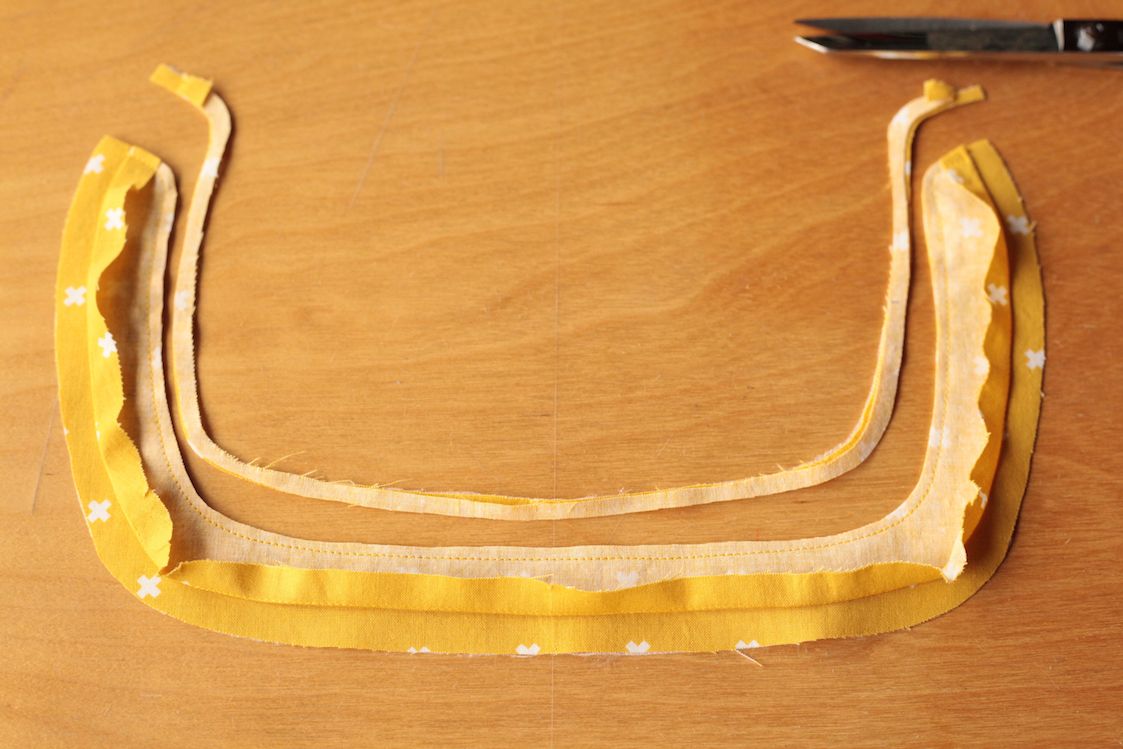
I also do a bit of mini clipping at the inner corners and some mini notching at the rounded front corners.
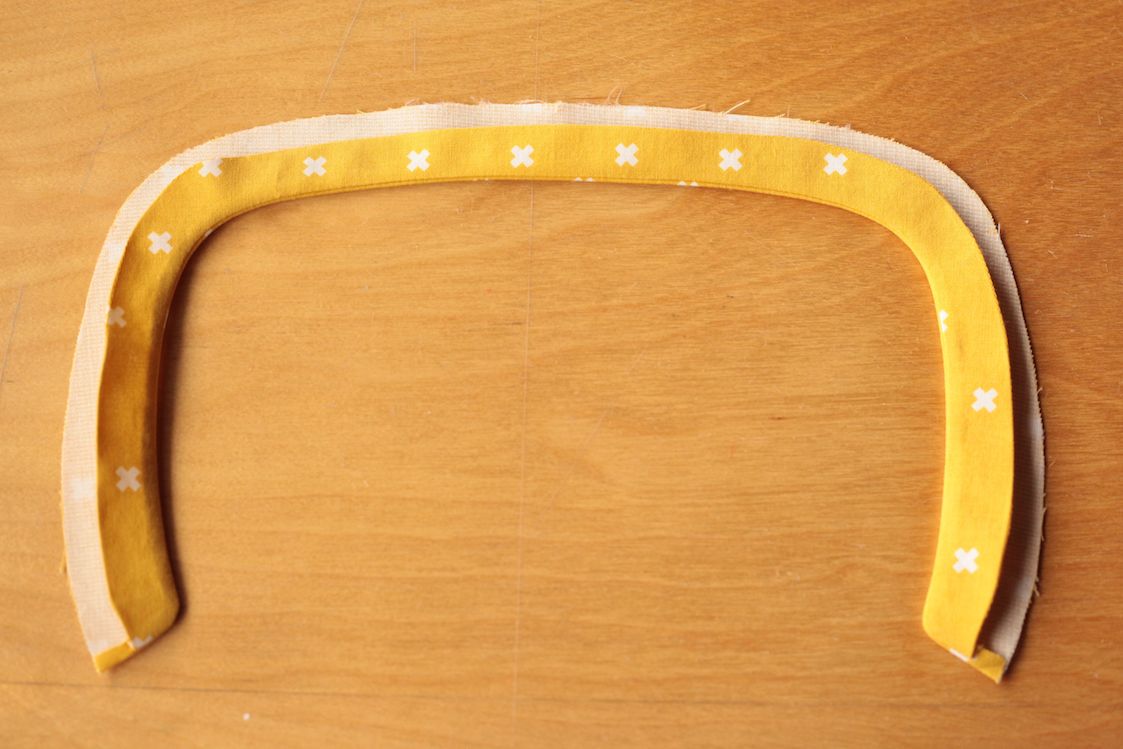
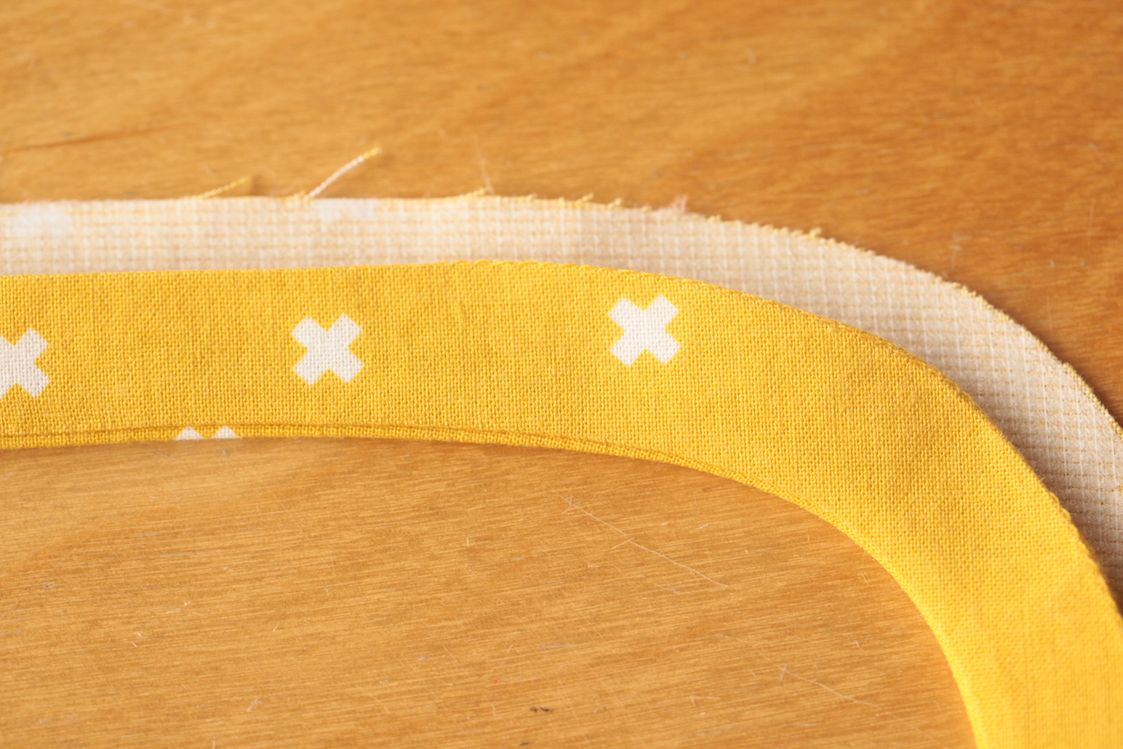
I turn the collar right side out and take my time to press it nicely. Some might choose to understitch but I don’t (it’s a very narrow collar and when I press it, I can ensure the seam line is slightly rolled to the uninterfaced side (the final non-public side), so it’s not an issue for me. But some people choose to put that nice touch.).
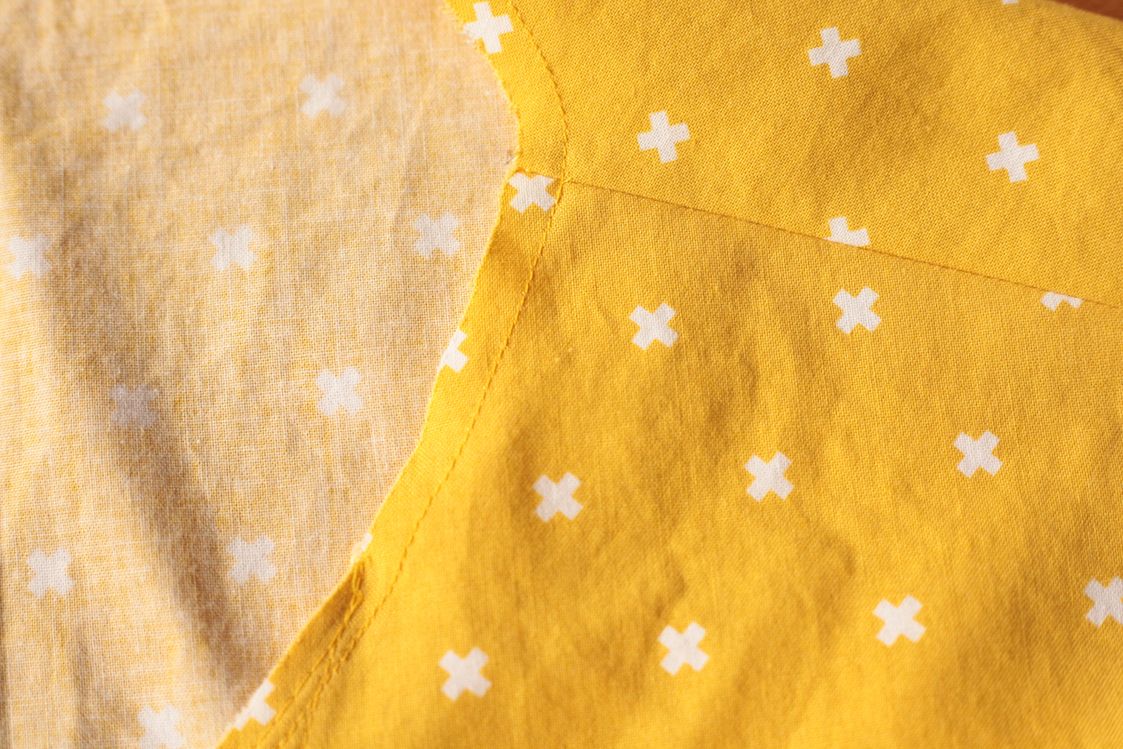
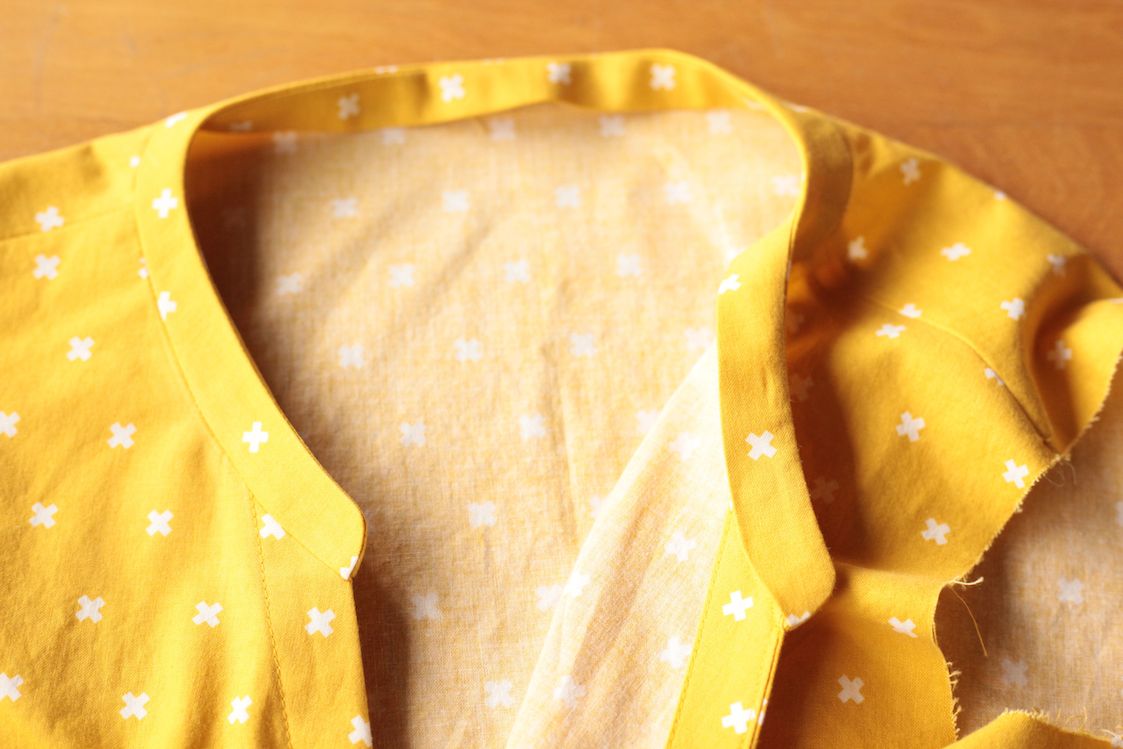
Now I can go to the neckline. The neckline should be stay stitched. The line of stay stitching is just a hairline within the seam allowance, so it’s just a tiny bit less than 3/8″ (1 cm) from the cut edge. When the collar is finished, this stay stitch should not be visible.
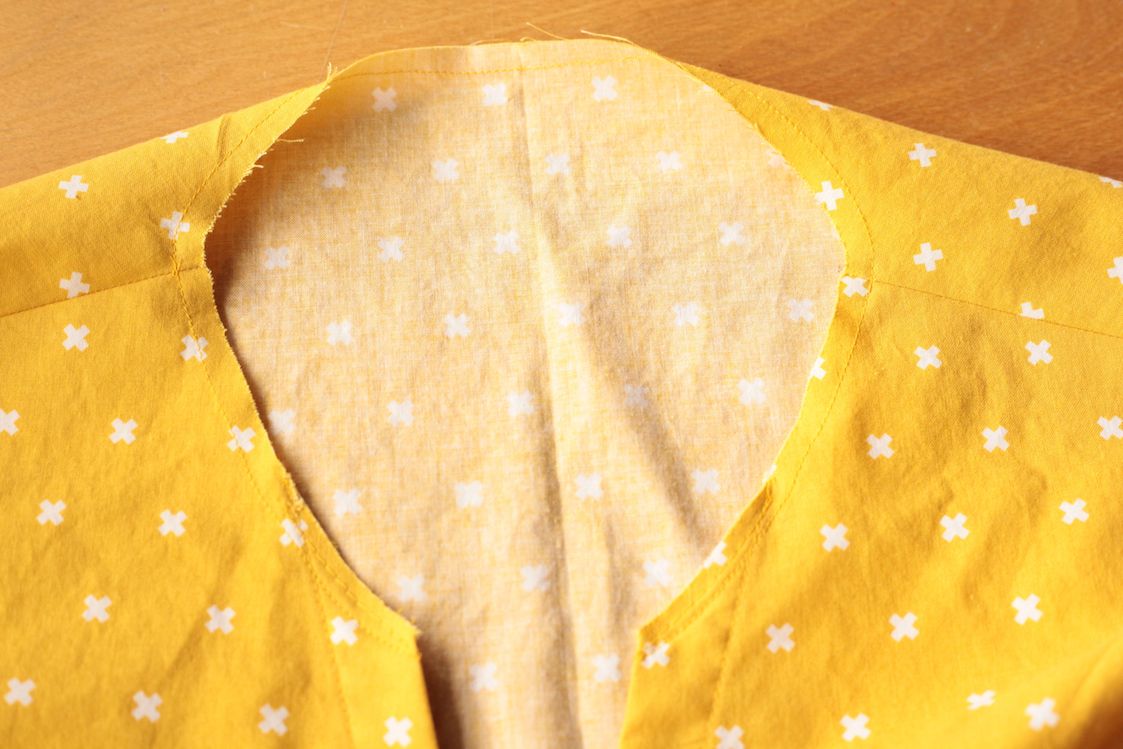
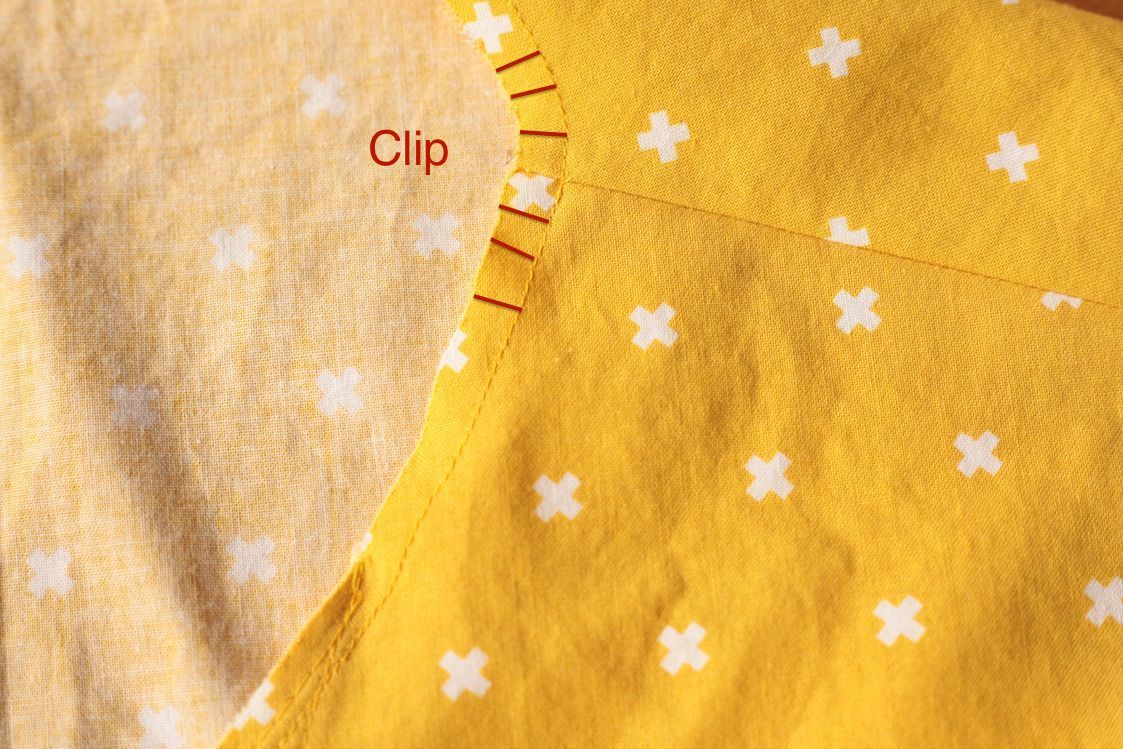
One step that I did, but I failed to take a photo is that I clipped to the line of stay stitch around the curves at the neckline. I hope my over-imposed photo will do anyway.
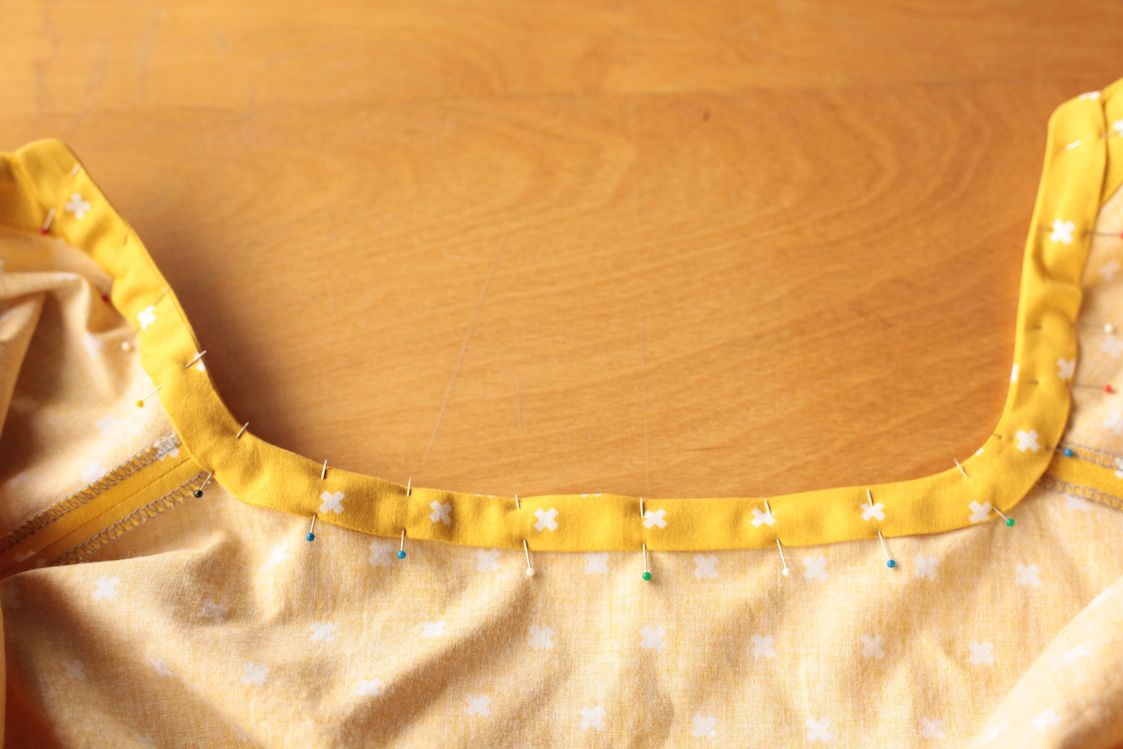
Now I can pin my collar to the neckline. The circle markings are supposed to be matching the shoulder seams.
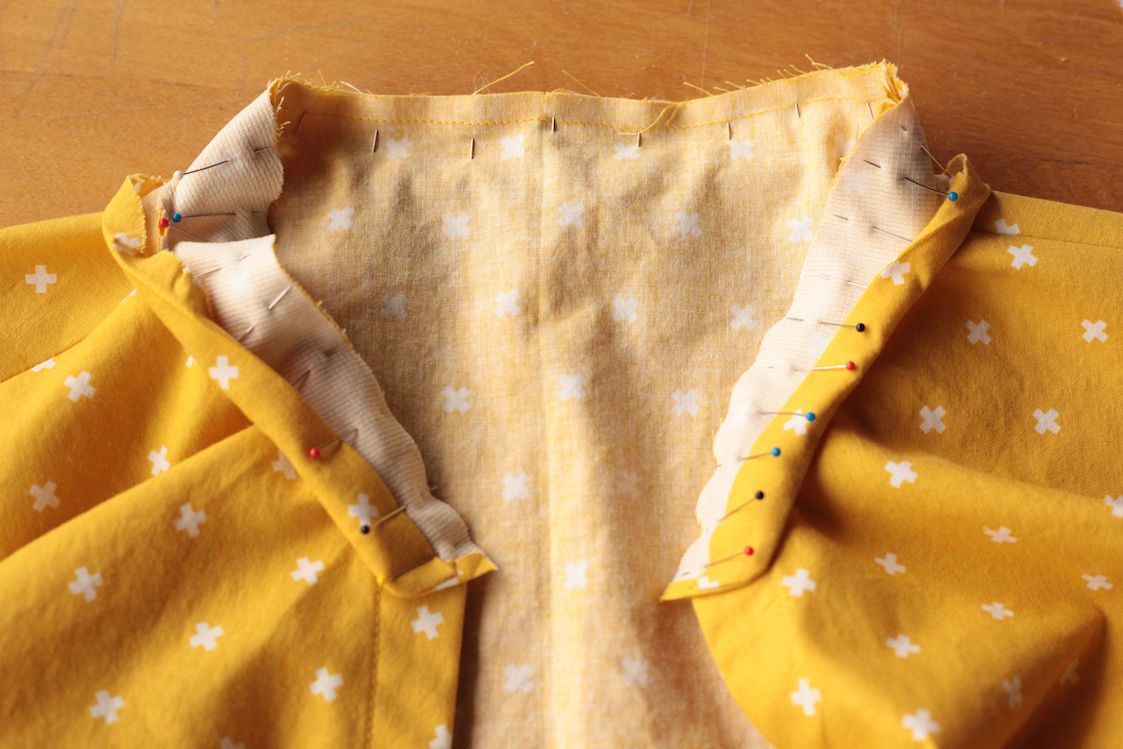
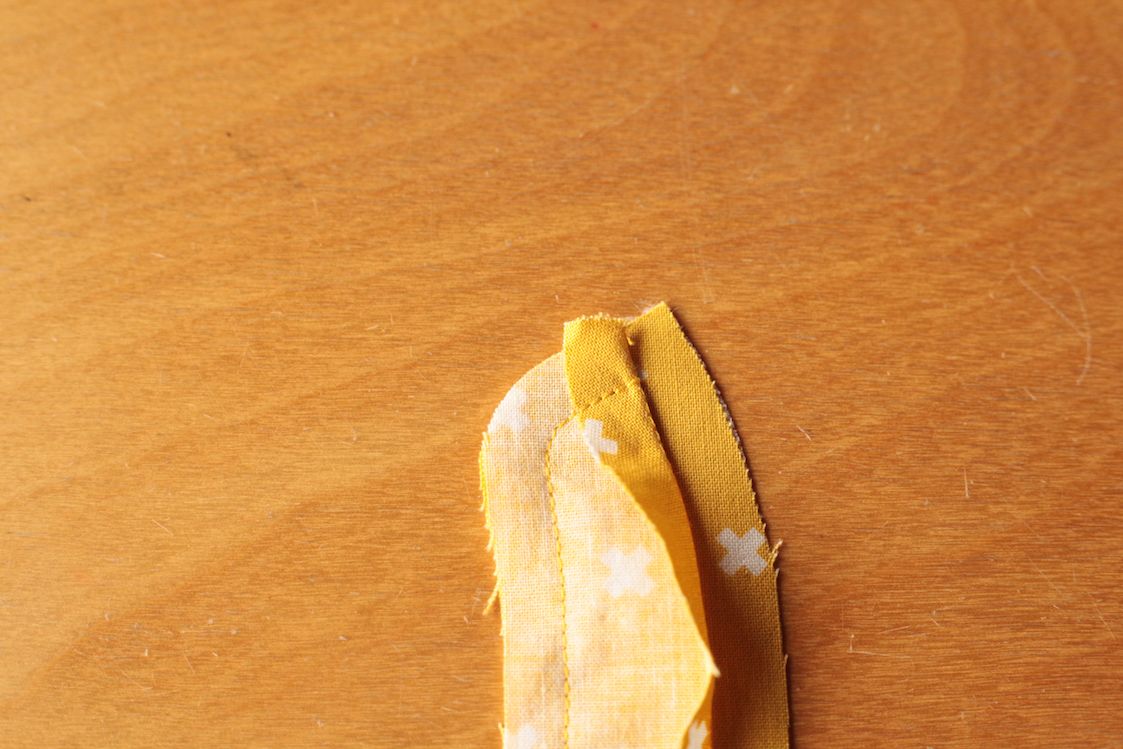
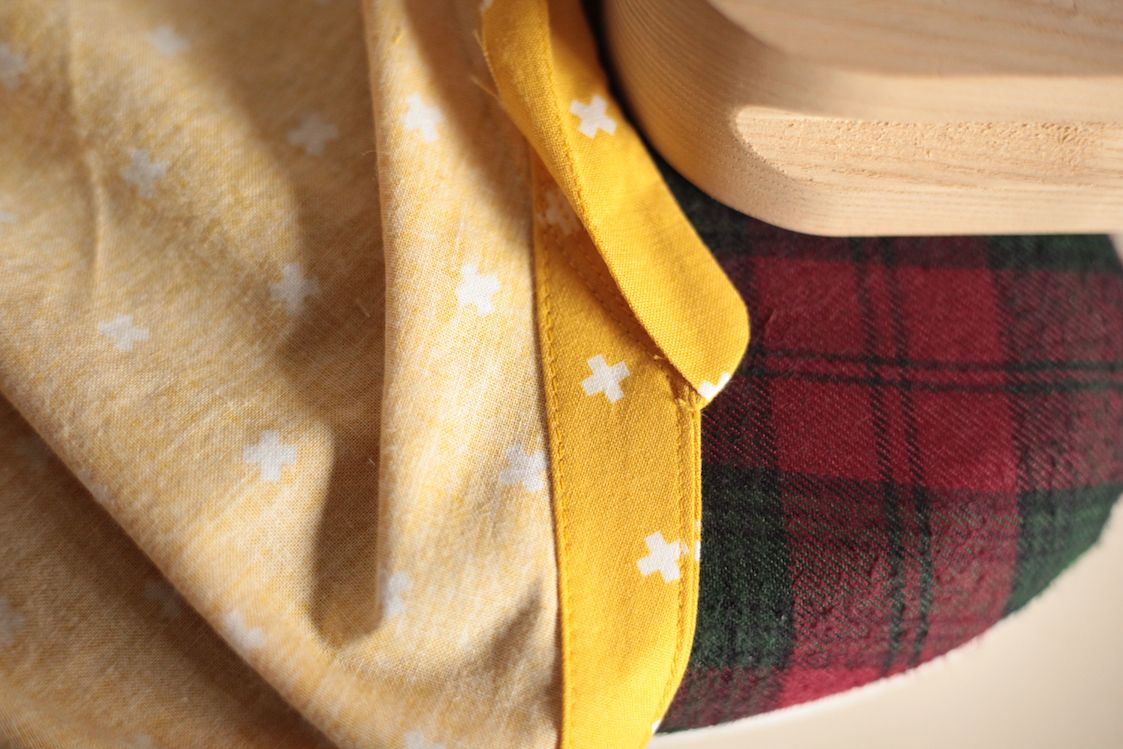
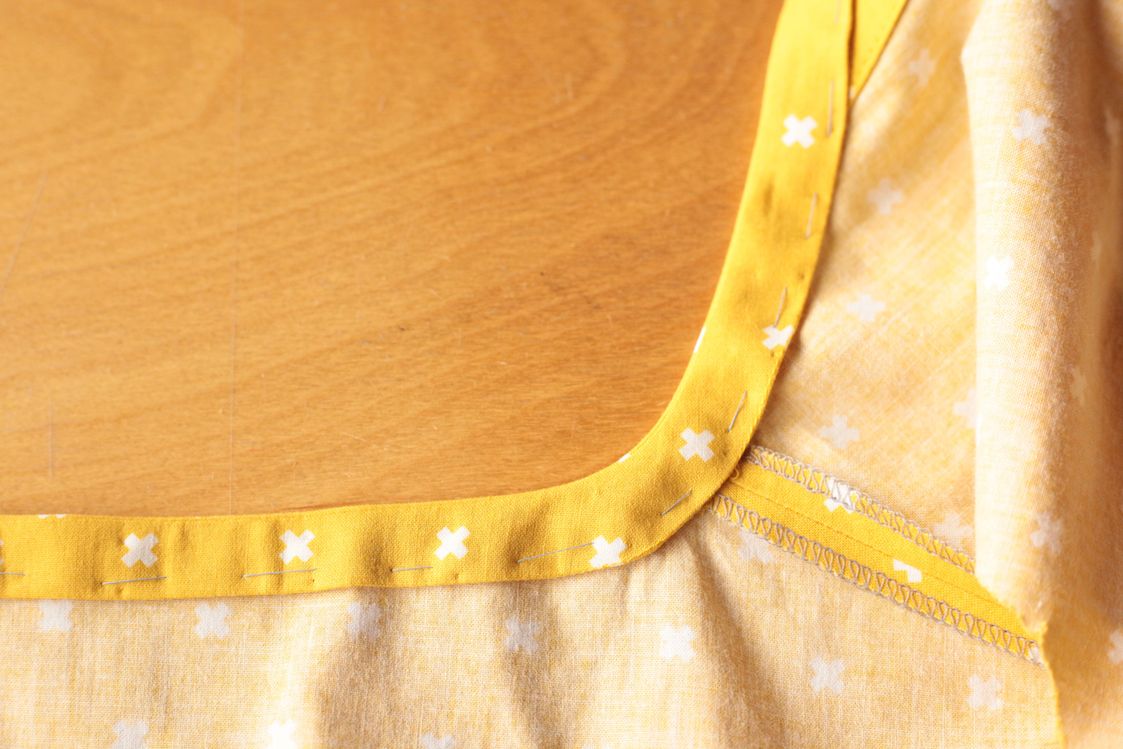
Now this part is very important on Bonn specifically. You should be matching the seam line in the front of the collar, not the cut edge. It really should be the case for whatever you are sewing anyway. Here are a couple photos to show you what I mean. By matching the seam line, the collar seam allowance actually sticks out a little. Here’s one side of it.
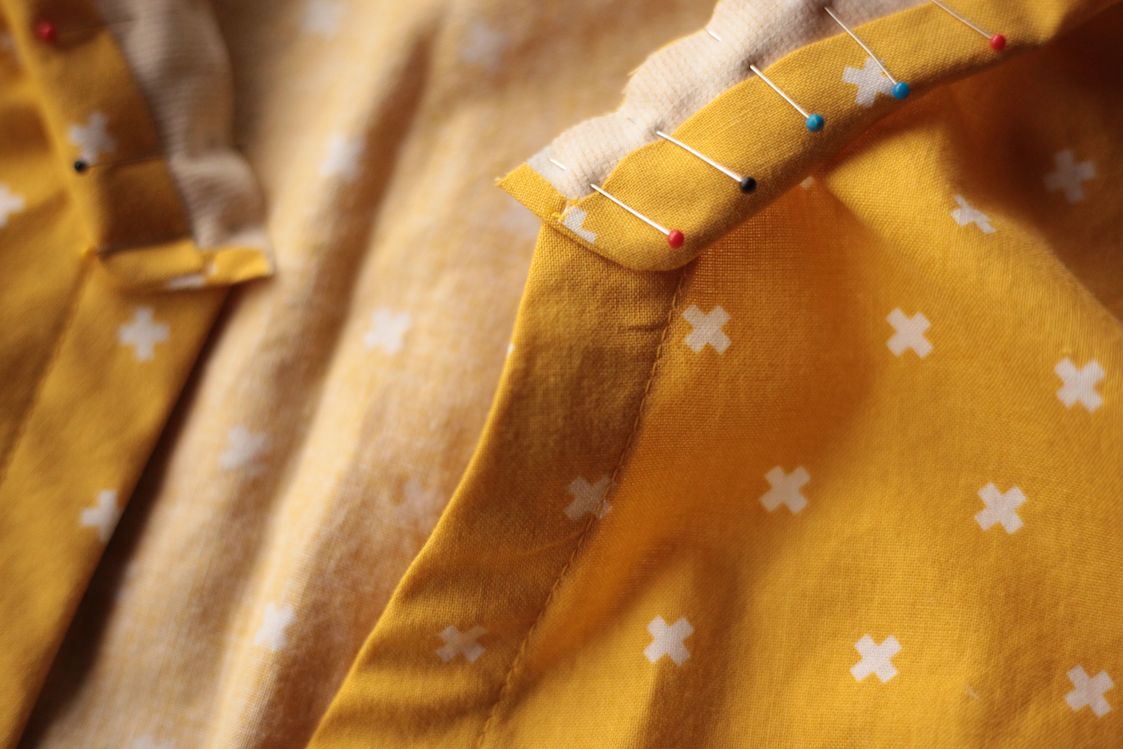
And here is the flip side of it.

Now if I pretend to have sewn it and turned the collar up, you see that the collar and the front edge are in line. I’d like to think that I don’t insist on perfection everywhere, but I do insist it here because any misalignment would be in the center front of the shirt!

Alright. Now I can stitch the collar to the neck line.
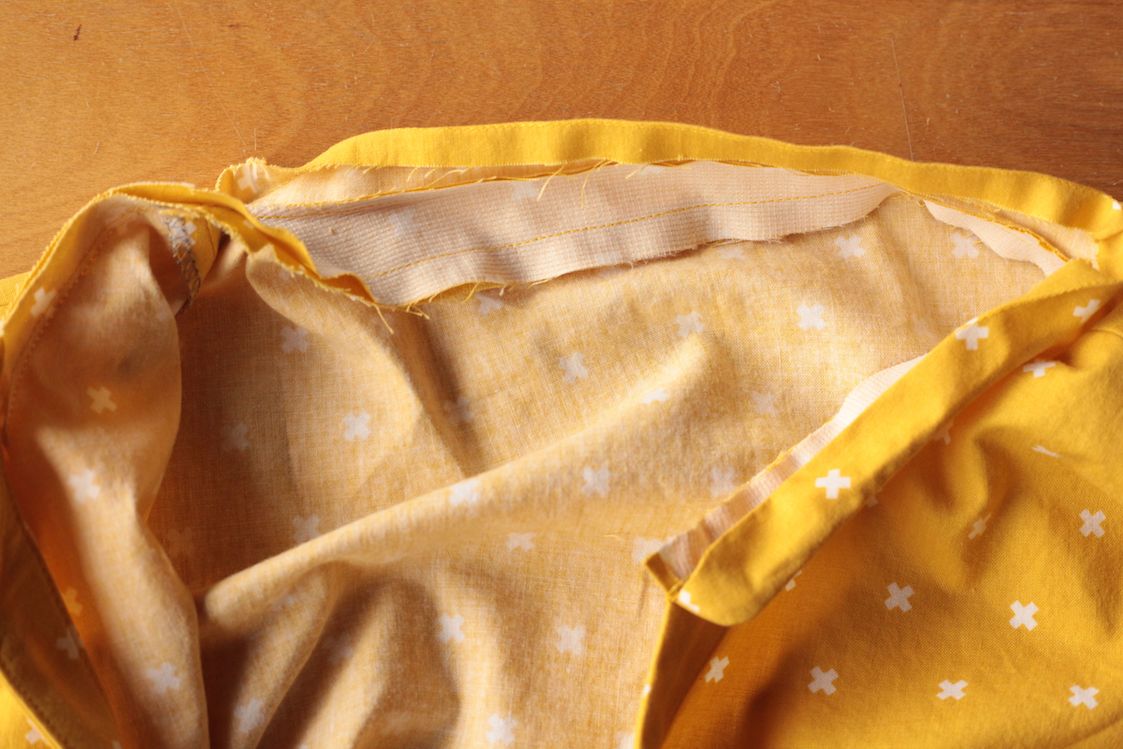
Turn up the collar and press the seam allowance toward the collar. If the collar front doesn’t look good, you can always redo just the 2″ (5 cm) of it. There’s nothing wrong with unpicking. One thing I learned over the years is that if there’s something I am not happy with, and I ignore it and keep moving to the next steps, later on it will be way harder (if not impossible) to fix. Don’t be like the regretful me. Re-doing just a tiny little bit here is not the end of the world.
I am happy with the collar front here, but I found that I had a pucker by the shoulder seam. What did I do? I unpicked it and redid that little part. Voila! Pucker be gone.
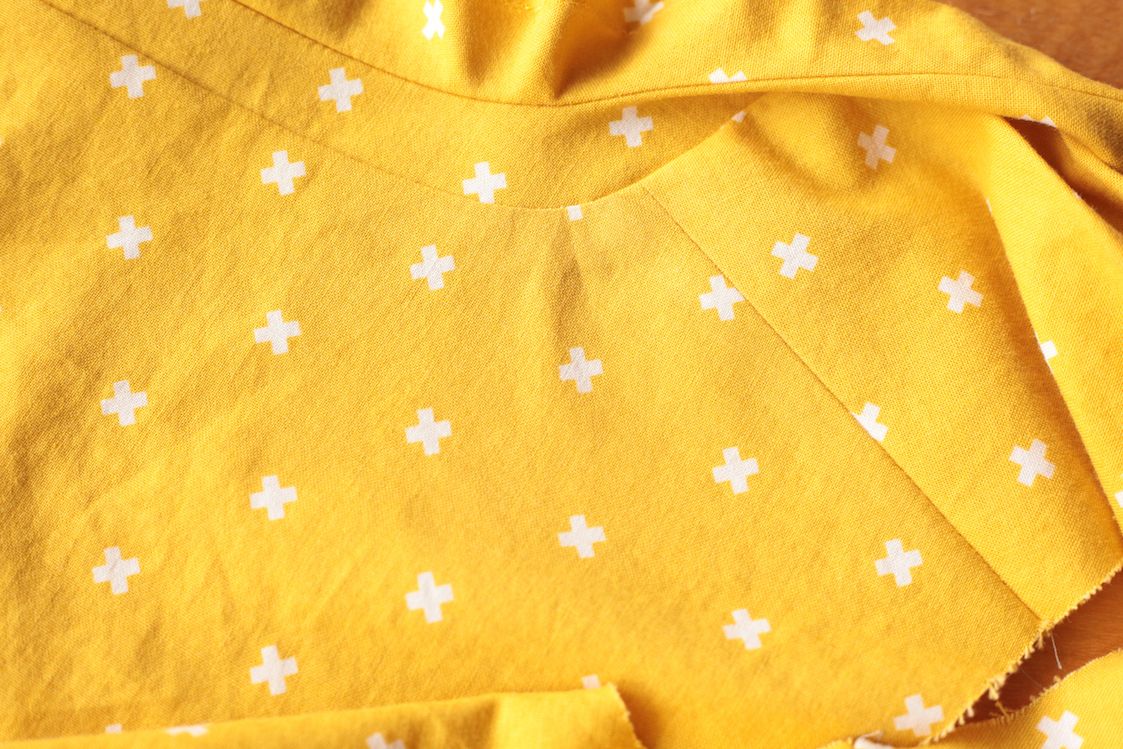
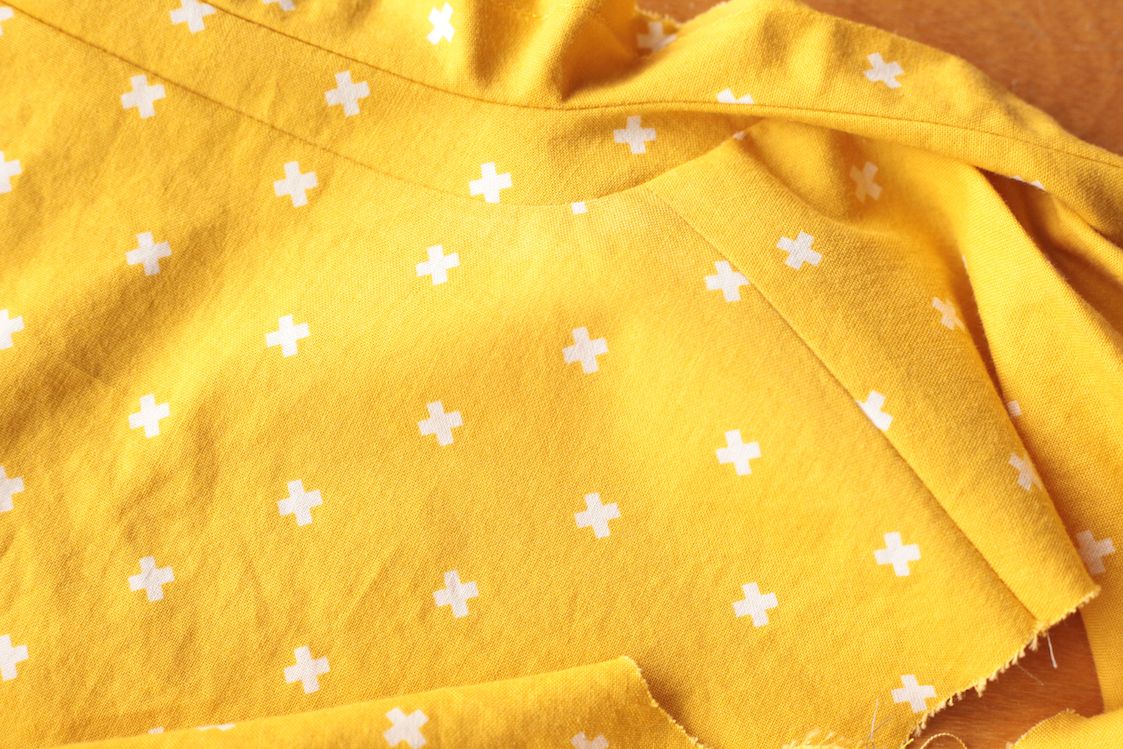
Everything looks good, so I can trim the seam allowance down.
To make it look extra good, I press the collar front really nicely. I use my clapper to press it down, so it’s seriously flat.
I can now bring the fold (the line of guiding stitch on the collar) to the stitch line of the neckline. Pin the collar closed.
I don’t want anything to shift, so I put the extra effort of basting the collar closed too.
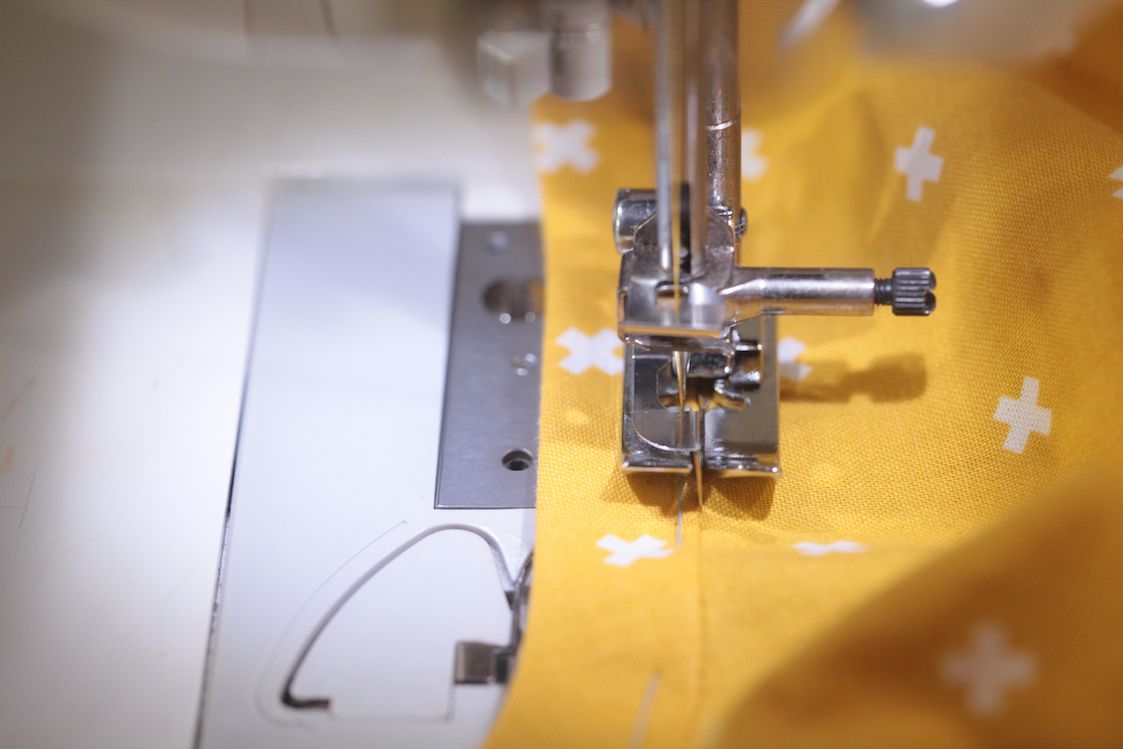
From the right side (or public side), I edge stitch through all the layers.
If you have a sharp eye and are inquisitive, looking at the photo, you might ask, “why is your shirt on the right-hand side of the pressor foot?” If you ask that question, you have my virtual pet in the shoulder. Actually the reason is that I want to use this “stitch-in-the-ditch” foot, and it can only stitch exactly on the seam line (the ditch) or slightly on the left side. So I had no choice but to put my shirt to the right-hand side. You can use whatever method you like to edge stitch though. I found my “stitch-in-the-ditch” foot gives me good result, even though I have to accommodate it a little.
Here is the collar done!
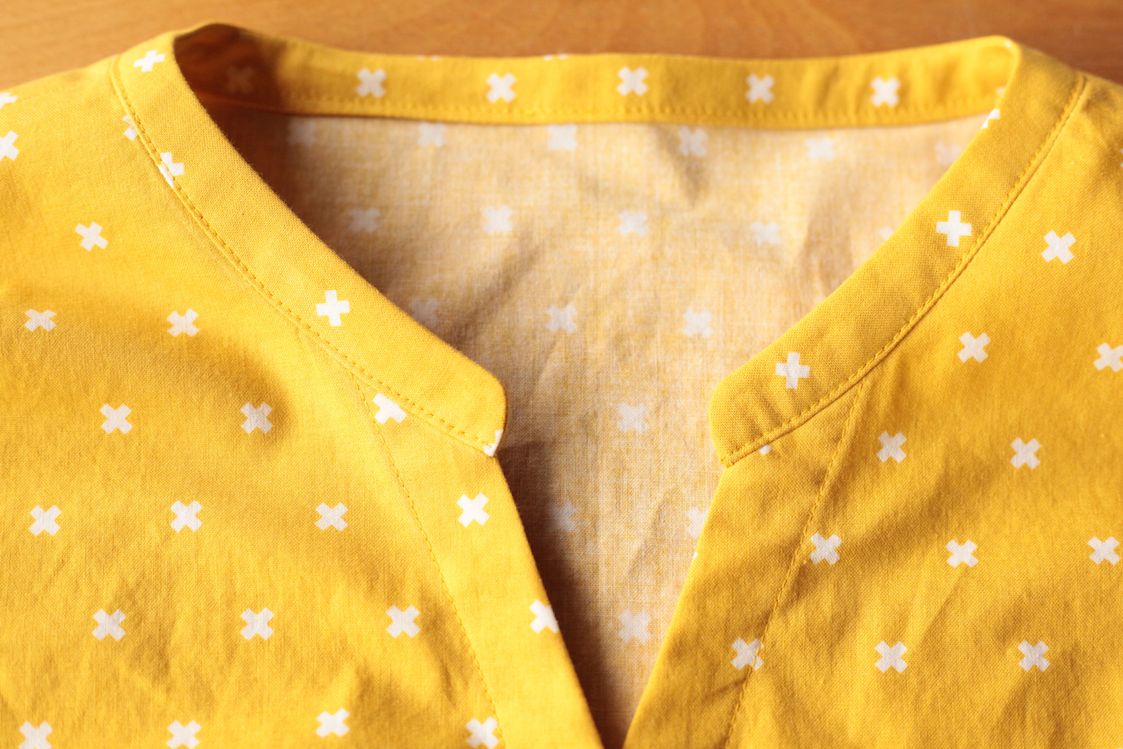
It does take some time to ensure a great result, but I think it’s worthwhile, don’t you think?
I hope this is helpful! Until next time, keep stitching!

This was amazing!!! Mine wasn’t even close but this did help a lot, yours is so beautiful!
I am glad it helped. It will get easier next time. 🙂
I should have read this before I started my Bonn shirt.
(I have a very bad habit of starting things without reading instructions first)
I have cut the collar 3 times so far, and now my neckline of the bodice is so frail :{
I read the instructions in the PDF but I didn’t quite understand the whole thing of pressing the seam allowance of the uninterfaced part of the collar and stitching the collar to the bodice, so I just winged it. (I deserve a slap on my hand)
The first time, everything went well, but the collar puckered too much, and I couldn’t make it not to.
And the last 2 times, the collar would end up 2 cm short!
Also the fabric I chose is polyester blend type and it just refuses to be pressed. I learned my lessons about that type of fabric too. If garment needs understitch/topstitch, this type of blend fabric is to be avoided.
I will try the collar again tonight following this instruction. And hope for the best..
Because so far what I made looks so fabulous!!. I want to finish it good.
Thanks for the detailed instructions!!
Good luck! Maybe you can view your previous attempts as taking 3 sewing lessons. I am sure they help you make your current one better.
Already made my second collar for one Bonn shirt (muslin) and again it’s not nice looking at the neckline. It’s came to mind yesterday to first check this tutorial, but forgot to do that. And now I know why I should have looked at this first. Going to make my third collar :-).
Thank you for this great tutorial.
thank you so much it helped me a lot in collar making . its a nice tutorial.
Do you back stitch the top stitching at the end of each collar?
Hi Peggy, I think in this case, I didn’t backstitch on the topstitching. I left the thread pretty long and used a needle to weave the ends inside the shirt.
Thanks
What an amazing tutorial with so many great photos. Very much appreciated!
Thank you, thank you! You do the best step by step tutorials. So clear and well photographed. I did know the principle but you have made it much easier to follow.
Thank you for posting these instructions! So helpful for all sorts of different types of collars. I’ve liked wearing these collars on tops – they are comfortable – not being to high and they look neat with a placket as well.
I love how this technique results in a lovely looking collar. A first for me sewing this type of collar and with a little patience it turned out Terrific. Thanks for providing great institutions.