
How to Make a Narrow Hem on Curves
There are many tutorials out there on how to create a narrow hem. The problem is they mostly demonstrate on a rectangular piece of fabric, which makes the process deceivingly easy. With a few exceptions, that usually is not how I use a narrow hem. If I need to hem something straight, a wide hem of 1″ or more (2.5 cm or more) is appropriate. A wide hem creates some weight at the bottom, and that slight extra weight helps the skirt or shirt to hang better. As a result, I still haven’t got a chance to try out the ban roll method. It certainly looks good on paper though.
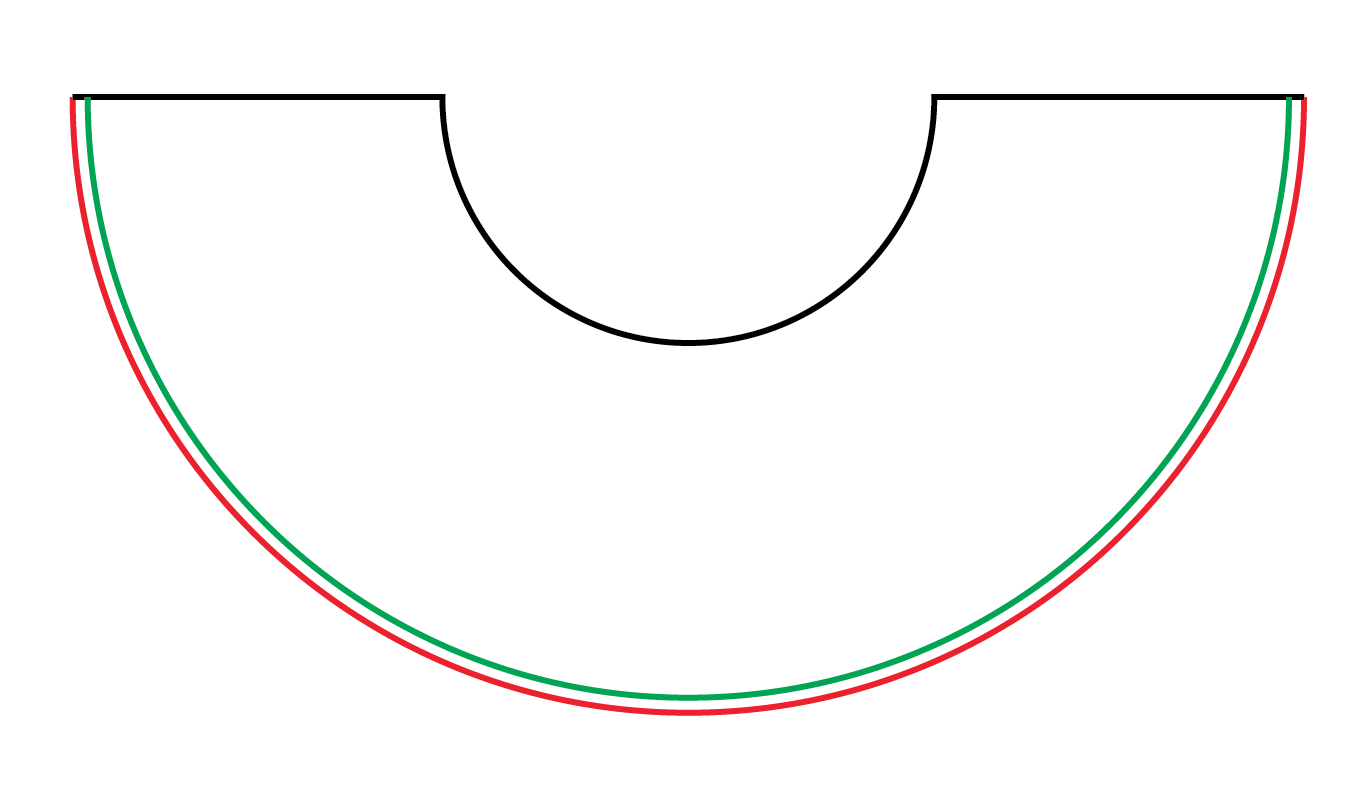
A narrow hem (or a baby hem) is appropriate when you are hemming a circle skirt or a shirt tail. Let’s say this is a circle skirt pattern, by hemming, you are folding the skirt up so that the red line gets to the green line. Even without measuring, you can tell that the red line is longer than the green line. The wider the hem, the bigger the length difference between the red and green lines.
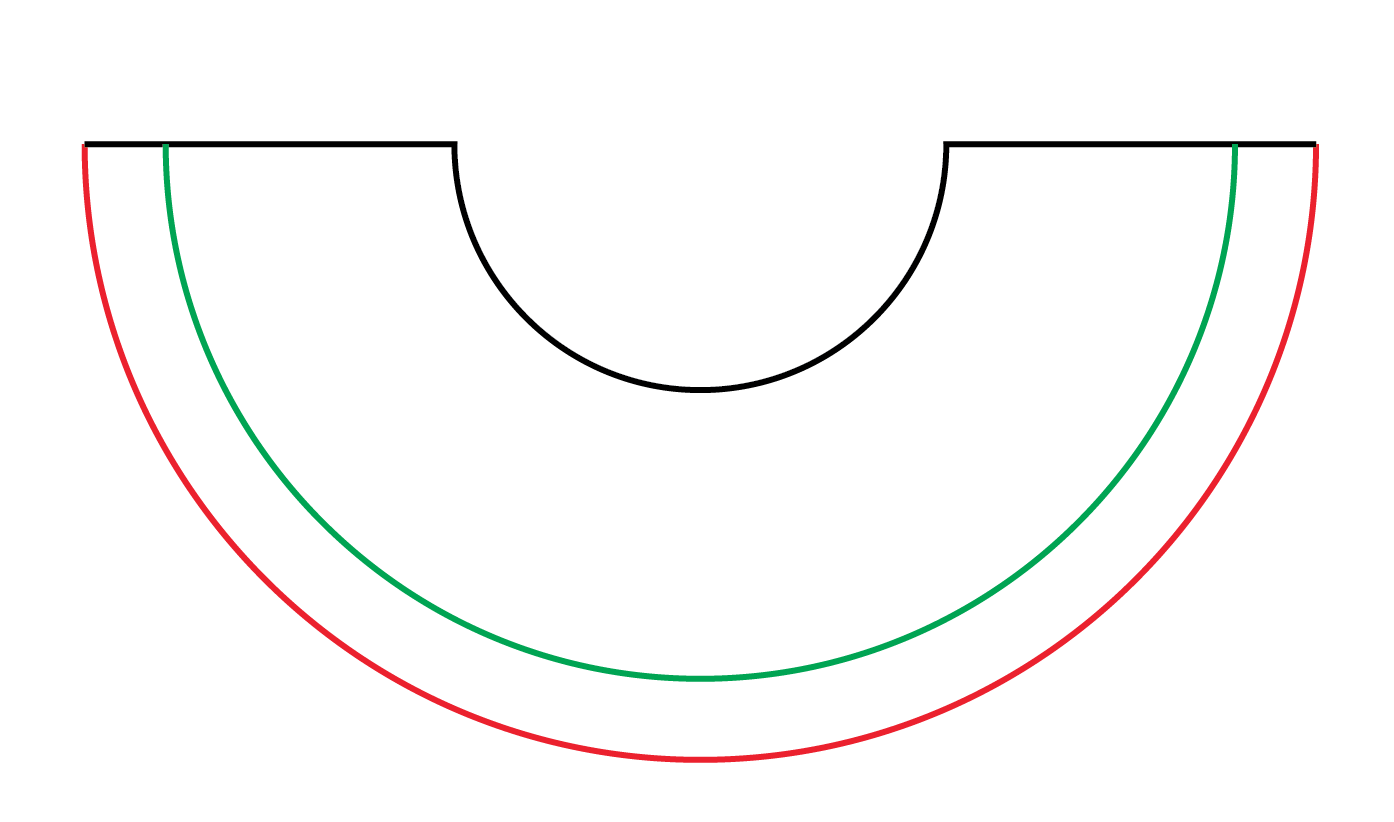
There are other methods, such as creating a hem facing, if you really want a wide hem. But that’s besides the point; don’t let me go off on a tangent. My point here is that a narrow hem is the appropriate way to hem curves. Then the red line and the green line would be more similar in length, thus you can just ease the red line a little and fit it into the green line.
To create a narrow hem, you could:
- Use a narrow hemmer foot. The problem of this option is that, even though the result could look amazing, the learning curve is very steep. You’d need to practice a lot to make the result look semi-decent.
- Use the rolled hem function of your serger. I personally am not a big fan. It reminds me of the super fast and cheap fashion. It could look good in certain applications as a decorative element, but it doesn’t convey quality in a classic shirt.
- Just wing it. Do a double fold along the curve as you stitch the hem. Unless you have super power, this method likely ends in jagged angles.
- Stay stitch along the curve, and then fold up along the stay stitch. This method could look OK, but if you want to double fold, the inside would still look like a mess.
And finally, this is my method of choice. A serger is required though. But I do have one.
I cut a portion of a shirt tail (from my Mila Shirt) for this demonstration.
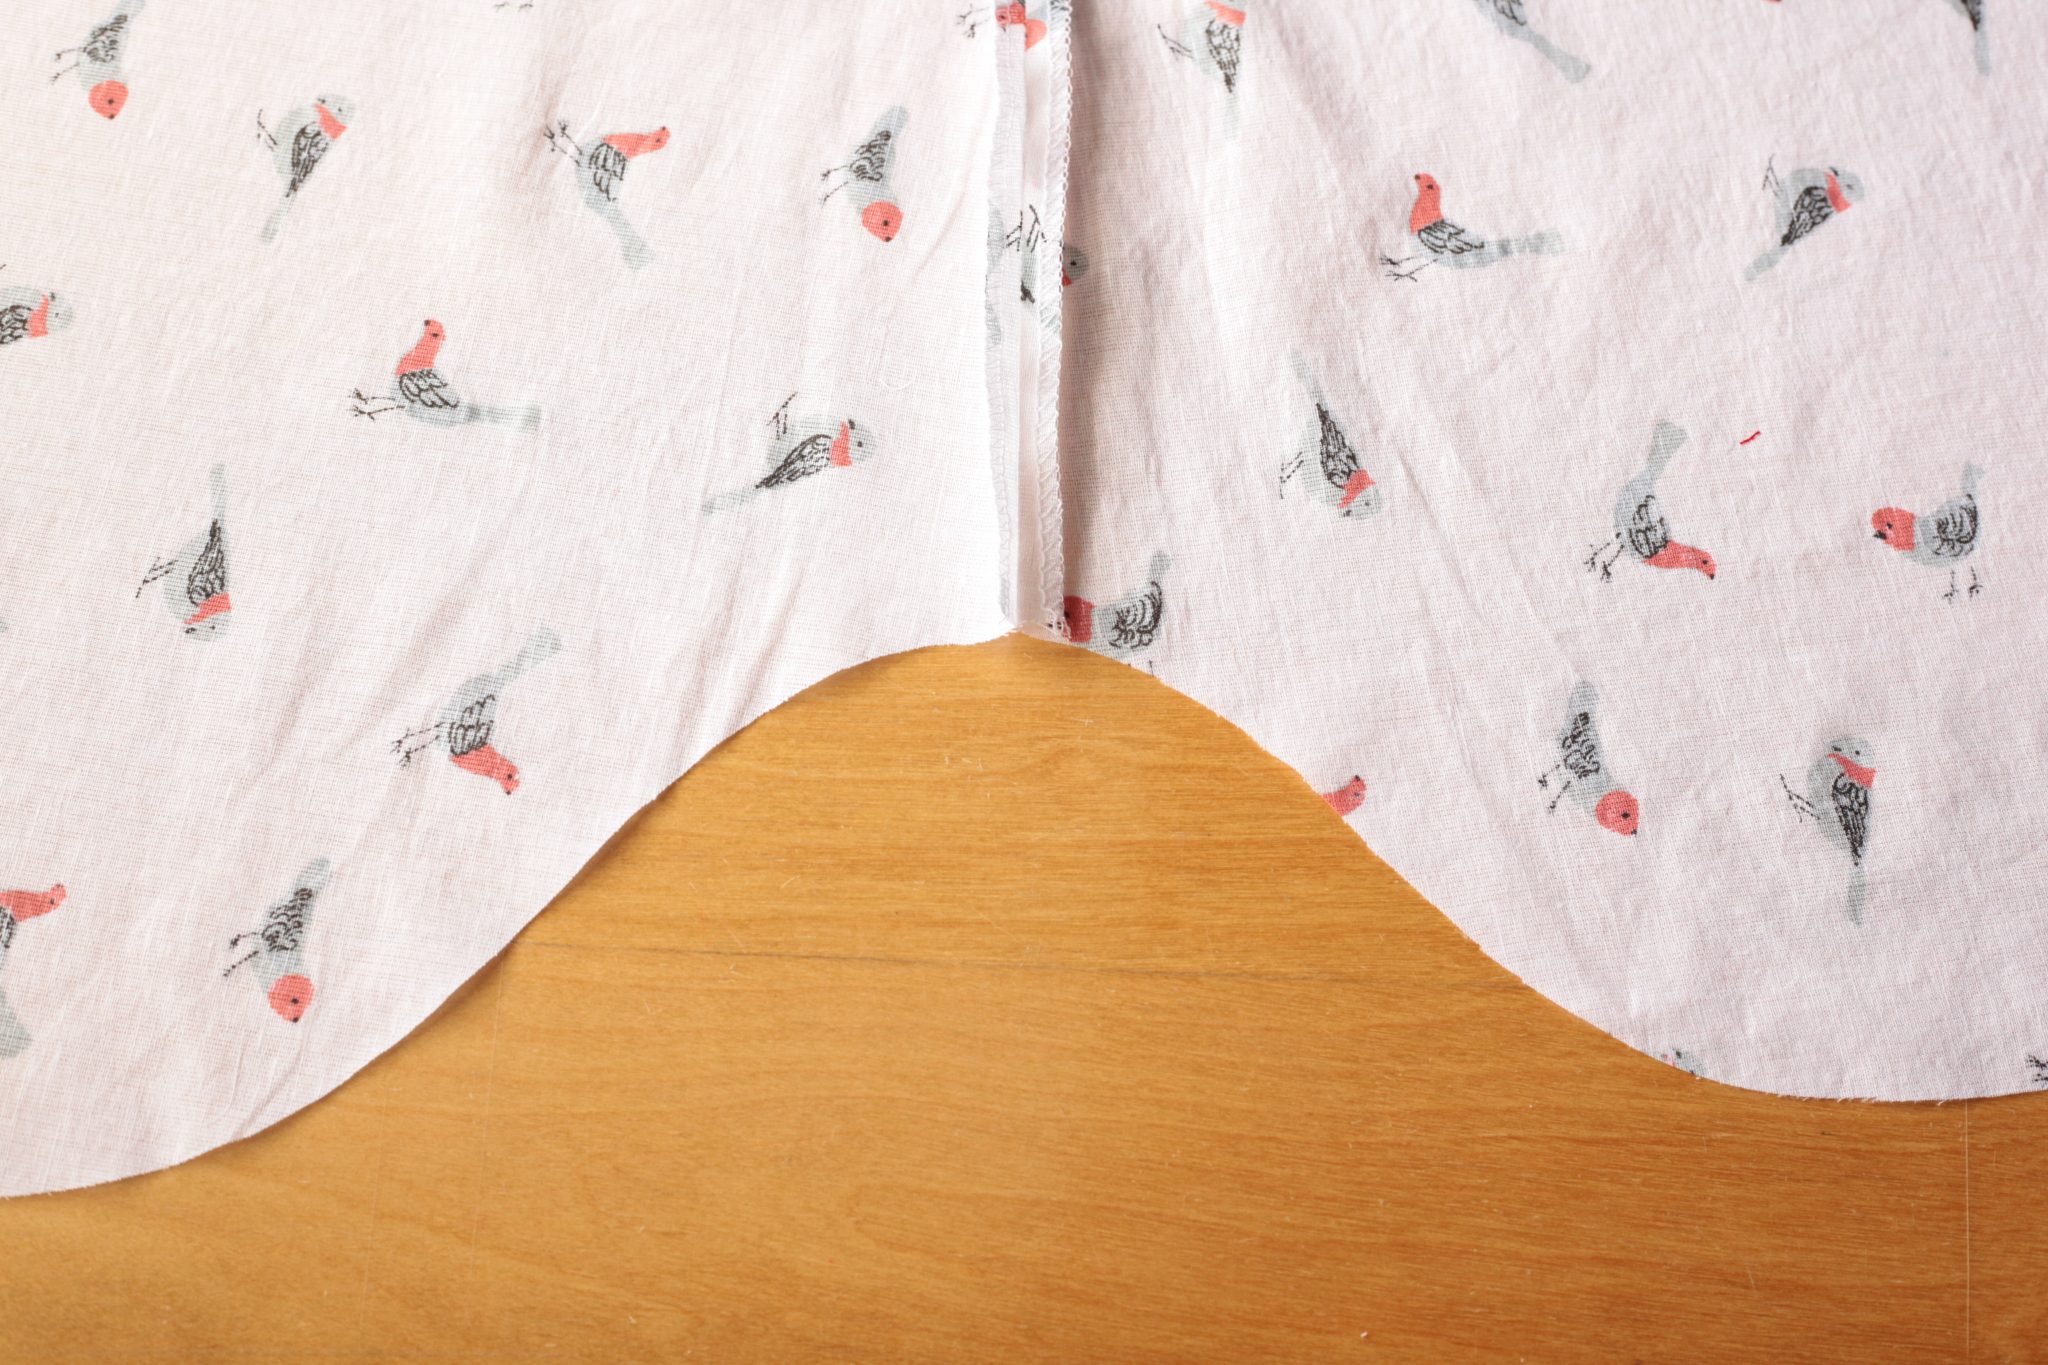
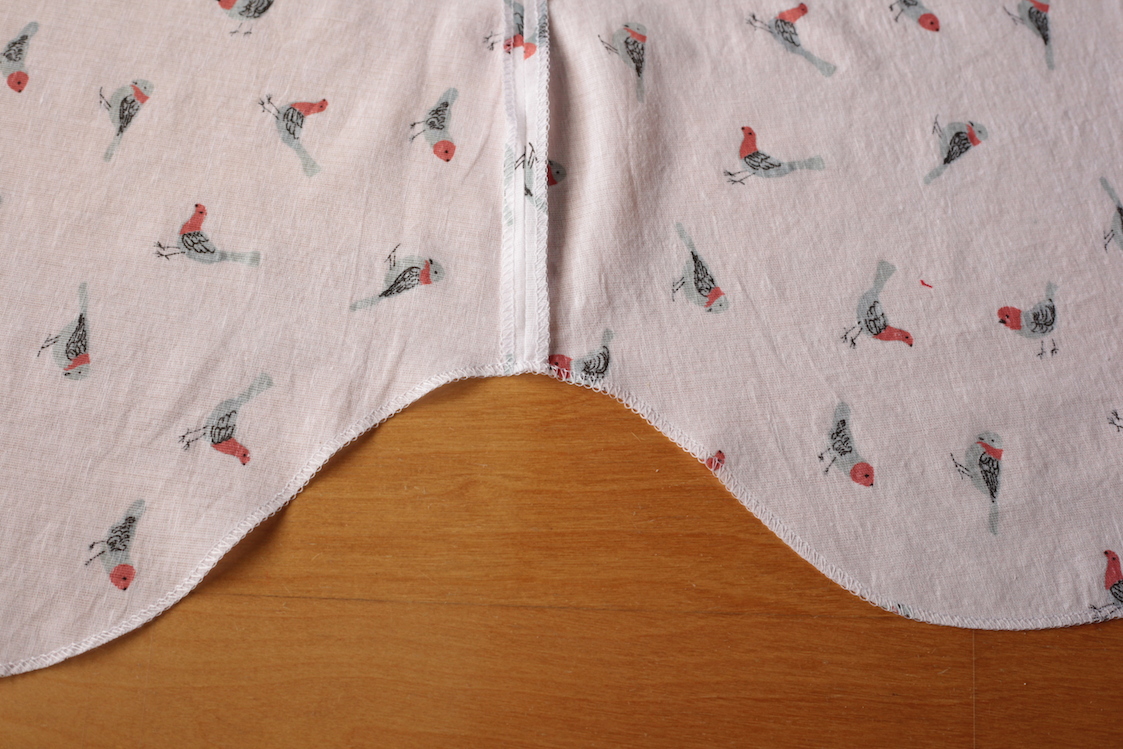
I serge the curved raw edge.
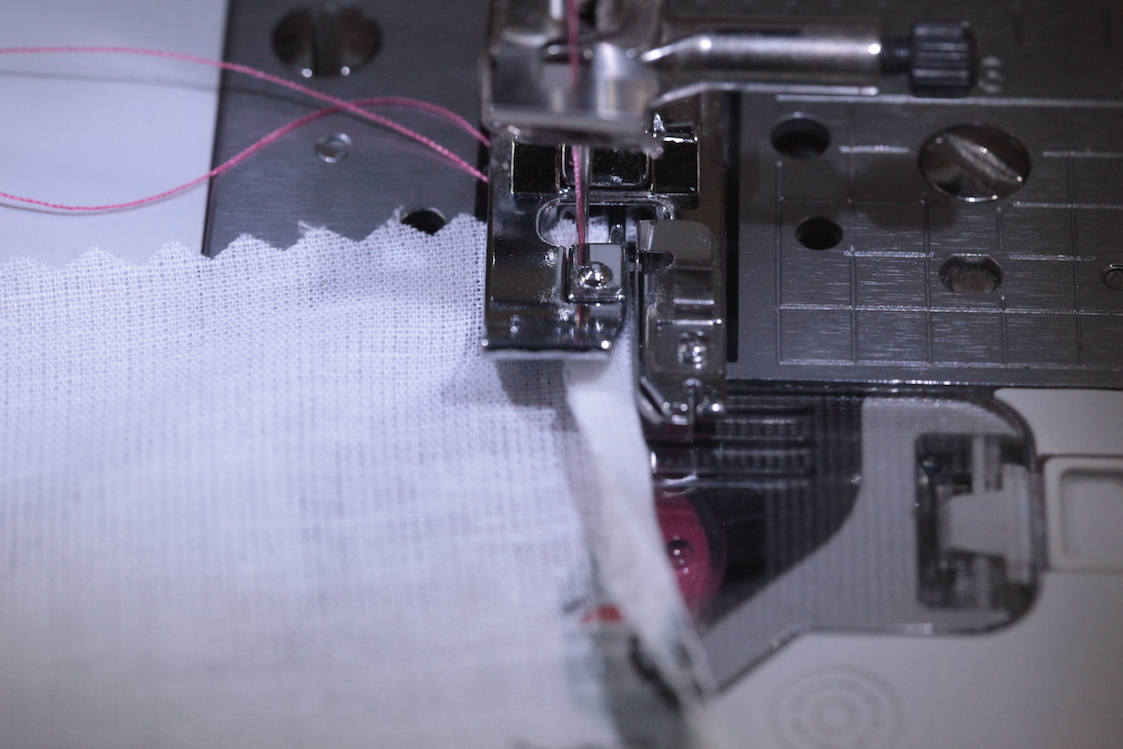
At the sewing machine, I fold the beginning of the hem. Note that I only finger press it; I don’t even need to press it with an iron. Single fold along the top of the serge stitches. Than fold again.


The serged stitches act as something I can leverage. I set my stitch length slightly longer. The default stitch length of my sewing machine is 2.5 mm, but for this, I set it to 3 mm. In fact, it’s not only this method that you should set your stitch length slightly longer. You know that annoying way the hem flip up after washing? A longer stitch length will help. I am not saying this would definitely prevent the flipping from happening, but it does help.
I start stitching on the double-folded hem.
I continue to double fold right before the needle hits the portion. As with my method of setting in sleeve, I am only focusing on the next inch (2.5 cm) or so. Don’t try to fold too much ahead of time.
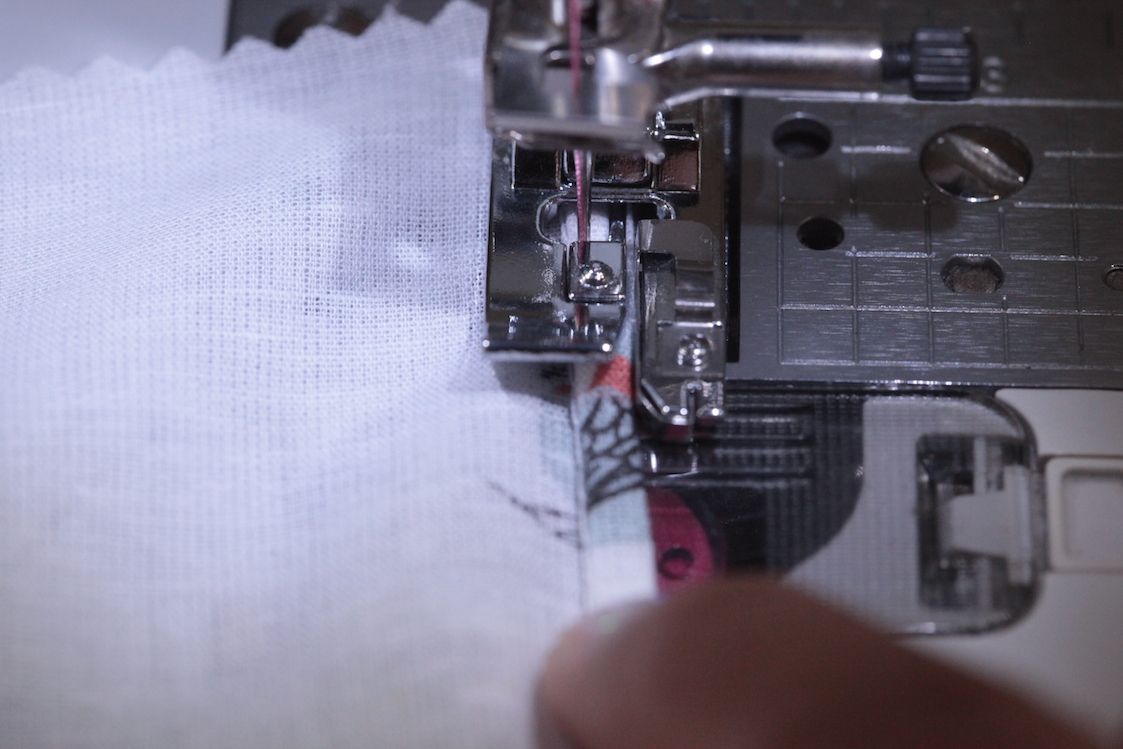
When getting to the very curvy portion, I do exactly the same: keep double folding. That’s all there is to it.
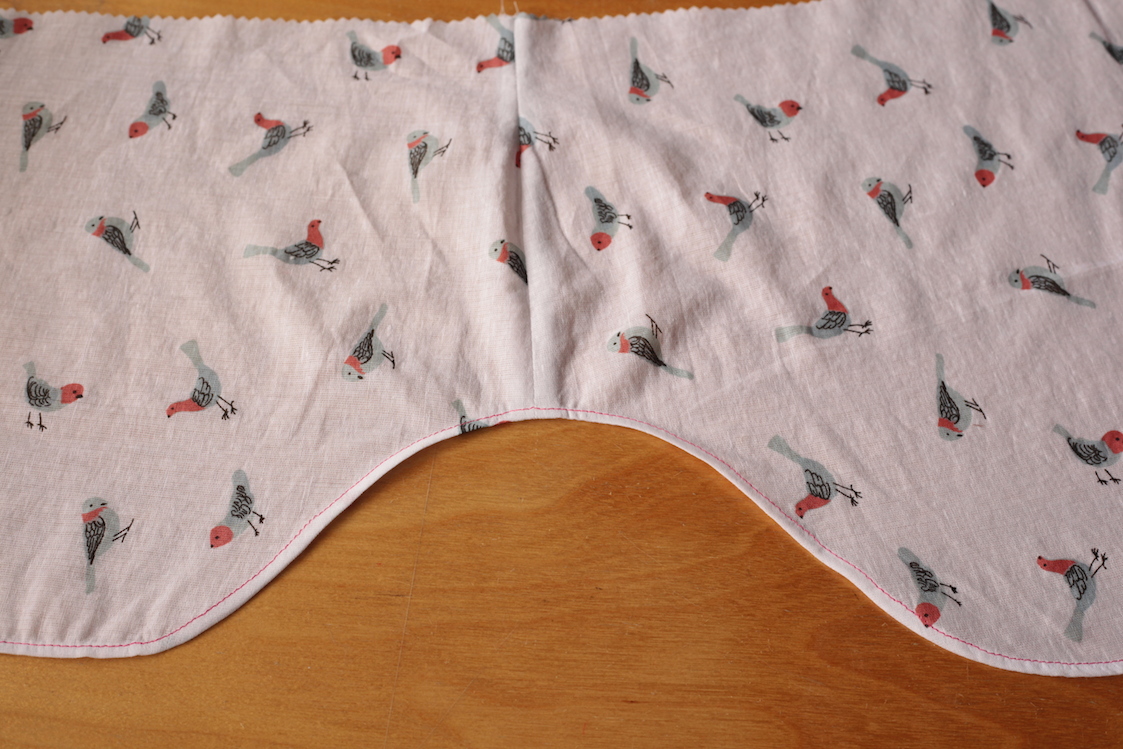
The hem is likely stretched out a bit right after stitching. So go ahead and give it a good press with lots of steam.
Here is the narrow hem from the right side.
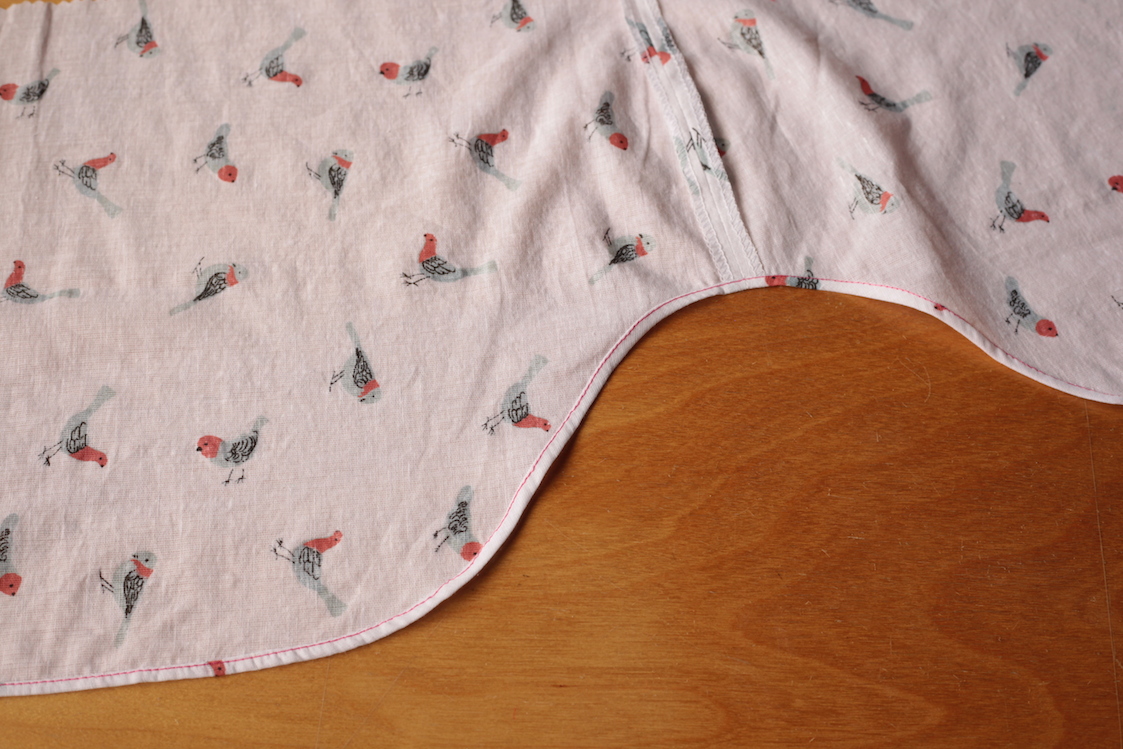
The narrow hem on the wrong side.
Give this a try and let me know how you like it!
Ready to make garments with narrow hem? Check out Chirripo Top, Crystal Cove Cami and Giverny Dress.

This curved narrow hem works great! Thanks for including the link in the Santorini pattern. And on a separate note, thanks also for telling me about all-in-one facing. I found all sorts of YouTube videos to help me through steps 24-30 of Santorini.
This is the way I’ve been doing it professionally for 30 years. Works well with almost all fabric that requires a narrow hem.
I am working on a top with a very stretchy knit. Would you recommend the above tutorial or something different with the stretchy fabric. I do not have a serger. Thank you!
Hi Kennis, I wonder if I can apply your method to a wide hem on a knit garment? I’d like to use my coverstitch for the hemming.
Thank you 🙂
If the hem is straight (not curved), then you can use a wide hem. The reason for the narrow hem is in the second and third paragraphs above (and some illustrations too). It’s not necessarily have anything to do with woven vs. knit. So you certainly can wide hem on knit if the hemline is appropriate.
Kennis – do you know what a gift you are to the sewing community? Bottom line is that that narrow hems are hard. Just try using the narrow hem foot! This about set me into fits of insanity. I like your method and I’m super excited to try it. It will require patience. Something that I sorely lack. Only issues I can see from my perspective is that my serger, no matter how hard I try does not easily go around curves and hold the stiches on the raw edge.
I appreciate you sooooo much!
I have been doing a similar method without having a serger. I just run a line of stitching about 1/4 inch in from the edge. I then finger press along that line of stitching and fold and sew as you did.
I used this method on the sheer overlay of the wrap-type dress for my daughter’s grad. There was a ruffle all along the edge … took forever but looked beautiful when done.
What foot do you have o your sewing machine?
Just a regular foot, not any special one.
The foot looks like it’s got a guide on the right side. I’ll have to look through mine and see if I have something comparable.
I just found and tried your serger method, after trying #1 unsuccessfully on some slippery rayon. Your way is brilliant! It was so fast and easy to do, and looks great! Thank you for sharing! ❤️
So glad your tutorial came up in my Google search. Did my first narrow curved hem tonight by your method and it’s brilliant. Thank you so much for the information.
Glad to hear Nola!
Whew. Just finished my hem by your instructions #4.
It looks great, only one little boo-boo on the inside and not at all noticeable. It was hard, for sure! It was just like yours, a swoopy hem but I’m so big mine was about 500 miles around! Twice! Once for the stay stitching, then for the hem stitch.
I tried to be patient but I’m a “want it done yesterday” sewer and just tried to slow down. Thank you so much for your great tutorial esp. the photos. Donna
you are welcome Donna. ?
I’m going to try this too on my next narrow hem! On my last one I did the bias tape finish but it was super fiddly 🙂
I found a video on youtube describing how putting fusible thread in your lower looper and ironing it up also helps with keeping that first turn stable before turning it a second time 🙂 Might be worth a try 🙂
Great idea – I am going to try it on my next shirttail hem!
If you want the edge to cup in on the outside curves, but don’t have differential feed, or know how to adjust, just put your hand behind the serger presser foot and gently press as the fabric feeds through, the curve will come out perfectly eased in
Thanks for the tip! 🙂
It’s great to know that I’m not the only one who can’t seem to grip the “easiness” of the rolled hem foot! UGH! It looks really easy in the How-to videos.
I am absolutely trying this! Thanks for the tutorial?
Normal (not messing with the differential) feed? I’ve never tried this method, but I will. Certainly my rolled hem foot and I have never become best friends, LOL!
Yes, Angela, I use “normal” differential feed on the serger.
I like the look of that! I usually use bias for shirts and serger only folded once for circle skirts. But this looks much better! I recently bought the Mila (and Bonn) patterns just waiting for the kids to go back to school next week. Thanks for sharing!
A narrow bias tape can be quite pretty too! 🙂