
Liana Jeans Sew Along: Day 1 – Intro, Materials and Supplies
Today we are officially starting our Liana Stretch Jeans sewalong! There are usually way more tips I want to share than what’s put in the instructions, but including everything would make the instructions too long. This is a great forum for me to share them with you.
With that said, the sewalong is not meant to substitute the instructions; you should still understand the basic instructions that come with the pattern. I will change the order a little for the purpose of fitting, but I will tell you when we get to that part.
Today’s topic is materials and supplies.
Denim Fabric
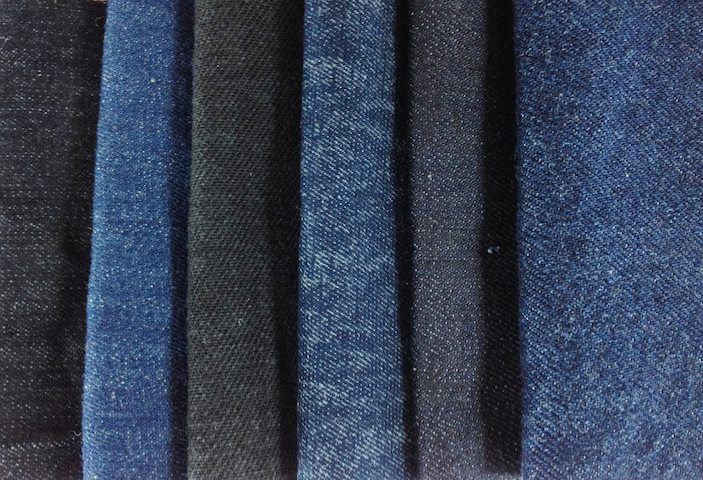
Stretch Denim Fabric
The first and foremost material of the stretch jeans is of course denim fabric.
Fabric Stretch
In the “pre-post” a couple days ago, I mentioned how to determine the percentage of stretch for your fabric.
The stretch of your fabric is a critical factor in determining the fit of your jeans. The Liana Stretch Jeans were designed to use bottom weight fabric with 20% to 25% stretch. If you follow the size chart but use a less stretchy fabric, then you might not be able to pull up or zip up your jeans. Conversely, if you use a more stretchy fabric, your jeans might fall off you.
Usually fabric shops only list the amount of Lycra (spandex or elastane) in the content, but not the amount of stretch. I found that denim fabric with 2% to 3% of Lycra might result in 20% to 25% stretch, but that is not always the case. The truest way to tell the stretch of the fabric is to do the stretch test. If you buy online, you should ask before making your purchase.
With that said, when you create a test garment for fitting (which we will do in the sewalong), you need to use a fabric with the same amount of stretch. When you use a non-stretchy/less-stretchy/more-stretchy fabric to get the best fit, you would find that your “real fabric” would fit very differently. Ideally, you use the same fabric to make your test garment, but understandably, it is more expensive to use the “real fabric”. I’d settle for a fabric that has the same percentage of stretch, but know that you may have to make some minor adjustment when you get to your real jeans.
Allow me to make a note on the term “muslin”. When people say “I am making a muslin for my jeans,” they don’t necessarily mean that they are using a non-stretch, plain weave, cotton fabric (that is known as muslin). Most of the time, they only mean, “I am making a test version of my jeans”, and they could be using any kind of fabric for the test. So please don’t misunderstand they are using the muslin fabric to test the fit of their stretch jeans.
Another note about stretch denim is the direction of stretch. Most of the time, you will find that stretch denim only has a width-wise stretch, not a length-wise stretch. This is to be expected. If the fabric has a length-wise stretch as well, then it’s going to the “jeggings” (jeans leggings) territory, which, by itself, has nothing wrong with it. You just have to note that you are able to make your jeans way more fitted when the fabric has length-wise and width-wise stretch. Since the more typical stretch jeans only has the width-wise stretch, you will need some room in order to accommodate your movement, especially when it comes to vertically-oriented movement, such as sitting and bending your knees. Many jeans don’t take this into account and that’s why you see the seat and the knees are torn. It happens to me all the time; the usual reason of death of my store-bought jeans is when I get a torn seat.
Fabric Weight
We have a bit more leeway when it comes to the weight of the denim fabric. You can sew your jeans with a 7 to 12 oz (237 to 406 gsm) bottom weight fabric (it means that your fabric should weigh 7 to 12 ounce per square yard, or 237 to 406 gram per square meter). Anything less than 7 oz would feel pretty flimsy as jeans or pants. Also, you’d find that with thin fabric, lumps and bumps of the body would be more visible. Conversely, you might have a hard time getting your sewing machine to go over a fabric heavier than 12 oz, especially across seam intersections. Some fabric stores are able to tell you the weight of the fabric, or if the fabric is already in your stash, then you could very well weigh it yourself. But you could also estimate by feeling. Does it feel like a substantial enough fabric to be pants? Is it similar to some jeans that I own? Would my sewing machine choke on 8 layers of this fabric?
Fabric Preparation
I wash my denim fabric at least 2 times, if not 3 times. First of all, the sizing of the fabric (a protective coating of the yarns for efficient manufacturing of the fabric) can be washed off. Secondly, the loose dye of the fabric can be washed off (instead of rubbing off all over your other clothing and bags). In fact, after I wash my denim fabric the third time, I can still see a ring of blue dye in my washer (I have a top-loading, white washer). And finally, only after you wash your fabric that you can see the true color and feel the true texture of your fabric.
There are so many characteristic of denim fabric, and I don’t claim to be the expert of every aspect. You can certainly research more if you want to know, for example, the difference between right-hand twill and broken twill, but they don’t necessarily affect how you’d create your jeans.
I have been talking about denim only here, but you certainly can use other twill or corduroy fabric with the required stretch and weight. In my last post, I mention several places that you can purchase your denim (or other fabric), so you can go check them out.
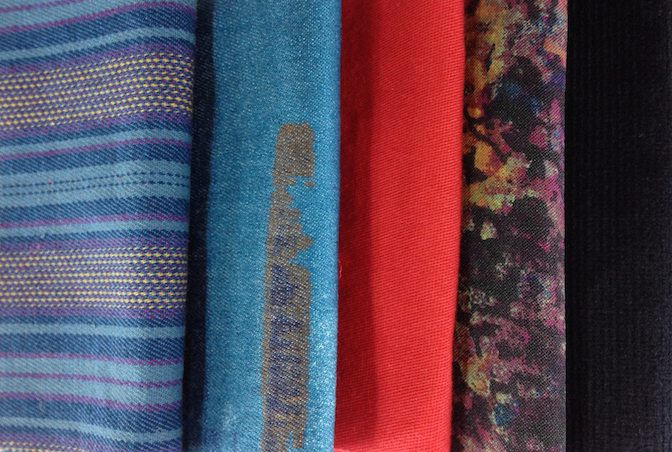
Stretch twill & corduroy can be used too.
Lining Fabric
We will use lining fabric to create the pocket bags. You will find that the pockets of the Liana Stretch Jeans also serve as the “pocket stay”, which means they extend to the center front and are supposed to trim the tummy a bit.
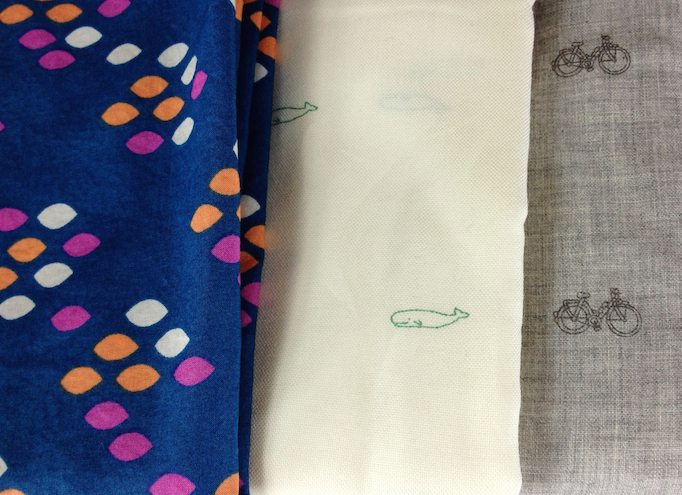
Quilting cotton as lining fabric (pocket bags)
Quilting cotton is great for this purpose. Quilting cotton is usually 100% cotton with no Lycra (spandex or elastane); however, it does have minimal mechanical stretch width-wise, which I found to be comfortable for this purpose. You see that the grain lines of the pockets run up and down the pattern pieces to take advantage of the mechanical stretch property.
Several weeks ago I was in Nordstrom (a big department store in the US) and found a pair of jeans with the pocket stay. They used a stretchy fabric for the pocket stay, but the stretch was very supportive, much like what you would find in bras. If you have such fabric, feel free to use it, but that is probably harder to find than quilting cotton, which might already in your stash or in your scrap pile.
Another advantage of quilting cotton is that you can find many cute prints. Note that, per the instructions, the pretty side (a.k.a. the right side) of the quilting cotton will be facing you. In other words, when you take off the jeans, you can see the cute print. I think it makes more sense for you to see the pretty side instead of having it hidden inside (your hands won’t see or appreciate the cute print).
You may notice that I don’t have use any interfacing on the jeans. Typically, I do put fusible interfacing on the front fly to stabilize it, but in this case, the lining helps with the stabilization. Moreover, if you take apart a pair of store-bought jeans, you will see that they do not include any interfacing, so I want my jeans to be as store-bought like as possible (from a construction stand-point).
Jeans/Metal Zipper
You can buy jean or metal zipper in any sewing stores. The pattern calls for a 6” (15 cm) zipper, but you will actually only need 4”. Why call for a longer zipper? The reason is that we can get the zipper pull out of the way when installing the zipper, which makes the process much easier. However, the downside is that you will have to shorten the zipper. I will be using the shorter zipper just because I have some on hand, but I also go over how to shorten the zipper later in the sewalong.
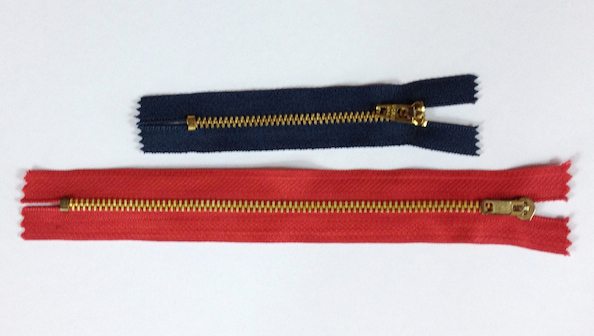
Jeans/metal zipper
There is a little trick about zipper that I learned from my mom when I was little. New zippers are hard to pull up and down; you can rub beeswax along the zipper teeth (front and back) and you will find it much easier to zip.
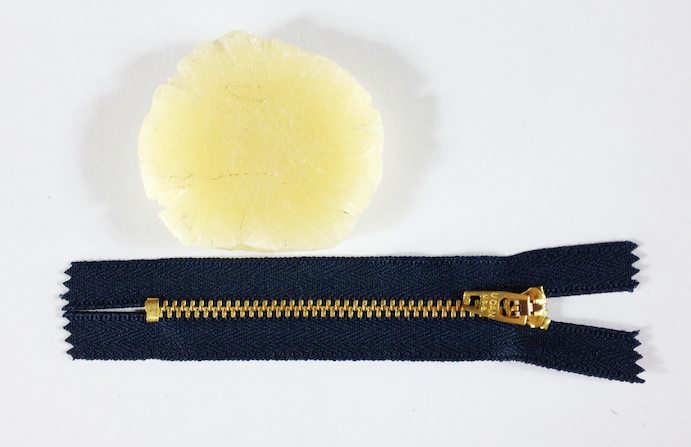
Use beeswax to smooth zipper teeth
Jeans Button
You can find jeans button at many places too. I found mine online because I want the sturdy, all-metal ones that are harder to find in the local stores. There are also many designs and colors to choose from online. The downside is that usually you have to buy many online (and I am not planning to make 100 pair of jeans). One place I found is Taylor Tailor, where you can just buy a few. In my last post, I posted the discount code, so check it out. You can also find some on eBay.
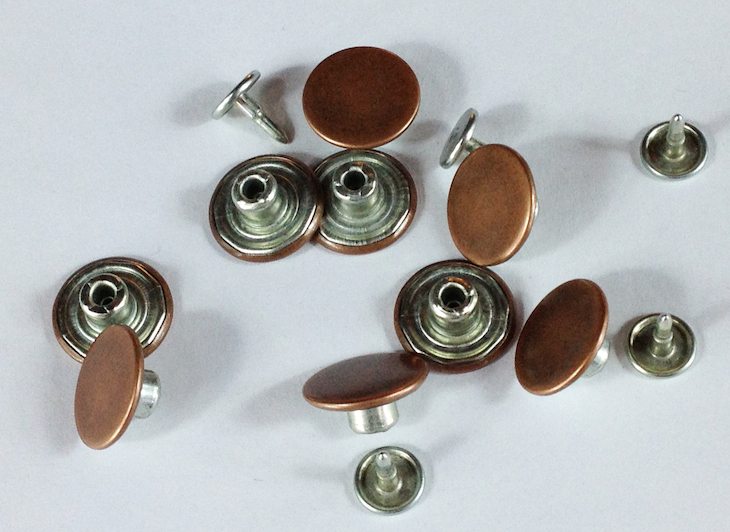
Jeans buttons
The fly closure of the jeans requires one button, but if you decide to make the pocket flaps, you will need two more buttons.
Thread
You will need thread to construct your jeans. I use my regular Gütermann 100% polyester or Coats & Clark Dual Duty XP 100% polyester thread, which I use on all my other sewing projects.

Construction and topstitching thread
Besides construction thread, you will also need topstitching thread. You have some choices:
- Two strands of regular 100% polyester thread
- Jeans topstitching thread
- Any other thicker thread, such as buttonhole or upholstery thread
My sewing machine is pretty picky when it comes to the type of thread to use, and yours may like one over another too. The key is to test. We will cover more about topstitching in a later post.
Rivets (Optional)
Rivets are optional for the Liana Stretch Jeans. They do strengthen the pockets openings, but if you observe ready-to-wear jeans, they are not always used. While they do serve a function, in my mind they are more decorative. You could also use bar tacks for strengthening too. I don’t wear my jeans to pan for gold in the river, so the bar tacks are usually sufficient, but I do use the rivets in several pairs of my jeans.
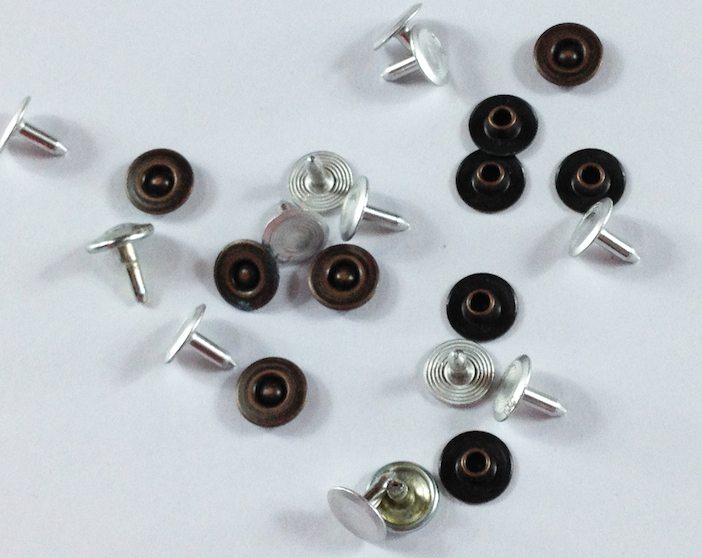
Jeans rivets
The rivets I use have hollow poles. I found that when I cut the pole with a cuter, the end of the pole gets flat, so I’ll have to reshape them a bit to make them round again. Some of the rivet has solid poles, so that is less so of a problem.
Be sure to get the kind of rivets that only need a hammer to install. There are others out there, such as nipple-shaped or flat ones, that you will need a press to install. Also, you will likely have to shorten the rivet pole, so be sure you have a nipper on hand. I also use an awl to make a hole before inserting the rivet; if you don’t have one, you can use a nail too.
The pattern calls for 9 rivets if you choose to use them: 2 for each front pocket, 2 or each back pocket and 1 for the coin pocket. You could choose to install rivets on both corners for the coin pocket too; it’s more a style choice.
Stabilizer (Optional)
Because of the stretch of the fabric, you will find it much easier to topstitch your back pocket if you back them up with some stabilizer, especially if you want some fancy design. My favorite is a water-soluble stabilizer, but you could also use a tear-away or a cut-away one.
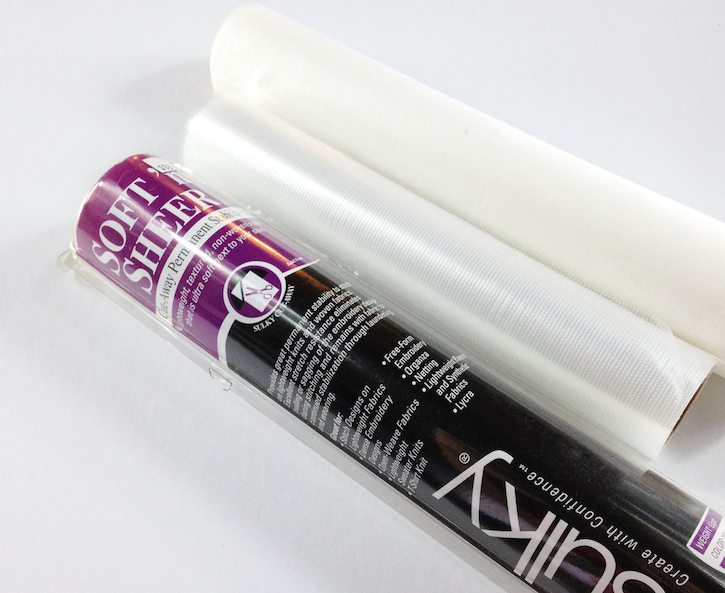
Soluble, tear-away and cut-away stabilizer
Twill Tape
The twill tape will be used to stabilize the waist. Because these are stretch jeans, if you don’t stabilize the waist, it may expand and fall. None of us wants that to happen. The stretching will become more severe after several uses and washes.
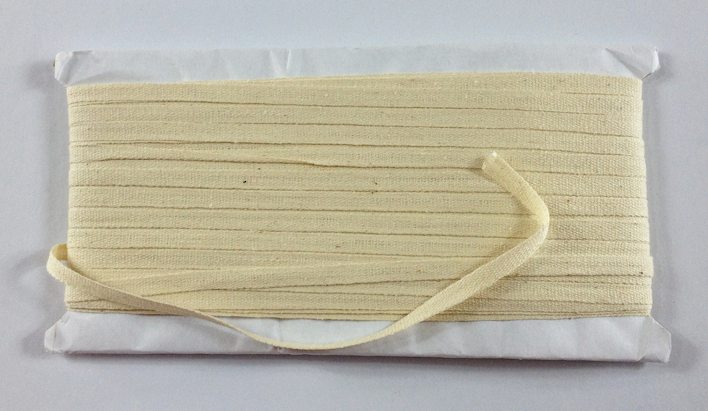
All cotton twill tape
I use a 1/4” (6 mm) all-cotton twill tape. I have not seen that in the mainstream local fabric store, but I do see the polyester version in a little Wrights package in the local sewing stores. Either would work.
Jeans Needles
Depending on the thickness of the fabric, I use number 14, 16 or 18 jeans needle for both construction and topstitching. I found that it’s unnecessary to switch between jeans needle and topstitching needle as I don’t observe any difference.
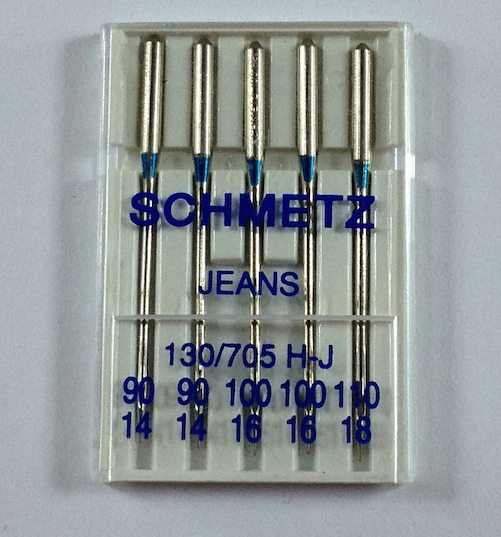
Jeans needles
Wire cutter and Plier (Optional)
As mentioned above, these are for shortening the zipper. If you use to use a 4” (10 cm) zipper, then you wouldn’t have to shorten your zipper, though you will have to deal with the zipper pull when installing the zipper.
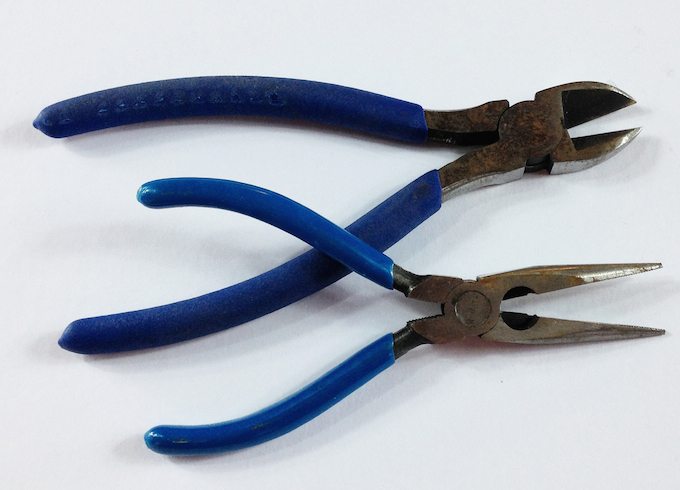
Nippers and pliers
Hammer
You will need the hammer for installing your jeans button and your rivets (if using). Also, the hammer will help with reducing the seam thickness, which may or may not able necessary for your fabric. Hammering also add some distressing to the jeans, if that is something you desire. Sometimes I use a mallet to have a softer touch. We will cover distressing in a later post.
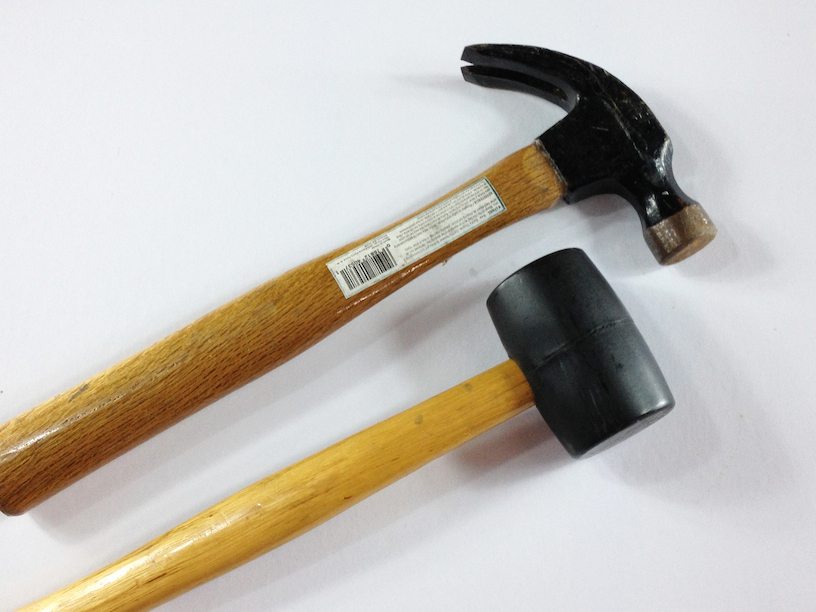
Hammer and mallet for installing buttons and rivets, as well as reducing seam bulk
Tailor’s Clapper (Optional)
Though this is optional, I do use it quite often, not just for jeans, but for many of my sewing projects. A tailor’s clapper (or I often refer it as just clapper) is a solid piece of wood. After you steam press your seam, you put the clapper on and apply a bit of pressure for a few seconds. You will find that your seam to be flatter and sharper.
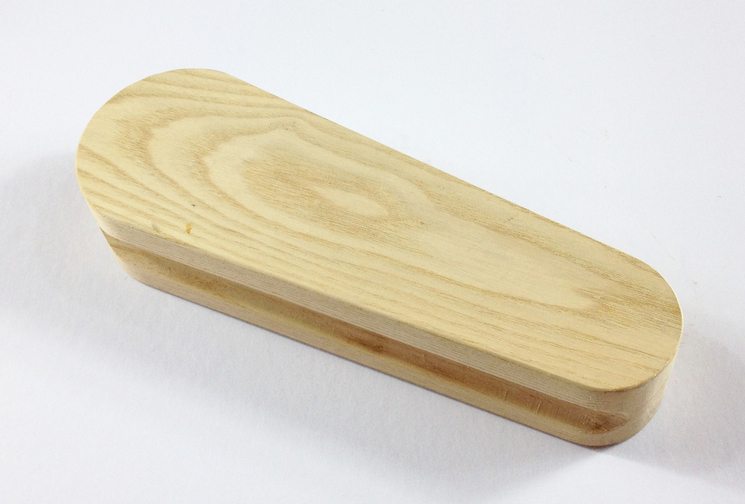
Tailor’s clapper for reducing seam bulk
Sanding Block and Sand Paper (Optional)
If you decide to distress your jeans, you will need a hand sanding block and some sandpaper. I use a 220-grit sandpaper. 220-grit may seam pretty fine, but I prefer to go light and just apply more pressure when necessary. It’s better than making a big hole right from the get-go. You can get hand sanding block and sandpaper in any home improvement stores. Sandpaper comes in a pack or a sheet; a sheet would be sufficient for one pair of jeans.
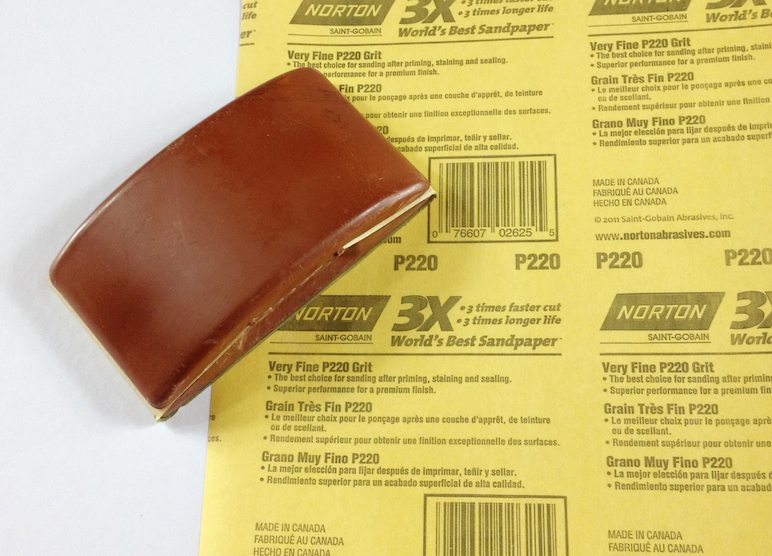
Sanding block and sandpaper
Walking Foot (Optional)
A walking foot for your sewing machine is optional, but it’s extremely helpful. I routinely use my walking foot when sewing any fabric with stretch. A walking foot gives you the best result when you need to feed the top and bottom fabric evenly and prevent stretching. For Liana Stretch Jeans, I use the walking foot to stitch the back pocket design as well as the back pocket openings, but I use the regular or edge stitching foot to stitch other parts. That is because the other seams are mostly vertical (i.e., have no stretch) or are stabilized by the pocket bags. You could still use the walking foot for all the seams, but I find that I topstitch with more precision with other feet. Some latest sewing machines have built-in even feed system; if that’s the case, lucky you!

Walking foot
Serger (Optional)
A serger is also optional. I serge finish my seam allowances, but you could use a zigzag stitch too. You may even decide to use a flat-fell seam so all raw edges are enclosed. I observe in many store-bought jeans that serged finishes are common. I do see an occasional back crotch seam that uses flat-felt seam, which makes that seam more durable. If there’s enough interest, I could do a post on flat felt seam. Please let me know in the comment!
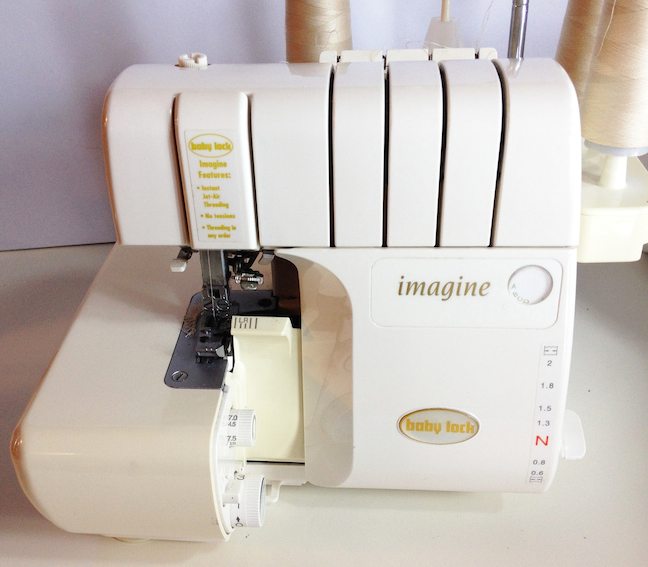
Serger for finishing seam allowances
Phew! That’s a long post for today!
Here’s the schedule of the Liana Stretch Jeans Sew Along, be sure to look at other posts too!
Day 0: Get Ready!
Day 1: Intro, Material and Supplies (this post)
Day 2: Topstitching & Distressing
Day 3: Choosing a size & Cutting Test Garment/Muslin
Day 4: Fitting Part 1
Day 5: Fitting Part 2
Day 6: Sewing the Back
Day 7: Sewing Front Pockets
Day 8: Sewing Fly Front Zipper
Day 9: Sewing Back to Front & Waistband
Day 10: Hemming and Finishing

Kennis is there a substitute for twill tape? Thanks
Yes please on the Flat Felled seam tute =D
Great post Kennis! Think I have everything but twill tape!
I thought I might fit the sew along in, but it isn’t going to happen. I purchased the pattern and will do my own sew along after the Holidays. Will I have to save the posts or will the sew along be available later? These Jeans look fabulous and I can’t wait to make them!
No worries Jan. Life happens. All the posts will be available. I probably will even create a “Sewalong” menu/tab up top so the sewalong posts can be accessed easily.
Thanks Kennis/ I’ll share my results
in January!