
Hong Kong Seam Finish – Part 2
In the previous post on Hong Kong seam finish (Part 1), we talked about the basic of making a Hong Kong seam finish, and now we are going to something more advanced: how do you finish a princess seam allowance using the Kong Kong finish technique?
Because of the curves involved, typically a princess seam is clipped and notched so that the seam allowance lays flat. However, clipping or notching may not be an option if your garment is unlined. Let’s be honest, having seam allowance all clipped and notched are a bit unsightly.
I like to use the Hong Kong seam finish for an unlined garment. And by using the bias tape skillfully, you can control the princess seam allowance so that it will lay flat without the help of clipping or notching.
We are extremely fortunate that Anne created this tutorial for the Itch to Stitch readers. Be sure to follow Anne on Instagram for some advanced sewing tips (or some sewing eye candies)!
One note to add is that, you may not need to use this technique if your princess seam is not very curvy. For example, if your cup size is not large, or your princess seam is not very curvy (as in the shoulder-to-waist type of princess seam), then you will not need to use this technique. Seam is wavy? Use this technique. Seam is not wavy? Don’t.
Without further ado, let me hand over to Anne.
+++++++++++++
When applying the bias tape to curved edges, I had an epiphany that the tape needs to be relaxed along the smaller edge, just like for a neckband on a knit t-shirt. This means that you need to pull the bias slightly to get it to stretch out along the slightly longer edge, whether this is the cut outer edge of a convex edge (like applying the binding to a circle of fabric), or the sewn inner edge of the binding on a concave edge (like applying the binding to the edge of a circular hole in the fabric or along a neckline).
However, applying the binding to very curved seam allowances that you want to lie flat poses a special problem, for example on the side part of a princess seam.
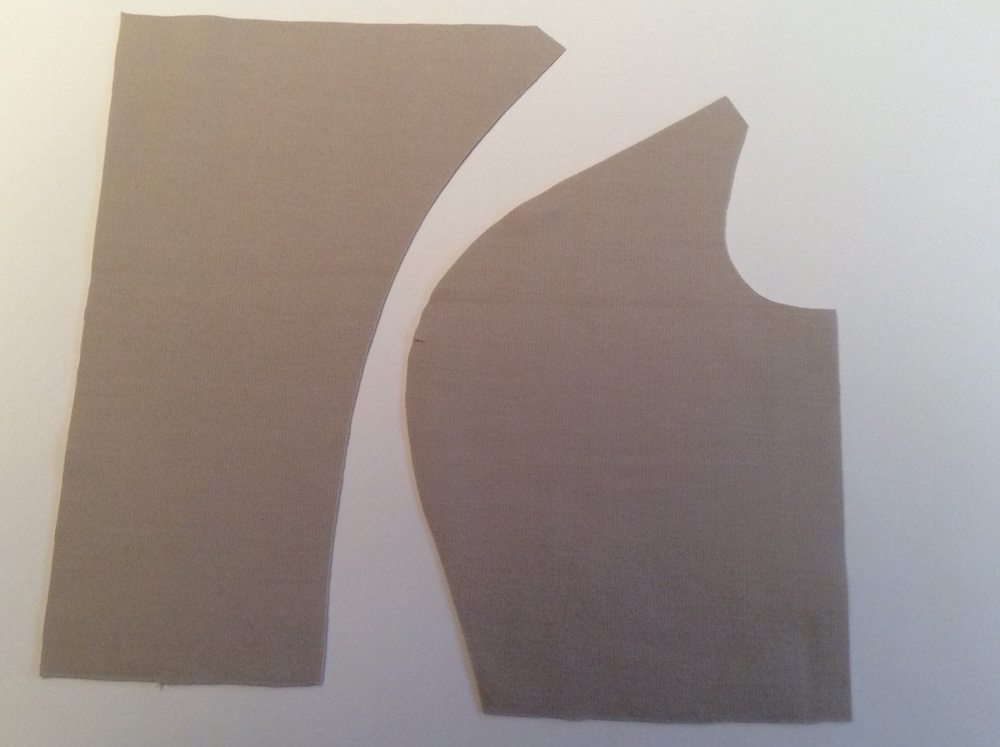
A sample princess seam. Notice the side piece has a very curved edge and that the seam allowance will need to fold back on the piece.
If you simply apply the edging as described above, the seam allowance will be wavy, just like it is before you applied the binding.
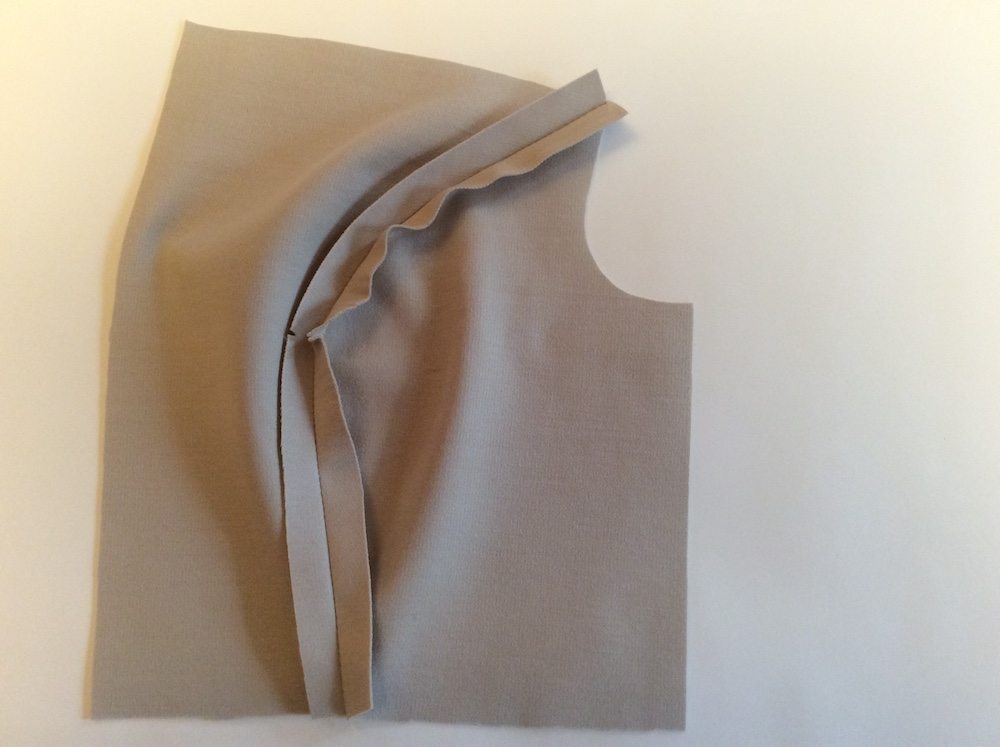
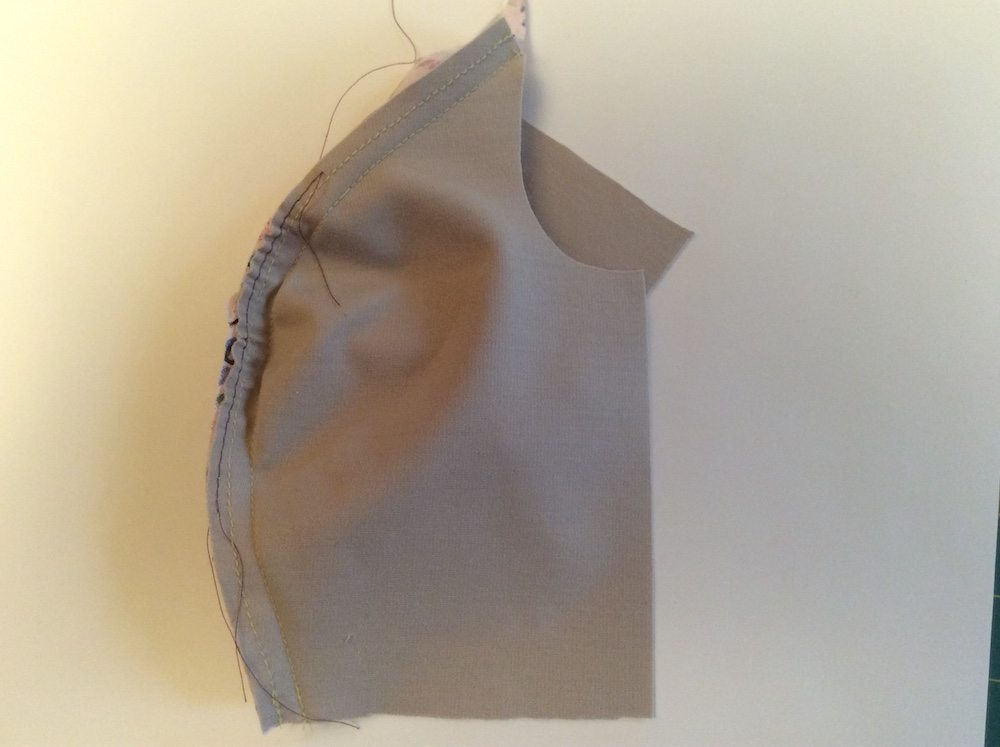
Seam allowances of the princess seam. Notice the seam allowance on the side piece is ruffled. It does not want to lie flat.
This happens because while the seam is convex the edge of the seam allowance needs to become concave. In other words, you have much more fabric in the seam allowance, so this fabric needs to be flattened. If you weren’t applying a HK finish or other bias finish, you would grade and clip the seam allowance so it would lie flat. However, with any type of bias finish, you don’t want to clip into the seam allowance. Therefore, to get the seam allowance to lie flat, you need to pull it to distribute the extra fullness evenly and coax the fabric into an approximation of lying flat. If you put in a line or two of gathering stitches close to the edge of the seam allowance, you can ease in the fullness.
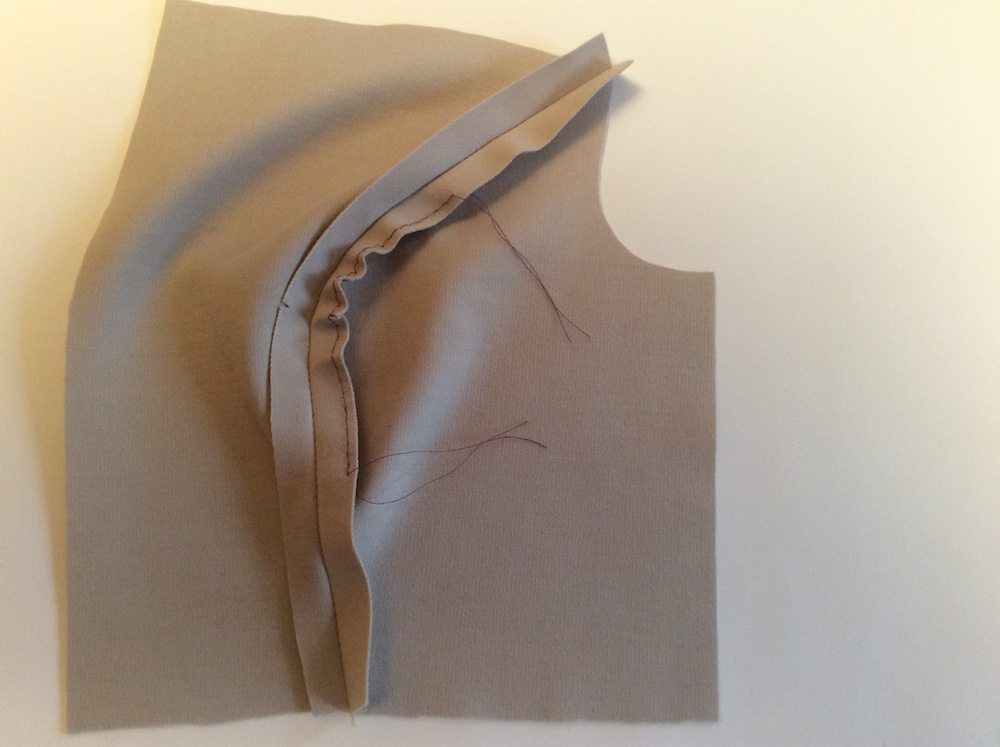
Gathering stitches on the seam allowance.
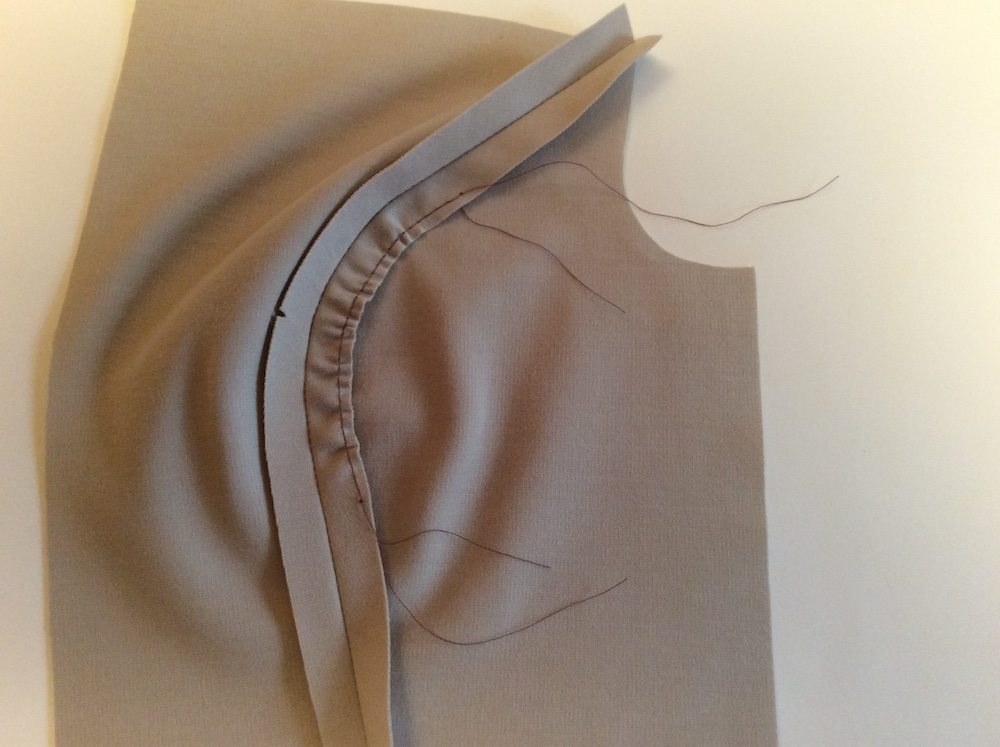
Easing in the fullness. Pull up on one of the thread of the gathering (usually the bobbin thread) to ease in the fullness.
This has the advantage of making it a little easier to apply the bias binding to this edge.
Now you can apply the bias tape.
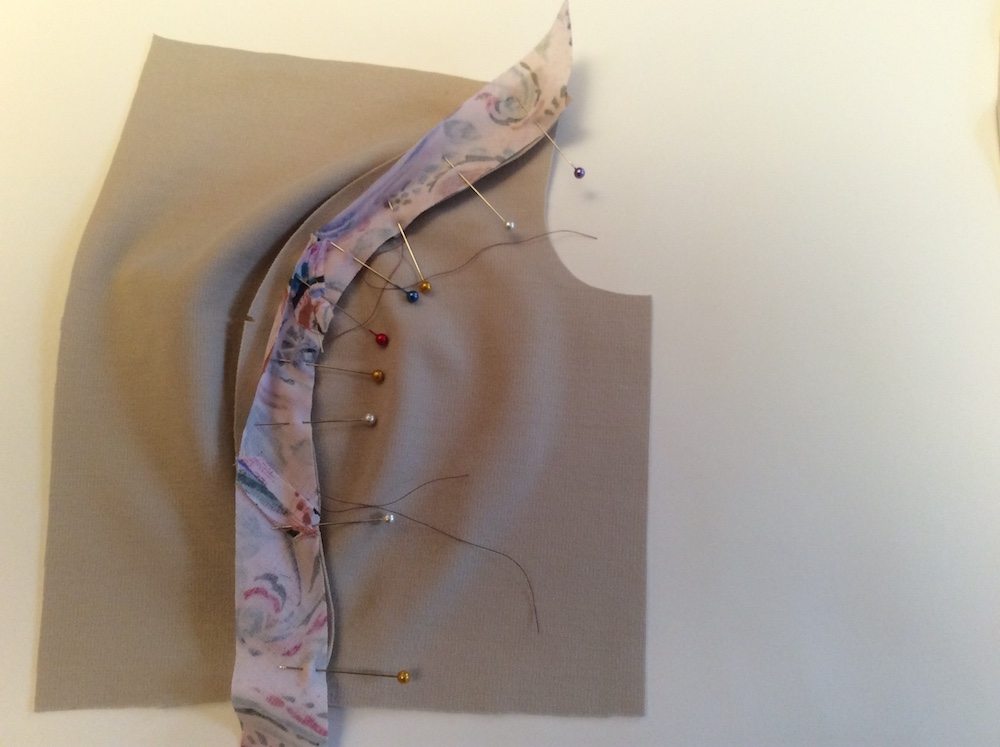
Bias tape stretched and pinned to fit the curved edge. You can see the bias tape curling towards the side piece due to the tension applied to the tape. This tension will help keep the edge in position after it’s all sewn.
Sew the HK finish in place, being careful not to stretch out the area that you carefully gathered. You can pull on the gathering threads as you sew around this area to keep the fullness eased in.
Caution: you might need to make your bias tape a little wider because you will be pulling it very tightly around the very curved section of your princess seam. With some experimentation, I found that 1.25” was a good width for bindings with a lot of body and not much bias stretch as well as bindings with a lot of stretch on the bias. I used this wider width just for these very curved seams and trimmed off any excess from the other parts of the seam allowance later.
Now you can finish the HK seam finish as usual, folding the bias tape back over the edge and stitching it in place.

Finishing the HK finish. If you leave the thread tails from the gathering stitches loose, you can pull them out; their work is finished and they are no longer needed.
You can finish the other edge of the princess seam as for a regular HK finish, either before or after tackling the highly curved side piece’s edge. Once done, admire your work!
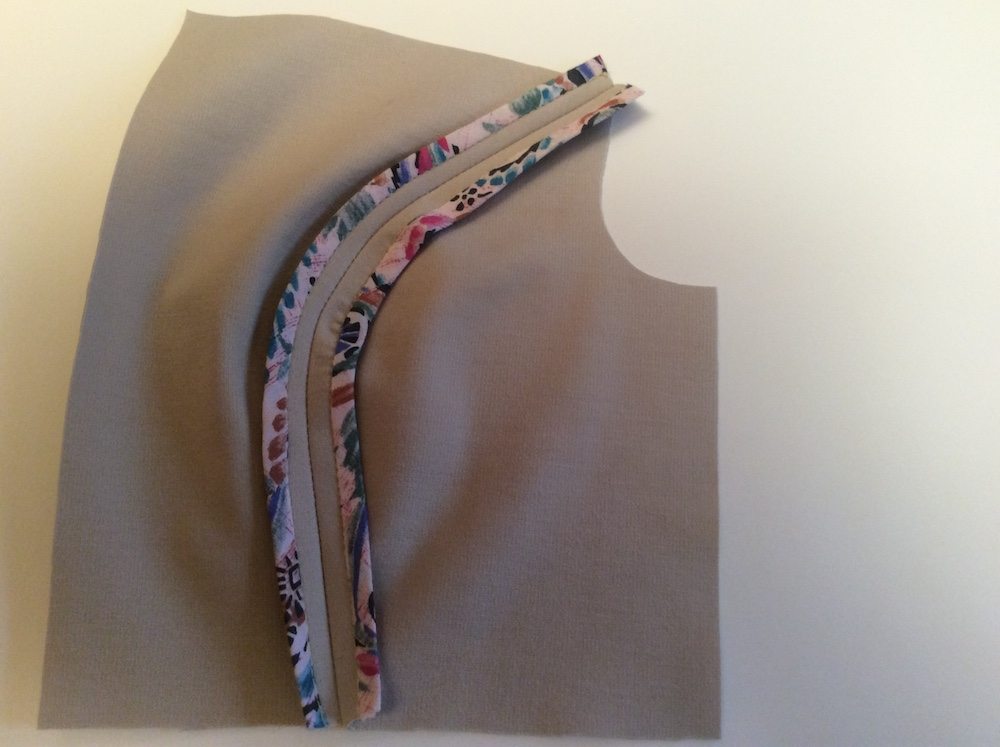
The completed HK finish. The side seam allowance is not going to flip towards the front piece.
+++++++++++++
Want to try your hand at Hong Kong seam finish? Try the technique on the La Paz Jacket or Hvar Jacket!
Hope this helps! Until next time, keep stitching!

Ah that’s brilliant! Thanks so much Anne, and Kennis too for publishing this
So beautiful!
Fantastic! I’m in the process of making a princess seam dress and this technique for a non lined dress is perfect actually! Good point on the gather epiphany!!!
Dear Itch to Stitch
Thankyou very much for the great effort you put into this excellent tutorial aboud Hong Kong seams which I really love. One question: Is there any reason, why you don’t add the bias tape before sewing the seams? I find it much easier to sew the bias tape to the raw edges first and then sew the seams.
Hi Susanne, I don’t see why not if that works for you!
Excellent tutorial!!
Bonjour
I love this finish. I have been doing it for over 40 years. I did not and do not own a Serger. This is smooth on the skin. When you washed the clothes nothing come undone. It take a little bit of time but it is well worth it.
Merci
MIMIYO